Herbs
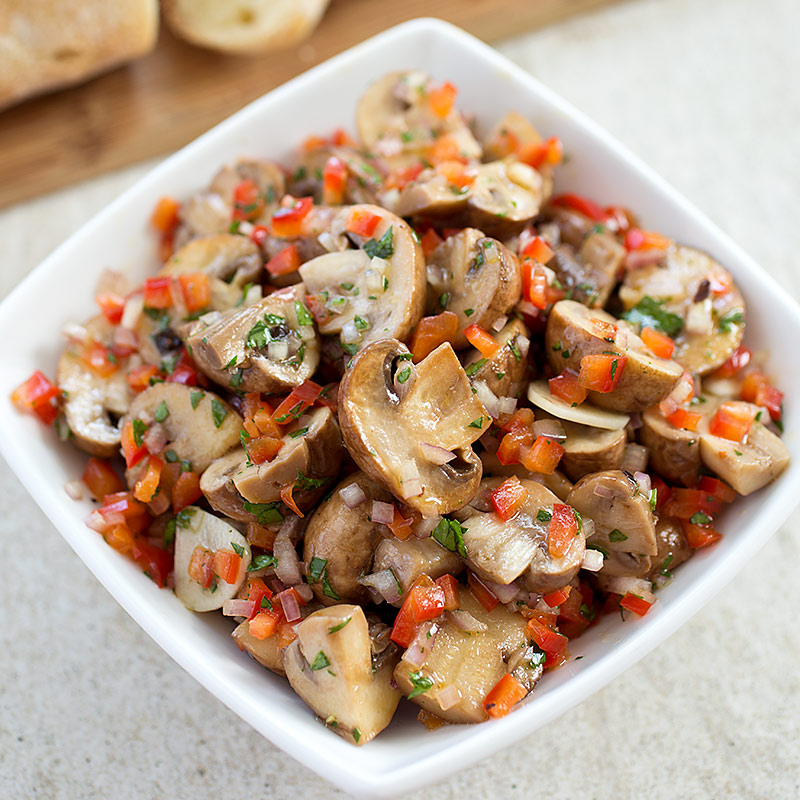
Cook’s Illustrated Marinated Mushrooms
Cooking the mushrooms over relatively high heat encourages them to quickly release liquid, which can then be reduced to a concentrated, flavorful glaze.
1/4 C. extra-virgin olive oil
1/8 tsp. red pepper flakes
Salt and pepper
1 pound cremini or white mushrooms, trimmed, left whole if small, halved if medium, quartered if large
3 tsp. lemon juice
1 garlic clove, sliced very thin
1 large shallot, minced
1/4 small red bell pepper, chopped fine
1 tsp. minced fresh thyme or 1 tsp. chopped fresh parsley or basil
Heat 3 tsp. oil, pepper flakes, and ‘h tsp. salt in 12-inch skillet over medium-high heat until shimmering. Add mushrooms and 2 tsp. lemon juice. Cook, stirring frequently, until mushrooms release moisture, moisture evaporates, and mushrooms have browned around edges, about 10 minutes. Spread mushrooms in single layer on large plate or
rimmed baking sheet; cool to room temperature, about 20 minutes. When cooled, transfer mushrooms to medium bowl, leaving behind any juices. Stir garlic, shallot, and bell pepper into mushrooms, cover with plastic wrap, and refrigerate at least 6 or up to 24 hours. Allow mushrooms to stand at room temperature about 1 hour. Stir in remaining 1 tsp. olive oil, 1 tsp. lemon juice, and thyme and season with salt and pepper to taste before serving.
Will it Waffle: Stuffed Biscuit Waffles
 3 eggs
1 T. milk
1/4 C. shredded cheddar cheese
1 tube refrigerated biscuit dough
salt and pepper, to taste
Heat a medium non-stick skillet over medium low heat. Crack the eggs into a medium bowl and whisk together with the milk. Scramble the eggs until just slightly wet. Stir in the cheese and remove from the heat. Heat the waffle iron and spray with non-stick cooking spray. Butterfly each biscuit by running a sharp knife through the middle of the biscuit just to the other side. Do not fully split the biscuit in half. Stuff the biscuits with the eggs and press the edges to seal the eggs inside. Place a biscuit in the waffle iron and gently close the lid. Don’t press it fully closed. Let cook for one minute. After one minute, fully close the waffle iron and continue cooking for two more minutes. Remove from the waffle iron and continue cooking the remaining biscuits.
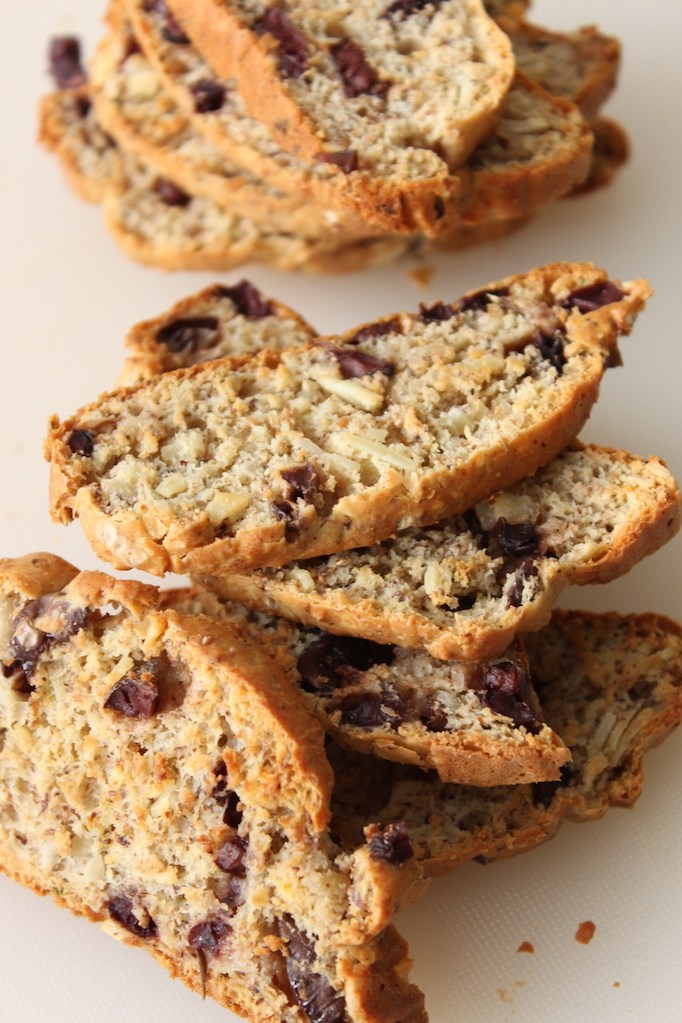
½ C. all-purpose flour
½ C. whole wheat flour
1 tsp. granulated sugar
½ tsp. dried thyme
½ tsp. sea salt
½ tsp. baking soda
½ tsp. black pepper
1 C. buttermilk
â…“ C. almonds, coarsely chopped
â…“ C. pitted olives, coarsely chopped
Preheat oven to 350 degrees Fahrenheit. Lightly oil a 9-inch loaf pan and line with parchment paper. Whisk flours, sugar, thyme, sea salt, baking soda, and black pepper in a large bowl. Stir in buttermilk. Fold in almonds and olives. Pour batter into prepared loaf pan. Bake for 30 minutes. Remove from oven. Decrease oven to 325 degrees Fahrenheit. Slice loaf into ¼ inch thick slices or thinner, if possible. Lay the slices in a single layer on a parchment lined baking sheet. Bake for another 30 minutes, flipping halfway through, or until both sides are golden brown. Let cool on a wire rack.
Garlic Scented Grilled Sirloins with Bell Pepper Relish
â…“ cup olive oil, plus extra for oiling grill rack
4 large cloves garlic, peeled
4 ½ teaspoons chopped fresh thyme
4 ½ teaspoons chopped fresh rosemary
3 1-pound boneless sirloins, 1 inch thick, trimmed of excess fat
Salt
Freshly ground black pepper
Red and Yellow Pepper Relish
Combine â…“ cup of olive oil, garlic, thyme, and rosemary in a food processor or blender and
process, pulsing several times, until garlic and herbs are finely minced. Brush this mixture on both
sides of each steak. Salt and pepper steaks and let stand at cool room temperature 15 to 20 minutes.
Oil a grill rack and arrange 4 to 5 inches from heat source. Prepare grill for a hot fire (high
temperature). Grill steaks 4 to 6 minutes per side or until rosy pink inside for medium-rare. (Internal
temperature should be 145 degrees F.) Halve each steak and top each portion with a mound of Red
and Yellow Pepper Relish. Pass extra relish in a small bowl.
Red & Yellow Pepper Relish
2 tablespoons unsalted butter
2 tablespoons olive oil
1 large yellow onion, halved lengthwise and thinly sliced
1 red bell pepper, cut into ½-inch dice
1 yellow bell pepper, cut into ½-inch dice
â…“ cup coarsely chopped pitted kalamata olives
1 tablespoon Dijon mustard
1 large clove garlic, peeled and chopped
Salt
Freshly ground black pepper
Combine butter and oil in a large, heavy skillet over medium-high heat. When hot, add onion and cook, stirring, until softened and golden, about 5 minutes. Add bell peppers and sauté, stirring, until just tender, about 3 minutes. Add olives, mustard, and garlic and stir 1 minute. Remove from heat, taste, and season with salt and pepper. Transfer relish to a bowl and cool. If not using immediately, cover and refrigerate. Bring to room temperature before serving. (Relish can be prepared 2 days ahead.)
Crispy Waffled Bacon & Eggs
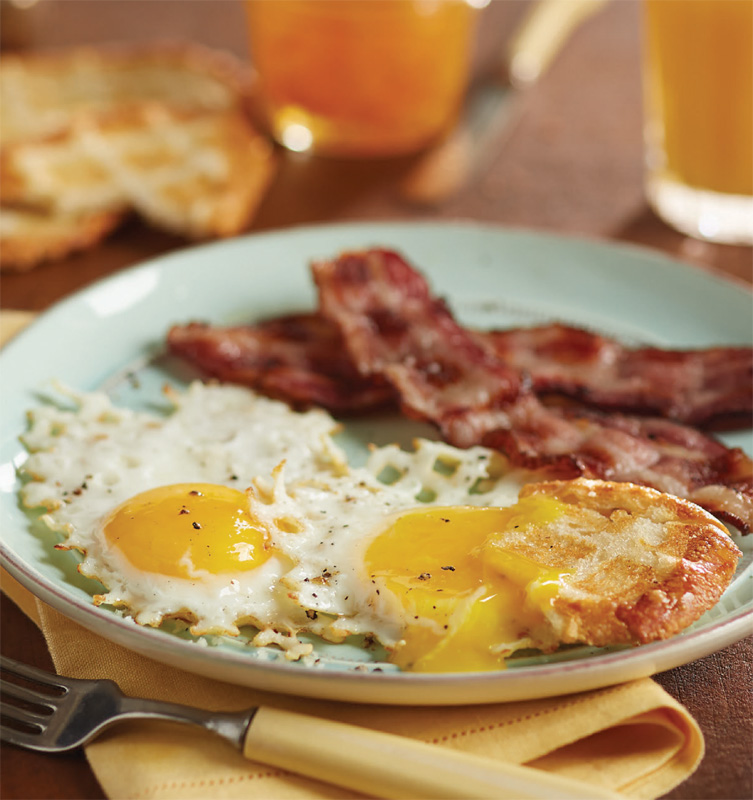 4 Strips Bacon
2 Large Eggs
Salt & Pepper
Preheat waffle iron on medium. Preheat oven to lowest temperature. Line an oven safe dish or pan with paper towels. Place bacon strips in waffle iron, without any sticking out on the edges, and close the lid. Check after 4 minutes; thick cut bacon might need 1-2 minutes more. Remove when crispy without being blackened. Remove bacon to paper towel lined dish and place in oven to stay warm. Crack eggs into a small bowl. Carefully pour eggs into waffle iron (should be greased from bacon). Cook without closing the lid, until white has set, about one minute. Loosen edges carefully with heat resistant / silicone spatula then remove, supporting egg. Season egg and serve with bacon.
Uses for Soy Sauce
To give steamed rice a savory flavor, add 1 tsp. soy sauce to the cooking water.
For a delicious glaze on roasted pearl onions, mix together equal parts soy sauce and molasses and toss with the onions before roasting.
To make a quick Polynesian sauce, stir together 1/3 C. soy sauce, 1/2 C. pineapple juice, 1 can (5 oz.) crushed pineapple, and 1/2 tsp. hot-pepper sauce. Add to cooked vegetables or meat as a stir-fry sauce or serve over roasted pork, chicken, or fish.
For an Asian-style glaze, mix together 1/4 C. soy sauce or teriyaki sauce, 6 oz. Dr. Pepper, 1 tsp. hot-pepper sauce, 1/2 tsp. ground cloves, and 1/2 tsp. ground ginger. Boil over high heat until reduced in volume by about half and thickened to a syrup, about 10 minutes. Brush over baked ham during the last 20 minutes of cooking.

Ricotta, Spinach, and Mushroom Lasagna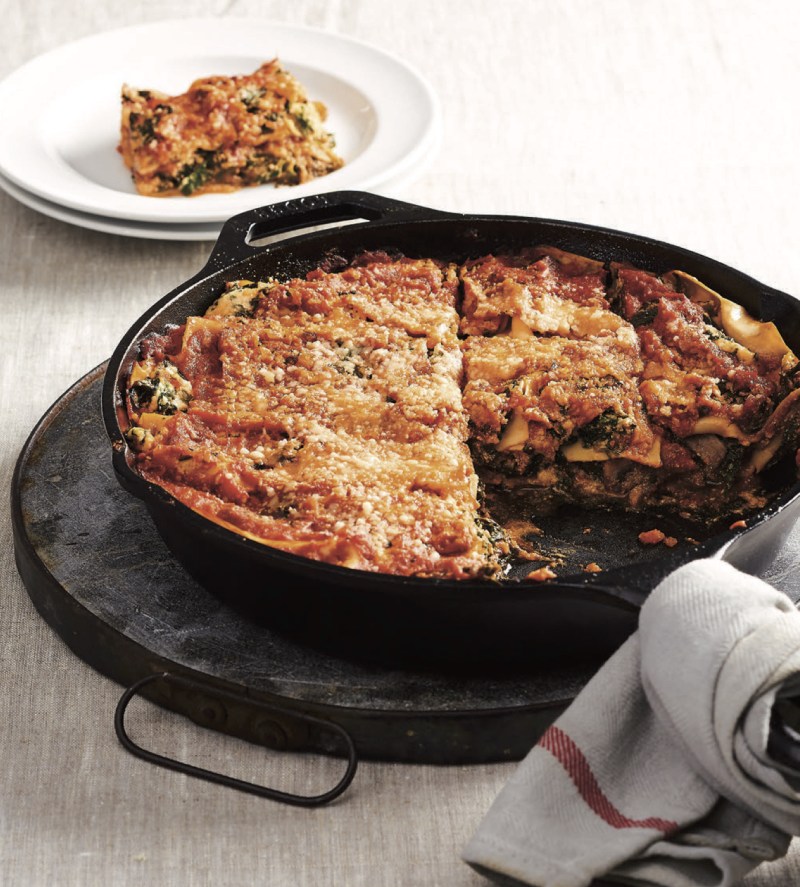
1 T. olive oil, plus more for greasing the skillet
8 ounces white mushrooms, sliced
1 clove garlic, cut in half and crushed
1 tsp. fresh thyme leaves, chopped, or ¼ tsp. dried thyme
Salt and freshly ground black pepper
1 (10-ounce) package frozen chopped spinach, thawed
1 C. ricotta
1 large egg
3 C. marinara sauce (Store-bought or homemade)
4 ounces no-boil lasagna noodles
2 T. freshly grated Parmesan cheese
Preheat the oven to 350°F with one rack in the middle. Preheat the skillet over medium heat for 2 minutes. Add the olive oil to the skillet, allow it to heat 1 minute, then add the mushrooms, garlic, thyme, ¼ tsp. salt, and ¼ tsp. pepper. Cook, stirring occasionally, until the mushrooms soften, about 10 minutes. Taste to check for seasoning and add salt and pepper as necessary. Remove and discard the garlic. Pour the mushrooms and any liquid into a bowl and set aside. In a medium-size bowl, combine the spinach with the ricotta, egg, ¼ tsp. salt, and ¼ tsp. pepper.
Rub a coating of olive oil on the skillet and then layer the ingredients in this order:
¾ C. of the ricotta mixture
1 C. of the marinara sauce
half of the mushrooms and their liquid
half of the noodles (break the noodles if necessary to cover the whole skillet)
¾ C. of the ricotta mixture
1 C. of the marinara sauce
the remaining mushrooms and any liquid
the remaining noodles
the remaining ricotta mixture
the remaining marinara sauce
Sprinkle the Parmesan evenly across the top of the lasagna. Cover the skillet tightly with aluminum foil and place in the oven. Bake until the mixture is bubbling and the lasagna noodles are tender, about 45 minutes. Remove the skillet from the oven and transfer it to a rack to cool slightly, about 10 minutes, before serving hot. Leftovers can be refrigerated in a covered container for up to 2 days.
 Wild Mushroom and Brie Quesadilla
1 C. Crimini mushroom, sliced
6 oz. oyster mushroom, sliced (approx. one head)
1 small shallot, diced (approx. 2 T. cooked)
1 T. white wine
1 – 8 oz. package brie
2 T. fresh parsley, chopped
2 T. fresh sage, chopped
2 T. fresh rosemary, chopped
2 T. fresh thyme, chopped
Salt and pepper to taste
8 Tortillas
Preheat 10″ sauté pan over medium heat. Add butter and mushrooms in sauce and cook until lightly browned- about 5-7 minutes. Add salt and pepper, shallots and prepared herbs and cook 3 minutes more. Pour wine in pan to deglaze for 2 minutes. Take mixture off heat and strain well in colander. Cool mixture. Place about 2 T. mushroom mixture in center of top half of each tortilla. Cut the cheese in eight slices. Pull slices of cheese apart with your fingers and spread equal portions over mushroom mix. Fold empty tortilla half over half with filling to form half moon shape. Pan fry quesadillas in 10″ nonstick pan with a T. of olive oil until golden brown on each side. Cut each quesadilla into three wedges and serve.
Beefsteak Tomato and Mozzarella Salad with Arugula
3 large ripe beefsteak tomatoes, cored and sliced approximately ½-inch thick
8 oz. lowfat mozzarella cheese, sliced approximately ¼-inch thick
2 C. arugula lettuce, washed and steamed
1 large shallot, peeled and sliced
2 bunches chives, cut into 1-inch pieces
1 oz. extra virgin olive oil
1 oz. ice cubes
2 oz. Balsamic vinegar (aceto)
1 tsp. dried lavender leaves
cracked black pepper to taste
Chive Oil: Blanch chives in boiling water for 3 to 5 seconds. Immediately shock chives in cold water until chilled. Squeeze most of the water out of the chives and place in a blender. Add olive oil, ice cubes and water and puree on highest speed for 12 to 15 seconds. Pour pureed mixture in a fine strainer, placing a clear container underneath it. Push liquid through strainer with a ladle. When all oil and liquid is passed through the strainer, let stand in the refrigerator for 2 hours. At this time the dark green foam and the water will separate from the oil. The oil will be in the center of the container. With a ladle, gently skim off and discard the dark foam from the top. When you get to the bright green oil, ladle this into a separate container. Then, when you get to the water at the bottom of the oil, stop skimming. Now you have the ultimate infused flavorful herb oil. To Plate: Fan tomato slices and cheese on plates, forming an intertwined wheel. Top with arugula and shallots. Splash balsamic vinegar on lettuce, tomatoes and cheese. Top with chive oil, lavender leaves and fresh cracked pepper. Enjoy
Vegetarian Grilled Vegetable Sandwich with Olive Tapenade
1 carrot, thinly sliced
1 zucchini, thinly sliced
1 red bell pepper, cored, seeded and cut into large pieces
6 scallions, trim off bottom root and top (6-inch slice)
1 Japanese eggplant, thinly sliced
1 head Belgian endive, slice root off, keep leaves whole
2 whole wheat rolls
Tapenade:
10 calamata olives, pitted
½ shallot, peeled and sliced
1 tsp. capers
½ tsp. olive oil
Sandwich: Grill carrots, zucchini, bell peppers, eggplant and scallions until soft and caramelized. Tapenade: In a food processor, chop all ingredients into a fine paste. Cut rolls in half and toast until light golden brown. Spread tapenade on both sides of rolls and build a great vegetarian sandwich with all of the grilled vegetables.
Quick Pea “Risottoâ€
Peas and chives add a Spring touch to this creamy, any-time-of-year, main dish.
1/2 C. arborio rice
2/3 C. vegetable broth
1/2 C. frozen petite peas
1/8 tsp. dried thyme
1 T. finely chopped chives
1 tsp. extra virgin olive oil
Place rice, vegetable broth, peas and thyme in rice bowl or 4 C. glass dish. Stir briefly to combine. Place bowl in steamer tray, filling water level to medium and steam uncovered for 30 minutes. Let rest 5 minutes. Add chives and oil, stirring gently to combine.
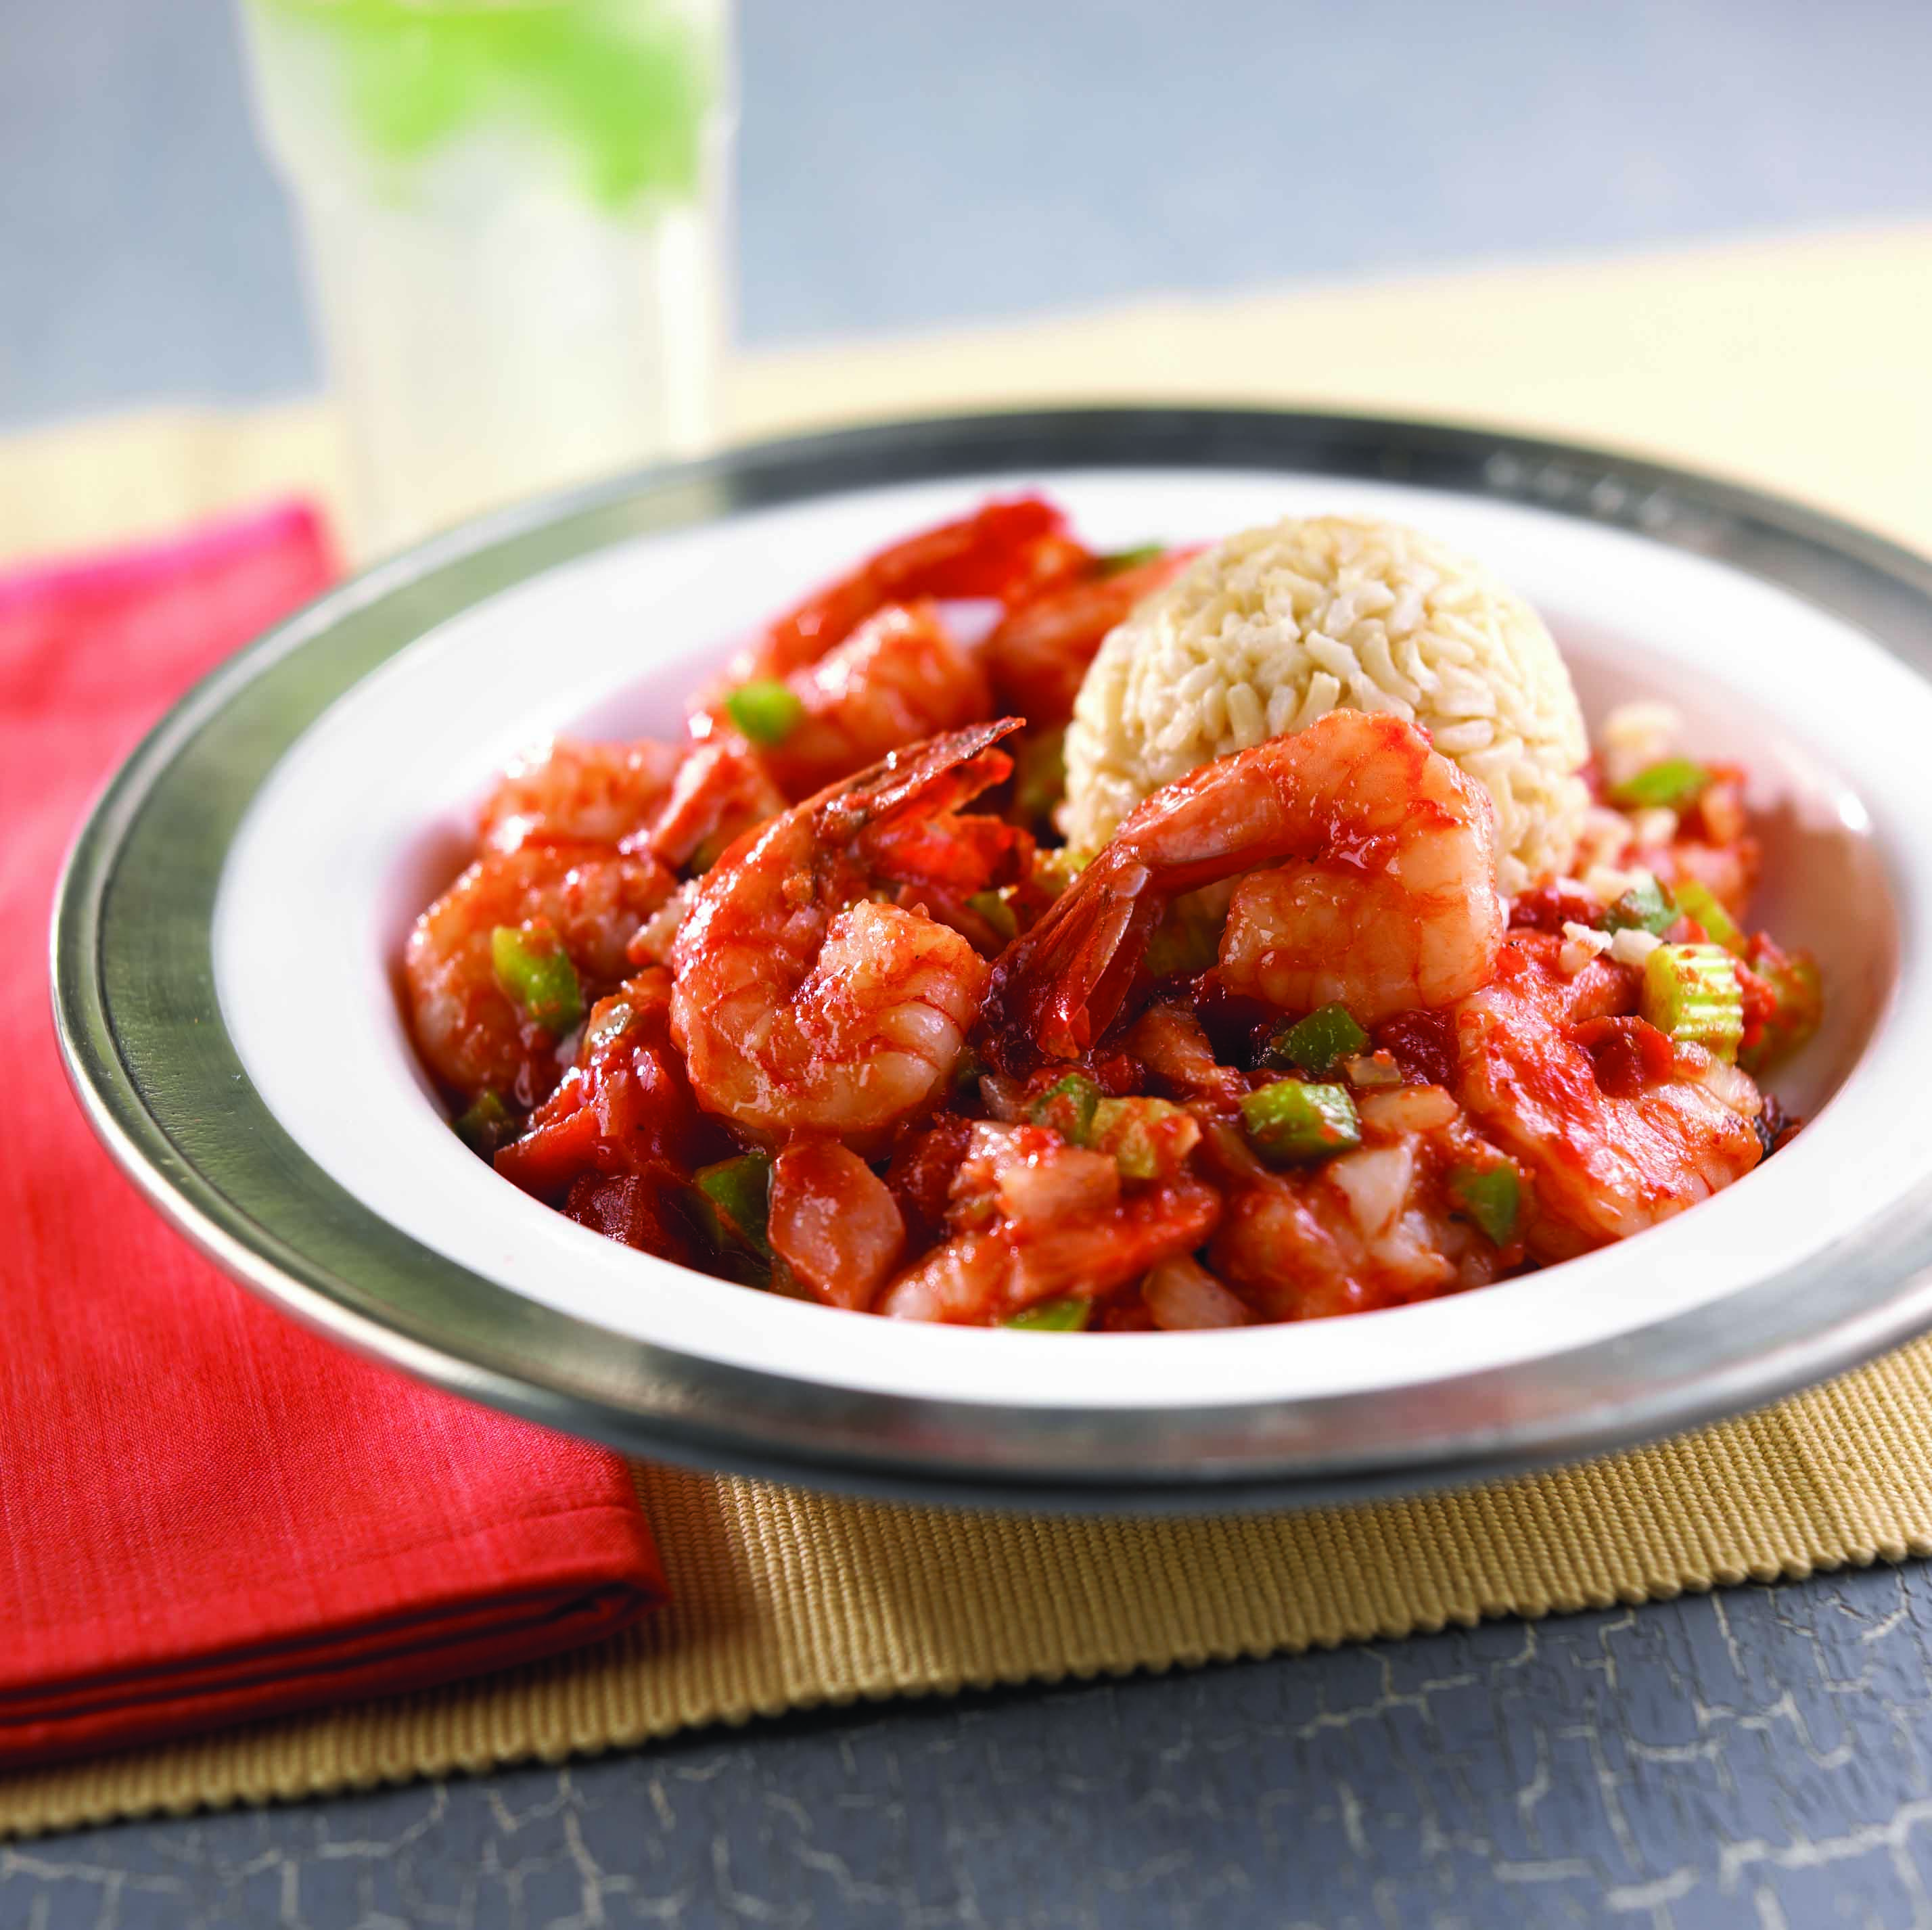
Big Easy Shrimp
 2 strips turkey bacon or Canadian bacon
1 onion, chopped
1/2 green bell pepper, chopped
1 rib celery, chopped
1 clove garlic, minced
1 can (16 oz.) chopped tomatoes
1 bay leaf
1/2 tsp. ground black pepper
1 tsp. Worcestershire sauce
1 tsp. hot pepper sauce
1 lb. medium shrimp, peeled and deveined
Cook the bacon in a large skillet, over medium heat until crisp. Place on a paper towel-lined plate to drain. Crumble when cool. Remove and discard all but 1 T. of drippings from the skillet. In the hot drippings over medium heat, cook the onion, bell pepper and celery for 5 minutes, or until tender. Stir in the garlic and cook for 1 minute. Add the tomatoes (with juice), bay leaf, black pepper, Worcestershire sauce and hot pepper sauce. Heat to boiling. Reduce the heat to low and simmer for 20 minutes. Add the shrimp and bacon and cook for 10 minutes, or until the shrimp are opaque. Remove and discard the bay leaf before serving.
Yield: 4 servings
Calories: 185
Fat: 4g
Fiber: 3g
Watermelon Granita
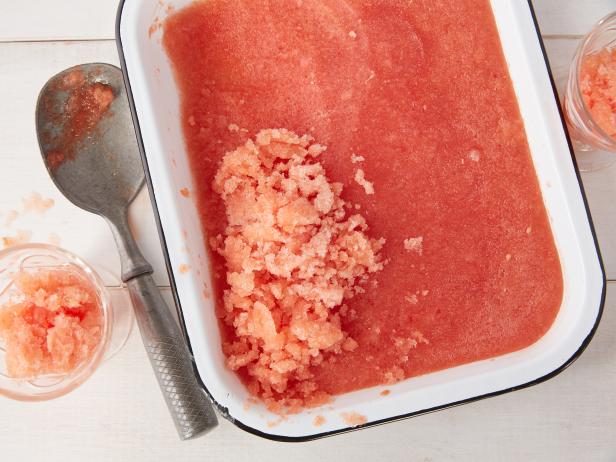 5 C. seeded watermelon pulp
1 C. simple syrup
2 T. fresh lemon juice
Thin watermelon wedges, cut into strips for a garnish
Puree watermelon in a food processor. Pour into a 9 x 13 inch baking dish. Stir in the syrup and lemon juice. Freeze for about 4 hours or until frozen solid. To serve, scrape up granita with a large spoon and place in goblets, tulip shaped wine glasses or ice cream dishes. Garnish with a narrow wedge of watermelon. Makes 4 servings. To make sugar syrup; Combine 1/2 C. water and 1 C. sugar in a saucepan. Bring to a boil over medium-high heat. Boil for one minute. Stirring constantly until all of the sugar has dissolved. Cool in the refrigerator
Pepper and Herb Stir-Fry
4 each of red, yellow, and light green peppers (about 2 lb. total)
1 bunch flat-leaf parsley
1 bunch fresh basil
1 bunch fresh chives
2 cloves garlic
2 T. olive oil, or more to taste
Salt and pepper, to taste
Juice of 1/2 lemon
Stem and seed peppers, cutting them into large 1- or 2-inch pieces. Make a rough chop of the parsley, basil, and chives. Mince garlic. Over high heat, add oil to a sauté pan. Put in all the peppers at once and stir every minute or so as they cook for about 5 minutes. When they wilt slightly, add garlic, cooking 1 minute more. Toss in all herbs, salt and pepper to taste, and turn off heat. Let herbs cook from the pan heat and add the lemon juice to finish.
Uses for Parmesan Cheese
To enrich the breading for pan-fried or baked chicken, add 1/4 to 1/3 C. grated Parmesan cheese to each C. bread crumbs.
For a fun new taste in muffins, add Parmesan cheese. Preheat the oven to 350°F and line 12 muffin C. with paper liners. Sauté 4 shallots and 3 garlic cloves in 1 tsp. olive oil then set aside to cool. Whisk together 2 C. flour, 2 tsp. baking powder, 2 tsp. crumbled dried rosemary (or Italian herb seasoning) and 1/2 tsp. salt in a large bowl. In a small bowl, whisk 1/3 C. olive oil, the cooled shallot mixture, 1 C. milk, 1 egg, and 1/3 C. grated Parmesan cheese. Stir into the dry ingredients until just moistened. Spoon the batter into the muffin C. and sprinkle with another 2 tsp. grated Parmesan. Bake until a toothpick inserted in the center comes out almost clean, about 15 minutes.
For nifty Parmesan cheese baskets, heat a 10-inch nonstick skillet over medium-high heat. Sprinkle about 3 tsp. shredded (not grated) best-quality Parmesan cheese over the bottom of the pan, sprinkling more in the center for stability and less around the edges for a delicate, lacy look. When the Parmesan disk is melted and golden brown on the bottom, 2 to 3 minutes, use a spatula and your fingers to carefully lift it out of the pan. Quickly flip and drape the disk over the bottom of an inverted drinking glass (the golden side of the disk should be on top). Gently press in the sides in a few spots to create folds and the look of an upside-down basket. Let cool until firm, about 5 minutes. When cool, invert and fill with cold chicken salad, tuna salad, green salad, or another cold food. Avoid hot foods as these will melt the cheese again and cause the basket to collapse. The baskets will keep at room temperature for several hours or covered and refrigerated for up to 1 day.
To make Parmesan butter, combine: 1/2 C. (1 stick) softened unsalted butter, 1/4 C. grated Parmesan cheese (preferably Parmigiano-Reggiano), 1/2 tsp. dried oregano, 1/4 tsp. salt, and 1/4 tsp. freshly ground black pepper. Use on crusty bread or melted over broiled chicken, pork, beef, or shrimp.
To add flavor, color, and aroma to a gratin or other casserole, top with a sprinkling of freshly grated Parmesan cheese.
Ham & Cheese Tortellini
 1 tablespoon butter
2 cups diced onion (about 1 whole onion)
12 oz ham, diced
1 cup low-sodium chicken broth
(9 oz) tortellini (fresh or frozen)
salt and pepper to taste
1 cup baby sweet peas, frozen
1/4 cup heavy cream
1 cup shredded cheese (Swiss, White Cheddar, Monterey Jack, Pepper Jack)
Melt the butter in a large ovenproof skillet over medium-high heat. Add the onions and cook until softened and golden brown. Add the ham and continue to cook until lightly browned. Add the chicken broth, tortellini, and plenty of salt and pepper to taste. I use 1/2 teaspoon each. Stir well to combine and bring to a boil. Cover, then reduce heat and simmer for 12 minutes until the tortellini is tender. Stir in the peas and cream. Off heat, then stir in 1/2 cup cheese until well combined. Top with remaining cheese, then place under the broiler in the oven until cheese is golden and bubbly, about 3 minutes. Enjoy!!
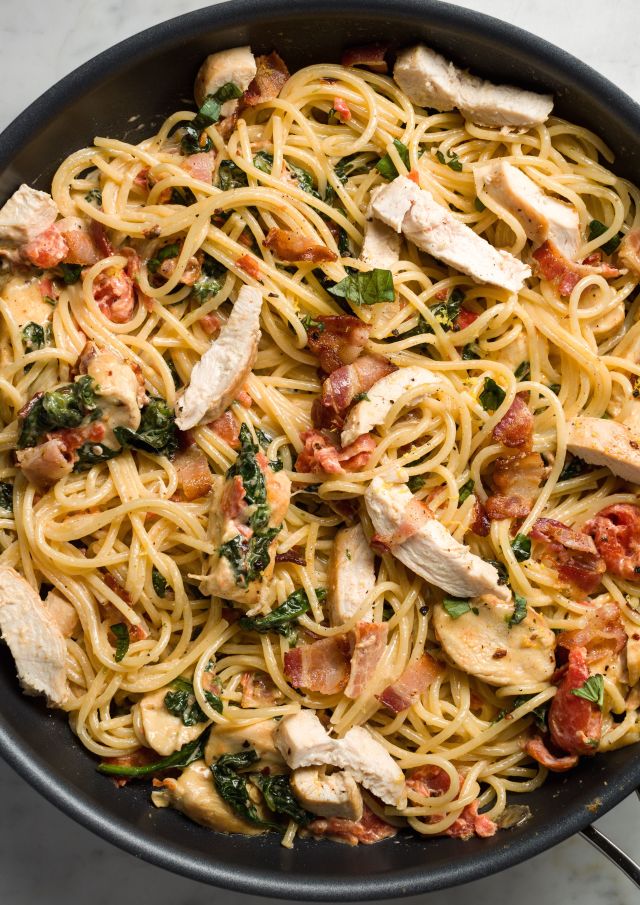
12 oz. spaghetti or angel hair
1 T. extra-virgin olive oil
1 lb. boneless skinless chicken breasts
kosher salt
Freshly ground black pepper
6 slices bacon
2 cloves garlic
2 c. diced tomatoes (canned or fresh)
3 c. baby spinach
1/2 c. heavy cream
1/3 c. freshly grated Parmesan
Fresh basil, for garnish
In a large pot of salted boiling water, cook spaghetti or angel hair according to package directions until al dente. Drain, reserving 1 cup pasta water, and return to pot. Meanwhile, in a large skillet over medium-high heat, heat oil. Season chicken with salt and pepper and cook until cooked through and no longer pink, 4 minutes per side. Transfer to a cutting board and slice into strips. In a second skillet, cook bacon until crispy. Transfer to a paper towel-lined plate and drain, then chop. Pour off half the bacon fat and add garlic, tomatoes, and spinach to skillet. Season with salt and pepper, then add heavy cream, Parmesan, and 1/2 cup pasta water; let simmer. Add spaghetti or angel hair and toss until fully coated. Add chicken and bacon and toss, then garnish with basil and serve.
 1 1/2 C. almonds
1 1/2 C. walnut halves
1 C. hazelnuts
1 C. pecan halves
1/2 C. maple syrup
1/4 tsp. cayenne
1 1/2 tsp. chopped fresh oregano leaves
1 1/2 tsp. chopped fresh sage leaves
1 1/2 tsp. chopped fresh thyme leaves
1 1/2 tsp. chopped fresh rosemary leaves
1 1/2 tsp. chopped fresh savory leaves
1 1/2 tsp. chopped fresh marjoram leaves
3 T. olive oil
About 1 tsp. kosher salt
Mix almonds, walnuts, hazelnuts, pecans, maple syrup, cayenne, oregano, sage, thyme, rosemary, savory, marjoram, and oil in a 10- by 15-inch rimmed pan. Sprinkle nuts with 1 tsp. salt. Bake in a 300° oven, stirring occasionally, until all liquid evaporates and nuts are golden under the skin (break open to test), about 45 minutes. Let cool. Taste and add more salt if desired.
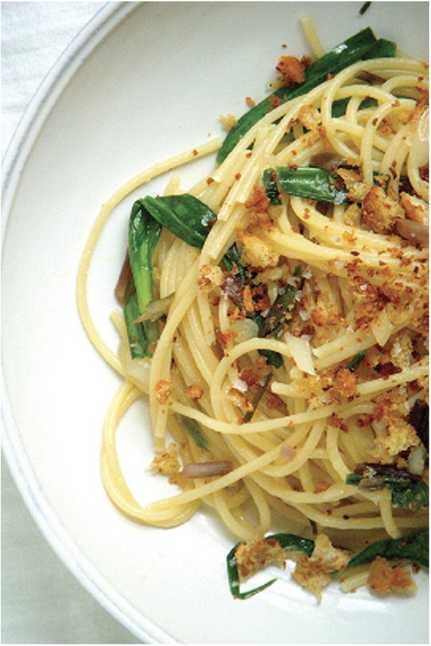 Bring a large pot of salted water to a boil and cook l pound spaghetti according to package directions. Drain the pasta (reserve 1/4 C. pasta water) and set it aside. Meanwhile, in a food processor, pulse 2 slices stale bread* (3 oz.) until coarse crumbs form. Chop the bulbs of 8 oz. ramps** (reserve the greens). In a large skillet, heat 1 tsp. olive oil over medium heat; add the breadcrumbs and cook, stirring occasionally, until golden, about 5 minutes. Transfer the breadcrumbs to a bowl and season with salt and pepper; wipe the skillet with a paper towel. Place 1 tsp. olive oil and 2 tsp. salted butter in the skillet and set it over medium heat. When the butter melts, add the ramps and cook until fragrant and tender, about 4 minutes. Add the pasta to the skillet with the cooked ramps, add the reserved greens, and toss until wilted. Stir in the reserved pasta water to create a thin sauce. Serve sprinkled with the breadcrumbs. * Or use 2/3 C. panko ** Or a small bunch of scallions + 1 small garlic clove
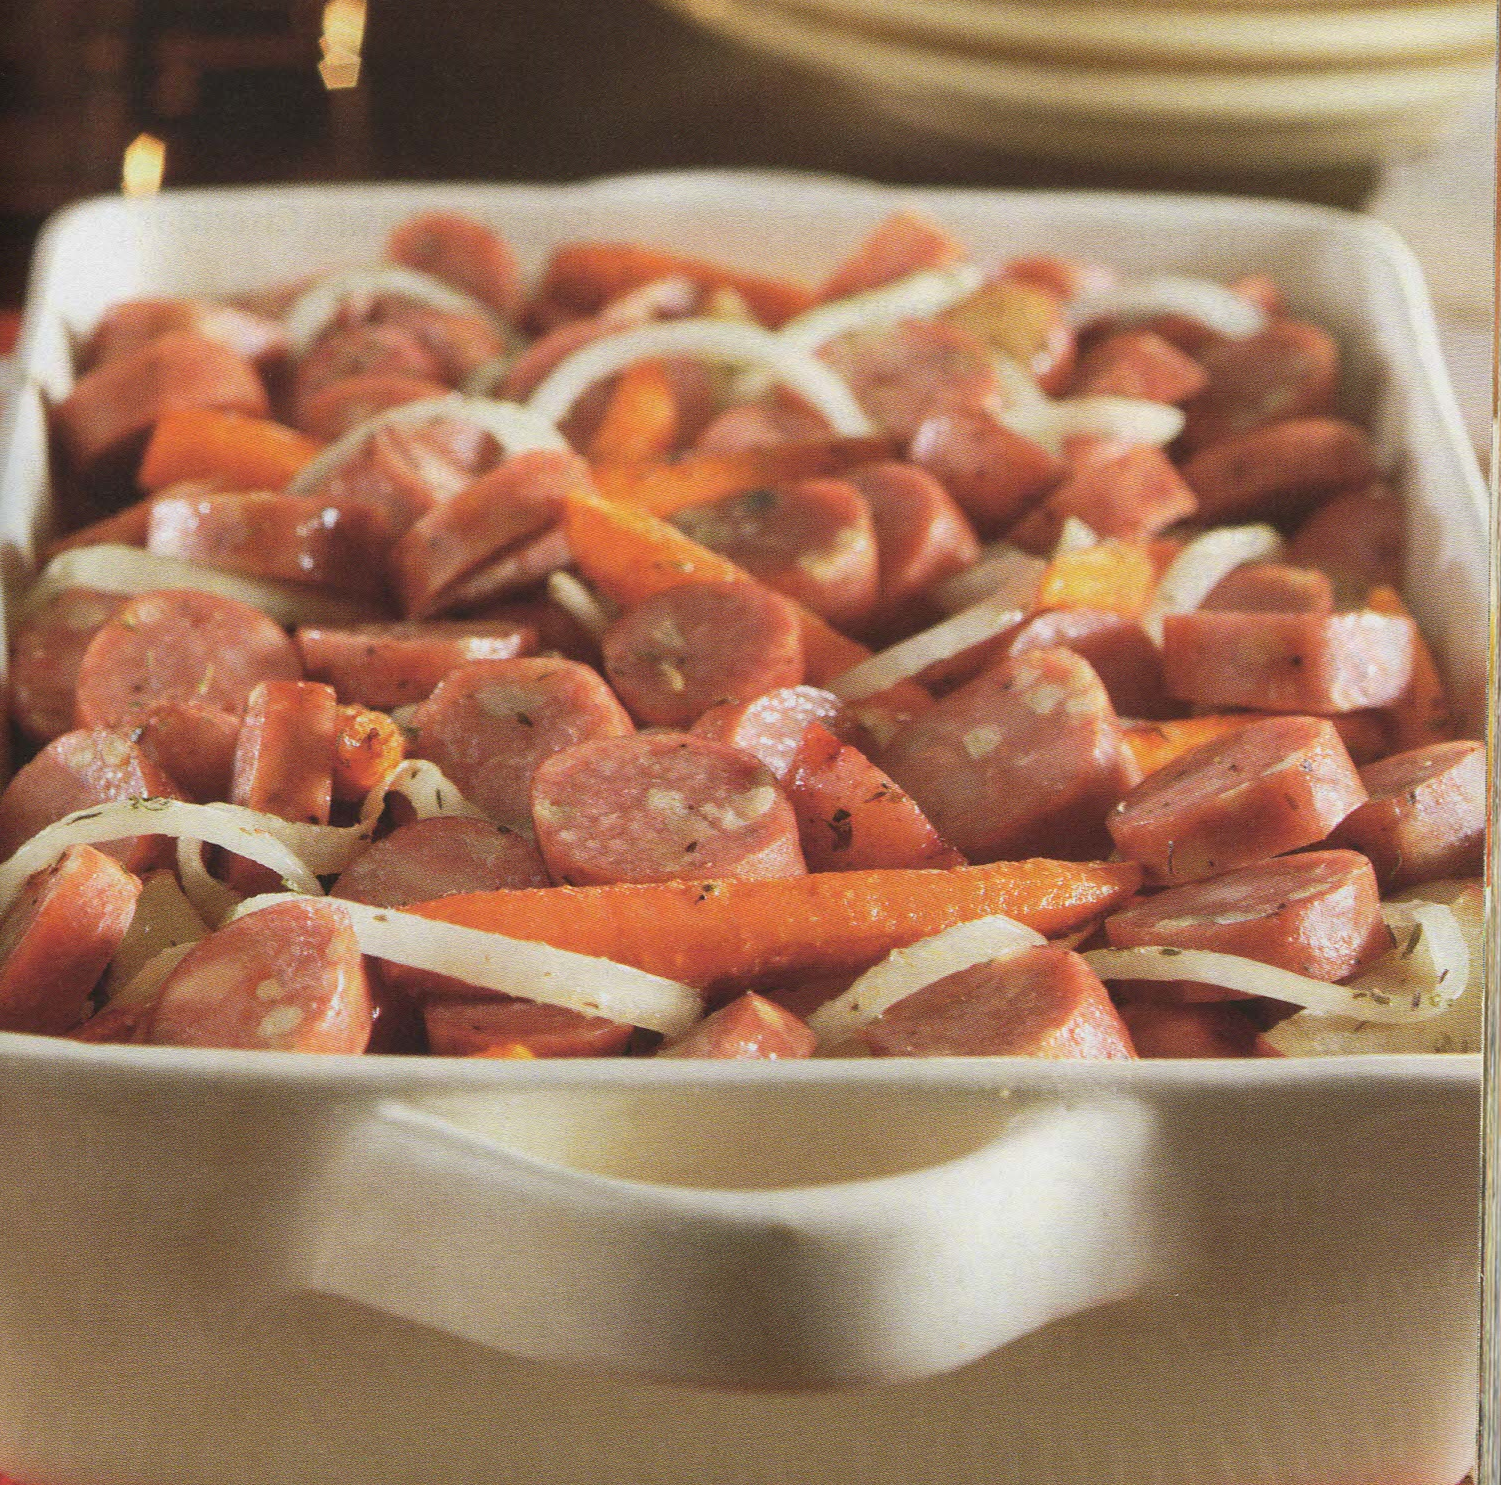 1 lb. red potatoes, cut in halves or quarters
1 large onion, sliced
1/2 lb. baby carrots
2 Tp. margarine, melted
1 tsp. salt
1 tsp. garlic powder
1/2 tsp. dried thyme leaves
1/2 tsp. black pepper
1 Kielbasa (or other sausage), sliced into thick rounds
Preheat oven to 400 degrees F. Spray 13X9-inch baking pan with nonstick cooking spray. Combine potatoes, onion, carrots, butter, salt, garlic powder, thyme, and pepper in large bowl. Toss to coat evenly. Place potato mixture into prepared pan; bake, uncovered, 30 minutes. Add sausage to potato mixture; mix well. Continue to bake 15 to 20 minutes or until potatoes are tender and golden brown
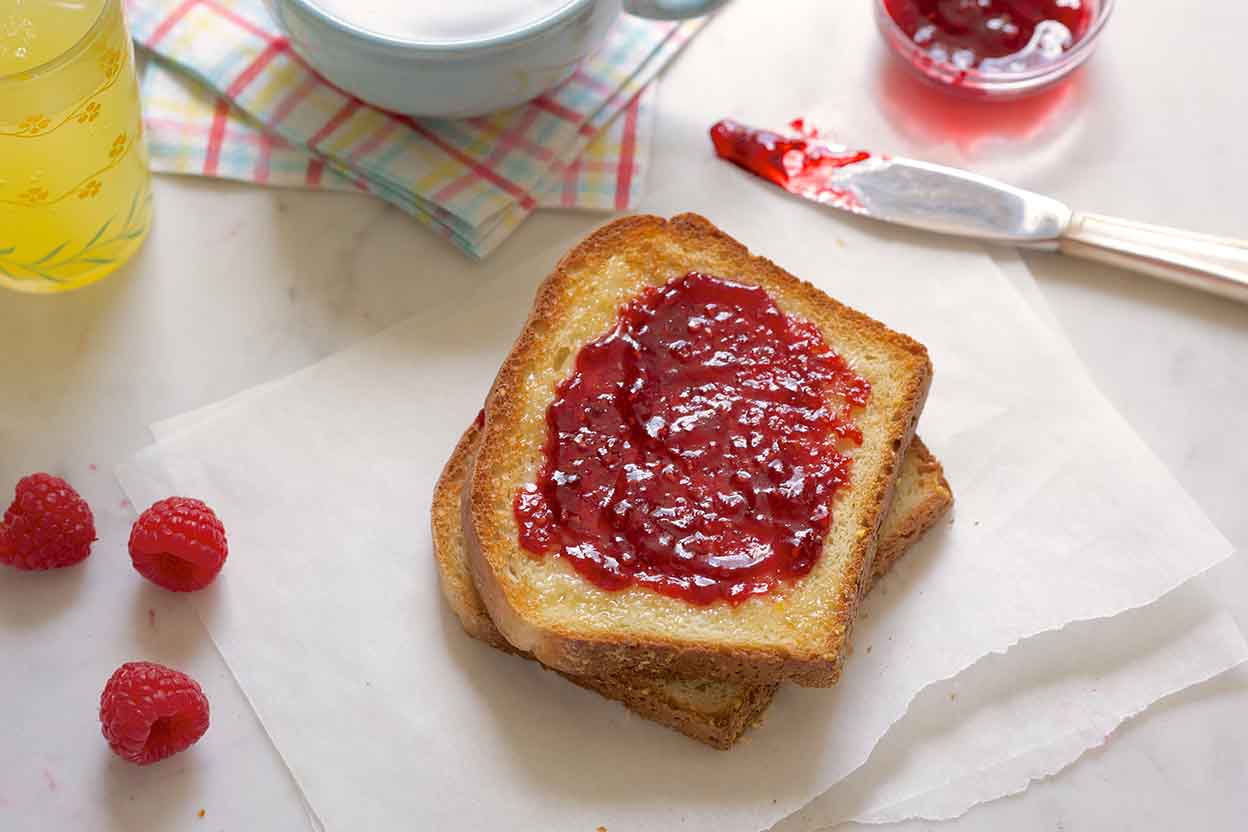 3 C. King Arthur Unbleached All-Purpose Flour
1 tsp. sugar
1 1/2 tsp. salt
1/4 tsp. baking soda
1 tsp. instant yeast
1 C. milk
1/4 C. water
2 tsp. vegetable oil or olive oil
cornmeal, to sprinkle in pan
Whisk together the flour, sugar, salt, baking soda, and instant yeast in a large mixing bowl. Combine the milk, water, and oil in a separate, microwave-safe bowl, and heat to between 120°F and 130°F. Be sure to stir the liquid well before measuring its temperature; you want an accurate reading. If you don’t have a thermometer, the liquid will feel quite hot (hotter than lukewarm), but not so hot that it would be uncomfortable as bath water. Pour the hot liquid over the dry ingredients in the mixing bowl. Beat at high speed for 1 minute. The dough will be very soft. Lightly grease an 8 1/2″ x 4 1/2″ loaf pan, and sprinkle the bottom and sides with cornmeal. Scoop the soft dough into the pan, leveling it in the pan as much as possible. Cover the pan, and let the dough rise till it’s just barely crowned over the rim of the pan. When you look at the rim of the pan from eye level, you should see the dough, but it shouldn’t be more than, say, 1/4″ over the rim. This will take about 45 minutes to 1 hour, if you heated the liquid to the correct temperature and your kitchen isn’t very cold. While the dough is rising, preheat the oven to 400°F. Remove the cover, and bake the bread for 22 to 27 minutes, till it’s golden brown and its interior temperature is 190°F. Remove the bread from the oven, and after 5 minutes turn it out of the pan onto a rack to cool. Let the bread cool completely before slicing.
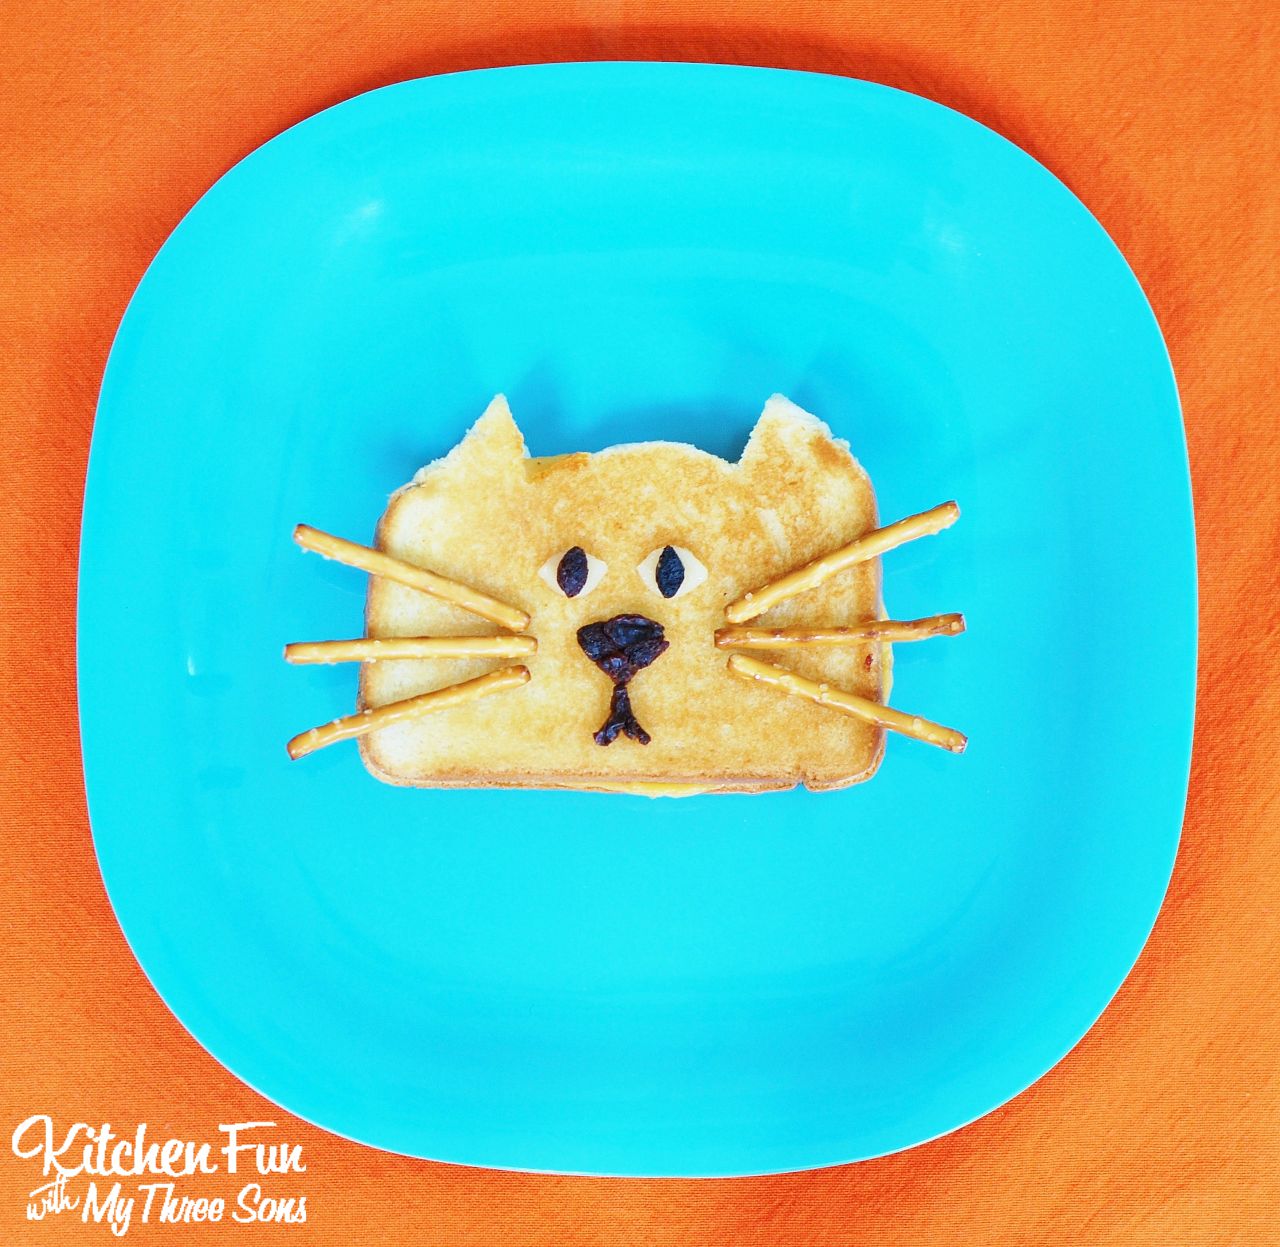
2 Pieces of Bread
Butter
Sliced Cheese
6 Pretzel Sticks
5 Raisins

Hazelnut spread
Banana
Strawberry
Blueberry
Fruit Leather
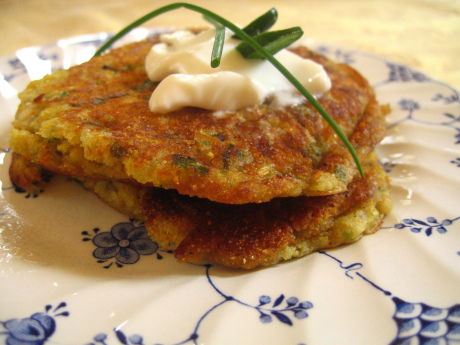 1/2 C. white corn meal
1/2 C. yellow corn meal
1/2 C. all-purpose flour
2 tsp. salt
1 tsp. black pepper
1 tsp. baking soda
2 tsp. sugar
2 tsp. honey
2 tsp. unsalted butter, melted and more for pan-frying the cakes
1 large egg
1 C. buttermilk
1 C. thawed frozen corn, chopped
1/2 small red onion, chopped
1 clove garlic, minced finely
1-2 serrano chilies, chopped (remove the seeds if you like)
handful of cilantro, roughly chopped
1 scallion, chopped
10 sprigs of chives, chopped
1 C. queso blanco or monterey jack, shredded
Garnish: sliced serranos, chives, and sour cream or crema
Mix together all the dry ingredients. Set aside. Combine the egg, buttermilk, and melted butter. Add in the onion, garlic, serranos, cilantro, scallion, chives, corn, and the queso blanco. Stir the dry ingredients into the wet ingredients until just combined. Heat a griddle or frying pan with some butter on medium-medium high heat and drop 1/2 C.-fulls of batter into the pan. Cook on each side for approximately 3 minutes per side. Garnish with sliced serranos, chives, and sour cream or crema.
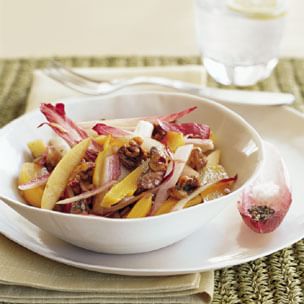 2 tsp. aged red wine vinegar
1 tsp. balsamic vinegar
1/4 tsp. salt
1 shallot, diced
2 tsp. chopped fresh anise hyssop leaves
2 T. walnut oil
1 T. olive oil
3 golden beets, about 1 lb. total, tops trimmed to 1/2 inch
1/2 C. walnut halves
3 or 4 endives, 3/4 to 1 lb. total, quartered and cored
2 medium Golden Delicious apples
Salt, to taste
To make the vinaigrette, in a small bowl, combine the red wine vinegar, balsamic vinegar, salt, shallot and anise hyssop leaves. Let stand for 10 minutes. Whisk in the walnut oil and olive oil. In a covered steamer over boiling water, steam the beets until tender when pierced, 25 to 40 minutes. Remove from the heat and let stand until cool enough to handle. Cut off the stems and slip off the skins. Cut the beets into thin wedges and toss with 1 T. the vinaigrette. Meanwhile, preheat an oven to 350°F. Spread the walnuts on a baking sheet and toast until fragrant, about 7 minutes. Cut the endives into long, thin slivers. Set an apple upright on a cutting board and cut 1/4-inch-thick slices off each of 4 sides of the apple. Cut the slices into long strips. Repeat with the remaining apple. In a bowl, toss the apples with the endives, walnuts and the remaining vinaigrette. Season with salt. Divide the salad among 4 salad plates or bowls and top with the beets.
For Gnocchi:
2 lb. baked potatoes
½ C. basil, finely chopped
Salt to taste
1 large egg
1 ½ tsp. unsalted butter, melted
1 ½ C. all purpose flour
2 tsp. olive oil
For Sauce:
2 tsp. olive oil
1 tsp. garlic, chopped
1 tsp. shallots, chopped
1 pound medium-sized shrimp (or substitute shrimp for two 6-oz. chicken breasts, cooked and diced)
1 C. sweet peas
1 C. chardonnay
1 C. cream
1 tsp. unsalted butter
1 2-oz. block of parmesan cheese
Peel and dice potatoes, then place in a large sauce pot with cold water to cover. Add salt and bring water to a boil over high heat. Lower heat and simmer for about 30 minutes or until the potatoes are cooked. Drain and mash. Place a stock pot on the stove with two quarts of water, a tsp. olive oil and a pinch of salt, and bring to a boil. Place the mashed potatoes into a bowl. Add flour a little at time. Add the egg and the butter, blend well. Add the basil and salt & pepper, mix well. Continue to add flour slowly, blending well after each addition. The amount of flour will vary depending upon the moisture in the potatoes. You should add sufficient flour to make dough that is smooth and elastic enough to form into gnocchi easily. Place ½ C. flour in a small bowl. Break off a workable amount, roll into tube shape and cut into desired size. Next, dust the gnocchi in the flour bowl and place onto a cookie sheet lined with wax paper until sauce is made.. Once all gnocchi is ready to cook, drop into boiling water for 5 minutes or until gnocchi floats to the top. Remove with a slotted spoon and set aside in a bowl with a tsp. olive oil until all is cooked. Then add to the sauce when ready.
Wash and clean shrimp or chicken breast and set aside. If you using shrimp make sure they are peeled and deveined; tail may or may not be left on according to preference. Sauté shrimp or chicken until almost cooked through. Set aside and dice when cooled. Place a medium-sized sauté pan onto the stove with a tsp. olive oil over medium high heat. Add garlic, shallots and sauté for 1 minute. Next, add shrimp or diced chicken breast turning over once the shrimp start to get pink and adding white wine and cream. Simmer until slightly thickened. Add salt and pepper to taste. Add sweet peas and gnocchi, mix well. With a vegetable peeler shave parmesan cheese into pan with sauce. Simmer about 5 minutes, while blending in cheese.. Add butter to the sauce and stir. Serve and top off with a little chopped parsley for garnish.
 16 large anise hyssop leaves plus 1 optional tsp. the plant’s blossoming buds
4 oz. plain chèvre (goat’s-milk cheese)
4 tsp. Crème Fraîche
4 slices cut 1/2-inch thick from a seedless watermelon, rind and white flesh removed
1/4 tsp. flaked sea salt, such as Maldon (may substitute coarse kosher salt)
1 tsp. organic edible flower petals (any combination of anise hyssop blossoms or culinary lavender blossoms, or other edible flowers such as viola, bee balm, borage or bachelor button. Pluck individual petals from the stem.
Cut 4 of the largest anise hyssop leaves into 1/8-inch pieces, then combine in a small bowl with the chevre and creme fraiche. Add up to 1 tsp. the plucked anise hyssop buds, if desired; mix well. Stack the trimmed watermelon slices and cut them into bite-size pieces. Lay the 24 watermelon pieces on a serving tray; use any partial pieces to taste-test the proportions of all the elements. Place a couple of flakes of sea salt on each watermelon piece and taste with some of the chevre; adjust the salt level as desired. Cut the remaining 12 anise hyssop leaves in half lengthwise and offset on each piece of watermelon so the edges will poke out once the chevre mixture is added. Scoop a tsp. the chevre mixture; use a second spoon to push it out on top of each watermelon-leaf piece. Garnish with an individual lavender blossom or other edible flower petal. Serve immediately or cover loosely and refrigerate. Serve within 1 hour.
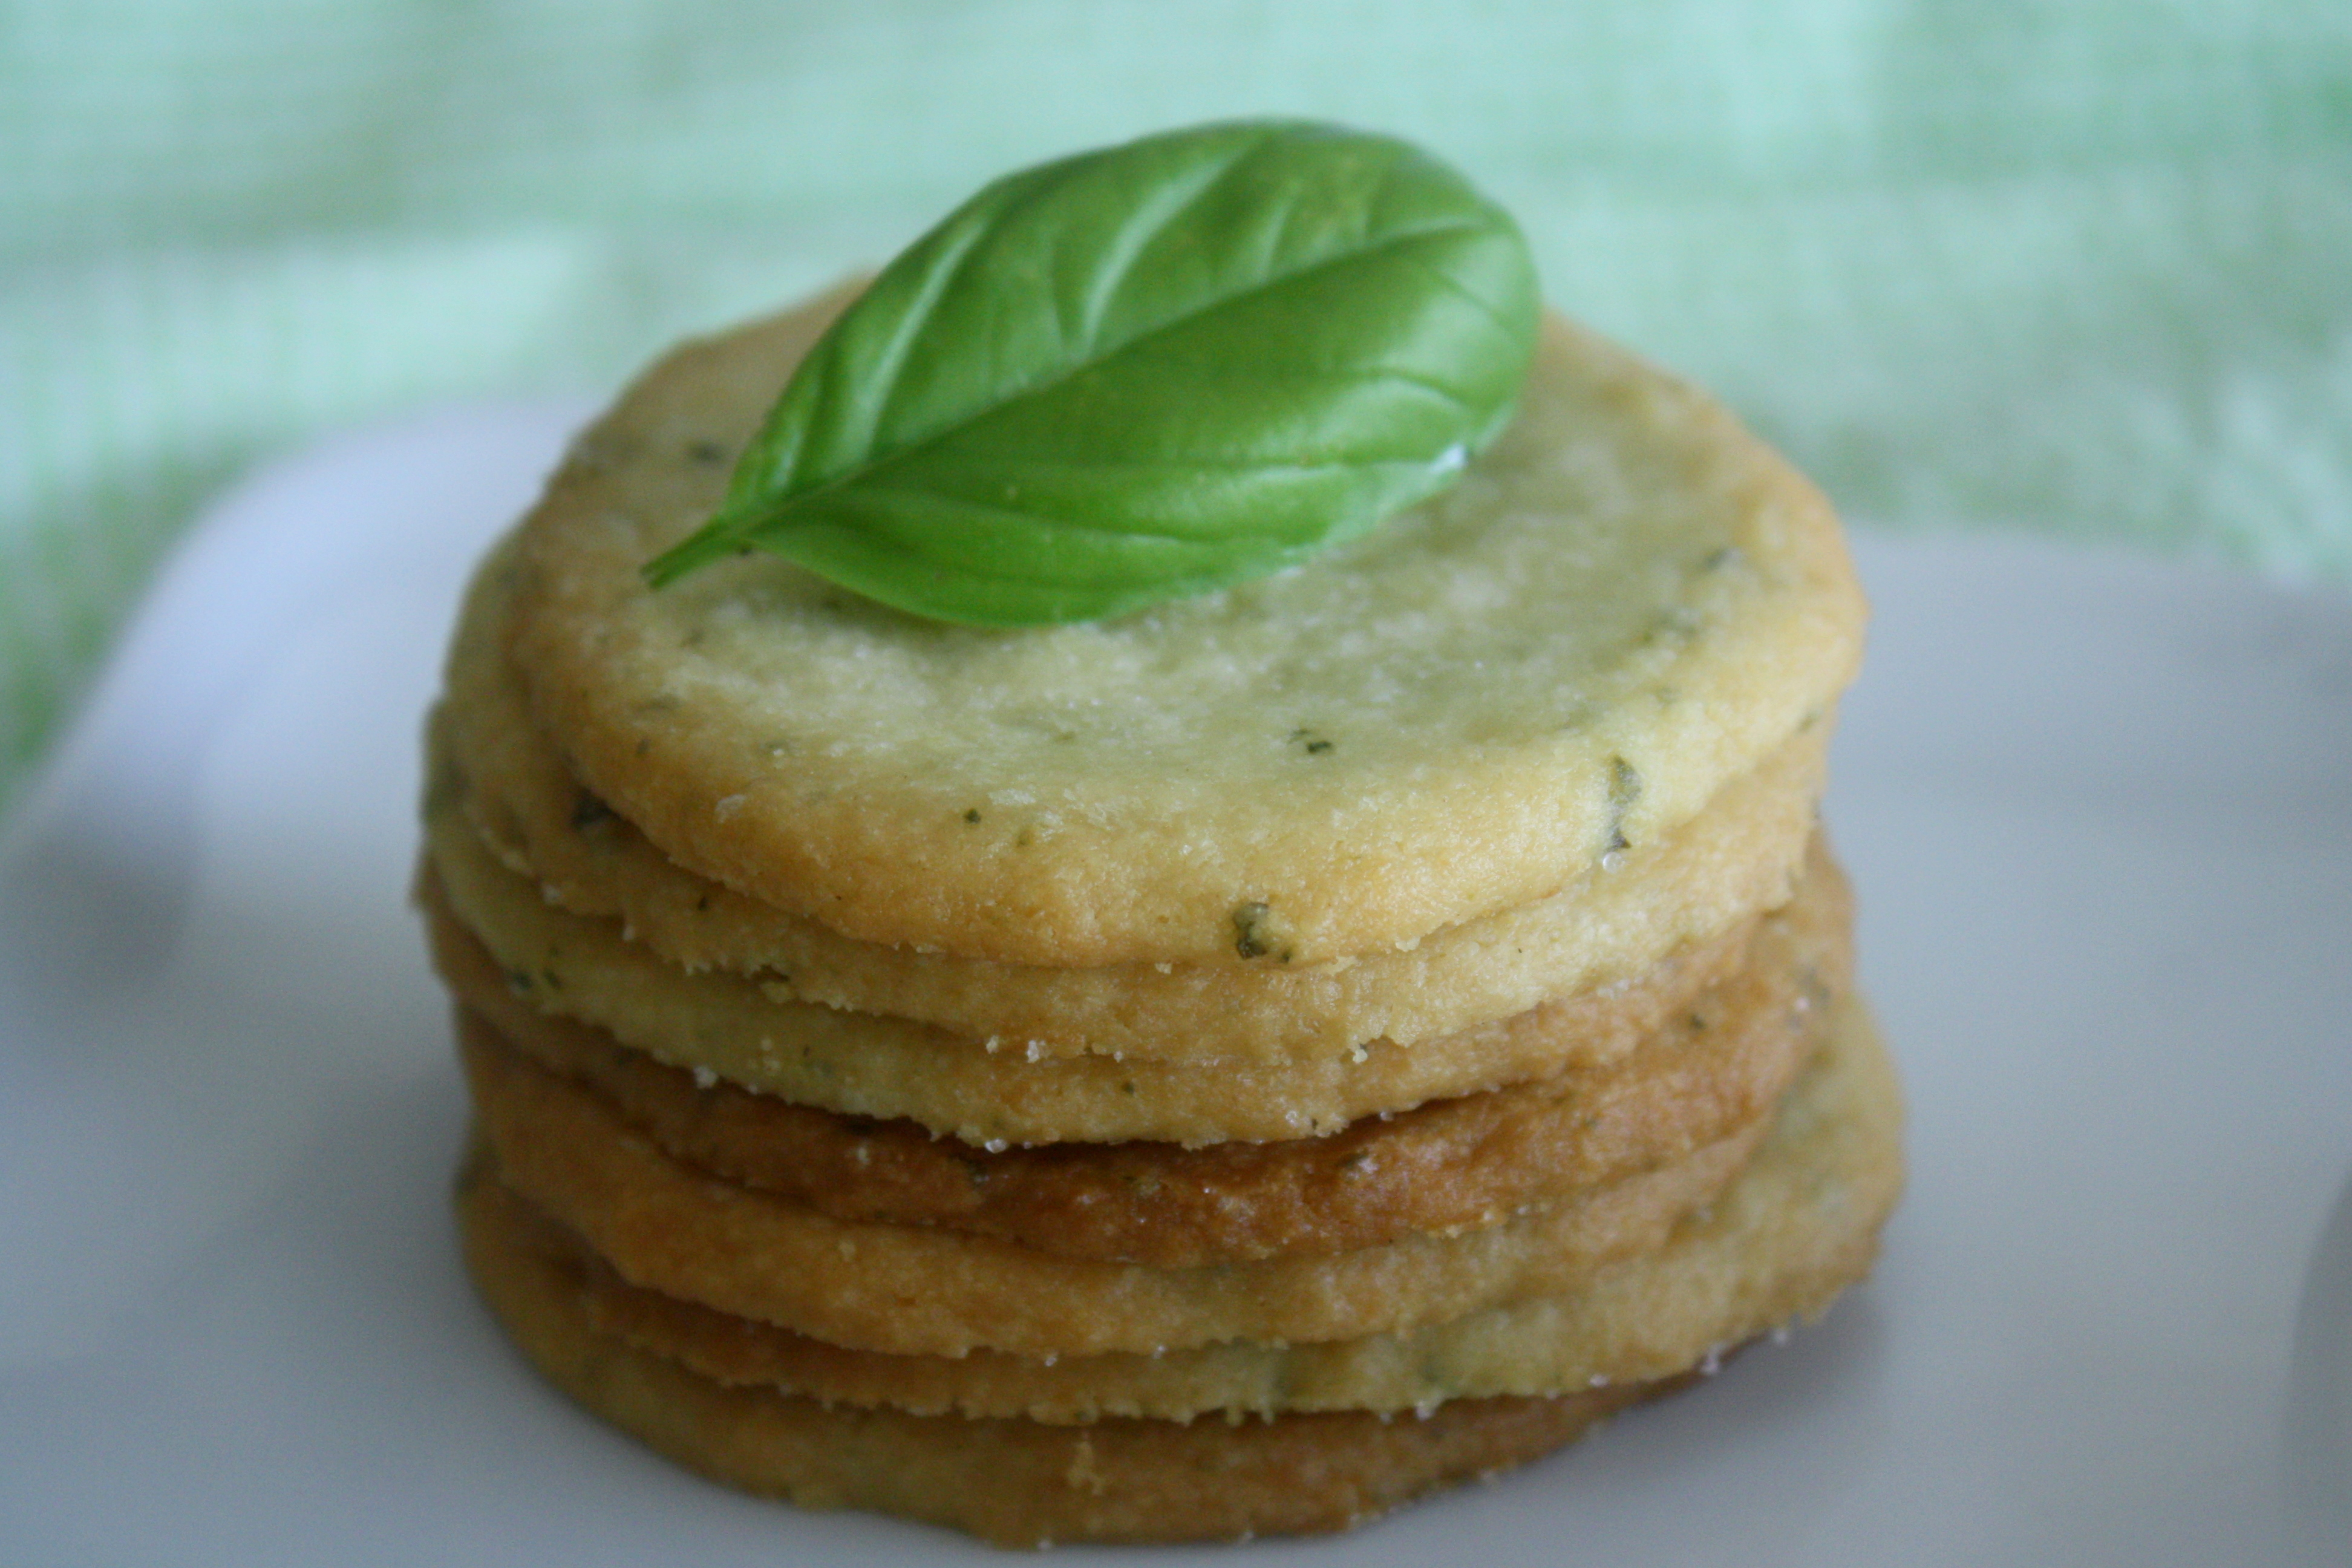 1 C. all-purpose flour
1/2 C. powdered sugar plus more for pressing cookies
1/2 C. (1stick) chilled unsalted butter, cut into 1/2″ cubes
2 tsp. sliced fresh basil leaves
1 tsp. finely grated lemon zest plus 1 tsp. fresh lemon juice
1/2 tsp. finely grated lime zest
1/4 tsp. kosher salt
Sanding sugar (optional)
Decorative sanding sugar has large, crunchy crystals; available at specialty foods stores and
Preheat oven to 375°. Place flour, 1/2 C. powdered sugar, butter, basil, both zests, lemon juice, and salt in a food processor. Pulse until large, moist clumps form. Measure level T.fuls of dough; roll between your palms to form balls. Place on a large baking sheet, spacing 2″ apart. Lightly dust the bottom of a flat measuring C. with powdered sugar and press cookies into 2″ rounds, dusting C. bottom with powdered sugar as needed to prevent sticking. Sprinkle tops of cookies with sanding sugar, if using. Bake until edges are brown, about 14-15 minutes. Transfer to a wire rack; let cool.
Even folks who are not especially enamored of traditional Mac & Cheese, love this hot and spicy, chile-laden version. For a rustic effect, serve in individual iron skillets or kettles.
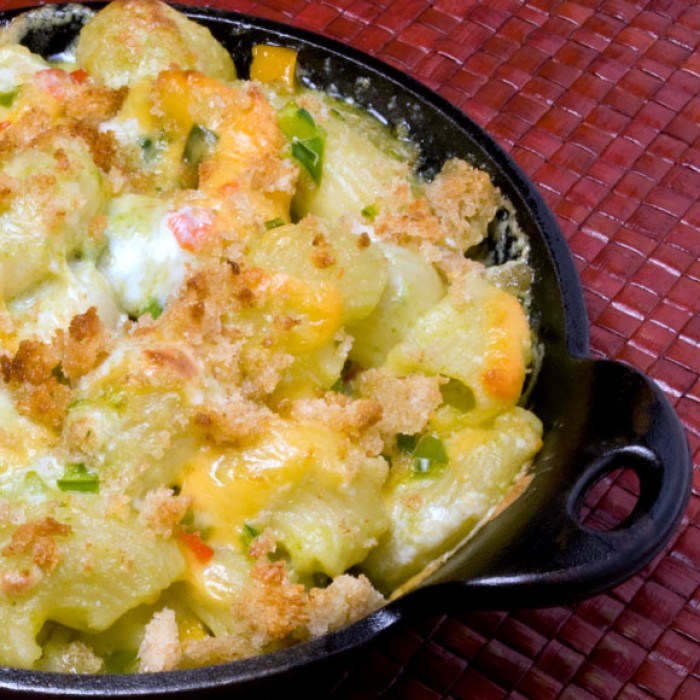
1 pound, short, dried, tubular pasta, such as mini penne, garganelli, maccheroni, mostaccioli, tortiglione, or ziti (about 2¼ pounds cooked)
2 tsp. sea salt
6 tsp. unsalted butter, melted
2 C. dried white bread crumbs, coarsely crumbled
2 clove garlic, pressed or minced
sea salt, to taste
9 oz. Tillamook White Extra Sharp Cheddar (aged over 2 years)
9 oz. Queso Asadero cheese
1½ oz. (about 3/4 C.) finely grated Parmesan
2 tsp. unsalted butter 1 C. minced yellow onion (4 oz. or about ½ large onion)
¼ C. all-purpose flour
3 C. Green Chile Crema
sea salt, to taste
½ C. stemmed, ribbed, seeded, red bell pepper
½ C. stemmed, ribbed, seeded, orange bell pepper
½ C. stemmed, ribbed, seeded, green poblano or Anaheim pepper
½ C. fresh sweet corn sea salt, to taste freshly ground black pepper, to taste
Coat an 8- to 10-C. capacity, ovenproof casserole with vegetable spray or a dab of butter; or coat six 1½-C. capacity stoneware ramekins or iron skillets. Reserve. To prepare the pasta, bring a large pot of water to a rapid boil, add 2 tsp. salt, return to a boil, and add the pasta. Cook until still VERY al dente. Do not cook until fully tender. Remove the pasta pot from the stove and carefully pour the water and pasta into a large colander to drain. Run cold water over the pasta to cool it to room temperature. Add pasta to a large mixing bowl.
Toss the pasta in the bowl with all of the cheeses and reserve. To make the breadcrumb topping, in a small mixing bowl, combine the melted butter, bread crumbs, and garlic. Season to taste with sea salt. Reserve. To make the cream sauce, in a medium saucepan, melt the butter, add the onions, and slowly cook until onions are just beginning to soften. Add the peppers and corn, and stir to coat with butter. Stir in the flour and cook without browning for two minutes. Slowly pour in the Green Chile Crema and whisk constantly while bring the sauce to a simmer. Simmer, whisking continuously, for 2 minutes. Season to taste with sea salt. To finish the dish, pour the sauce over the pasta and cheeses in the bowl. With a large spatula, fold to combine. Spoon into the prepared casserole, mounding slightly at the center.
Sprinkle on the breadcrumb topping. Bake at 350º for 30-40 minutes for the single casserole or 10-15 minutes for individual ramekins, until heated through and just bubbling. (High heat or excessively long cooking time may curdle the cheeses.) Broil for a minute or two to finish browning the top.
Green Chile Crema
A creamy, silky sauce with a perfect balance of fiery heat, rich creaminess, and acidic and herbaceous counterpoints.
2 C. heavy cream
26 oz. fresh, stemmed, seeded, roasted, peeled green Anaheim chiles (about 3 C.)
1 tomatillo, papery skin removed, sticky coating rinsed off, stemmed, chopped
2 tsp. minced garlic
3 green onions, green parts only, chopped
sea salt, to taste
In a medium saucepan, heat the cream and add the chiles, tomatillo, and garlic. Simmer gently for 2-4 minutes and then remove from the heat. Let cool. Using a blender, pour the cream and chile mixture into the container and liquefy. Add the green onion and liquefy.
Season with salt to taste. Pour the crema through a single mesh strainer to remove any remaining coarse particles. The crema should be very smooth.
The sweet flavor of pork has a natural affinity with acidic fruit flavors, as in this rhubarb-cider sauce, and with spices, such as allspice and cloves, which are used here in an apple cider brine. The key to this dish is in not overcooking the pork; it should be nicely rosy in the center, very juicy and tender. And yes, it is quite safe to eat it this way and so much preferable to the dried-out, stringy stuff we are so often served in the name of pork.
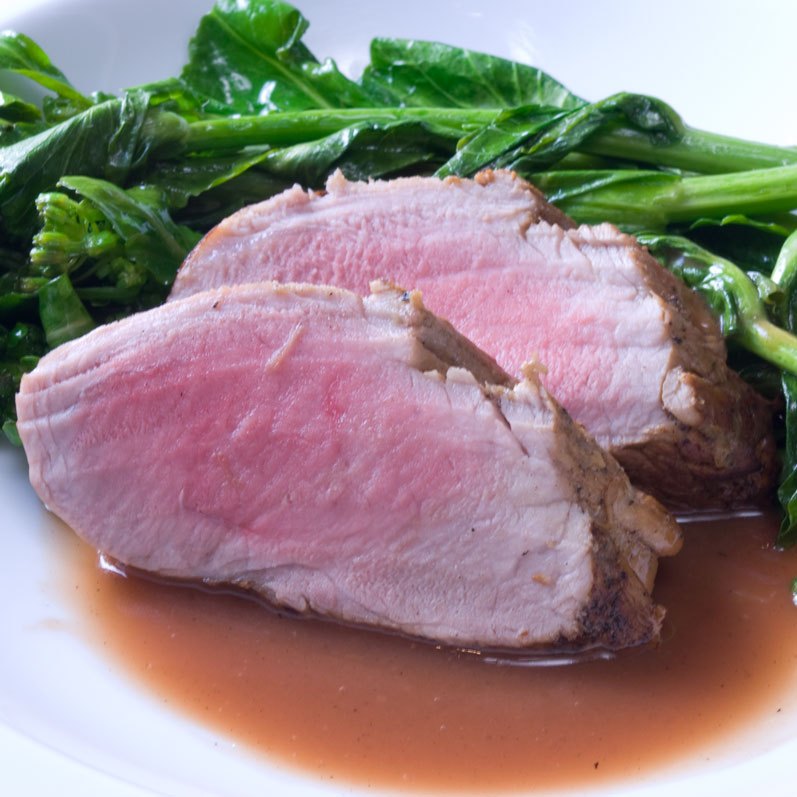 2 whole pork tenderloins (preferably about 9 oz. each and 9-inches long)
2 C. apple cider
1 tsp. fine sea salt
1 tsp. sugar
½ cinnamon stick, broken
1 tsp. whole allspice
½ tsp. whole cloves
2 C. trimmed, diced rhubarb
2 tsp. brown sugar
1 C. low-salt chicken stock
1 C. apple cider
1 tsp. unsalted butter
1 tsp. cold pressed olive oil
2 tsp. balsamic vinegar
½ C. low-salt chicken stock
fine sea salt, to taste
freshly ground black pepper, to taste
sugar, to taste
Trim all fat from the tenderloins and reserve. To brine the pork, in a mixing bowl, combine the brine ingredients, and stir until the salt and sugar dissolve. Place the tenderloins in a glass baking dish and pour the brine over them. Seal tightly with plastic wrap and refrigerate for at least 6 hours or overnight. Rotate the tenderloins once or twice while brining. To make the sauce, in a small saucepan, combine the rhubarb and brown sugar, and let sit for 1 hour. Add 1 C. chicken stock and apple cider. Cook until rhubarb is actually disintegrating. Into a large measuring glass measuring C., strain the sauce, pushing against the solids to extract as much of the liquid as possible. Reserve. Remove tenderloins from the brine and pat dry with paper towels. Discard the brine. In a large sauté pan, heat the butter and olive oil. Lay the tenderloins in the pan and brown deeply on all sides. (It’s fine to cut the tenderloins if they are too long for the pan.) This process usually requires about 8-10 minutes. Do this quickly so that the pork doesn’t cook all the way through. Drain the fat from the sauté pan, and add the vinegar and ½ C. stock to the pan to deglaze. Cover the pan and braise slowly (just a bubble on the surface) until the internal temperature of the pork reads 145 degrees, about 12-18 minutes. (Pork is judged safe to eat at 137 degrees, but it is advisable to cook it somewhat beyond this point to be sure.) When the pork is done, remove from the pan and keep warm for a few minutes. Raise the heat and add the rhubarb sauce. Whisk and cook until thickened; the sauce should just coat a wooden spoon. (If desired, you can make a slurry with a tsp. cornstarch and a tsp. stock and use it to thicken the sauce slightly.) Taste and then carefully season the sauce with salt, pepper, and additional sugar if needed. Strain sauce into a small saucepan. Keep warm. Cut the tenderloin into 3/4-inch medallions, arrange on one side of four individual warmed serving plates and pour the sauce under and around. If desired, serve with a quick braise of rapini or baby vegetables, such as turnips, parsnips, and carrots.
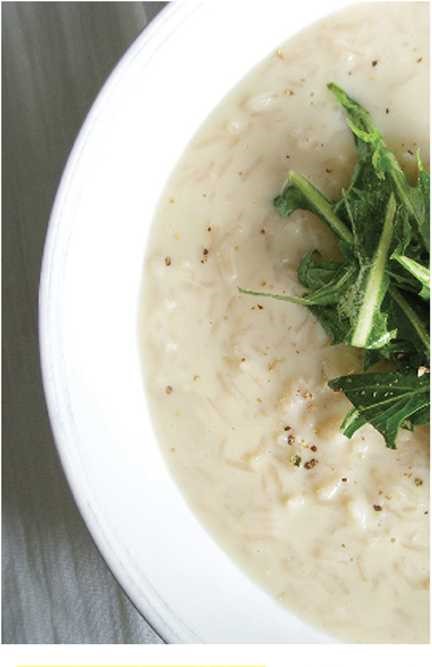 Bring 8 C. (2 quarts) vegetable broth to a boil in a Dutch oven or other large pot. Add 1 1/4 C. white long-grain rice and simmer until tender, about 15 minutes. Meanwhile, in a medium bowl, toss 1 bunch dandelion greens, stems trimmed and leaves roughly torn, with the finely grated zest of 1 lemon, 2 tsp. fresh lemon juice, 2 tsp. olive oil, and salt and pepper until coated; set aside. When the rice is tender, whisk together 4 large eggs and ¼ C. fresh lemon juice in a small bowl. While whisking the eggs, slowly add about 1/4 C. hot broth from the pot. Remove the pot from the heat and transfer the warmed egg mixture from the bowl to the pot; stir until thickened and creamy, about 1 minute. Season with salt and pepper to taste and serve topped with the reserved greens. or top with: sliced radicchio + shaved Pecorino Romano
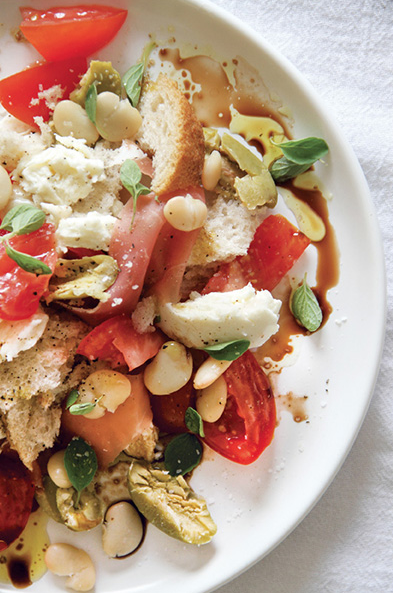 Tear about 10 oz. stale crusty bread (from a 6-inch loaf) into bite-size pieces.
In a large bowl, combine the bread with 1/2 C. green olives, pitted and cracked (about 8 whole olives); 8 oz. fresh mozzarella, tom into pieces; 4 oz. prosciutto, torn into pieces; 4 plum tomatoes, cut into rough chunks; 1 can (15 oz.) butter beans, rinsed and drained; and 1 tsp. fresh oregano leaves.
Drizzle the salad with 2 tsp. balsamic vinegar and 2 T. extra-virgin olive oil, season with salt and pepper, toss, and serve.

Pancake Batter, homemade or store bought
Cocoa
2 Chocolate Chips
1 Marshmallow
1 Strawberry
1 Clementine
Nutella
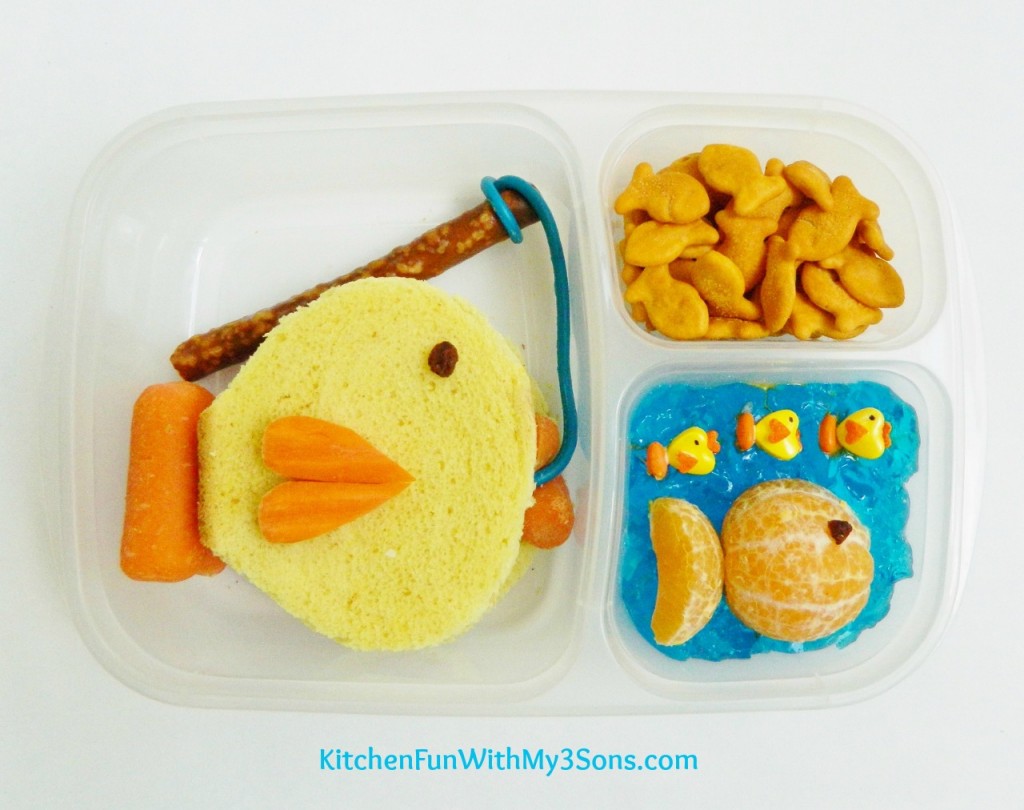
2 Pieces of Bread
Tuna
3 Carrots
1 Pretzel Rod
1 Twizzler String
Gold Fish Crackers
Blue Jell-O
1 Clementine
Heart Sprinkles (optional)
(This is never going to stay like this if you were really packing a lunch. You need filler for the sandwich side, and that yellow? Yikes, what a mess. Easy lunchboxes aren’t leak proof. I have several small boxes of different types to fit into the various wells of our multitudinous lunch boxes.  And I would probably exchange the crackers for little fish cut from carrots; I have a cutter for that. It’s way carb / sugar heavy)
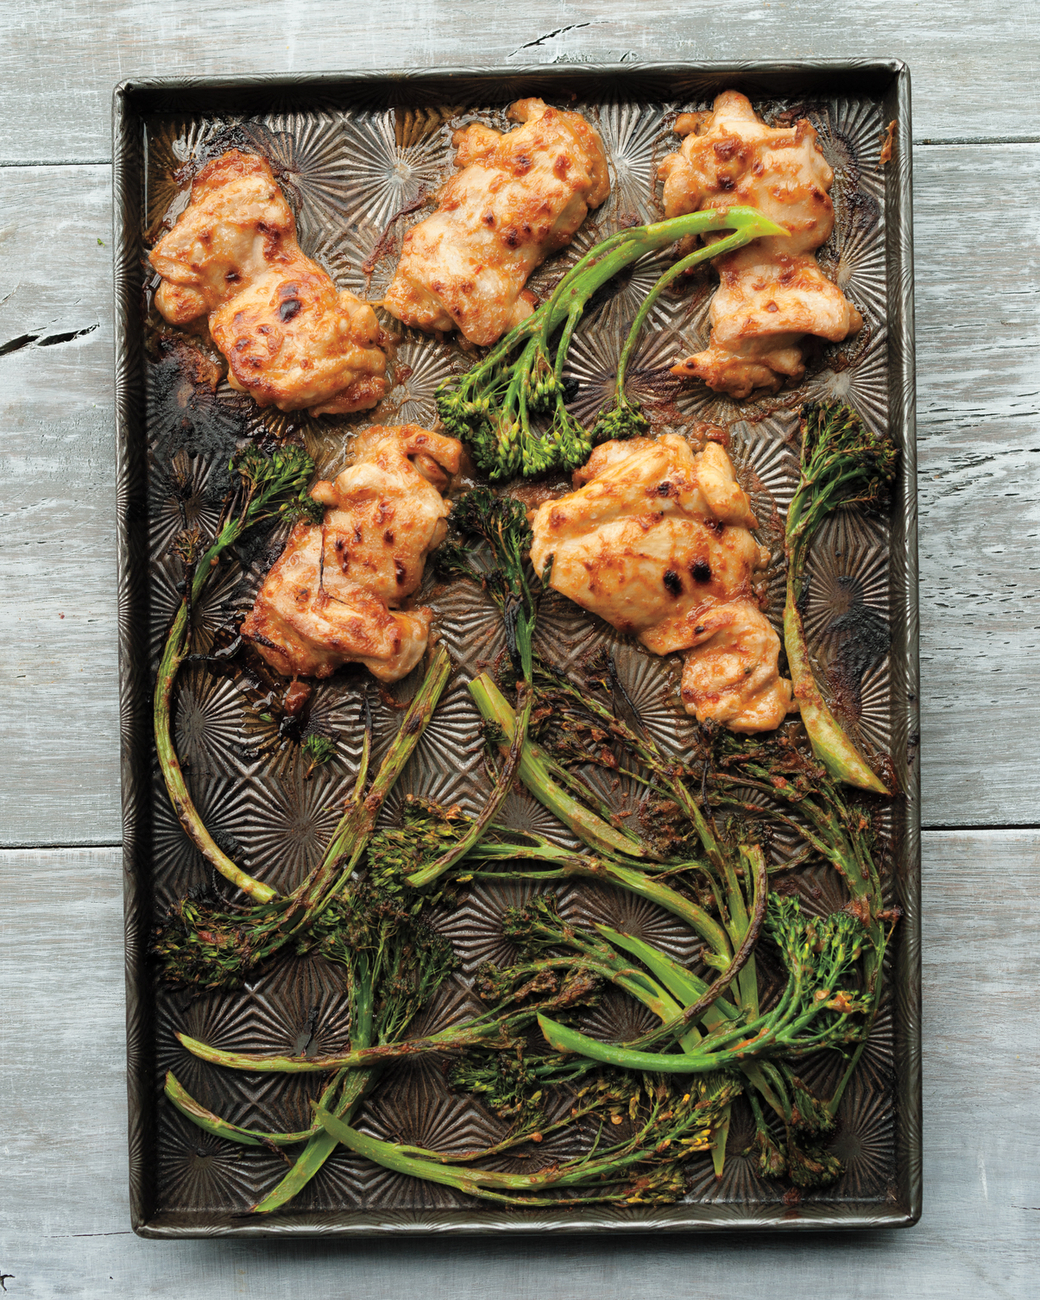
1/4 C. smooth peanut butter
1/4 C. water
1/4 tsp. toasted sesame oil
2 tsp. soy sauce
2 tsp. sambal oelek
2 tsp. rice vinegar
4 skinless chicken thighs
1 bunch Broccolini
Preheat broiler. Mix together peanut butter, water, sesame oil, soy sauce, sambal oelek, and rice vinegar. Toss chicken thighs and Broccolini in sauce, and place on a rimmed baking sheet. Broil 10 inches from heat until chicken is cooked through, about 10 minutes (watch to make sure it doesn’t burn).
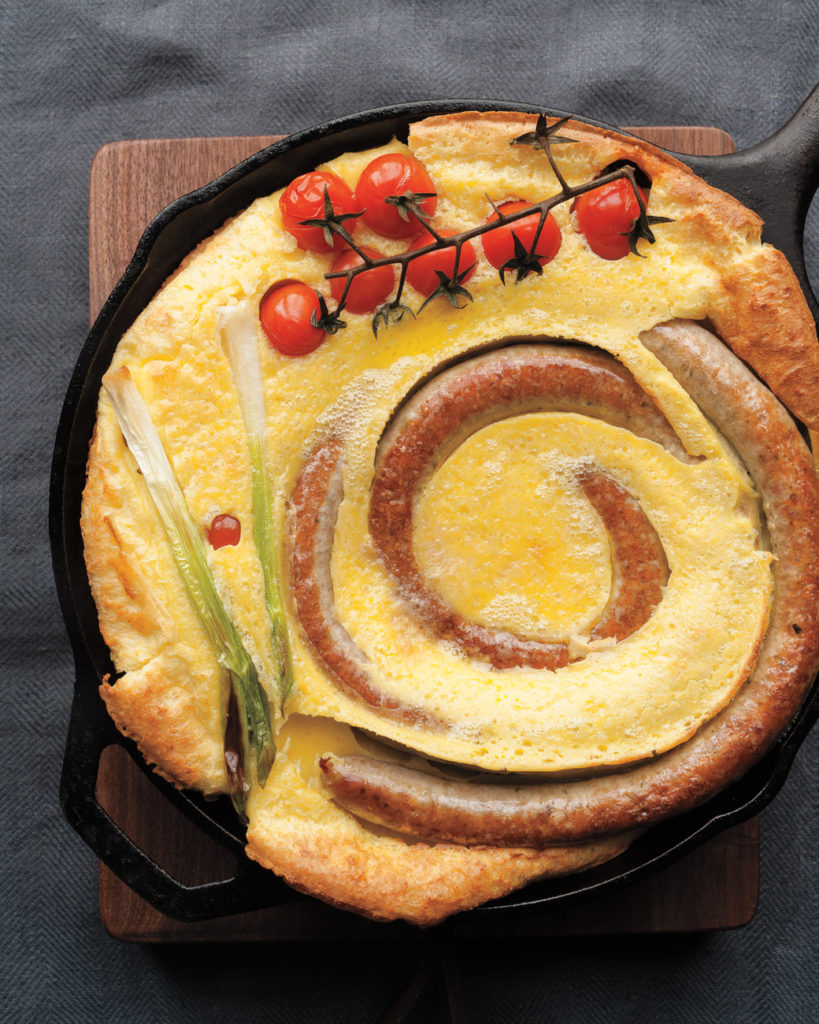 1 1/2 C. all-purpose flour
1 1/2 C. milk
3 large eggs
2 tsp. melted unsalted butter
1 tsp. coarse salt
1 pound sausage
5 whole scallions
1 tsp. extra-virgin olive oil
10 cherry tomatoes
Preheat oven to 425 degrees. Blend flour, milk, eggs, butter, and salt. Brown sausage and scallions in olive oil in a 10-inch cast-iron pan. Pour batter over sausages, and top with tomatoes. Bake until puffed and set, about 30 minutes.