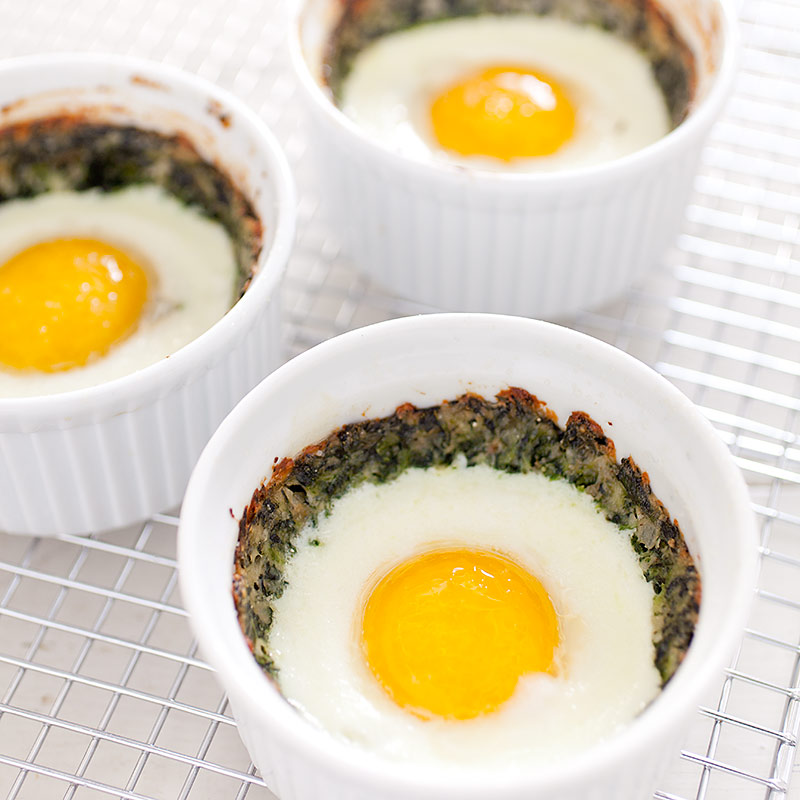
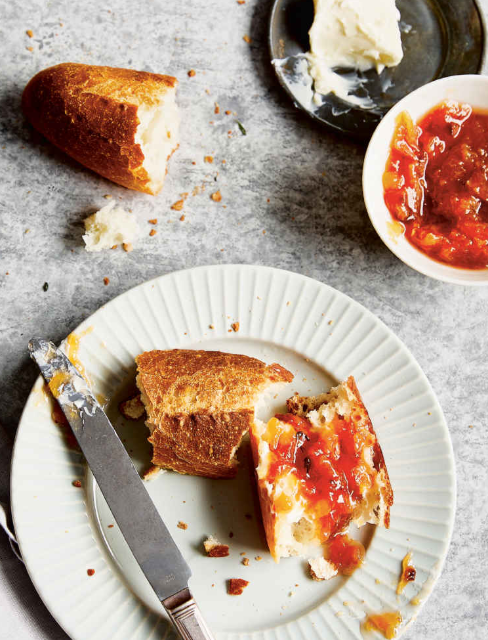
Beef Stir-Fry with Fresh and Pickled Ginger

Beef Stir-Fry with Fresh and Pickled Ginger

3 tsp. dry sherry
2 tsp. soy sauce
2 tsp. cornstarch
1 1/4 pounds sirloin steak, thinly sliced

1/2 C. low-sodium chicken broth
2 tsp. dry sherry
3 tsp. oyster sauce
1 tsp. hoisin sauce
1 1/2 tsp. Chinese chile-garlic sauce
1 1/2 tsp. cornstarch
3 tsp. vegetable oil
1/4 C. julienned fresh ginger
6 scallions, cut into 2-inch lengths
2 tsp. pickled ginger, sliced into thin strips

In a large bowl, whisk the sherry with the soy sauce and cornstarch. Add the steak and turn to coat with the marinade. Let stand for 15 minutes. In a small bowl, whisk the chicken broth with the sherry, oyster sauce, hoisin sauce, chile-garlic sauce and cornstarch. Lift the beef from the marinade; discard the marinade. Heat a wok or large skillet until very hot. Add 2 tsp. the vegetable oil and heat until shimmering. Add the steak and stir-fry over high heat until browned and cooked to medium, about 1 minute. Transfer the steak to a plate. Add the remaining 1 tsp. vegetable oil to the wok. Add the fresh ginger and scallions and stir-fry over high heat until fragrant, about 30 seconds. Return the steak to the wok and add the pickled ginger and the sauce. Stir-fry until the sauce thickens, about 10 seconds. Transfer the steak to bowls and serve. Serve With: Steamed white rice or cooked lo mein noodles.

Roger’s Scampi

Roger’s Scampi

1 lb. Large prawns
4 tsp. butter
1/4 C. Olive oil
5 Cloves fresh garlic, minced
1/8 tsp. each sweet basil, oregano
Juice of 1 lemon
Salt and pepper to taste
1/4 C. Triple Sec or Cointreau

Shell and devein prawns; rinse and drain. Melt butter in medium skillet; add olive oil, garlic, basil and oregano and lemon juice. Sauté for 1 minute. Add prawns and cook until pink. Add salt and pepper and Triple Sec and cook on high until liquid is reduced by 3/4. Serve over pasta or rice.

Roasted Green Beans with Beets, Feta, and Walnuts

Roasted Green Beans with Beets, Feta, and Walnuts

2 pounds fresh green beans, trimmed
1 pound fresh beets, trimmed, peeled, and cut into thin wedges
1/2 C. sliced shallots (4 medium)
1/4 C. olive oil
1/2 tsp. salt
1/2 tsp. freshly ground black pepper
1/2 C. broken walnuts (or almonds or filberts)
1/2 C. crumbled feta cheese (2 oz.) (or chevre)

Preheat oven to 425 degrees F. In a large roasting pan combine green beans, beets, and shallots. Drizzle with oil and sprinkle with salt and pepper; toss to coat. Roast, uncovered, for 45 to 50 minutes or until beans and beets are tender, stirring once or twice and adding walnuts during the last 10 to 15 minutes of roasting. To serve, transfer roasted vegetables to a serving platter. Sprinkle with cheese.

Gypsy Garlic Chicken

Gypsy Garlic Chicken

21 or more cloves fresh garlic, peeled, divided
8 chicken breast halves and 4 legs
2 tsp. vegetable oil
2 medium onions, sliced
1 1/2 C. water
1 (8 oz) can tomato sauce
1/2 C. Sherry
2 tsp. sugar
1 tsp. vinegar
1 tsp. each salt and chervil
2 large bay leaves
1 heaping tsp. whole peppercorns
1 cheesecloth square, 4×4 inches
Lemon slices and parsley for garnish
cooked buttered noodles

Cut 5 garlic cloves into thin slices. With sharp pointed knife, pierce chicken skin at 1 1/2 inch intervals and insert garlic slices between the skin and the flesh. Heat oil to medium heat and sauté chicken, onions and remaining whole garlic cloves until chicken is slightly browned, being careful that onions and garlic do not burn, stir often. Add water, tomato sauce, sherry, sugar, vinegar, salt and chervil; bring to a boil. Wrap bay leaves and peppercorns in cheesecloth and tie opposite ends to make a bag. Drop into the boiling sauce; reduce heat, cover and simmer for 25-30 minutes until chicken is tender. Remove spice bag. Secure a parsley sprig into center of 8 lemon slices with a toothpick. Place on top of larger pieces of meat, cover and simmer for 8 minutes. Arrange on platter, decorated with additional fresh parsley, if desired. Serve at once, accompanied by buttered noodles.

Paidaka (Grilled Lamb Cutlets)

Paidaka (Grilled Lamb Cutlets)

2 ¼ lb. Lamb Cutlets, untrimmed
1/4 C. Olive Oil
Juice of 2 Lemons
1 tsp. dried Oregano
1 Garlic clove, crushed
Salt and Pepper
Alatopiperigano for serving (salt, pepper, oregano mix)
Lemon Wedges, for serving

Rinse cutlets and place in a dish. In a small bowl mix the oil, lemon juice, oregano, garlic, salt and pepper. Spoon 4 tsp. over the cutlets, massage into meat, cover with plastic wrap and allow to rest for an hour. Preheat grill to hot. Grill 4 inches from coal until deep brown and crusty looking here and there on both sides, but not dried out, basting often with remaining marinade. Remove to a platter, scatter with alatopiperigano and serve with lemon wedges. For a greek meal, the table should include tzatziki, fava, greek salad, grilled bread, and some spicy feta (tirokaferi).

Turkish Baklava

Turkish Baklava

1 lb. phyllo dough sheets (18×14 inch)
3 C. raw unsalted pistachios (coarsely grounded)
1/3 C. raw unsalted pistachios (finely grounded)
3 tsp. powdered sugar
1 lb. sweet cream unsalted butter

For the Syrup:
3 C. ground sugar
1 ½ C. water
3 tsp. honey
1 tsp. fresh lemon juice

First, prepare the syrup. Add the sugar and water in a pot. After the sugar melts, add the honey and lemon juice. Let it boil for 2 minutes and remove from heat. Cool syrup. It is easier to cool syrup if you pour it in a different pot or a deep bowl. Let it sit at room temperature. If the phyllo dough is frozen, make sure it’s thawed in the refrigerator and it is out of the fridge in room temperature 5 hours before preparing the baklava. Otherwise, the phyllo sheets may be sticky which will make them difficult to butter. Melt the butter on low heat and cool. Anything that accumulates on top (whitish foam), remove with a spoon. This will clarify the butter. Using a cooking brush, grease a 18×14 inch tray with the clarified butter. You may also use a 9×14 inch pyrex dish if you do not have an 18×14 inch tray. In this case, you will need to cut the phyllo sheets in half to fit the pyrex dish. Mix the coarsely grounded pistachios with the powdered sugar. Make sure everything is ready before opening the phyllo dough (i.e. the butter, the tray, the pistachio mix). The phyllo dough tends to dry out quickly. Cover with a damp cloth or a damp paper towel after opening. Select one sheet and place on the greased tray. Quickly butter the phyllo sheet completely. Add another sheet and repeat the same process until you have buttered 8-9 phyllo sheets. Then add 1 ½ C. the pistachio mix and spread all over the sheets so that there is a thin layer of the mix. Add another sheet of phyllo dough and butter all over. Repeat the same process for another 8-9 sheets. Add the rest of the pistachio mix and spread to cover the sheets. Again, place a sheet of phyllo dough on top of the mix and butter it. Butter each of the left phyllo dough sheets one by one until you are out of phyllo sheets. If you see that some of the phyllo sheets are sticky and will not come out separately, then you may add the sticky sheets all together (without separating) and butter very well. One of the secrets of a good baklava is making sure every single sheet is buttered well. After finishing the phyllo sheets, if you have left over butter, pour on top of the tray. Cut diagonally or in squares after pouring the butter. Heat the oven to 350º F. Place the baklava tray in the middle rack and bake for 30-35 minutes or until golden brown. Remove baklava when ready and pour the cooled syrup all over the tray. Make sure every single piece has syrup on it. The baklava has to be hot when pouring the cooled syrup. Decorate with the finely ground pistachios on top of each of the pieces. Cover with aluminum foil and let sit overnight. Enjoy with aa cup of strong Turkish coffee.

Rhubarb Buckle with Ginger Crumb

Rhubarb Buckle with Ginger Crumb

1/3 C. granulated sugar
1/4 C. all-purpose flour
1/4 C. finely chopped candied ginger
2 T. unsalted butter, melted

1 3/4 C. all-purpose flour
1 tsp. baking powder
1 tsp. dried ginger
1/2 tsp. baking soda
1/2 tsp. fine sea salt
3/4 C. unsalted butter, at room temperature
1 C. granulated sugar
2 eggs
3/4 C. buttermilk, at room temperature
1 pound rhubarb, trimmed and thinly sliced

Heat oven to 350 degrees. Butter a 9-inch round baking pan. Make ginger crumb topping: Mix sugar, flour, and candied ginger together in a bowl, then stir in melted butter. Put the topping in the freezer while you mix up the cake. Make the cake: whisk flour, baking powder, ginger, baking soda, and salt in a bowl. Using a handheld mixer with beaters, or a stand mixer with paddle attachment, cream the butter and sugar together on medium-high speed until light and fluffy, about 3 to 5 minutes. Add the eggs, one at a time, scraping down sides of bowl after each addition. Stir in the flour mixture in three additions, alternating with buttermilk in two additions, beginning and ending with dry ingredients, and scraping down the sides of the bowl occasionally. Gently fold in rhubarb. Spread the batter into the prepared pan, then sprinkle the crumb topping over the cake. Bake for 45 to 50 minutes, or until lightly golden, and firm on top. Store wrapped in plastic, at room temperature, for 2 to 3 days.

Pickled Three Bean Salad

Pickled Three Bean Salad

1 ½ Lb. Fresh Green Beans — 4 1/2 C.
1 ½ Lb. Fresh Wax Beans — 4 1/2 C.
1 Lb. Canned Kidney Beans — or Shelled Lima Beans, rinsed and drained
2 C. Celery — sliced
1 Large Onion — peeled and sliced
1 C. Sweet Pepper — diced
2 ½ C. Sugar
3 C. White Vinegar
1 T. Mustard Seed
1 tsp. Celery Seed
4 tsp. Pickling Salt
1 ¼ C. Water

Rinse beans, trim ends and cut into 1 1/2″ pieces. Mix in large pot with celery, onion and pepper. Cover with boiling water and simmer 10-12 minutes (the recipe calls for 8 minutes, but that wasn’t enough). Drain. Bring sugar, vinegar, spices, and water to a boil. Simmer, covered, 15 minutes. (The amounts are just right, only a little brine left over. Don’t boil the brine away!) Add drained vegetables and kidney beans. Return to a boil. Pack hot vegetables into hot jars, leaving 1/2″ headspace. Ladle hot spiced vinegar over vegetables, leaving 1/2″ headspace. Remove air bubbles. Wipe rim of jar clean; place hot, previously simmered lid on jar and screw down ring firmly tight. Process 15 minutes in a boiling water bath canner. Do not change the ratio of vinegar, water and vegetables. This is a tested recipe for water bath canning.

Mini Garden Pizzas

Mini Garden Pizzas

1 recipe Pizza Dough
2 tablespoons Olive Oil
1 ball Fresh Mozzarella , thinly sliced
½ cup Grape or Cherry Tomatoes, sliced
1 recipe Simple Parsley Gremolata (see below for recipe)
Salt and Pepper, to top
10-12 Fresh Basil Leaves

Preheat the oven to 425 degrees. Divide the dough into 12 equal sections. Shape each section of dough into a ball. Roll each ball into a circle that is 1/8” thick. Place the dough circles spaced 2” apart on parchment-lined baking sheets. Brush the top of each dough circle with olive oil. Top each dough circle with a few slices of fresh mozzarella. Top half of the dough circles with 5-6 tomato slices, each. Add a bit of basil. Sprinkle the remaining half of the pizzas with gremolata (about 1-2 teaspoons, each). Sprinkle the pizzas with salt and pepper. Bake in the preheated oven on the top rack for 10-12 minutes, or until the cheese is bubbling and crust is golden brown.

Simple Parsley Gremolata

¼ cup Fresh Parsley, chopped
3 Garlic Cloves, finely minced
Zest of 1 Lemon

Combine all ingredients in a small bowl and mix together. Sprinkle over pizzas, meat, fish, pastas, etc. Store the Gremolata in an airtight container. Keep refrigerated. Will keep for about 1 week.

Sweet Basil and Lemon Sorbet

Sweet Basil and Lemon Sorbet

2/3 C. water
¾ C. superfine Sugar
Zest of 2 lemons
1 large bunch of basil leaves (whichever variety you wish), reserve some to serve
2/3 C. lemon juice

Place the water, sugar and lemon zest in a small pan, bring to the boil and simmer for 4 minutes. Remove from the heat and allow to cool for 10 minutes. Remove the basil leaves from the stems (discarding the stems) and purée the leaves in a pestle and mortar or blender. Add the lemon juice and basil purée to the lemon-zest syrup, stir well, then allow to cool for 30 minutes to allow the flavors to infuse. If you wish to be posh, strain the infusion through a sieve or if, like me, you love the leaves, simply pour it straight into a plastic tub or earthenware freezer-proof dish and place it in the freezer. Generally, sorbet takes 2 hours to set. So that the sorbet is not rock hard, remove the container from the freezer after 30 minutes, beat the sorbet with a fork and return to the freezer. Repeat this three more times, every 30 minutes. You will find that this will make the sorbet crystallize rather than set as a rock of ice. Serve decorated with some fresh basil leaves.

Owl Lunch

Owl Lunch

1 Babybel
2 Raisins
2 pieces of whole wheat bread (sandwich of choice)
2 Baby Carrots
Pretzel Spoons or Mini Pretzel Twists
1 Pretzel Rod
Kale Chips (or you could use green grapes)

Llapingachos (Ecuadorian Potato and Cheese Patties)

Llapingachos (Ecuadorian Potato and Cheese Patties)

5 large Russet potatoes, peeled and cut in chunks
2 tsp. sunflower oil
½ C. finely chopped white onion
2 tsp. ground achiote
1 C. grated Mozzarella or Fontina cheese
Salt to taste

To serve: salsa de mani or peanut sauce, tomato and onion curtido, avocado slices, lettuce, fried eggs, fried sausages and hot sauce.

Boil the potatoes until soft. Heat the oil over medium high heat to make a refrito, add the onions and achiote, cook until the onions are soft, about 5 minutes. Mash the potatoes, mix in the onion refrito and salt to taste. Cover the potato dough and let it sit at room temperature for about an hour. Make small golf size balls with the potato dough. Make a hole in the middle of each ball and fill with the grated or crumbled cheese. Shape the dough into thick patties and let rest in the refrigerator for about ½ to 1 hour. Cook the patties on a hot griddle until browned on each side, be careful when turning them as they will be very delicate. Serve with a fried egg, peanut sauce, tomato and onion curtido, avocado slices and hot sauce.

Honey Glazed Baby Root Vegetables with Greens

Honey Glazed Baby Root Vegetables with Greens

Honey Glazed Baby Root Vegetables with Greens

1 lb. Baby Golden Beets or Turnips, greens attached

1 lb. Radishes, Greens Attached

3 garlic cloves, peeled

1/4 C. extra-virgin olive oil

2 tsp. thyme leaves, plus some whole sprigs for garnish

2 tsp. honey

1 tsp. kosher salt

1  T. unsalted butter


Wash the beets and radishes, and peel the beets. Cut radishes in half lengthwise, taking care to leave some greens attached to each root piece, and cut beets lengthwise until they are the same size as the radishes. Put the veggies in a sauté pan with a lid, add the garlic and olive oil, and toss to coat. Add 3/4 C. water, the thyme leaves, honey, and salt, and bring to a boil over high heat. Cover the skillet, reduce heat to medium-low, and simmer, shaking the skillet occasionally, until the vegetables are tender and pierced easily with the tip of a knife, 12 to 15 minutes.  Transfer the vegetables to a serving platter, draping the soft greens around the roots in pleasing swirls.  Bring cooking liquid back to a boil, remove from heat and swirl in the butter.  Pour sauce over vegetables, garnish with thyme and serve.  The secret here is in finding small, baby veggies, or carefully cutting them all to the same small size lengthwise without cutting off the stems. Shoot for about half the size of a golf ball. If you detach a few greens, it doesn’t matter. Cook ’em anyway!

Chamomile-Scented Strawberry Syrup

Chamomile-Scented Strawberry Syrup

3 half pint jars

4 pounds rinsed and hulled strawberries, crushed (about 8 C.)
2 C. sugar
2 chamomile tea bags
1/4 C. fresh lemon juice

Prepare for water-bath canning: Sterilize the jars and keep them hot in the canning pot, put a small plate in the freezer, and put the flat lids in a heatproof bowl. Put the strawberries in a wide, 6- to 8-quart preserving pan. Bring to a simmer, stirring frequently^, then continue to cook for 5 minutes. Working in batches if necessary, pour into a very-fine-mesh sieve or jelly bag set over a large bowl and stir the berries gently to drain off all the juice. Rinse the preserving pan and return the juice to the pan. (Reserve the strawberry pulp for another use; see this page.) Add the sugar, tea bags, and lemon juice and bring to a boil over high heat. Boil, stirring occasionally, until a small dab of the syrup spooned onto the chilled plate and returned to the freezer for a minute becomes somewhat firm (it will not gel), about 30 minutes. Skim off as much foam as you can and remove the tea bag. Ladle boiling water from the canning pot into the bowl with the lids. Using ajar lifter, remove the sterilized jars from the canning pot, carefully pouring the water from each one back into the pot, and place them upright on a folded towel. Drain the water off the jar lids. Ladle the hot syrup into the jars, leaving 1/2 inch headspace at the top. Use a damp paper towel to wipe the rims of the jars, then put a flat lid and ring on each jar, adjusting the ring so that it’s just finger-tight. Return the jars to the water in the canning pot, making sure the water covers the jars by at least 1 inch. Bring to a boil, and boil for 5 minutes to process. Remove the jars to a folded towel and do not disturb for 12 hours. After 1 hour, check that the lids have sealed by pressing down on the center of each; if it can be pushed down, it hasn’t sealed, and the jar should be refrigerated immediately. Label the sealed jars and store.

Whole Wheat Walrus Waffles

Whole Wheat Walrus Waffles

2 lg. Eggs
1 ¾ C. Milk
¼ C. Oil (or melted butter)
2 tsp. Honey
1 tsp. ground Cinnamon
¼ tsp. Baking Soda
1 ½ C. Whole Wheat Flour
1 tsp. Baking Powder
1/8 tsp. Salt
Cooking Spray or Butter
2 pieces Cooked Turkey Bacon
1 Banana
3 Blueberries

Preheat waffle iron. In large bowl whisk together the eggs, milk, oil, honey, cinnamon and baking powder until well combined. Add in flour, baking powder, and salt and whisk just until large lumps disappear. Spray or butter your waffle iron and griddle to the directions of your waffle iron manufacturer. Keep warm under foil until all are cooked. To decorate a waffle, cut two slices from a banana for eyes. Add blueberries for pupils, and a blueberry for a nose. Cut the rest of the banana in half and place to resemble tusks. Finally, lay the bacon over the bananas to make a moustache.

Apple Cake in an Iron Skillet

Apple Cake in an Iron Skillet

1-3/4 stick Butter
3/4 C. Sugar
4 whole – 5 Whole Granny Smith Apples, Peeled, Cored, and Cut into Six Equal Pieces

1 stick Butter
2/3 C. Sugar
1-1/2 tsp. Vanilla
2 whole Large Eggs
1/2 C. Sour Cream
1-1/2 C. All-purpose Flour
1-1/2 tsp. Baking Powder
1 tsp. Salt
1/2 tsp. Cinnamon
1 whole Small Granny Smith Apple, Peeled, Cored, And Chopped Finely

Preheat oven to 375 F. In a 9 to 10-inch skillet, melt 1 3/4 sticks butter over low heat. Add 3/4 C. sugar to the pan and stir around, then place apple slices, cut side down, in the pan. Don’t pack them too tightly, but try not to leave overly large gaps. Allow this to cook over low/medium-low heat while you make the cake batter. In the bowl of an electric mixer, beat 1 stick of butter and 2/3 C. sugar until light and fluffy. Mix in vanilla and eggs. Add sour cream and mix well. In a bowl, mix flour, baking powder, salt, and cinnamon. Stir together then gradually add flour mixture into the creamed mixture until just combined. Gently stir in 1 chopped apple. Remove skillet from heat. Spoon batter over the top, then spread gently so batter is evenly distributed. Bake for 20 to 25 minutes, or until cake is golden brown and bubbly. Allow cake to sit in skillet for five minutes, then invert onto a serving plate. Don’t worry if some of the topping isn’t perfect—it’ll taste perfect! Serve warm with vanilla ice cream.

Marha Pörkölt – Hungarian Beef Paprika Stew

Marha Pörkölt – Hungarian Beef Paprika Stew

2 tsp. vegetable oil
1 large onion, minced
1 large garlic clove, minced
1/2 medium green bell pepper, chopped
1 lb. beef stew meat
2 tsp. sweet paprika – Hungarian paprika is best
1 tsp. caraway seeds
1 large tomato, cored and chopped
Salt and black pepper to taste
1 tsp. chopped fresh parsley for garnish (optional)

In a large sauté pan, heat canola oil over medium. Add minced onion and sauté for about 8 minutes till softened. Add the garlic and green bell pepper. Continue to sauté for another 5 minutes till garlic is fragrant and bell pepper is tender-crisp. Add the beef to the pan and season lightly with salt and pepper. Cook for 5-6 more minutes, stirring twice, till meat is browned. Sprinkle paprika and caraway seeds evenly across the top of the meat. Add diced tomatoes to the pan. Pour 4-5 C. hot water into the pan, till the meat is almost covered. Stir and bring to a boil. Reduce heat to a simmer and cover to pan. Let the mixture simmer slowly for about 90-100 minutes, replenishing the water as needed to keep it from getting dry. The stew is ready when the meat is fork tender and the sauce is thick. Season with additional salt and pepper to taste before serving, if desired. Serve over spaetzle, potatoes, rice or noodles. It would also be great over quinoa.

Cat Cora’s Farfalle and Herb Salad with Peas

Cat Cora’s Farfalle and Herb Salad with Peas

Cat Cora says: a pasta salad is a good dish to have in your repertoire, and this one, with its butterfly-shaped pasta, shines-just be sure to choose fresh, bright herbs. For pasta salads, cook the pasta a little less than you would for a hot pasta dish.

3 tsp. kosher salt
1 pound farfalle pasta or orzo
3/4 C. peas (blanched if fresh)
1/4 C. finely chopped fresh parsley
2 tsp. chopped fresh chives
1 tsp. chopped fresh oregano
1 tsp. chopped fresh mint
3 garlic cloves minced
5 tsp. fresh lemon juice (from 2 large lemons)
1 1/2 C. halved cherry tomatoes
2 tsp. extra-virgin olive oil

Bring a large pot of water to a boil over high heat. Add 2 tsp. the salt to the boiling water, then add the farfalle. Cook for 7 minutes, or until the past is done but still firm. Drain the pasta in a colander, rinse with cold water, and drain again. In a large serving bowl, combine the pasta, peas, herbs, garlic, lemon juice and the remaining 1 tsp. salt. Toss and mix well. Add the cherry tomatoes, drizzle with the olive oil, and toss gently. Serve or cover and refrigerate until you’re ready to serve.

Spicy Tunisian Tomato Sauce with Olives & Preserved Lemon

Spicy Tunisian Tomato Sauce with Olives & Preserved Lemon

Tomato sauce is infinitely adaptable. This version takes the basic Italian sauce and heads south with it, across the Mediterranean Sea, to Tunisia. It includes either Baharat or Ras el Hanout spice blend, along with paprika, cinnamon, preserved lemons, and olives. It’s fabulous as the base for a Moroccan Tagine (and is specified for Moroccan Kefta Tagine (Spicy Meatballs & Tunisian Tomato Sauce). But it’s also delicious tossed with linguini or strozzapreti pasta, Italian-style.

¼ C. cold pressed, extra-virgin olive oil
1 large onion, minced (2½ C. or 10 oz. minced)
4 cloves of garlic, minced or pressed
2 tsp. Baharat or Moroccan Ras el Hanout
2 tsp. ground cumin (only if Ras el Hanout contains no cumin)
2 tsp. ground paprika
1 tsp. ground cinnamon
½ C. dry white wine
28 oz. canned, crushed tomatoes
2 C. chicken stock, plus more as needed
2 tsp. fine sea salt, plus more to taste
1 tsp. freshly ground black pepper, plus more to taste
1 tsp. wildflower honey, plus more to taste
1 C. large cerignola mix, calamata, or green olives, pits removed, and cut into quarters lengthwise
½ C. small preserved lemons, cut into quarters or eighths lengthwise, pits removed
¼ C. chopped cilantro

In a large sauté pan, over medium-low heat, heat the oil and add the onions. Cook the onions slowly, partially covered, until soft and translucent but not browned, about 10 minutes.
Add the garlic and cook for 2 minutes more, stirring to incorporate. Add the baharat or ras el hanout, cumin (if needed), paprika, and cinnamon. Stir to incorporate. Turn the heat up and add the wine. Simmer until almost all liquid is evaporated. Add the tomatoes and chicken stock. Simmer slowly, partially covered for 15 minutes. Add the olives and preserved lemons, and continue cooking for about 15 minutes longer, until sauce is slightly thickened, with a silky sheen. Total cooking time will be about 30 minutes. If the spices still taste harsh at this point, add a little more stock, and simmer longer. If needed, thin the sauce with additional chicken stock. Sauce should not be too thick. Taste for seasoning, and add salt, pepper, and honey to taste. Just before serving, add the cilantro. Sauce can be used immediately or cooled and refrigerated for up to 3 days. It’s even better on day two. Makes about 2 quarts.

Liquid Gold: Brown Poultry Stock

Liquid Gold: Brown Poultry Stock

Stock Making: Hints and Tips

Poultry, meat, fish, and vegetable stocks all utilize the same techniques, differing only in small details.

The aim of stock making is to produce a rich, flavorful broth; therefore, use only enough water to cover the solid ingredients by 1½ inches.

To make a rich, flavorful stock, you must use a high percentage of meat, rather than bones only. Luckily, however, the cheaper cuts of meat and poultry are generally the most flavorful. You can make a light poultry stock with a carcass from a roasted bird, but it will not have the rich flavor of a stock made from uncooked meat and bones.

A non-corrosive stockpot should be used when acid is included in the list of stock ingredients, as with wine in fish stock.

When meat or poultry is heated in water, it releases albumin particles that will cloud the broth if not removed. The water must be heated very slowly to draw out the impurities, which will form a scum on the surface, where they can be skimmed off. This process usually takes 15-20 minutes.

When making meat, poultry, or fish white stock, the skimming process should be completed before adding aromatic vegetables. If vegetables are included at the beginning, they will interfere with skimming. With brown stocks, there is not much skimming required, so roasting the larger vegetables along with the meat is fine.

All stocks should be cooked at a bare simmer. Rapid boiling will cause solid ingredients to disintegrate and cloud the stock.

Meat stock requires 5-6 hours of cooking time; Poultry stock requires 3-4 hours of cooking time; Fish or vegetable stock requires only 45-60 minutes of cooking time.

Seasonings, particularly salt, should not be added until the stock has been concentrated and reduced; or seasonings can be left out altogether so that the future dish utilizing the stock can be individually flavor-balanced.

Stock can be produced more rapidly if finely chopped meat or poultry is used in place of bone-in carcass pieces. The finer the ingredients are chopped, the more surface area is exposed to the simmering water, and the more quickly the ingredients will give up their flavor to the liquid. In this way, acceptable stock can be produced in 1 ½ hours.

The flavor of a rapidly made stock will be good, but because no bones or trimmings are generally used, it will be short on gelatin, thus much lighter in body.

Rapid stock technique does not involve skimming because the many particles of meat “catch” the albumin particles and hold them until final straining.

Stock should be refrigerated after it is of acceptable strength. A flavor change (souring) may occur if hot stock is refrigerated with a cover, therefore, chill thoroughly first, then cover.
Refrigerated stock should be simmered for several minutes every 2-3 days to keep it from spoiling.

Stock may be frozen. Ladle clear, cool stock into heavy-duty, zip-lock freezer bags, seal carefully, and freeze. (Two C. batches are most convenient.) Still in the plastic bag, thaw in warm water; or remove from the bag and heat gently in a small saucepan; or place in a bowl and thaw in the microwave.

Brown Poultry Stock

According to The New Larousse Gastronomique, Brown Stock can be made from beef, veal, or poultry. It’s the method that’s important, and that involves thorough browning of the meat, bones, and vegetables in fat prior to the long, slow simmering generally associated with stock-making. The following formula is for poultry brown stock, probably the least commonly used of the three types. When I make a brown turkey stock, I buy a small turkey, remove the legs and whole breast to roast later and cut the rest of the bird unto pieces for the stock.

¼ C. vegetable oil
5-6 pounds turkey parts (necks, wings, backs, bones, gizzards)
6 stalks celery, leaves and all, roughly chopped
3 carrots, roughly chopped
2 onions, with skins, quartered
4 unpeeled garlic cloves
small handful of parsley, stems and all
1 bay leaf
2 whole cloves
1 sprig fresh thyme or 1/2 tsp. dried
cold water to cover

In a large roasting pan, put the oil, turkey parts, celery, carrots, onions, garlic, and parsley. (If you have a large Le Creuset casserole, use it. You will be able to take it straight from the oven and onto the burner for the simmering stage. No fuss, no muss.) Roast, at 450°, uncovered, on the middle rack in the oven, turning pieces occasionally until well browned, 1-1½ hours. Remove from the oven and transfer the browned ingredients to a large (10-14 quart) stockpot. Deglaze the roasting pan with a little water, scraping up all the bits and pieces of coagulated meat juices from the bottom and sides. (Don’t worry about the fat at this point. It will come off later and in the meantime contributes flavor to the developing stock.) Pour all of the collected juices (everything) into the stockpot. Add cold water to the stockpot to cover the meat and bones by 1½ inches. Heat slowly. When the liquid comes to a bare simmer, regulate the heat to maintain, and then begin to skim off any scum that forms on the surface. Above all, do not stir the stock at this point, as this action will incorporate the clouding particles into the liquid. Continue skimming until the scum ceases to accumulate, about 15-20 minutes. Now add the bay leaf, cloves, thyme, and more water, if necessary, to maintain the beginning level. Partially cover and continue cooking at a very slow simmer for 3-4 hours, partially covered if desired. (Overnight is fine.) Remove the large ingredients from the stockpot with a large slotted spoon, and put the stock through a triple mesh strainer. There will be virtually no flavor or nutrients left in the solid ingredients at this point; they should be discarded. Allow the hot stock to settle for 5-10 minutes before attempting to remove the fat. Then, skim the surface with a spoon, draw a “grease-catcher” brush across the surface, or use a bottom-pouring degreaser (available in most kitchenware stores and definitely the easiest of the three methods) to remove the fat. If time is not critical, refrigerate the stock, uncovered, until the fat hardens, at which point, it can be easily removed. After the stock is thoroughly degreased, check it for taste. If there is not enough flavor, simply boil it down to concentrate its strength. Salt may be added now if desired, although I think it is generally preferable to wait with this until the final dish is prepared utilizing the stock. Refrigerate, covered, remembering to boil the stock for several minutes every few days to keep it from spoiling, or freeze in 2-C. batches.

Kalua Pork

Kalua Pork

1 2.5-3.5 boneless pork shoulder (butt) roast
Sea salt (pink Hawaiian sea salt if you can find it; SMOKED Hawaiian sea salt if you can find that)
Hickory-flavored liquid smoke (if you can’t find smoked sea salt, or for a little more smoky flavor)

Rinse the pork roast and pat it dry. Pierce the entire roast with a fork. Sprinkle generously with the liquid smoke (about 1 T., more if you have a very large roast) and sprinkle with the sea salt (start with about a little less than tsp. and see how far it gets you; you can always add more after it cooks). If using traditional kosher salt, decrease salt to 1-2 tsp. Rub the salt into the roast. Place the roast in a slow cooker and cook on low for 8-10 hours or until the meat shreds easily with a fork. Remove the roast from the pan and place it in a serving dish or on a serving platter. Shred it, discarding any large pieces of fat. Drizzle enough of the cooking liquid over the pork to re-moisten it and keep it from drying out. Serve with any combination of sweet potatoes, mashed potatoes, rice, macaroni salad, and/or fresh fruits and vegetables (or a green salad). Plan on 6-8 oz. pre-cooked meat per person–pork shoulder is quite fatty, so the weight will really cook down.

What to do with Kalua Pork, besides gobble it down as is?

Kalua Pork Sliders with Spicy Sweet Slaw
Kalua Pork Pizza
Kalua Pork Wontons
Kalua Pig over Grits with Balsamic Drizzle
Kalua Pig in Creamy Wine Sauce over Noodles
Kalua, Melted Cheddar on Crostini
BBQ in a Blanket (Crescent Rolls, Pulled Pork)
Kalua Pig with Beer Cheese Grilled Cheese

Mexican Corn

Mexican Corn

1/4 C. butter or margarine
1/4 C. finely chopped onion
1/4 C. chopped green pepper
1 pkg. (10 oz.) frozen corn or 1 can whole kernel corn
1/4 C. diced pimiento
1/2 tsp. salt
1/4 tsp. pepper
sweet pepper slices, to garnish

Heat butter or margarine over low heat. Add and cook until onion is transparent. Add green pepper. Add corn. Cook corn covered, over low heat, about 10 minutes, or until tender. During the last few minutes of cooking, mix in diced pimento. Season to taste with salt and pepper. Mix gently. Garnish with sweet red pepper slices. Serves 4.

Lemon Cod with Sorrel Salsa Verde & Minted New Potatoes

Lemon Cod with Sorrel Salsa Verde & Minted New Potatoes

4 x Fillets Cod
Sea salt & black pepper
Zest of 1 lemon
Juice of 1 lemon
Good glug of olive oil

Sorrel Salsa Verde

1/2 Clove of garlic – Crushed and finely chopped
2 Anchovy fillets – Finely chopped
Small handful of sorrel – Finely chopped
Small handful of parsley leaves – Finely chopped
Large handful of basil leaves – Finely chopped
Generous sprinkle of sea salt
Generous sprinkle of black and white pepper
1 Tsp Dijon mustard
1 Small glug of red wine vinegar
Generous glug of good quality extra virgin olive oil

Start by marinating the cod fillets by evenly covering them with lemon juice, zest, seasoning and oil, cover and place in the fridge for as long as you have. Next combine all salsa verde ingredients together, ensuring you’ve chopped it all as finely as possible (you can use a blender but I prefer it to be hand cut). Make sure you try it and adjust seasoning accordingly. Cover and place in the fridge for the flavours to combine and intensify. Bring to the boil a large pan of water and add in a handful (roughly a third) of the mint leaves plus a sprinkle of salt before adding the potatoes and cooking for 7-10 minutes or until the potatoes become soft. Once the potatoes are cooked drain the water and add in the remaining mint leaves plus the seasoning, a large knob of butter and a glug of oil. Slightly mash with the back of the spoon or fork. Cover to keep warm or let cool and reheat when you’re ready to serve. Once you’ve thoroughly washed the spinach add to a pan over a medium heat along with a small amount of seasoning and cover until the leaves wilt. Drain or squeeze out the excess liquid prior to serving. For the cod fillets, place a large frying pan over a medium to high heat and allow to heat up for a minute or so then place the fillets in the pan skin side down (your marinade should be oily enough to ensure the skin doesn’t stick but if not add a small glug of oil to the skin of the fish along with an extra sprinkle of salt then place face down in the pan). Allow to cook here for around 2-3 minutes until the skin crisps. If the fillets are quite thick transfer to a baking dish and allow to cook on 190 degrees Celsius for a further 3-4 minutes until the fish is cooked through. Once cooked allow to rest under foil for 2-5 minutes before serving.
Plate up by starting with the spinach in the centre of the plate followed by the crushed minted new potatoes on top. Place the fillet of cod on the potatoes and finish by adding a generous dollop (or two) of salsa verde.

Shrimp & Pepper Noodle Bowl

Shrimp & Pepper Noodle Bowl

2 pkg shrimp flavored ramen noodles
8 oz. pkg. cooked medium shrimp
1 C. bell pepper strips
1/4 C. chopped green onions
1 tsp. soy sauce
2 tsp. chopped fresh cilantro
1/2 tsp. tabasco sauce

Bring 4 C. of water to a boil in large saucepan over high heat. Reserve seasoning packets from noodles. Set aside. Break up noodles. Add to water. Add shrimp and bell pepper; cook for 3 minutes. Add seasoning packets, green onions, soy sauce and tabasco sauce; cook 1 minute. Garnish with cilantro. Makes 4 servings.

Sheet Pan Suppers: Honey-Orange Shrimp with Baby Bok Choy

Sheet Pan Suppers: Honey-Orange Shrimp with Baby Bok Choy

Honey-Orange Shrimp With Baby Bok Choy1 ½ pounds 26/30 count raw shrimp, peeled and deveined, tails removed
1 tsp. grated orange zest
¼ cup plus 3 T. freshly squeezed orange juice
¼ cup extra-virgin olive oil
2 T. hot sauce
1 T. Dijon mustard
2 cloves garlic, minced
Cooking spray
2 T. unsalted butter, melted
2 T. honey
1 T. soy sauce
Pinch of crushed red pepper flakes
1 pound baby bok choy, sliced lengthwise into quarters

Place the shrimp, orange zest, ¼ cup orange juice, olive oil, hot sauce, Dijon mustard and garlic in a medium-size bowl or gallon-size zip-top bag, and toss to combine. (Seal the bag and shake gently.) Cover the bowl and marinate the shrimp in the fridge for 20 to 30 minutes. Meanwhile, preheat the oven to 400 degrees with a rack in the center position. Mist a sheet pan with a lip with cooking spray. Whisk together the butter, honey, soy sauce, red pepper flakes and remaining 3 T. orange juice in a small bowl. Place the bok choy on the sheet pan, drizzle with the dressing, and toss to coat. Spread out the bok choy in a single layer. Roast the bok choy, rotating the pan halfway through, until it starts to brown and the sauce has thickened, about 25 minutes. Add the shrimp and its marinade to the pan in a single layer over the bok choy, and roast until the shrimp are bright pink and just cooked through, an additional 8 to 10 minutes. Serve hot.

Jicama Sticks

Jicama Sticks

1 red or sweet onion, finely chopped
1 C. cold water
¾ tsp. salt
¼ C. extra-virgin olive oil
2½ tsp. fresh lime juice
1 tsp. sugar
¼ tsp. freshly ground pepper
1½ lbs. jicama, peeled, cut into matchsticks
1/3 C. finely chopped cilantro or parsley

Steps: Soak onion in water with ½ tsp. of the salt, 15 minutes. Drain. Rinse under cold water. Pat dry. Whisk together oil, lime juice, sugar, remaining ¼ tsp. of the salt and pepper in a large bowl until sugar dissolves. Add onion, jicama and cilantro. Toss well. Nutrition information per serving: 97 calories, 62 percent of calories from fat, 7g fat, 1 g saturated fat, 0 mg cholesterol, 9 g carbohydrates, 1 g protein, 222 mg sodium, 4 g fiber

Chicken & Egg Breakfast

Chicken & Egg Breakfast

Chicken Pancakes

Pancake Mix (or favorite homemade recipe)
1 Strawberry
1 Hard Boiled Egg
1 Piece of Turkey Bacon
1 Orange Slice
Granola
1 Chocolate Chip

Start out by pouring your pancake mix in a pan on low heat making a large pancake. Cut around the edges in the shape of a chicken. Cut out the tail & wing from the scraps using kitchen scissors. We cut slices from 1 strawberry for the top. We used an orange slice from the beak. We cut a piece of turkey bacon for the feet and waddle & a chocolate chip for the eye. We place granola at the bottom & then placed the hard boiled egg on top.

Ultimate Party Crab Bites

Ultimate Party Crab Bites

2 C. breadcrumbs (plus another cup for coating finished balls)
16oz crabmeat
8oz Monterey jack cheese, shredded
8oz cream cheese, at room temperature
3 large eggs
½ C. mayonnaise
1 medium onion, finely diced
1 red bell pepper, finely diced
¼ C. parsley, chopped
2 jalapeno peppers, finely diced
1 T. Old Bay seasoning
1½ tsp. salt
A few cranks of fresh ground black pepper
Vegetable oil for frying

In a large mixing bowl, combine all ingredients (except 1 C. of reserved breadcrumbs). Scoop and form into bite sized balls. Roll balls in breadcrumbs. Place on a large platter and chill for a half of an hour. Heat 1″ of oil in a large frying pan until a deep fry thermometer registers at 350º. Fry the crab bites until golden brown. Drain on paper towels and place on a cookie sheet in a 200º oven to keep them warm while you fry the rest of them up. Serve with cocktail sauce, tartar sauce and lemon wedges. (Remoulade?)

Roast Chicken with Prosecco Herb Sauce

Roast Chicken with Prosecco Herb Sauce

2 lb. chicken thighs and drumsticks
3 T. butter
2 T. olive oil
salt and pepper to taste
½ C. flour
â…“ C. shallots, diced
1.5 C. Prosecco (or any champagne)
1.5 C. chicken stock
1 T. fresh oregano, chopped (see notes)
1 tsp Herbs de Provence
½ C. heavy cream
salt and pepper to taste

Preheat oven to 350º. In a Dutch oven, heat butter and oil over medium heat. Season chicken with salt and pepper. Lightly dredge in flour. Place in skillet and let the chicken cook for ten minutes undisturbed. This is what creates that wonderful crispy skin. After ten minutes, turn the pieces and cook an additional ten minutes. Remove chicken and place on a plate. Set aside. Add shallots to the pan. Sauté until translucent, 4-5 minutes. Add Prosecco, stock and herbs. Using a wooden spoon, loosen the crusty browned chicken bits from the bottom of the pan. This is the good stuff and it will add so much flavor to the final dish. Simmer for ten minutes. Add chicken pieces back to pan, cover and place in the oven for thirty minutes. At that point, remove chicken from pan and pour in the cream. Season with salt and pepper to taste. Give it a good stir and add chicken pieces back in. Serve immediately. Notes: Herbs de Provence already has oregano in the mix, but the addition of fresh adds a different flavor. You could skip fresh oregano and replace with fresh parsley, but I do like the way the fresh oregano plays with the Prosecco in this dish.

Old Fashioned Raspberry Preserves

Old Fashioned Raspberry Preserves

4 C. smashed, fresh raspberries , use a potato masher to smash the raspberries
4 C. sugar
¼ C. fresh lemon juice

Place berries in a large stainless steel or enamel saucepan. Bring to a full boil over high heat, stirring continuously. Boil hard for 1 minute, continuing to stir. Add sugar, return to a boil, and boil until mixture reaches 220ËšF on a candy or instant thermometer. Ladle into clean jars for storage in the freezer or into sterilized jars if processing with a water bath. If water-bath processed, this jam can be stored at room temperature.

Limoncello Soaked Pound Cake

Limoncello Soaked Pound Cake

3 C. flour
1 tsp. baking soda
1 tsp. salt
2 sticks butter, softened
¾ C. granulated sugar
½ C. brown sugar
3 eggs
½ C. milk plus 2 T.
the zest and juice of 1 lemon
Limoncello for soaking (anywhere from ½ C. to 1 C. depending on how strong you like it)

Preheat oven to 350º. Grease loaf pan. (see notes). In a large mixing bowl, combine flour, baking soda and salt. Set aside. In a stand mixer (or hand mixer) beat butter and sugars until light and fluffy. Add eggs one at a time, mixing just until incorporated. Add milk and mix for another two minutes over medium speed. Add flour mixture by the heaping spoonful just until incorporated. Add lemon juice and zest and mix on medium speed for two more minutes. Pour batter into greased loaf pan and bake in a 350º oven until a toothpick inserted comes out clean. (about an hour) Let cake cool for ten minutes. Poke holes all over the top of the cake. (I used a fork) Using a spoon, ladle the Limoncello over the top of the cake slowly. Allow each spoonful to be absorbed before adding another. Wrap cake with cellophane and chill for at least two to three hours. It’s even better if you wait until the next day to serve. Notes: I used an odd sized 12″x5″ pan, but you can use a standard loaf pan for this recipe.

Dandelion Greens Salad with Roasted Nectarines and Warm Red Onion Vinaigrette

Dandelion Greens Salad with Roasted Nectarines and Warm Red Onion Vinaigrette

Dandelions arrive in my yard during the summer months, a little later than they appear in areas with milder climates. Their fringed yellow heads speak of warmth and sunshine and remind me that soon other wildflowers will appear, and the bees will surely follow. Though dandelions attract pollinators like bees, we dig them up to make more room for native wildflowers. I reserve the tender greens for salads while saving the soft yellow blossoms for sweet fritters.

When foraging for wild dandelion greens, take care to source them from areas you know’ to be free from pesticides, such as your own yard, and avoid dandelions growing near waterways, in public parks, or near the roadside, as they may contain chemical residue.

4 medium nectarines, pitted and quartered
1 tsp. extra-virgin olive oil
8 oz. bacon, chopped
1 small red onion, minced
1 tsp. brown mustard seeds
1/4 C. red wine vinegar
6 C. loosely packed dandelion greens, rinsed well and trimmed of tough stems

Preheat the oven to 400°F. Arrange the nectarines in an 8-inch square baking dish and roast them for 15 to 20 minutes, turning once, until they release their juice and begin to caramelize around the edges. Remove them from the oven and let them cool while you prepare the rest of the salad. Line a plate with a paper towel or clean kitchen towel. Warm the olive oil in a skillet over medium heat, drop in the bacon, and fry until it crisps and renders its fat, 6 to 8 minutes. Remove the bacon from the pan with a slotted spoon and let it drain on the lined plate. Stir the onion into the bacon fat and fry it over medium heat for 3 minutes, or until soft and translucent. Stir in the mustard seeds and sauté for 1 minute. Remove the skillet from the heat and whisk in the vinegar to make the vinaigrette. Arrange the dandelion greens on a serving plate and place the nectarines on top. Top with the crisped bacon and dress with the warm vinaigrette. Serve immediately.

Pickled Garlic Scapes

Pickled Garlic Scapes

Are you familiar with garlic scapes? They’re the curly, wonky shoots that pop up from garlic plants in late spring and early summer. They range in thickness from hefty-chive to green-onion size and they smell and taste like mild garlic. If you’re a fan of garlic (and I assume you are if you spend much time here on Foodie with Family), then you are quite likely to be a fan of garlic scapes.

Garlic scapes are versatile; they taste amazing chopped up fresh and added to salads, in pesto, sautéed with bacon, on top of pizzas, and more. PICKLED garlic scapes take that fabulousness to an even higher plane. They add a little tang of vinegar and a hint of spice to the party. I’ve been known to fish a cold, pickled garlic scape out of the jar and munch it plain. Granted, this is a pretty bad idea if you’re going to go out to a party where you’re going to be cheek-to-jowl with a lot of people, but if you’re staying home and your sweetheart eats one, too, you’re golden. This may or may not be one of the reasons I’m a homebody.

Leaving all that aside, garlic scapes are really only available at one time of year. NOW. If you want to preserve the deliciousness that is the garlic scape in all it’s glory, there’s only one way to do it. You have to pickle it. Just imagine cracking open a jar of pickled garlic scapes in January and putting it on a pizza or chopping it up and adding it to potato salad or a pasta dish. Shoot, you can even make pickled garlic scape pesto. Can you picture anything more heart-lifting than a bowl of garlic scape pesto while the snow swirls ouside your window? Or a hearty breakfast of frittata or scrambled eggs studded with pickled garlic scapes on a cool fall morning?

To Make about 2 Pints of Pickled Garlic Scapes:
2 bunches garlic scapes (washed and trimmed of any withered or brown areas)
1 ½ C. apple cider vinegar
1 ½ C. water
2 T. kosher salt
2 T. raw sugar (can substitute granulated white sugar if necessary)

Additional ingredients PER PINT:
½ tsp. black peppercorns
½ tsp. mustard seed (not ground mustard)
¼ tsp. crushed red pepper flakes (can omit if you’re sensitive to heat)
¼ tsp. coriander seeds (not ground coriander)
Coil each garlic scape and insert into a sterilized mason or ball jar. When you have filled the jar to within ¼ –inch of the top of the jar, coil or break any extra scapes and stuff them down into the center of the jar. When the jars are full of scapes, add the spices to each pint jar. Set aside.
Bring the apple cider vinegar, water, salt, and sugar to a boil, stirring until the salt and sugar are dissolved. Carefully pour the boiling brine over the garlic scapes. The garlic scapes will probably pop up and look like they are trying to get out of the jar. Use a sterile chopstick or butterknife to push it back into the jar. Wipe the rims of the jars, then fix the lid tightly into place. Let the jars come to room temperature before storing in the refrigerator for 6 weeks before opening and tasting. Be patient. It’s worth it! The pickled garlic scapes will store well for up to 8 months when stored tightly covered in the refrigerator. If at any point the scapes stick above the brine and develop mold, remove the entire scape that has mold. The rest should still be alright.