Browsed by
Tag: Sweet Stuff

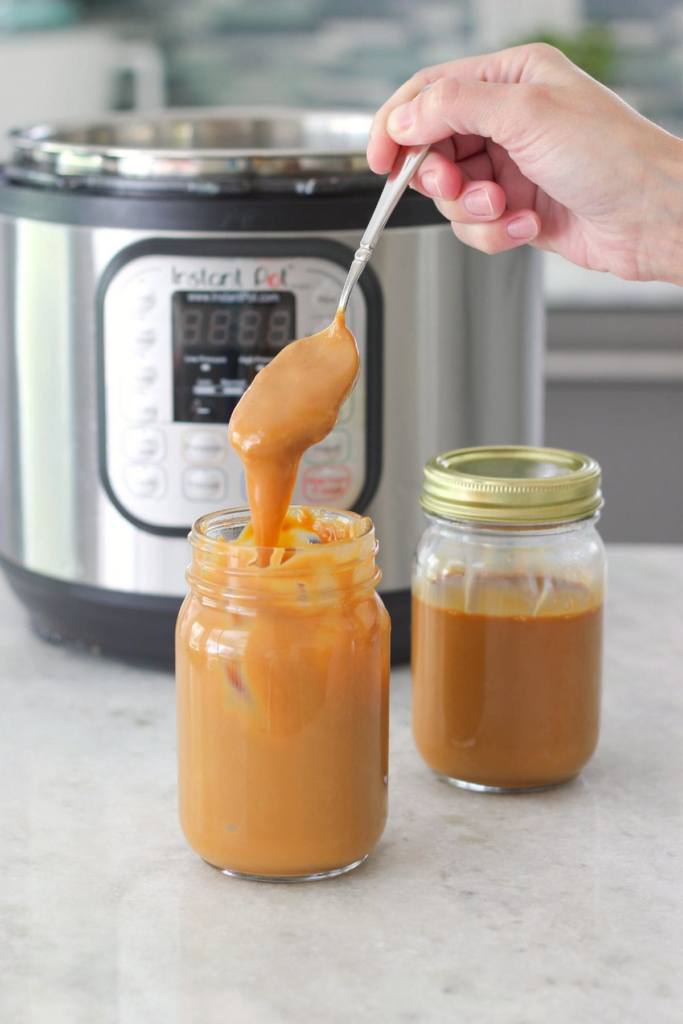
Dulce de Leche

Dulce de Leche

Dulce de LecheDulce de Leche


1 14-oz. can sweetened condensed milk

1 tsp. vanilla extract or brandy

Large pinch of fine sea salt


Remove the paper label from the can of sweetened condensed milk and discard it. Open the can and discard the top. Cover the opening of the can tightly with a piece of aluminum foil. Insert the steamer rack in the pressure cooker and put the can of condensed milk on the rack. Add enough water to reach halfway up the sides of the can. Cover and cook on high pressure for 40 minutes. Allow the pressure to release naturally. Transfer the can of milk to a wire rack, uncover, and let cool for at least 20 minutes; then mix in the vanilla and salt. Serve warm or let it cool completely.


Servings: 10
Serving Size: 2 T.

Calories: 128
Fat: 3 g
Fiber: 0 g
Protein: 3 g

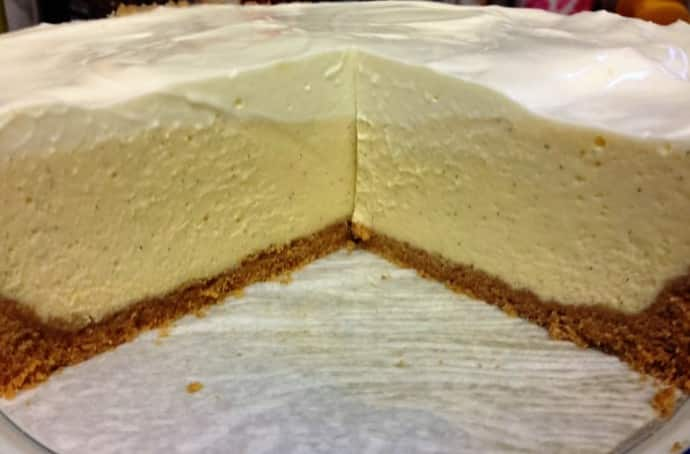
Classic Vanilla Bean Cheesecake

Classic Vanilla Bean Cheesecake

Classic Vanilla Bean CheesecakeClassic Vanilla Bean Cheesecake


Cooking cheesecake in the pressure cooker is one of those game-changing experiences. Not only is it faster than using your oven, it’s also easier since you don’t have to bother with a water bath. And you’ll end up with the silkiest cheesecake imaginable. Make sure your cream cheese is very soft before beating it. Consider microwaving the cream cheese (out of its foil package) for 10 to 20 seconds. Soft cream cheese is essential for getting a lusciously smooth texture here.


3/4 C. (75 grams) graham cracker crumbs (9 to 11 graham crackers)

3 T. unsalted butter, melted

1 T. dark brown sugar

Pinch of salt

16 oz. cream cheese, softened (see headnote)

6 T. sugar

1/3 C. crème fraîche or sour cream

1 vanilla bean, split in half lengthwise, or 2 tsp. vanilla extract

2 tsp. brandy

Pinch of salt

2 large eggs


Preheat the oven to 35O°F. To make the crust, combine crumbs, butter, brown sugar, and salt in a small bowl. Pat into the bottom of a 6- or 7-inch springform pan, patting it all over the bottom and 1/2 to 1 inch up the sides. Bake until golden brown, 8 to 12 minutes. Transfer it to a rack to cool. Make the filling: Using an electric mixer fitted with the paddle attachment, beat the cream cheese and sugar until the mixture is very smooth (this could take several minutes). Then add the crème fraîche, beating again until incorporated. Use a paring knife to scrape the seeds out of the vanilla bean so that they drop into the mixer bowl (save the pod for another purpose). Add the brandy and salt and beat again until smooth. Beat in the eggs, one at a time, scraping down the sides of the bowl between additions. Pour the filling into the prepared pan and cover the top of the springform pan with aluminum foil. Fill the pressure cooker with 1/2 inch of water. You can either place a steamer rack in the pot and then lower the cake pan onto the rack using a homemade sling (see this page) or, if you have a rack with an attached handle, simply lower the rack and pan together. Cover and cook on high pressure for 32 minutes. Let the pressure release naturally for 8 minutes, and then release the remaining pressure manually. Lift the pan out of the pressure cooker and transfer it to a wire rack. Remove the foil. Only the outside of the cheesecake should be fully set; the inside will set further as it cools. Let the cheesecake cool to room temperature. Chill the cheesecake for at least 8 hours and preferably overnight. Release the springform sides to serve.


Servings: 8
Serving Size: 1 slice (1/8 of cheesecake)

Calories: 379
Fat: 30 g
Fiber: 0 g
Protein: 6 g

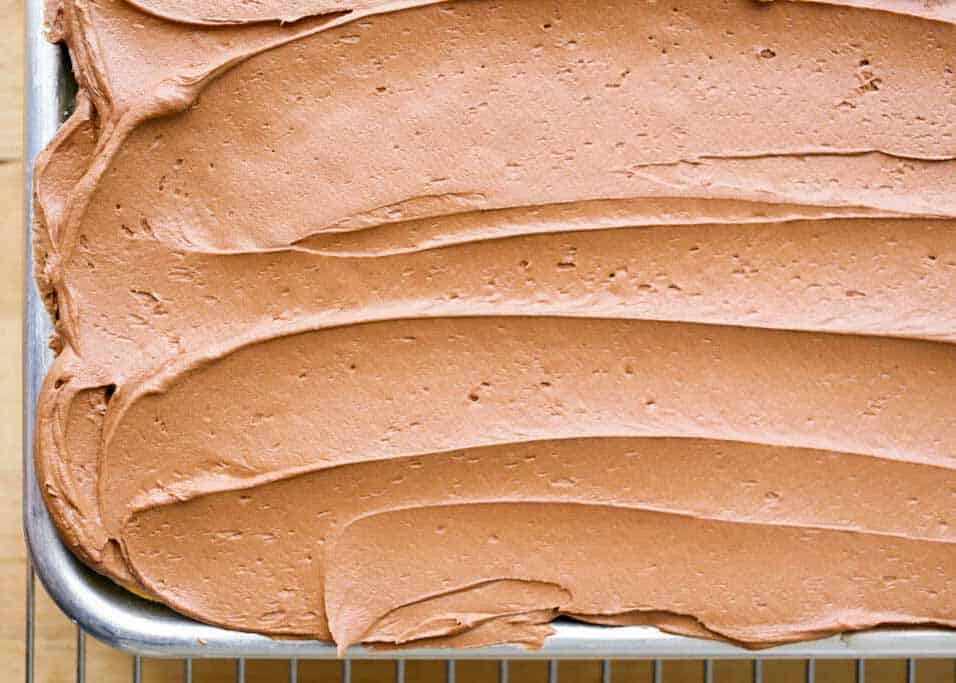
Fluffy, Creamy, Perfect Chocolate Buttercream Frosting

Fluffy, Creamy, Perfect Chocolate Buttercream Frosting

Fluffy, Creamy, Perfect Chocolate Buttercream Frosting


1 cup semi-sweet chocolate chips

1 cup butter room temperature

2 cups powdered sugar

2 teaspoons vanilla extract


Place the chocolate chips in a glass bowl and microwave them for 90 seconds, at 50% power, stir and microwave again for 30 seconds at 50% power. Stir until smooth. Let cool to almost room temperature, do not skip the cooling step. (The chocolate can also be melted in a glass bowl over a simmering pan of water on the stove. Use whichever method works for you, just melt it slowly, until the chocolate is smooth.)  In a mixing bowl, beat the butter on medium speed until smooth. Add 1 cup of powdered sugar and beat again. Scrape the sides and add the remaining powdered sugar. Continue beating for about a minute, scraping the sides as needed, until the mixture is smooth and creamy. Add the vanilla and the cooled chocolate and beat on high for about 2 minutes, scraping the sides as necessary, until the frosting is creamy, smooth, and very fluffy. Spread across the cake of your choice, or just grab a spoon. Enjoy!


Servings: 28
Serving Size: 2 T.

Calories: 121
Fat: 8 g
Fiber: 0 g
Protein: 0 g

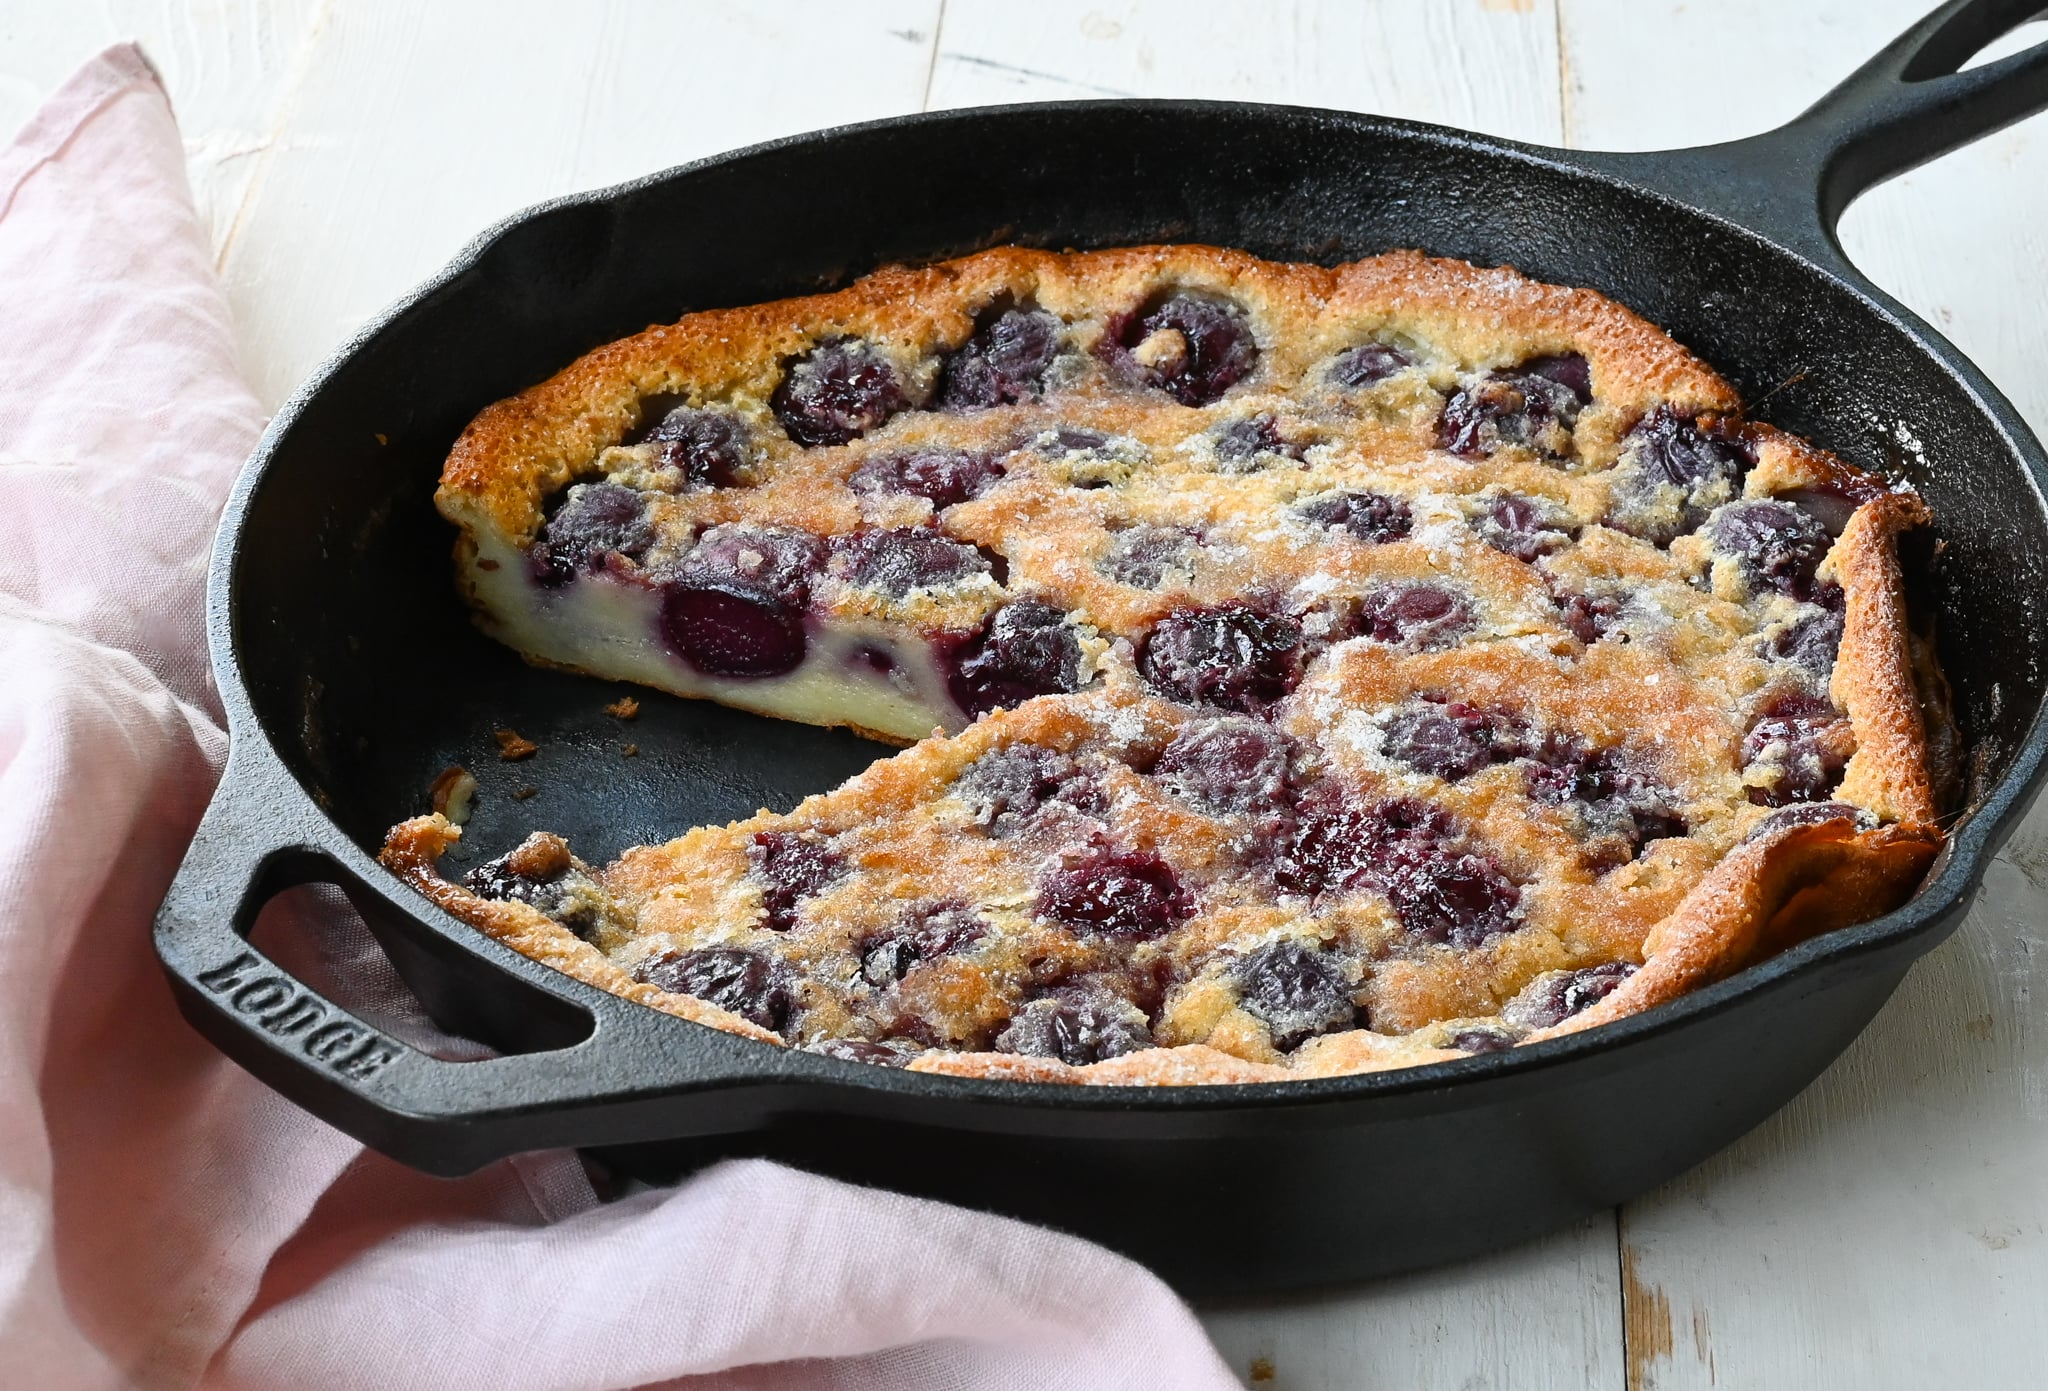
Mixed Berry Clafoutis

Mixed Berry Clafoutis

Cherry Clafoutis


4 eggs

1/2 cup heavy cream or half and half

1/2 cup almond flour

2 T. honey

1 tsp. vanilla extract

Butter (for greasing the baking dish)

1 cup fresh mixed berries (blueberries, raspberries, strawberries & blackberries)


Preheat oven to 350° degrees. Combine eggs, cream, almond flour, honey and vanilla in a blender and blend until smooth (alternatively, combine in a medium bowl and whisk until smooth). Pour batter into 8″ or 9″ greased baking dish. Add berries one by one so they are scattered throughout the dish. Bake for 25-30 minutes until golden and puffy.


Servings: 6
Serving Size: 1 wedge (1/6 of dish)

Calories: 209
Fat: 16 g
Fiber: 2 g
Protein: 7 g

Peppermint Baubles

Peppermint Baubles

Peppermint Baubles


1 cup unsalted butter, at room temperature
1 1/4 cups granulated sugar
2 large eggs
1 1/2 tsp. vanilla extract
1/2 tsp. peppermint extract
3 cups all-purpose flour, plus more for rolling
1/2 tsp. table salt
Red and green food coloring


In the bowl of a standing mixer, beat butter and sugar on high speed until pale and fluffy, about 4 minutes. Beat the eggs into the butter mixture one at a time, beating well after each addition. Add vanilla and peppermint extracts. In another bowl, whisk together the flour and salt. Add this to the butter mixture and beat on low just until combined. Turn the dough out onto a lightly floured counter and divide it up into three portions: two large and one quite small. (The small portion should amount to about 1/6 of the total amount of dough.) Gather the two larger portions into balls, press them into disks, and then wrap in plastic and refrigerate until firm, at least 1 hour and up to 24 hours. Now take the smaller portion of dough. Divide it in half and mix one half with enough red food coloring to achieve your desired color. Mix the second half with green food coloring. Wrap these doughs in plastic and chill as above. Take your red and green doughs and divide and roll them into small balls, each about 1/4 to 1/2 inch in diameter. Set half of them on a plate and return them to the refrigerator. Keep the other balls on hand. Preheat your oven to 350° and set your racks to the upper and lower thirds of the oven. Lay a sheet of lightly floured waxed paper on your counter and roll out one of the large disks of dough on the paper to a 1/8-inch thickness. Arrange red and green balls over the surface of the dough in a pleasing pattern, then use your thumb to press them into the dough to form circles. If the dough begins to soften during this time, transfer it (on the waxed paper) to the freezer for 10 minutes. Using a 2-inch round cookie or biscuit cutter, cut the decorated dough into circles, working as tightly as possible to squeeze the maximum number of balls out of the dough (once decorated, it can’t be re-rolled). Discard scraps (or you can always gently knead them to make tie-dye-style cookies).  Bake the cookies, turning the sheets halfway through, until edges are lightly golden, 11 to 13 minutes. Let the cookies sit for 5 minutes, then transfer to racks to cool completely. Repeat the entire process with the second batches of dough. Serve at room temperature.


Servings: 45
Serving Size: 2 cookies

Calories: 69
Fat: 3 g
Fiber: 0 g
Protein: 1 g

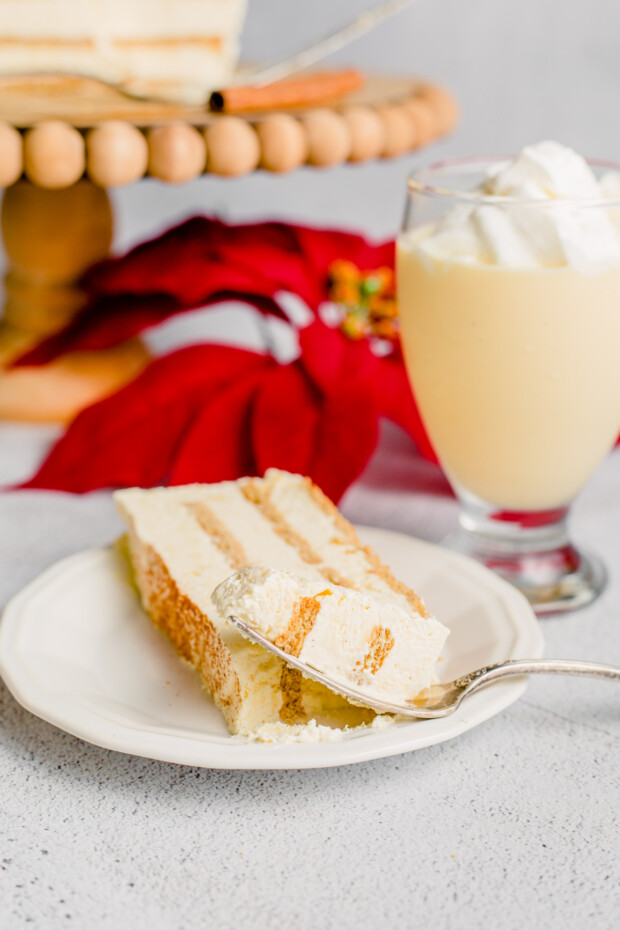
Eggnog Icebox Cake

Eggnog Icebox Cake

Eggnog Icebox CakeEggnog Icebox Cake


EGGNOG MOUSSE

3/4 C. eggnog

1 T. cornstarch

0.25 oz. bag powdered gelatin

8 oz. cream cheese, room temperature

1/3 C. sugar

3/4 tsp. nutmeg

1 3/4 C. heavy whipping cream

3/4 C. powdered sugar

WHIPPED CREAM

1 1/4 C. heavy whipping cream

1/2 C. powdered sugar

6 T. eggnog

6 T. milk

2 1/2 packages (5.3 oz.) of Walkers Shortbread


Add eggnog and cornstarch to a sauce pan and heat on medium-high until eggnog is hot and just starting to simmer around the edges. Do not boil. Sprinkle gelatin over eggnog and turn heat to low. Whisk gelatin into eggnog until smooth, then remove from heat and set aside to cool. (I put it into another bowl and then in the fridge to speed cooling – about 4-5 minutes) In another bowl, beat cream cheese, sugar and nutmeg until smooth. Add eggnog mixture to cream cheese mixture and mix until well combined. In another bowl, whip heavy whipping cream for mousse until it starts to thicken. Add powdered sugar and whip until stiff peaks form. Carefully fold whipped cream into eggnog mixture. Prepare a 9-inch springform pan by lining the sides with parchment paper that sticks about an inch above the sides of the pan. In a small bowl, combine additional eggnog and milk. Make a single layer of shortbread in the bottom of the pan. As you add the shortbread to the pan, dip each cookie into the eggnog and milk mixture and hold it there for 3-4 seconds. Top the shortbread with half of the eggnog mixture. Repeat steps 10 and 11, then make whipped cream for the top. Whip heavy whipping cream until it starts to thicken. Add powdered sugar and whip until stiff peaks form. Set about 1/3 C. of whipped cream aside for piping on the edges of the cake, then spread the rest into an even layer on top of the cake. Place cake in the fridge for 5-6 hours to firm, or set in the freezer. I prefer to freeze it first to make it easier to remove from the pan, then leave it in the fridge. Once cake has been removed from the pan, pipe remaining whipped cream around the edges. Store cake in refrigerator until ready to serve.


Servings: 12
Serving Size: 1 slice (1/12 of cake)

Calories: 536
Fat: 39 g
Fiber: 1 g
Protein: 6 g

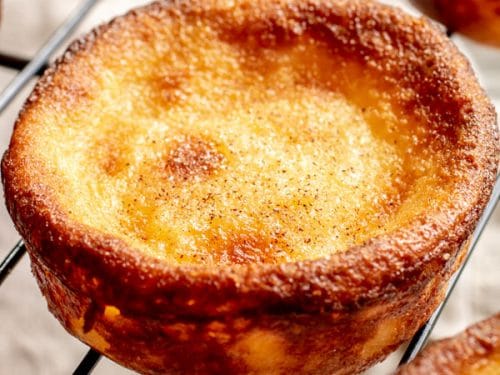
Portuguese Milk Tarts (Queijadas de Leite)

Portuguese Milk Tarts (Queijadas de Leite)

Portuguese Milk Tarts (Queijadas de Leite)Portuguese Milk Tarts (Queijadas de Leite)


2 C. Sugar

1 C. Flour

4 Eggs, beaten

½ C. Butter, melted

3 ¾ C. Whole milk

1 T. Cinnamon

2 T. Sugar


Preheat oven to 400 degrees F. In a large bowl combine 2 C. of sugar and flour. Whisk in beaten eggs, then add melted butter, continuing to whisk, and then milk. Pour mixture into greased muffin tin, filling them to a little more than ¾ full. Bake on center rack for 30 mins or until sides and top are golden. Remove the tarts from muffin tin while hot by running a sharp knife around the sides and lifting them out. Mix sugar and cinnamon together and sprinkle over the tarts as a topping. Serve the same day or store in cool place until ready to serve. Can be made 1 day ahead and served at room temperature.


Servings: 18
Serving Size: 1 tart

Calories: 210
Fat: 8 g
Fiber: 0 g
Protein: 4 g

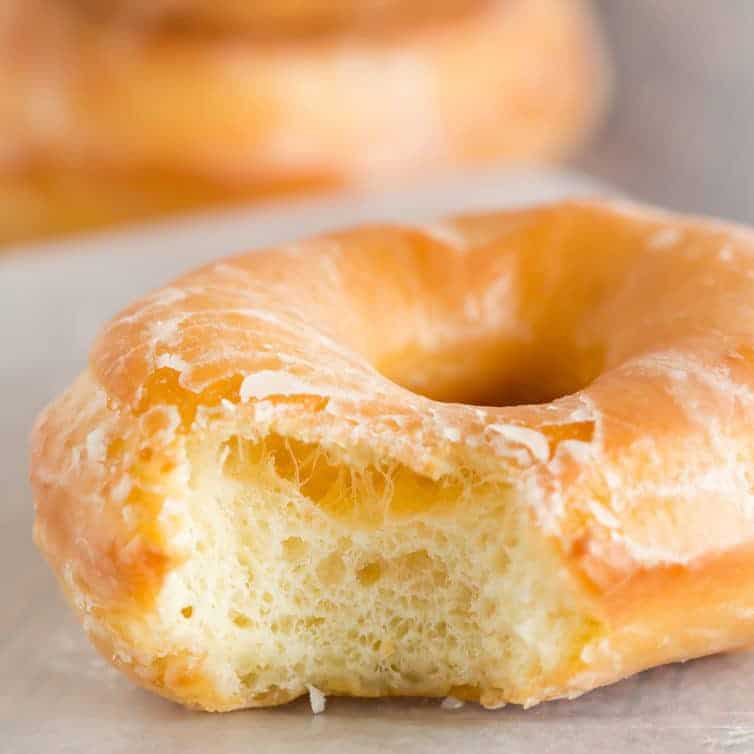
Homemade Krispy Kremes

Homemade Krispy Kremes

Homemade Krispy KremesHomemade Krispy Kremes


3 T. milk

3 T. boiling water

1 tsp. dry active yeast

8 oz. all-purpose flour (a little under 2 C., I recommend you measure and weigh)

1 1/2 oz. sugar (about 3 T.)

1 egg

1 oz. butter, cold to room temperature

1 dash salt

oil, for frying

for Glaze

1/3 C. butter

2 C. confectioners’ sugar

1 1/2 tsp. vanilla

4 T. hot water (or as needed)


In a large measuring jug, combine the milk and boiling water. Add a tsp. of the sugar and the yeast. Stir it gently, then leave it in a warm place for the yeast to activate (aka foam). In a large mixing bowl, combine the flour, the rest of the sugar, and the salt. Cut in the butter using your fingers or a pastry blender, until it resembles crumbs. Add the egg (give it a quick beat) and yeast mixture to the flour mix, and mix into a smooth dough. This usually takes about 5 minutes of mixing. Turn the dough out onto a lightly-floured counter and knead for about 5 to 10 minutes —it should feel springy and little bubbles should form under the surface. Place it back in the bowl, cover with a cloth or plastic wrap, and let rise for about an hour until double in size. Once risen, place the dough onto the counter and cut it into 4 pieces. One piece at a time, stretch it into a long rope about an inch to an inch and a half wide. Cut strips about an inch long, ball em up with your hands, and place them on a baking tray or wire rack to wait. Cover the doughnuts holes with a cloth to rise while you heat the oil to 375°F. Place the doughnuts into the oil and fry until golden brown on each side, about 2 minutes. Be sure to fry only a few at a time so they don’t overcrowd and stick together. Drain on a paper towel or wire rack over a cloth, before glazing them. Be sure to glaze them warm, or else they won’t get that delicious coverage!

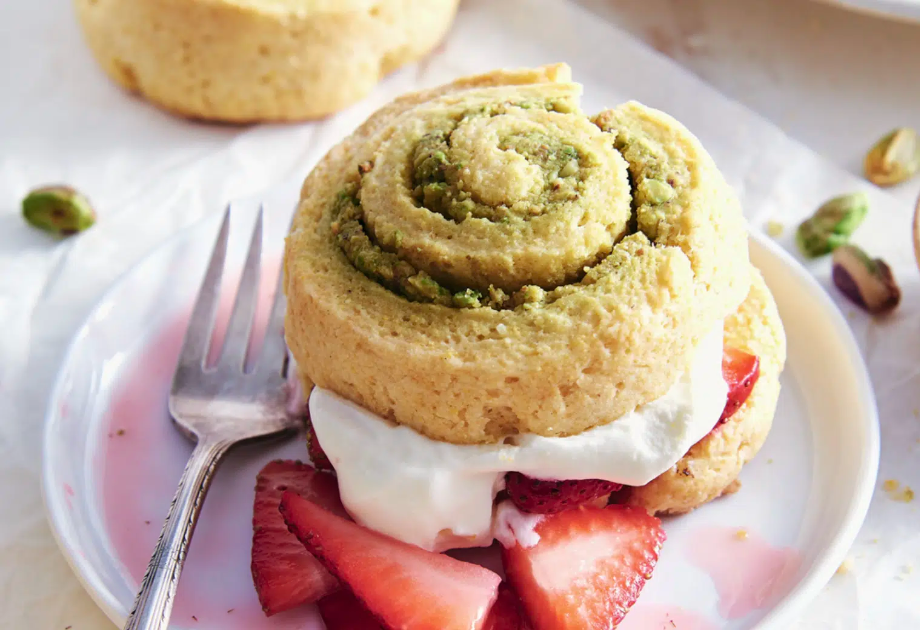
Pistachio Swirl Strawberry Shortcakes

Pistachio Swirl Strawberry Shortcakes

Pistachio Swirl Strawberry Shortcakes


1 cup all-purpose flour, plus more for rolling
²⁄3 cup yellow cornmeal
3 T. granulated sugar, divided
2 tsp. baking powder
¾ tsp. kosher salt
1 cup heavy cream
¾ cup raw (unsalted) shelled pistachios
2 T. unsalted butter, softened

For the strawberries:
1 1/2 lb. strawberries, hulled and sliced (about 4 C.)
2 T. granulated sugar

For the whipped cream:
1 C. heavy cream
2 T. powdered sugar
1/2 tsp. vanilla extract


Preheat your oven to 375° and set a rack in the middle. Line a baking sheet with parchment paper and set aside.   In a large bowl, whisk together the flour, cornmeal, 1½ T. sugar, baking powder, and salt until evenly combined. Add the cream and stir with a spatula until a cohesive dough forms. Set aside. In a blender, pulse the pistachios with 1½ T. sugar until finely ground, with some peppercorn-size pieces remaining. Add the butter and pulse to combine, scraping the sides with a spatula as needed.  Dust the counter with flour. Press the dough out into a rough rectangle, sprinkle with flour, and roll an even 12-by-9-inch rectangle with the long side facing you. Spread the pistachio mixture evenly over the dough, leaving a 1-inch border at the top. Starting from the bottom, roll the dough up around the filling like a jelly roll. When you get to the top, lightly press the seam to seal. Use a sharp knife to cut the roll crosswise into eight equal portions; arrange these, evenly spaced, on the baking sheet. Press each lightly to flatten it a bit. Transfer to the oven and bake until fragrant and just golden at the edges, 20 to 25 minutes. Let cool completely.

While the shortcakes bake, toss the strawberries with the sugar and let sit 20 to 30 minutes to release their juices. Whip the cream with the powdered sugar and vanilla to soft peaks. To serve, split each shortcake in half, spoon about 1/2 C. strawberries and their juice over the bottom half, top with about 1/4 C. whipped cream, and replace the top.


Servings: 8
Serving Size: 1 shortcake with strawberries and whipped cream

Calories: 454
Fat: 31 g
Fiber: 4 g
Protein: 7 g

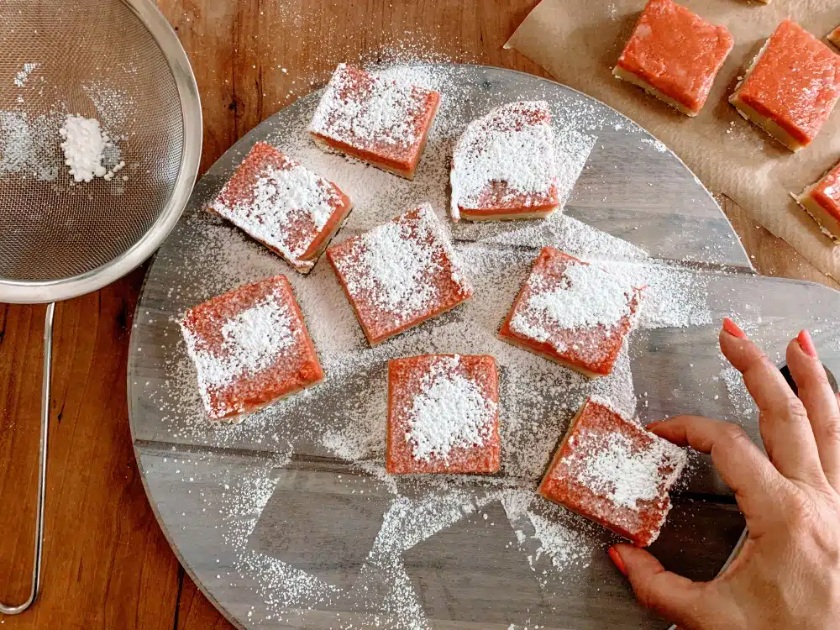
Lemon-Rhubarb Bars

Lemon-Rhubarb Bars

Lemon-Rhubarb Bars


2 sticks (1/2 pound) unsalted butter, softened, plus more for greasing pan
2 cups all-purpose flour
1/2 cup granulated sugar
1/2 tsp. kosher salt

3/4 pound (6–10 stalks, depending on size) red rhubarb, chopped
1/2 cup water
1/3 cup plus 2/3 cup granulated sugar
2 T. fresh lemon juice
1/2 tsp. freshly grated lemon zest
2 large eggs, plus 2 egg yolks
1/3 cup all-purpose flour
Powdered sugar, for dusting


Preheat your oven to 350° and set a rack to the middle position. Grease the bottom of a 9-by-13-inch baking pan, then line with a piece of parchment paper that’s long enough to drape over the sides of the pan. In a large bowl, use a handheld or stand mixer on low speed to combine the butter, flour, sugar, and salt until they come together as a dough. Press this evenly into the bottom of the baking pan, then bake until it’s just beginning to turn golden, 15 to 20 minutes. In a 3- or 4-quart pot, combine the chopped rhubarb with the water and 1/3 cup sugar. Set over medium-high heat, cover, and simmer, stirring occasionally, until the rhubarb is completely broken down, 8 to 10 minutes. Remove from heat and let sit for 5 minutes. Use an immersion or standing blender to completely purée the rhubarb, then add the remaining 2/3 cup sugar, lemon juice, and lemon zest. Stir and set aside. In a large bowl, whisk together the eggs and yolks. Once the rhubarb purée is cool enough to touch, add it to the eggs and whisk to combine, then stir in the flour until smooth. Pour the topping over the shortbread crust and bake until it’s set and barely beginning to turn golden at the edges, 20 to 25 minutes. Remove from the oven and let cool at room temperature for 30 minutes, then chill, uncovered, for at least 3 hours. Run a knife along the edge of the pan to loosen the slab, then lift it out in one piece and cut into equal squares. Just before serving, dust with powdered sugar.


Servings: 24
Serving Size: 1 bar (1/24 of pan)

Calories: 174
Fat: 9 g
Fiber: 1 g
Protein: 2 g

Rhubarb Cookies

Rhubarb Cookies

Rhubarb Cookies


2 sticks (225g) unsalted butter

3/4 cup (150g) granulated sugar

1/2 tsp. salt

1 large egg

2 tsp. vanilla extract

2 3/4 cups (375g) all purpose flour

1/2 cup (160g) rhubarb jam, cooled and well-stirred


Preheat the oven to 350°F (180°C). Line 2 baking sheets with parchment paper. Place the butter, sugar, and salt in the bowl of a stand mixer fitted with the paddle attachment. Beat together at medium-high speed until very light and fluffy, about 2 minutes. Add the egg and vanilla and continue mixing until very light and fluffy, about 30 more seconds. Scrape down the sides and bottom of the bowl with a flexible spatula and beat for a few more seconds to combine. Add the flour and mix together at low speed, just until it forms a uniform dough (about 15 to 30 seconds). Scrape the bottom of the bowl to make sure it is fully incorporated, but do not over-mix. Measure out 1 slightly heaped T. (20g or #50 disher) balls. Roll smooth and make a thumbprint with the ball cupped in your hand to avoid cracks. Place each thumb-printed disc on the baking sheet with an inch or two between each one. Fill each one with 1/2 tsp. jam (do not go over the level of the cookie). Bake for 15 minutes, letting them fully cool on the tray.


Servings: 40
Serving Size: 1 cookie

Calories: 103
Fat: 5 g
Fiber: 0 g
Protein: 1 g

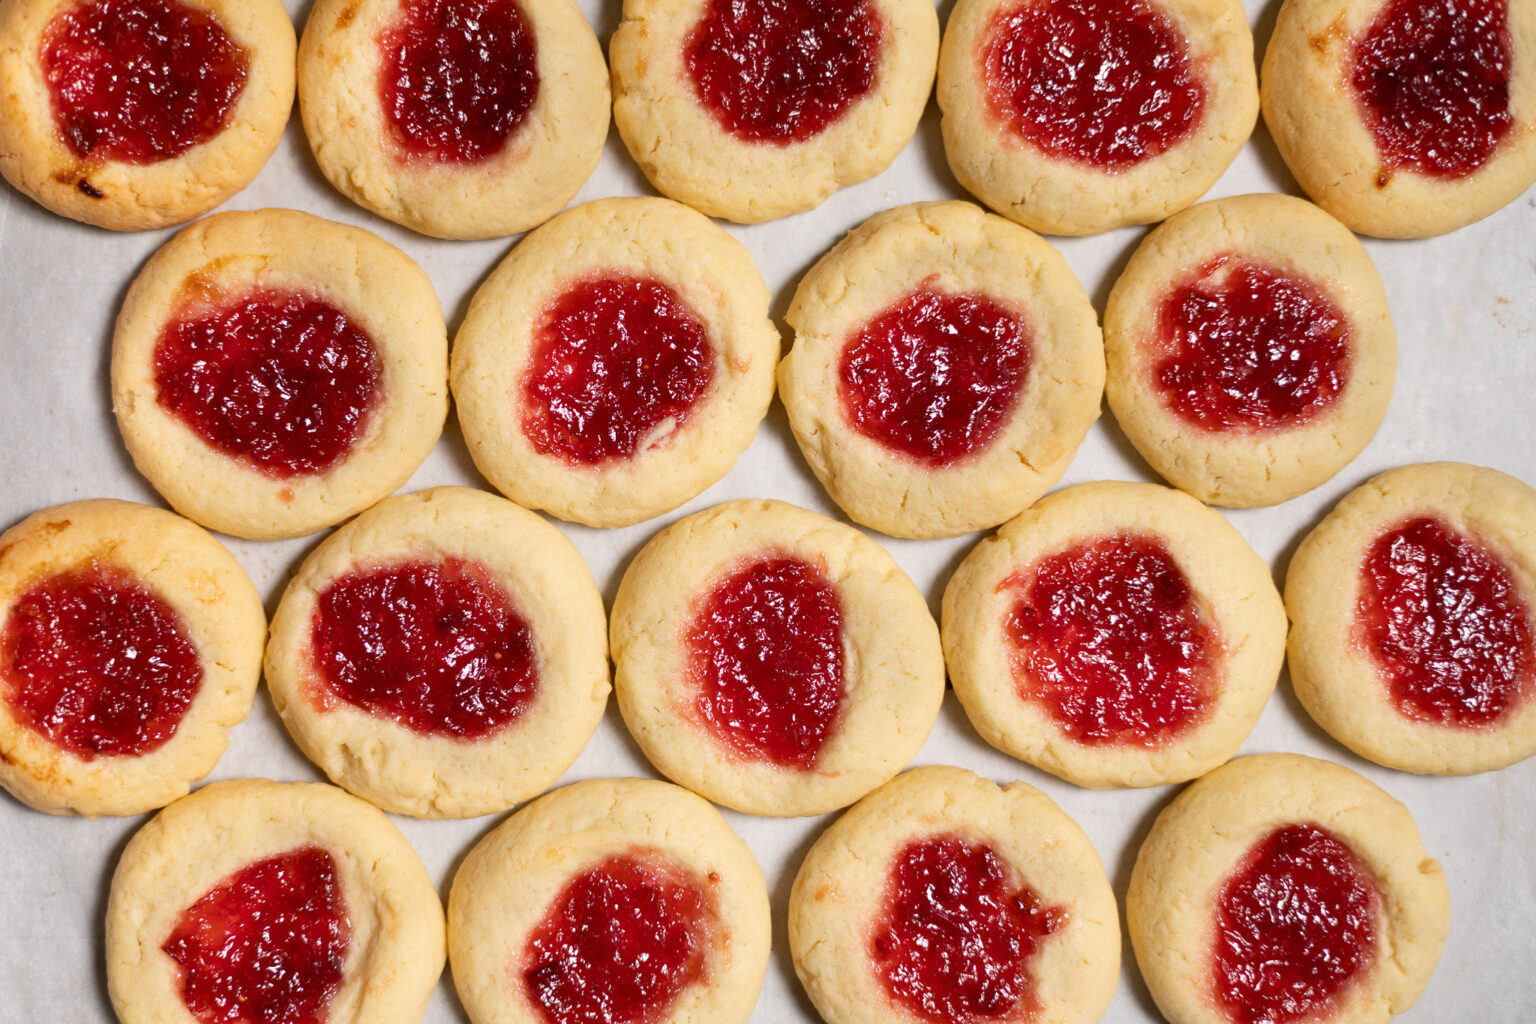
Rosehip Jam Thumbprint Cookies

Rosehip Jam Thumbprint Cookies

Rosehip Jam Thumbprint CookiesRosehip Jam Thumbprint Cookies


1 lb. rosehips, after trimming leaves and stems off

2 C. water

1¼ C. granulated sugar

¾ tsp. powdered pectin

Juice of one lemon

Cookie Dough

2½ C. all-purpose flour

½ tsp. baking powder

1 large egg, room temperature

½ tsp. vanilla extract (almond is lovely, too)

1½ sticks butter

1 C. granulated sugar

½ tsp. salt

1 C. jam


This is using either fresh or frozen rosehips. Dried rosehips can be used to make jam, but I’ve not personally done it. Also to be noted, many rosehip jams incorporate oranges, lemons, and apples for flavor, texture, and mostly, for pectin. I do love the flavor of citrus with rosehips, so I’ve added the lemon juice here, but I chose to share this recipe with powdered pectin instead of apples and oranges because I’ve gotten the most consistently jammy texture. While most times, if my jam doesn’t set, I just smile and call it syrup, but for these thumbprint cookies, a syrup won’t do. Rinse your rosehips and trim off all stems and leaves. Put rosehips in a stainless steel pot, preferably with a heavy bottom, and simmer until hips are soft—about 30 minutes. Run the softened hips, first, through a food mill or strainer and then again through a fine sieve. This part is rather tedious but necessary to get the seeds and fine hairs out that would otherwise be very irritating to the eater. Return your liquid to a pot and add the sugar, pectin, and lemon juice. Stir to combine. Bring this mixture to a rapid boil and then lower slightly to set at a high simmer for roughly 45 minutes, but check every 15 minutes or so to stir, skim foam, and adjust the heat so as not to scald the bottom. After 35 minutes, start checking the temperature with a candy thermometer or a digital read thermometer—you want to reach 220°F for jam. When you reach 220°F, pour your hot jam, through a funnel, into a sterilized jar, leaving about ½-inch headspace. If you’re going to use it soon, you can just let it cool and pop it into the fridge. For long-term storage, you can water bath can for 10 minutes.

Thumbprint Cookies: Preheat oven to 350°F and line two baking sheets with parchment (parchment optional, just nice for jam spills.) Whisk together flour and baking powder in a medium bowl. In a small bowl, whisk together egg and vanilla or almond extract. With either a stand mixer or in a large bowl with a hand mixer, cream the butter, sugar, and salt until fluffy (about 4 minutes). Turn the speed down a notch and add egg mixture. Turn the speed all the way to low and add the flour mixture slowly. Turn the mixer off and scrape down sides and bottom of bowl to make sure all the little bits get incorporated. Scoop dough by the rounded T. and roll into a ball with your hands. Place no less than one inch apart on the baking sheet. Here’s where most people use their thumb, which I used to do, but I actually find it easier and more effective to use the bottom of the ½-teaspoon measuring spoon. Center the belly of the spoon over the center of the dough ball and push gently down into the spoon with your thumb. The edges of the cookie may crack depending on the moisture and temperate of your dough. I, personally, kind of like the cracks, especially when the jam runs down into them and sort of caramelizes. If you don’t like the cracks, work with a warm and moist dough and while you’re making the “thumbprint” with one hand, gently hold the edges of the cookie together in the other. If any cracks form, they can usually be mended by pinching. Spoon the jam into the thumb wells. Fill to level with the top of the cookie if you want a tidy pool of jam, or, mound it a bit for a pool that might overfloweth. The jam will often settle a bit while baking, so I lean toward overfilling, plus I love when it bubbles over the edge. You can always top off the jam after baking, too. Bake for 10 to 14 minutes, turning the pan halfway for evenness. 12 minutes is usually the sweet spot for me, but every oven is different. Don’t wait for any significant browning, or they’ll likely be overbaked. Wait for the jam to stop bubbling before you take a bite—sugar burns are the worst. Optionally, while still a little warm, I like to sprinkle with big flake sea salt and a pinch of fine lemon zest to add an extra punch, crunch, and zing, but they’re still brilliant without this. Place on a cooling rack. When completely cool, they can be stored for about a week in a cookie tin.


Servings: 36
Serving Size: 1 cookie

Calories: 112
Fat: 4 g
Fiber: 0 g
Protein: 1 g
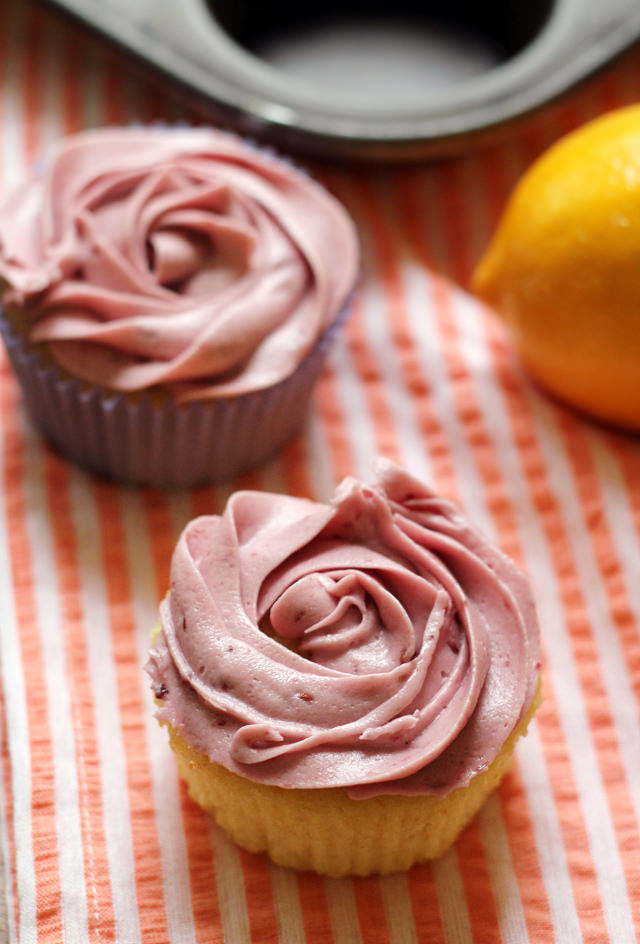
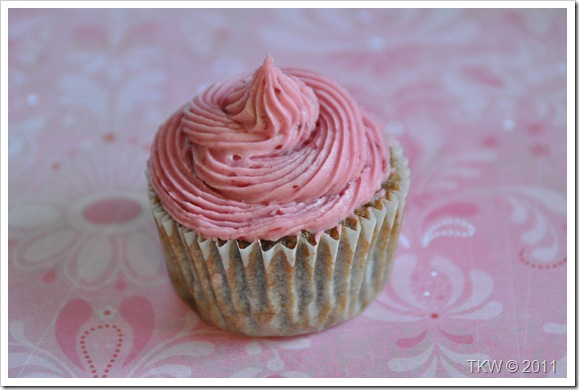
Meyer Lemon Cupcakes with Raspberry Buttercream
Meyer Lemon Cupcakes with Raspberry Buttercream

Meyer Lemon Cupcakes with Raspberry Buttercream


1½ cups all purpose flour

1 tsp. baking powder

¼ tsp. kosher salt

½ cup unsalted butter, softened

1 cup sugar

3 large eggs

½ cup whole milk

1 tsp. vanilla extract

3 T. Meyer lemon juice, divided

1 T. Meyer lemon zest


For the buttercream:

½ cup butter, room temperature

1 tsp. vanilla

⅓ cup raspberry jam

3 cups powdered sugar

1-2 T. milk


Heat oven to 350F. Line cupcake tins with 15 cupcake liners. Set aside. In a medium bowl, whisk together the flour, baking powder, and salt. Set aside. In the bowl of a stand mixer fitted with the paddle attachment, cream together the butter and sugar on medium speed until fluffy, about 3-4 minutes. Reduce speed to low and add the eggs one at a time, mixing until just blended. Add in the vanilla, 2 T. lemon juice, and milk. Mix for 30 seconds on low. Slowly pour in the dry ingredients and the lemon zest. Mix until just combined. Divide the batter among the prepared cupcake liners, only filling them until they are about ¾ full. Bake until the tops are just dry to the touch, about 18-20 minutes. While the cupcakes are still warm, brush with the remaining lemon juice. Allow to cool completely. For the buttercream, cream together the butter, vanilla, and jam in the bowl of a stand mixer fitted with the whisk attachment, mixing until fully incorporated. With the mixer on low, add in the sugar 1 cup at a time. Drizzle in milk if frosting becomes too thick. Mix the buttercream on high for 1-2 minutes. Pipe the buttercream onto the cooled cupcakes as desired.


Servings: 15
Serving Size: 1 cupcake

Calories: 341
Fat: 14 g
Fiber: 0 g
Protein: 3 g

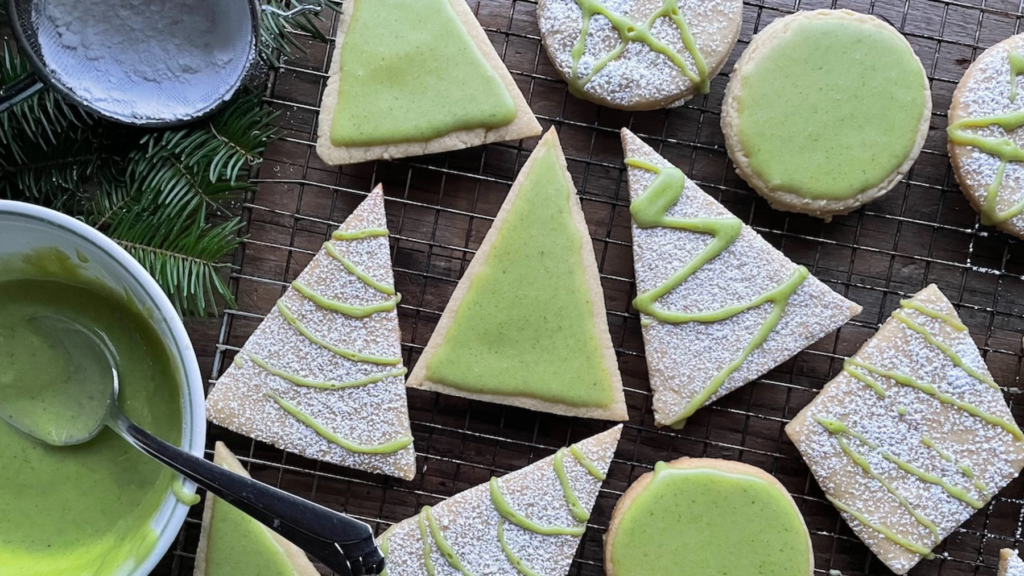
Conifer Sugar Cookies

Conifer Sugar Cookies

Conifer Sugar CookiesConifer Sugar Cookies


2 C. all-purpose flour, more for dusting

¼ tsp. salt

⅛ tsp. nutmeg

½ tsp. baking powder

½ C. butter, room temp

1 C. granulated sugar

1 egg

1 tsp. vanilla extract (

1 T. cognac, brandy, bourbon, amaretto, or something similar

Evergreen Icing

2 to 3 T. evergreen needles (fir or spruce)

¼ C. half & half

1¼ C. confectioners sugar


In a large bowl, whisk together flour, baking powder, salt, and nutmeg. With an electric mixer, cream together butter and sugar until light and fluffy. Lower speed to beat in egg, vanilla, and cognac. With mixer all the way on low, add the dry ingredient mixture slowly and stir until combined. Divide dough in half and flatten roughly into 1-inch thick disks. Wrap in plastic and freeze for 20 minutes if baking immediately. Alternatively, you can chill in the fridge for a few days or freeze for a few months. Preheat oven to 325°F. Line baking sheets with parchment. Remove one portion of dough from the freezer and let stand for 5 to 10 minutes until pliable. On a lightly floured surface, roll out to ⅛-inch thick, dusting your rolling pin if it starts to stick. Cut dough into shapes using cutters, the open end of a drinking glass, or, as I often do, trace and cut shapes out of thin cardboard and cut the dough around them with the tip of a sharp knife. Using a floured spatula, transfer to baking sheets. Repeat with remaining scraps of dough. Bake at 325°F for 8 to 15 minutes, depending on size. Check halfway and turn the baking sheet if they’re cooking unevenly. You want slightly golden edges and a light, soft center. Your nose will likely tell you when they’re done. Cool on wire cooling racks completely before glazing.

Preparation for Evergreen Icing: Collect 3 to 5 hand-sized branch ends of fir or spruce. Snip the needles off the branches into a bowl until you have 2 to 3 T. worth. Grind needles in an electric spice grinder or with a mortar and pestle until finely ground or pulverized. Scrape the ground pulp out of the grinder or mortar into a small bowl. Add half of the confectioners’ sugar a little at a time and mash with the back of a spoon to mix with the ground needles. When you have added half of the sugar and have an evenly mixed paste, stir in your cream and mix completely. Pour and press this mixture through a fine sieve into a small bowl to screen out the bigger bits of balsam pulp. Stir in the rest of your confectioners’ sugar bit by bit until you have the consistency you like. If you’re going to paint or pipe it on for more detailed decoration, you’ll want it thick with more sugar. If you want to drizzle or spoon it on, less sugar. I usually just use the spoon I mixed the glaze with. I usually fully glaze half the batch with icing for full flavor, and the other half, I’ll dust with powdered sugar and top that with a light drizzle of glaze for a more subtle flavor.


Servings: 24
Serving Size: 1 cookie with icing

Calories: 136
Fat: 4 g
Fiber: 0 g
Protein: 1 g

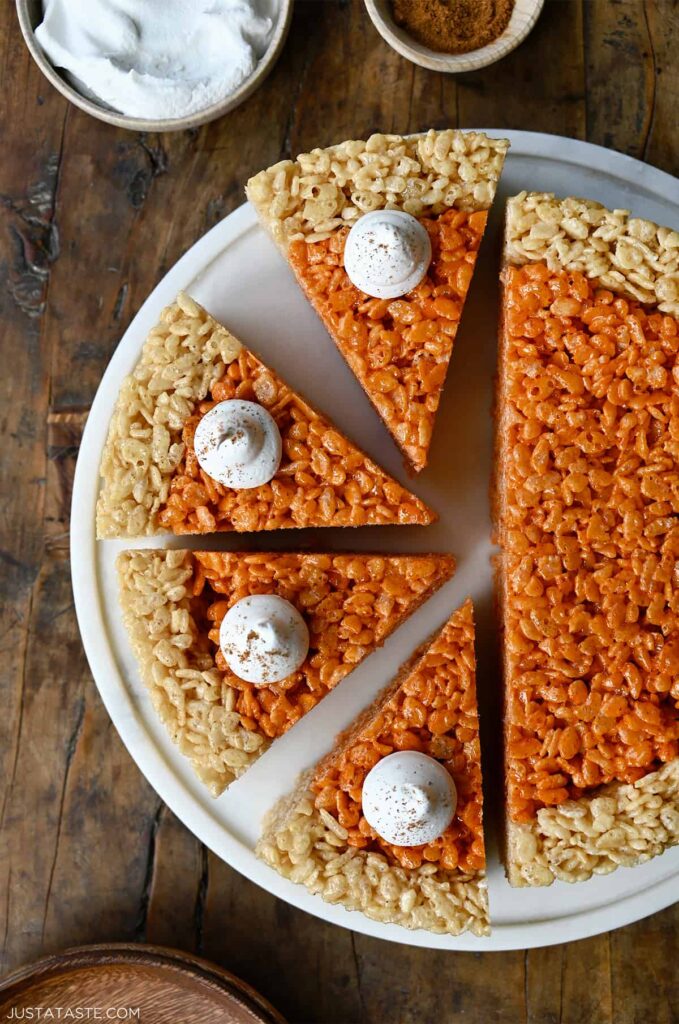
Pumpkin Pie Rice Krispies Treats

Pumpkin Pie Rice Krispies Treats

Pumpkin Pie Rice Krispies Treats


1 1/2 T.  unsalted butter

2 cups (about 16) marshmallows

1/2 tsp. vanilla extract

3 cups Rice Krispies cereal


2 1/2 T.  unsalted butter

1 tsp. pumpkin pie spice

3 cups (about 24) marshmallows (See Kelly’s Note)

2 tsp. orange food coloring

4 cups Rice Krispies cereal

Whipped cream, for decorating (optional)

Equipment: 8-inch round cake pan; Piping bag; Star-shaped piping tip


Coat an 8-inch round cake pan with cooking spray. Set it aside. Add the butter to a medium saucepan set over medium-low heat. Once the butter has melted, add the marshmallows and cook, stirring constantly, until the marshmallows are melted. Stir in the vanilla extract and then the Rice Krispies cereal until the cereal is well coated. Transfer the mixture into the prepared cake pan an press it firmly against the inside edge of the pan to form about a 1-inch crust. Let it cool while you prepare the filling. Make the Rice Krispies filling: Add the butter and pumpkin pie spice to a medium saucepan set over medium-low heat. Once the mixture has melted, add the marshmallows and cook, stirring constantly, until the marshmallows are melted. Stir in the orange food coloring then stir in the Rice Krispies cereal until the cereal is well coated. Press the mixture firmly inside the crust border, pushing it down to compact it, and allow it to cool completely in the pan. Once cooled, place a serving plate on top of the pan and invert the pan. Slice the pie into wedges and top with a dollop of whipped cream (optional).  Grease your baking dish and any utensils (spatulas or hands) you’ll be using with a thin layer of butter or cooking spray to prevent sticking.  Once you’ve melted the marshmallows, work swiftly when folding in the cereal. The mixture can set rapidly, so have everything ready before you start


Servings: 8
Serving Size: 1 slice (1/8 of pan)

Calories: 249
Fat: 6 g
Fiber: 0 g
Protein: 2 g

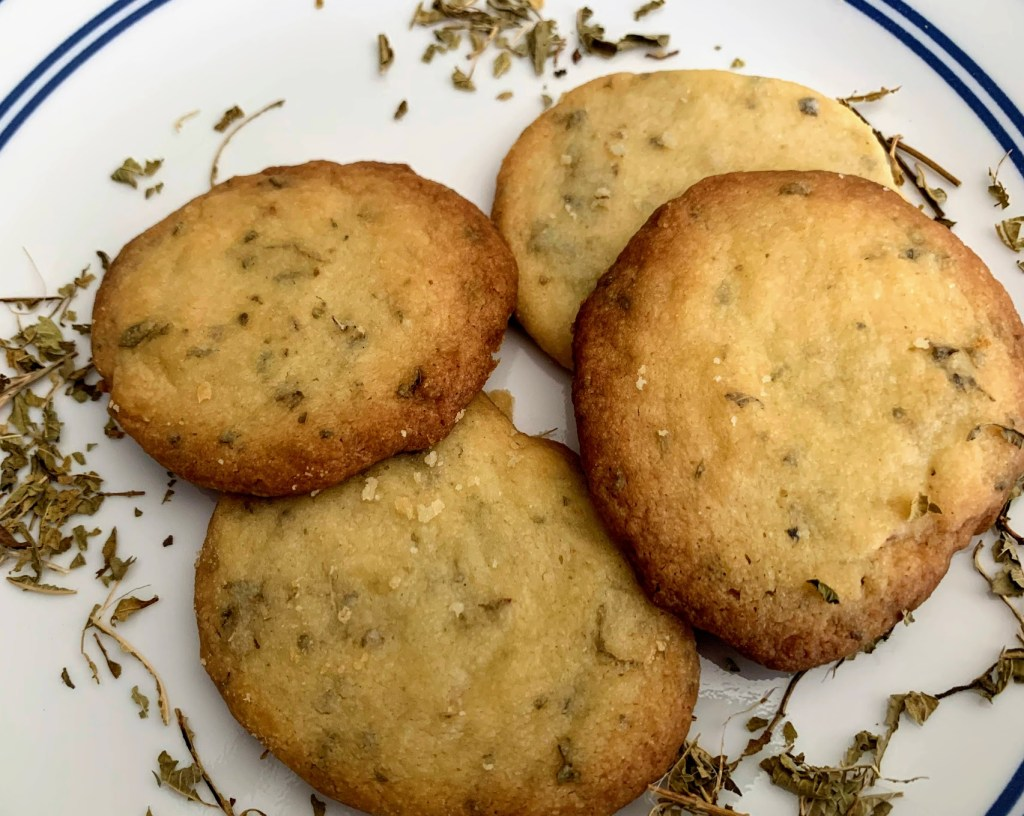
Lemon Verbena Cookies

Lemon Verbena Cookies

Lemon Verbena CookiesLemon Verbena Cookies


2 1/2 C. flour (I use unbleached all-purpose flour)

2 T. finely chopped fresh or dried crushed leaves lemon verbena leaves.

2 tsp. baking powder

1/2 tsp. salt

1 C. butter

1 1/2 C. sugar

2 eggs

1 tsp. vanilla


Mix the flour, baking powder, salt and leaves and set aside. Whip the butter until creamy and then add the sugar, eggs and vanilla. Use a tsp. to measure out rounded drops of dough. Place on a cookie sheet about 2 inches apart. Bake at 350 degrees for about 8 to 10 minutes or until they look ready. Be careful, the bottoms can burn quickly.


Servings: 72
Serving Size: 1 cookie

Calories: 57
Fat: 3 g
Fiber: 0 g
Protein: 1 g

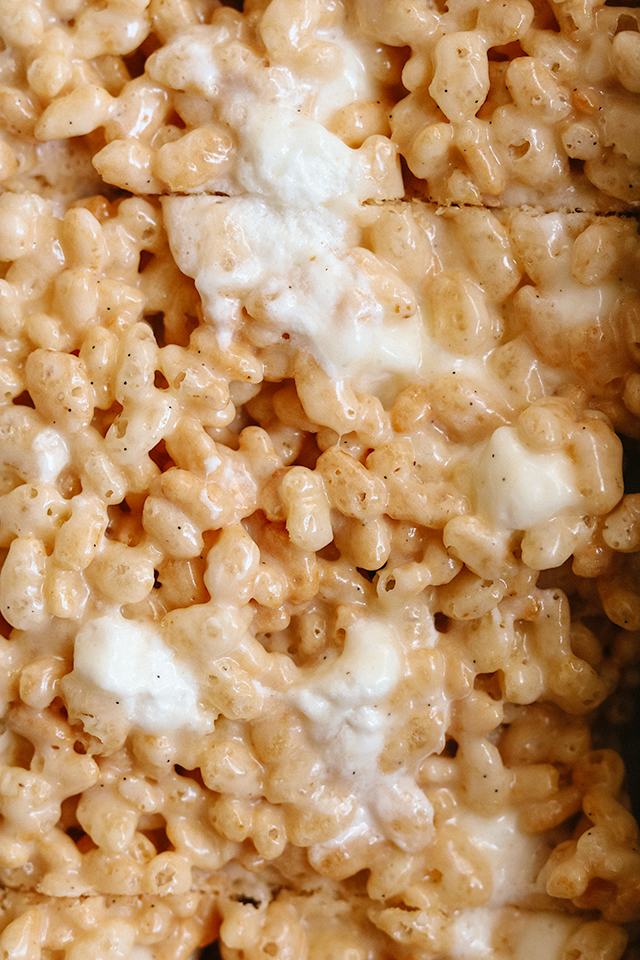
Next-Level Rice Crispy Treats

Next-Level Rice Crispy Treats

Next-Level Rice Crispy Treats


½ cup (113 g) unsalted butter

2 10-oz bags mini marshmallows, divided

¾ tsp. kosher salt

4 oz (113 g) high quality white chocolate, coarsely chopped

¾ tsp. vanilla bean paste

8 cups (256 g) crispy rice cereal


Grease a 9×13-inch baking pan with baking spray, dabbing away any excess with a paper towel. Set aside. In a large heavy-bottomed pot, melt the butter over medium-low heat. Once melted, add in one and a half bags of the mini marshmallows and the salt. Stir to combine until the marshmallows are almost completely melted. Add in the white chocolate and stir until smooth. Add in the vanilla and stir again to combine. Decrease the heat to low and add in the rice cereal. Stir until completely combined, then add in the remaining marshmallows. Continue to mix just until the marshmallows are starting to melt but are still mostly whole. Remove the pan from the heat and quickly pour the mixture into the prepared pan. Use an offset spatula to pat it into an even layer. Set aside to cool for at least 45 minutes, then cut into squares and serve.


Servings: 24
Serving Size: 1 square (1/24 of pan)

Calories: 176
Fat: 6 g
Fiber: 0 g
Protein: 2 g

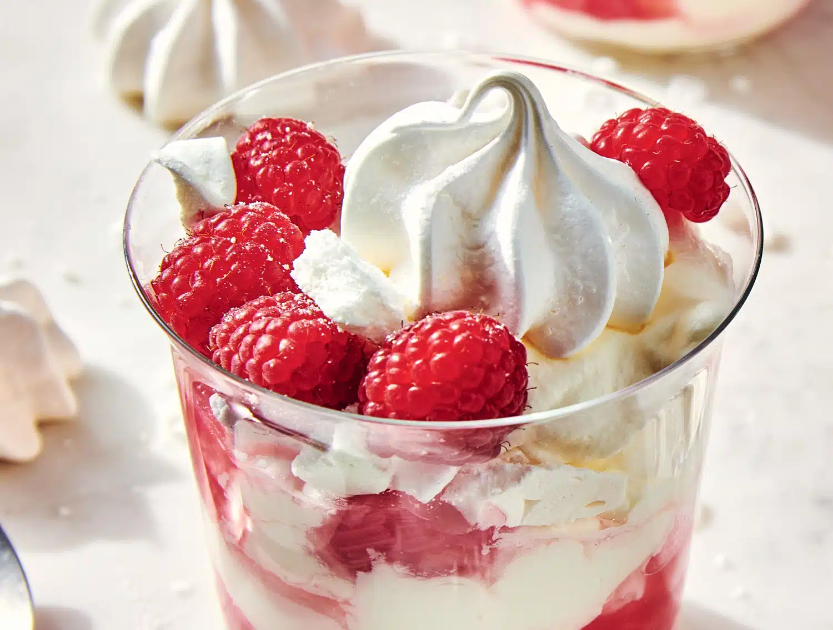
Rhubarb Eton Mess

Rhubarb Eton Mess

Rhubarb Eton MessRhubarb Eton Mess


1¼ lb. (7–9 stalks) red rhubarb, chopped (4–5 C.)

½ C. plus 1 T. granulated sugar

2 strips fresh lemon peel (optional)

2 T. water

2 C. heavy cream

2 tsp. vanilla extract

Pinch of salt

3 C. crushed meringue cookies (about 15 cookies)

30 raspberries


In a medium saucepan, stir together the rhubarb, ½ C. sugar, lemon peel (if using), and water. Cover and set over medium heat. When the water starts to simmer, stir and cook for 2 more minutes. Remove lid and cook, covered, stirring occasionally, until the rhubarb is fully cooked down and has thickened slightly, 10 to 12 minutes. Transfer to a bowl, remove lemon peel (if used), and let cool to room temperature. Just before serving, whip the cream with the remaining 1 T. sugar, vanilla extract, and pinch of salt to form medium peaks. Reserve ¾ C. of the crushed meringues for the topping. To assemble, divide the whipped cream among six bowls, alternating in layers with the rhubarb compote and the crushed meringues and ending with whipped cream. Top each bowl with 5 raspberries and some of the reserved crushed meringues. Serve immediately.


Servings: 6
Serving Size: 1 bowl

Calories: 473
Fat: 30 g
Fiber: 2 g
Protein: 5 g

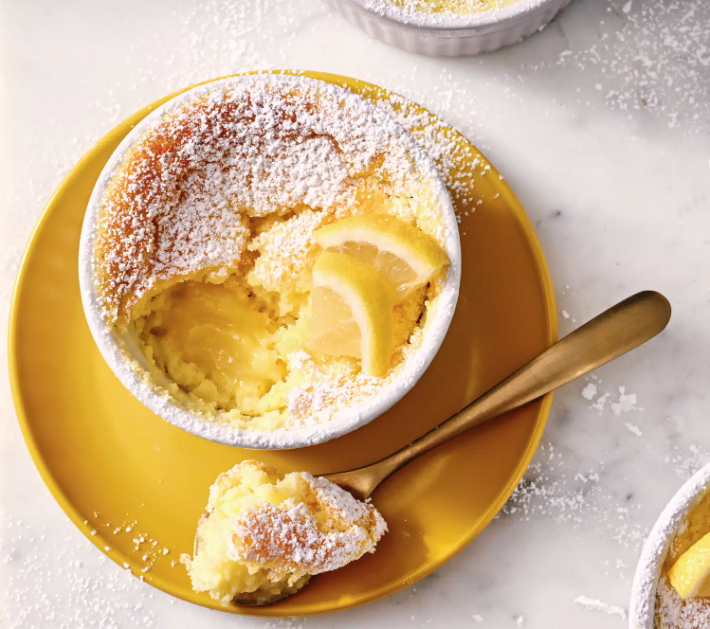
Lemon Pudding Cakes

Lemon Pudding Cakes

Lemon Pudding CakesLemon Pudding Cakes


1 C. milk

½ C. heavy cream

4 large eggs, separated

2 tsp. lemon zest

1/3 C. freshly squeezed lemon juice (1 to 2 large lemons)

1 T. salted butter, melted

1¾ C. granulated sugar

½ C. (70 grams) all-purpose flour

Confectioners’ sugar, for serving


Preheat your oven to 350°F. Grease eight 6-oz. ramekins, place in a large roasting pan, and set aside. Heat a large pot or kettle with water until boiling, reduce heat, and let simmer until needed. In a large liquid measuring cup, combine the milk and cream and set aside. In a large bowl, whisk together the egg yolks, zest, juice, melted butter, and sugar until smooth. Whisk half the milk and cream into the mixture, followed by half the flour. Whisk in the remaining milk and cream and then the remaining flour until just combined. Add the egg whites to the bowl of a stand mixer and, using the whisk attachment, whip the egg whites until soft peaks form. Add a quarter of the egg whites to the batter and whisk until smooth. Gently fold the remaining egg whites into the batter. Pour the batter into the ramekins (they will be quite full), place the roasting pan in the oven, and pour the hot water into the pan until it reaches halfway up the sides of the ramekins. Bake until the cakes are puffed and the tops are set and very lightly golden, about 25 minutes. Use tongs to carefully remove each ramekin from the roasting pan and set on a cooling rack. Let cool for about 20 minutes (the cakes might deflate a bit, but that’s OK). Serve warm and dusted with confectioners’ sugar.


Servings: 8
Serving Size: 1 ramekin

Calories: 322
Fat: 10 g
Fiber: 0 g
Protein: 5 g

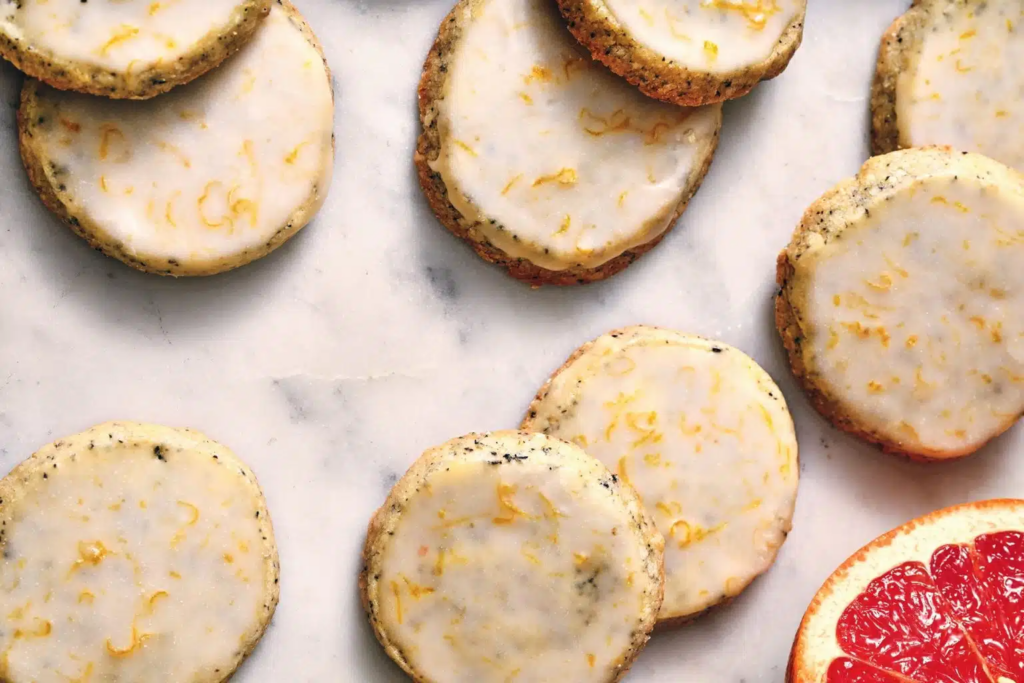
Earl Grey Sablés with Pink Grapefruit Glaze
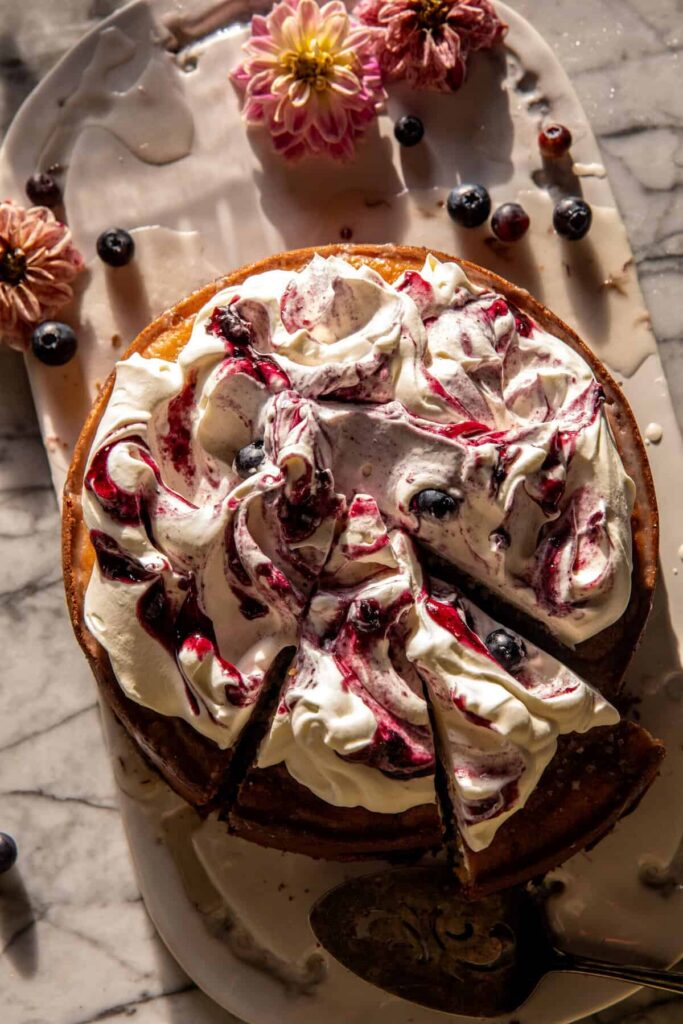
Earl Grey Sablés with Pink Grapefruit Glaze

Earl Grey Sablés with Pink Grapefruit GlazeEarl Grey Sablés with Pink Grapefruit Glaze


2 T. Earl Grey tea leaves

¾ C. granulated sugar

1 C. (2 sticks) salted butter, room temperature

2 tsp. pink grapefruit zest

2 large egg yolks

2 C. (280 grams) all-purpose flour


In the bowl of a food processor, combine the tea, sugar, butter, and grapefruit zest and process until smooth. Scrape down the sides of the bowl, add the egg yolks, and process until combined. Scrape down the sides and bottom of the bowl again, add the flour, and pulse until just combined and the dough forms into clumps. Dump the dough onto a lightly floured workspace and bring it together, patting it into a square. Divide the square in half and roll each portion of dough into even 2-inch-wide logs. Wrap each tightly in plastic wrap, smoothing out the log and flattening the ends. Chill for at least 4 hours and up to one day. (The logs may also be frozen at this point for up to 4 months—just defrost in the refrigerator before slicing and baking.) When ready to bake the cookies, preheat your oven to 350°F. Line a baking sheet with parchment paper and set aside. Remove one log from the refrigerator and unwrap. Use a sharp knife to cut it into generous 1/3-inch-thick slices, place on the prepared baking sheet, and bake until the edges are light golden brown, about 12 minutes. Remove from the oven and let cookies cool on the sheet for 5 minutes before removing and placing them on a cooling rack. Repeat with the remaining dough. Notes: The tea in tea bags is much more finely ground than loose tea. If you use loose tea leaves here, pulse them in the food processor a few extra times to create a finer texture. Also, while the color of pink grapefruit is very pretty in these cookies, you can substitute yellow grapefruit.

Glaze:

1 cup confectioners’ sugar
2 teaspoons pink grapefruit zest
Pinch of kosher salt
2–4 tablespoons freshly squeezed pink grapefruit juice

While the cookies are cooling, prepare the glaze. In a bowl, combine the confectioners’ sugar, grapefruit zest, and salt. Add the grapefruit juice a tablespoon at a time until you have a thin glaze, whisking until smooth. Dip one cookie at a time into the glaze, flip it up, and give it a shake or two to ensure the glaze evenly coats the top of the cookie. Return cookies to the cooling rack and allow the glaze to set before serving. Store cookies in an airtight container for up to 3 days.

Yield: 30 cookies


Servings: 30
Serving Size: 1 cookie

Calories: 127
Fat: 7 g
Fiber: 0 g
Protein: 1 g

Blueberry Ricotta Pudding Cake

Blueberry Ricotta Pudding Cake

Blueberry Ricotta Pudding CakeBlueberry Ricotta Pudding Cake


1 stick (8 T.) salted butter, at room temperature

3/4 C. granulated sugar

2 T. lemon zest

3 large eggs at room temperature

1 C. whole milk ricotta cheese

1/2 C. milk or cream, at room temperature

2 tsp. vanilla extract

2 C. all-purpose flour

2 tsp. baking powder

1/2 tsp. salt

1 1/2 C. fresh or frozen blueberries

1 T. whole wheat or all-purpose flour

2 T. blueberry jam

whipped cream, for serving

2 T. lemon juice

3 T. coarse sugar

1/2 C. powdered sugar

flaked salt


Preheat the oven to 350°F. Butter a 9-inch springform pan and line the bottom with parchment paper. In a bowl, using an electric mixer, beat together the butter, sugar, and lemon zest until light and fluffy, 3 to 5 minutes. Add the egg yolks, beating to combine. Mix in the ricotta and vanilla. Add the flour, baking powder, and salt. Beat until smooth, then stream in the milk. Mix until combined. In a bowl, using an electric mixer, whisk the eggs whites until stiff peaks form, 3 to 5 minutes. Gently mix the whites into the batter until the batter is smooth with no streaks. Toss the blueberries with 1 T. flour. Mix the berries into the batter. Scrape the batter into the prepared pan. Swirl in the blueberry jam, leaving streaks of jam throughout the batter. Bake 50-60 minutes, tenting with foil at 30 minutes. The longer you bake, the more set your cake will become. I bake mine for 55 minutes. To make the glaze. In a bowl or glass measuring cup, whisk together all ingredients. The glaze will be thin. Pour the glaze over the cake. Serve warm with whipped cream or ice cream.


Servings: 12
Serving Size: 1 slice (1/12 of cake)

Calories: 309
Fat: 12 g
Fiber: 1 g
Protein: 7 g

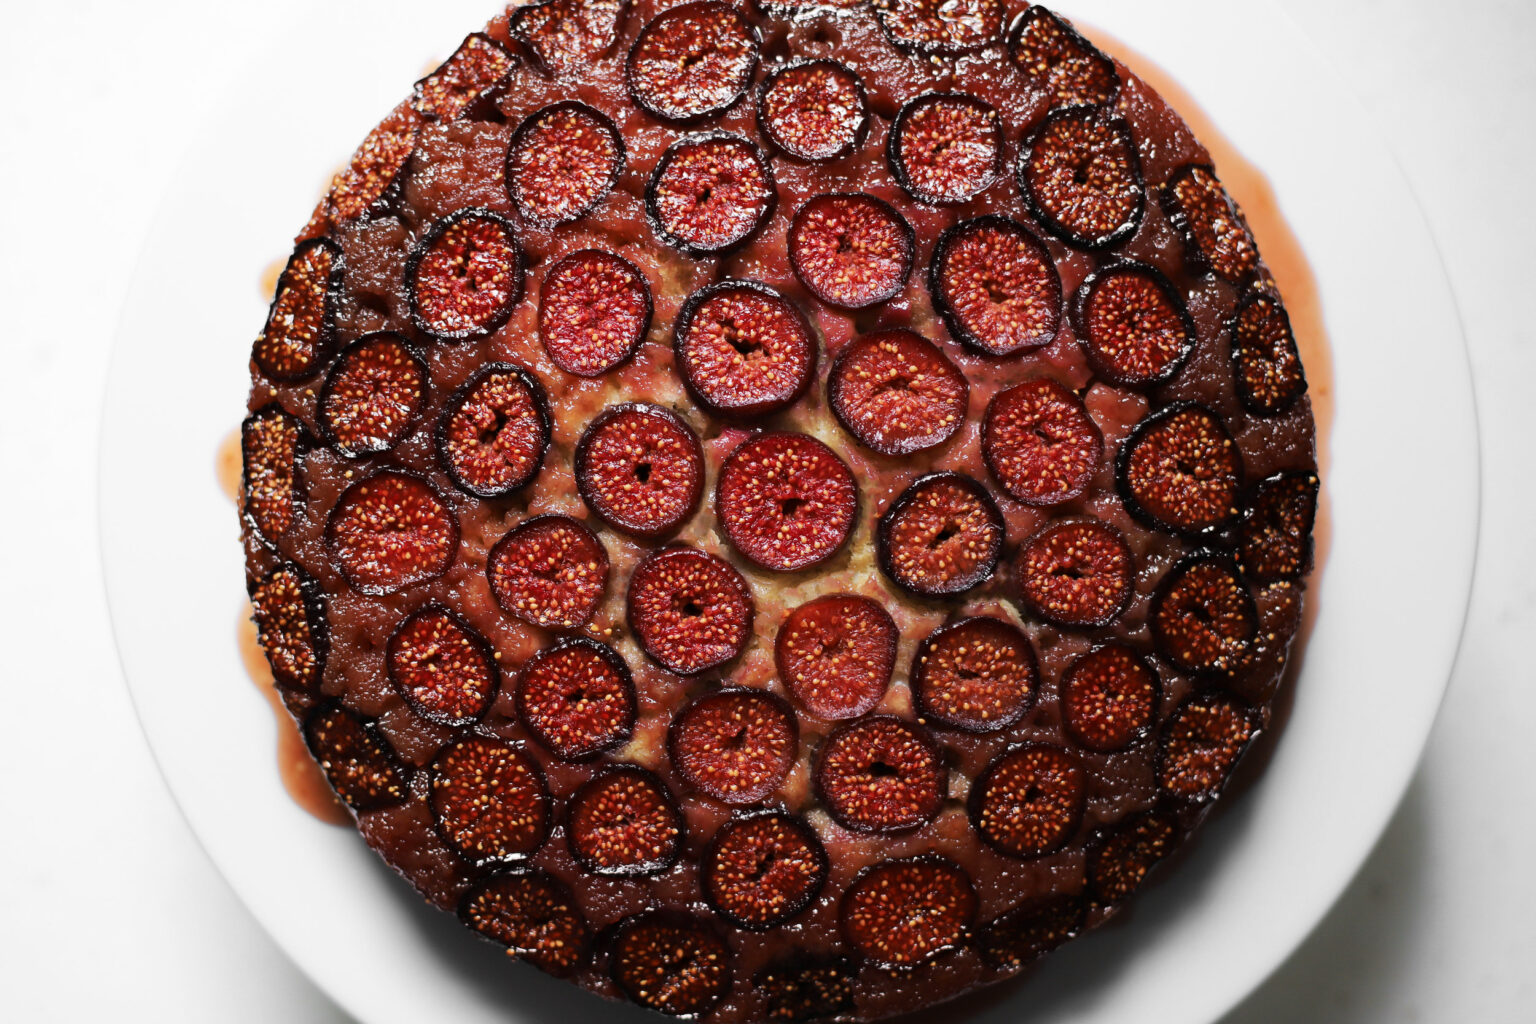
Fig Cake

Fig Cake

Fig Cake


Butter for greasing the pan

4 T. [57g] melted butter

1/2 cup [100g] light brown sugar

1/8 tsp. salt

10.5oz [300g] small fresh figs*


1 1/2 cups [200g] flour

1 1/4 tsp. [5g] baking powder

1/4 tsp. [1.5g] baking soda

1/2 tsp. [3g] salt

2 large room temperature eggs

4 T. [55g] melted and cooled butter

3/4 cup [150g] granulated sugar

3/4 cup [170g] plain yogurt**

Optional Flavoring (1-2 tsp. Vanilla, 1-2 drops almond extract, pinch of cinnamon, cardamom, ginger, or cloves, 1 T. Orange Blossom Water, OR1 tsp. Rosewater)


To prep the fig and brown sugar bottom: Butter one 8-inch round cake pan. Cover the bottom with a parchment round. Mix together the melted butter, brown sugar, and salt, and pour it over the parchment-covered cake pan. Use an offset spatula to spread the brown sugar out evenly over the bottom until it’s completely covered. Slice the figs in half. Arrange the figs cut-side-down over the buttery brown sugar. To bake the cake: Preheat the oven to 350° F convection (177° C). Sift together the flour, baking powder, baking soda, and salt in a mixing bowl. Beat the eggs and butter together until they are very well incorporated. Then add the sugar, yogurt, and orange blossom water, and beat to combine well. Pour the wet mixture over the dry mixture, and stir together just until everything is combined. It won’t be completely smooth, and there might be some tiny lumps; this is completely fine. Don’t over-mix! Carefully pour the batter over the figs, smooth out the top a little bit with a spatula, and bake for about 30 minutes. It’s done once you can insert a toothpick into the center and batter doesn’t stick to it. It may take longer than 30 minutes to cook through, especially if your figs have a lot of moisture. Let it cool for 5 to 10 minutes in the cake pan. Then trace around the edge with a butter knife to make sure it’s loosened from the pan. Place a plate or cake-stand upside-down over the cake. Put on your grippiest oven mitts, and hold the plate and cake together so that your thumbs are underneath the cake pan. Carefully and quickly rotate it away from yourself and give it a quick up-and-down shake to release the cake from the pan. Remove the pan, slice, and serve.


* If you can’t find small figs, you can use larger ones. Just make sure you cut them into about 1/2-inch slices instead of cutting them in half. To get the same look as these photos, slice the figs along their equators instead of stem to end.

** If you have Greek yogurt, you can substitute it here, but make sure you water it down before measuring (using either a little milk or water). It needs to be the approximate consistency of plain, unstrained yogurt (Greek yogurt doesn’t have as much moisture).


Servings: 10
Serving Size: 1 slice (1/10 of cake)

Calories: 300
Fat: 11 g
Fiber: 1 g
Protein: 4 g

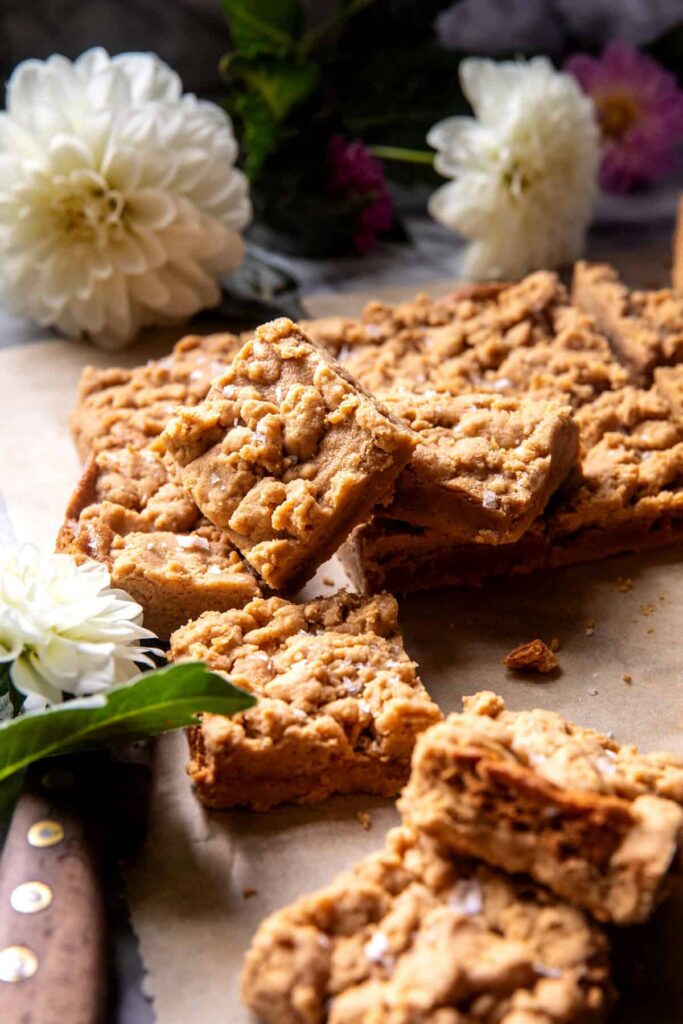
Nutter Butter Cookie Bars

Nutter Butter Cookie Bars

Nutter Butter Cookie BarsNutter Butter Cookie Bars


6 T. salted butter, at room temperature

1/2 C. creamy peanut butter

1/4 C. dark brown sugar

2 tsp. vanilla extract

1 C. all-purpose flour

1/4 tsp. baking powder

flaky sea salt (optional)


for Peanut Butter Creme Filling

3/4 C. creamy peanut butter

6 T. salted butter, at room temperature

3-4 T. honey


Preheat the oven to 350 degrees. Line an 8×8 inch square pan with parchment paper. In a large bowl, cream together the butter, peanut butter, brown sugar, and vanilla until smooth. Add the flour and baking powder, beat until combined, and the dough begins to form a ball. If the dough is crumbly, add 2-3 tsp. of water. If the dough feels moist, add 1-2 T. flour. Press half the dough into the prepared pan. To make the filling, beat together the peanut butter, butter, and honey until combined. Spread an even layer over the dough, then crumble the remaining dough over the peanut butter. Bake for 25 minutes, until the top is set. Sprinkle with salt if desired. Let cool, then cut into bars. The bars are on the crumbly side so handle gently. Enjoy!

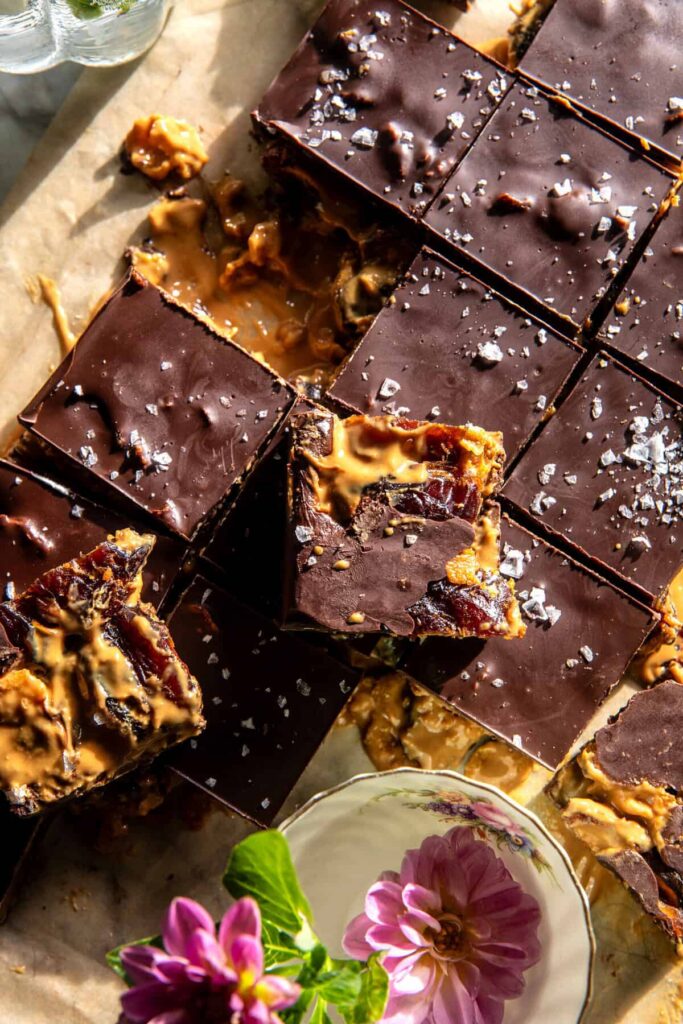
Chewy Chocolate Peanut Butter Crunch Bars
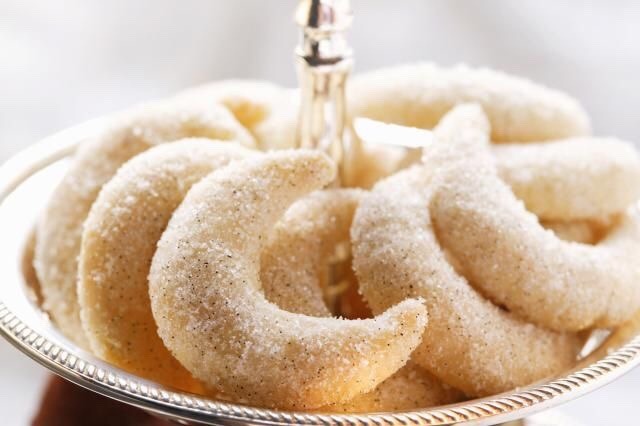
Chewy Chocolate Peanut Butter Crunch Bars

Chewy Chocolate Peanut Butter Crunch BarsChewy Chocolate Peanut Butter Crunch Bars


2 T. salted butter (optional)

2 C. organic corn flakes or brown rice krispies

24 plump Medjool dates, split lengthwise and pitted

3/4 C. creamy peanut butter, warmed

20 oz. semi-sweet/dark chocolate, melted

flaky sea salt (optional)


Melt the butter in a large skillet over medium heat until lightly brown. Add the cornflakes and cook until toasted, 5-8 minutes. Remove from the heat. Line a 9×13 inch baking pan with parchment paper. Tear the dates and press into a single layer on the bottom of the pan. For BEST results use fresh very chewy, plump dates. Add the cornflakes and evenly pour over the peanut butter. Alternately, if a studier bar is desired, blend the dates and peanut butter in a food processor, stir in the cereal, then press the mix firmly into the prepared pan. Freeze for 10 minutes. Pour over the chocolate. Sprinkle with sea salt. Chill in until firm, at least 20 minutes. Cut into bars. Keep in the freezer. Please note these bars are messy.


Servings: 24
Serving Size: 1 bar (1/24 of pan)

Calories: 235
Fat: 11 g
Fiber: 3 g
Protein: 4 g

Moon Spell Cookies

Moon Spell Cookies

Moon Spell Cookies


1 cup of finely grated almonds

1 ¼ cups of flour

¼ cup of confectioner’s sugar

¼ cup of butter

1 egg yolk


Combine almonds, flour, and sugar. Work in butter and egg yolk until well blended. Set it in the fridge until chilled. Roll into crescent moon shapes or use a cookie cutter. Place on greased cookie sheet and bake at 320 degrees Fahrenheit (160 degrees Celsius) for 20 minutes. Spells for:


Love – Add a few pinches of rosemary, sweet basil, cinnamon, and honey.

Prosperity – Add cinnamon, nutmeg, basil, and grated lemon peel.

Protection – Add cloves, rosemary, anise, and cinnamon.

Psychic Ability – Add star anise, nutmeg, orange, and thyme.


Servings: 24
Serving Size: 1 cookie

Calories: 71
Fat: 4 g
Fiber: 1 g
Protein: 2 g

Nutrition is for plain cookies without spell additions. Adding honey or other ingredients will change the nutrition information.

Snow Pudding with Light Custard Sauce
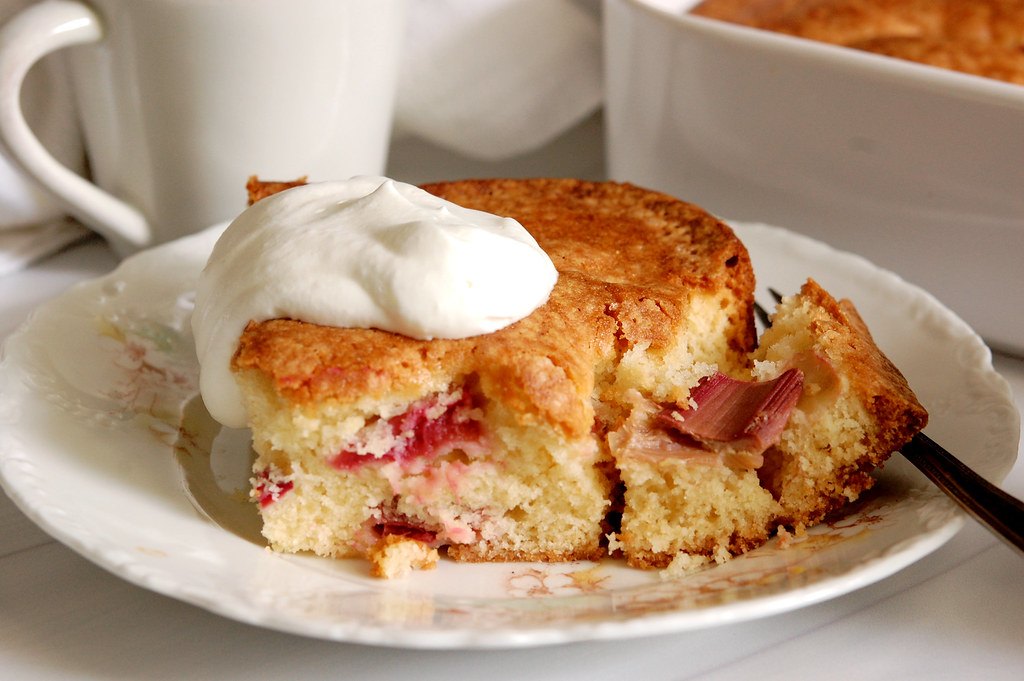
Snow Pudding with Light Custard Sauce

Snow Pudding with Light Custard Sauce

2 packages unflavored gelatin
1/2 cup cold water
1/2 cup lemon juice (approximately 2 lemons)
2 cups sugar
2 cups boiling water
5 egg whites

Dissolve unflavored gelatin in cold water. Add lemon juice, sugar, boiling water. Let gel until syrupy and just starting to set, approximately 45 minutes. Beat egg whites until they form soft peaks, then beat in the gelatin until the mixture is really fluffy and white, approximately 5 minutes. Rinse a 1-1/2- to 2-quart mold with cold water and turn the pudding into it. Chill until firm, preferably overnight, then unmold onto a serving platter and serve with Light Custard Sauce. If you don’t have a baking mold, you can use a large bowl and then scoop the pudding to serve.


Light Custard Sauce:


1 quart milk

5 egg yolks

1/2 cup sugar

pinch of salt

2-1/2 T. cornstarch

1 tsp. vanilla


In a double boiler or over low heat, heat milk. Beat egg yolks until fluffy, then slowly add to milk, then sugar and a pinch of salt. Heat mixture, stirring, then remove about 1/4 cup and dissolve cornstarch in it. Stir cornstarch mixture into custard; continue to cook and stir until slightly thickened (10 to 15 minutes). Let cool, then add vanilla.


Servings: 12
Serving Size: 1/12 of pudding with sauce

Calories: 254
Fat: 5 g
Fiber: 0 g
Protein: 6 g

Easy Rhubarb Cake

Easy Rhubarb Cake

Easy Rhubarb Cake


1 cup neutral vegetable oil

2 cups sugar, plus more for sprinkling

4 large eggs

1 T. pure vanilla extract

Zest of 1 lemon

Pinch of kosher salt

1 T. baking powder

3 cups all-purpose flour

1/2 cup milk

3 generous cups chopped rhubarb (from about 5 stalks, cut into 1/2″ pieces, leaves discarded)

Fresh whipped cream or vanilla ice cream, to serve


Grease a 9″ x 13″ baking pan and preheat the oven to 350°F. In the bowl of an electric mixer fitted with the paddle attachment, or by hand with a large whisk and mixing bowl, beat together the oil and sugar until emulsified. Add the eggs, vanilla, and the lemon zest. Beat until very smooth and lightened in color, about 2 minutes. (If using an electric mixer, use a medium- to medium-high setting.) Scrape the bowl. Add the salt, baking powder, and flour and stir on low until the flour mixture is mostly combined. Add the milk and continue to mix the batter on low until smooth. Do not overmix. Stir in half the diced rhubarb. PRO TIP: Mixing the batter on low once the flour is added serves two purposes: First, it prevents a flour “explosion” in the mixer. Second, gentle mixing prevents too much gluten from forming, keeping the cake nice and tender. Pour the rhubarb cake batter into the prepared baking dish and use a spatula to smooth the batter evenly. Scatter the reserved chopped rhubarb all over, and then sprinkle the top of the cake with sugar (about 1 to 2 T.). Bake the cake for about 1 hour 15 minutes, or until a cake tester inserted into the center comes out clean. Cool fully. Serve the rhubarb cake plain or with whipped cream or ice cream. Strawberry ice cream or vanilla ice cream would be particularly delicious.


Servings: 16
Serving Size: 1 piece (1/16 of pan)

Calories: 336
Fat: 15 g
Fiber: 1 g
Protein: 4 g

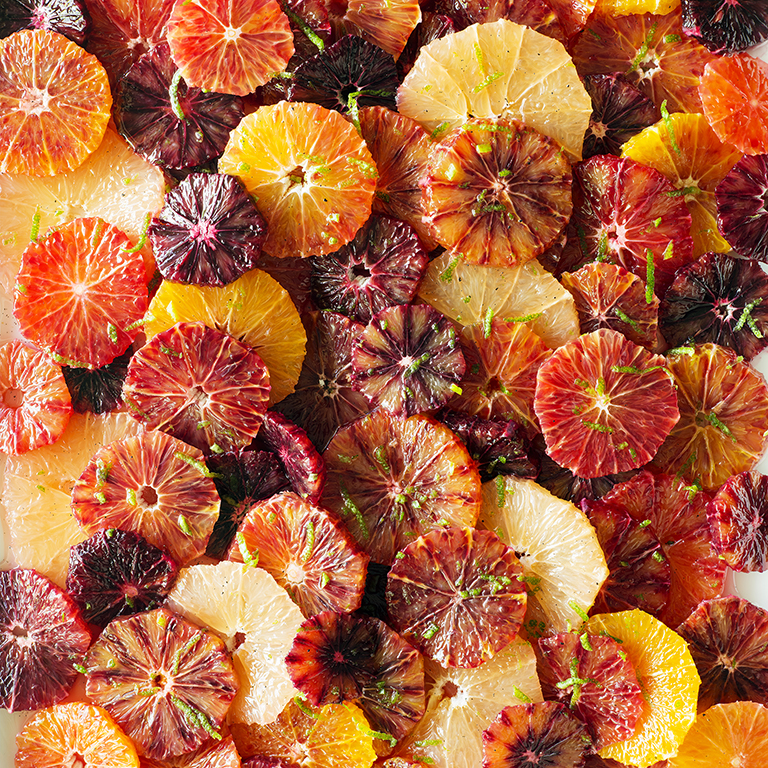
Citrus Salad with Spiced Vanilla Syrup
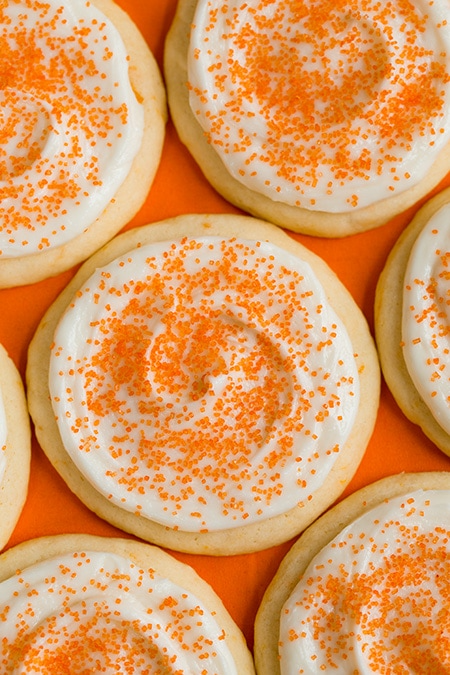
Citrus Salad with Spiced Vanilla Syrup

Citrus Salad with Spiced Vanilla Syrup


1/2 C. sugar

1 vanilla bean, split, seeds scraped out and reserved

4 whole allspice

2 green cardamom pods, crushed to release seeds

2 grapefruit, preferably 1 pink and 1 white

1 1/2 pounds blood oranges (all one variety, or a mix of Moro, Sanguinelli, and Tarocco, if available)

Zest of 1/2 lime (use a five-hole zester)


In a small saucepan, heat sugar with 1/2 C. water, the vanilla-bean pod and seeds, and spices over high heat until sugar dissolves. Remove from heat, steep 30 minutes, then strain. Meanwhile, cut peel (including all white pith on outside of fruit) from grapefruit, following curve of fruit. Slice grapefruit crosswise into rounds about 1/4 in. thick, removing any seeds. Arrange on a large platter. Repeat with oranges. Drizzle citrus with about 1/3 C. spiced syrup. Scatter lime zest on top. Serve with a little more syrup if you like.


Servings: 6
Serving Size: about 3/4 C. fruit with syrup

Calories: 101
Fat: 0 g
Fiber: 3 g
Protein: 1 g

Orange Creamsicle Sugar Cookies

Orange Creamsicle Sugar Cookies

Orange Creamsicle Sugar Cookies


6¼ C. cake flour

1 tsp. salt

½ tsp. baking soda

½ tsp. cream of tarter

1 C. butter, softened

1¼ C. sugar + ¼ C.

¾ C. powdered sugar

¾ C. canola oil

2 T. fresh orange juice

1 T. orange zest

⅛ tsp. orange extract, optional

1 tsp. vanilla, optional

2 eggs


6 ounces white chocolate chips

1 (8 ounce) package cream cheese, softened

¼ C. butter, softened

2 T. fresh orange juice

⅛ tsp. orange extract

3 C. powdered sugar

orange food coloring, if desired


Preheat your oven to 350 degrees. In a medium size mixing bowl, mix your flour, salt, baking soda & cream of tarter. Set aside. In a stand mixer, cream the butter, 1¼ C. sugar & the powdered sugar for about 2 minutes. Slowly add the oil, orange juice, orange zest, orange extract & vanilla. Beat in the eggs one at a time. Slowly add the flour mixture to the wet ingredients (scrape the sides of the bowl as needed). Roll the dough into 2″ balls and place on a parchment lined cookie sheet. Add the remaining ¼ C. sugar to a bowl or small dish. Use the bottom of a drinking glass (about 2½” in diameter) & dip it into the sugar then press (the sugar coated, bottom of the glass) into the ball of cookie dough until it’s about ½” thick (the dough will form a jagged edge). Bake the cookies for 8 minutes (you don’t want to over bake or they will be dry). Gently remove the cookies from the pan onto a cooling rack to let them cool. When cool, place in an airtight container and place in the fridge. FOR THE FROSTING: Place the white chocolate in a medium sized microwave safe dish. Melt according to the package directions. Let the chocolate cool for 3 minuets then beat in the cream cheese, butter, orange juice & orange extract. Beat on medium speed until well blended. Slowly add the powdered sugar and beat well. Add food coloring if desired.(If the frosting has small clumps, microwave for 30 seconds, stir, then microwave for 30 more seconds. The frosting will be slightly more runny but will set up firm again.) Frost the cookies, then let them chill in the fridge. Store in an airtight container in the fridge. Cookies are best cold.


Servings: 32
Serving Size: 1 frosted cookie

Calories: 343
Fat: 17 g
Fiber: 0 g
Protein: 3 g

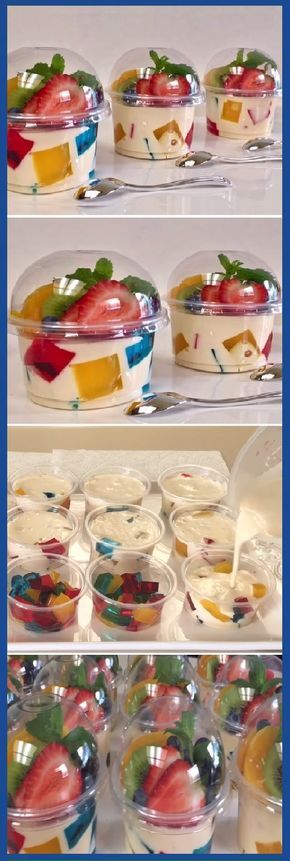
Broken Glass Jello

Broken Glass Jello

Broken Glass Jello


(4) 3 ounce boxes Jello gelatin, assorted colors

4 C. boiling water

(2) .25 ounce envelopes unflavored gelatin

2 C. hot water

14 ounce can sweetened condensed milk

1 tsp. vanilla


Dissolve each 3 ounce box of jello into its own individual container, using 1 C. of boiling water per flavor (no more than 1-inch deep.) Chill until solid, about 3 hours or overnight.  Once solid, cut each of the different flavors into small square cubes. Using a 9×13 glass dish, gently mix the cubes together in an even layer (being very careful not to break or tear them.)  In a medium-sized bowl, dissolve 2 envelopes of unflavored gelatin in 2 C. of hot water. Let the hot mixture cool slightly and then whisk in a 14 ounce can of sweetened condensed milk and 1 tsp. vanilla.  Let mixture cool to the touch (If it’s too warm, it could melt the Jello cubes.) Then evenly pour the mixture over the cubes of Jello. Chill in the refrigerator overnight. Cut into squares and serve.


Servings: 24
Serving Size: 1 square (1/24 of 9×13 pan)

Calories: 110
Fat: 1 g
Fiber: 0 g
Protein: 3 g

Biscochitos

Biscochitos

BiscochitosBiscochitos


1 C. lard

1 C. sugar

1 egg

2 tsp. vanilla extract

1/4 C. brandy or rum (I used dark rum)

1 tsp. anise seeds

3 C. all purpose flour

1 tsp. salt

1 tsp. baking powder

1/4 tsp. cinnamon

1/2 C. sugar


In stand mixer, cream together lard and sugar on medium speed until fluffy. With mixer running on low, add egg, vanilla extract, brandy, and anise seeds and mix until homogeneous. Add flour, salt, and baking powder and mix just until dough forms into cohesive ball. Form dough into two cylinders about 1 1/2 to 2 inches in diameter. Chill for 2 hours or wrap tightly in plastic wrap and store in refrigerator for up to 3 days. For longer storage, freeze logs tightly wrapped for several months. Defrost in refrigerator for 1 day before using. Adjust oven rack to middle position and preheat oven to 350°F. Combine sugar and cinnamon in small bowl and set aside. Cut cylinders into 1/4 inch disks and on ungreased cookie sheets leaving 1/2-inch gap between cookies. Bake until golden brown, about 12 minutes. Dip rim of each cookie into cinnamon sugar mixture. Let cool on racks and store at room temperature in air-tight container for up to 5 days.


Servings: 56
Serving Size: 2 cookies

Calories: 82
Fat: 4 g
Fiber: 0 g
Protein: 1 g

Blackberry Cupcakes

Blackberry Cupcakes

Blackberry CupcakesBlackberry Cupcakes


3 6 oz. packs blackberries

1/3 C. milk, at room temperature

6 large egg whites, room temperature

2 tsp. lemon juice

2 1/4 C. cake flour, sifted

1 3/4 C. sugar

4 tsp. baking powder

1 tsp. salt

12 T. unsalted butter (1 1/2 sticks), softened

1 recipe Blackberry Buttercream Frosting, recipe follows


Preheat oven to 350 degrees and prepare two muffin pans with liners. Puree blackberries in a food processor or blender. Scrape into a fine mesh sieve set over a bowl. With a rubber spatula, work the blackberries through the sieve, leaving seeds behind. Remove 1/4 C. of puree for the frosting. Your mileage may vary but you should have ~2/3 C. of blackberry puree leftover. In small bowl, combine puree, milk, egg, lemon juice, and mix with fork until well blended. In bowl of stand mixer, add sifted flour, sugar, baking powder and salt and mix to combine. Continue beating at slow speed and add butter. Mix until combined and resembling moist crumbs. Add liquids and beat at medium speed for about 1 minute or until full and evenly combined. Stop mixer to scrape down the sides of the bowl and beat for 30 more seconds. Fill cupcake liners ~3/4 full. Bake for about 20 minutes or until a toothpick inserted in the center cupcake in each pan comes out clean. Let cupcakes cool in pans and then transfer to a covered plate.


Blackberry Buttercream

2 sticks butter unsalted butter, softened

1/2 tsp. vanilla

1/4 tsp. almond extract

5 C. confectioner’s sugar

1 T. meringue powder

pinch of salt

1/4 C. blackberry puree


Cream butter and extracts until smooth. Mix in confectioner’s sugar, meringue powder, and salt and beat 2-3 minutes on high. Add blackberry puree and beat for an additional minute. Adjust consistency, if desired, with additional confectioner’s sugar or water.


Servings: 24
Serving Size: 1 frosted cupcake

Calories: 322
Fat: 14 g
Fiber: 0 g
Protein: 2 g

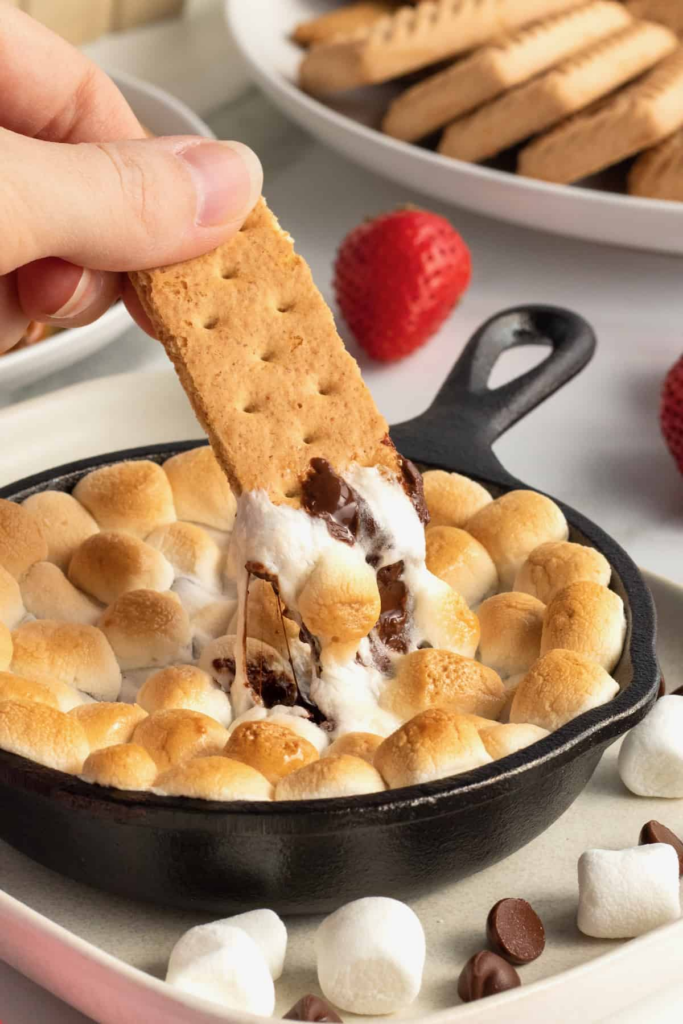
Skillet S’mores Dip

Skillet S’mores Dip

Skillet S’mores DipSkillet S’mores Dip


1/2 T. butter

1 ¾ C. milk chocolate chips

1/2 C. mini marshmallows

graham crackers, for serving


Preheat your oven to 450°. On your stovetop, heat a 10-inch skillet on low. When warm, add in the butter and once melted, use a pastry brush to coat the sides and bottom of the skillet. Turn off the heat, add the chocolate chips and top with the marshmallows in a thin layer. Bake on the middle rack of your preheated oven for 5 to 6 minutes or until the tops of the marshmallows is golden brown. Carefully transfer the skillet to a trivet (the pan will be hot!) and serve warm with graham crackers.


Servings: 8
Serving Size: about 3 T. dip (graham crackers not included)

Calories: 216
Fat: 12 g
Fiber: 1 g
Protein: 3 g

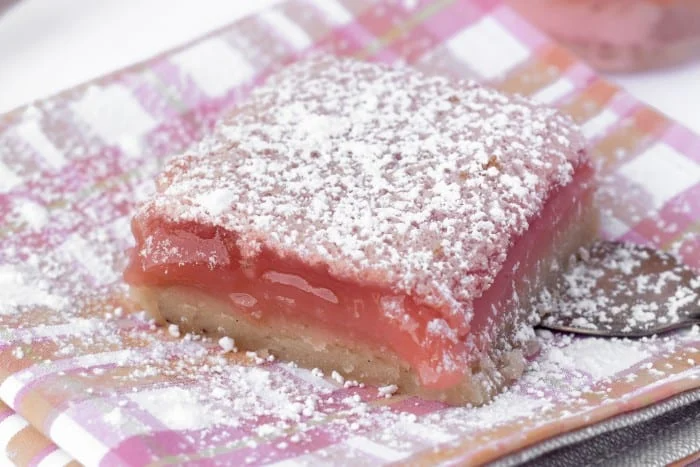
Hibiscus Lemon Bars

Hibiscus Lemon Bars

Hibiscus Lemon Bars


1/2 C. 1 stick unsalted butter, room temperature

1/4 C. sugar

1 C. flour

pinch of salt

1 tsp. vanilla bean paste


1/2 C. fresh squeezed lemon juice

1 T. dried hibiscus or hibiscus tea

3 large eggs

1 1/2 C. sugar

1/2 C. flour

garnish

confectioner’s sugar


Set oven to 350F. Cream the butter, sugar, and vanilla together. I did this in my stand mixer. Add in the flour and salt, and mix just until combined. Press the dough into a 9×9 baking pan. I lightly flour my fingers so they don’t stick to the dough. Press it evenly across the bottom of the pan. Chill for 15 minutes. Bake the crust for 15 minutes until it is just lightly browned. Set it aside to cool, but leave the oven on. Meanwhile make the filling. Stir the hibiscus into the lemon juice and let sit for 15 minutes until it is a dark pink color. Then strain it and discard the hibiscus. Whisk the eggs and sugar together until well blended. Stir in the lemon juice and then blend in the flour. Pour the filling over the crust and return to the oven to bake for another 20-25 minutes, until the center of the filling is set and not jiggly. Let cool fully before slicing. Dust with powdered sugar before serving.


Servings: 16
Serving Size: 1 bar (1/16 of 9×9 pan)

Calories: 194
Fat: 7 g
Fiber: 0 g
Protein: 2 g

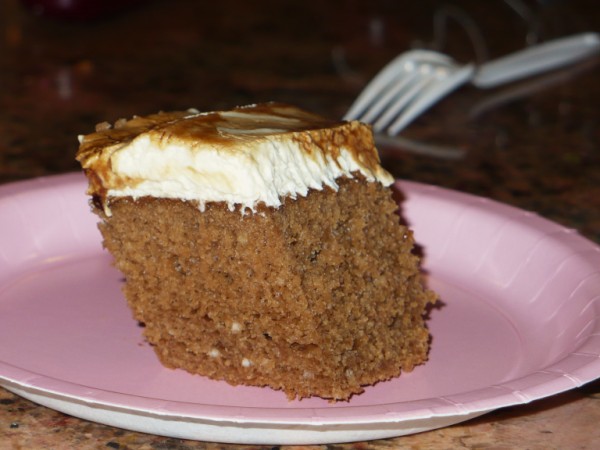
Root Beer Float Cake

Root Beer Float Cake

Root Beer Float CakeRoot Beer Float Cake


1 box white cake mix with pudding

3 egg whites

1/4 C. vegetable oil

1 (12 oz.) can (1 1/2 C.) root beer

2 tsp. root beer concentrate (or 2 T. root beer flavored syrup)

1 (3.4 oz.) package instant vanilla pudding mix

1 C. milk

1/2 tsp. vanilla

1 (8 oz.) container Cool Whip, thawed

garnish: crushed root beer barrels or root beer flavored syrup


Preheat oven to 350 degrees. Lightly spray bottom only of 9×13 baking dish with cooking spray. In a large bowl, beat cake mix, egg whites, vegetable oil, root beer, and root beer concentrate or syrup on low speed for 30 seconds. Beat at medium speed for 2 minutes, scraping bowl occasionally. Pour into pan. Bake for 28-32 minutes or until toothpick inserted in center comes out clean. Cool completely; about 1 hour. (Optional: for best root beer flavor, after cooling, cover cake with plastic wrap and refrigerate overnight.) In a large bowl, whisk together pudding mix, milk, and vanilla for 2 minutes. Fold in Cool Whip and spread over cooled cake. Garnish with crushed root beer barrels or syrup just before serving. Keep refrigerated.


Servings: 15
Serving Size: 1 piece (1/15 of 9×13 cake)

Calories: 243
Fat: 9 g
Fiber: 0 g
Protein: 3 g

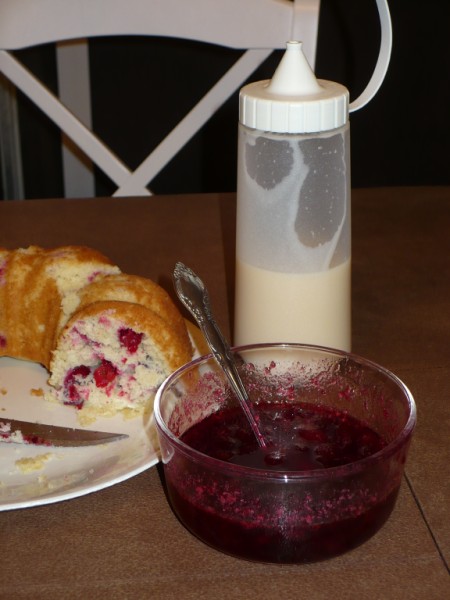
Cranberry Cake with Warm Vanilla Butter Sauce

Cranberry Cake with Warm Vanilla Butter Sauce
Cranberry Cake with Warm Vanilla Butter SauceCranberry Cake with Warm Vanilla Butter Sauce


2 C. all-purpose flour

3 tsp. baking powder

1 tsp. salt

1 C. sugar

3 T. butter, melted

2 eggs, beaten

1 C. milk

1 bag fresh cranberries, divided


Preheat oven to 350 degrees. Liberally grease a bundt pan with shortening. Combine flour, baking powder, salt, and sugar in a mixing bowl. Beat in butter, eggs, and milk; do not over mix. Fold in 2 C. cranberries. Pour batter into bundt pan and bake for 30-35 minutes or until toothpick inserted in center comes out clean. Cool 15 minutes then invert pan onto wire rack. Let cake cool completely.


Warm Vanilla Butter Sauce

1/2 C. (1 stick) butter

1 C. sugar

1/2 C. cream or half-and-half

1 tsp. vanilla


Combine all ingredients in a saucepan over medium-low heat and stir until butter melts and sugar is dissolved. Let cool slightly, then pour into a squeeze bottle for drizzling, if you have one.


Cranberry Glaze

1 C. water

1 C. sugar

remaining cranberries from bag


Combine water and sugar in a saucepan over medium heat until sugar dissolves. Add cranberries. Heat to boiling; reduce heat and simmer until thickened, about 10-15 minutes, slightly crushing cranberries as they simmer. Let cool and serve over cake slices.


Servings: 12
Serving Size: 1 slice (1/12 of cake) with sauce and glaze

Calories: 435
Fat: 16 g
Fiber: 2 g
Protein: 4 g

Elderberry Syrup

Elderberry Syrup

Elderberry Syrup

2 C. dried elderberries

4 C. cold water

2-3 dried ginger root

1 cinnamon stick

1 C. honey

1 C. vodka or brandy


Combine berries and herbs with cold water in pot to boil. Reduce heat and allow to simmer. Remove and allow to sit for one hour. Strain berries with cheese cloth.  0ne liquid has cooled, stir in honey. Add vodka or brandy if wanting to increase shelf life. Bottle in a sterilized jar.

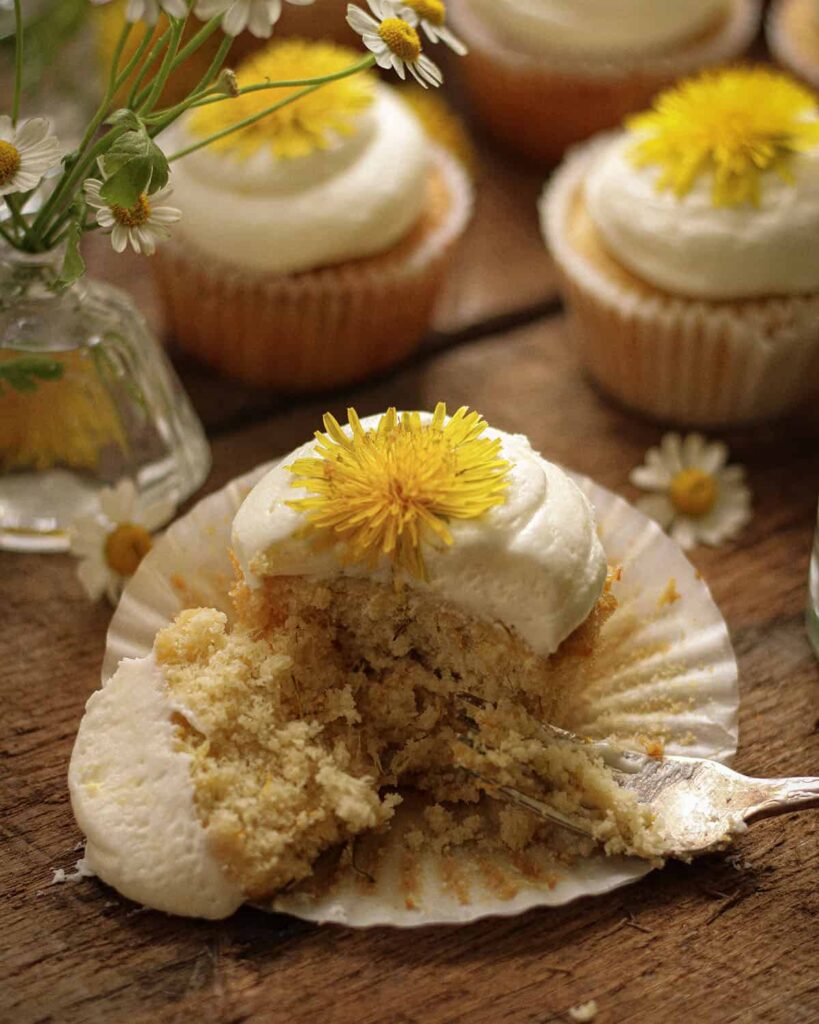
Dandelion Cupcakes with Lemon Buttercream Frosting
Dandelion Cupcakes with Lemon Buttercream Frosting

Dandelion Cupcakes with Lemon Buttercream Frosting


1½ C. all-purpose flour

¼ tsp. baking soda

½ tsp. baking powder

¼ tsp. salt

3/4 C. butter  (at room temperature)

½ C. sugar

½ C. honey

3 large eggs

½ C. buttermilk

1 lemon zested

¾ C. dandelion petals


1/2 C. butter 1 stick (at room temperature)

1 lemon zested and juiced

pinch salt

2-3 C. powdered sugar to desired consistency


Preheat the oven to 350° F (176° C). Line a 12 muffin tin with baking C.. In a medium bowl, combine the flour, baking powder, baking soda, and salt. With a mixer, cream the butter and sugar together for approximately 1 minute, or until light and fluffy. Add in the honey and mix until fully incorporated. Add in the eggs one at a time, then turn the mixer off and scrape the bottom and sides of the bowl to make sure there isn’t any unmixed butter and sugar. With the mixer on low speed, add the buttermilk and flour mixture a little at a time, alternating between each. Mix until evenly distributed. Add in the lemon zest and dandelion petals, making sure they are evenly incorporated and aren’t clumped together. Fill each lined muffin tin with ¼ C. of the batter and bake for 20-25 minutes, or until a toothpick inserted in the middle comes out clean. Allow the cupcakes to cool in the pan for 15 minutes, then they can be placed carefully on a wire rack to cool for another 30 minutes. While the cupcakes cool, prepare the frosting.


Lemon Buttercream Frosting

In a medium mixing bowl, combine the butter, lemon juice, lemon zest, and salt. Using an electric mixer on medium speed, mix thoroughly until smooth and creamy. Add in the confectioner’s sugar ½ C. at a time, mixing in between until the desired consistency is reached. Spread the frosting evenly over the top of the cupcakes. Garnish the cupcakes with dandelion petals or flowers if desired.

Sticky Gingerbread

Sticky Gingerbread

Sticky GingerbreadSticky Gingerbread


1 stick (1/2 C.) plus 3 T. butter

3/4 C. dark corn syrup

3/4 C. molasses

2/3 C. packed soft dark brown sugar

2 tsp. finely grated fresh ginger

1 tsp. ground ginger

1 tsp. ground cinnamon

1/4 tsp. ground cloves

1 C. milk

2 eggs, beaten

1 tsp. baking soda, dissolved in 2 T. warm water

2 C. all-purpose flour


Preheat oven to 350 degrees and line cake pan (about 12 x 8 x 2 inches) with aluminum foil or parchment paper (grease foil if using). In saucepan, melt butter over low heat along with syrup, molasses, sugar, fresh ginger, ground ginger, cinnamon, and cloves. Remove from heat, and add milk, eggs, and dissolved baking soda in it’s water (mixture will foam a bit). Measure flour into bowl and pour in liquid ingredients, beating until well mixed. (Batter will be very wet.) Pour into pan and bake for 45-60 minutes (mine was perfect at 45 min.), until bread rises and is firm on top. Do not overbake; it will continue to bake as it cools. Transfer pan to wire rack and let cool before cutting gingerbread into squares,


Servings: 16
Serving Size: 1 square (1/16 of pan)

Calories: 271
Fat: 9 g
Fiber: 1 g
Protein: 3 g

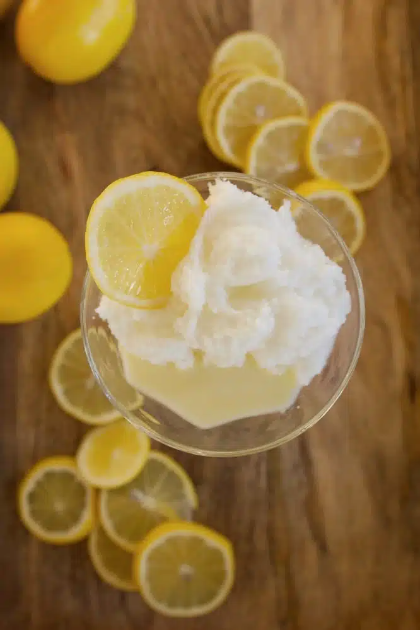
Lemon Caramel

Lemon Caramel

Lemon CaramelLemon Caramel


1 C. sugar

1/4 C. water

1/4 C. lemon juice (from 1 lemon)

2 T. butter

1/3 C. cream

1/8 heaping tsp. flaky sea salt


Put sugar in a heavy saucepan and drizzle water around the edges. Turn heat on medium-low and cook until sugar is dissolved and caramel is brown (5-10 minutes, watch carefully). Take off heat and add lemon, butter and cream. Whisk vigorously until butter melts and everything is blended (but be careful – it will be very hot). Pour into a heatproof dish and let cool for at least 5 minutes before serving or to room temperature if refrigerating (where it’s good for a couple of weeks).


Servings: 8
Serving Size: 2 T.

Calories: 158
Fat: 7 g
Fiber: 0 g
Protein: 0 g