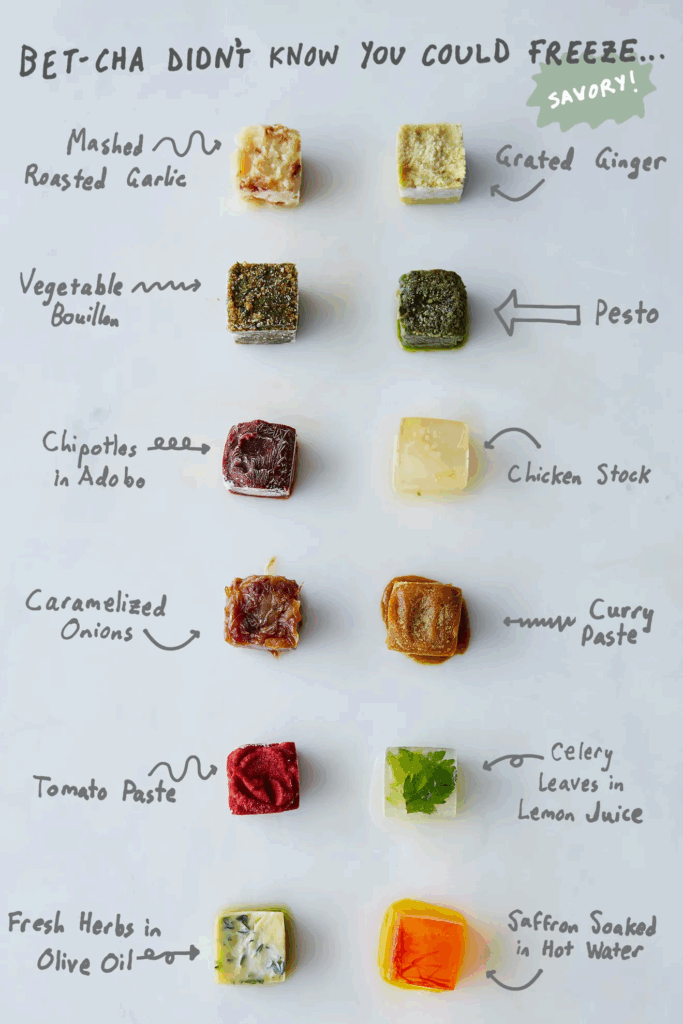
Things You Can Freeze
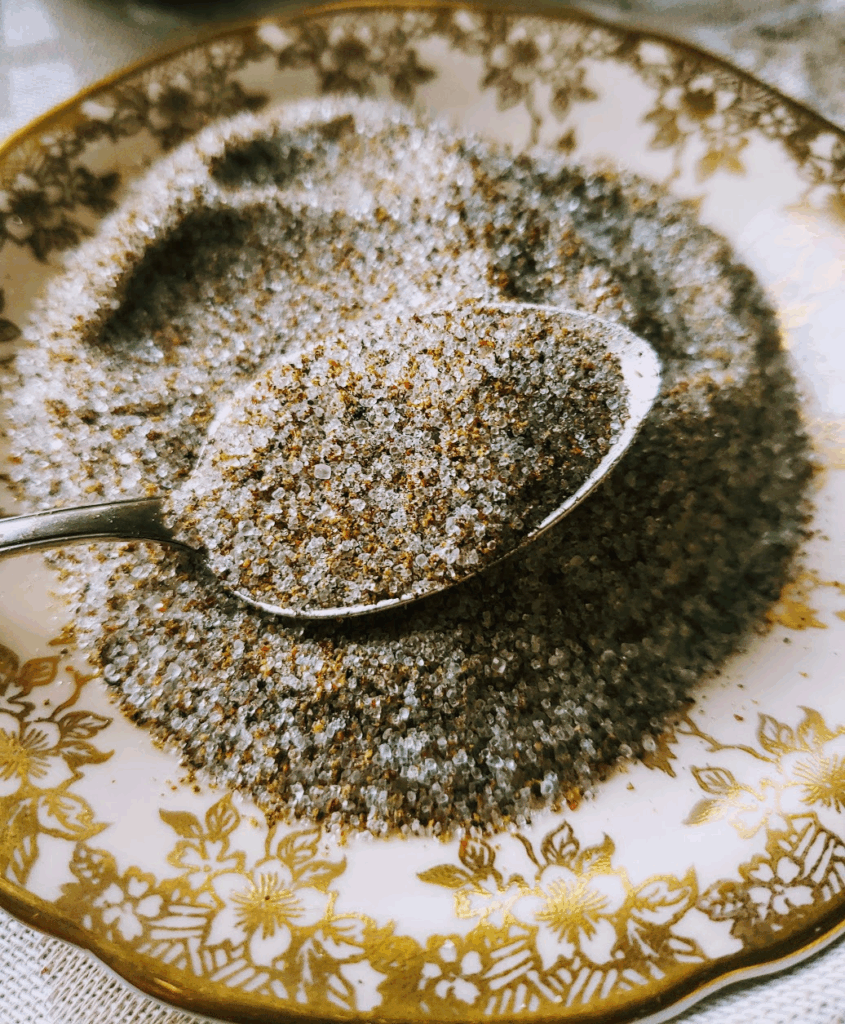
Wild Spiced Sugar
4 tablespoons Juniper berry, dried
5 tablespoons Fennel Seeds
3 tablespoons dried tart berries (dried completely to be ground into powder) or dried rind of half a lemon or orange – ground to a powder)
2 tablespoons dried Sumac berries (or just add the other half of the lemon/orange rind)
3 tablespoons dried Rose petals
½ tablespoon Lavender buds
2 tsp of dried Mint
pinch of dried Thyme
1 cup granulated sugar (or granulated monk sugar if you want a keto version).
Directions
Grind all herbs and berries to a fine powder in a mortar with a pestle or coffee grinder. Carefully sieve off large bits and then grind again. Again sieve off any large pieces. You should be left with a fine soft powder with no gritty bits! Mix ground spices with granulated sugar. Place in jar, cap and let sit overnight before using.
 Wild Spice Infused Honey
Make another batch of the wild spice mixture per the previous recipe. Instead of adding sugar blend the spices into a cup of honey. Place the honey in a mason jar into the top of a double boiler and gently warm it off and on for 3-4 days. Just keep it on the lowest setting and remember to replenish the water. I keep it on all day and turn it off at night. The longer it warms the tastier – and more medicinal your honey. To pour off for use, simply heat the honey and sieve off the plant material.
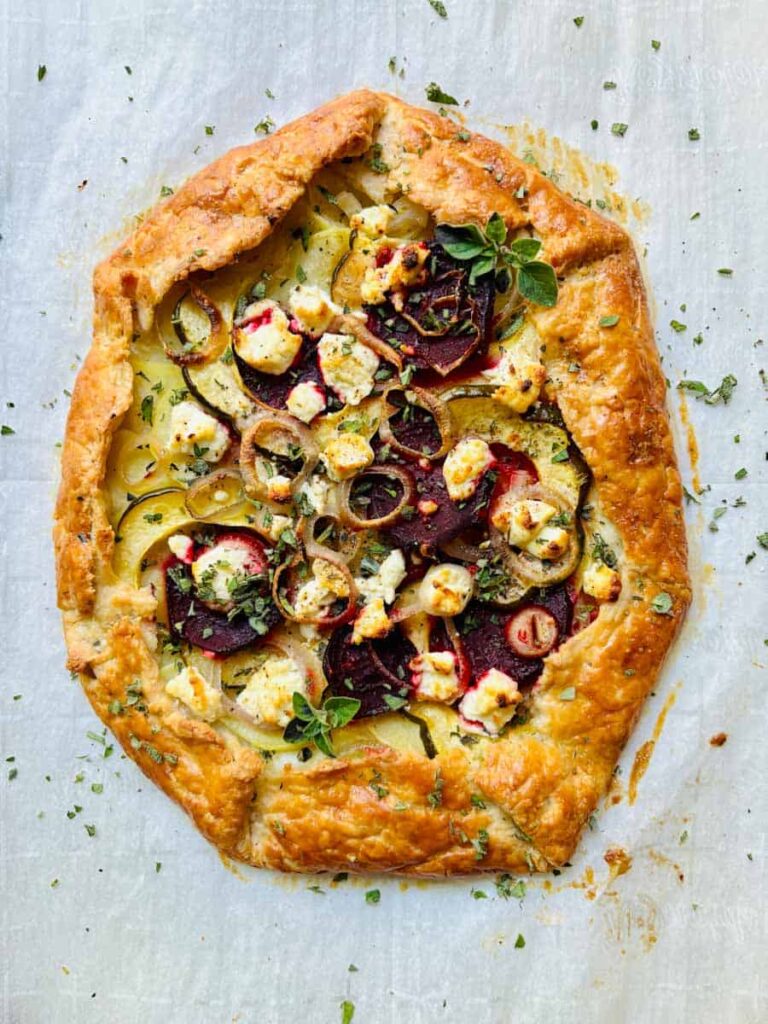
Anything You Like Galette

Keep pie dough in the freezer, and a galette for dinner is surprisingly simple. Anything can become a galette filling—saute some mushrooms or greens, roast up some root vegetables, or just rummage through the fridge for leftovers. As Irene will tell you, baked brie is technically a galette! Once you’ve got your filling, spoon it onto the crust, make a few simple folds (so easy a six-year-old can do it, we promise), bake, and eat. You can also layer a sauce on the bottom of the crust, mix in some herbs or spices, or sprinkle on bits of cheese or meat. Experiment on the outside of the crust too, by dusting on some grated Parmesan, everything bagel spice, or just a few grinds of black pepper and a pinch of flaky salt.
2 T. extra-virgin olive oil, plus more as needed
1 small onion or large shallot, chopped
4 garlic cloves, chopped
3 cups filling of choice
1 pie crust, thawed if frozen and unrolled
1 egg beaten with a small splash of water, for egg wash (optional; a bit of olive oil or heavy cream works too)
Heat the oven to 400 degrees. Line a rimmed baking sheet with parchment or a silicone baking mat. Heat the olive oil in a large skillet over medium heat, then add the onion and garlic. Sauté until the onion is tender, about 5 minutes. Stir in any other filling ingredients as directed below, then season to taste with salt and pepper. Roll out the pie crust and place on the prepared baking sheet. If you’re adding a sauce or cheese to the base of the galette, smear it across the center, leaving a roughly 2-inch border around the edges. Scoop your filling on top and spread it around. Fold the edges up over the sides of the filling in all directions (galettes are meant to be rustic, so don’t worry too much about the shape), then brush with an egg wash, olive oil, or cream, if using. Bake until the crust is a deep golden brown, 35 to 45 minutes. Let cool slightly before serving.


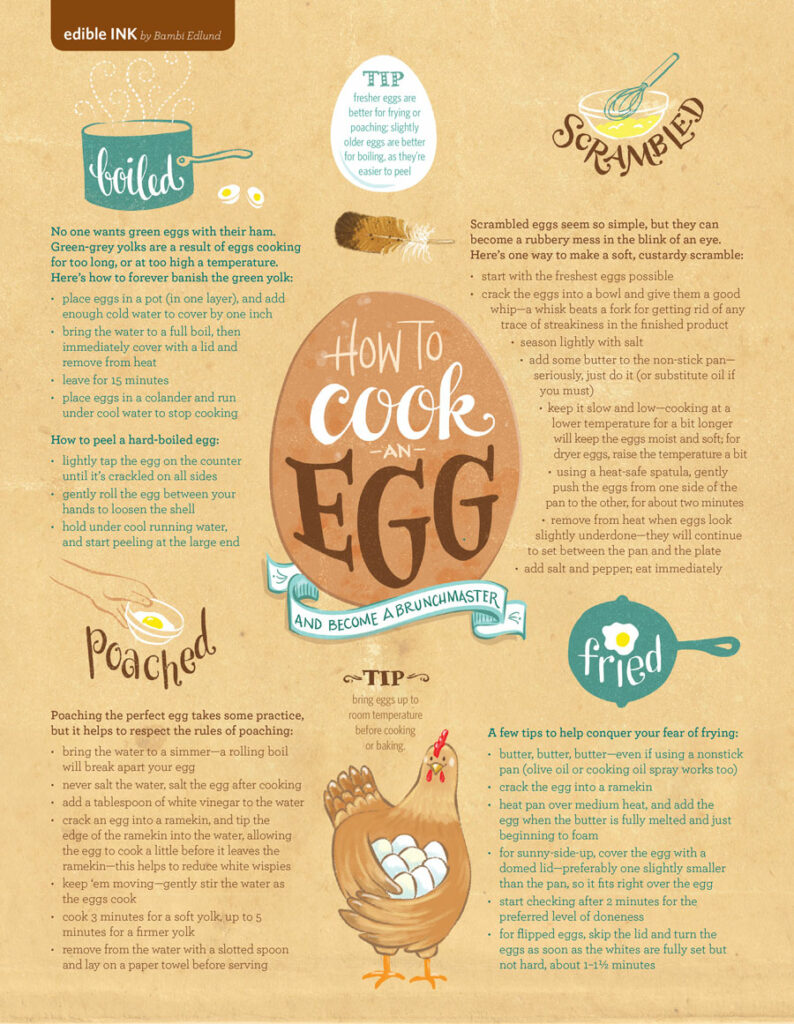
![]() Leftover Hard Boiled Eggs
Leftover Hard Boiled Eggs
| Name | Flavor and Use |
| Apple Blossoms | Apple blossoms have a light, floral flavor with both sweet and sour undertones, just like apples! They can be candied like rose petals or used to garnish fruit or citrus dishes. |
| Basil | Basil is found on most spice racks. But it’s also a flowering plant and the flowers are edible. Thai basil is often harvested once it’s fully flowered. The whole flower is edible and carries the distinct savory flavor reminiscent of anise and mint with a touch of pepper. |
| Bee Balm | Bee balm has pretty, round flowers. It tastes similar to oregano and sage together and it is most often included in savory dishes such as salads, vegetable dishes, and herbal butters. It can also be included in herbal tea recipes. |
| Borage | Borage comes in a beautiful form, blue blooms in a star-like pattern. This shape gives it the nickname starflower. It taste sweet with a honey-like zest. It’s great as a garnish on drinks. It’s often an ingredient in desserts or treats. |
| Camellia | Camellias have beautiful, delicate blooms and come in hundreds of species with thousands of hybrids. The flowers are edible while the leaves are a long-standing ingredient in teas. |
| Carnation | Carrie Bradshaw is not a fan of receiving carnations, but the foodie in her might have enjoyed the spiciness their petals offer. They have a flavor that is almost peppery and similar to cloves. |
| Chamomile | Chamomile is most commonly used in teas. Its subtle apple-ish flavor complements other flavors, like mint or citrus. While known in teas, it can also be used in desserts like custards. The petals can also be used in candied form or as dessert ornament. |
| Cherry Blossom | Called sakura in Japan, cherry blossoms have a long history of use in Japanese culture including edible blooms. The Japanese have pickled them in salt and used them as a confectionary. |
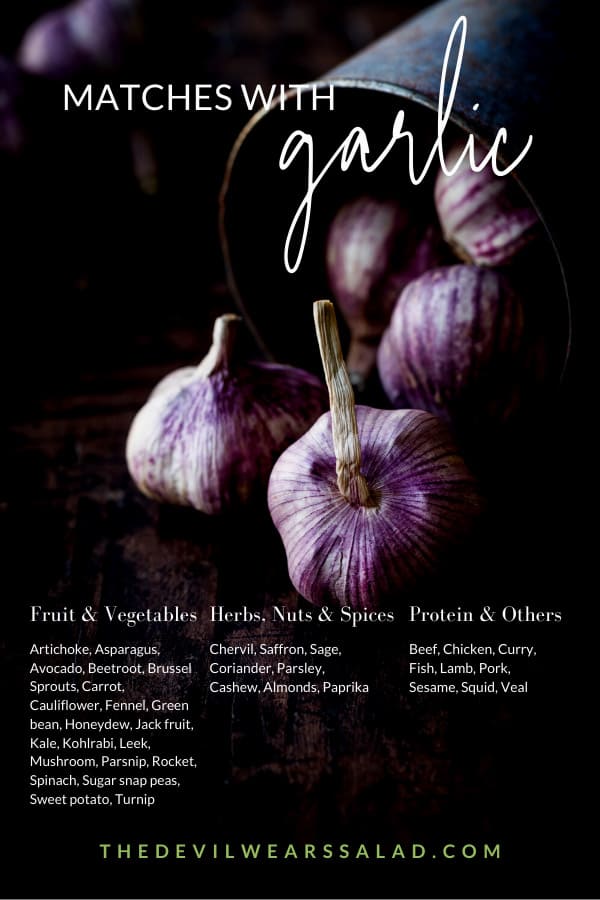
| Chives | Chives are a well-known herb with a distinct and popular onion-like flavor. Common chives produce purple flowers and can be used in salads, as garnishes, or to add savory flavor to other dishes. Chinese chives have an even more pronounced garlic-like flavor. |
| Chrysanthemum | Chrysanthemum has a taste that resembles chamomile. It can be used in teas and desserts. It’s also mixed into stir-fry recipes, chop suey, and other traditional Asian dishes. |
| Cilantro | Also known as coriander, cilantro is a very common flowering herb. It has a unique flavor reminiscent of citrus and parsley. It’s used as a spice and as a garnish in many dishes. |
| Coltsfoot | Coltsfoot has many edible uses. Toss it into a salad to brighten it up, use it to make an aromatic herbal tea, or mix the flowers with honey and use it as a natural cough remedy. |
| Cornflowers | Their blooms don’t look like popcorn. These beautiful purplish-blue blossoms have an intriguing flavor profile. They mix a touch of sweetness with a clove-like spicy flavor. They are also a popular food dye with their beautiful bluish-purple color. |
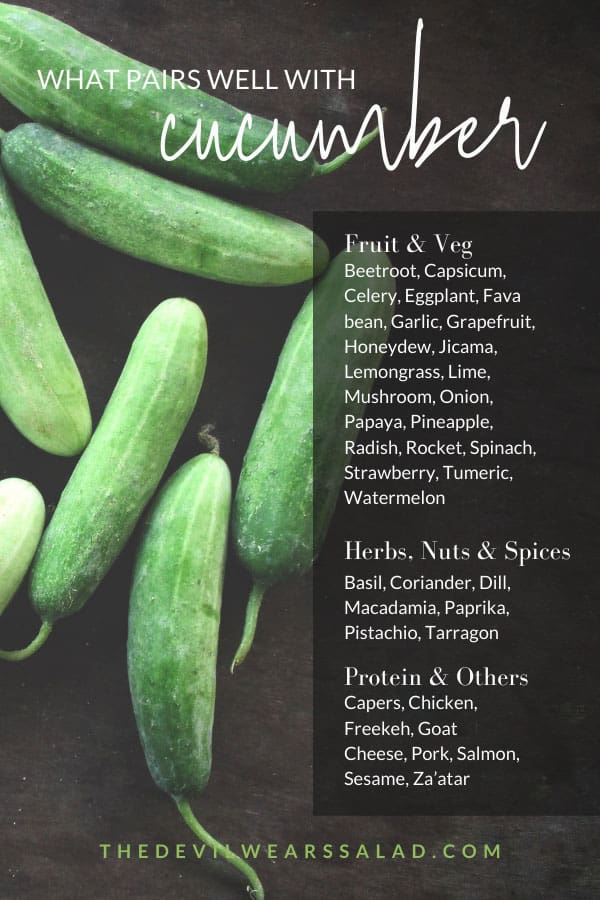
| Cucumber | Cucumber blooms can be used to add a little nutrition with flair to your salad. You can eat them raw or stir fry them. The flower is a pretty yellow color and has a cucumber-floral flavor. |
| Dahlia | Known for their beauty, dahlia flowers are also edible. The celery-like tubers offer additional benefits. The tubers contain potassium, vitamin B, and riboflavin but the flowers make an attractive garnish or colorful addition to dishes. The flowers make a great edible adornment for cakes. |
| Daisy | This colorful flower’s petals can be added to the recipe of any dish to offer a sweet perfume taste. |
| Dame’s Rocket | Dame’s Rocket has eye-catching purple flowers that make an excellent addition for color to salads and other dishes. Their flavor is mild and rather bland so it’s best included as a complementary ingredient. It’s best consumed in small doses as it large amounts might cause nausea. |
| Dandelion | Dandelions are considered a flowering herb. Commonly used in salads, they have a distinctly earthy and nutty flavor with hints of bitterness. Their flavor can balance other sweet ingredients in recipes. |
| Daylily | Despite its name, the day lily is not a member of the family we think of as common lilies (lilium). It has attractive orange blooms and its flavor is grassy and similar to peas. |
| Dill | Dill grows with small clusters of yellow flowers. It’s been cultivated for cooking and herbal use for thousands of years across Eurasia. The flowers are more pungent and flavorful than the leaves. Dill has been used in ayurvedic medicine, as an oil, and as a spice often coupled with fish. |
| Echinacea | Echinacea has a pretty, usually purple, flower in the wild. Its petals have been used traditionally in teas and herbal remedies. It also goes by the name purple coneflower and is cultivated around the world for its herbal benefits. |
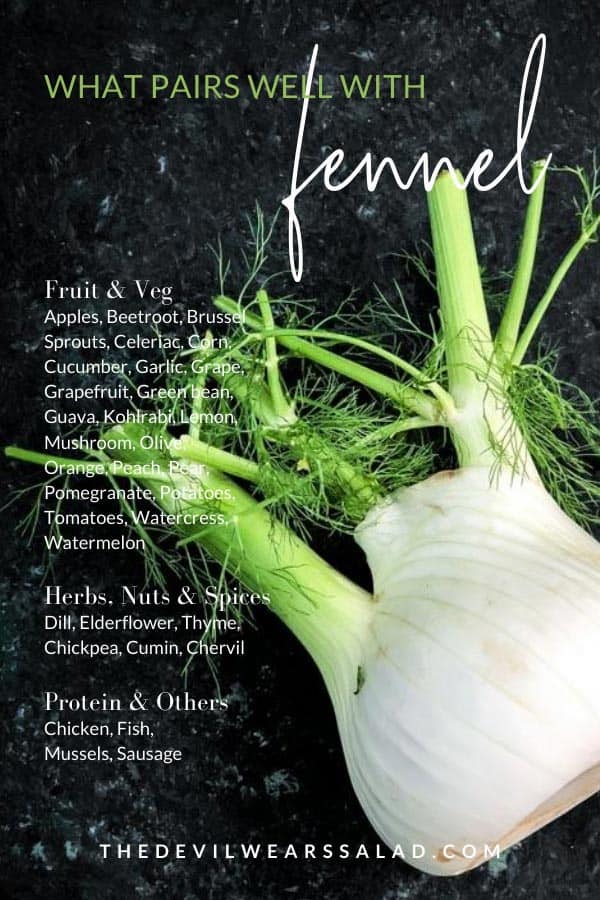
| Fennel | All parts of the fennel plant are edible which includes the stalk, bulb, and fronds. Fennel is commonly used in cooking. Usually, recipes use the bulbs which have a celery-like texture and an almost licorice-like flavor. |
| Garden Pea | The common garden pea’s well-known pods grow with white flowers. Pea flowers can be included in anything made with peas. The flowers also carry a grassy, herbal flavor. *Warning:* Do not confuse the common pea with sweet peas (lathyrus odoratus). Sweet peas are poisonous. |
| Gardenia | Gardenia can be eaten raw, boiled, pickled, or preserved in honey. They can be used in tea like jasmine, with a similar flavor profile. They also have been used as a food dye for their yellow coloring. |
| Hibiscus | Its flavor is tart and very cranberry-ish. It’s a tropical flower and its blossoms are bright and beautiful. It’s often used in teas but can play a role in desserts, as a candied treat, a dried garnish, and an ingredient in cakes. |
| Honeysuckle | The flowers, unsurprisingly have a honey-like flavor. Honeysuckle nicely complements soups, salads, desserts, and drinks. *Warning*: ONLY eat the flowers. Do not eat the berries, which are poisonous. It also produces a pleasant aroma. |
| Hops | Hops are famous for their role in brewing beer. They are also a flowering plant. They provide a bittering balance to the sweetness of the yeast in beer. Beer isn’t their only use, however. Custards and sauces often incorporate hops for stabilizing flavor profiles. |
| Lavender | Lavender is in the mint family and has a sweet floral flavor. It’s also used in a wide range of recipes from gourmet entrees to dessert. It gives off a pleasant aroma which adds to its appeal for cooking. |
| Lilac | Often used in salads, lilac carries a lemony sometimes slightly bitter flavor. It’s also a pungent flower. It can also be used in syrups, beverages, and even beer. |
| Mallow | Malva includes over 25 varieties of beautiful flowers. But that floral elegance doesn’t translate into culinary bliss. Mallow has a mild, earthy flavor that is usually sauteed. Historically, it’s also been used as an ingredient in love potions! |
| Marigold | An herb and also traditionally a remedy for strengthening the immune system. Marigold comes in beautiful yellow, orange, and golden colors. Often used as a garnish or a decorative addition to dishes to add a pop of color. |
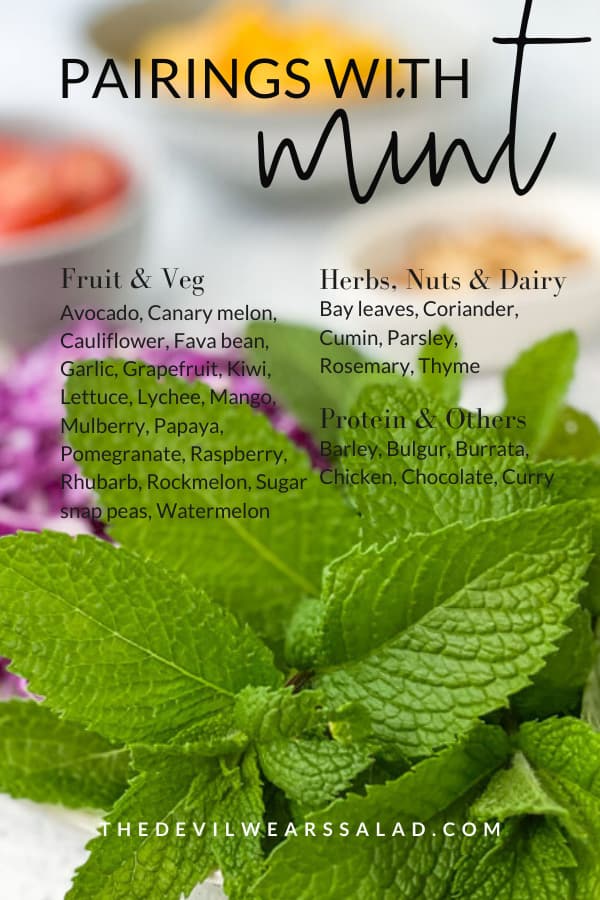
| Mint | Everyone knows mint’s distinct, sweet flavor. It’s the basis of everything from gourmet recipes to candy canes. The distinct flavor comes from the leaves but the flowers are also edible and make an excellent garnish for all occasions. |
| Nasturtium | Add some nasturtium blooms to add a pop of color and a bite in flavor. They have a spicy, peppery flavor that makes a good addition to a range of dishes. But if you’re cooking with it, make sure to add it at the end of the cooking process so it doesn’t overcook. |
| Orchids | Orchids are typically used for the finishing touches as beautiful garnishes on any meal in need of a pop of color. |
| Oxlip | Oxlip is a mild flavoring that can be used for soups when cooked or to pretty up salads when raw. It can be used in herbal teas or other mixtures. |
| Pansy | Pansy is the common name for hybrid flowers in the viola family. Popular because they come in a wide variety of bright colors, these edible flowers are |
| Peonies | Peonies have the same medicinal value as roses and can help ease sore muscles. |
| Plum Blossom | Plum blossoms are a favorite flower around the world. Their flavor is more complicated with hints of spice, sweetness, and floral tangs. Because of their beauty, these spring blooms can be used for floral confections and desserts of many varieties. They can be used to make frosting or sprinkled on top of puddings. |
| Pumpkin flowers | Field pumpkins are not just for Halloween. They produce pretty flowers that can have a culinary purpose. They are commonly used in Asian cuisines such as Bengali dishes. Their flavor is mildly sweet with earthy undertones. |
| Purslane | Purslane is packed with nutrition. It contains a very high portion of vitamin A, C, iron, magnesium, manganese, potassium, and calcium. It’s also high in antioxidants and omega-3s. It has a slightly sour, salty flavor akin to watercress or spinach. |
| Primrose | Primrose flowers have a range of flavors that span from a mild salad lettuce taste to a more bitter flavor. The flowers can be used as garnishes or even mixed in with the leaves for tea. |
| Red clover | Red clover has a long history as an edible flower and plant. It has a very floral taste when eaten raw but when cooked, it provides a vanilla-ish taste. A healthy flowering plant, it’s a gluten-free ingredient that has a nutritional profile akin to alfalfa sprouts. It contains vitamins A, B1, B2, B3, and C along with antioxidants, calcium, and potassium. |
| Rose | Flavors from roses will vary based on type, color, and soil conditions. While roses are also medicinal, their flower petals are a staple in many cocktails and dessert dishes. |
| Rosemary | A common spice, rosemary is a flowering shrub native to Mediterranean regions. It has beautiful purple, pink, blue, or white flowers that carry a distinct fragrance. It has a lemony pine-like flavor that complements many dishes. |
| Sage | Sage is a common name for two different types of flowering shrubs. Artemisia is sagebrush and salvia mellifera is black sage. Both can be used as flavoring herbs when cooking. They both have a slightly peppery flavor and are suitable for teas. |
| Strawberry Blossoms | Everyone knows how good the fruit tastes. But, surprise! Strawberry blossoms are also great to include in dishes. Farmed blossoms tend to be pink while wild strawberry blossoms are white. Just be careful where you get the blossoms from though as some farms like to douse them in chemicals. |
| Sunflowers | Sunflowers do produce the beloved sunflower seeds, but their stem can also be steamed and eaten like an artichoke. Not to be confused with a sunchoke! |
| Tansy | Tansy has a long, interesting history as an edible flower. It was used as an insect repellant and also common for Easter pudding. Its nutmeg-cinnamon-like flavor is best used as a flavoring and the flowers can be used in tea. *WARNING* Don’t eat tansy in large amounts, it may upset your tummy. |
| Tulip | You can nibble on some tulips with your own two lips! *WARNING*: Tulips can cause an allergic reaction. If you develop even minor allergic reactions do not eat the petals. Never eat the bulbs! When in doubt, avoid eating the flower. |
| Violet | The beautiful violet flower has a subtle flavor, slightly sweet. The refreshing taste evokes the flavor of springtime. |