Browsed by
Category: Desserts & Fruit

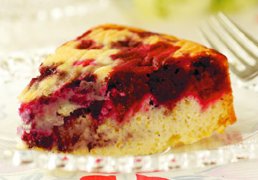
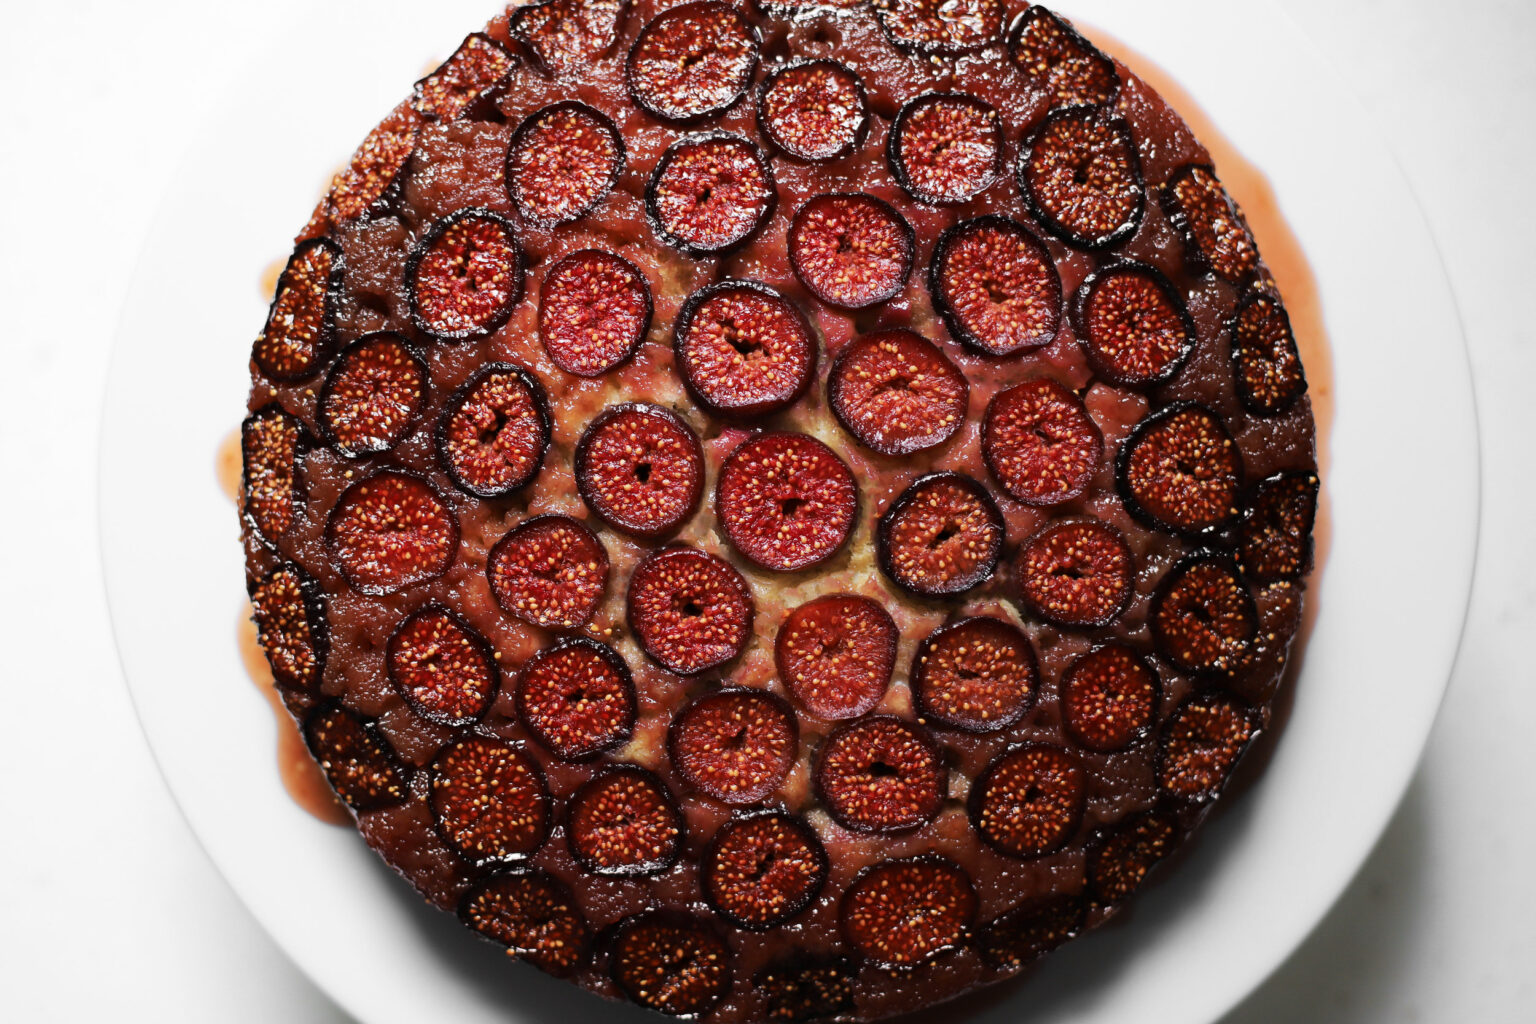
Fig Cake

Fig Cake

Fig Cake


Butter for greasing the pan

4 T. [57g] melted butter

1/2 cup [100g] light brown sugar

1/8 tsp. salt

10.5oz [300g] small fresh figs*


1 1/2 cups [200g] flour

1 1/4 tsp. [5g] baking powder

1/4 tsp. [1.5g] baking soda

1/2 tsp. [3g] salt

2 large room temperature eggs

4 T. [55g] melted and cooled butter

3/4 cup [150g] granulated sugar

3/4 cup [170g] plain yogurt**

Optional Flavoring (1-2 tsp. Vanilla, 1-2 drops almond extract, pinch of cinnamon, cardamom, ginger, or cloves, 1 T. Orange Blossom Water, OR1 tsp. Rosewater)


To prep the fig and brown sugar bottom: Butter one 8-inch round cake pan. Cover the bottom with a parchment round. Mix together the melted butter, brown sugar, and salt, and pour it over the parchment-covered cake pan. Use an offset spatula to spread the brown sugar out evenly over the bottom until it’s completely covered. Slice the figs in half. Arrange the figs cut-side-down over the buttery brown sugar. To bake the cake: Preheat the oven to 350° F convection (177° C). Sift together the flour, baking powder, baking soda, and salt in a mixing bowl. Beat the eggs and butter together until they are very well incorporated. Then add the sugar, yogurt, and orange blossom water, and beat to combine well. Pour the wet mixture over the dry mixture, and stir together just until everything is combined. It won’t be completely smooth, and there might be some tiny lumps; this is completely fine. Don’t over-mix! Carefully pour the batter over the figs, smooth out the top a little bit with a spatula, and bake for about 30 minutes. It’s done once you can insert a toothpick into the center and batter doesn’t stick to it. It may take longer than 30 minutes to cook through, especially if your figs have a lot of moisture. Let it cool for 5 to 10 minutes in the cake pan. Then trace around the edge with a butter knife to make sure it’s loosened from the pan. Place a plate or cake-stand upside-down over the cake. Put on your grippiest oven mitts, and hold the plate and cake together so that your thumbs are underneath the cake pan. Carefully and quickly rotate it away from yourself and give it a quick up-and-down shake to release the cake from the pan. Remove the pan, slice, and serve.


* If you can’t find small figs, you can use larger ones. Just make sure you cut them into about 1/2-inch slices instead of cutting them in half. To get the same look as these photos, slice the figs along their equators instead of stem to end.

** If you have Greek yogurt, you can substitute it here, but make sure you water it down before measuring (using either a little milk or water). It needs to be the approximate consistency of plain, unstrained yogurt (Greek yogurt doesn’t have as much moisture).
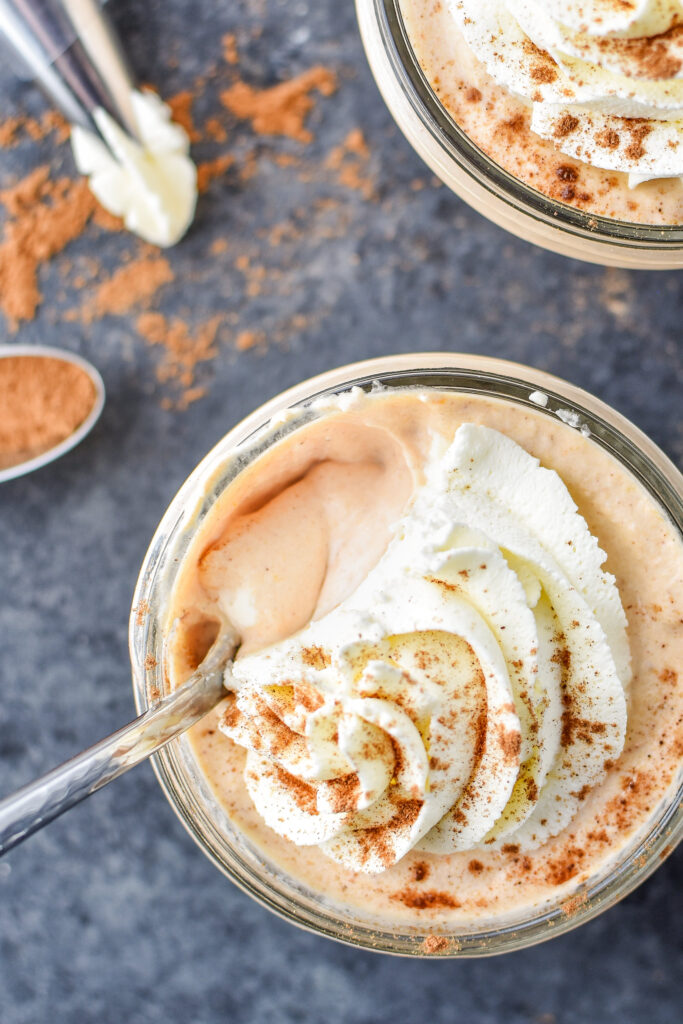
Pumpkin Spice Whipped Greek Yogurt

Pumpkin Spice Whipped Greek Yogurt
Pumpkin Spice Whipped Greek Yogurt


1 C. whole fat or 2% plain Greek yogurt (such as Fage)

1/4 C. heavy whipping cream (at least 36% milk fat)

2 T. maple syrup

1/2 tsp. vanilla extract

1/2 tsp. pumpkin spice

1/4 tsp. ground cinnamon

pinch of salt (optional)

1/3 C. canned pumpkin (unsweetened with pumpkin as the only ingredient)


Add ingredients: Add all ingredients except the canned pumpkin to the bowl of a stand mixer fitted with the whisk attachment, or use a hand mixer.  Whip yogurt: Begin mixing on low for about 20 seconds, until the liquid cream begins to mix into the yogurt. Slowly increase power to the highest speed. After about 2 minutes of whisking, pause mixing and use a spatula to give the yogurt a quick mix – push down the sides of the bowl and make sure the very bottom is mixed in. Continue mixing for another 2-3 minutes, or until soft peaks form when the whisk is removed. The peaks will not be super stiff, but will still stand up.  Add pumpkin: Add the canned pumpkin to the mixing bowl and fold in by hand until well mixed.  Serve & store: Place the mixture into individual portion containers or a large bowl with a lid. Enjoy now or place in the fridge for 3-4 hours – the whipped Greek yogurt will thicken as it chills. Top with whipped cream if you wish! Store in a sealed container in the fridge for up to 5 days.

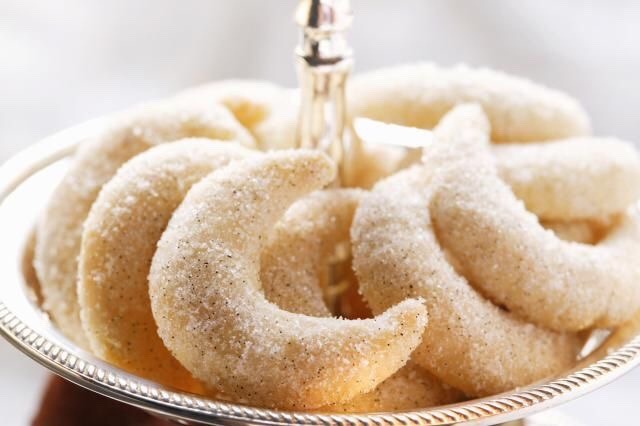
Moon Spell Cookies

Moon Spell Cookies

Moon Spell Cookies


1 cup of finely grated almonds (optional)

1 ¼ cups of flour

¼ cup of confectioner’s sugar

¼ cup of butter

1 egg yolk


Combine almonds, flour, and sugar. Work in butter and egg yolk until well blended. Set it in the fridge until chilled. Roll into crescent moon shapes or use a cookie cutter. Place on greased cookie sheet and bake at 320 degrees Fahrenheit (160 degrees Celsius) for 20 minutes. Spells for:


Love – Add a few pinches of rosemary, sweet basil, cinnamon, and honey.

Prosperity – Add cinnamon, nutmeg, basil, and grated lemon peel.

Protection – Add cloves, rosemary, anise, and cinnamon.

Psychic Ability – Add star anise, nutmeg, orange, and thyme.

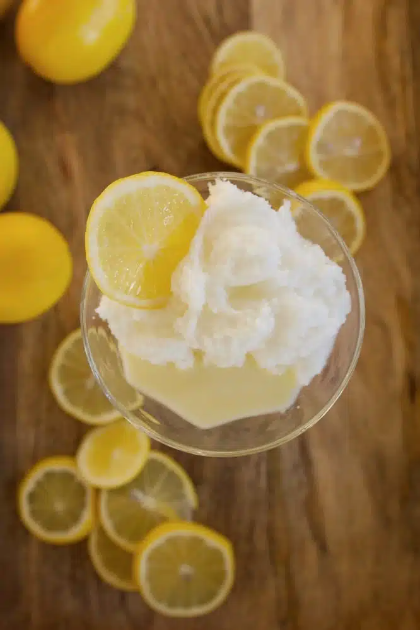
Snow Pudding with Light Custard Sauce

Snow Pudding with Light Custard Sauce
Snow Pudding with Light Custard Sauce

2 packages unflavored gelatin
1/2 cup cold water
1/2 cup lemon juice (approximately 2 lemons)
2 cups sugar
2 cups boiling water
5 egg whites

Dissolve unflavored gelatin in cold water. Add lemon juice, sugar, boiling water. Let gel until syrupy and just starting to set, approximately 45 minutes. Beat egg whites until they form soft peaks, then beat in the gelatin until the mixture is really fluffy and white, approximately 5 minutes. Rinse a 1-1/2- to 2-quart mold with cold water and turn the pudding into it. Chill until firm, preferably overnight, then unmold onto a serving platter and serve with Light Custard Sauce. If you don’t have a baking mold, you can use a large bowl and then scoop the pudding to serve.


Light Custard Sauce:


1 quart milk

5 egg yolks

1/2 cup sugar

pinch of salt

2-1/2 T. cornstarch

1 tsp. vanilla


In a double boiler or over low heat, heat milk. Beat egg yolks until fluffy, then slowly add to milk, then sugar and a pinch of salt. Heat mixture, stirring, then remove about 1/4 cup and dissolve cornstarch in it. Stir cornstarch mixture into custard; continue to cook and stir until slightly thickened (10 to 15 minutes). Let cool, then add vanilla.

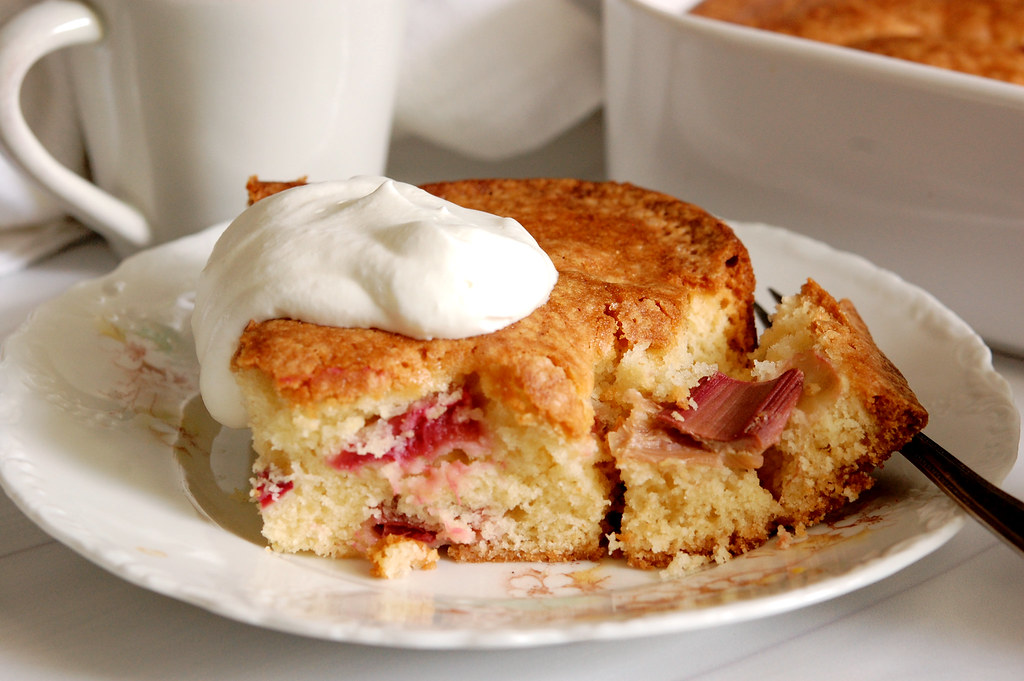
Easy Rhubarb Cake

Easy Rhubarb Cake

Easy Rhubarb Cake


1 cup neutral vegetable oil

2 cups sugar, plus more for sprinkling

4 large eggs

1 T. pure vanilla extract

Zest of 1 lemon

Pinch of kosher salt

1 T. baking powder

3 cups all-purpose flour

1/2 cup milk

3 generous cups chopped rhubarb (from about 5 stalks, cut into 1/2″ pieces, leaves discarded)

Fresh whipped cream or vanilla ice cream, to serve


Grease a 9″ x 13″ baking pan and preheat the oven to 350°F. In the bowl of an electric mixer fitted with the paddle attachment, or by hand with a large whisk and mixing bowl, beat together the oil and sugar until emulsified. Add the eggs, vanilla, and the lemon zest. Beat until very smooth and lightened in color, about 2 minutes. (If using an electric mixer, use a medium- to medium-high setting.) Scrape the bowl. Add the salt, baking powder, and flour and stir on low until the flour mixture is mostly combined. Add the milk and continue to mix the batter on low until smooth. Do not overmix. Stir in half the diced rhubarb. PRO TIP: Mixing the batter on low once the flour is added serves two purposes: First, it prevents a flour “explosion” in the mixer. Second, gentle mixing prevents too much gluten from forming, keeping the cake nice and tender. Pour the rhubarb cake batter into the prepared baking dish and use a spatula to smooth the batter evenly. Scatter the reserved chopped rhubarb all over, and then sprinkle the top of the cake with sugar (about 1 to 2 T.). Bake the cake for about 1 hour 15 minutes, or until a cake tester inserted into the center comes out clean. Cool fully. Serve the rhubarb cake plain or with whipped cream or ice cream. Strawberry ice cream or vanilla ice cream would be particularly delicious.

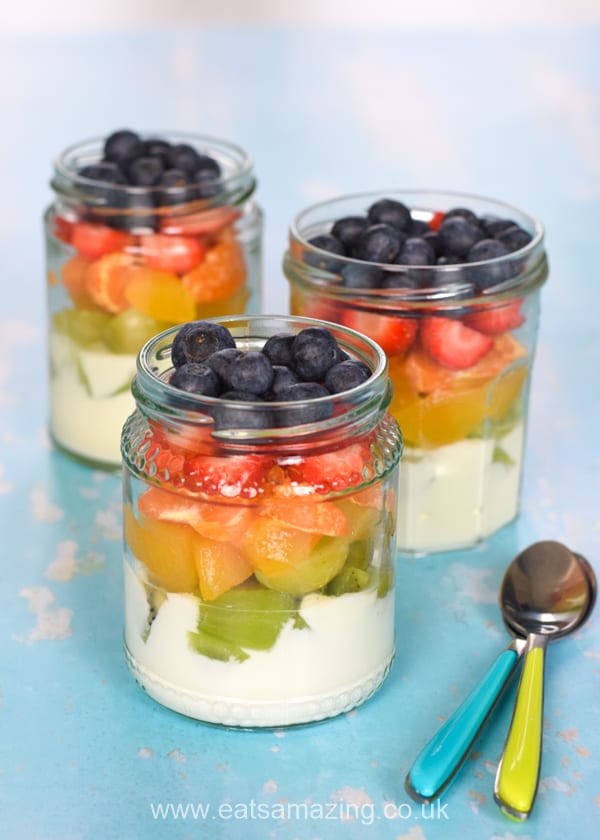
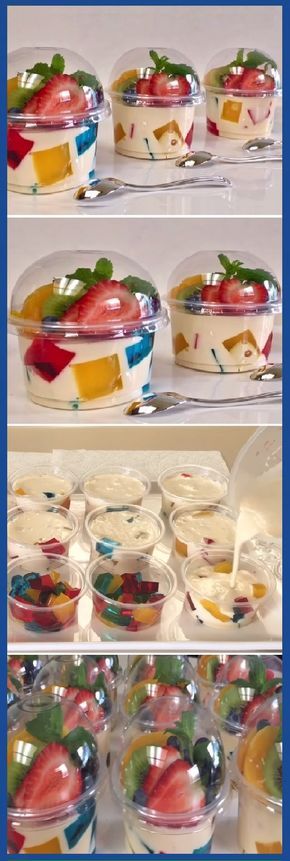
Rainbow Fruit Salad Jars

Rainbow Fruit Salad Jars
Rainbow Fruit Salad Jars


350g natural yogurt

1 T. honey (optional)

100g green grapes

2 kiwi fruits

½ 400g tin apricot halves in light syrup

2 easy peel oranges

8 medium sized strawberries

100g fresh blueberries


Mix the yogurt with the honey, then divide between the 4 jars, carefully spooning into the bottom of each jar and avoiding dripping it down the sides if possible.  Prepare the fruit – wash and halve the green grapes, peel and roughly chop the kiwi fruits, roughly chop 4 apricot halves (reserve the syrup), peel and break the oranges into segments, wash, hull and roughly chop the strawberries, wash the blueberries. Carefully divide the fruit between the 4 jars, layering in rainbow order – the order I used was kiwi, green grapes, apricot, orange segments, strawberries and blueberries.  Drizzle a spoonful of the reserved syrup from the tinned apricots over the fruit in each jar and serve immediately.

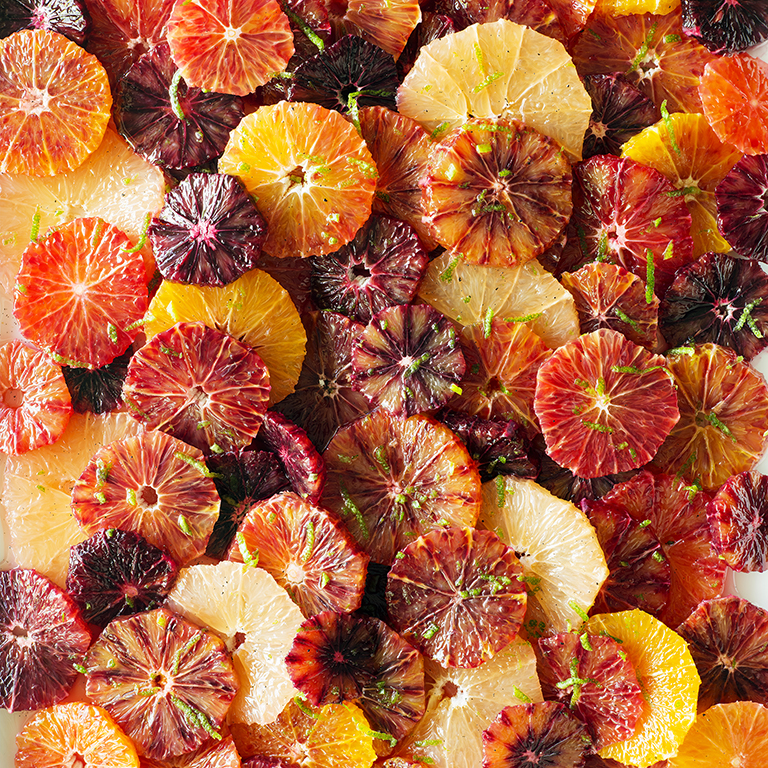
Citrus Salad with Spiced Vanilla Syrup

Citrus Salad with Spiced Vanilla Syrup

Citrus Salad with Spiced Vanilla Syrup


1/2 C. sugar

1 vanilla bean, split, seeds scraped out and reserved

4 whole allspice

2 green cardamom pods, crushed to release seeds

2 grapefruit, preferably 1 pink and 1 white

1 1/2 pounds blood oranges (all one variety, or a mix of Moro, Sanguinelli, and Tarocco, if available)

Zest of 1/2 lime (use a five-hole zester)


In a small saucepan, heat sugar with 1/2 C. water, the vanilla-bean pod and seeds, and spices over high heat until sugar dissolves. Remove from heat, steep 30 minutes, then strain. Meanwhile, cut peel (including all white pith on outside of fruit) from grapefruit, following curve of fruit. Slice grapefruit crosswise into rounds about 1/4 in. thick, removing any seeds. Arrange on a large platter. Repeat with oranges. Drizzle citrus with about 1/3 C. spiced syrup. Scatter lime zest on top. Serve with a little more syrup if you like.

Orange Creamsicle Sugar Cookies

Orange Creamsicle Sugar Cookies
Orange Creamsicle Sugar Cookies


6¼ C. cake flour

1 tsp. salt

½ tsp. baking soda

½ tsp. cream of tarter

1 C. butter, softened

1¼ C. sugar + ¼ C.

¾ C. powdered sugar

¾ C. canola oil

2 T. fresh orange juice

1 T. orange zest

⅛ tsp. orange extract, optional

1 tsp. vanilla, optional

2 eggs


6 ounces white chocolate chips

1 (8 ounce) package cream cheese, softened

¼ C. butter, softened

2 T. fresh orange juice

⅛ tsp. orange extract

3 C. powdered sugar

orange food coloring, if desired


Preheat your oven to 350 degrees. In a medium size mixing bowl, mix your flour, salt, baking soda & cream of tarter. Set aside. In a stand mixer, cream the butter, 1¼ C. sugar & the powdered sugar for about 2 minutes. Slowly add the oil, orange juice, orange zest, orange extract & vanilla. Beat in the eggs one at a time. Slowly add the flour mixture to the wet ingredients (scrape the sides of the bowl as needed). Roll the dough into 2″ balls and place on a parchment lined cookie sheet. Add the remaining ¼ C. sugar to a bowl or small dish. Use the bottom of a drinking glass (about 2½” in diameter) & dip it into the sugar then press (the sugar coated, bottom of the glass) into the ball of cookie dough until it’s about ½” thick (the dough will form a jagged edge). Bake the cookies for 8 minutes (you don’t want to over bake or they will be dry). Gently remove the cookies from the pan onto a cooling rack to let them cool. When cool, place in an airtight container and place in the fridge. FOR THE FROSTING: Place the white chocolate in a medium sized microwave safe dish. Melt according to the package directions. Let the chocolate cool for 3 minuets then beat in the cream cheese, butter, orange juice & orange extract. Beat on medium speed until well blended. Slowly add the powdered sugar and beat well. Add food coloring if desired.(If the frosting has small clumps, microwave for 30 seconds, stir, then microwave for 30 more seconds. The frosting will be slightly more runny but will set up firm again.) Frost the cookies, then let them chill in the fridge. Store in an airtight container in the fridge. Cookies are best cold.

Broken Glass Jello

Broken Glass Jello

Broken Glass Jello


(4) 3 ounce boxes Jello gelatin, assorted colors

4 C. boiling water

(2) .25 ounce envelopes unflavored gelatin

2 C. hot water

14 ounce can sweetened condensed milk

1 tsp. vanilla


Dissolve each 3 ounce box of jello into its own individual container, using 1 C. of boiling water per flavor (no more than 1-inch deep.) Chill until solid, about 3 hours or overnight.  Once solid, cut each of the different flavors into small square cubes. Using a 9×13 glass dish, gently mix the cubes together in an even layer (being very careful not to break or tear them.)  In a medium-sized bowl, dissolve 2 envelopes of unflavored gelatin in 2 C. of hot water. Let the hot mixture cool slightly and then whisk in a 14 ounce can of sweetened condensed milk and 1 tsp. vanilla.  Let mixture cool to the touch (If it’s too warm, it could melt the Jello cubes.) Then evenly pour the mixture over the cubes of Jello. Chill in the refrigerator overnight. Cut into squares and serve. 24 servings:  Calories: 54kcal |  Fat: 1g | Saturated Fat: 1g

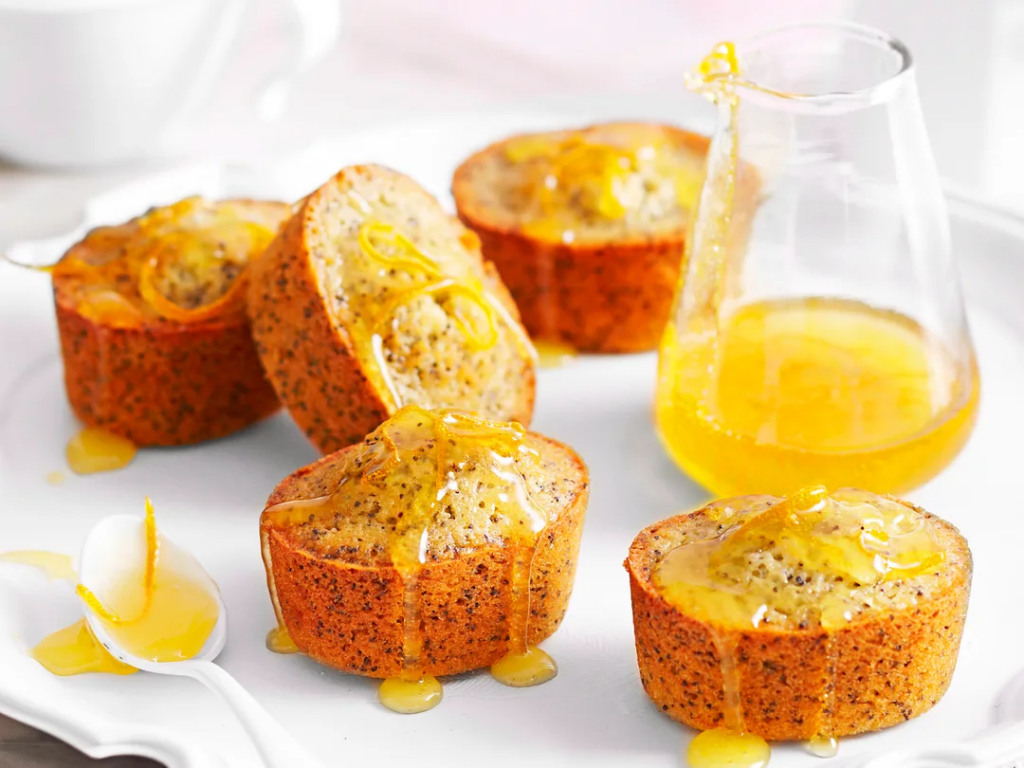
Orange and Poppy Seed Friands

Orange and Poppy Seed Friands
Orange and Poppy Seed Friands


1 1/2 C. icing sugar mixture

1 C. almond meal

1/2 C. plain flour, sifter

1/4 C. poppy seeds

2 oranges, finely grated zest

185 gram melted butter

6 egg whites

Syrup

1 C. sugar

1 C. water

1/2 C. orange juice

1 orange, peeled strips of zest


Preheat oven to moderate, 180°C (160°C fan-forced). Lightly grease a 12-hole friand pan. In a bowl, combine icing sugar, almond meal, flour, poppy seeds and zest. Mix in butter, stirring gently, until just combined. In a clean bowl, lightly whisk egg-whites until frothy. Fold through almond mixture. Divide mixture evenly between friand recesses. Bake 20-25 minutes, until cooked when tested. To make syrup: Meanwhile, in a small saucepan, combine all syrup ingredients. Stir over a low heat until sugar dissolves. Bring to boil. Reduce heat. Simmer, without stirring, 4-5 minutes, until reduced slightly. Pierce each hot friand in several places with a wooden skewer. Slowly pour over warm syrup, allowing to soak into friands. Serve warm.

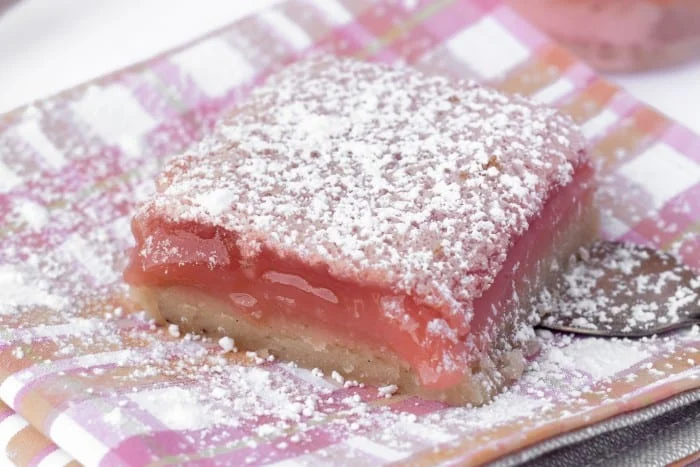
Hibiscus Lemon Bars

Hibiscus Lemon Bars
Hibiscus Lemon Bars


1/2 C. 1 stick unsalted butter, room temperature

1/4 C. sugar

1 C. flour

pinch of salt

1 tsp. vanilla bean paste


1/2 C. fresh squeezed lemon juice

1 T. dried hibiscus or hibiscus tea

3 large eggs

1 1/2 C. sugar

1/2 C. flour

garnish

confectioner’s sugar


Set oven to 350F. Cream the butter, sugar, and vanilla together. I did this in my stand mixer. Add in the flour and salt, and mix just until combined. Press the dough into a 9×9 baking pan. I lightly flour my fingers so they don’t stick to the dough. Press it evenly across the bottom of the pan. Chill for 15 minutes. Bake the crust for 15 minutes until it is just lightly browned. Set it aside to cool, but leave the oven on. Meanwhile make the filling. Stir the hibiscus into the lemon juice and let sit for 15 minutes until it is a dark pink color. Then strain it and discard the hibiscus. Whisk the eggs and sugar together until well blended. Stir in the lemon juice and then blend in the flour. Pour the filling over the crust and return to the oven to bake for another 20-25 minutes, until the center of the filling is set and not jiggly. Let cool fully before slicing. Dust with powdered sugar before serving.

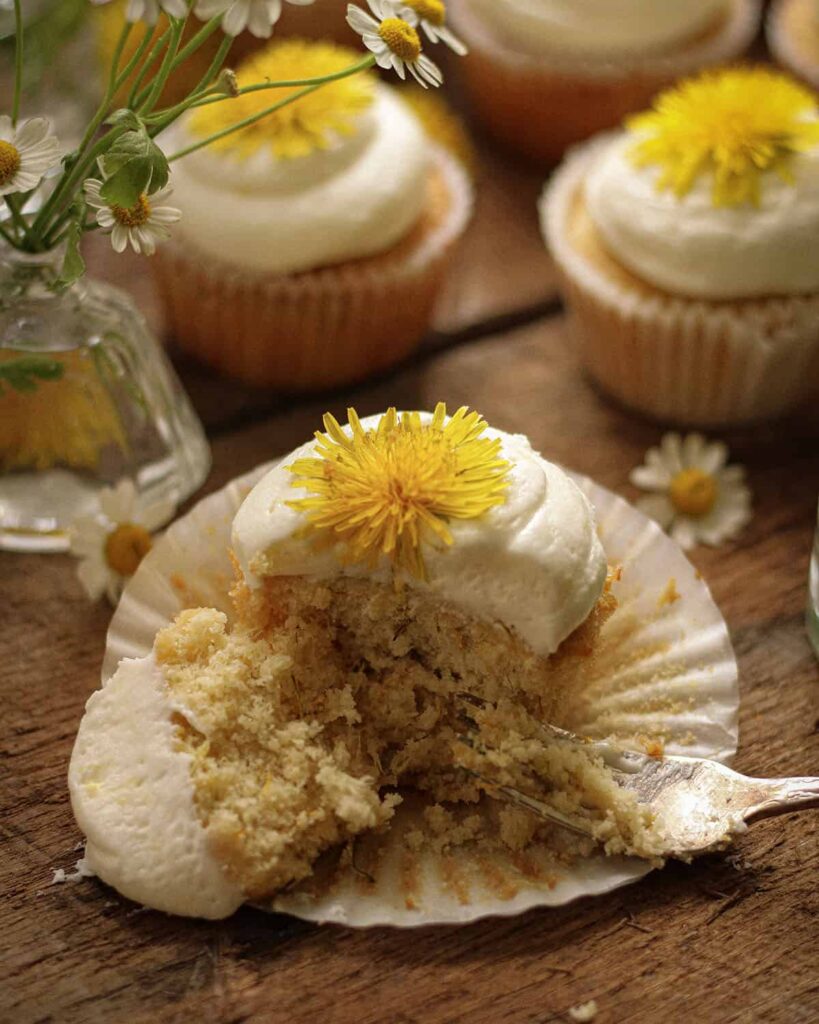
Dandelion Cupcakes with Lemon Buttercream Frosting

Dandelion Cupcakes with Lemon Buttercream Frosting
Dandelion Cupcakes with Lemon Buttercream Frosting


1½ C. all-purpose flour

¼ tsp baking soda

½ tsp baking powder

¼ tsp salt

3/4 C. butter 1½ sticks (at room temperature)

½ C. sugar

½ C. honey

3 large eggs

½ C. buttermilk

1 lemon zested

¾ C. dandelion petals


1/2 C. butter 1 stick (at room temperature)

1 lemon zested and juiced

pinch salt

2-3 C. powdered sugar to desired consistency


Preheat the oven to 350° F (176° C). Line a 12 muffin tin with baking C.. In a medium bowl, combine the flour, baking powder, baking soda, and salt. With a mixer, cream the butter and sugar together for approximately 1 minute, or until light and fluffy. Add in the honey and mix until fully incorporated. Add in the eggs one at a time, then turn the mixer off and scrape the bottom and sides of the bowl to make sure there isn’t any unmixed butter and sugar. With the mixer on low speed, add the buttermilk and flour mixture a little at a time, alternating between each. Mix until evenly distributed.

Add in the lemon zest and dandelion petals, making sure they are evenly incorporated and aren’t clumped together. Fill each lined muffin tin with ¼ C. of the batter and bake for 20-25 minutes, or until a toothpick inserted in the middle comes out clean.

Allow the C.cakes to cool in the pan for 15 minutes, then they can be placed carefully on a wire rack to cool for another 30 minutes. While the C.cakes cool, prepare the frosting.


Lemon Buttercream Frosting


In a medium mixing bowl, combine the butter, lemon juice, lemon zest, and salt.

Using an electric mixer on medium speed, mix thoroughly until smooth and creamy. Add in the confectioner’s sugar ½ C. at a time, mixing in between until the desired consistency is reached. Spread the frosting evenly over the top of the C.cakes. Garnish the C.cakes with dandelion petals or flowers if desired.

Blooming Good Day Platter

Blooming Good Day Platter
Blooming Good Day Platter


4 strawberries

1 slice of watermelon

2 kiwis

1 slice of cantaloupe

2 slices of mango

33 mini candy eyes

50 grams dark chocolate

curved sprinkles


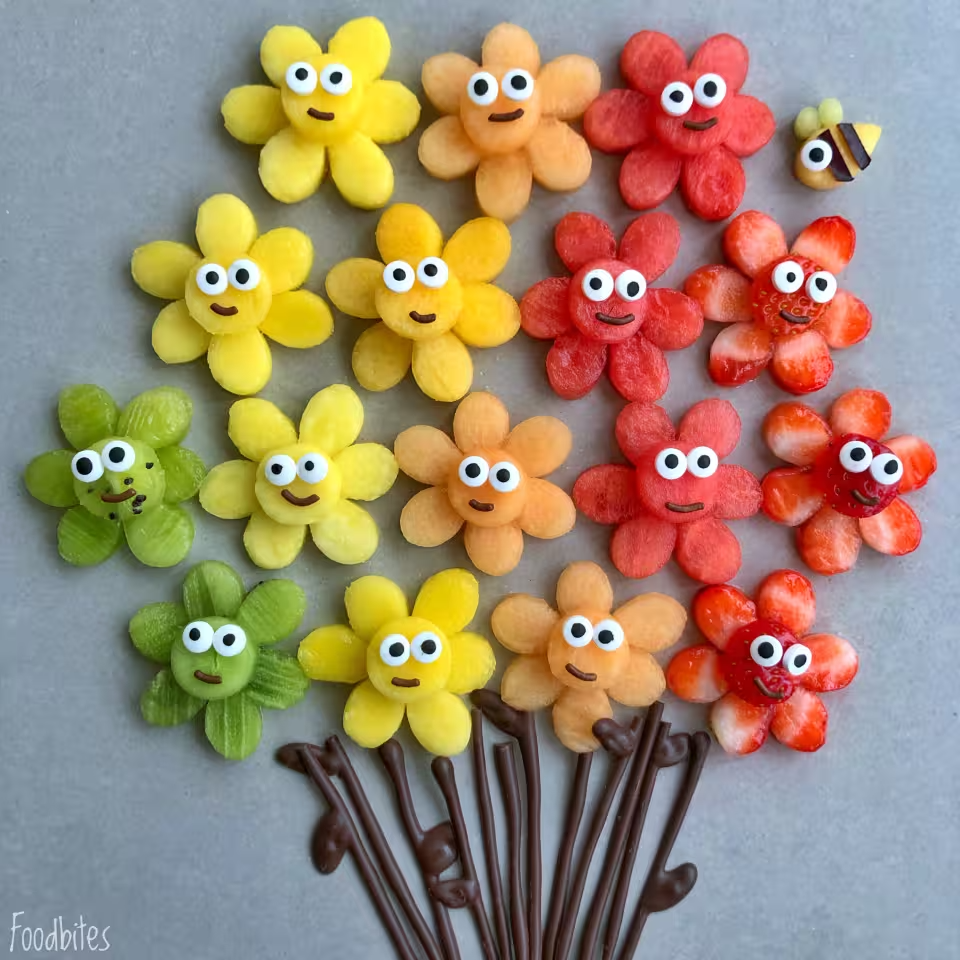
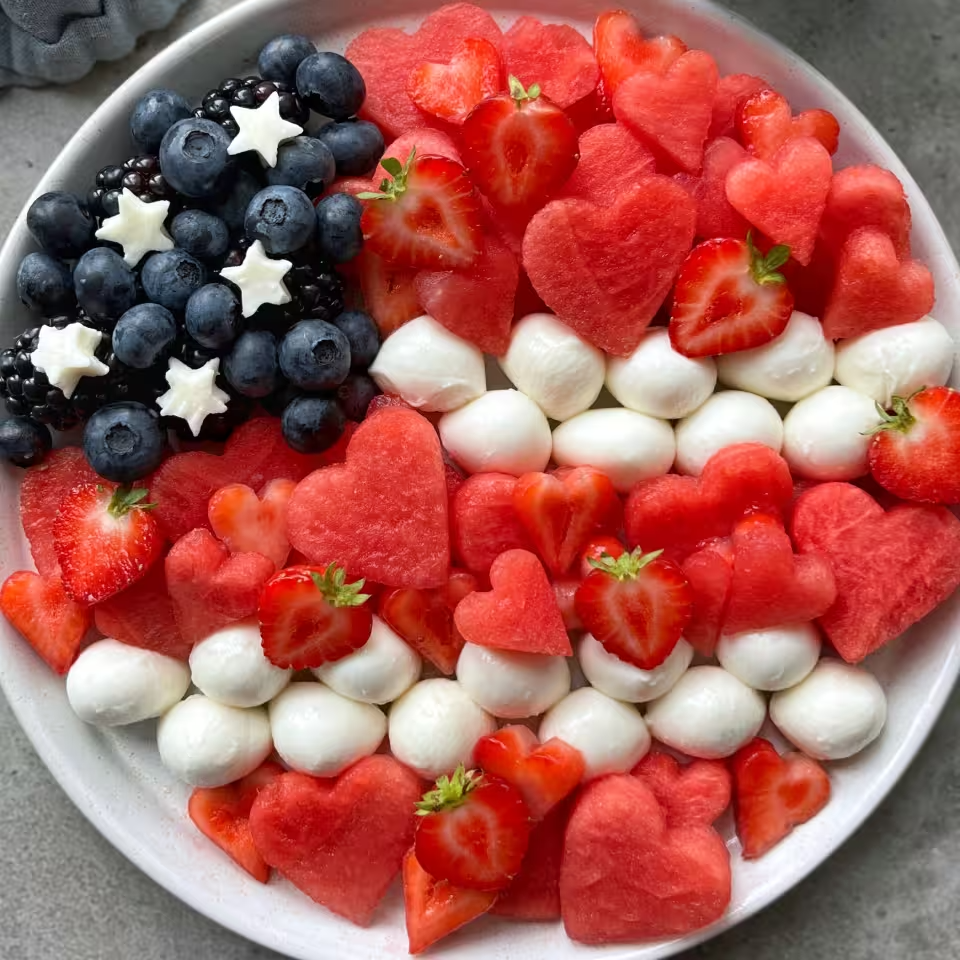
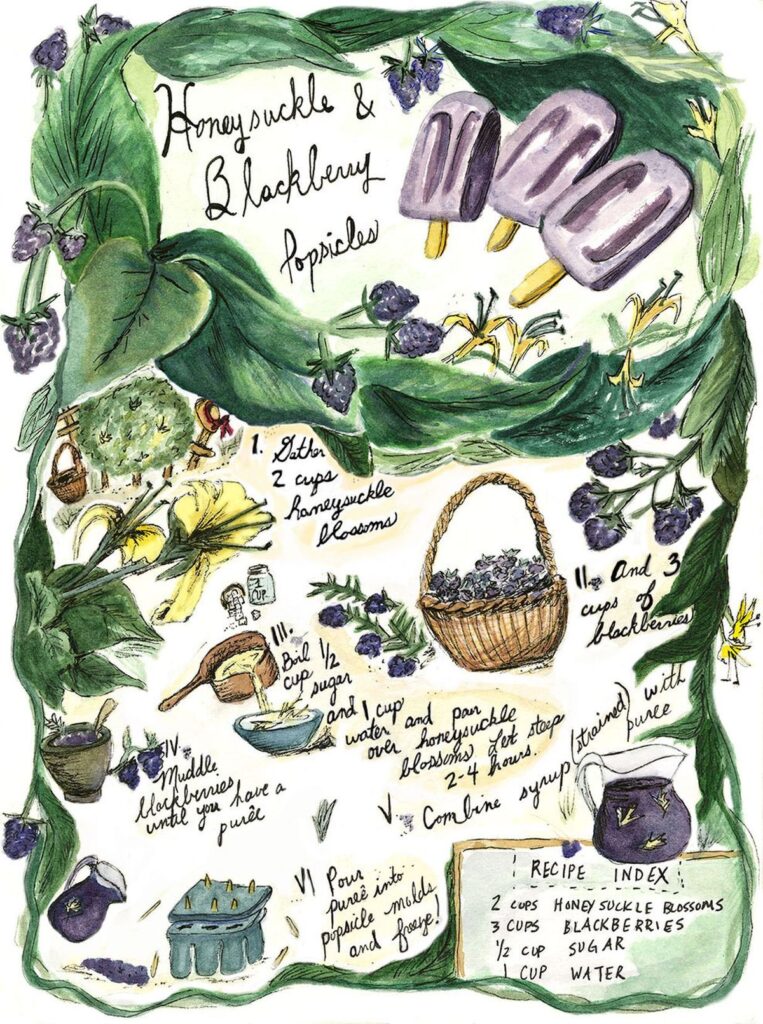
Slice the fruit into equally thick pieces. Cut 6 petals and 1 round center for each flower you make. Melt the dark chocolate. Once the chocolate has cooled down a bit, add it to a piping bag and pipe out the stems onto parchment paper. You can add a few chocolate leaf details, too. When the chocolate has set, arrange the flowers and top with candy eyes and a curved sprinkle for the mouth.  To make the bee, use a small petal-shaped cookie cutter and mango. For the wings, I used a metal straw and for the stripes a tiny bit of plum peel (you can use chocolate too). Top with a small candy eye.

Upside-Down Salted Caramel Apple Pecan Cake
Upside-Down Salted Caramel Apple Pecan Cake

Upside-Down Salted Caramel Apple Pecan Cake


3 medium Honeycrisp Apples, peeled and thinly sliced

1 1/2 C. all purpose flour

1/2 C. salted butter, softened

1/3 C. of chopped pecans

1 tsp. baking powder

1/4 C. granulated sugar

3/4 C. dark brown sugar

2 eggs

1/2 C. of milk of choice (almond, skim, etc)

2 T. sour cream

1 1/4 tsp. vanilla

3/4 tsp. of cinnamon

Pinch of nutmeg

Brown sugar for dusting

Coarse Sea Salt for sprinkling


1/2 C. of unsalted butter (1 stick)

3/4 C. of packed dark brown sugar

1/2 tsp. of sea salt


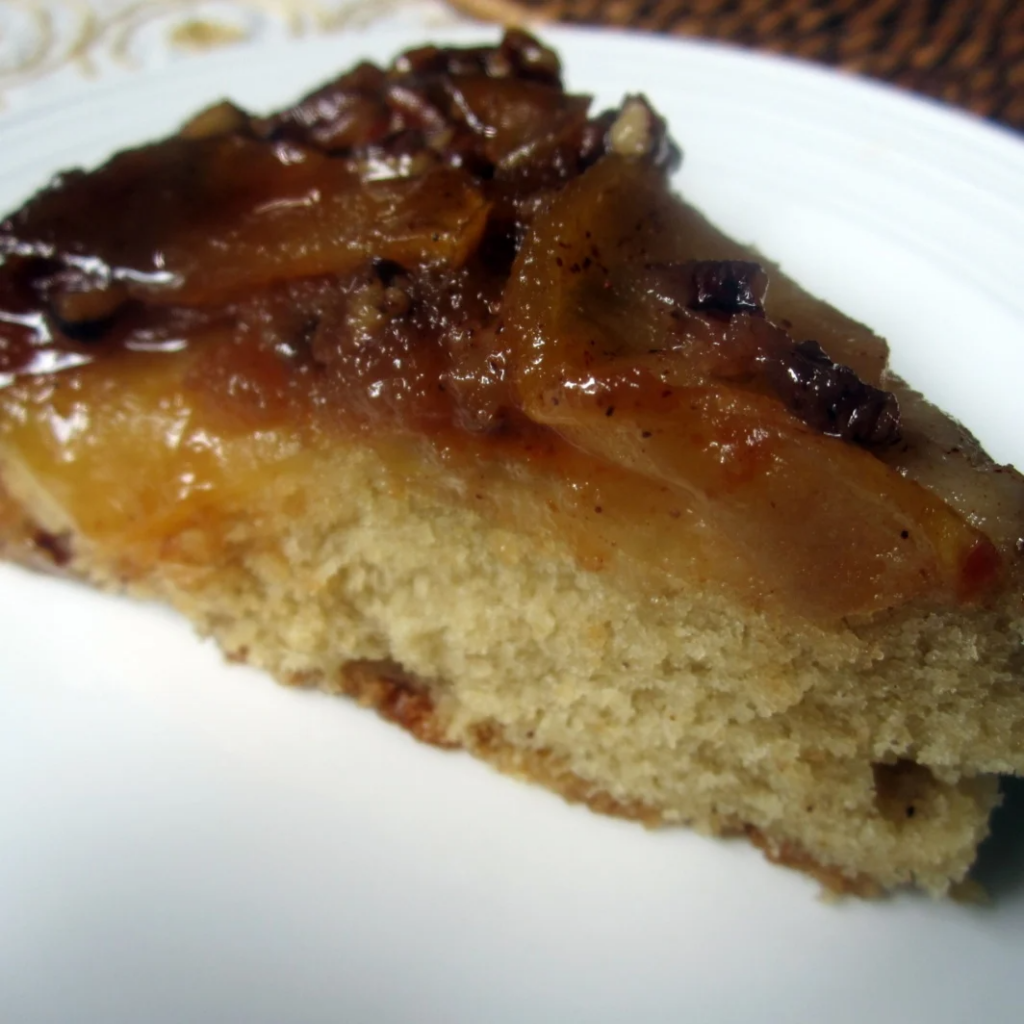
Preheat the oven to 350 degrees F. Generously grease the sides of a 9-inch cake pan with butter or non stick cooking spray. Peel and thinly slice apples, set aside. For the salted caramel sauce: Melt 1 stick of butter in saucepan over medium heat, add 3/4 C. of dark brown sugar and stir until bubbling. Add 1/2 tsp. of sea salt and stir for 30 seconds then turn off heat. Spread caramel mixture in cake pan and layer with apples and pecans. For the cake, in small bowl mix flour, baking powder, cinnamon and nutmeg; set aside. In medium bowl beat 1/2 C. of softened butter and both sugars until creamy. Add eggs, vanilla, and beat until fluffy, about 3 minutes. Alternate adding flour mixture and almond milk. Beat about 2 minutes until smooth, then add in sour cream and mix until well combined. Pour cake batter on top of the apples. Generously sprinkle brown sugar all over top of cake batter. Bake 45-55 minutes, or until a toothpick put into center comes out clean. Cool 15-20 minutes then run a knife along the outer edge of the cake to loosen and place on platter then flip over to remove cake from pan. Sprinkle top of cake with sea salt. Let the cake cool for an additional 10 minutes. Serve warm with vanilla bean ice cream.

Strawberry Buttercream Frosting

Strawberry Buttercream Frosting
Strawberry Buttercream Frosting


1 C. (about 25g) freeze-dried strawberries

1 C. (16 Tbsp; 226g) unsalted butter, softened to room temperature

3 and 1/2 C. (420g) confectioners’ sugar

1/4 C. (60ml) heavy cream or whole milk, at room temperature

1 tsp. pure vanilla extract

salt, to taste


Using a food processor or blender, process the freeze-dried strawberries into a powdery crumb. You should have around 1/2 C.. If it’s not grinding down fine enough, you can sift it with a fine mesh sieve to rid larger seeds/pieces. Set aside. In a large bowl using a handheld or stand mixer fitted with a paddle or whisk attachment, beat the butter on medium-high speed until creamy, about 2 minutes. Add confectioners’ sugar, strawberry powder, heavy cream/milk, and vanilla. Beat on low speed for 30 seconds, then switch to high speed and beat for 2 minutes. Taste. Add 1–2 more T. of heavy cream/milk if needed to thin out, if desired. (I usually add at least 1 more.) Add a pinch of salt if frosting is too sweet. Use immediately or cover tightly and store for up to 1 week in the refrigerator or up to 3 months in the freezer. After freezing, thaw in the refrigerator then beat the frosting on medium speed for a few seconds so it’s creamy again. After thawing or refrigerating, beating in a splash of heavy cream or milk will help thin the frosting out again, if needed. (It stiffens in the refrigerator.)

4th of July Dessert Dip

4th of July Dessert Dip
4th of July Dessert Dip


125 grams mascarpone

250 ml whipping cream, 1 cup

1 teaspoon vanilla paste

1 tablespoon maple syrup

200 grams blueberries

200 grams raspberries

1 tablespoon pomegranate arils

150 grams biscuits, to serve

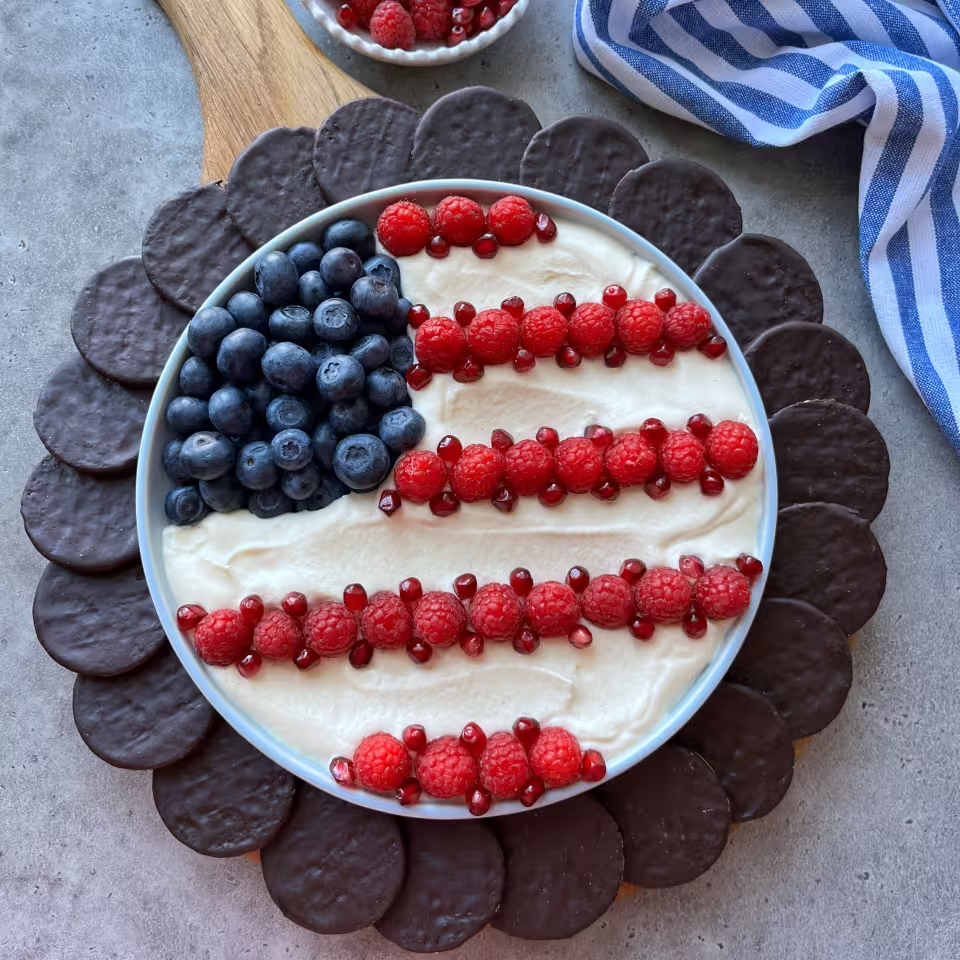
For Toppings – I use pomegranate arils, blueberries, and raspberries, but strawberries, red currants, and cherries will work too.


Whip the mascarpone and vanilla paste in a bowl for 60 seconds. Add the cream and whisk again until soft peaks form. Fold in the maple syrup. Arrange the blueberries onto the platter, followed by the cream. Top with the raspberries and pomegranate arils. Serve and enjoy!

Rhubarb Chess Pie

Rhubarb Chess Pie

Rhubarb Chess Pie


single-crust pie pastry

2 C. (½‑inch thick) slices rhubarb

1 ¼ C. granulated sugar (divided)

2 tsp. unsalted butter (at room temperature)

3–4 pinch kosher salt (divided)

4 large eggs (lightly beaten)

½ C. heavy cream

¼ C. melted unsalted butter

2 T. white vinegar

1 T. cornstarch

1 T. cornmeal

1 tsp. vanilla


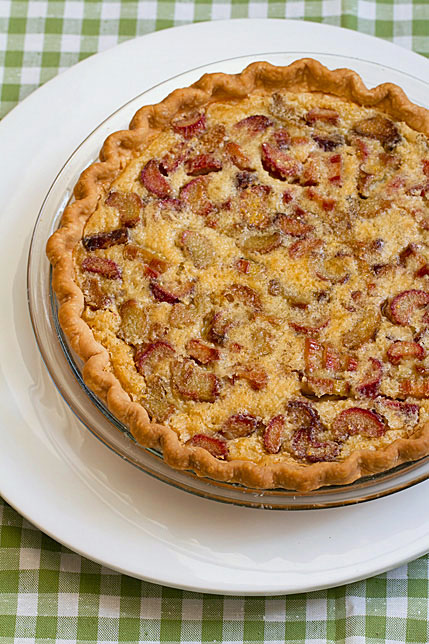
Set oven rack to the middle position and preheat the oven to 400ºF. On a lightly floured surface, roll the pastry out to a 12-inch circle, a generous ⅛‑inch thick. Carefully transfer the dough to a 9‑inch pie plate and gently press it up the sides. Drape any excess crust over the edge, then fold under and crimp decoratively. Use a fork to prick holes in the bottom of the dough. Line the dough with parchment or foil and fill with dried beans or pie weights. Bake for 8 minutes. Carefully remove the weights and parchment or foil, then continue baking for another 5 minutes, or until the crust is dry and pale colored. Remove from the oven and set aside on a rimmed baking sheet to cool.  Meanwhile, toss together sliced rhubarb, ¼ C. granulated sugar, butter, and a big pinch of salt on a separate rimmed baking sheet. Roast, stirring once, until just tender, about 12 minutes. Scrape the rhubarb, and any juices, evenly across the bottom of the prepared pie pastry. Lower the oven temperature to 350ºF. In a large bowl whisk together eggs, remaining sugar, cream, melted butter, vinegar, cornstarch, cornmeal, vanilla and 2 or 3 big pinches of salt. Once well-combined pour the mixture over the rhubarb in the pie pastry. Place the pie, on the rimmed baking sheet, in the heated oven and bake for 40 minutes., or until the center of the pie is just set. If the crust get too brown lightly tent it with foil for the last 10 or 15 minutes of baking. Cool on a wire rack 2 hours. Cover and chill the pie at least 3 hours. Allow the pie to sit at room temperature 15 or 20 minutes before slicing.

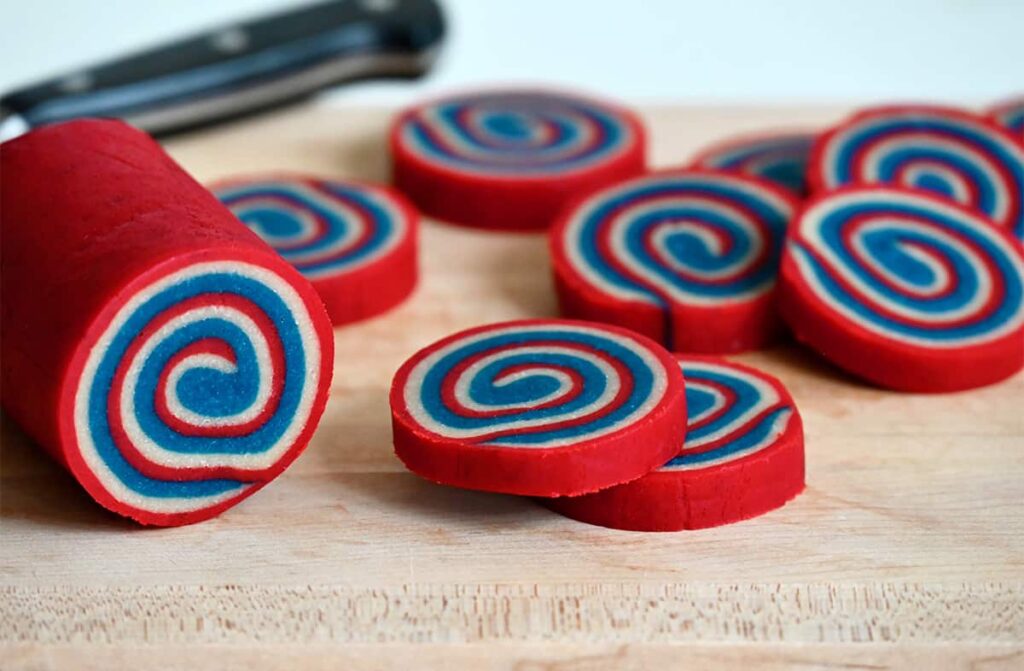
Red, White and Blue Pinwheel Icebox Cookies
Red, White and Blue Pinwheel Icebox Cookies

Red, White and Blue Pinwheel Icebox Cookies


3 cups all-purpose flour

1/2 tsp. baking powder

1/2 tsp. salt

1 cup (2 sticks) unsalted butter

1 1/3 cups sugar

2 large eggs

2 tsp. vanilla extract

Red food coloring

Blue food coloring


In a medium bowl, sift together the flour, baking powder and salt. In the bowl of a stand mixer fitted with the paddle attachment, beat the butter until smooth, about 2 minutes. Add the sugar and continue beating until the mixture is light and fluffy, about 3 minutes. Add the eggs one at a time, beating between each addition, then add the vanilla. Turn the mixer off. Add the flour and then beat just until combined. Remove the dough and separate it into three equal pieces. Shape one piece of the dough into a 4- by 4-inch square, wrap it securely in plastic wrap and place it in the fridge. (This will be the white portion of the cookies.) Return one of the remaining pieces of dough to the stand mixer bowl, and with the mixer on “low,” add in the red food coloring until it reaches your desired color. Remove the red dough, shape it into a 4- by 4-inch square, wrap it securely in plastic wrap and place it in the fridge. (This will be the red portion of the cookies). Clean out the bowl to remove any red food coloring residue. Add the final piece of dough to the stand mixer bowl, and with the mixer on “low,” add in the blue food coloring until it reaches your desired color. Remove the blue dough, shape it into a 4- by 4-inch square, wrap it securely in plastic wrap and place it in the fridge. (This will be the blue portion of the cookies.) Refrigerate the dough for 30 minutes. Remove the dough from the fridge and cut each square in half to form two rectangles. Wrap half of each color of dough in plastic wrap and return it to the fridge. Place the red dough in between two pieces of wax paper and roll it into a rectangle about 1/8-inch thick. Roll out the white dough between two separate pieces of wax paper until it is a rectangle about 1/8-inch thick. Roll out the blue dough between two separate pieces of wax paper until it is a rectangle about 1/8-inch thick.

Peel the top layer of wax paper off of the red dough and then peel the wax paper off one side of the white dough and use the other side to transfer the white dough on top of the red dough. Peel off the wax paper from one side of the blue dough and use the other side to transfer it atop the white dough. Very lightly roll the three layers together. Starting at the shorter end of the rectangle, roll the dough as tightly as possible into a log. Repeat the rolling and stacking process with the remaining dough in the fridge. Wrap the logs in wax paper and then plastic wrap and refrigerate them for 1 hour. Remove the dough logs and roll them on the counter several times so they don’t develop a flat side. Alternately, stand the rolls up in glasses in the fridge. Refrigerate the dough for 4 more hours. When ready to bake, preheat the oven to 350ºF and line two baking sheets with parchment paper. Remove the dough from the fridge and slice each log into 1/4-inch rounds. Place the rounds about 2 inches apart on the baking sheets, as the cookies will expand when baked. Bake the cookies for 9 to 11 minutes until pale golden, and then transfer them to a wrack to cool completely.

Hibiscus Mint Dunked Pineapple

Hibiscus Mint Dunked Pineapple
Hibiscus Mint Dunked Pineapple


1 whole Pineapple

1/2 C. Hibiscus Syrup

12 oz Sparkling Water, Hibiscus – LaCroix

2 – 3 whole Mint Leaves, optional


2 – 3 whole Mint Leaves, finely chopped

1 – 2 T. Hibiscus Syrup (click for recipe)

1/4 tsp Black Lava Salt


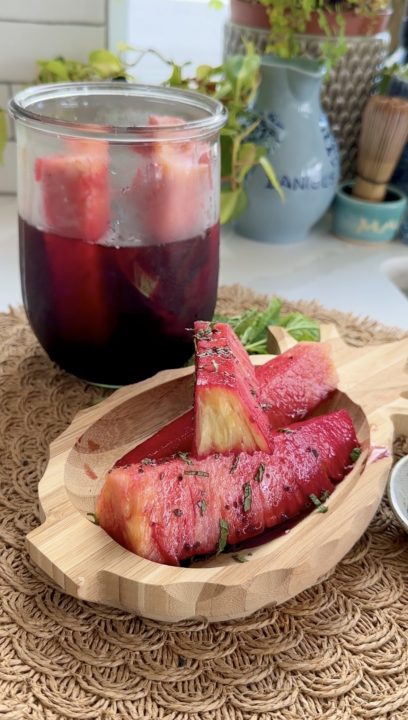
Prep the pineapple, ala peel, core and slice. Place in a container that has a good fitting lid. The size will vary depending on the size of your pineapple. Drizzle in hibiscus syrup and about half of the sparkling water. Add mint leaves and push in between pineapple spears, if using. Top off with more of the water to fill the container and cover pineapple. Secure the lid and place in the fridge. We let ours soak for 24 hours. When ready to serve, place spears on a plate or serving platter. Sprinkle with mint, drizzle on a bit more syrup & a lil’ sprinkle of lava salt (all optional) or dive in and enjoy right from the jar, refreshingly delicious!

Gram’s Hot Milk Cake

Gram’s Hot Milk Cake
Gram’s Hot Milk Cake


1 C. whole milk

8 T.  butter unsalted

2 and ¼ C. all-purpose flour

2 tsp. baking powder

1 tsp. salt

4 large eggs at room temperature

2 C. granulated sugar

½ T.  pure vanilla extract


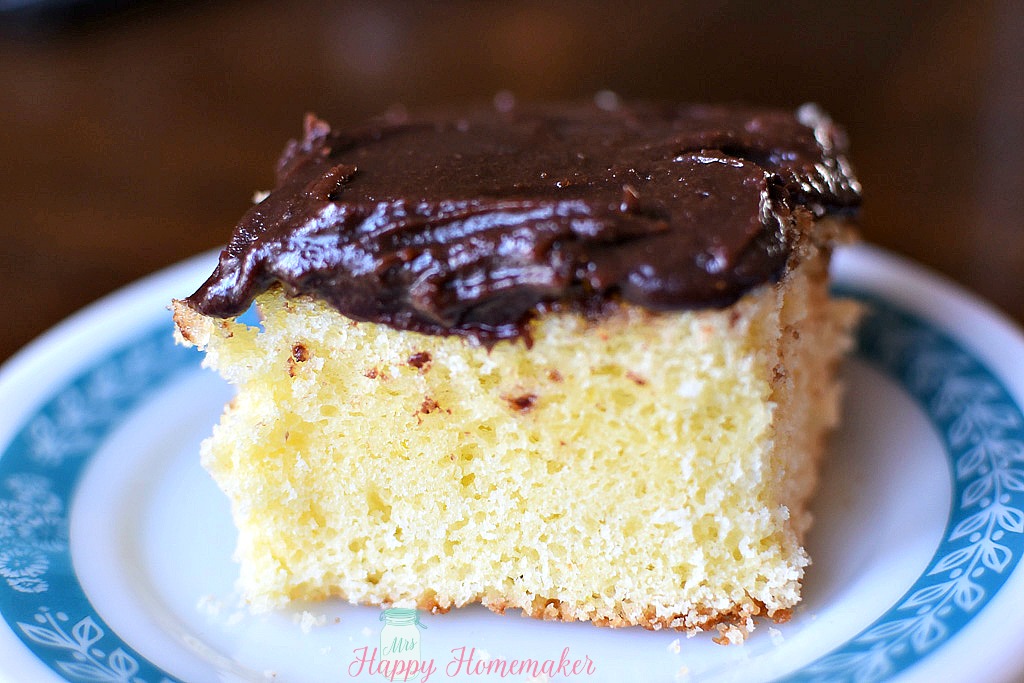
Preheat the oven to 350℉.Grease a 13×9 pan with solid vegetable shortening like Crisco. In a small saucepan, heat milk and butter until the butter is melted. Remove from heat. In a bowl combine the flour, baking powder, and salt, whisk to combine. Crack the eggs into the bowl of your electric mixer. Beat the eggs until thick and light yellow. Once thick, gradually add the sugar and beat until fluffy. Add vanilla. Turn the mixer to a slow speed and slowly add in the flour mixture. Mix until smooth. Slowly pour in the milk and melted butter. Mix until just combined. Pour the batter into your prepared cake pan. Bake for 25-30 minutes or until a toothpick inserted in the center comes out clean or with dry crumbs.  Allow the cake to cool completely on a wire rack. Once the cake is almost completely cooled. Start making the chocolate frosting. Spread the icing over the top of the cake. Serve and enjoy

Fluffy Peanut Butter Frosting

Fluffy Peanut Butter Frosting
Fluffy Peanut Butter Frosting


½ C. butter, at room temperature (or sub vegan butter)

½ C. natural creamy peanut butter (just peanuts + salt)

2 C. powdered sugar

1 tsp. vanilla

2-3 T. unsweetened almond milk (or milk of choice), to make the frosting creamy


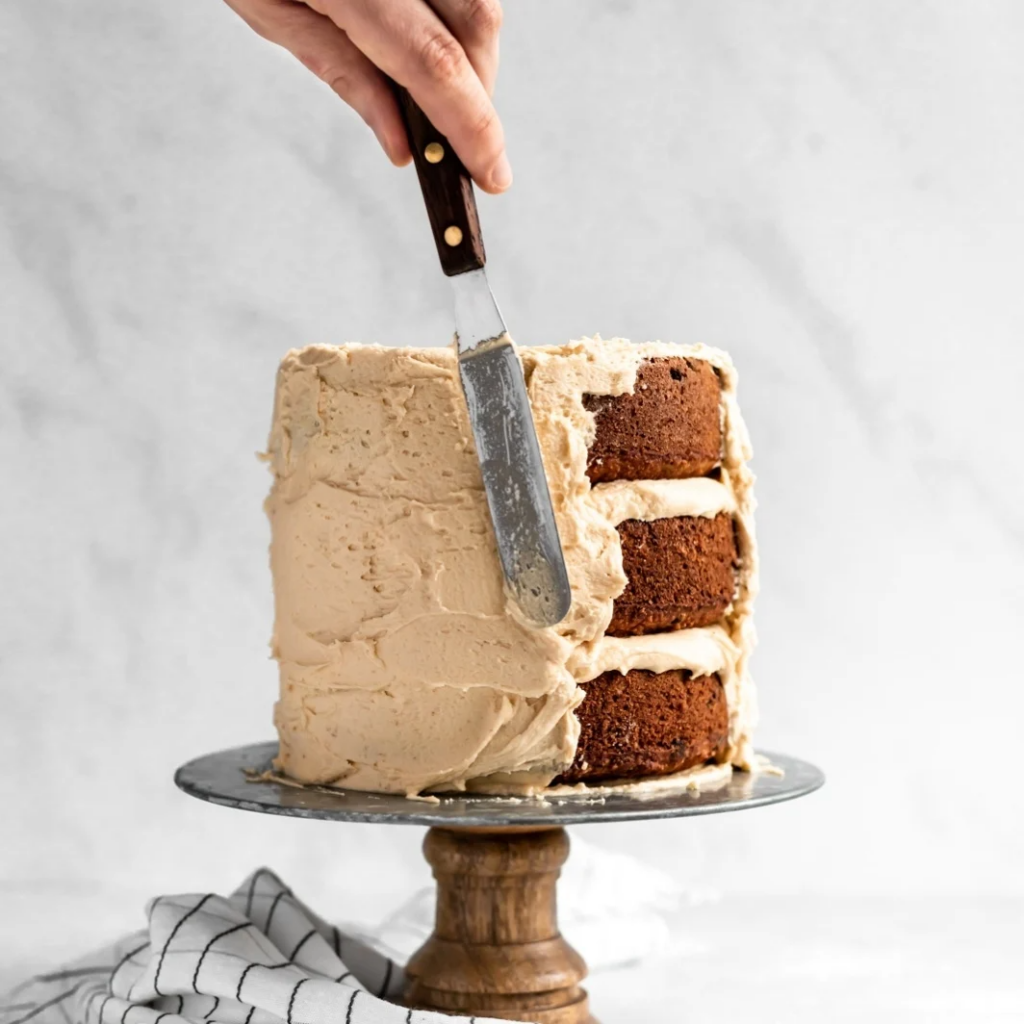
In the bowl of an electric mixer, add the softened butter and peanut butter and whip on high until light and fluffy. Add powdered sugar, vanilla and 2 T. almond milk. Beat slow at first, then increase speed to high and beat for approximately two minutes. Frosting should be nice and creamy, if you want it extra creamy, add another T. of almond milk and beat again.  Spread on your favorite cake, cupocakes, cookies, or whatever your heart desires!

Fluffy Vanilla Frosting

Fluffy Vanilla Frosting
Fluffy Vanilla Frosting


5 T. flour , plain/all purpose

1 cup white sugar , regular/granulated (can reduce to 1/2 cup, Note 1)

1 cup milk, warmed using any method , full fat best (but even 0% fat works)

1 1/2 tsp. vanilla extract

Pinch of salt

225g / 1 cup unsalted butter , softened but not too soft!

Chocolate Frosting option:

1/4 cup cocoa powder, unsweetened (Dutch processed best, if you can)


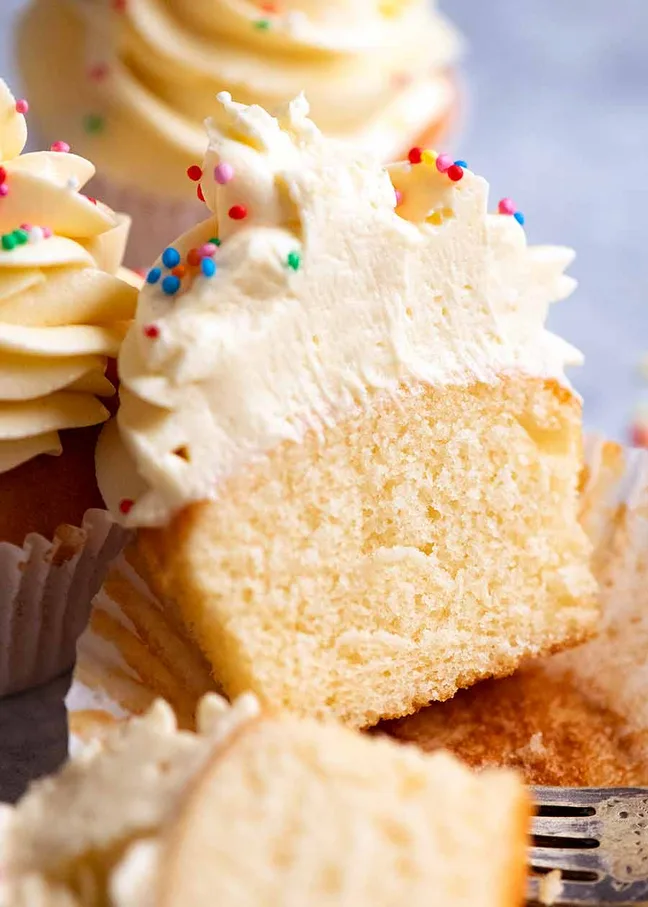
Place flour and sugar in a large saucepan over medium heat. Cook, stirring constantly, for 30 seconds. While whisking constantly, slowly pour the milk in (this ensure it’s lump free). As the milk gets hotter, it will start to thicken – stir constantly so the base doesn’t catch. Cook until the mixture thickens in a thick, dolloping custard – see video for texture. TIP: Thicker texture = thicker frosting texture but won’t make the frosting dense, it’s still fluffy and spreadable but it just makes it “sturdier” with sharper edges when piped. Remove from heat and scrape into a bowl. Cover with cling wrap, pressing down onto the surface to prevent a skin from forming. Cool completely (I leave on counter for 20 min or so then refrigerate 30 min to speed up but don’t let it get chilled, best at room temp to beat into butter). You can leave in fridge overnight but take it out 1 hour prior to using (to dechill – otherwise it won’t mix well with softened butter). Making the Fluffy Frosting: Place butter in a bowl and use either a handheld beater or stand mixer (with whisk attachment) to beat for 3 minutes until it’s smooth and changes from yellow to very pale yellow, almost white. Now start whipping in the Thickening Roux. On speed 5 (medium), start adding the thick roux one heaped T. at a time. Take about 1 minute to add it all. Once all added, add vanilla and salt, then whip for 2 to 3 minutes until you can see that it is still enough to hold peaks. Then it’s ready to use! Chocolate flavored option: Beat in the cocoa powder at the end, just until mixed through.


Note: Sugar – caster/superfine ok too. 1 cup sugar yields a sweet frosting but not overly sweet like buttercream which uses about 2.5 – 3 cups equivalent. Can reduce to as little as 1/2 cup – then this really does taste like a lightly sweetened whipped cream!

White Texas Sheet Cake

White Texas Sheet Cake
White Texas Sheet Cake


1 cup unsalted butter

1 cup water

2 cups all-purpose flour

1½ cups granulated sugar

1 teaspoon baking soda

¼ teaspoon table salt

½ cup sour cream

2 eggs lightly beaten

1 teaspoon clear vanilla extract


¾ cup unsalted butter cubed

½ cup milk

6 cups confectioners sugar

½ teaspoon almond extract

2 cups walnuts chopped and divided

Fresh berries for garnish optional (blueberries, strawberries, blackberries, raspberries)


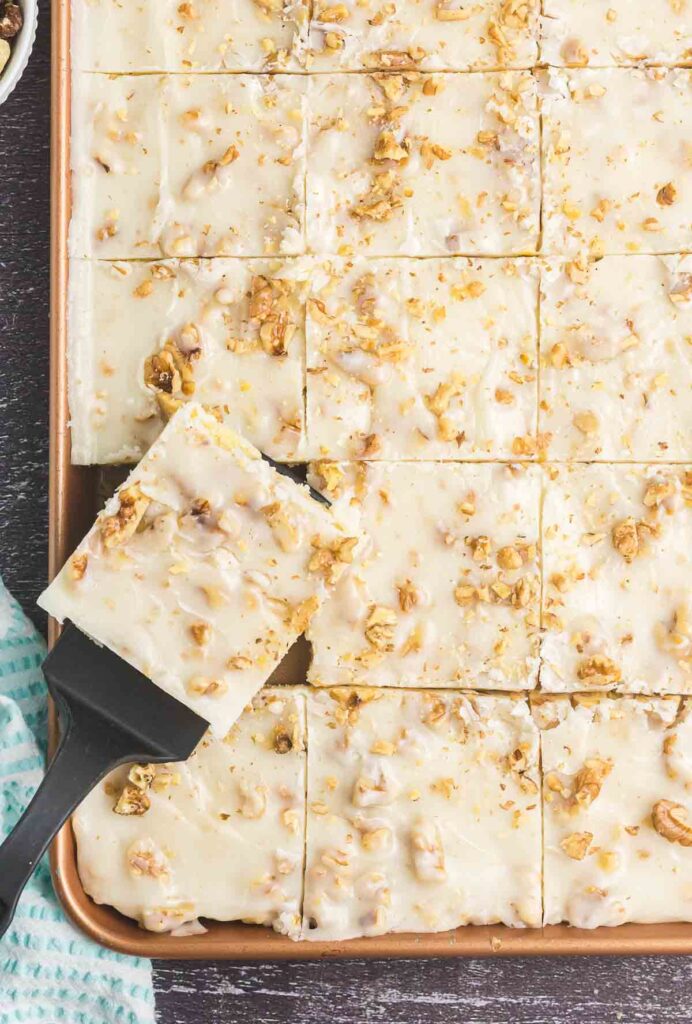
Preheat the oven to 350 degrees.  Grease an 18×13” (large jelly roll baking sheet) rimmed ½ sheet pan well with nonstick spray or shortening. a. Note: A large rimmed cookie sheet, or a jelly roll pan works best for this recipe. Using a 9×13 standard cookie sheet is too small. In a medium saucepan, melt the butter over medium/low heat. Once melted, whisk in the water then bring to a low boil for 30 seconds. Remove the saucepan from the heat and let cool for 2 minutes, stirring in intervals. In a large glass mixing bowl, combine the flour, granulated sugar, baking soda, and salt with a spoon or spatula and stir to combine. a. Note: Use a glass that can allow some* heat when the butter/water mixture is added. Pour the warmed butter mixture into the flour and mix by hand with a spatula. Once combined, add the sour cream, eggs, and vanilla. Continue mixing, and make sure to scrape the bottom and sides of the bowl. Pour the batter into the prepared pan and spread evenly with an offset spatula. Bake at 350 degrees for 12-15 minutes until the cake is cooked. While the cake is cooling, make the icing. In a medium saucepan over low heat, melt the butter. Once melted, add the milk and continue whisking until combined. Add 1 cup of confectioner sugar at a time, whisking each time until the sugar is combined. This process will take approximately 5 minutes. Add the almond extract with the final cup of powdered sugar, and then mix until smooth and blended.

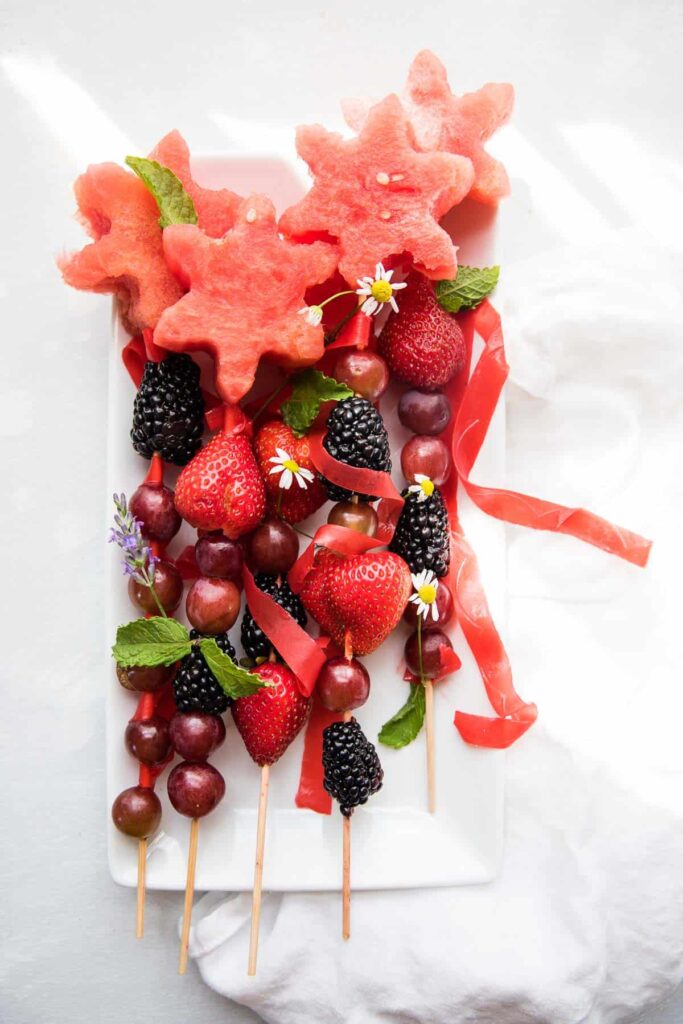
Magic Fairy Fruit Wands

Magic Fairy Fruit Wands
Magic Fairy Fruit Wands


1 small watermelon

1 pound red grapes

½ pound blackberries

½ pound strawberries

2 rolls fruit leather (we used Fruit by the Foot)

heavy duty skewers

star or heart-shaped cookie cutter


Cut the watermelon. Cut the watermelon into 1-inch rounds. Using a star cookie cutter, cut out pieces of watermelon and set them aside.  (Cut any leftover watermelon into cubes to snack on later.) Slice. Using a pizza cutter, slice the fruit leather into 10 to 12-inch pieces, then into two strings per piece. Build the wands. On each skewer, add pieces of berries and grapes leaving about 2 inches from the top.  Tie the fruit leather “strings” to the skewer in between the top of the berries and below the watermelon. Place the watermelon star on the top of the skewer without the top poking through. If making these for small kids, trim the pointed part of the skewer before placing the watermelon star on top. When selecting fruit for the wands, pick fruit with skin or that isn’t very ‘wet’ to the touch like strawberries, blackberries, blueberries, raspberries, and grapes. Use heavy-duty skewers or two thin skewers per wand as the watermelon toppers can get a little heavy once all the fruit is stacked on the skewer. If making these in advance, wait to add the fruit leather ribbons otherwise the moisture from the fruit will make them sticky and wet while the fruit wands sit.

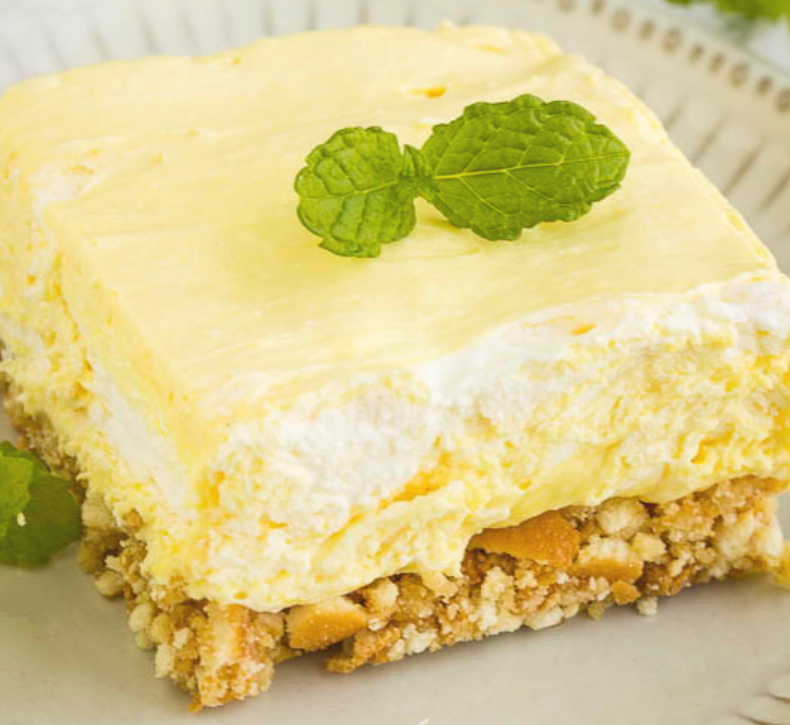
Lemon Curd Fluff Bars

Lemon Curd Fluff Bars
Lemon Curd Fluff Bars


12.7 -ounces lemon curd

8 -ounces cream cheese at room temperature

8 -ounces Cool Whip

1 and ½ cups vanilla wafers crushed

6 T.  butter melted


Spray a 9×9-inch baking pan or glass pan with non-stick spray or line with parchment paper. In a bowl, mix the crushed vanilla wafers and the melted butter. Press the mixture into your prepared pan. Refrigerate while you’re mixing the filling. With a hand mixer or stand mixer, beat the cream cheese until smooth. Add the lemon curd and mix until it’s well combined. Fold in the Whipped Cream (Cool Whip) carefully. Spoon the filling into your crust. Cover and refrigerate 1 hour before cutting and serving. Cover or store in an airtight container 4 days. The crust starts to get a little soggy after that.

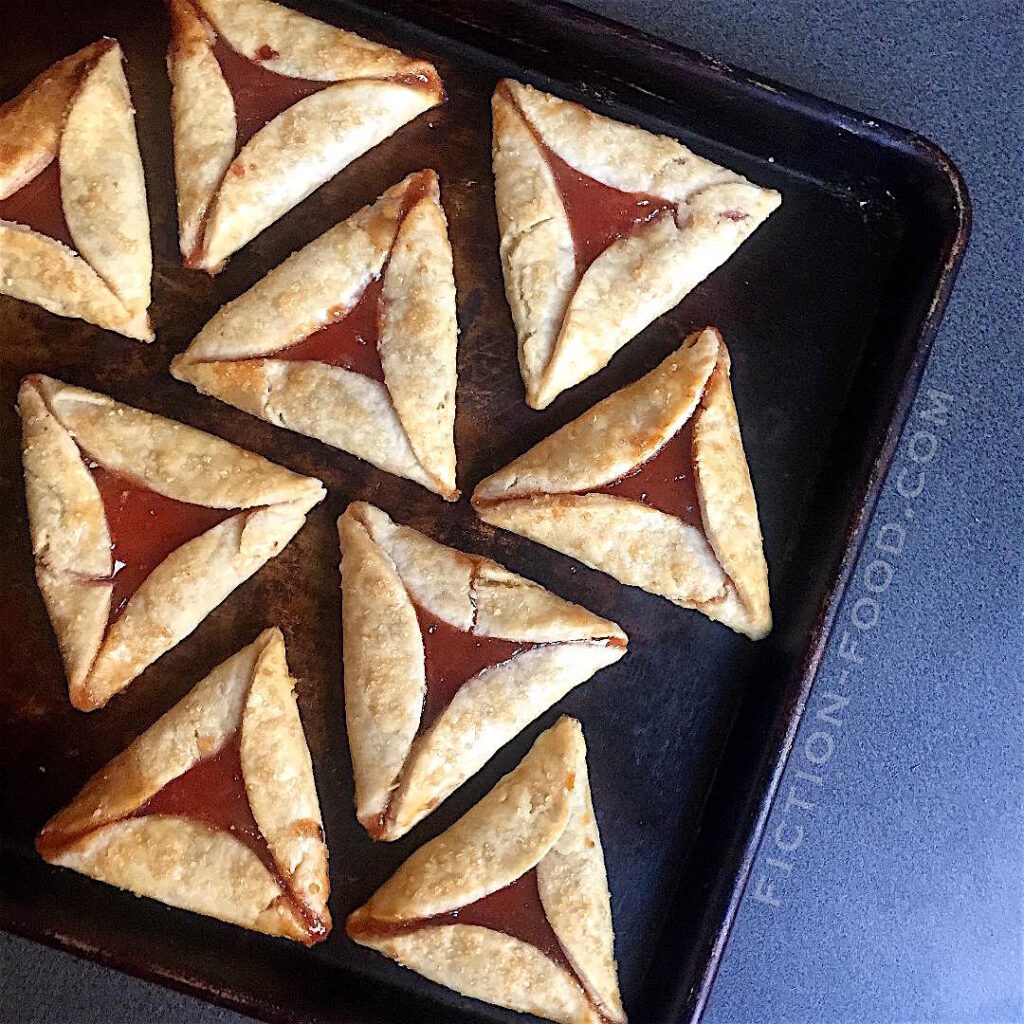
Persimmon Jelly Tarts

Persimmon Jelly Tarts

Persimmon Jelly Tarts


Persimmon Jelly

3 Cups Diced Ripe Persimmons

2 Cups Water

½ Cup Sugar

1 T. Lemon Juice

⅛ – ¼ tsp. Ground Cinnamon, to preference

Tart Crust

2½ Cups Flour

1 tsp. Sugar

1 tsp. Salt

¾ Cup (1½ sticks) Chilled Unsalted Butter, cut into small cubes

¼ Cup Ice Water

1 Egg, well beaten, for egg wash

Raw Sugar, for sprinkling (granulated white sugar is fine)


Persimmon Jelly: In a large pot on medium-high heat, bring the persimmons & water to a boil. Turn down to medium-low, cover, & simmer until the persimmons are soft. Mash well with a potato masher & simmer a bit longer until the mixture is very soft & pulpy. Strain the mixture very well through a fine mesh strainer or flour sack/cheese cloth. You should have about 1¾ – 2 cups of liquid. Pour the liquid back into the pot & bring to a boil on medium-high. Stir in the sugar, lemon juice, & cinnamon. Cook until the mixture thickens & measures 220ºF on a candy thermometer, stirring occasionally so it doesn’t stick to the bottom of the pot, & to deter the liquid from bubbling over. Pour the liquid into a shallow, heat resistant dish to help it cool quicker while you work on the crust. Tart Crust: In a large bowl whisk the flour, sugar, & salt. Using your fingers, rub in the cubed butter until the mixture is crumbly. Drizzle in the water & cut it in with the side of a spoon until the mixture just comes together in a shaggy dough. Mound the dough together & then split in half. Wrap each half in a large sheet of plastic wrap, flattening into discs about ½-inch thick. Chill in the fridge for about 30 minutes. Pre-heat your oven to 375ºF. Line a large baking tray with parchment paper. Remove 1 of the doughs from the fridge & roll to about ⅛-inch thickness (it will be crumbly to begin with but will soften up). Using an overturned bowl that is about 5-inches in diameter or a 5-inch diameter circle template cut from card-stock, cut out 6 discs from the dough & lay on the tray, re-rolling the dough as needed. Building & Baking: Spoon about 1 T. of the persimmon jelly into the center of each dough circle & spread to within ½-inch of the edges. Fold 3 sides of each disc towards the center to create a triangle, overlapping the edges slightly & leaving a triangle opening in the center. Pinch the corners well to close. Brush the tarts lightly with the beaten egg & sprinkle with sugar. Bake on the middle oven rack for about 20-25 minutes, or until golden & the jelly center is bubbling. Remove to a cooling rack. Repeat the process with the rest of the dough & jelly. Store in an airtight container. Makes about 12 tarts.

No-Bake Minions Cookies

No-Bake Minions Cookies
No-Bake Minions Cookies


Pepperidge Farm Milano Cookies (any flavor)

Yellow candy melts

Blue candy melts

Black candy melts

Small candy eyes

Large candy eye


Line a baking sheet with parchment paper or wax paper. Melt the yellow candy melts according to the package instructions. Dip one flat side of each cookie into the candy melts then place it on the baking sheet. Refrigerate the cookies for 5 minutes until the candy melt has fully hardened. Melt the blue candy melts according to the package instructions. Dip the lower one-third of each cookie into the candy melts then return it to the baking sheet. Transfer a portion of the melted candy melts into a piping bag, snip off the tip and pipe the straps of the overalls. Refrigerate the cookies for 5 minutes until the candy melt has fully hardened. Melt the black candy melts according to the package instructions. Transfer the candy melts to a piping bag, snip off the tip and pipe a variation of mouths (smiling, frowning, scowling, etc.) onto the cookies above the overalls. Next, pipe a variation of hairstyles at the tops of the cookies, then pipe a line (below the hair) across each cookie and immediately place two small eyes or one large eye on each cookie. Refrigerate the cookies for 5 minutes until the candy melts have fully hardened then serve or use as a cupcake topper.

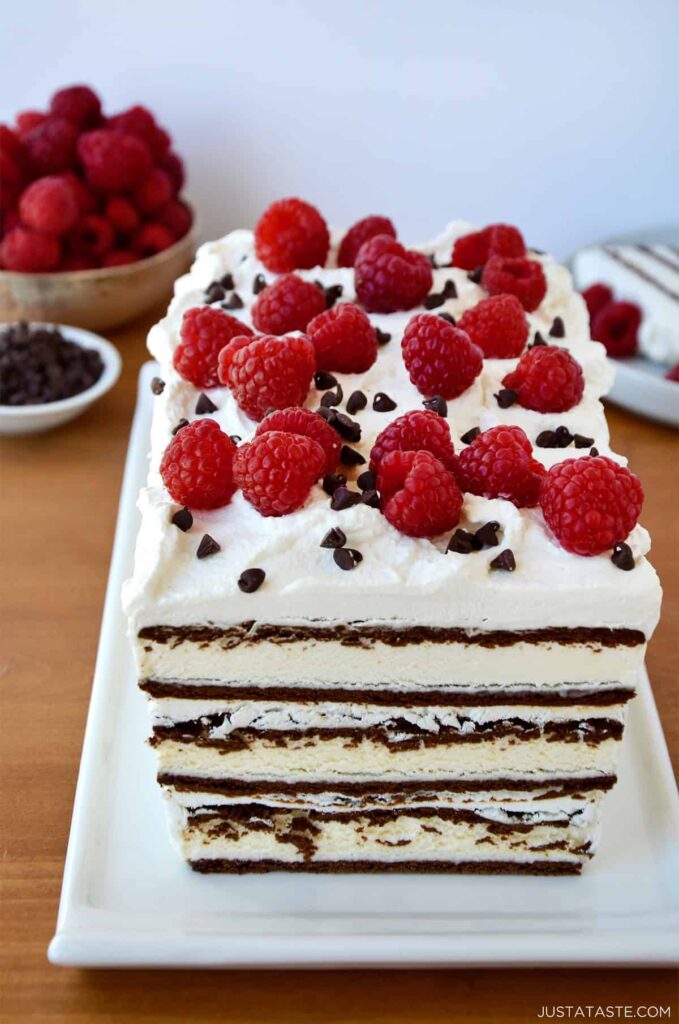
Ice Cream Sandwich Cake

Ice Cream Sandwich Cake
Ice Cream Sandwich Cake


1 1/2 cups heavy whipping cream, cold

1/4 cup confectioners’ sugar

1 T.  vanilla extract

15 ice cream sandwiches

1 1/2 cups raspberries

Chocolate chips, for garnishing


Line a 9×5-inch loaf pan with plastic wrap so that it hangs over on all sides. In the bowl of a stand mixer fitted with the whisk attachment, beat the heavy cream, confectioners’ sugar and vanilla extract on medium-high speed until stiff peaks form. (Alternately, use a handheld beater.) Unwrap the ice cream sandwiches and arrange them in a single layer on the bottom of the loaf pan, trimming them as needed to fit the shape of the pan. Top the ice cream sandwiches with a third of the whipped cream then add another layer of ice cream sandwiches on top and press them down lightly. Add another third of the whipped cream on top then another layer of ice cream sandwiches followed up the final third of whipped cream. Cover the pan securely with plastic wrap and freeze the cake for a minimum of 2 hours or until it is firm. When ready to serve, use the plastic wrap overhangs to lift the cake out of the pan. Top it with the raspberries and chocolate chips then slice and serve immediately.

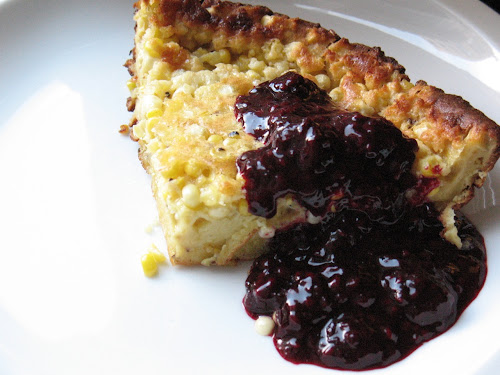
Corn Pancake with Blackberry Sauce

Corn Pancake with Blackberry Sauce
Corn Pancake with Blackberry Sauce


4 T. unsalted butter

1/2 cup flour

1/4 cup fine cornmeal

5 eggs

1/3 cup whole milk

2 T. honey

1/8 tsp. salt

1/2 tsp. fresh-ground black pepper

Corn kernels from 2 ears of corn (about 1 cup)

2 cups blackberries

3 T. sugar


Preheat oven to 425 F. Add butter to a 2-quart gratin or casserole dish and bake until butter melts and starts to bubble, about 7 minutes. Meanwhile, in a large bowl, whisk together flour and cornmeal. In a separate bowl, whisk together the eggs and milk. Pour into the bowl with the dry ingredients and stir to combine. Whisk in the honey, salt and pepper. Stir in the corn kernels. Remove the dish from the oven and add the pancake batter. Bake until the pancake is well browned around the edges, puffed up and golden on top, about 20-30 minutes. While the pancake bakes, make the blackberry sauce. Heat a medium saucepan over medium heat with the blackberries and sugar. Lower heat a bit and simmer ingredients until the blackberries have broken down into a syrupy sauce. Serve the pancake in wedges topped with blackberry sauce.

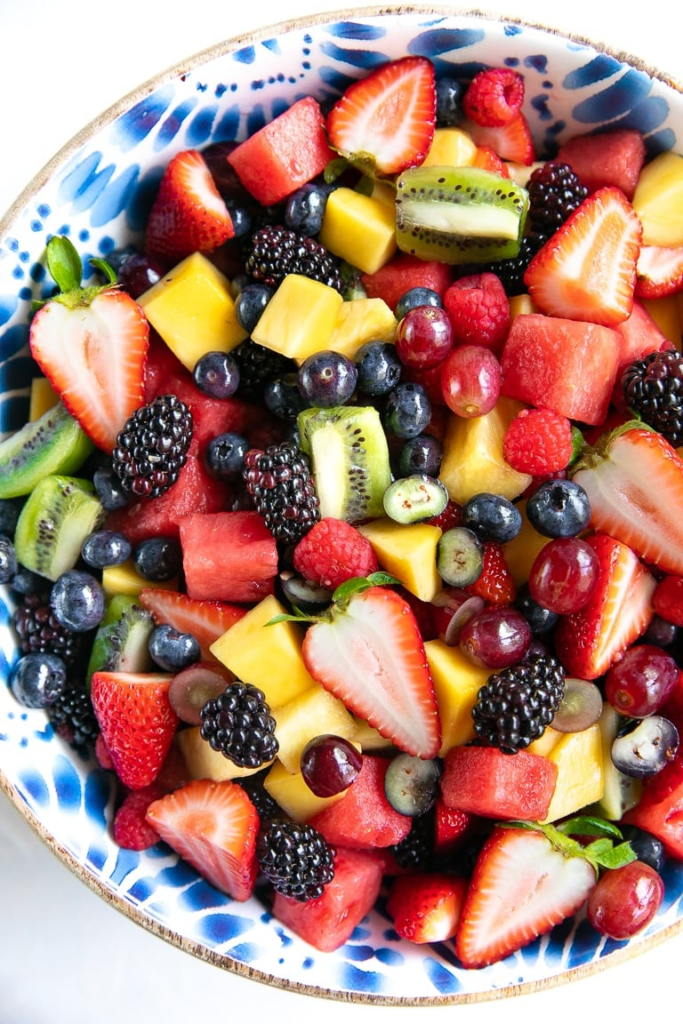
Easy Fruit Salad

Easy Fruit Salad

Easy Fruit Salad


1 large orange, juiced

1 lemon, juiced

2 cups seedless red grapes

1 pineapple, cored and chopped into chunks

4 mango, peeled, cored, cubed

6 ounces blueberries

2 pounds strawberries, halved

6 cups watermelon, cubed

12 ounces blackberries

5 kiwi, peeled and quartered

6 ounces raspberries, (see notes)


Prepare the orange juice “dressing”. Add the fresh orange just and lemon juice to a small bowl. Mix to combine and set aside. Prepare the fruit. Prepare and chop fruit – take care not to chop fruit into pieces that are too large, or too small. Of they are too small, they will turn mushy faster, and will not taste as fresh should you end up with leftovers. Mix. To a large mixing bowl add the more “sturdy” fruit first (grapes, pineapple, mango, blueberries, and strawberries). Drizzle with half the orange juice mixture and gently toss to combine. Next, add the remaining fruit except for the raspberries (see notes). Drizzle with the remaining orange juice mixture and gently toss to combine. Serve. Add the raspberries to the bowl and serve immediately, or cover with plastic wrap or a tight-fitting lid and store in the refrigerator until ready to enjoy. Note: Raspberries and other overly-ripe fruit do not hold up well when mixed around a bunch. For these fruits, I recommend adding them at the very end or simply placing them right on top of the bowl.

Blackberry Upside-Down Cake:

Blackberry Upside-Down Cake:
Blackberry Upside-Down Cake:


1 cup all-purpose flour

3/4 cup granulated sugar

1 1/2 tsp. baking powder

1/4 tsp. salt

1 egg, room temperature

1/2 cup milk

1/4 cup butter, room temperature

1/4 tsp. lemon zest, grated

1 tsp. lemon juice, fresh-squeezed

1 tsp. pure vanilla extract

Blackberry Topping:

1/4 cup butter

1/2 cup firmly-packed brown sugar

1 1/2 tsp. lemon zest (yellow rind), grated

1/4 cup nuts of your choice, chopped

3 cups fresh blackberries

Instructions

Blackberry Upside-Down Cake Instructions:

Preheat oven to 350 degrees F.


Prepare Blackberry Topping (see below); set aside.


In a large bowl, combine flour, sugar, baking powder, and salt.  Add egg, milk, and butter; beat 2 minutes.  Add lemon zest, lemon juice, and vanilla extract; beat 2 minutes.  Pour over blackberries in frying pan, spreading evenly. Bake 40 to 50 minutes or until a toothpick inserted in center comes out clean.   Cake is done when the internal temperature registers approximately 190 to 200 degrees F. on your cooking thermometer. Remove from oven and cool 5 minutes on a wire rack. Run knife around edge of pan to loosen; cover with a cake plate and invert.  Serve warm.

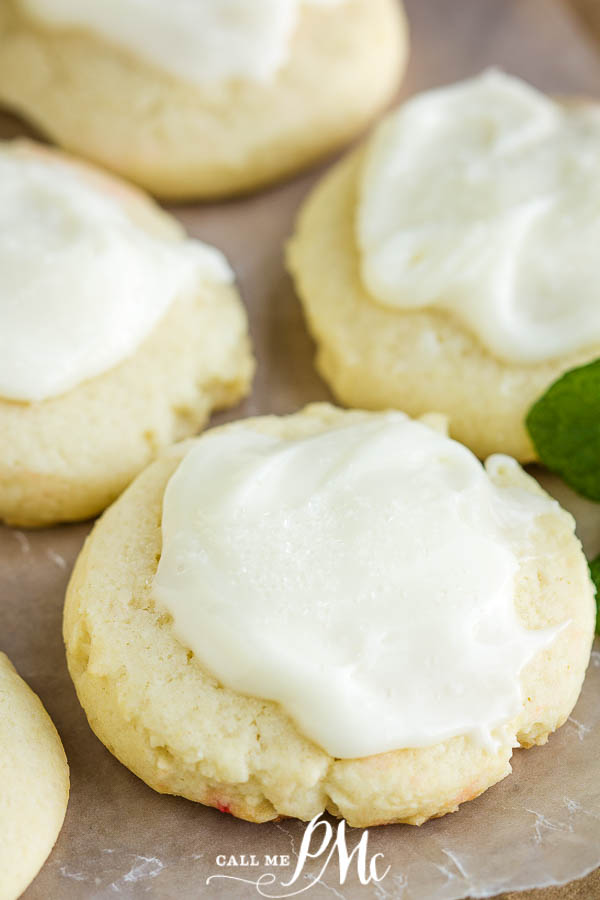
Soft Amish Sugar Cookies

Soft Amish Sugar Cookies
Soft Amish Sugar Cookies


2 cups butter 1 cup softened to room temperature and 1 cup melted

1 cup granulated sugar

1 cup powdered sugar

2 large eggs at room temp

2 tsp. almond extract or vanilla extract

4 and ½ cups all-purpose flour

1 tsp. baking soda

1 tsp. cream of tartar


2 T.  butter at room temp

2 T.  cream cheese at room temp

1 to 2 T.  heavy whipping cream can substitute whole milk

½ tsp. almond extract

2 to 2.5 cups powdered sugar (aka confectioners) sifted, then measured


In the bowl of your electric mixer, beat the butter and sugars until combined. Stop mixer and scrape sides, combine again. Beat in eggs and vanilla. Stop the mixer and scrape sides, combine again. In another large bowl, whisk together flour, baking soda, and cream of tartar. In two additions, add flour mixture to the butter mixture, beating until just combined. Do not overmix. Chill dough for at least one hour before baking. Line baking sheets with parchment paper or silicone baking mat. Using a spring-release scoop drop onto a silicone mat on a sheet pan. (My spring release scoop holds 1 T.  of dough.) Press dough slightly flat with your palm or the bottom of a glass. Bake at 350 for 11 to 13 minutes, or until edges and bottoms are very lightly browned. Cool for 2 minutes on the sheet pan before moving to a wire rack to cool completely. These are good for 5 days stored in an airtight container on the counter before they start drying out. If you frost with cream cheese frosting, you’ll need to store them in the refrigerator. This cookie dough freezes great!  Beat the butter and cream cheese until smooth.

Add 1 cup of the sifted powdered sugar, whipping cream, and extract and mix until creamy. Slowly add the remaining powdered sugar and mix until smooth. Frost cookies and serve. Store in an airtight container in the refrigerator

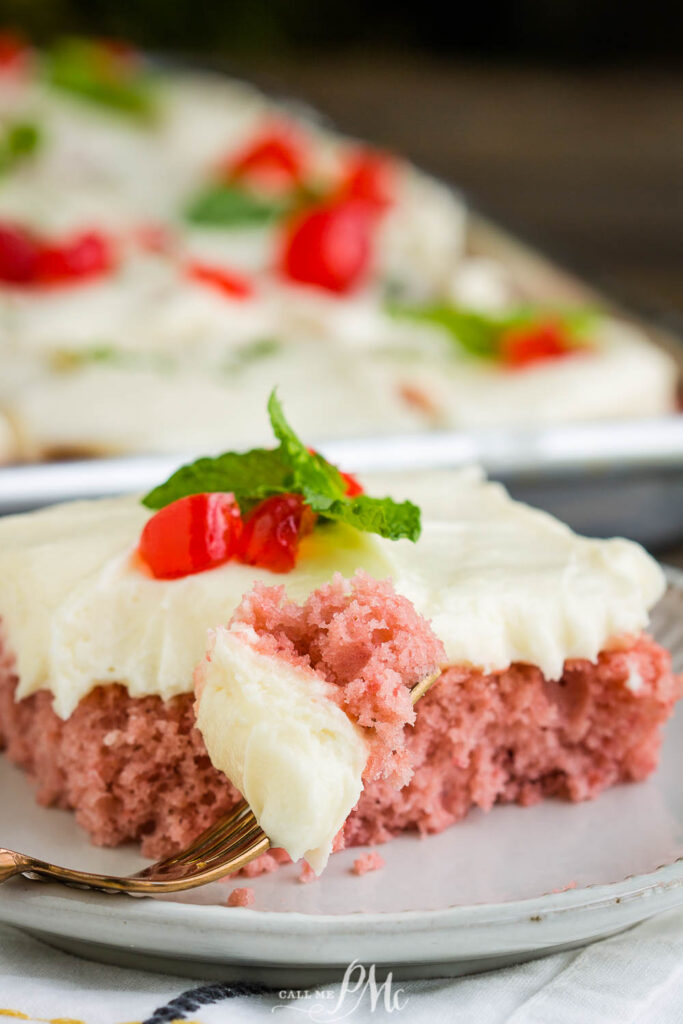
Cherry Sheet Cake

Cherry Sheet Cake

Cherry Sheet Cake


15.25 ounce box white cake mix

21 ounce can cherry pie filling

4 large eggs


½ cup butter at room temperature

8 ounces cream cheese at room temperature

4 to 5 cups powdered sugar (aka confectioners) sifted

1 to 2 T.  heavy whipping cream

2 tsp. pure vanilla extract use clear extract to prevent discoloration


Spray a 12×17-inch sheet pan or a 9x-13-inch cake pan with nonstick spray. Preheat your oven to 350°F.

Pour the cake mix into a large bowl. Puree the cherry pie filling and pour it into the bowl with the cake mix.

Break your eggs into a separate bowl and whisk. Pour the whisked eggs in with the cake mix and pie filling. Stir to combine. Pour the batter into your prepared pan and spread evenly. For the sheet pan, it will bake 20 to 24 minutes. For the 9×13-inch cake pan, it will take 26 to 29 minutes. After it has cooked, allow the cake to cool completely before frosting. If you use the cream cheese frosting recipe that I provided, you’ll need to store the cake in the refrigerator. It’ll be good for 5 to 7 days in the fridge.

Jell-o Egg Jigglers

Jell-o Egg Jigglers
Jell-o Egg Jigglers


JELL-O EGG JIGGLERS Egg Mold

1 ½ C. boiling water

1 (6 oz) pkg Jell-O gelatin, any flavor


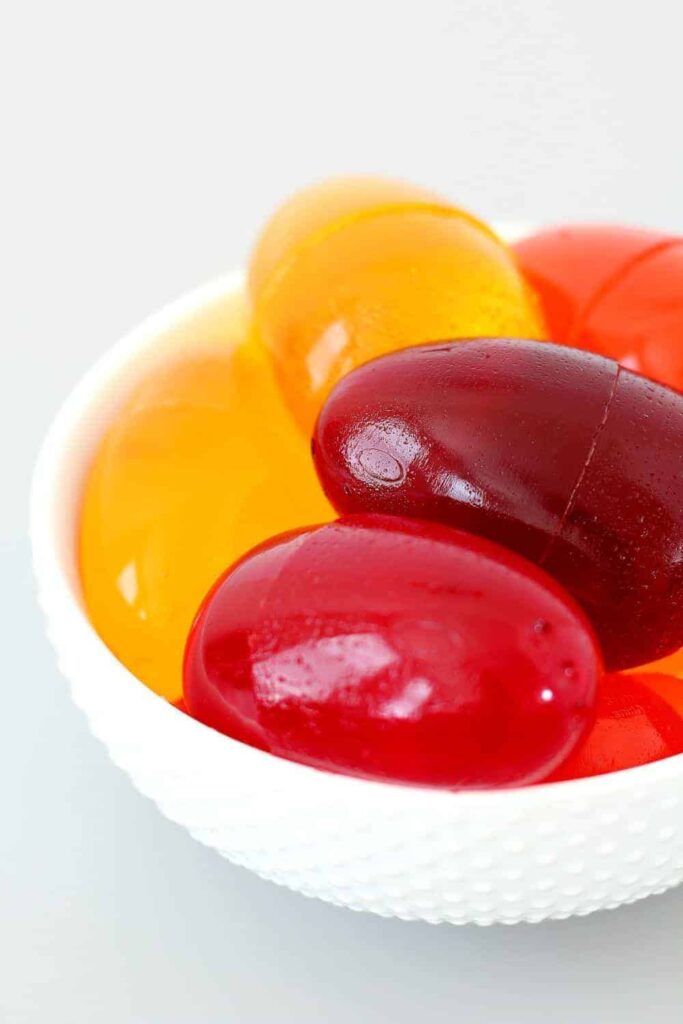
Spray insides of both sides of egg mold and along rims with cooking spray. Close mold, matching up rims of egg halves. Snap each of the 6 individual egg halves together until each egg is firmly sealed. Inspect each egg to make sure it is closed and sealed. Place mold, fill-side up, on tray. Add boiling water to gelatin mix in large bowl; stir 3 min. until completely dissolved. Pour into measuring C. with pour spout. Immediately pour into mold through fill-holes until each egg is filled just to top of egg shape. (Any remaining gelatin mixture can be poured into custard C..) Refrigerate 3 hours or until firm. Open mold using a dull flat knife to gently pry between the halves of each egg. (Do not pull on the handle.) Turn mold over and shake gently to unmold eggs. Keep refrigerated.

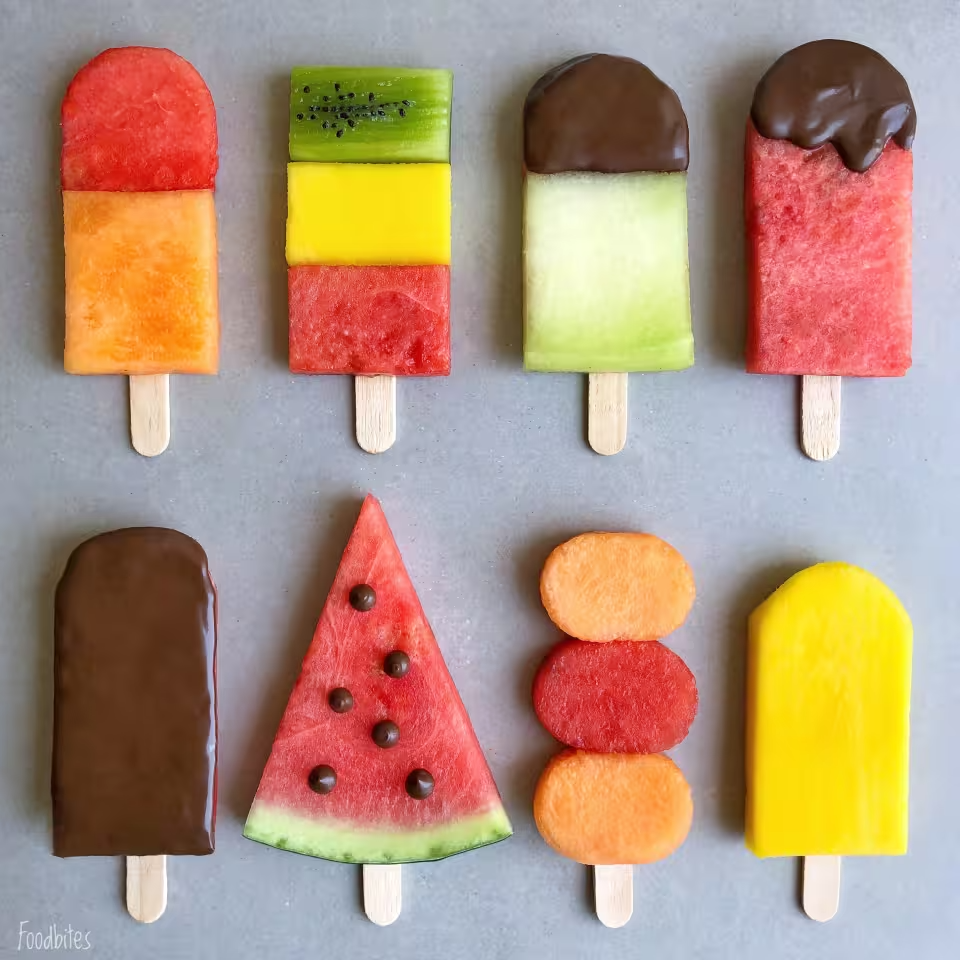
Fruit Ice Lollies

Fruit Ice Lollies

Fruit Ice Lollies


1 kiwi

2 slices of watermelons

1 slice of cantaloupe

100 grams dark chocolate

1 slice of Galia melon

2 slices of mango

piping utensil / bag

ice lolly cookie cutter

rectangular cookie cutter

oval cookie cutter

ice lolly sticks


Watermelon and Cantaloupe Lolly:

  1. Cut slices of watermelon and cantaloupe. Try to ensure they are the same thickness.
  2. Use the ice lolly cutter to cut the top piece of watermelon, as well as the bottom piece of cantaloupe. You may need to trim the midsection straight so they fit together.
  3. Stick them onto a lolly stick.


Kiwi, Mango and Watermelon Lolly:

  1. Slice the fruit in somewhat equal pieces.
  2. Use the rectangular cutter to trim three equal rectangles.
  3. Stack them on top of each other and secure with an ice lolly.


Galia / Watermelon and Chocolate Lolly:

  1. Melt the dark chocolate.
  2. Use the ice lolly cutter to cut the melon and insert the lolly stick.
  3. Dry the melon with kitchen towel to ensure that the dark chocolate will stick.
  4. While holding onto the stick, dip the tip of the melon into the chocolate. Lay it on baking parchment and allow it to set.
  5. For the watermelon and dark chocolate version, dip the watermelon into the chocolate twice, and use a toothpick to scallop the chocolate a bit.


Watermelon and Dark Chocolate:

  1. Slice the watermelon.
  2. Trim it with the ice lolly cutter.
  3. Insert the ice lolly stick.
  4. Dab the melon dry with a kitchen towel.
  5. Melt the dark chocolate.
  6. Immerse the watermelon into melted chocolate entirely (you can hold onto the stick).
  7. Place the lolly onto baking parchment and allow to set.


Watermelon Lolly:

  1. Cut a slice of watermelon into a wedge, as pictured.
  2. Insert the ice lolly stick.
  3. Dab the melon dry with a kitchen towel.
  4. Top with dark chocolate chips or blobs.


Cantaloupe & Watermelon Lolly:

  1. Use the oval cutter to create equal-sized watermelon and cantaloupe pieces.
  2. Place onto an ice lolly stick.


Mango Lolly:

  1. Cut the mango using the ice lolly cutter.
  2. Insert an ice lolly stick.

Notes

If you have any leftover fruit, save all the odd-shaped bits in a freezer bag for your next smoothie, or chop it up and make a mini fruit salad.

Nutter Butter Pie

Nutter Butter Pie

Nutter Butter Pie


1 pint heavy whipping cream

2 T. s. powdered sugar

1 tsp. cream of tartar

16 oz. peanut butter

16 oz. cream cheese frosting

1 nine-inch pie shell, par-baked

4 T. s. chopped chocolate

Nutter Butter cookies for garnish and snacking


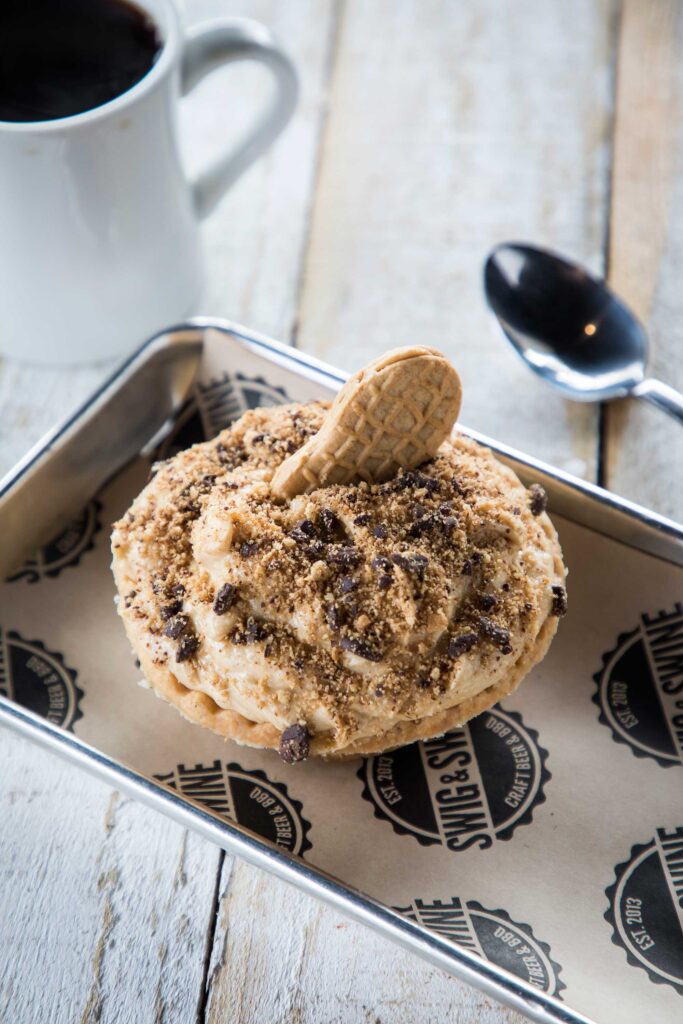
Whip cream, powdered sugar, and cream of tartar to stiff peaks. Set aside. In another bowl, combine peanut butter and cream cheese frosting until incorporated. Fold in whipped cream mix. Fill pie shell. Sprinkle chocolate and crumble some of the cookies over top and garnish with whole cookies. Refrigerate until chilled. When ready to serve, slice and plate, and let sit at room temperature for a few minutes before serving.

Strawberry-Lemon Bars

Strawberry-Lemon Bars
Strawberry-Lemon Bars


¾ cup butter, softened to room temperature

½ cup confectioners’ sugar

2 cups all-purpose flour

¼ tsp. salt


1 cup fresh lemon juice

3 T. lemon zest

¾ cup chopped fresh strawberries

1 ¾ cups granulated sugar

6 large eggs


½ cup all-purpose flour

½ tsp. baking powder

¼ tsp. salt


Confectioners’ sugar

Chopped strawberries

Pinch of sugar

Fresh mint leaves


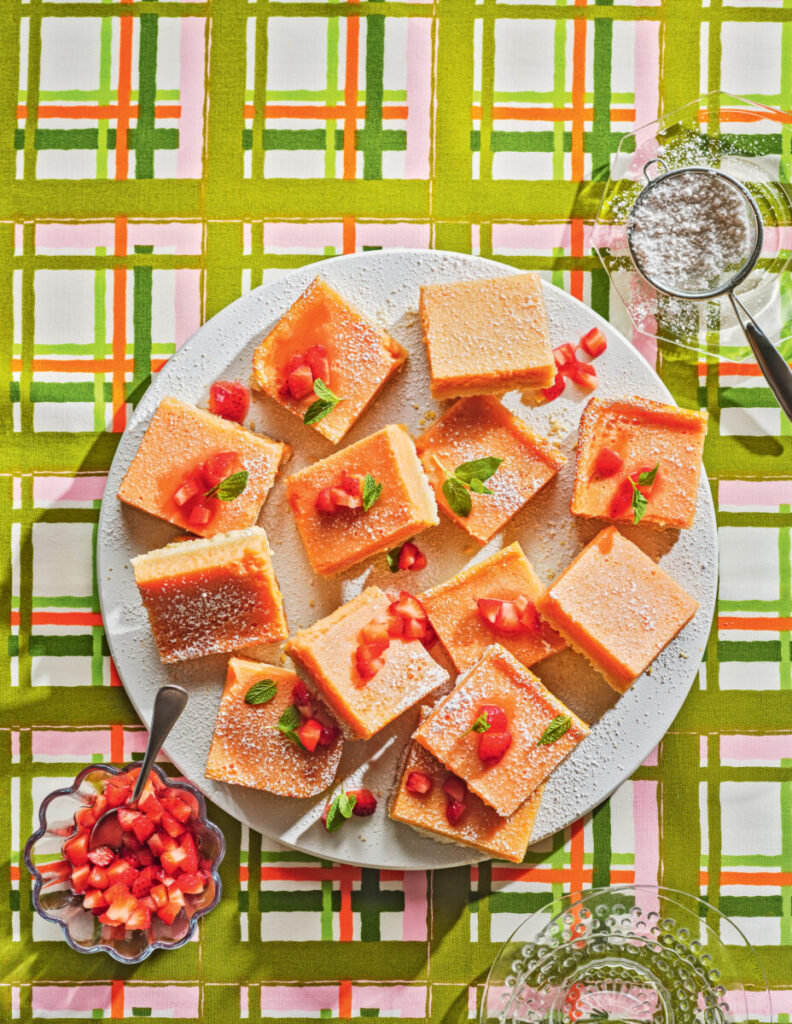
Preheat oven to 325°F. Spray the bottom and sides of a 9-by-13-inch pan lightly with cooking spray. Take a sheet of parchment paper longer than the pan and press it lengthwise onto the bottom. Crumpling the paper and smoothing it out before fitting it into the pan can help. There should be enough parchment hanging over the edges to easily lift the dessert from the pan. Make the crust: Using a stand mixer or a medium bowl and a hand mixer, cream the butter and sugar together until fluffy. Add flour and salt, and mix just until the dough comes together. Scoop the mixture into the pan and gently press it into an even layer. (A little flour on your fingers helps.) Bake for 25 to 30 minutes, just until it turns golden brown. Set the crust aside to cool. Reduce oven to 300°F. Make the filling: Combine lemon juice, zest, strawberries, and sugar in a blender and blend until smooth. Add an egg, blend until smooth, then repeat with each egg, making sure each is incorporated before you add the next. Add flour, baking powder, and salt, and blend until smooth. Pour the filling onto the shortbread crust and bake for about 40 minutes or until the center of the filling is set. Cool completely, then chill in the refrigerator for at least 4 hours. To serve: Use the parchment to lift the dessert onto a cutting board. Using a sharp knife (and a ruler if you really want to be precise), cut into 12 or 24 squares and arrange the bars on a platter. Dust with confectioners’ sugar. Toss chopped berries in a small amount of sugar. Garnish each bar with chopped berries and mint leaves.

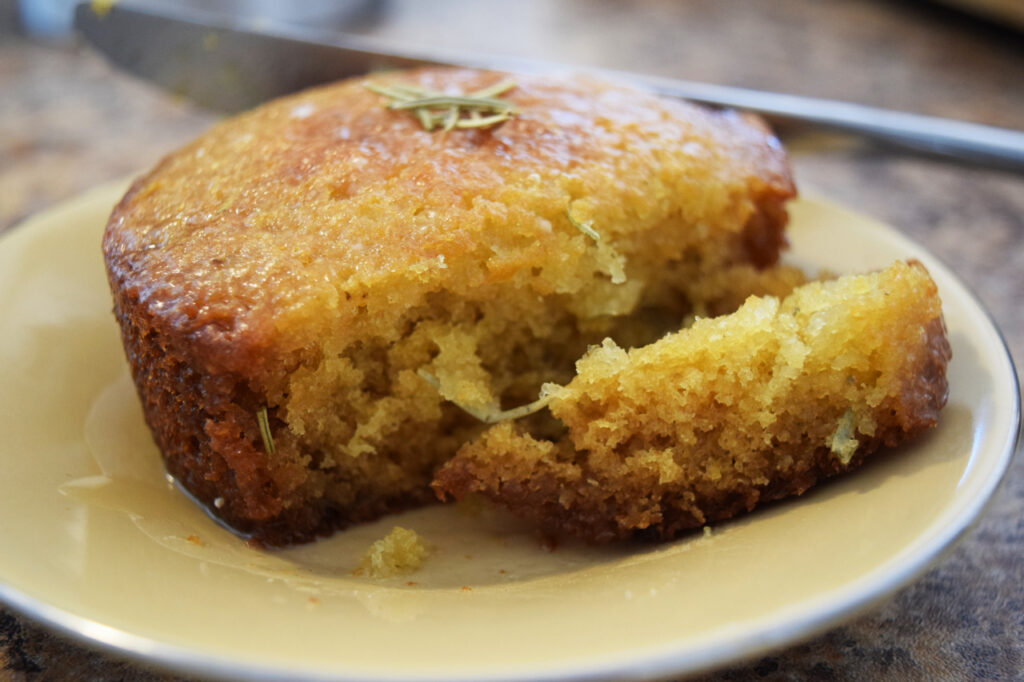
Ostara Cakes

Ostara Cakes

Ostara Cakes


¾ Cup All-Purpose Flour

¾ Tsp Baking Soda

A Dash of Salt

One Egg

1/3 Cup Sugar

3 T. Honey

Zest and Juice of One Lemon (Juice should be about ¼ cup)

6 T. Unsalted Butter

¼ Cup Milk

1 T. Rosemary

¼ Cup Powdered Sugar (give or take a few T.).


Preheat your oven to 350 F and oil/butter three ramekins. Set aside. Whisk together honey, lemon zest, sugar, and butter (melted). Once combined, crack and whisk in the egg, followed by the ¼ Cup of milk and half your lemon juice. In a separate bowl, sift together the flour, baking soda, and salt. Stir in the rosemary.  Make a well in the middle of the dry ingredients and pour your wet mixture into the center. Gently fold to combine. Equally divide the batter among the ramekins. Before placing in the oven, hold your hands above the ramekins and recite the following: I imbue these cakes with the energy of new beginnings. May I grow and flourish. May I nurture nature as it has nurtured me. Place the cakes in the oven for 20 minutes at 350 F. While the cakes bake, whisk together the powdered sugar and the remaining lemon juice. This will be your glaze.  Once the cakes have baked through, remove them from the ramekins and coat in the glaze as well as a drizzle of honey.