Browsed by
Category: Vegetables

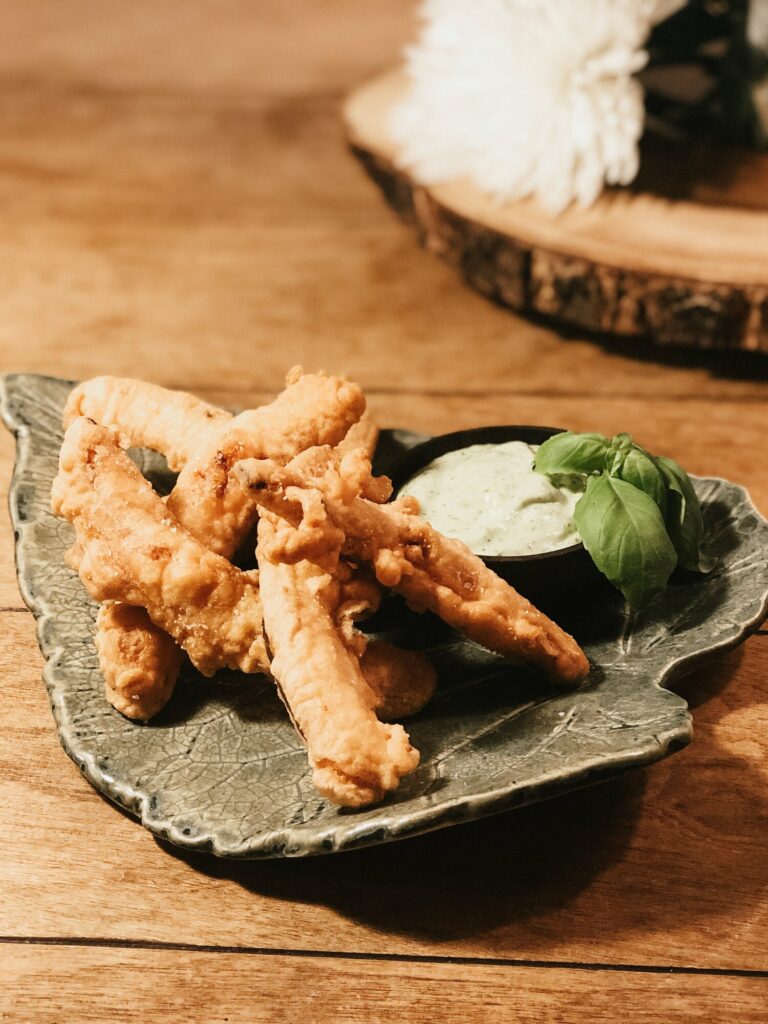
Tempura Pumpkin with Basil Aïoli

Tempura Pumpkin with Basil Aïoli

Tempura Pumpkin with Basil Aïoli


1 C. basil leaves, packed tight

1–2 cloves of garlic, peeled and grated on a microplane

3 egg yolks

2 T. Dijon mustard

1 T. apple cider vinegar

1 T. lemon juice

1 C. neutral oil (safflower, sunflower or avocado work well)


Roughly chop the basil leaves and add them to your blender (or food processor, which works just fine). Add the garlic, egg yolks, Dijon, vinegar and lemon juice and blend until incorporated. Scrape down the sides of the blender to make sure everything is evenly mixed.


While the blender is running, dribble in the oil slowly in the thinnest stream possible. It’s important not to dump the oil in all at once, because the gradual addition of oil to the egg and mustard mixture is what will emulsify the sauce into an aïoli.


Once all of the oil has been incorporated, season with salt to taste and scrape out the finished aïoli with a rubber spatula. This condiment is delicious on everything from sandwiches to shellfish, and we especially love it with tempura veggies.


For the tempura

Serves 2–4


1 medium sized pumpkin or squash

2 large eggs, cold

2 C. flour, sifted

2 C. water with several ice cubes added

Oil for frying


Fill a large, thick bottomed pot with 4” of oil. Pick a pot that has high sides and a nice heavy base. This will regulate the heating and temperature of the oil, which makes for more even frying. Set this pot over medium heat until the oil reaches a temperature of 375°F. This takes a few minutes.  Meanwhile, prepare the pumpkin for frying. Cut the entire pumpkin in half, scrape out the seeds and guts until the flesh is smooth and uniform. Remove the outer skin with a vegetable peeler. Cut the pumpkin pieces in half vertically, making four quarters of a sphere. Slice the quarters again vertically into long, ½-inch thick strips. Keep in mind not to cut the strips too thick, or they will take too long to cook fully in the oil. Continue until you have cut the entire pumpkin into strips of the same thickness. Due to the curvature of the fruit, some strips will be longer than others—this is fine, as long as they are all relatively the same thickness.  Set up a “drop zone”, or a place where the pumpkin will cool and rest once it is removed from the oil, like a wire rack placed over a sheet tray, or a large bowl or dish lined with paper towels.  Place a long-handled metal slotted spoon or “spider” strainer near the heating pot of oil. When the oil reaches the proper temperature, crack the eggs into a deep mixing bowl. Whisk until homogenous. Add the ice water and mix again, then add the flour. Mix, gently, trying to prevent too many air bubbles from forming. Some small clumps are good, so don’t over mix. The less you agitate the batter, the better. (Chopsticks are a better mixing tool than a whisk.) Once everything is combined, drop in a handful of your pumpkin sticks. Coat them evenly with the batter, and then using tongs (or chopsticks), remove them from the bowl and drop them into the oil one by one. Once this batch of pumpkin has been added to the oil, place the tempura batter in the fridge to keep cold while they cook.  The pumpkin slices should float right to the top, but depending on the water content of the pumpkin, some may sink to the bottom of the pot. This is fine, just give them a slight nudge off the bottom and they should rise right up. Make sure to adjust the heat of the oil so that it stays at 375°F. Adding lots of ice cold batter and veggies will definitely drop the temperature significantly, so adjust accordingly.  Once the slices are golden brown they are ready to be removed from the oil with the slotted spoon. Place them in the “drop zone” and season with salt and pepper. Repeat the frying process as many times as necessary, or until you run out of pumpkin or tempura batter. Serve hot with the basil aioli for dunking.
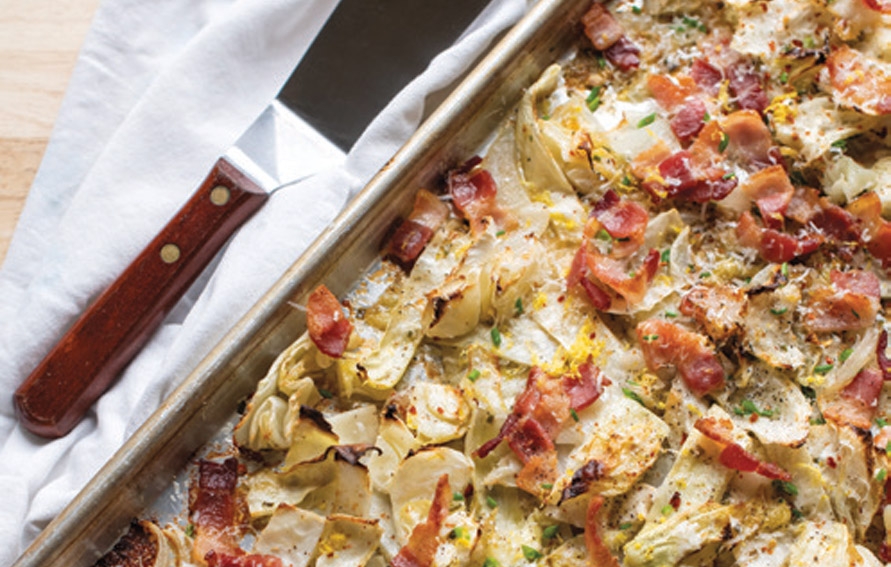
Sheet Pan Roasted Lemony Parmesan Cabbage and Bacon

Sheet Pan Roasted Lemony Parmesan Cabbage and Bacon
Sheet Pan Roasted Lemony Parmesan Cabbage and Bacon


4 C. (1 pound) green cabbage, chopped into 3 x ½ inch strips

½ pound applewood smoked bacon, sliced into ¼ inch pieces

1 medium white onion, thinly sliced

4 ounces grated parmesan cheese

2 T. lemon zest

1 tsp. kosher salt

¾ tsp. pepper

3 T. olive oil or neutral vegetable oil

1 tsp. crushed red pepper flakes (optional)

2 T. fresh chives, finely chopped


Preheat the oven to 400°F. Coat a rimmed sheet pan (13” x 18”) with nonstick cooking spray. Layer all ingredients evenly across the pan and place into the preheated oven. Roast the cabbage and bacon for 40 minutes, stirring halfway through for even cooking. Once the tips of the cabbage are brown and the bacon is crisp, remove the pan from the oven and serve immediately.

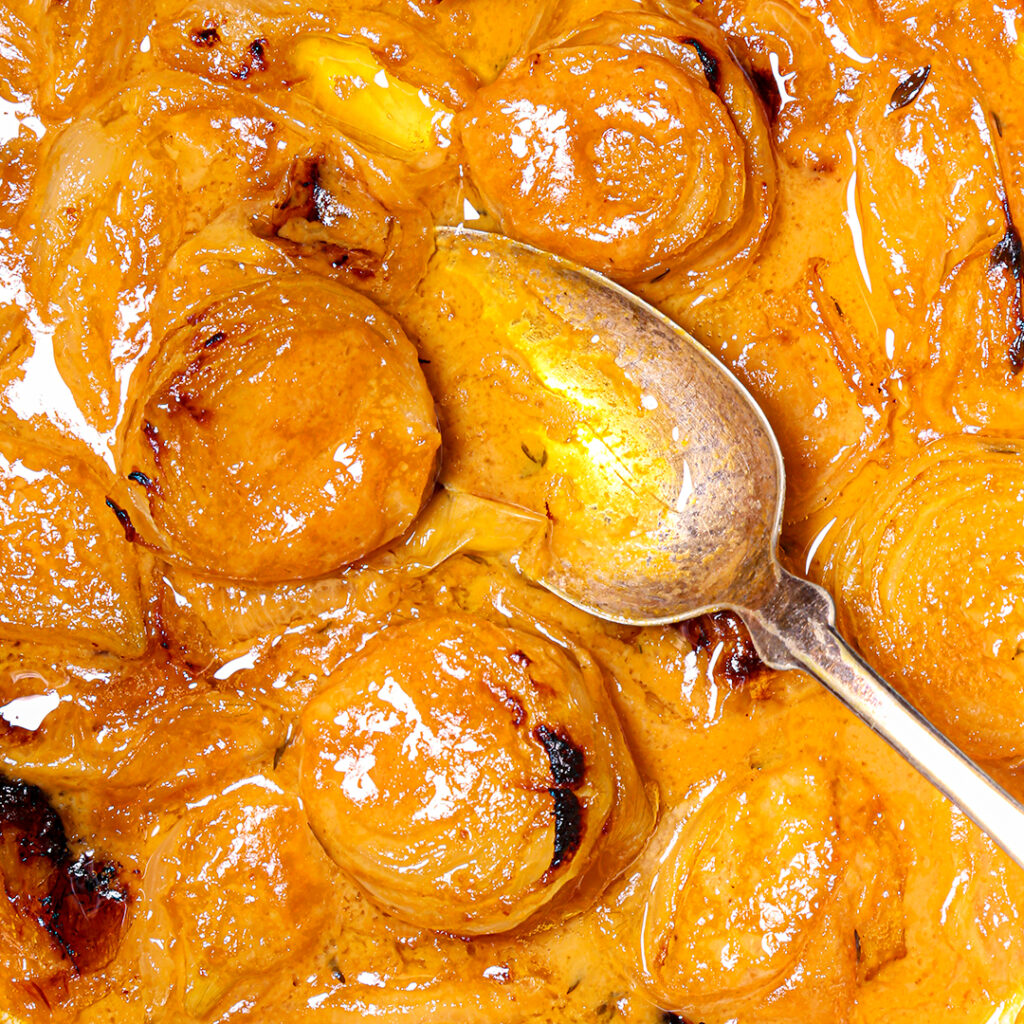
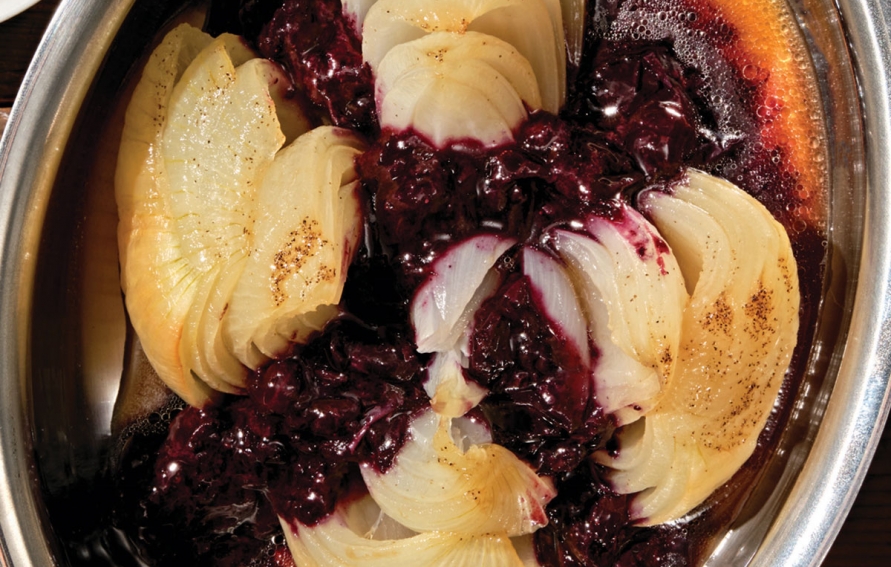
Melting Onions with Berry Compote

Melting Onions with Berry Compote
Melting Onions with Berry Compote


2 Spanish (or yellow) onions

3–4 T. olive oil

Salt and pepper to taste


1 C. frozen blueberries*

¼ C. water

½ tsp. cornstarch

Pinch of salt

Optional: maple syrup


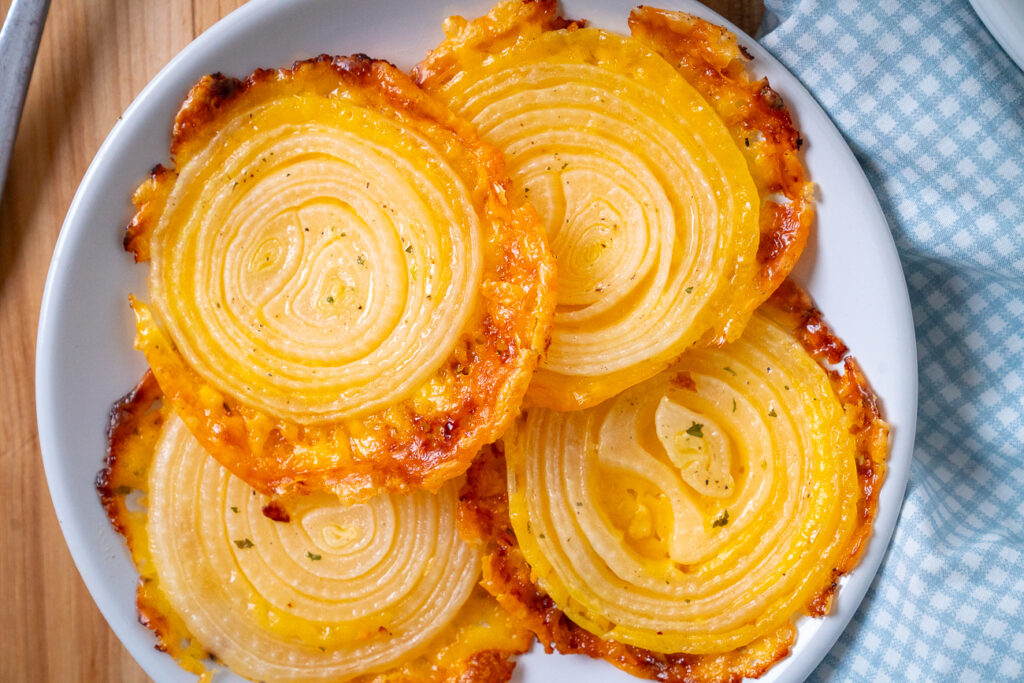
Preheat oven to 375°F. Slightly trim the top and bottom of the onions, careful to leave the skin attached. (This serves as insulation.)  From the top of the onion, make a cross cut slicing almost through to the bottom (nearly halving the onion).  Place the whole onions in a small baking dish (a loaf pan also works well). Drizzle the olive oil over the onions, then season with salt and pepper.  Cover with aluminum foil and roast for 75 minutes. Occasionally uncover and baste the onions with the oil mixture that will collect at the bottom of the dish.  Then uncover and roast for another 10 minutes. Remove from the oven, carefully remove skins, and plate with berry compote. In a small saucepan over low heat, simmer berries and water. Once the berries start to break down, smash with potato masher. After 2–3 minutes, slowly whisk in the cornstarch to thicken the sauce. Add maple syrup for additional sweetness, if desired. Remove from heat and serve atop onions. *Fresh blueberries may also be used; adjust the amount of water and cornstarch as needed.

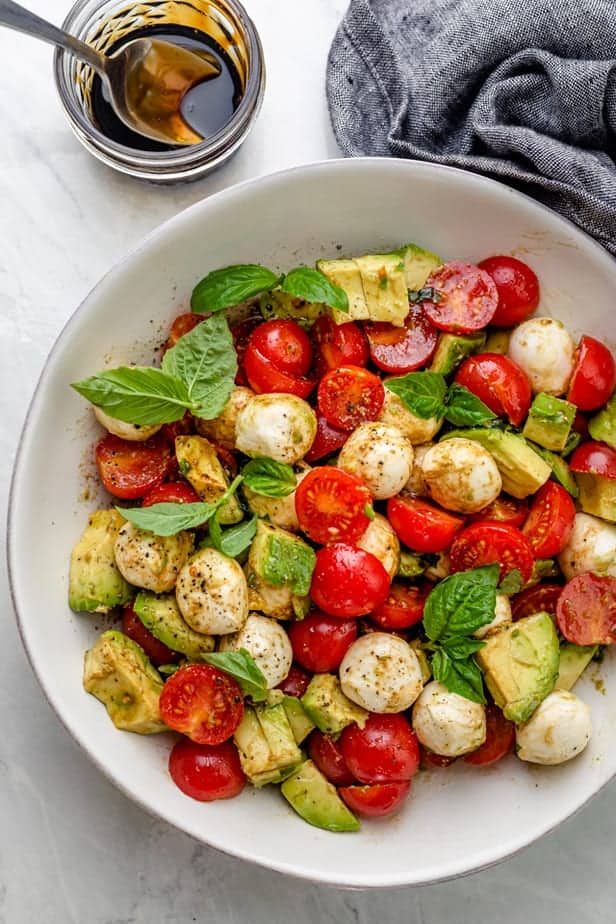
Avocado Caprese Veggie Starter

Avocado Caprese Veggie Starter
Avocado Caprese Veggie Starter


7 Cherry Tomatoes

7 Mini Mozzarella Balls (Bocconcini)

½ Avocado, pitted and cut into chunks or balled

1 T. balsamic vinegar

1 T. olive oil

salt and pepper


Arrange the halved tomatoes, mozzarella balls, and chunks or balls of avocado in a bowl and drizzle the balsamic vinegar and olive oil all over. Season well with salt and pepper and serve.

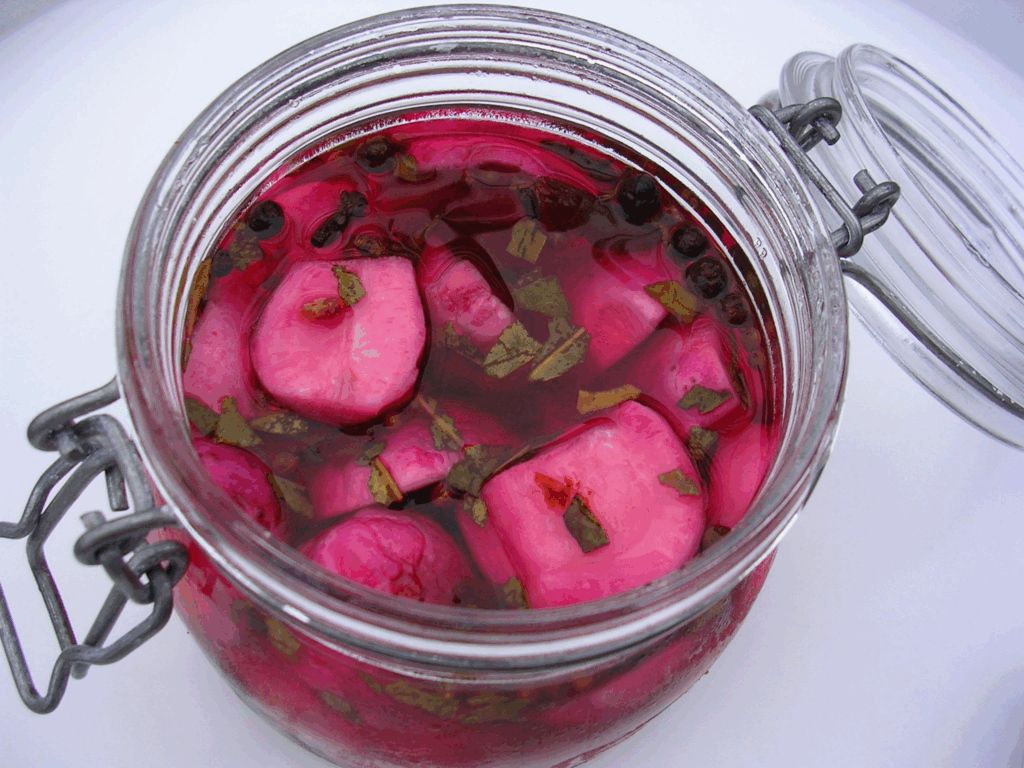
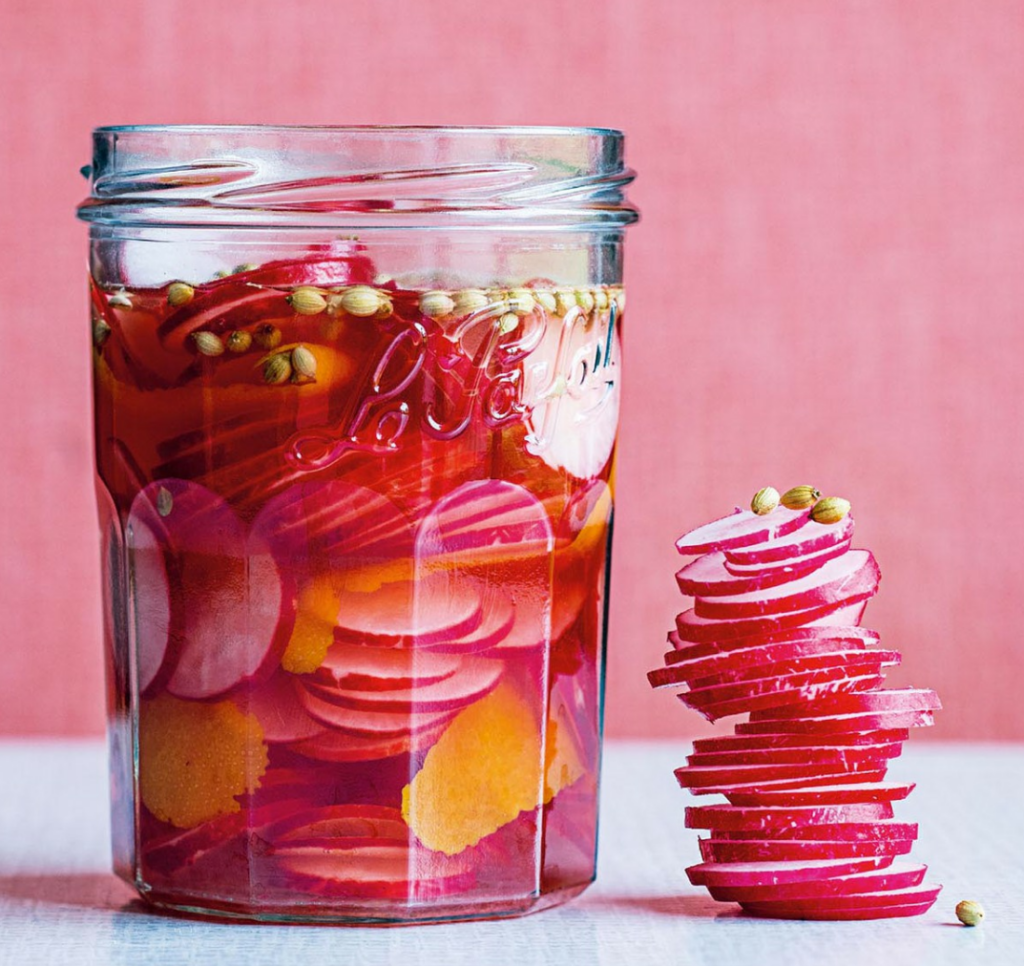
Coriander & Orange Pickled Radish

Coriander & Orange Pickled Radish
Coriander & Orange Pickled Radish


¾ C. plus 2 T. Apple Cider Vinegar

4 strips unwaxed Orange Peel

1 T. Coriander Seeds

7 oz. thinly sliced Radishes


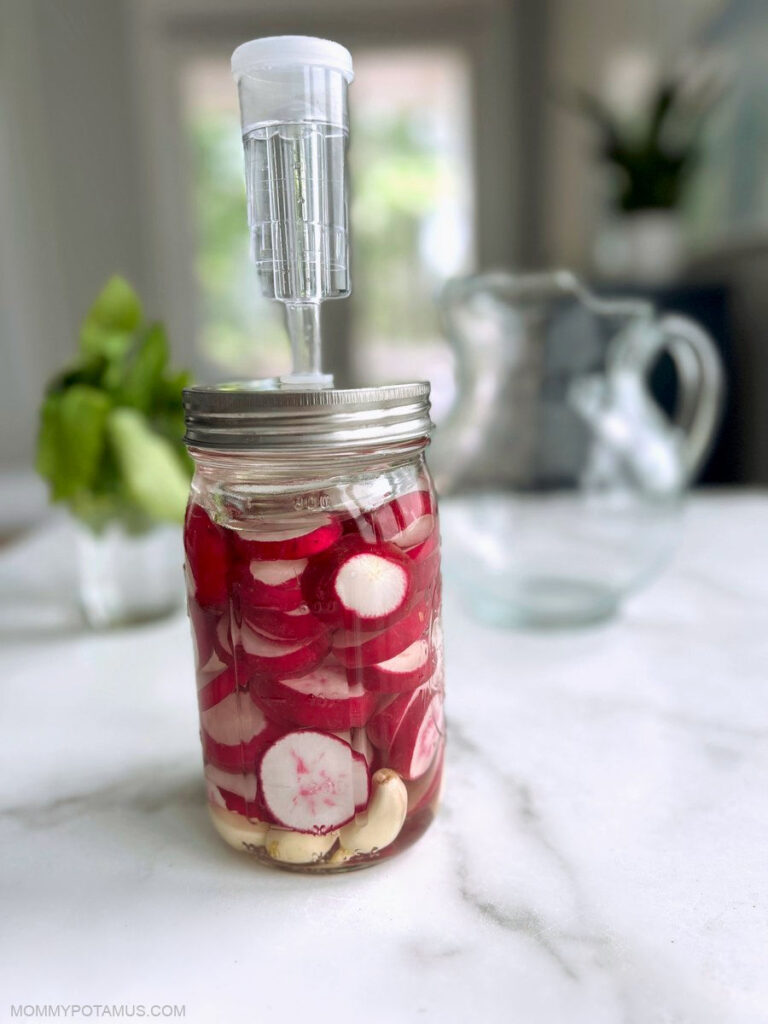
Pour the apple cider vinegar into a small saucepan. Add the orange peel, coriander seeds, and salt and place the pan on medium heat. Bring the liquid to a boil, then immediately remove the pan from the heat. Set it aside and let the liquid cool slightly. Pack the radish slices into a sterilized l-pint/5 00ml jar, pour in the cooled liquid (including the seeds and peel) to cover, then seal and refrigerate. You can eat the pickles immediately, although they will benefit from 1 hour in the pickling liquid first, and will get stronger over time. Use within 4 weeks.

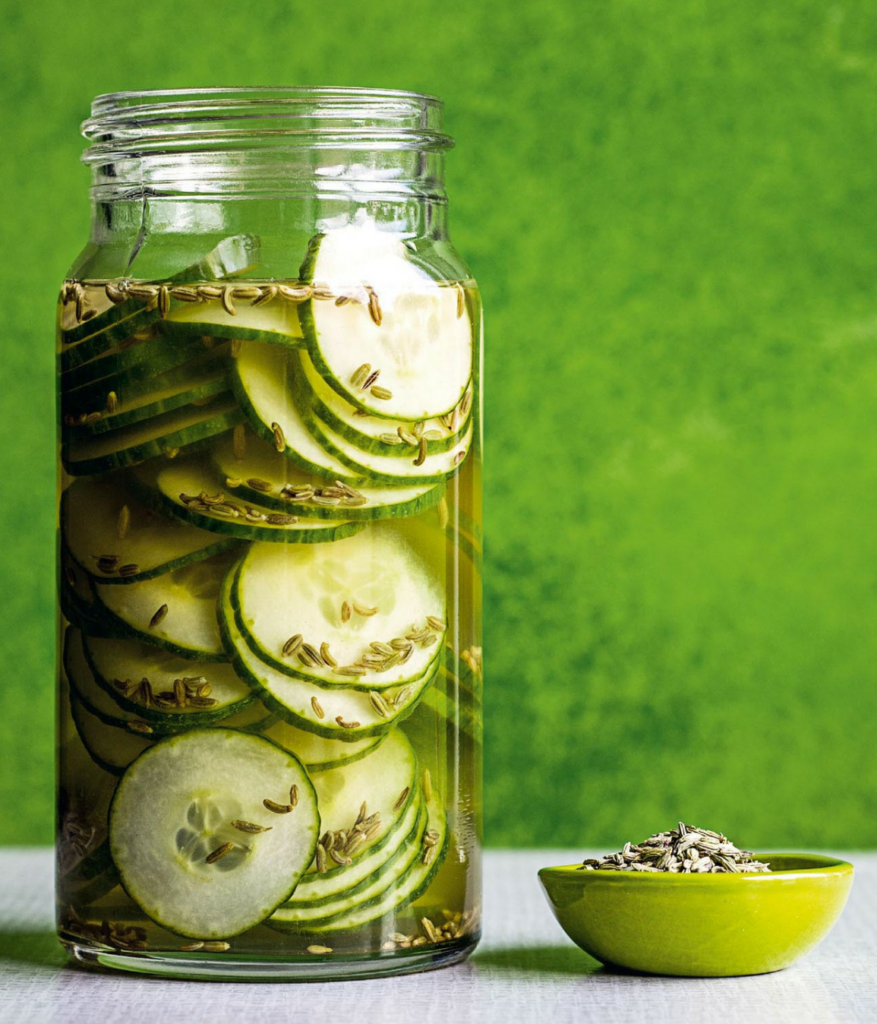
Cucumber & Fennel Refrigerator Pickles

Cucumber & Fennel Refrigerator Pickles

Cucumber & Fennel Refrigerator Pickles


¾ C. plus 2 T. Apple Cider Vinegar

1 T. Fennel Seeds

1 large Cucumber, thinly sliced

1 T. Salt


Pour the apple cider vinegar into a saucepan. Add the fennel seeds, x/4 cup/6Oml of water, and the salt and place the pan on medium heat. Bring the mixture to a boil, then immediately remove the pan from the heat and set it aside for the liquid to cool slightly. Meanwhile, pack the sliced cucumber into a sterilized 1-pint/500ml jar (see note). Pour the cooled liquid from the saucepan (including the seeds) into the jar to cover the cucumber slices, seal the jar, and refrigerate. The pickles are ready to use immediately, although the flavor will intensify over time. Use the pickles within 4 weeks. A note on sterilizing jars: Preheat the oven to 2 75 °F. Wash the jars and lids with clean, soapy water and rinse (but don’t dry) them. Place the jars and lids upside down on a baking sheet and transfer them to the oven for 15-20 minutes. Fill and seal the jars while they are still hot.

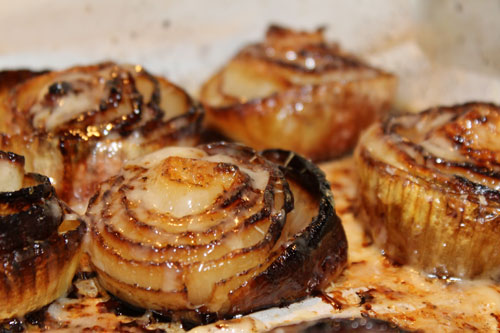
Roasted Parmesan Creamed Onions

Roasted Parmesan Creamed Onions

Roasted Parmesan Creamed Onions


3 onions, sliced

1/4 C. white wine

1 C. heavy cream

1/2 C. grated parmesan cheese

4 T. butter without salt

3 T. olive oil

1 tsp. powdered garlic

Salt and pepper to taste


Preheat oven to 400°F (200°C). Toss sliced onions with olive oil, and spread them on a baking sheet. Roast onions for 15 minutes until tender and slightly caramelized. Change temperature of oven to 450º F (230º C) and remove the roasted onions. In a saucepan over medium heat, combine heavy cream, white wine, butter, garlic powder, and cayenne. Cook until butter melts and bubbles form on the cream’s edge.

Blistered Tomatoes and Squash with Whipped Feta

Blistered Tomatoes and Squash with Whipped Feta

Blistered Tomatoes and Squash with Whipped Feta


1 medium yellow squash

24 cherry tomatoes

5 T. olive oil, divided

2 tsp. garlic pepper

1 French baguette

2 tsp. Italian seasoning

For the Whipped Feta:

8 ounces feta cheese

¼ C. cream cheese, cubed

¼ C. water

½ C. olive oil

Zest of 1 lemon

Salt and pepper to taste

2 T. honey


Preheat the oven to 425°. Line a sheet pan with parchment paper. Quarter and cube the squash so the pieces are about the same size as the cherry tomatoes. In a medium bowl, toss the squash and tomatoes with 2 T. of olive oil and garlic pepper. Spread on parchment paper. Roast for 7 minutes. After you remove the roasted veggies, reduce oven heat to 350°. Slice the baguette into thin slices (about ½-inch thick, makes about 30). Brush with 2-3 T. olive oil and season with Italian seasoning, if desired. Bake for 15 to 20 minutes, turning once. For the Whipped Feta: In a food processor, combine feta, cream cheese, water and olive oil. Process 2 to 3 minutes. Add lemon zest, salt and pepper, and honey. Process 2 minutes longer. Can be made a day ahead. To serve, smear each crostino with Whipped Feta, followed by a spoonful of blistered tomatoes and squash.

Cold Sesame Beets

Cold Sesame Beets

Cold Sesame Beets


4–5 large beets

1 T. sesame oil

1 T. rice wine vinegar

1 T. toasted black and/or white sesame seeds

Salt and freshly ground black pepper to taste


Steam or roast beets until just tender; let cool and remove skin. Slice, dice, or matchstick-cut them to your liking. In a bowl, toss beets with remaining ingredients, season to taste, and refrigerate for at least 1 hour before serving cold.

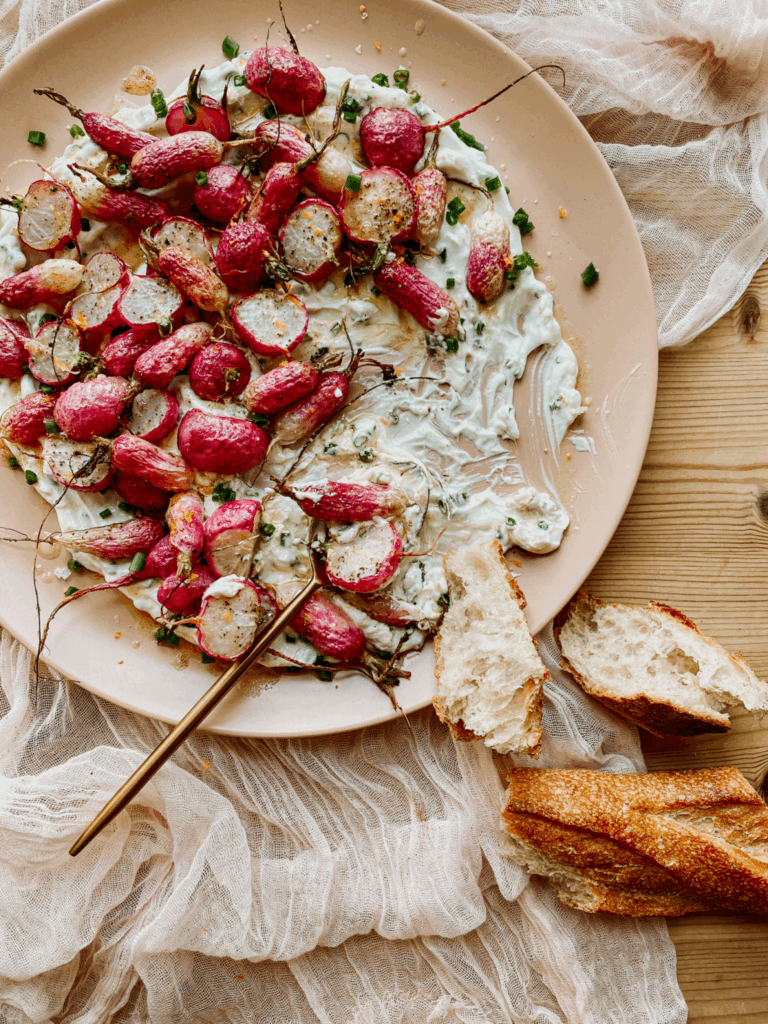
Roasted Radishes with Honey Butter & Thyme

Roasted Radishes with Honey Butter & Thyme

Roasted Radishes with Honey Butter & Thyme


1 lb. fresh radishes

1/4 C. butter

1 T. honey

A few sprigs fresh thyme

Sea salt to taste


Preheat oven to 425ºF. Wash radishes and radish greens and trim the ends to remove the greens and the long root. Reserve the radish greens. Slice the radishes in half lengthwise and set aside in a bowl. Rough chop the greens and add them to the bowl with the radishes. (This is optional but highly recommended!) Add a few sprigs of fresh thyme, or about 1/4 tsp. dried thyme. Add the honey and the butter to a glass bowl or measuring C. and heat in the microwave or in a double boiler until completely melted. Mix well and then pour the honey butter mixture over the radishes and toss to coat. Spread the honey-butter coated radishes, herbs and greens on a baking sheet and place in preheated oven. Bake for 12 to 15 minutes, until soft and slightly browned around the edges. Sprinkle with a pinch of sea salt and enjoy hot. Store leftovers in the fridge for up to 3 days and sauté with little bit of butter or a dollop of olive oil to reheat.

Bok Choy with Miso Ginger Dressing

Bok Choy with Miso Ginger Dressing

Bok Choy with Miso Ginger Dressing


1 1/2 pounds baby bok choy, split lengthwise

1 T. avocado oil

1 T. ginger garlic paste

Salt to taste

Dressing

2 T. toasted sesame oil

2 T. rice vinegar

1 T. white miso

1 T. orange juice

1 T. avocado oil

1 T. Greek yogurt (optional)

1 tsp. ginger garlic paste

Toasted sesame seeds, for garnish


In a medium bowl, combine all dressing ingredients and whisk until smooth and emulsified. Add oil and ginger garlic paste to a wide skillet. Place over medium heat and cook, stirring occasionally, until the oil begins to bubble around the ginger garlic, but before it starts to brown. Toss in the bok choy and spread into one layer, cut side down. Sprinkle with salt, then cook, without stirring, until starting to turn brown, about 2 minutes. Flip and cook for another 2 minutes or until the green leaves have wilted and the white bottoms have begun to soften but still have some crunch. Drizzle bok choy with dressing. Garnish with toasted sesame seeds and browned ginger garlic bits from the pan, if desired.

Nasu Dengaku (Miso Glazed Eggplant)

Nasu Dengaku (Miso Glazed Eggplant)

Nasu Dengaku (Miso Glazed Eggplant)


Eggplant

6 small Japanese eggplants

2 T. olive oil

3 slices of bacon chopped (optional)

1 T. chives sliced thin for garnish

1 T. toasted sesame seeds for garnish

Sauce

2/3 C. white miso

1/3 C. sake

1/3 C. mirin

1/3 C. sugar


For the sauce, combine miso and sugar in a medium-size, heavy-bottomed saucepan. Whisk in sake and mirin. Over low heat, bring to a simmer and cook, frequently stirring, until sugar dissolves, color darkens, and it has the consistency of a thick sauce—approximately 45 minutes. Sauce can be made up to a day in advance and should be refrigerated. When ready to use, reheat in a pan on low heat for 2–3 minutes.

Preheat oven to 425°F. Cook bacon in a small skillet over medium heat, stirring often, until crisp, about 5 minutes. Remove from heat and set aside. Cut eggplants in half lengthwise. Use the tip of a paring knife to score cut sides in a crosshatch pattern. Brush scored sides with olive oil, then spread 1 tsp. of miso mixture over each half. Place on parchment-lined baking sheet. Roast eggplant for about 20 minutes, until tender and browned. Sprinkle with sesame seeds, chives, and bacon, and serve.

Creamy Sorrel Sauce

Creamy Sorrel Sauce

Creamy Sorrel Sauce


¾ C. chopped sorrel, stem and rib removed

¼ C. chopped parsley

¼ C. chopped chives

2 cloves garlic, chopped

1 T. lemon juice

½ tsp. salt

¼ tsp. freshly ground pepper

½ C. plain yogurt


Sorrel is one of my all-time-favorite perennials and it can be used to create a sauce that adds lemony brightness to many meals. Sorrel is a low-fuss plant to grow but you can also find it at some farmers’ markets. As an alternative, you can use spinach and increase the amount of lemon juice to create something that comes close to sorrel’s consistency and tartness. This sauce works well with roasted potatoes, grilled salmon or asparagus. You can also use it as a dip or spread on a sandwich. It is best served the day you make it.  Puree all ingredients except yogurt in food processor. Adjust seasonings. Whisk in yogurt.

Blistered Shishitos with Sriracha Aioli

Blistered Shishitos with Sriracha Aioli

Blistered Shishitos with Sriracha Aioli


For the peppers

8 oz. shishito peppers

1 T. neutral oil (like grapeseed or canola)

Flaky salt, such as Malden


In a large bowl, toss all of the peppers with oil until well coated. Pour a little oil into a large cast-iron skillet. Heat oil over high heat until it is just starting to smoke. Add the peppers in single layers without touching, and cook until blistered in multiple spots, flipping them as needed. This takes about 4 minutes. The peppers will puff up and become tender. If you want a more blistered look, cook them a little longer. Season with salt and serve immediately with lemon wedges and/or sriracha aioli.


For the sriracha aioli

¼ cup mayonnaise

1 T. sriracha or more to taste

1 tsp. fresh lemon juice

1 clove garlic, minced

Kosher salt to taste


Whisk everything together. Can be refrigerated, covered, for a day or two.  I usually just fill a hot iron skillet with olive oil and then toss the peppers in, allowing them to blister on one side before turning them over. For grilling, I’ll brush the peppers with a bit of olive oil and blister them on a hot grill.

Sweet-Sour-Sumac Roasted Shallots

Sweet-Sour-Sumac Roasted Shallots

Sweet-Sour-Sumac Roasted Shallots


1 pound shallots (roughly equal size), topped, tailed, and peeled

¼ tsp. kosher salt

½ tsp. granulated sugar

1 tsp. ground sumac

Freshly ground black pepper

2 T. salted butter, cut into pieces

6 sprigs thyme


Fill and Seal the Packet: Cut a double layer of heavy-duty aluminum foil that measures 20 inches long. Arrange the shallots lengthwise down the middle of the foil, stopping 2 inches shy of either end. Add the salt, sugar, sumac, and a generous grinding of pepper. Toss to combine, then dot with the butter pieces and add the thyme. Gather the long edges of the foil together, folding them over each other two or three times to form a tight seal. Seal both ends of the packet in the same way. Pack into a resealable bag or leakproof container and refrigerate. Place a grill over medium-hot coals with direct and indirect cooking zones. Roast the shallots, shuttling the packet between direct and indirect heat as needed to maintain a gentle sizzling sound throughout the cooking. When the shallots feel very soft and a knife poked through the foil encounters almost no resistance, 25 to 40 minutes, cut open the top of the packet so you can see inside. Finish the shallots over direct heat, monitoring them closely so they color in spots and the buttery shallot juices reduce to a glaze, 3 to 5 minutes. Serve hot. Notes: The shallots can also be roasted without a grill by setting the packet in hot ashes directly next to medium-hot coals. Turn the packet frequently and monitor closely to prevent burning.

Leeks in Vinaigrette with Black Olives and Bread Crumbs

Leeks in Vinaigrette with Black Olives and Bread Crumbs

Leeks in Vinaigrette with Black Olives and Bread Crumbs


2 bunches leeks

4 ounces (115 g) goat cheese, room temperature

2 T. (30 mL) extra-virgin olive oil, more to taste

Juice of 1 lemon

1/4 C. (60 mL) fresh tarragon, roughly chopped

1/2 C. (125 mL) black olives, pitted

1/2 C. (125 mL) Bread Crumbs (this page)


Bring a large saucepan of salted water to a boil. While you’re waiting for the water to boil, fill a medium bowl halfway with water and ice. Trim the dark green parts from the leeks and discard, or save for future use in a stock or soup. Drop the leeks into the boiling water and blanch for 4 to 5 minutes, until they are easily pierced with a paring knife. Immediately plunge the leeks into the prepared bowl of ice water and let cool completely. Drain and pat dry. Slice the leeks into 1-inch (2.5 cm) rounds. Schmear a large plate or platter with the goat cheese. Arrange the leeks on top. Drizzle the olive oil and lemon juice overtop. Sprinkle with the tarragon, olives, and bread crumbs and drizzle with additional olive oil, if desired. Store leftovers in an airtight container in the fridge for up to 5 days.

Butter-Roasted Delicata

Butter-Roasted Delicata

1 large or 2 small (2-3 lb in total) delicata squash

1/4 cup salted butter

2 T. pure maple syrup

2 T. orange juice

2 T. chopped rosemary leaves


Using a sharp knife, slice the squash in half lengthwise. Using a teaspoon, scrape out and discard the seeds. Lay the squash cut side down and cut it into 1 -inch-thick slices. Spread the slices in a single layer on the prepared baking sheet. In a small saucepan over low heat, melt the butter, and then whisk in the maple syrup and orange juice until fully emulsified. Brush this mixture over the squash slices, then flip them over and brush the other side, ensuring they are well coated. Drizzle any remaining butter mixture overtop. Sprinkle with the rosemary. Roast for 35 minutes, until fork-tender and caramelized on the outside. Remove from the oven and allow to cool slightly before serving. The cooked squash will keep in an airtight container in the fridge for up to 1 week.

Frozen Peas with Lemon Butter

Frozen Peas with Lemon Butter

Frozen Peas with Lemon Butter


2 T. salted butter

1 (1-pound) bag frozen peas

1 tsp. kosher salt tsp.

ground black pepper

Zest and juice from 1 medium lemon


Add butter and frozen peas to a 12″ skillet over medium heat. Sauté 1 minute, stirring frequently to melt the butter and heat the peas through. Raise heat to medium-high. Add salt, pepper, lemon zest and juice. Cook 3 minutes, stirring frequently. Serve immediately.

Bacon Cabbage Dippers

Bacon Cabbage Dippers

Bacon Cabbage Dippers


1 medium head green cabbage

1 lb. bacon

1/4 c. grated Parmesan

2 tbsp. extra-virgin olive oil

Kosher salt

1 tsp. Freshly ground black pepper

1 tsp. dried oregano


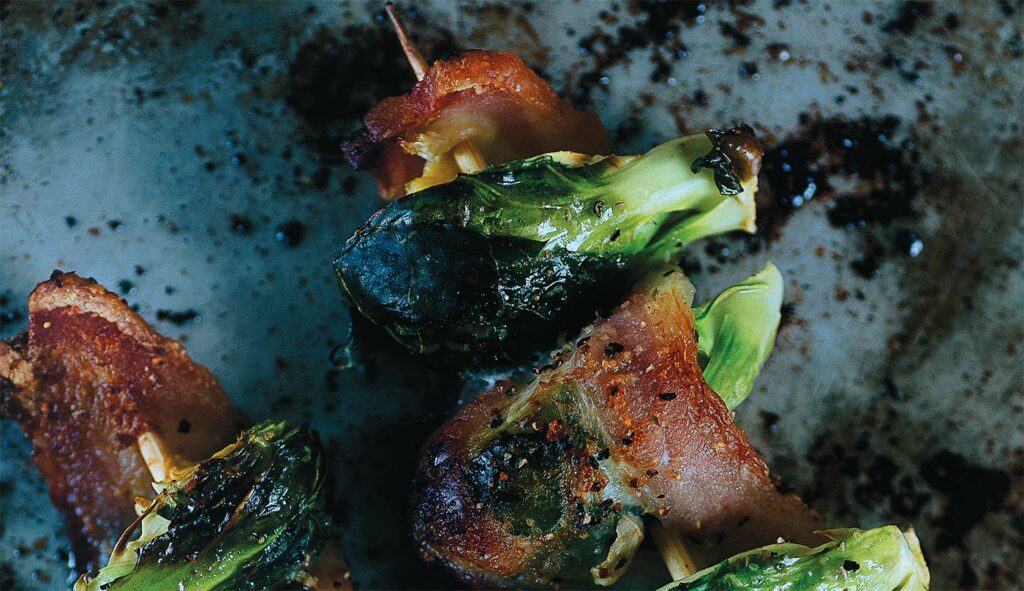
Preheat oven to 450°. Quarter the cabbage and remove thick stem, then cut each quarter piece in half.  On two large baking sheets, toss cabbage lightly with Parmesan and oil then season with salt, pepper, and oregano.  Wrap a piece bacon around each cabbage wedge. Bake until cabbage is golden and crispy around edges and bacon is cooked through, about 30 minutes. Serve warm with ranch for dipping.

Sauteed Zucchini with Herbed Dressing

Sauteed Zucchini with Herbed Dressing

Sauteed Zucchini with Herbed Dressing


A lovely side dish, this zucchini also makes a delicious omelet or vegetarian taco filling. Top with some avocado for extra green. For this meal, serve the zucchini warm or at room temperature. It’s great either way and the latter means you can make it a few hours ahead of time.


1/4 cup [60 g] plain full-fat Greek yogurt

A large handful of fresh Italian parsley leaves (a little bit of stem is fine!), roughly chopped

A large handful of minced fresh chives

1 garlic clove, minced

1 T. white wine vinegar

1/4 cup [60 ml] olive oil, plus 2 T., plus more as needed

Kosher salt

1 12 lb [680 g] zucchini (about 3 large), ends trimmed


In a food processor, combine the yogurt, parsley, chives, garlic, vinegar, and 1/4 cup [60 ml] of the olive oil and puree until smooth. You might need to scrape down the sides with a rubber spatula once or twice to make sure everything is evenly combined. Season the dressing to taste with salt and reserve it. Cut each zucchini in half lengthwise. Then, working with one zucchini half at a time, lay it on its flat side so it’s stable and cut into half-moons 1/2 in [12 mm] thick. You can do this on the diagonal if you’d like. In a large nonstick skillet over medium-high heat, warm the remaining 2 T. olive oil. Add as much of the zucchini to the pan as will fit in a single layer without crowding. You may need to work in batches, depending on the size of your skillet; you’re looking for sauteed zucchini, not steamed zucchini. Sprinkle with a generous pinch of salt and cook, stirring now and then, until just softened and browned in spots, 8 to 10 minutes. Transfer the zucchini to a serving platter. If working in batches, keep the first batch warm and repeat with the remaining zucchini, adding more oil to the skillet if needed. Drizzle the zucchini with the reserved dressing. Serve warm or at room temperature.


Leftovers: Place leftover zucchini, dressing and all, into a food processor with a drained and rinsed can of chickpeas. Puree until smooth and season to taste with tahini, lemon juice, and salt. Serve with warm pita bread (or crispy pita chips) or crunchy vegetables for dipping. It’s also good as a neighbor to roasted chicken, grilled shrimp, or even scrambled eggs.

Grated Carrot and Fir Needle Pickled Salad

Grated Carrot and Fir Needle Pickled Salad

Grated Carrot and Fir Needle Pickled Salad


4 lb. large carrots, peeled and trimmed

1 cup water

1½ cups sugar

2 cups white vinegar

¼ cup fir needles, stalks removed (grand fir, Douglas fir or hemlock fir)

4 cloves garlic, peeled and sliced


Place a hand grater on a clean cutting board and shred the carrot using a coarse shred. Meanwhile, wash your glass jar and rinse in hot water. Place on a rack to dry. Heat a heavy bottom saucepan over medium-high. Add water, sugar, vinegar, fir needles and garlic. Bring to a simmer. Add the shredded carrots to the pickling broth. Bring back to a boil and cook for one minute. Ladle the hot carrots into 6 – 500 ml jars. Top with the hot liquid to within ¼ inch from the top of jar. Tap the jar to remove any air bubbles. Wipe jar rim removing any residue. Place lid on clean jar rim. Screw band down until resistance is met, then increase to gently tighten. You can cool to room temperature and store in the fridge, or heat process to create a more stable product. In this case, place the filled jars in the rack of a canner and cover the jars by at least 1 inch of water. Cover canner and bring water to full rolling boil. Process for a full 10 minutes. Turn burner off, remove canner lid, wait five minutes, then remove jars without tilting and place them upright on a cooling rack. Cool upright, undisturbed for at least one day.

Rajas con Crema

Rajas con Crema

Rajas con Crema


5 poblano peppers

1 T. butter

1 medium onion, sliced root to tip, ¼”

2-3 cloves garlic, minced

1/2 tsp. coarse kosher salt, plus more to taste

3/4 cup Mexican crema (store bought or homemade)

1 cup shredded Oaxaca cheese


Line a baking sheet with aluminum foil and place poblano peppers on top. Set your oven rack directly underneath the broiler and turn the broiler on high. Broil poblanos in the oven for 5 minutes, or until the skin is blackened and blistered. Carefully flip them over and broil for another 5 minutes, or until the skin is blackened and blistered on all sides. Remove them from the oven, loosely cover the baking sheet with aluminum foil or plastic wrap to keep in some of the heat to help them steam and let them sit for 5 minutes. Pull and rub off as much of the loose skin on the peppers as possible. It doesn’t have to be perfect. Transfer poblanos to a cutting board, discard the stems and seeds. Cut poblanos into strips and set aside. Heat butter in a large skillet over medium-high heat. Add onions and cook for 5 minutes, until softened and translucent. Add garlic and cook for 30 seconds, stirring frequently. Add roasted poblano pepper strips, Mexican crema, and salt. Stir together to combine and cook for 2 more minutes.  Add shredded cheese and stir together until the cheese completely melts. Remove from heat and serve immediately in warm tortillas or with tortilla chips.


If poblanos are too spicy for you, use anaheim peppers or bell peppers instead.

If poblanos are not spicy enough, add in some a sliced jalapeno or serrano pepper.

Make this dish a little more hearty with the addition of cooked shredded chicken. Add it in the skillet along with the sliced peppers.

Need a little more texture? Add in 1 cup of frozen corn kernels when cooking the onions.

Roasted Brussels Sprouts with Bacon and Chestnut

Roasted Brussels Sprouts with Bacon and Chestnut

Roasted Brussels Sprouts with Bacon and Chestnut


3 T. olive oil

½ pound bacon, cut into lardons

4 shallots, thinly sliced

1 pound Brussels sprouts, trimmed and halved

¼ pound chestnuts, roasted and peeled

Salt and freshly ground pepper

2 T. unsalted butter

2 T. balsamic vinegar


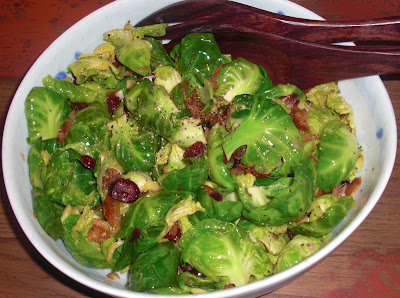
Preheat oven to 425°. Heat oil over medium heat in a roasting pan or oven-proof skillet. Add the bacon and cook until golden brown and crisp. Remove the bacon to a plate lined with paper towels. Drain all but two T. of fat from the pan. Add the shallots to the pan and cook until soft. Add the Brussels sprouts and chestnuts and toss to combine. Season with salt and pepper and roast in the oven until the sprouts are cooked through and golden brown, about 12 minutes. Remove the vegetables from the oven and stir in the butter and balsamic vinegar. Transfer to a platter and top with the crispy bacon.

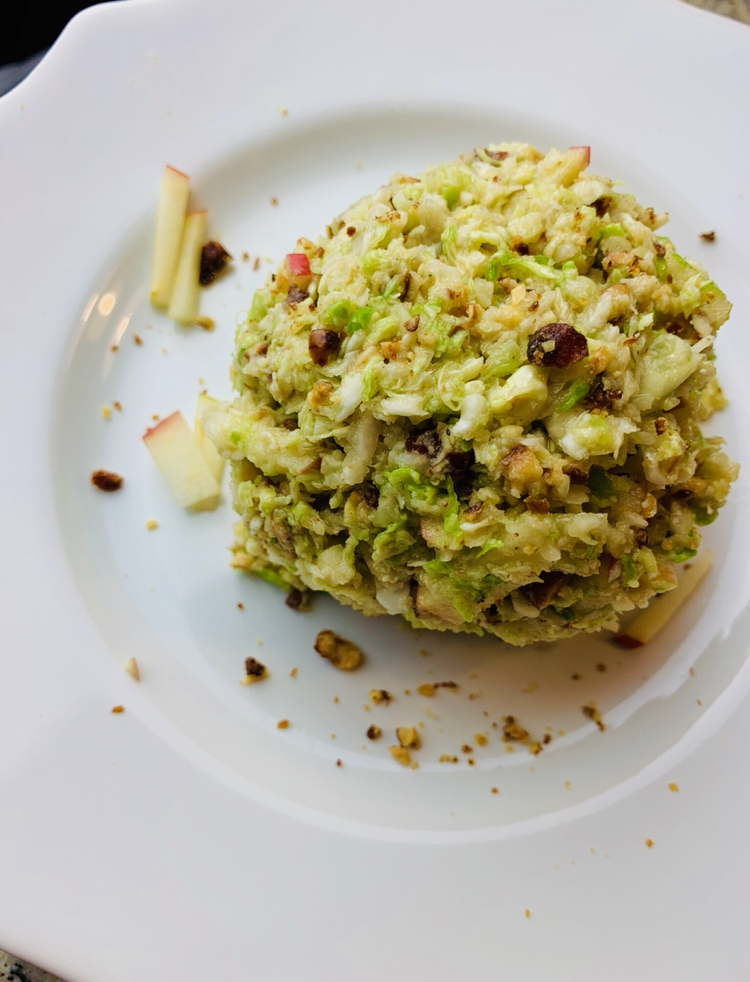
Blistered Cabbage and Apples with Walnut-Anchovy Caper Sauce

Blistered Cabbage and Apples with Walnut-Anchovy Caper Sauce

Blistered Cabbage and Apples with Walnut-Anchovy Caper Sauce


¼ cup walnuts, toasted and coarsely chopped

1 T. capers, rinsed if salt-packed

2—3 anchovy fillets, rinsed if salt-packed (or ½ tsp. anchovy paste)

1 garlic clove, minced

⅓ cup extra-virgin olive oil, plus 2—3 T. for searing

2 T. lemon juice

1 tsp. Dijon mustard

2 tsp. honey

½ tsp. red pepper flakes, or other chile (optional)

2 T. chopped flat-leaf parsley

Kosher salt

Freshly ground black pepper

1 medium head Napa or Savoy cabbage, outer leaves removed, quartered, leaving core intact

2 small apples, halved around the middle, seeds and cores intact


In a small food processor or with a mortar and pestle, roughly grind walnuts, capers, anchovies and garlic. Remove to a separate bowl. Whisk in ⅓ cup olive oil, lemon juice, mustard, honey, pepper flakes if using and parsley. Season with salt and pepper to taste. Set the sauce aside. Rub the exposed edges of the cabbage and apples with remaining olive oil; season liberally with salt and pepper, forcing some seasoning between cabbage leaves. Place a cast-iron or other heavy-bottomed skillet over high heat for several minutes to preheat. When the pan is ripping hot, add the cabbage wedges, flat side down. Press weight on top with another skillet. Cook until well charred, about 3 minutes. Flip to another flat side and add the apples. Press with weight and cook another 3 minutes. Flip the cabbage to the third side and flip the apples. Add weight and cook another 3 minutes. Remove pan from heat, leaving the weight atop, and let rest for 4 minutes or until the cabbage is mostly tender but still crisp in the center. Transfer the cabbage and apples to a serving plate and adorn with the sauce.

Cheesy Spinach Pancakes

Cheesy Spinach Pancakes

Cheesy Spinach Pancakes


14.1 ounces (400 g) frozen spinach, drained

8 large eggs

1 cup (90 g/3.2 oz) finely grated Parmesan

1/4 cup (37 g/1.3 oz) chopped sun-dried tomatoes

2 T. (16 g/0.6 oz) coconut flour

1 T. (5 g/0.2 oz) dried Italian herbs

1/2 tsp. sea salt

1/4 tsp. black pepper

2 T. (30 g/1.1 oz) ghee or duck fat

Optional: sliced avocado, cooked bacon, and Sriracha sauce for serving


Defrost the spinach (in a microwave oven or in the fridge overnight). Squeeze out as much moisture as possible (you will end up with about half of the original weight). Crack the eggs into a large bowl and whisk to combine. Add the drained spinach, Parmesan, sun-dried tomatoes, coconut flour, Italian herbs, salt, and pepper. Mix until well combined. Heat a large skillet greased with the ghee over medium heat. Once the skillet is hot, use a 1/3-cup measure to make 3 to 4 pancakes at a time. Shape them into small pancakes in the pan using a spatula. Cook for 2 to 3 minutes, or until lightly browned and firm enough to flip onto the other side, and then cook for another 1 to 2 minutes. Repeat for the remaining pancakes. Serve warm or let cool and store in an airtight container in the fridge for 4 to 5 days. Optionally, serve with avocado, cooked bacon, and Sriracha sauce.


Makes 12

Serving Size: 2 Pancakes

Calories: 244

Fat: 17g

Fiber: 3g

Peas with Fried Onions & Lemon

Peas with Fried Onions & Lemon

Peas with Fried Onions & Lemon


¼ C. Olive Oil

1 Yellow Onion, thinly sliced

10 oz. frozen Peas, thawed

½ Lemon, seeded and finely chopped (peel and all)

1 tsp. kosher salt

Freshly ground black pepper


Heat the oil in a medium skillet over medium-high heat. Add the onion and cook, stirring occasionally, until dark brown (really dark brown in some spots), 6 to 8 minutes. Stir in the peas and cook until heated through, about 1 minute. Remove from the heat, stir in the lemon, and season with the salt and a few grinds of black pepper.

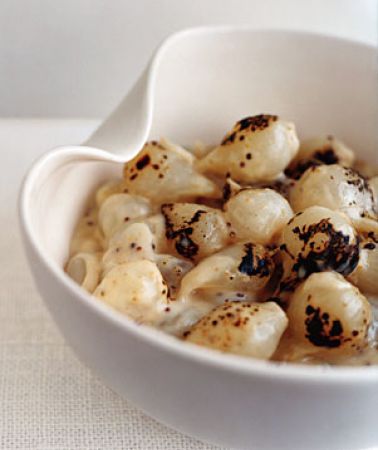
Glazed Red Pearl Onions

Glazed Red Pearl Onions

Glazed Red Pearl Onions


2 1/2 lb fresh red pearl onions

3/4 cup apple juice

3/4 cup reduced-sodium chicken broth

2 T. unsalted butter

2 (4-inch) sprigs fresh thyme

1/2 tsp. salt

1/4 tsp. black pepper

Garnish: fresh thyme leaves for sprinkling


Blanch pearl onions in a 6- to 8-quart pot of boiling water 1 minute, then drain in a colander. When onions are cool enough to handle, peel. Cook onions with remaining ingredients, covered, in a 12-inch heavy skillet over moderately low heat, shaking pan occasionally, until onions are tender and glazed and most of liquid is evaporated, about 45 minutes. Discard thyme.

Braised Fennel with Orange

Braised Fennel with Orange

Braised Fennel with Orange


3 T. extra-virgin olive oil

4 medium fennel bulbs (about 4 lb. total), stalks trimmed and bulbs cut into quarters (cores left intact), fronds reserved for garnish

2 medium cloves garlic, thinly sliced

1/2 cup dry white wine or dry white vermouth

1/2 cup lower-salt chicken broth

1 medium navel orange

1/2 tsp. fennel seeds, toasted and lightly crushed

1/2 tsp. coriander seeds, toasted and lightly crushed

Kosher salt

Freshly ground black pepper


Position a rack in the center of the oven and heat the oven to 325°F. Heat 2 Tbs. of the oil in a heavy-duty 12-inch skillet over medium-high heat. Add half the fennel, cut side down. Cook undisturbed until browned in spots, about 2 minutes. Flip and repeat on the other cut sides. Arrange the fennel browned sides up in a large (10×14-inch) gratin or shallow baking dish. Add the remaining 1 Tbs. oil to the skillet and repeat with the remaining fennel. Lower the heat to medium if any smoking occurs. It’s OK if the wedges are snug in the baking dish; they’ll shrink as they braise. Add the garlic to the skillet and cook until fragrant, about 30 seconds. Add the wine and scrape the bottom of the pan with a wooden spoon to dissolve any browned bits, about 1 minute. Add the broth and simmer to meld the flavors, about 2 minutes. Pour over the fennel. With a vegetable peeler, remove three 3-inch strips of zest from the orange and then juice the orange. Nestle the pieces of zest in the fennel and pour the juice over. Sprinkle with the fennel seeds, coriander seeds, 1 tsp. salt, and a few grinds of pepper. Cover the dish tightly with foil and braise in the oven until the fennel has collapsed and a paring knife penetrates the cores with no resistance, about 1-1/4 hours. Spoon some braising liquid over the fennel, garnish with the reserved fronds, and serve hot, warm, or at room temperature.

The New Crudites

The New Crudites

The New Crudites


The More Color the Better: In late summer, there’s a technicolor spread of in-season produce, from tomatoes and bell peppers to radishes, cucumbers and baby beets. For visuals alone, it’s the best time of the year for crudités.


Don’t Forget About Texture: In case you’ve gotten carried away with color: vary the texture and taste of the assortment, from crunchy carrots and snap peas to lush tomatoes.


Crowd the Platter: Like a good cheese plate, a crudites platter looks best and most appealing when it is full.


Even Fresh Produce Needs Help: Drizzle a little good-quality olive oil on the produce and season with flaky salt, advises Mansell. Dips alongside, a variety of one or two, are also advisable, according to the chef, even if the best produce won’t need them.


Dip Rules: Keep it thick and creamy. Thin sauces like chimichurri or salsas are too loose and drippy, and won’t cling to your veggie sticks. Make it smooth rather than chunky because, again, a chunky sauce won’t cling as well to the slick vegetables and will make for an awkward dipping experience. Feel free to go for bold flavors ~ the veggies can take it!

Asparagus (blanch)

Beets (golden, candy cane)

Belgian Endive

Bell Peppers

Broccoli (or broccolini), Cauliflower (try colored varieties), Romanesco

Carrots – Real baby carrots pulled from ground, or rainbow colors

Celery

Cucumber

Fennel

Green Beans, Wax Beans, Romano Beans (serve raw or blanched)

Jicama

Potatoes (halve roasted or boiled fingerlings)

Radishes (look for interesting ones, like French breakfast radish or watermelon radish)

Scallions

Snow Peas / Sugar Snap Peas (blanch. String if necessary)

Summer Squash & Zucchini (Add some Pattypan)

Sunchokes

Tomato (small sizes, like cherry or pear)

Treviso

Turnips

Grilled Corn, Mexican Street Style

Grilled Corn, Mexican Street Style

Grilled Corn, Mexican Street Style


6 ears shucked corn

Extra-virgin olive oil

8 T. crème fraîche (Mexican crema?)

8 T. grated cotija or queso blanco cheese

6 tsp. ground cayenne pepper, or to taste

Lime wedges

Cilantro, chopped

Salt and pepper


To grill. shuck your corn and then brush it on all sides with olive oil. Place the corn on a heated grill with medium-high heat and let the corn grill on each side for about 2–4 minutes, 10–15 minutes total. Keep your eye on it so it doesn’t burn! Spread the crème fraîche on a plate or shallow bowl and roll each ear of corn in it, coating it on all sides. Really get it on there. Sprinkle the grated cheese on all sides of the coated corn. Do the same with the cayenne pepper. This adds kick and color! Squeeze fresh lime juice over the corn. Garnish with cilantro, salt and pepper to taste. Die and go to heaven eating this corn!

Milkweed Buds with Ginger & Soy

Milkweed Buds with Ginger & Soy

Milkweed Buds with Ginger & Soy


12 milkweed buds with stems

Salt

1 T. coconut or unscented oil

1/2 thumb-size piece of ginger, peeled and very thinly sliced into matchsticks

1 T. soy sauce

1 T. fresh lemon juice

1/4 tsp. sugar

Freshly ground black pepper


In a saucepan, bring enough salted water to a boil to cover the milkweed. Blanch the buds and stems for a minute to dispel the latex. Drain and refresh under cold water and pat dry very, very well with a dishcloth or paper towels— the buds tend to absorb a lot of water. In a saucepan over medium heat, heat the oil. Add the ginger and sauté gently for a few minutes until cooked through. Increase the heat and add the soy sauce, lemon juice, and sugar, stirring briskly to dissolve the sugar. Add the blanched milkweed. Toss several times to heat through and coat with the glaze, and season with pepper. Serve immediately.

Corn with Mexican Mint Marigold Butter

Corn with Mexican Mint Marigold Butter

Corn with Mexican Mint Marigold Butter


1/2 cups unsalted, softened butter

2 green onions with tops, chopped

1/2 tsp. dried chile árbol, ground

Salt and pepper to taste

2 T. minced Mexican mint marigold

1 Zest of a lime

2 tsp. fresh lime juice

For each ear of unhusked corn:

1 T. Mexican mint marigold butter

A few sprigs Mexican mint marigold

Sprinkling of salt and pepper

2 Green onions, chopped

1 pinches dried red chile árbol


Fresh Corn, still in husk


Combine ingredients (except corn) in a small bowl. Chill for several hours, or overnight. (Keeps several days in fridge.) Preheat grill or oven. Peel back corn husks and remove corn silk, but don’t remove husks. Spread about 1 T. of butter on each ear of corn, then close the husk around the kernels. Wrap each ear tightly with foil, and grill or bake until tender (15 to 20 minutes).

Wild Mushroom Confit with Garlic and fresh herbs

Wild Mushroom Confit with Garlic and fresh herbs

Wild Mushroom Confit with Garlic and fresh herbs


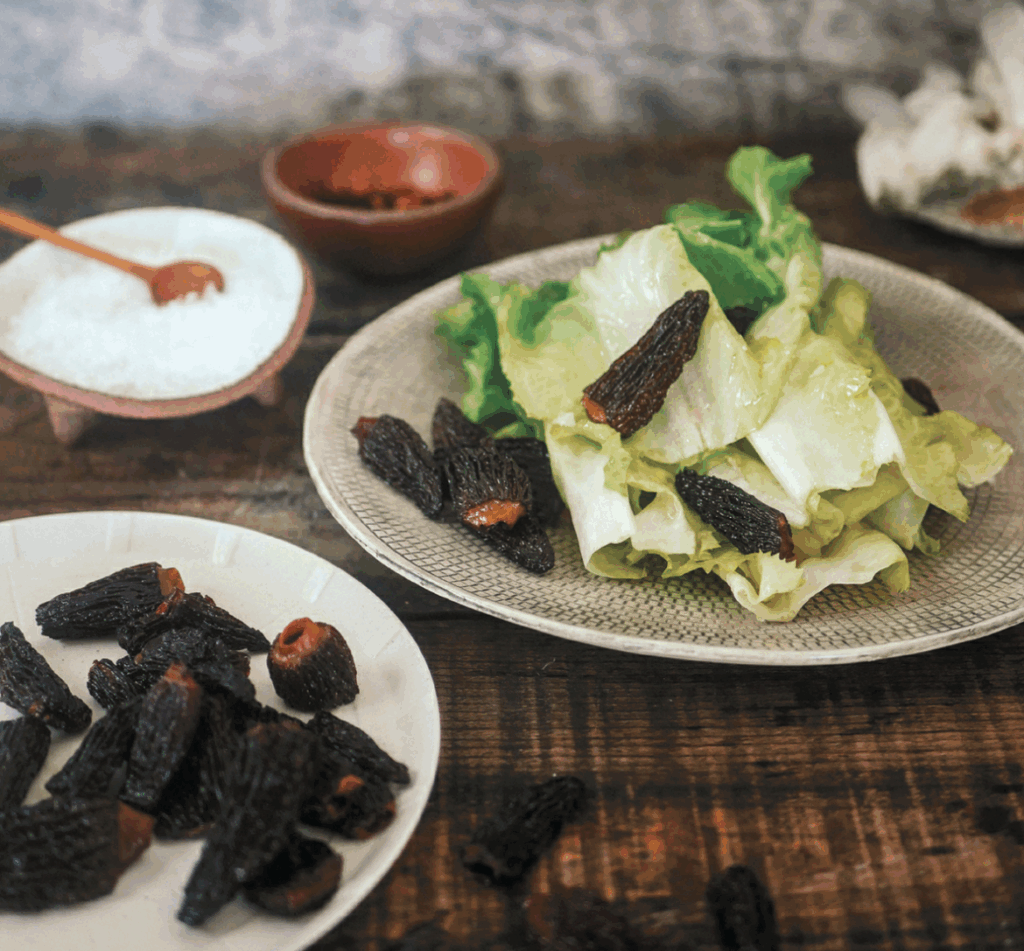
1 lb (455 g) assorted wild mushrooms (shiitake, oyster, Chanterelles, morels, black trumpet…) – medium in size

2 C. extra virgin olive oil

8 large garlic cloves – peeled and halved

12 large sage leaves

4 rosemary sprigs

6 thyme sprigs

8 winter savory sprigs

2 fresh bay leaves

2 tsp. whole black Tellicherry peppercorns

1 tsp. sea salt

1 1/2 T. aged sherry wine vinegar


Brush the mushrooms clean and trim the stems, but keep the mushrooms whole. Set aside. Heat a large non-stick skillet over medium-high heat. (I recommend a 12″ skillet.) Add 1/3 cup of oil and the mushrooms, toss carefully, and sauté undisturbed for 2 minutes until the mushrooms begin to brown. Toss again and continue to sauté until the mushrooms are golden-brown, about 4 to 5 minutes, tossing only from time to time. Add the garlic pieces and sauté for 1 minute, until the garlic is golden but not brown. Reduce heat to medium, add the balance of the oil and the herbs and peppercorns, and gently heat until the oil reaches 170ºF (80ºC) (use a thermometer). Once the oil has reached the desired temperature, continue poaching the mushrooms for 6 to 7 minutes, maintaining the temperature at 170ºF (80ºC), until the herbs are crisp and have turned a shade darker. Transfer the mushrooms, herbs and oil into a large bowl. Stir in the salt and vinegar and allow to cool to room temperature. To serve, scoop out the mushrooms with a slotted spoon and place in a serving bowl. Cook’s note: Once cooled, the mushrooms can be refrigerated in their cooking oil for up to 1 week. (Make sure they are covered with the oil.) Bring to room temperature before serving. To serve as a side dish, gently heat the mushrooms in their oil, drain, remove the herbs and peppercorns and serve warm.


Tip: Once you’ve consumed all these amazingly delicious mushrooms, don’t throw the oil away. Strain it through a fine sieve and use it to make another batch of the mushroom confit; or use it to make vinaigrettes, to drizzle over roasted or grilled vegetables, to sauté vegetables or to make sauces. It’ll bring beautiful aromas and flavors to anything you cook with it. Refrigerate the strained oil for up to 1 month.

Quickles

Quickles

Quickles


Choose any one of the following (the quantity of which doesn’t matter that much, just chop or slice enough to comfortably fit in your jar with a little bit of room at the top):


4 to 6 celery stalks, cut to fit the size of your jar

1 English cucumber or 3 Persian cucumbers, thinly sliced or cut into spears that fit your jar

1 red onion, beet, or fennel bulb, thinly sliced

1 bunch radishes, thinly sliced

4 to 6 fresh chilies, sliced

1 1/2 C. raisins or other dried fruit


1 cup cider, white wine, or rice vinegar

1 T. kosher salt

1 T. mustard, coriander, or cumin seeds

1 T. sugar

1/2 tsp. crushed red pepper flakes, optional

Freshly ground black pepper


Place the vegetables, chilies, or dried fruit in a large resealable container (preferably glass). Combine the vinegar, salt, seeds, sugar, crushed red pepper flakes, if using, and several grinds of black pepper in a small saucepan and bring to a simmer. Give the pan a swirl or two to help the sugar and salt dissolve, then pour the mixture over the vegetables. Add water to cover and let cool to room temperature. Cover tightly and refrigerate up to a month. You can mix your vegetables when you pickle them if you like. Just remember that if you add chilies everything will be spicy; if you add a beet everything will be red, etc.

Slow-Roasted Summer Garden Tomatoes

Slow-Roasted Summer Garden Tomatoes

Slow-Roasted Summer Garden Tomatoes


Cherry, grape or small Roma tomatoes

Whole cloves of garlic, unpeeled

Olive oil

Herbs such as thyme or rosemary (optional)


Preheat oven to 225°F. Halve each cherry or grape tomato crosswise, or Roma tomato lengthwise and arrange on a parchment-lined baking sheet along with the cloves of garlic. Drizzle with olive oil, just enough to make the tomatoes glisten. Sprinkle herbs on, if you are using them, and salt and pepper, though go easily on these because the finished product will be so flavorful you’ll need very little to help it along. Bake the tomatoes in the oven for about 3 hours. You want the tomatoes to be shriveled and dry, but with a little juice left inside–this could take more or less time depending on the size of your tomatoes. Either use them right away or let them cool, cover them with some extra olive oil and keep them in the fridge for the best summer condiment, ever. And for snacking.

Healthy Carrot Cucumber Rolls

Healthy Carrot Cucumber Rolls

Healthy Carrot Cucumber Rolls


2 medium cucumbers

1 large carrot

100 grams (3,5 oz) cream cheese

¼ teaspoon seasoning (Curry Powder, Celery Powder, etc.)


Wash and dry the carrot and cucumbers.  Gently peel the cucumbers into strips with a vegetable peeler. Leave the skin aside and continue peeling. If you have a hard time peeling because of the seeds, turn over the other side and start peeling from there. Set aside the cucumber strips.  Peel the carrot with a vegetable peeler.  Set aside.  Combine cream cheese and curry powder in a small bowl with a spoon.  Center carrot strip over cucumber strip.  Take one teaspoon of curry cream cheese and using a knife,  lay it as much as you need on wide end of the carrot.  Roll the carrot cucumber strips tightly and secure with a toothpick.

Air Fryer Butternut Squash

Air Fryer Butternut Squash

Air Fryer Butternut Squash


1 1/2 teaspoons onion powder

1 1/2 teaspoons garlic powder

1/2 teaspoon sweet paprika

1/8 teaspoon cayenne pepper

1/2 teaspoon kosher salt

1 teaspoon brown sugar, optional

4 heaping cups peeled and diced butternut squash, 1 –inch cubes, 24 ounces

1 tablespoon olive oil


Place butternut squash in the air fryer basket and spray with olive oil spray. Air fry 340F 20 to 23 minutes*, shaking the air fryer basket a few times until the squash is fork tender and golden. Meanwhile, in a small bowl, combine the onion powder, garlic powder, sweet paprika, cayenne, salt and brown sugar, if using. When the squash is tender, drizzle and toss the squash with olive oil. Add the spice mixture and toss gently to coat; cook 3 to 4 more minutes. Serve hot.