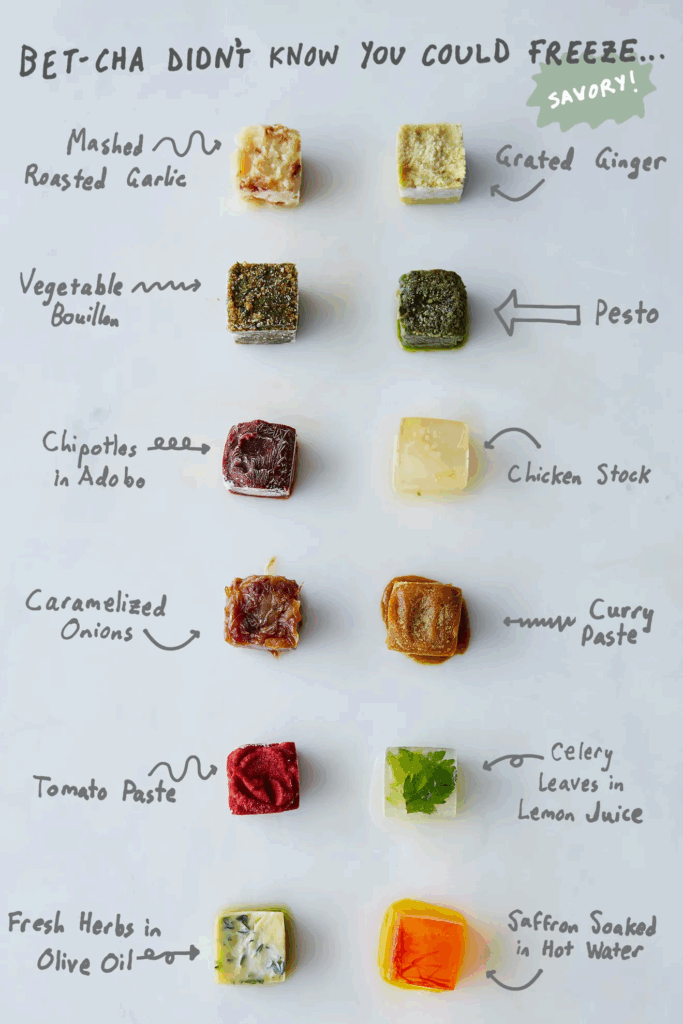
Things You Can Freeze

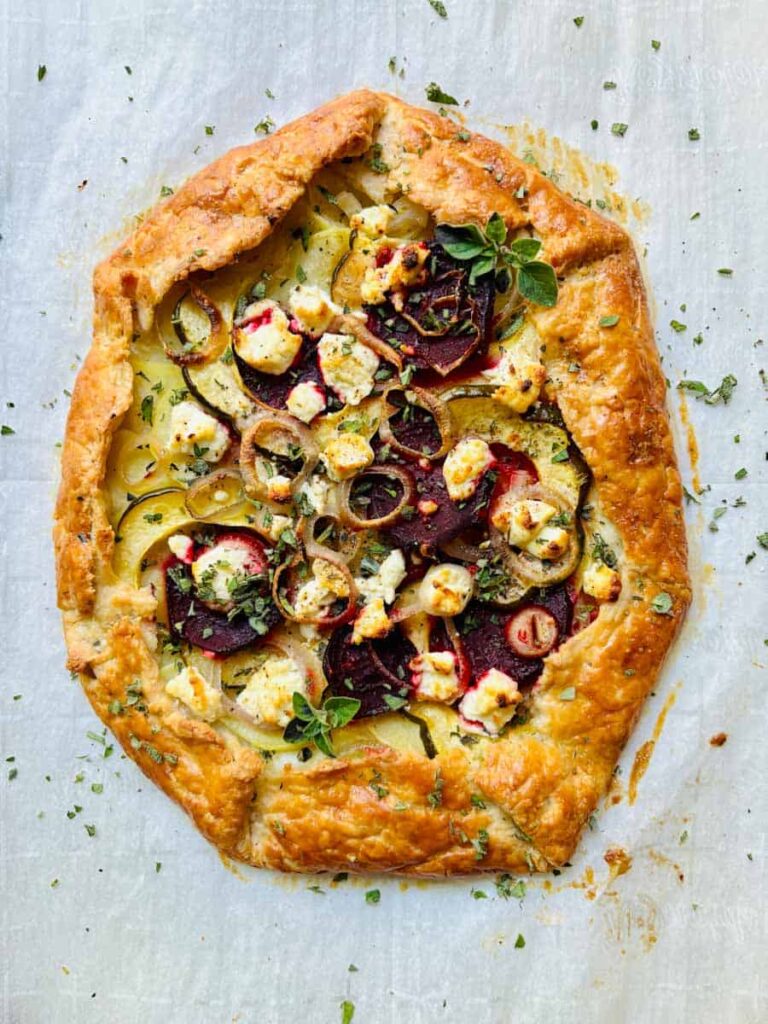
Anything You Like Galette

Keep pie dough in the freezer, and a galette for dinner is surprisingly simple. Anything can become a galette filling—saute some mushrooms or greens, roast up some root vegetables, or just rummage through the fridge for leftovers. As Irene will tell you, baked brie is technically a galette! Once you’ve got your filling, spoon it onto the crust, make a few simple folds (so easy a six-year-old can do it, we promise), bake, and eat. You can also layer a sauce on the bottom of the crust, mix in some herbs or spices, or sprinkle on bits of cheese or meat. Experiment on the outside of the crust too, by dusting on some grated Parmesan, everything bagel spice, or just a few grinds of black pepper and a pinch of flaky salt.
2 T. extra-virgin olive oil, plus more as needed
1 small onion or large shallot, chopped
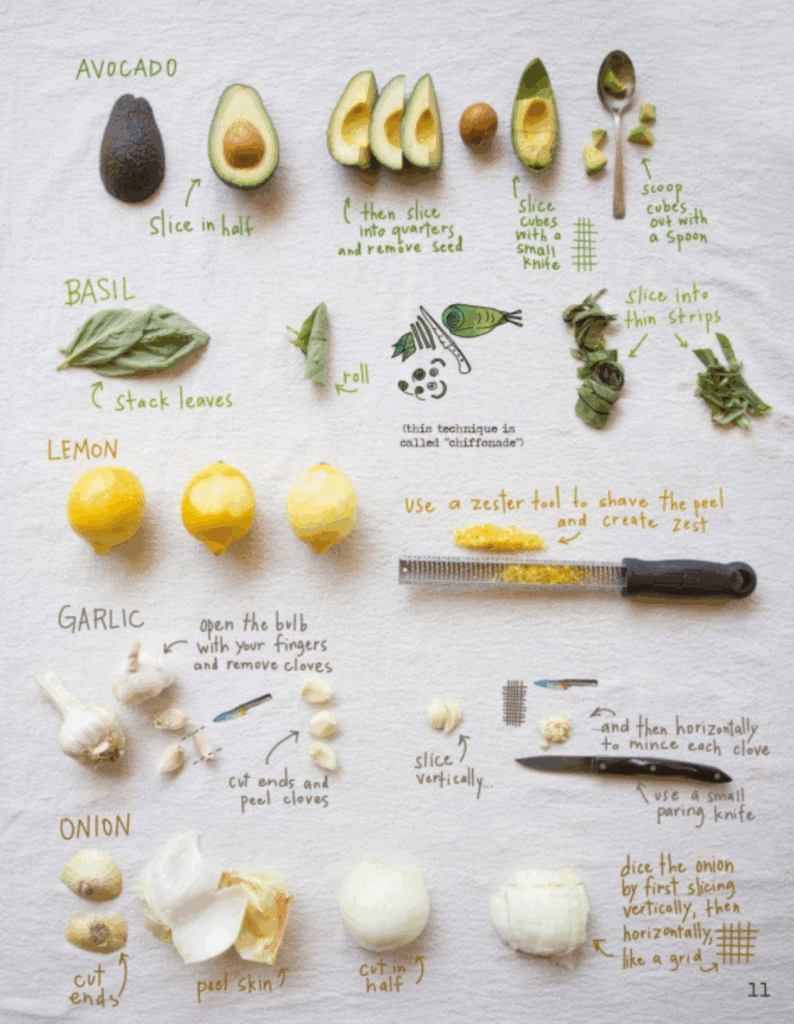
4 garlic cloves, chopped
3 cups filling of choice
1 pie crust, thawed if frozen and unrolled
1 egg beaten with a small splash of water, for egg wash (optional; a bit of olive oil or heavy cream works too)
Heat the oven to 400 degrees. Line a rimmed baking sheet with parchment or a silicone baking mat. Heat the olive oil in a large skillet over medium heat, then add the onion and garlic. Sauté until the onion is tender, about 5 minutes. Stir in any other filling ingredients as directed below, then season to taste with salt and pepper. Roll out the pie crust and place on the prepared baking sheet. If you’re adding a sauce or cheese to the base of the galette, smear it across the center, leaving a roughly 2-inch border around the edges. Scoop your filling on top and spread it around. Fold the edges up over the sides of the filling in all directions (galettes are meant to be rustic, so don’t worry too much about the shape), then brush with an egg wash, olive oil, or cream, if using. Bake until the crust is a deep golden brown, 35 to 45 minutes. Let cool slightly before serving.


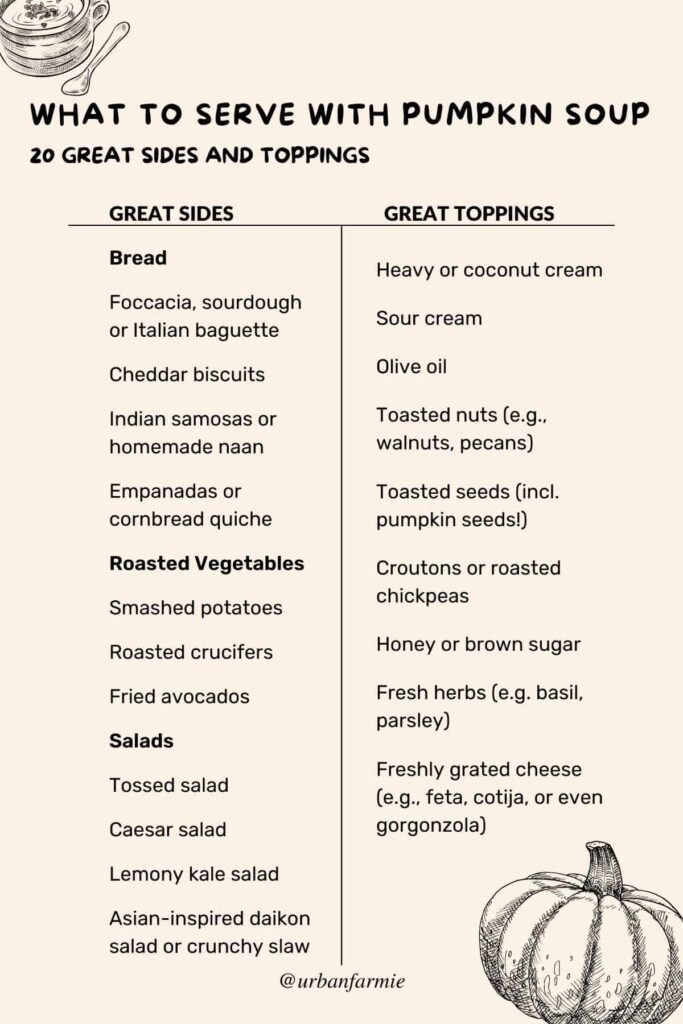
 Chili Oil
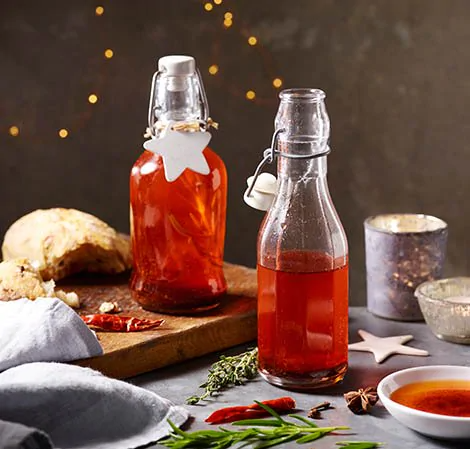
1 cup extra-virgin olive oil
3 whole dried Calabrian chilies, stemmed
2 tsp. dried red chili flakes
Heat 2 T. of the olive oil in a small heavy-bottomed saucepan over medium heat. When the oil is shimmering, add the chilies and chili flakes, swirling the pan, until they release their aroma and start to sizzle, a matter of seconds. Watch closely; the chilies can burn quickly. Add the rest of the oil to the pan, reduce the heat to low, and continue to cook just to warm the oil through, 2 to 3 minutes—it should be hot to the touch but not scalding; a thermometer inserted into the oil should read about 180°F. (If it’s a bit hotter, don’t worry.) Remove the pan from the heat and let the oil cool to room temperature, about 2 hours. Transfer the cooled oil to a sealed airtight jar or bottle, leaving the chilies and chili flakes in it. Store it in the refrigerator for up to 6 months, letting it come to room temperature before using it.
 Chili Powder
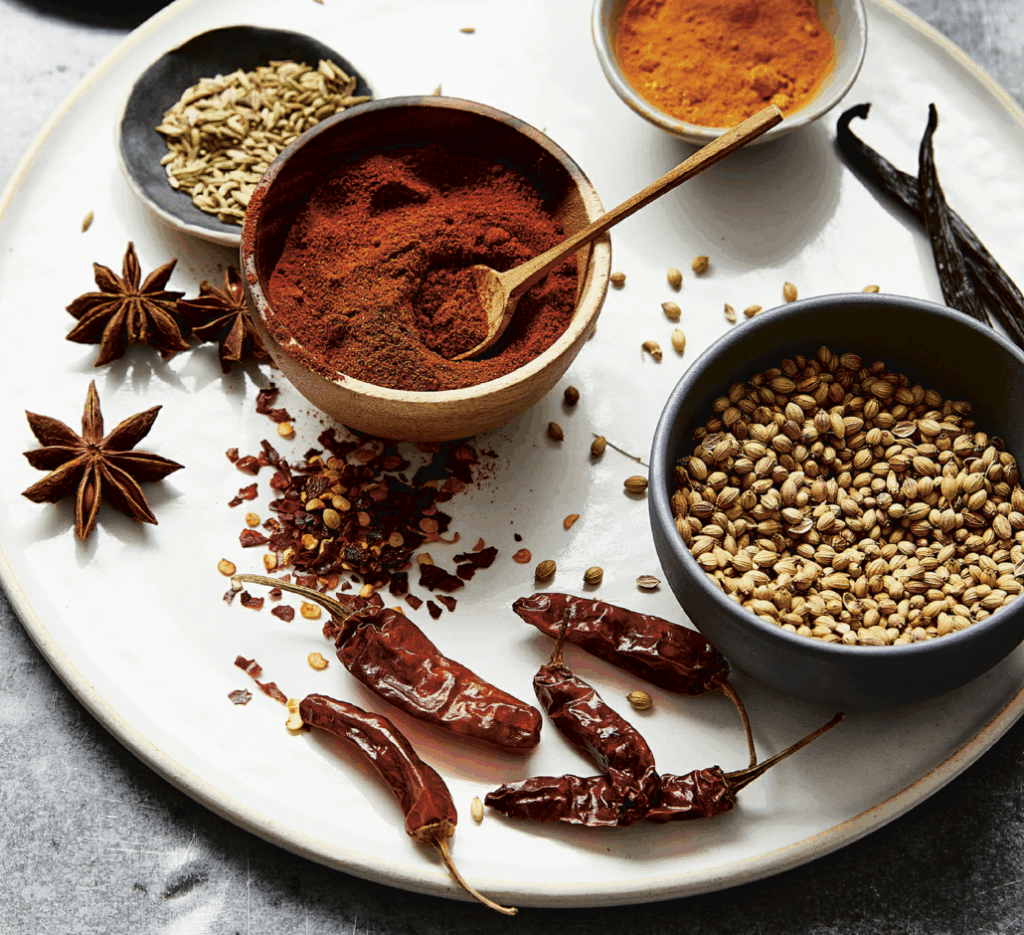
1 ½ tsp. cumin seeds, toasted and cooled
1 dried arbol chili pepper, stemmed, toasted, and cooled
¾ tsp. dried oregano, preferably Mexican
In a spice grinder, combine the cumin, chili, and oregano, and grind into a blended powder. You can prepare this a few hours or even a couple of days in advance and store it in a sealed plastic bag until you need it. But it’s best freshly made.
 Instant Pot Roasted Garlic
4-6 large Garlic Bulbs
½-1 T. EVOO per bulb, for drizzling
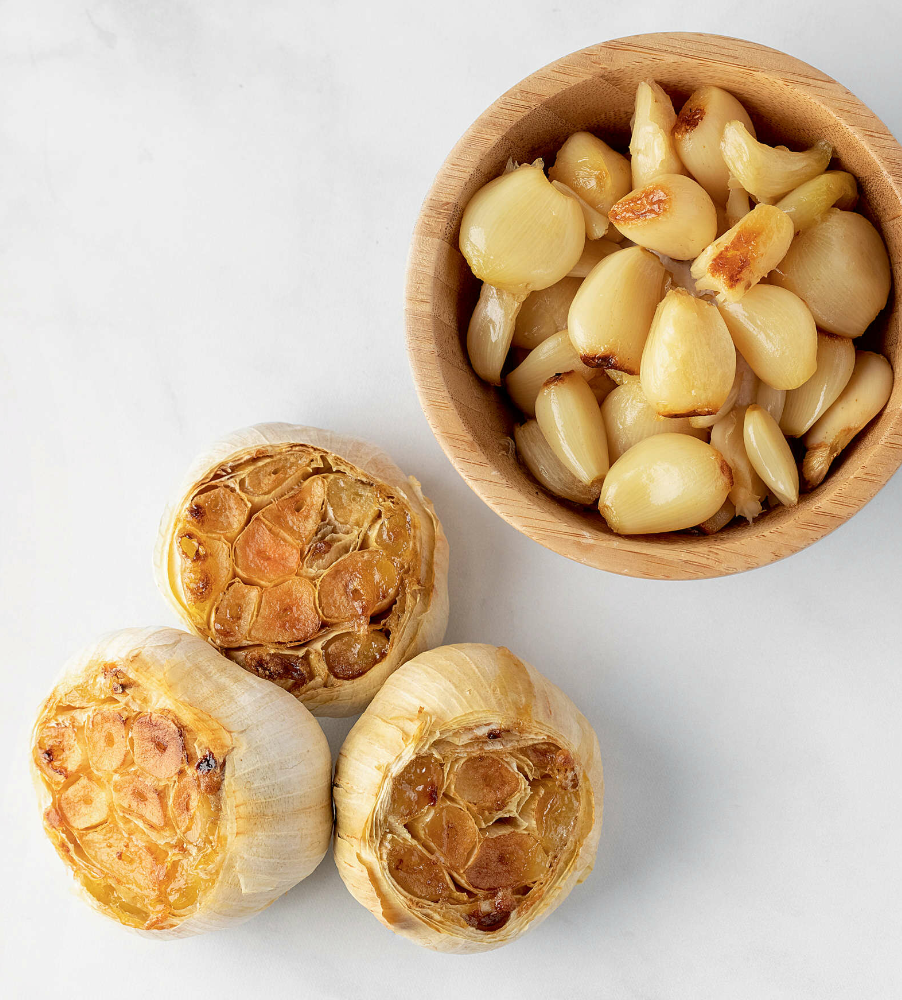
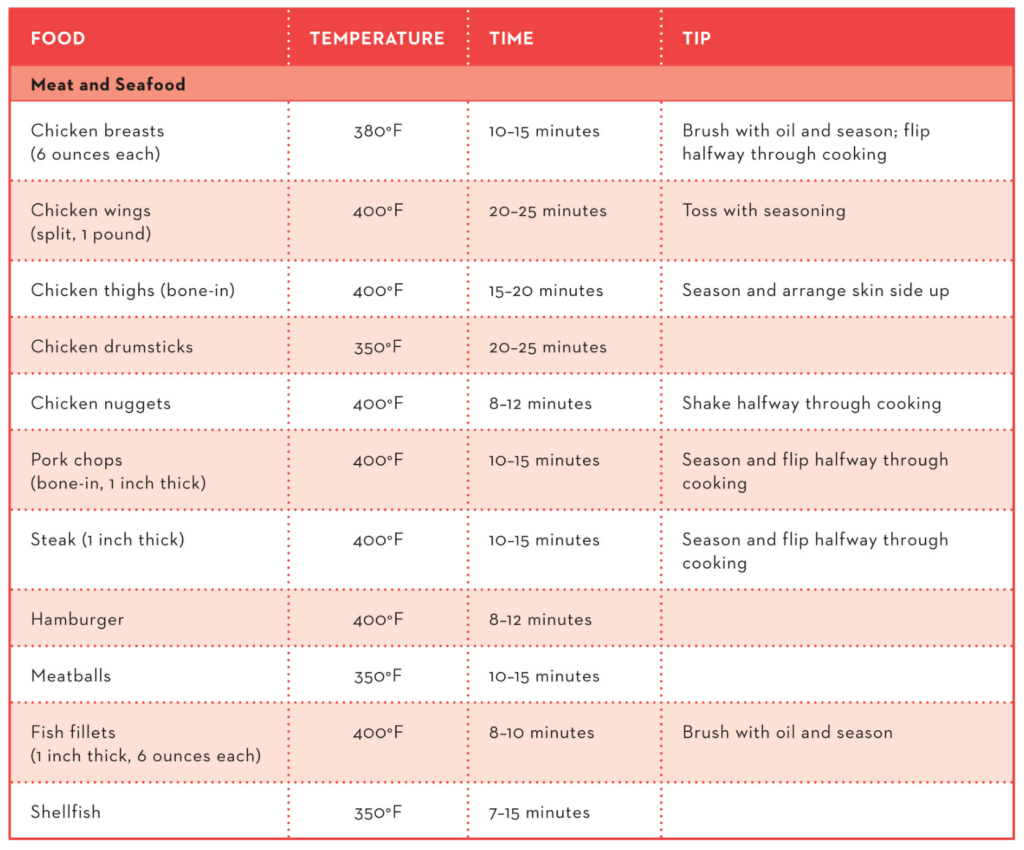
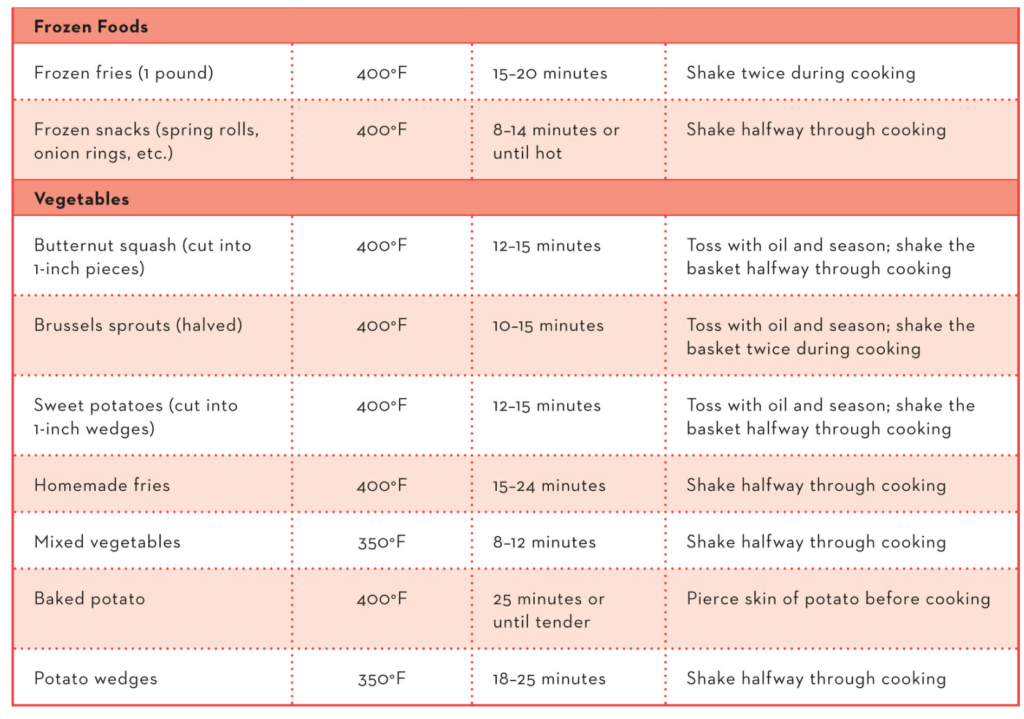
Using a good chef’s knife, slice off the top of each garlic bulb so all the cloves are exposed. Place the trivet in the Instant Pot, pour in 1 C. of water, and rest the garlic bulbs on the trivet, sliced side up. (You can use the basket that came with the air fryer lid instead of the trivet if you prefer.) Secure the lid, move the valve to the sealing position, and hit Manual or Pressure Cook on High Pressure for 5 minutes. When done, allow a 10-minute natural release followed by a quick release, then hit Keep Warm/Cancel to turn off the pot. Remove the trivet and garlic bulbs, drain the liner pot, and return it to the Instant Pot, then replace the trivet or basket and garlic bulbs (still sliced side up). Drizzle the oil onto each bulb, allowing it to seep into every nook and cranny. Add the air fryer lid, hit Broil (400°F) for 12 minutes, and hit Start to begin. Check on the garlic periodically until it’s roasted to your liking (it should be a rich golden brown). When done, remove the air fryer lid and let rest for 10 minutes. Once cool to the touch, pull off each garlic clove and squeeze the flesh into a bowl (it will pop right out of the skin and be almost paste-like). Discard the skins (your hands will get messy from this, but that means you’re doing a good job). You can now do anything you want with the garlic! Store in an airtight container in the refrigerator for up to 4 days
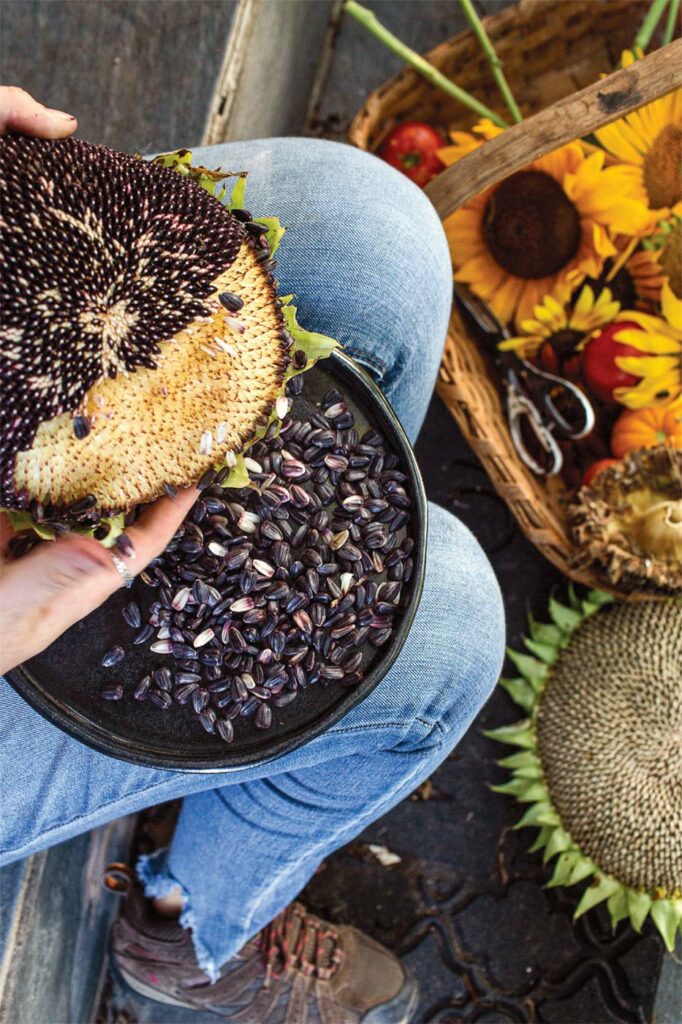
Roasted Fresh Sunflower Seeds
1 C. in-shell sunflower seeds, harvested and raw
2 ½ T. kosher salt
1 quart of water
Preheat the oven to 450°. Harvest sunflowers when the flower head is drooping and the petals around the center are dried. Note — the best seeds come from larger varieties of sunflowers such, as Mammoth Sunflowers. Use your thumb to rub the sunflower seeds out into a collection bowl. Place seeds, salt and water into a medium saucepan and bring to a boil. Reduce to a simmer for 15 minutes, then drain the water. Spread seeds onto a sheet pan in a single layer and roast for 20 to 30 minutes (check often and stir so they do not char). When dry and roasted to your satisfaction, remove from the oven and enjoy!

| Name | Flavor and Use |
| Apple Blossoms | Apple blossoms have a light, floral flavor with both sweet and sour undertones, just like apples! They can be candied like rose petals or used to garnish fruit or citrus dishes. |
| Basil | Basil is found on most spice racks. But it’s also a flowering plant and the flowers are edible. Thai basil is often harvested once it’s fully flowered. The whole flower is edible and carries the distinct savory flavor reminiscent of anise and mint with a touch of pepper. |
| Bee Balm | Bee balm has pretty, round flowers. It tastes similar to oregano and sage together and it is most often included in savory dishes such as salads, vegetable dishes, and herbal butters. It can also be included in herbal tea recipes. |
| Borage | Borage comes in a beautiful form, blue blooms in a star-like pattern. This shape gives it the nickname starflower. It taste sweet with a honey-like zest. It’s great as a garnish on drinks. It’s often an ingredient in desserts or treats. |
| Camellia | Camellias have beautiful, delicate blooms and come in hundreds of species with thousands of hybrids. The flowers are edible while the leaves are a long-standing ingredient in teas. |
| Carnation | Carrie Bradshaw is not a fan of receiving carnations, but the foodie in her might have enjoyed the spiciness their petals offer. They have a flavor that is almost peppery and similar to cloves. |
| Chamomile | Chamomile is most commonly used in teas. Its subtle apple-ish flavor complements other flavors, like mint or citrus. While known in teas, it can also be used in desserts like custards. The petals can also be used in candied form or as dessert ornament. |
| Cherry Blossom | Called sakura in Japan, cherry blossoms have a long history of use in Japanese culture including edible blooms. The Japanese have pickled them in salt and used them as a confectionary. |
| Chives | Chives are a well-known herb with a distinct and popular onion-like flavor. Common chives produce purple flowers and can be used in salads, as garnishes, or to add savory flavor to other dishes. Chinese chives have an even more pronounced garlic-like flavor. |
| Chrysanthemum | Chrysanthemum has a taste that resembles chamomile. It can be used in teas and desserts. It’s also mixed into stir-fry recipes, chop suey, and other traditional Asian dishes. |
| Cilantro | Also known as coriander, cilantro is a very common flowering herb. It has a unique flavor reminiscent of citrus and parsley. It’s used as a spice and as a garnish in many dishes. |
| Coltsfoot | Coltsfoot has many edible uses. Toss it into a salad to brighten it up, use it to make an aromatic herbal tea, or mix the flowers with honey and use it as a natural cough remedy. |
| Cornflowers | Their blooms don’t look like popcorn. These beautiful purplish-blue blossoms have an intriguing flavor profile. They mix a touch of sweetness with a clove-like spicy flavor. They are also a popular food dye with their beautiful bluish-purple color. |
| Cucumber | Cucumber blooms can be used to add a little nutrition with flair to your salad. You can eat them raw or stir fry them. The flower is a pretty yellow color and has a cucumber-floral flavor. |
| Dahlia | Known for their beauty, dahlia flowers are also edible. The celery-like tubers offer additional benefits. The tubers contain potassium, vitamin B, and riboflavin but the flowers make an attractive garnish or colorful addition to dishes. The flowers make a great edible adornment for cakes. |
| Daisy | This colorful flower’s petals can be added to the recipe of any dish to offer a sweet perfume taste. |
| Dame’s Rocket | Dame’s Rocket has eye-catching purple flowers that make an excellent addition for color to salads and other dishes. Their flavor is mild and rather bland so it’s best included as a complementary ingredient. It’s best consumed in small doses as it large amounts might cause nausea. |
| Dandelion | Dandelions are considered a flowering herb. Commonly used in salads, they have a distinctly earthy and nutty flavor with hints of bitterness. Their flavor can balance other sweet ingredients in recipes. |
| Daylily | Despite its name, the day lily is not a member of the family we think of as common lilies (lilium). It has attractive orange blooms and its flavor is grassy and similar to peas. |
| Dill | Dill grows with small clusters of yellow flowers. It’s been cultivated for cooking and herbal use for thousands of years across Eurasia. The flowers are more pungent and flavorful than the leaves. Dill has been used in ayurvedic medicine, as an oil, and as a spice often coupled with fish. |
| Echinacea | Echinacea has a pretty, usually purple, flower in the wild. Its petals have been used traditionally in teas and herbal remedies. It also goes by the name purple coneflower and is cultivated around the world for its herbal benefits. |
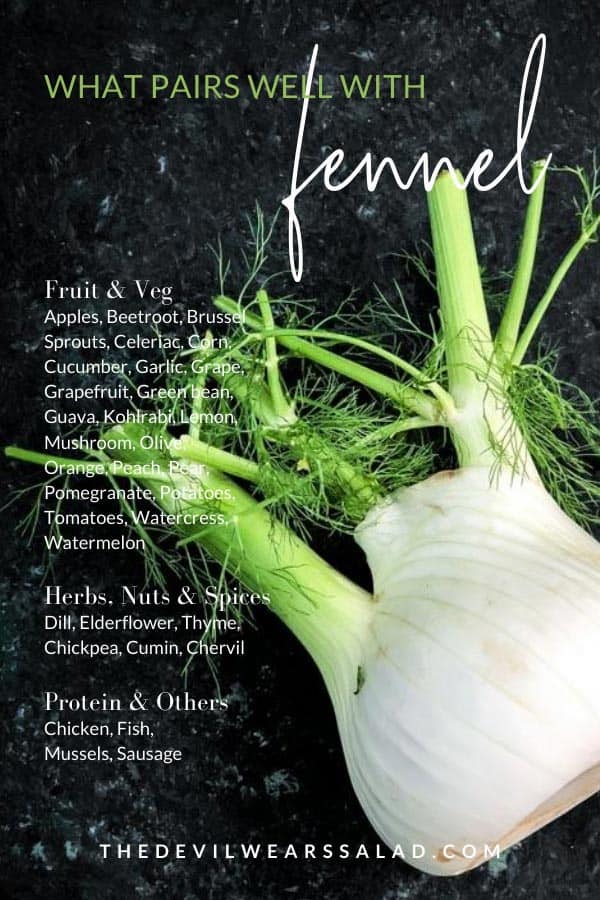
| Fennel | All parts of the fennel plant are edible which includes the stalk, bulb, and fronds. Fennel is commonly used in cooking. Usually, recipes use the bulbs which have a celery-like texture and an almost licorice-like flavor. |
| Garden Pea | The common garden pea’s well-known pods grow with white flowers. Pea flowers can be included in anything made with peas. The flowers also carry a grassy, herbal flavor. *Warning:* Do not confuse the common pea with sweet peas (lathyrus odoratus). Sweet peas are poisonous. |
| Gardenia | Gardenia can be eaten raw, boiled, pickled, or preserved in honey. They can be used in tea like jasmine, with a similar flavor profile. They also have been used as a food dye for their yellow coloring. |
| Hibiscus | Its flavor is tart and very cranberry-ish. It’s a tropical flower and its blossoms are bright and beautiful. It’s often used in teas but can play a role in desserts, as a candied treat, a dried garnish, and an ingredient in cakes. |
| Honeysuckle | The flowers, unsurprisingly have a honey-like flavor. Honeysuckle nicely complements soups, salads, desserts, and drinks. *Warning*: ONLY eat the flowers. Do not eat the berries, which are poisonous. It also produces a pleasant aroma. |
| Hops | Hops are famous for their role in brewing beer. They are also a flowering plant. They provide a bittering balance to the sweetness of the yeast in beer. Beer isn’t their only use, however. Custards and sauces often incorporate hops for stabilizing flavor profiles. |
| Lavender | Lavender is in the mint family and has a sweet floral flavor. It’s also used in a wide range of recipes from gourmet entrees to dessert. It gives off a pleasant aroma which adds to its appeal for cooking. |
| Lilac | Often used in salads, lilac carries a lemony sometimes slightly bitter flavor. It’s also a pungent flower. It can also be used in syrups, beverages, and even beer. |
| Mallow | Malva includes over 25 varieties of beautiful flowers. But that floral elegance doesn’t translate into culinary bliss. Mallow has a mild, earthy flavor that is usually sauteed. Historically, it’s also been used as an ingredient in love potions! |
| Marigold | An herb and also traditionally a remedy for strengthening the immune system. Marigold comes in beautiful yellow, orange, and golden colors. Often used as a garnish or a decorative addition to dishes to add a pop of color. |
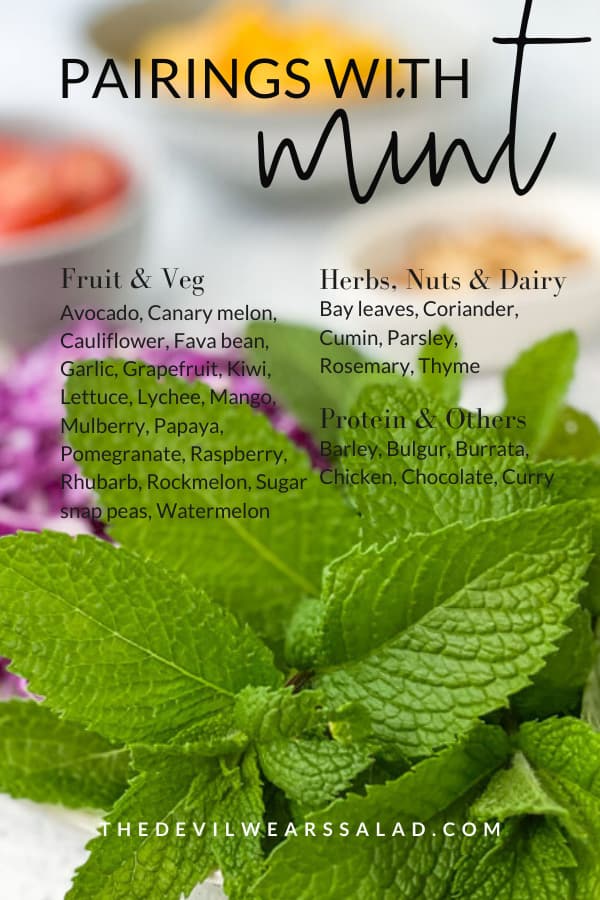
| Mint | Everyone knows mint’s distinct, sweet flavor. It’s the basis of everything from gourmet recipes to candy canes. The distinct flavor comes from the leaves but the flowers are also edible and make an excellent garnish for all occasions. |
| Nasturtium | Add some nasturtium blooms to add a pop of color and a bite in flavor. They have a spicy, peppery flavor that makes a good addition to a range of dishes. But if you’re cooking with it, make sure to add it at the end of the cooking process so it doesn’t overcook. |
| Orchids | Orchids are typically used for the finishing touches as beautiful garnishes on any meal in need of a pop of color. |
| Oxlip | Oxlip is a mild flavoring that can be used for soups when cooked or to pretty up salads when raw. It can be used in herbal teas or other mixtures. |
| Pansy | Pansy is the common name for hybrid flowers in the viola family. Popular because they come in a wide variety of bright colors, these edible flowers are |
| Peonies | Peonies have the same medicinal value as roses and can help ease sore muscles. |
| Plum Blossom | Plum blossoms are a favorite flower around the world. Their flavor is more complicated with hints of spice, sweetness, and floral tangs. Because of their beauty, these spring blooms can be used for floral confections and desserts of many varieties. They can be used to make frosting or sprinkled on top of puddings. |
| Pumpkin flowers | Field pumpkins are not just for Halloween. They produce pretty flowers that can have a culinary purpose. They are commonly used in Asian cuisines such as Bengali dishes. Their flavor is mildly sweet with earthy undertones. |
| Purslane | Purslane is packed with nutrition. It contains a very high portion of vitamin A, C, iron, magnesium, manganese, potassium, and calcium. It’s also high in antioxidants and omega-3s. It has a slightly sour, salty flavor akin to watercress or spinach. |
| Primrose | Primrose flowers have a range of flavors that span from a mild salad lettuce taste to a more bitter flavor. The flowers can be used as garnishes or even mixed in with the leaves for tea. |
| Red clover | Red clover has a long history as an edible flower and plant. It has a very floral taste when eaten raw but when cooked, it provides a vanilla-ish taste. A healthy flowering plant, it’s a gluten-free ingredient that has a nutritional profile akin to alfalfa sprouts. It contains vitamins A, B1, B2, B3, and C along with antioxidants, calcium, and potassium. |
| Rose | Flavors from roses will vary based on type, color, and soil conditions. While roses are also medicinal, their flower petals are a staple in many cocktails and dessert dishes. |
| Rosemary | A common spice, rosemary is a flowering shrub native to Mediterranean regions. It has beautiful purple, pink, blue, or white flowers that carry a distinct fragrance. It has a lemony pine-like flavor that complements many dishes. |
| Sage | Sage is a common name for two different types of flowering shrubs. Artemisia is sagebrush and salvia mellifera is black sage. Both can be used as flavoring herbs when cooking. They both have a slightly peppery flavor and are suitable for teas. |
| Strawberry Blossoms | Everyone knows how good the fruit tastes. But, surprise! Strawberry blossoms are also great to include in dishes. Farmed blossoms tend to be pink while wild strawberry blossoms are white. Just be careful where you get the blossoms from though as some farms like to douse them in chemicals. |
| Sunflowers | Sunflowers do produce the beloved sunflower seeds, but their stem can also be steamed and eaten like an artichoke. Not to be confused with a sunchoke! |
| Tansy | Tansy has a long, interesting history as an edible flower. It was used as an insect repellant and also common for Easter pudding. Its nutmeg-cinnamon-like flavor is best used as a flavoring and the flowers can be used in tea. *WARNING* Don’t eat tansy in large amounts, it may upset your tummy. |
| Tulip | You can nibble on some tulips with your own two lips! *WARNING*: Tulips can cause an allergic reaction. If you develop even minor allergic reactions do not eat the petals. Never eat the bulbs! When in doubt, avoid eating the flower. |
| Violet | The beautiful violet flower has a subtle flavor, slightly sweet. The refreshing taste evokes the flavor of springtime. |
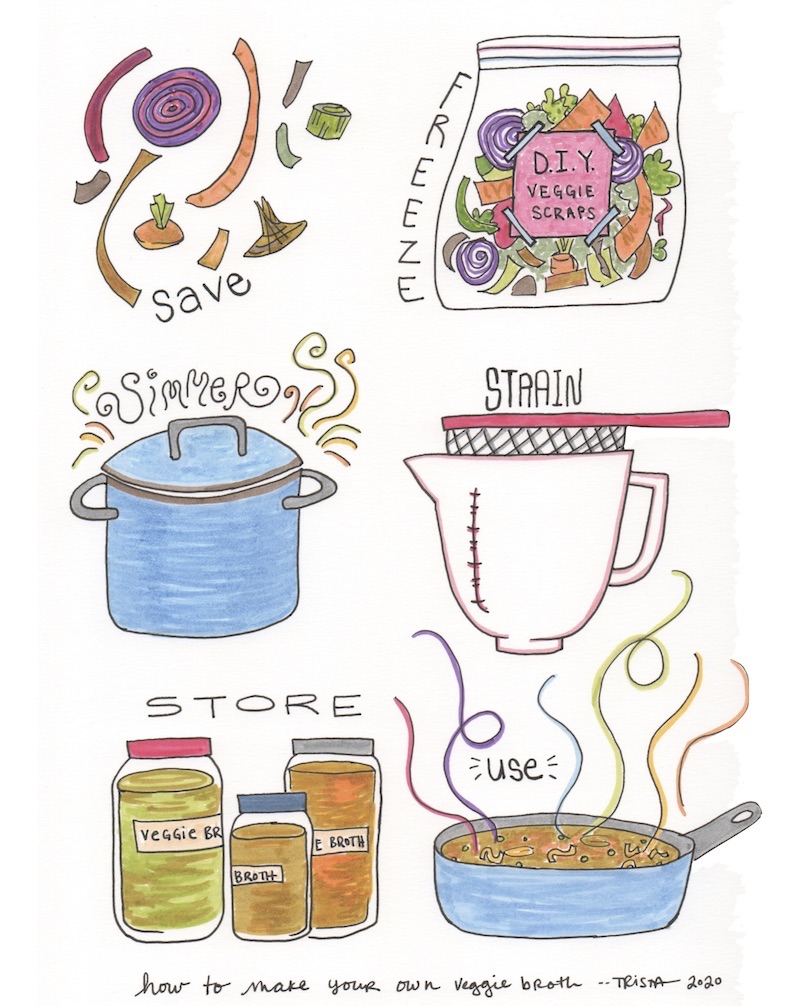
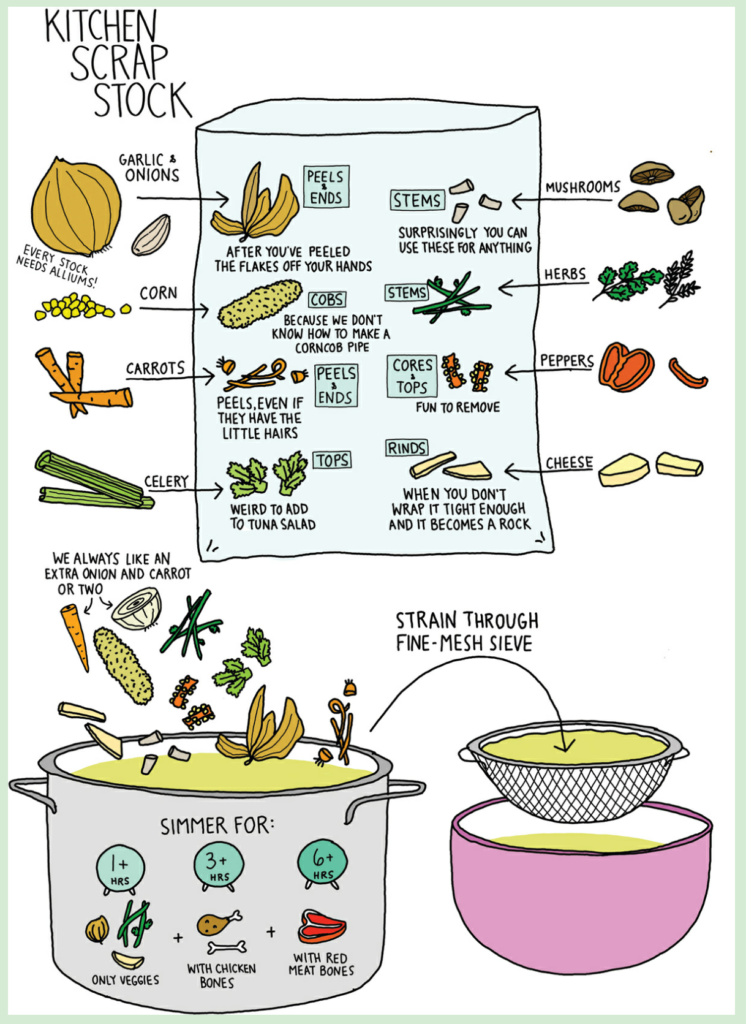
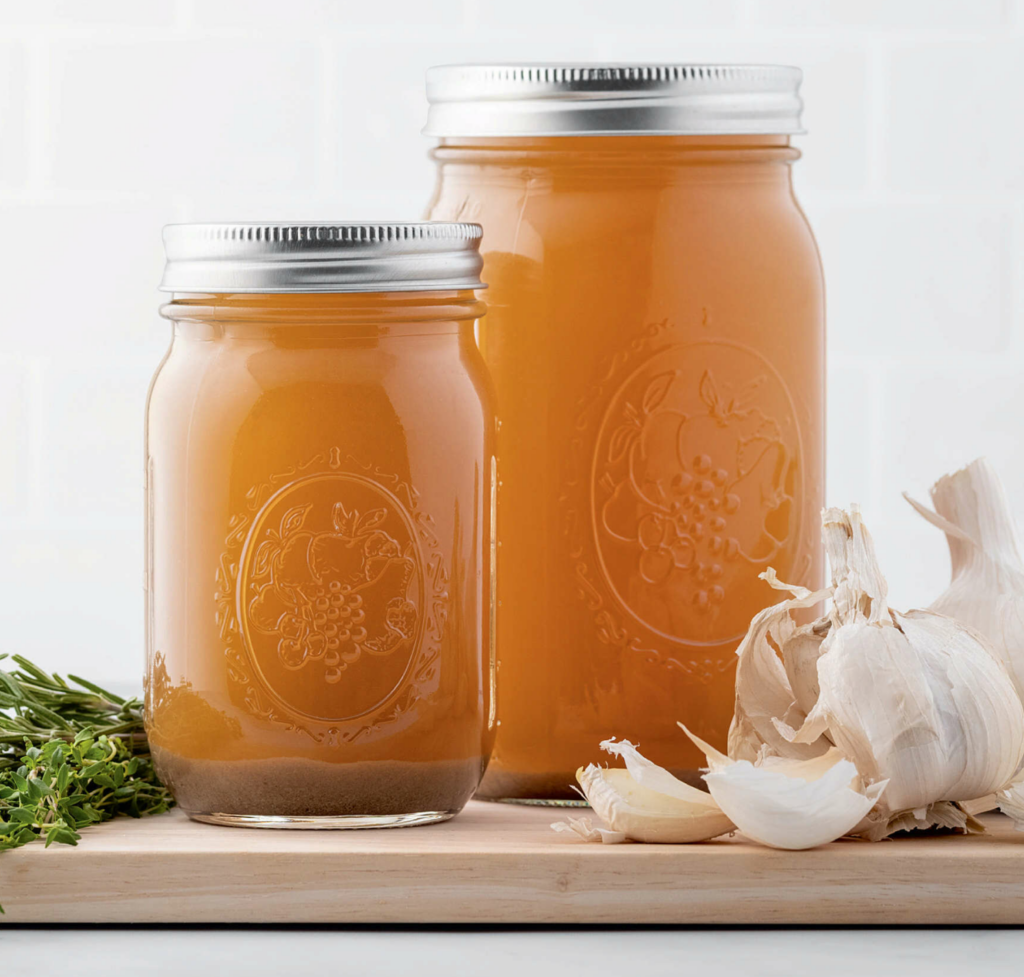 Instant Pot Garlic Vegetable Broth
40 cloves garlic, lightly smashed, or Roasted Garlic (can reduce to 10 and replace with other vegetables and scraps for less garlicky broth)
1 medium yellow onion, unpeeled and quartered
2 ribs celery, halved crosswise
10 whole black peppercorns
1 tablespoon garlic powder or granulated garlic
2 teaspoons garlic salt
2 sprigs thyme
2 sprigs rosemary
2 bay leaves
8 C. water
1 tablespoon apple cider vinegar
Any other seasonings you enjoy, to taste
Combine the garlic cloves, onion, celery, peppercorns, garlic powder, garlic salt, thyme, rosemary, and bay leaves in the Instant Pot. (NOTE: If you have a steamer basket, put the ingredients in it and lower into the pot.) Add the water and vinegar. Secure the lid, move the valve to the sealing position, and hit Manual or Pressure Cook on High Pressure for 120 minutes. Quick release when done. Carefully pour the broth through a fine-mesh strainer into a large bowl or pot; discard all the solids. (Or, if using the steamer basket, simply lift all the solids out of the liquid.) Now, taste the broth and season as you wish! The broth will keep in an airtight container in the fridge for up to 3 weeks or in the freezer for up to 3 months.
 Slow Cooker Caramelized Onions
5 yellow onions, cut lengthwise into 1/4-inch-thick slices
5 T. butter, melted
1 tsp. table salt
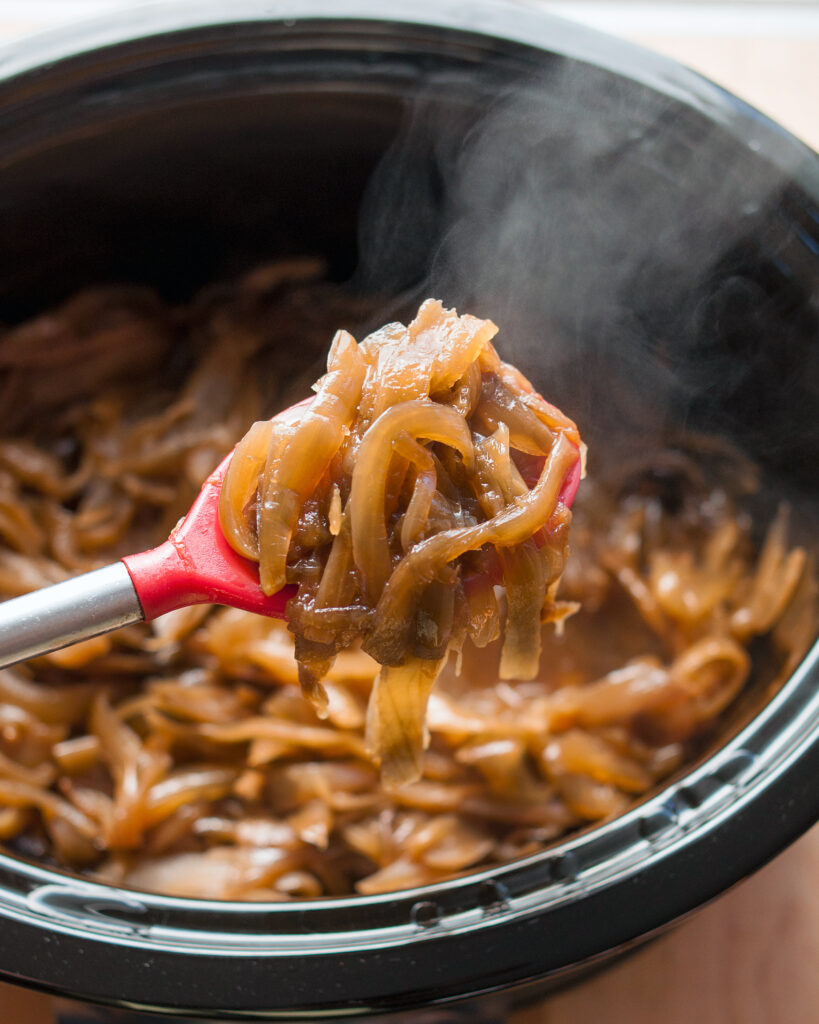
Place the onions in the crock of a slow cooker, then drizzle with the butter and salt and toss to combine. Cook on low for 12 hours. If at some point you can stir the onions, do so, but no need to set the alarm for two a.m. if you’re cooking them overnight. The onions will last in the refrigerator for 10 days, but I usually just package them in 1-cup servings and freeze for later use.
 Black Radish Pie Crust
Conveniently makes 4 crusts that freeze and hold in the fridge well.
5 c all purpose unbleached flour
3 T. sugar
1 1/2 tsp salt
1 cup unsalted butter, chilled and cut into cubes
1 cup chilled Organic Vegetable Shortening
1 large egg
1 tsp white vinegar
ice water
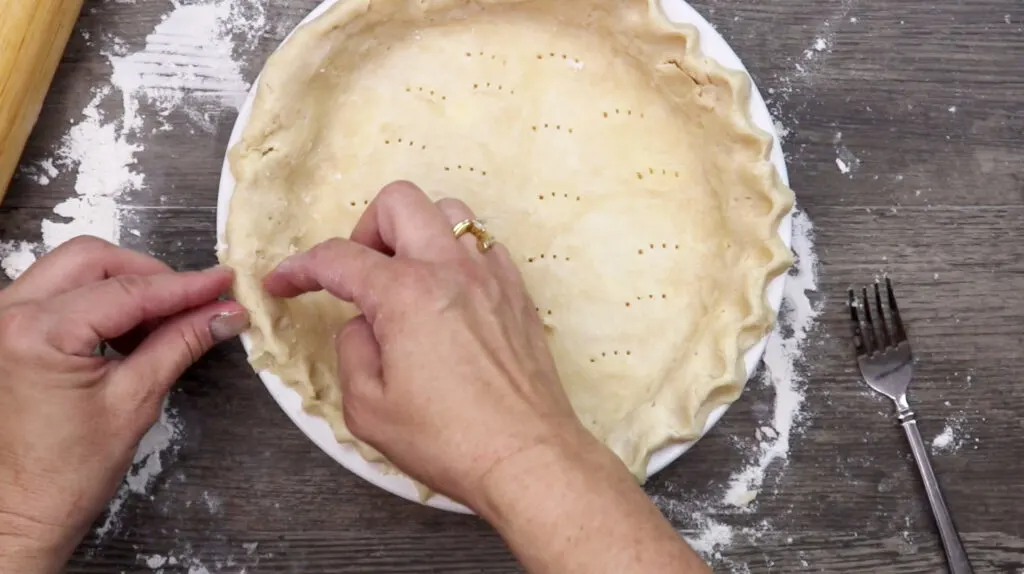
Cut up half of butter with dry ingredients in food processor. Pulse until chunky. Add all shortening, salt & sugar & pulse until you see chunks of butter/shortening the size of giant peas. Add remaining butter and replace lid w/feed tube. In a 1-cup measure, add egg & white vinegar and beat together. Add enough ice water to make a very full 1 cup. Pulse this mixture through feed tube until crumbly, adding more water if needed. Dough should just – barely – hold together when squeezed in the palm. Add more water until dough holds its shape when squeezed. (DO NOT OVER PROCESS) Dump dough out on lightly floured board and fold a few times into a crumbly round mass. Let rest in fridge at least overnight and up to a week. Divide dough into 4 portions. Roll out between parchment paper, using as little flour as possible to prevent sticking. Proceed with pie recipe if desired but for best results, allow to rest in the fridge overnight before using. Freeze unused pie crusts.
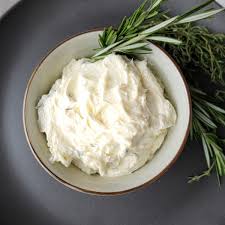 Horseradish Butter
Great for burgers or steaks. Or over fish, or melted, to dip seafood in. I mean, butter, horseradish, garlic, and lemon juice. How far wrong can you go?
2 T. (28 g) butter, softened
1 T. (15 g) prepared horseradish
1 /2 tsp. minced garlic
1/2 tsp. lemon juice
Combine everything in a small food processor and run until well-blended, or you can just mash it all together with a fork, if you prefer. By the way, the food processor is the reason I made two servings’ worth—one serving would barely be enough to reach the blades. Store any extra in a snap-top container in the refrigerator for 1 to 2 weeks. If you want to halve this, blend it by hand.
2 SERVINGS, each with: 107 Calories; 12 g Fat (94.7% calories from fat); Trace Protein; 1 g Carbohydrate; Trace Dietary Fiber; 1 g Net Carbs
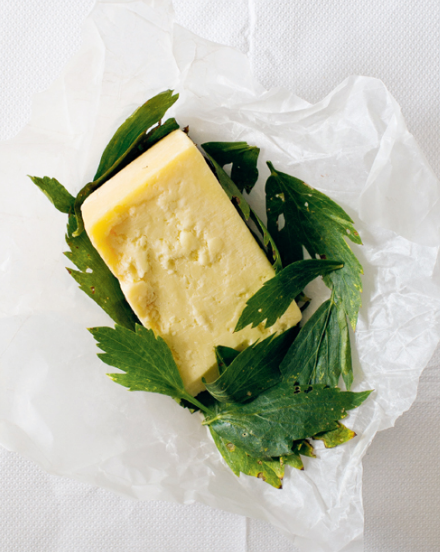 Lancashire Lovage
Lancashire or other crumbly cheese
Lovage leaves (enough to cover the cheese)
Wrap the cheese completely in dry lovage leaves and place the whole, wrapped cheese in greaseproof paper. Store in the fridge for a week before eating for the lovage flavor to inveigle itself into the cheese.
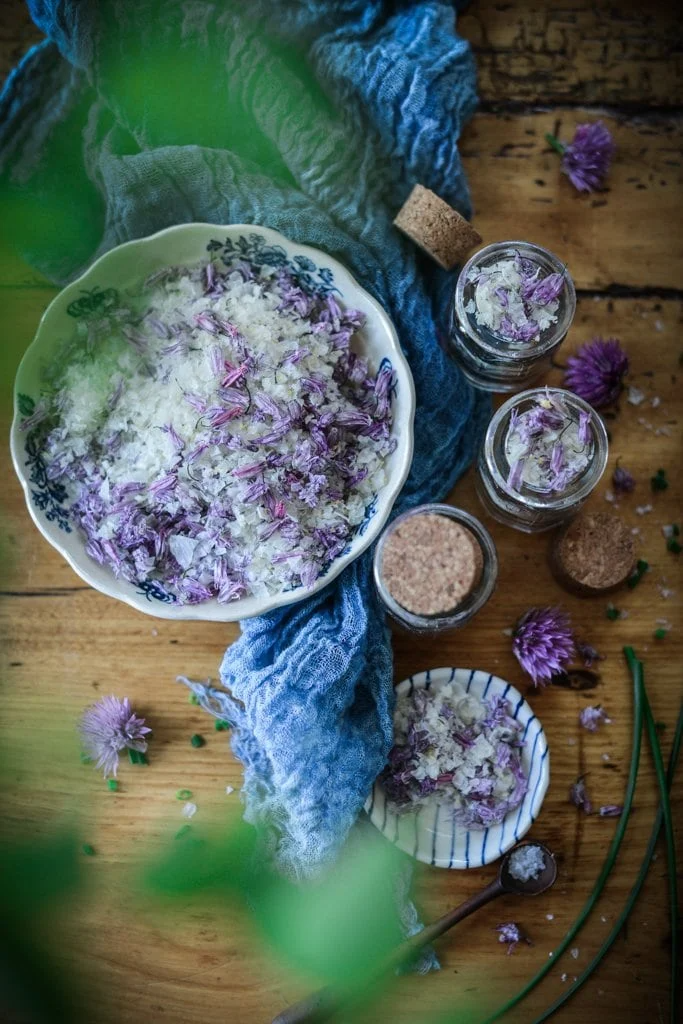 Marjoram and Chive Salt
How you dry this salt is everything. Leave it for a few days on greaseproof paper to slow-dry on a sunny window sill and its flavor is delightfully seaweedy; dry in a very low oven for 15 minutes (more if needed) and it’ll be a little brighter. Try half a batch of both and see which you prefer.
2/3 oz marjoram leaves
12 chive flower heads
2 ¼ oz coarse sea salt
Place the leaves, 8 of the chive flowers and the salt (add last to weigh down the herbs) in a coffee/spice grinder and whizz thoroughly: the change in tone from clatter to dentist drill tells you when it’s as it should be. If there are any remnants left unreduced, stir and whizz briefly again. For the oven-dry method, spread out (the salt, not you) on baking parchment on a baking sheet, and place in a very low oven; 230°F. After 10-15 minutes it should lighten in color. Scratch it up a little with a fork to expose the parts that are still a little damp and return to the oven. After 15-20 minutes it should be fairly dry. Allow to cool, add the remaining chive flowers (broken up a little), then jar immediately and try to focus on whatever else the day brings. A bit of finely grated lemon zest can be added.
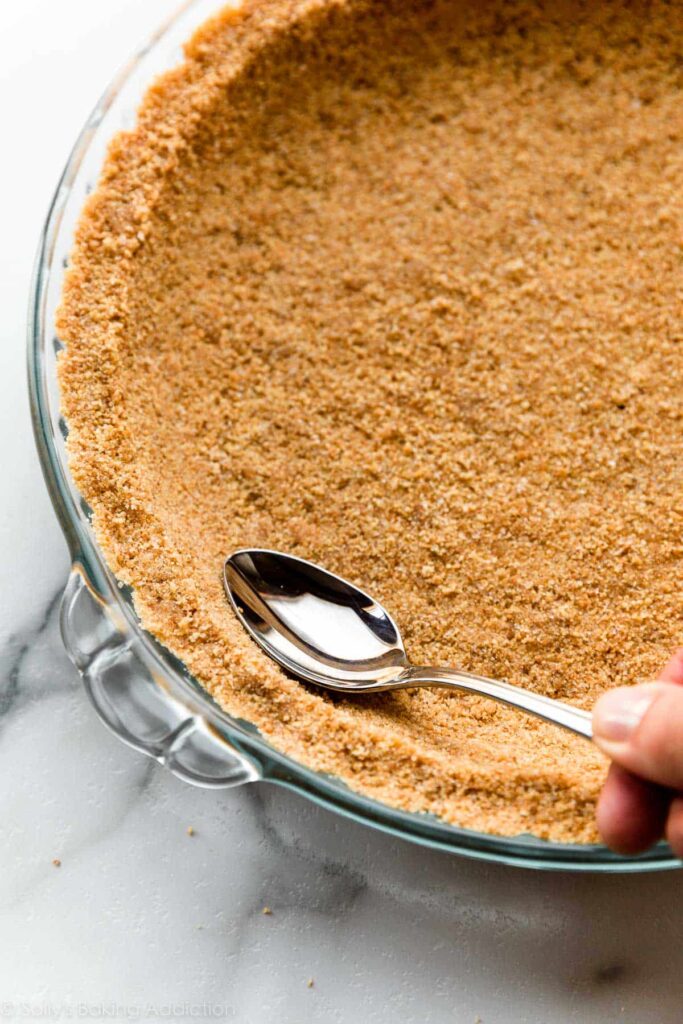 Perfect Graham Cracker Crust
1 and 1/2 cups (180g) graham cracker crumbs (about 12 full sheet graham crackers)
1/4 cup (50g) granulated sugar
6 Tablespoons (85g) unsalted butter, melted
If you’re starting out with full graham crackers, use a food processor or blender to grind them into fine crumbs. You can also place them in a zip-top bag and crush them into fine crumbs with a little arm muscle and a rolling pin. Stir the graham cracker crumbs and granulated sugar together in a medium bowl, and then stir in the melted butter. The mixture will be thick, coarse, and sandy. Try to smash/break up any large chunks. Pour the mixture into an ungreased 8-inch, 9-inch, or 10-inch pie dish, cake pan, springform pan, or square pan. With medium pressure using your hand, pat the crumbs down into the bottom and up the sides to make a compact crust. Do not pack down with heavy force because that makes the crust too hard. Simply pat down until the mixture is no longer crumby/crumbly. Tip: You can use a small flat-bottomed measuring cup to help press down the bottom crust and smooth out the surface, but do not pack down too hard. If making a pie, run a spoon around the bottom “corner” where the edge and bottom meet to help make a rounded crust—this helps prevent the crust from falling apart when you cut slices. For a baked dessert, pre-bake this crust per your filling recipe’s directions. I usually pre-bake for 10 minutes at 350°F (177°C). For a no-bake dessert, cool the crust completely before using, unless your filling’s recipe instructs otherwise.
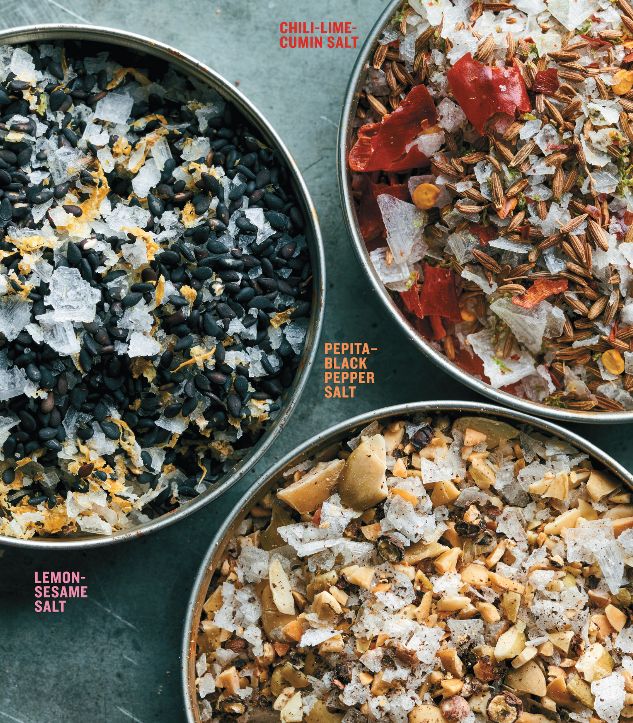 Finishing Salts
Chili-Lime Cumin Salt
2 T. cumin seeds
1 tsp. crushed red pepper flakes
1 T. finely grated lime zest
2 T. flaky salt
Toast the cumin seeds in a small dry skillet over medium heat, shaking often, until fragrant, 1 to 2 minutes. Transfer to a bowl and add the crushed red pepper flakes, lime zest, and flaky salt. Stir to combine, rubbing the zest in with your fingers. Leave at room temperature, tossing whenever you think about it, until the zest is dry (a few hours to overnight). Cover and store at room temperature up to 3 months.
Pepita-Pepper Salt
¼ cup pumpkin seeds, chopped
1 T. coarsely ground black pepper
2 T. flaky salt
Toast the pumpkin seeds in a small dry skillet over medium heat, shaking often, until golden and fragrant, about 2 minutes. Transfer to a bowl and add the black pepper and flaky salt. Stir to combine. Cover and store at room temperature up to 3 months.
Lemon-Sesame Salt
1/4 cup black or white sesame seeds
1 T. finely grated lemon zest
2 T. flaky salt
Toast the sesame seeds in a small dry skillet over medium heat, shaking often, until fragrant, 1 to 2 minutes. Transfer to a bowl and add the lemon zest and flaky salt. Stir to combine, rubbing the zest in with your fingers. Leave at room temperature, tossing whenever you think about it, until the zest is dry (a few hours to overnight). Cover and store at room temperature up to 3 months.
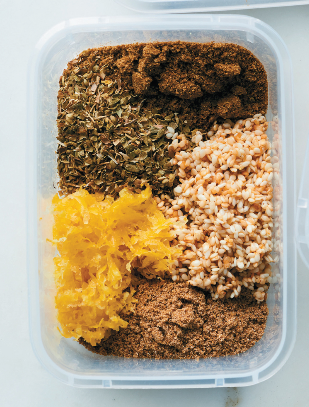 Za’atar Blend
Za’atar is an herby, nutty, tangy Middle Eastern spice blend. It’s named after its primary ingredient, hyssop leaves, that are dried and blended with toasted sesame seeds, herbs, spices, and ground sumac. Fresh or dried za’atar leaves can be hard to find in American supermarkets but you can use dried oregano or thyme in its place.
1 T. ground cumin
1 T. ground coriander
1 T. sesame seeds
1 tsp. ground sumac or freshly grated lemon zest
1 T. dried oregano or thyme
Place ingredients in a jar or other resealable container and shake or stir to combine. Za’atar will keep in an airtight container at room temperature for a couple of months.
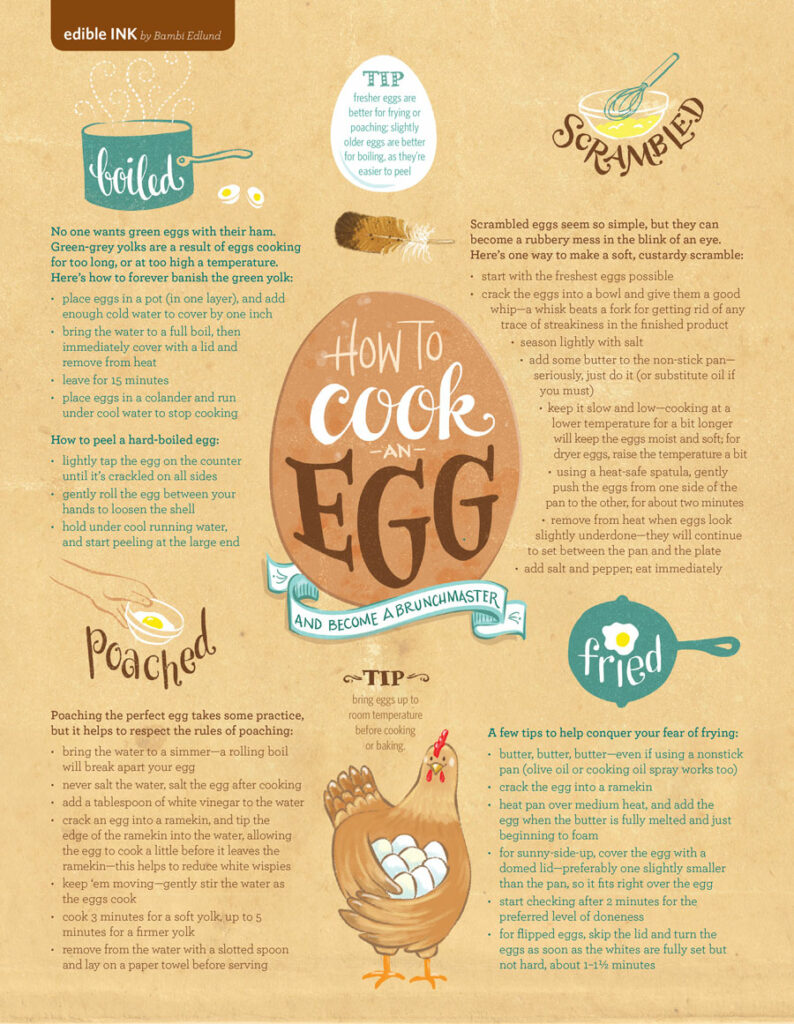
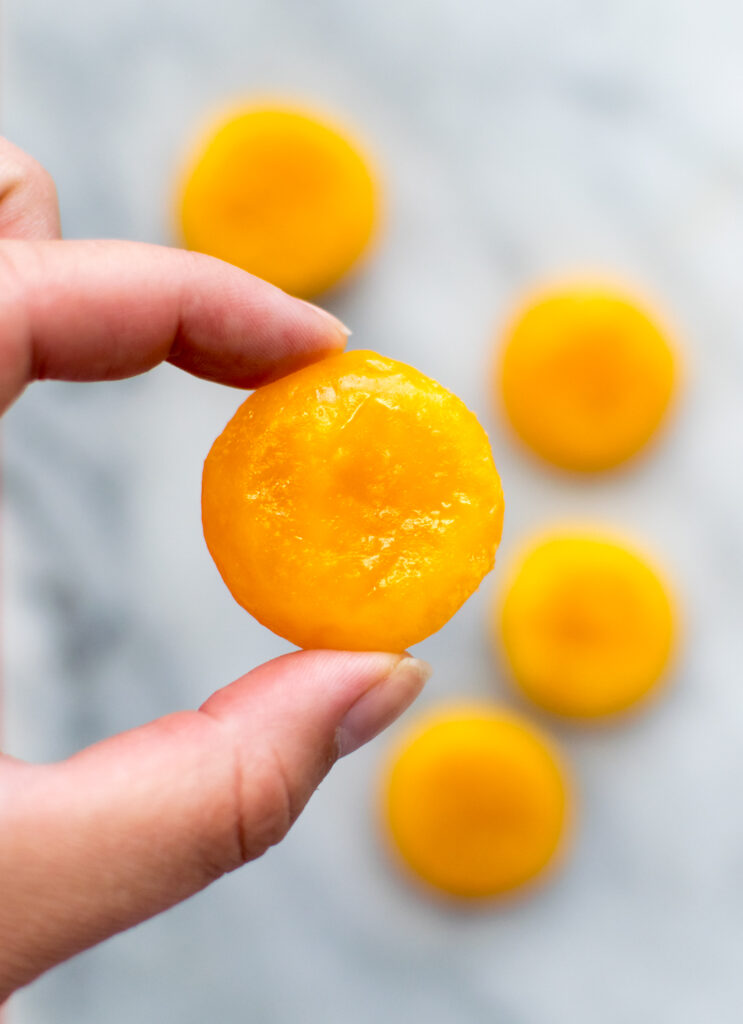 Cured Egg Yolks
1¾ cups kosher salt
1¼ cups sugar
4 large egg yolks
Nonstick vegetable oil spray
Preparation
Whisk salt and sugar in a medium bowl to combine. Evenly spread out half of salt mixture in an 8×8″ glass baking dish. Using the back of a tablespoon, create 4 depressions in salt mixture, spacing evenly. Carefully place an egg yolk in each depression. Gently sprinkle remaining salt mixture over yolks and tightly wrap dish with plastic. Chill 4 days. Preheat oven to 150°. Brush salt mixture off each yolk, then carefully rinse under cold water to remove any remaining salt (yolks will be semi-firm, bright, and translucent). Gently pat dry with paper towels. Generously coat a wire rack set inside a rimmed baking sheet with nonstick spray; place yolks on rack. Dry out in oven until opaque and texture is like a firm Gruyère cheese, 1½–2 hours. Let cool. (Alternatively, if your oven doesn’t go that low, you can dry out eggs in an unheated oven for 2 days.) Finely grate cured egg yolks over soups, pastas, or salads as you would a hard cheese. Do Ahead: Yolks can be cured 1 month ahead. Place in an airtight container and chill.
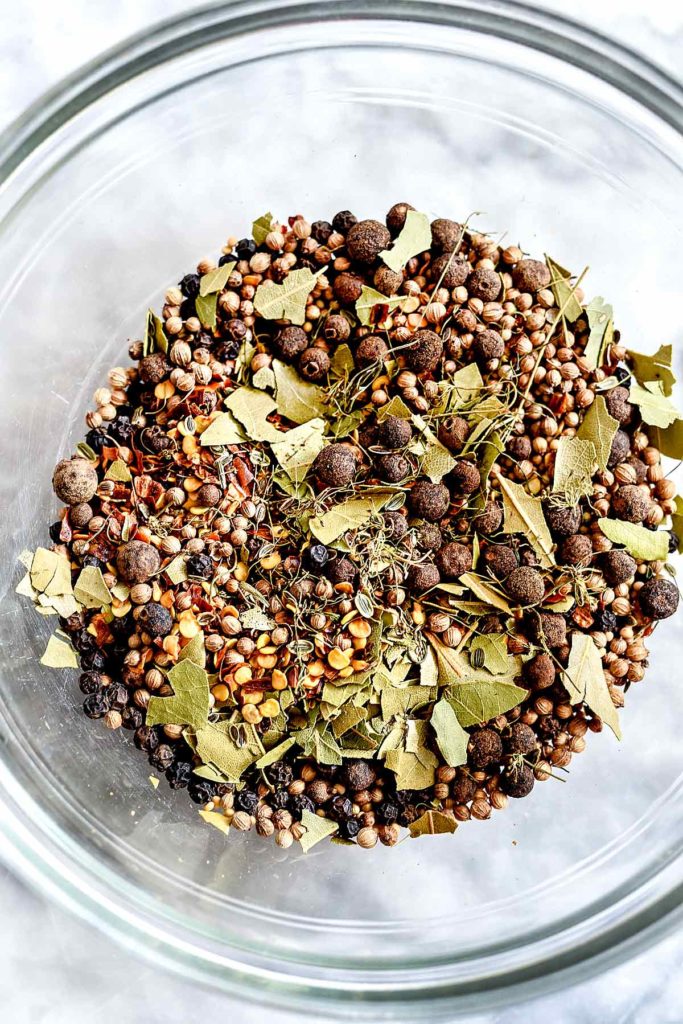 Pickling Spice Blend
1 tablespoons Mustard Seed
1 tablespoon Coriander Seed
1 tablespoon Caraway Seeds
1 Tablespoon Celery Seed
2 Whole Cloves
1 teaspoon Ground Ginger (or a fresh slice if using immediately)
1 teaspoon crushed Red Pepper Flakes
1 or 2 Bay Leaves, broken into pieces
1 teaspoon Whole Allspice Berries
1 teaspoon Black Peppercorns
1 teaspoon Whole Dill Seeds
 What to do with Celery Leaves
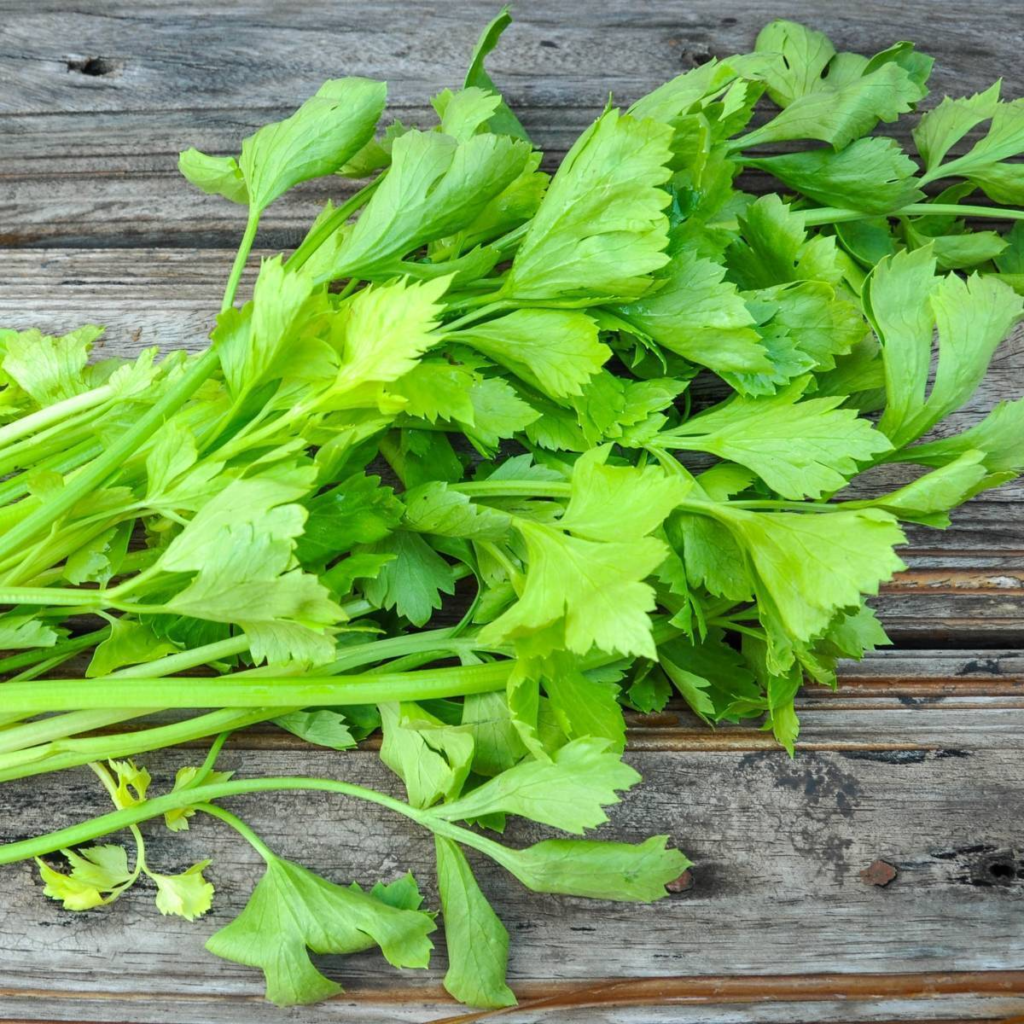
Celery leaves are actually quite tasty and incredibly versatile.
Add celery leaves to salads: My aunt likes to cut up the leaves and add them to her green salads. I had never tried it myself until I went to her house for lunch one day. I was surprised to find that it can be a delicious addition to change up and add a burst of flavor to your raw greens. (I think that it especially pairs up well with salads with apple slices.) I think the best leaves for salads are the lighter green, younger leaves, but that is a matter or taste, of course.
Add celery leaves and stalk pieces to stocks and bone broths: I like to freeze some of the leaves, and the small, ugly stalk bits I cut from my snacking pieces, so I can have them handy whenever I make stock or bone broth. Celery is probably my favorite vegetable for adding to stocks and broths. Not only is it incredibly healthy, adding its vitamins and antioxidants to your already healthy broths, but it also adds delicious flavor. I also often blend celery leaves and stalk pieces, along with onions, into soups with an immersion blender to give them great flavor and a thicker consistency. (That was a tip I learned from another one of my aunts.)
Chop celery leaves and use them as an herb. Celery leaves make a great replacement for fresh parsley in many recipes. You can chop the fresh leaves and add them to salsa and homemade salad dressings, for example. You can also dry the leaves and crumble them, using them as you would dried parsley.
Make pesto sauce with celery leaves.
Make celery powder with leftover leaves and ugly stalk pieces. This is actually probably my favorite use of leftover celery leaves and bits and pieces. It’s simple enough to dehydrate the leftover pieces and grind them into a fine powder once they are fully dry. The nice thing about celery powder is that it doesn’t take up much space at all and it keeps very well. I like to add it to soups, sauces, and all sorts of other dishes to add flavor and nutrients.
Make celery salt. Celery salt is just a modified use of celery powder. It is often made with ground celery seed that is mixed with salt. Don’t have celery seeds? You can also make a wonderful celery salt using the leaves and other not-so-pretty celery bits. Celery salt is often asked for in recipes, but I like to use it in place of regular sauce in all sorts of recipes to add extra nutrients and flavor!
Save for chickens or compost. If you don’t want to use the celery leaves yourself, don’t throw them away! When I’m short on time (and my freezer is full, and I have an abundance of celery powder on hand already), I throw them to my hens and they seem to love them. You can also add them to your compost bin.
Celery Powder
Wash and dry celery leaves and other celery bits and pieces. (To reduce drying time, consider chopping stalks into smaller pieces.) Fully dry leaves and stalk pieces in a dehydrator or at the lowest heat and convection setting of your oven. (Check occasionally and remove dry, brittle pieces, leaving the rest of the celery pieces to continue drying until brittle.) Once they are fully dry, grind up the celery leaves and stalk pieces until you obtain a fine powder. Celery leaves can be easily pulverized with a mortar and pestle. If using stalk bits, though, I find it much easier to use a spice grinder of coffee grinder. Store the homemade celery powder in a well-sealed container to keep moisture out, preferably out of direct sunlight.
Celery Salt
2 Tbsp celery powder
2 Tbsp salt
Mix together celery powder and salt. Store in a well closed container in a cool, dark place.
 Basic Fish en Papillote
6 rectangular sheets of parchment paper
3 T. butter
1 clove garlic, finely chopped
1 cup leeks, white part only, julienned
1 cup celery, julienned
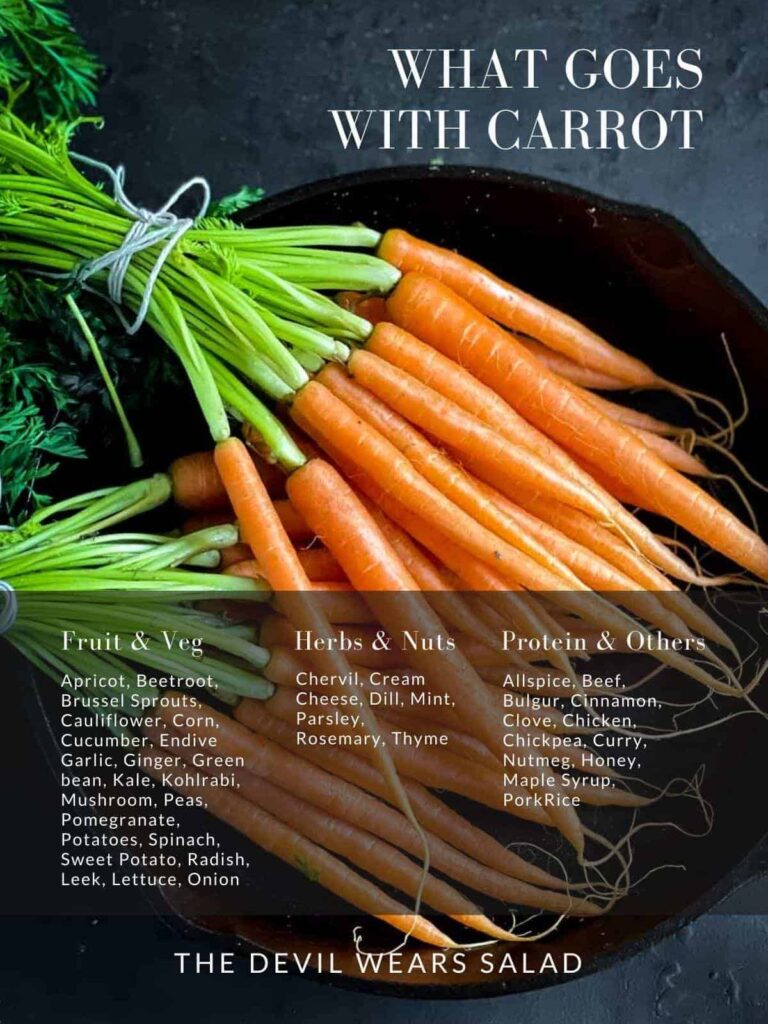
1 cup carrots, julienned
6 boneless, skinless fish fillets (6 to 7 ounces each)
Salt and freshly ground black pepper to taste
6 T. dry white wine
6 fresh thyme sprigs
Preheat oven to 425°F. Fold each sheet of parchment in half and cut into a heart shape large enough to encase a portion of fish when folded in half. In a medium sauté pan, heat the butter over medium-low heat, add the garlic, leeks, celery, and carrots, and season with salt and pepper to taste. Toss and stir the vegetables to coat them with butter. Cover pan and let vegetables sweat for about 5 minutes, or until the vegetables are almost soft. Set aside to cool for 5 minutes. Spray the parchment hearts lightly with nonstick cooking spray. Season each side of the fillets lightly with salt and pepper. Place 1 fillet on each parchment heart and spoon one-sixth of the sautéed mixture over each fish, drizzle 1 T. of wine over each fillet, and top with a sprig of thyme. Fold the parchment over and seal the edges by crimping them. Place parchment packages on a large sheet pan (or two if necessary) and bake in preheated oven for 10 to 12 minutes. If the parchment was well sealed, the packages may puff. Remove from oven and use a spatula to place a parchment package on each heated serving plate. Use a scissors or sharp knife to cut a large X in the top of the parchment. Serves 6.
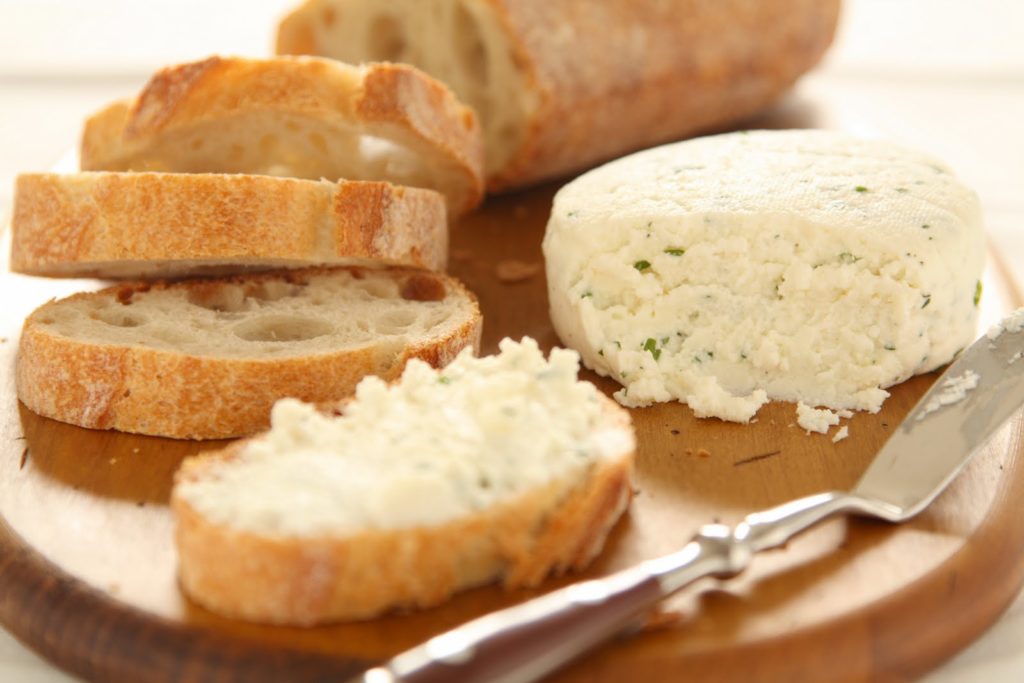
Herbed Lemon Cheese
1 quart whole or 2% milk
¼ cup freshly squeezed lemon juice
¾ tsp. minced fresh chives
½ tsp. minced Italian parsley
¼ tsp. minced fresh thyme
1 clove garlic, grated
Kosher salt
Freshly ground black pepper
Gently heat the milk to 180ºF. Add the lemon juice and stir slowly until the milk separates into curds and whey. Ladle into a cheesecloth-lined fine mesh sieve set over a large bowl. Gather the corners of the cheesecloth together over the curds and tie with butcher’s twine. Let the curds drain in the refrigerator for 4 to 24 hours, or until the desired consistency. Transfer the cheese to a medium bowl, stir in the chives, parsley, thyme, and garlic and season to taste with salt and pepper. Form the cheese into a wheel and wrap in plastic wrap. Refrigerate overnight before serving.
Easy Baked Polenta
You can use medium-grind cornmeal or polenta here.
8 cups water
2 cups medium-grind polenta
2 tsp. table salt
â…› tsp. pepper
4 ounces Parmesan cheese, grated (2 cups)
4 T. unsalted butter, cut into 6 pieces
Adjust oven rack to middle position and heat oven to 375 degrees. Combine water, polenta, salt, and pepper in 13 by 9-inch baking dish. Transfer dish to oven and bake, uncovered, until water is absorbed and polenta has thickened, about 60 minutes. Remove baking dish from oven. Whisk in Parmesan and butter until polenta is smooth and creamy. Serve.
 Mix and Match Skillet Meal
1 cup grain, uncooked
1 ½ cups vegetables, fresh, canned or frozen, ~cut bite-sized~
1 cup protein, cut bite-sized
2 cups sauce, stirred
½ tsp. spices
3 Tablespoons topping
To make in a skillet: Combine all ingredients except topping in a large skillet. Bring to a boil. Then reduce heat to low. Cover and simmer until grains are tender, about 15 to 45 minutes. Stir occasionally and add liquid if too dry. Add topping before serving. Refrigerate leftovers within 2 hours.
To bake in oven: Preheat oven to 350 degrees. Combine all ingredients except topping in a casserole dish. Cover with aluminum foil and bake until grains are tender, about 50 to 60 minutes. Add topping before serving. Refrigerate leftovers within 2 hours.
Grain – try bulgur, pasta, quinoa or rice
Vegetables – try a mixture of corn, carrots, green beans, onions, mushrooms, peppers or zucchini
Protein – try cooked cubed or ground beef, pork, chicken or turkey, canned tuna or salmon, tofu or beans
Sauce – try one can (10.75 ounces) condensed cream soup such as chicken, potato or tomato soup plus 1 1/4 cups water or low-fat milk
Spices – try basil, oregano, parsley, chili powder, garlic, onion powder or ground ginger
Topping – try grated cheese or crushed whole grain cereal or crackers
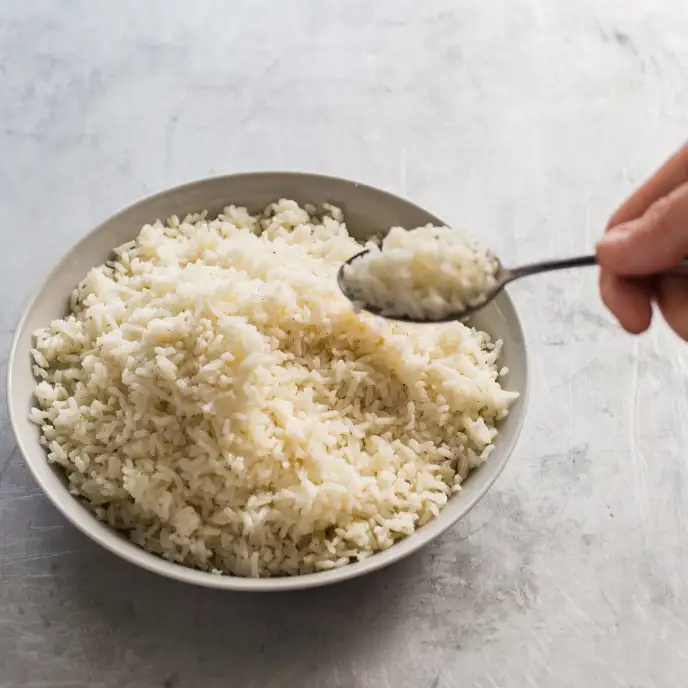 Simple Rice Pilaf
Be sure to rinse the rice until the water runs clear. A nonstick saucepan is crucial to prevent the wet rice from sticking to the pan; for the most evenly cooked rice, use a wide-bottomed saucepan with a tight-fitting lid. Basmati, jasmine, or Texmati rice can be substituted for the long-grain rice.
3 T. unsalted butter or vegetable oil 1 small onion, chopped fine
1 tsp. table salt
1½ cups long-grain white rice, rinsed
2½ cups boiling water
Melt butter in large nonstick saucepan over medium heat. Add onion and salt and cook until softened, 5 to 7 minutes. Stir in rice and cook until edges begin to turn translucent, about 3 minutes. Stir in boiling water and return to boil. Reduce heat to low, cover, and gently simmer until water is completely absorbed, 16 to 18 minutes. Off heat, uncover and lay clean dish towel over saucepan; cover and let sit for 10 minutes. Fluff rice with fork, season with salt and pepper to taste, and serve.