Browsed by
Category: Vegetables

Shredded Brussels Sprouts Salad with Bacon, Apple & Gorgonzola

Shredded Brussels Sprouts Salad with Bacon, Apple & Gorgonzola

1 1/2 pounds Brussels sprouts, trimmed (about 4 C.)
4 slices bacon
1/2 tsp. salt
1/4 tsp. freshly ground black pepper
1 large Granny Smith apple, peeled, cored, and finely chopped (about 1 C.)
2 oz. Gorgonzola cheese, crumbled (1/2 C.)

Halve the sprouts and thinly slice them into ribbons length-wise. Rub the slices gently between your fingers to separate the layers and put them into a large bowl. In a 12-inch nonstick skillet set over medium-high heat, cook the bacon until crisp, 5 to 7 minutes. Transfer to a paper towel-lined plate to drain. Pour off all but l tsp. the rendered bacon fat from the pan and return the pan to medium-high heat. Add the sprouts, salt, and pepper, and cook, stirring frequently, until browned, 4 to 5 minutes. Transfer the sprouts to a large bowl, crumble the bacon on top, and add the apple pieces and cheese. Toss to combine, divide among 4 plates, and serve.

Roasted Green Beans with Beets, Feta, and Walnuts

Roasted Green Beans with Beets, Feta, and Walnuts

2 pounds fresh green beans, trimmed
1 pound fresh beets, trimmed, peeled, and cut into thin wedges
1/2 C. sliced shallots (4 medium)
1/4 C. olive oil
1/2 tsp. salt
1/2 tsp. freshly ground black pepper
1/2 C. broken walnuts (or almonds or filberts)
1/2 C. crumbled feta cheese (2 oz.) (or chevre)

Preheat oven to 425 degrees F. In a large roasting pan combine green beans, beets, and shallots. Drizzle with oil and sprinkle with salt and pepper; toss to coat. Roast, uncovered, for 45 to 50 minutes or until beans and beets are tender, stirring once or twice and adding walnuts during the last 10 to 15 minutes of roasting. To serve, transfer roasted vegetables to a serving platter. Sprinkle with cheese.

Pickled Three Bean Salad

Pickled Three Bean Salad

1 ½ Lb. Fresh Green Beans — 4 1/2 C.
1 ½ Lb. Fresh Wax Beans — 4 1/2 C.
1 Lb. Canned Kidney Beans — or Shelled Lima Beans, rinsed and drained
2 C. Celery — sliced
1 Large Onion — peeled and sliced
1 C. Sweet Pepper — diced
2 ½ C. Sugar
3 C. White Vinegar
1 T. Mustard Seed
1 tsp. Celery Seed
4 tsp. Pickling Salt
1 ¼ C. Water

Rinse beans, trim ends and cut into 1 1/2″ pieces. Mix in large pot with celery, onion and pepper. Cover with boiling water and simmer 10-12 minutes (the recipe calls for 8 minutes, but that wasn’t enough). Drain. Bring sugar, vinegar, spices, and water to a boil. Simmer, covered, 15 minutes. (The amounts are just right, only a little brine left over. Don’t boil the brine away!) Add drained vegetables and kidney beans. Return to a boil. Pack hot vegetables into hot jars, leaving 1/2″ headspace. Ladle hot spiced vinegar over vegetables, leaving 1/2″ headspace. Remove air bubbles. Wipe rim of jar clean; place hot, previously simmered lid on jar and screw down ring firmly tight. Process 15 minutes in a boiling water bath canner. Do not change the ratio of vinegar, water and vegetables. This is a tested recipe for water bath canning.

Mexican Corn

Mexican Corn

1/4 C. butter or margarine
1/4 C. finely chopped onion
1/4 C. chopped green pepper
1 pkg. (10 oz.) frozen corn or 1 can whole kernel corn
1/4 C. diced pimiento
1/2 tsp. salt
1/4 tsp. pepper
sweet pepper slices, to garnish

Heat butter or margarine over low heat. Add and cook until onion is transparent. Add green pepper. Add corn. Cook corn covered, over low heat, about 10 minutes, or until tender. During the last few minutes of cooking, mix in diced pimento. Season to taste with salt and pepper. Mix gently. Garnish with sweet red pepper slices. Serves 4.

Butternut Squash Chips with Cranberry Toppings

Butternut Squash Chips with Cranberry Toppings

1 ½ lb (1 medium) butternut squash
2/3 T. oil – walnut oil would be nice
2 tsp. finely chopped fresh sage leaves (6–7 leaves)
½ tsp. ground black pepper
½ tsp. finely chopped fresh rosemary
½ tsp. kosher salt
¼ tsp. ground white pepper
2 T. finely chopped dried cranberries
1 T. honey
½ tsp. freshly squeezed lemon juice
Coarse salt, such as Celtic or Maldon sea salt
Fresh rosemary for garnish

Preheat your oven to 350°F, with the racks positioned in the upper and lower thirds. Line two baking sheets with parchment paper or silicone baking mats and spray or lightly brush them with some of the oil. To prepare the squash, remove about ½ inch from the top and bottom. Divide it into two sections where the neck meets the seed bulb, then remove the skin with a sturdy vegetable peeler or a paring knife. If you plan to use the seed bulb, scoop out the seeds. Cut each section into even, â…› inch slices, about as thick as two stacked quarters. A Mandoline or food processer would be helpful here. If the flesh around the seed bulb is less than ½ inch thick, save it for another use. In a wide pot or deep skillet, bring about 2 quarts of water to a boil. Place a bowl of ice water near your cooktop. Cook the squash in 2 batches, boiling each for 1½ to 2 minutes. Don’t overcook them or they’ll break apart. Carefully scoop the slices into the ice water. Lay the slices on a kitchen towel and pat them completely dry.
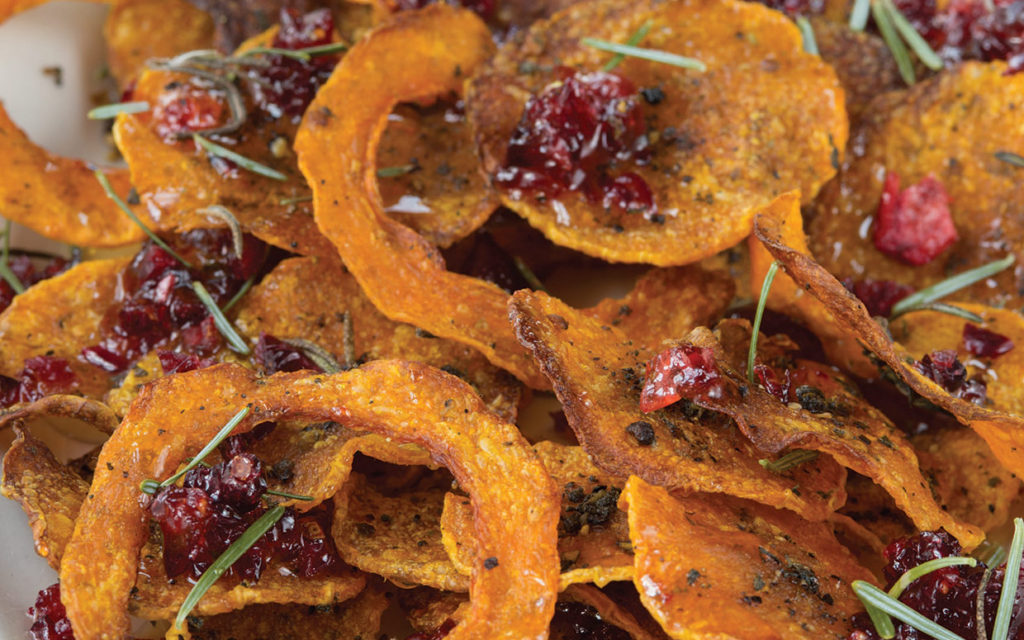
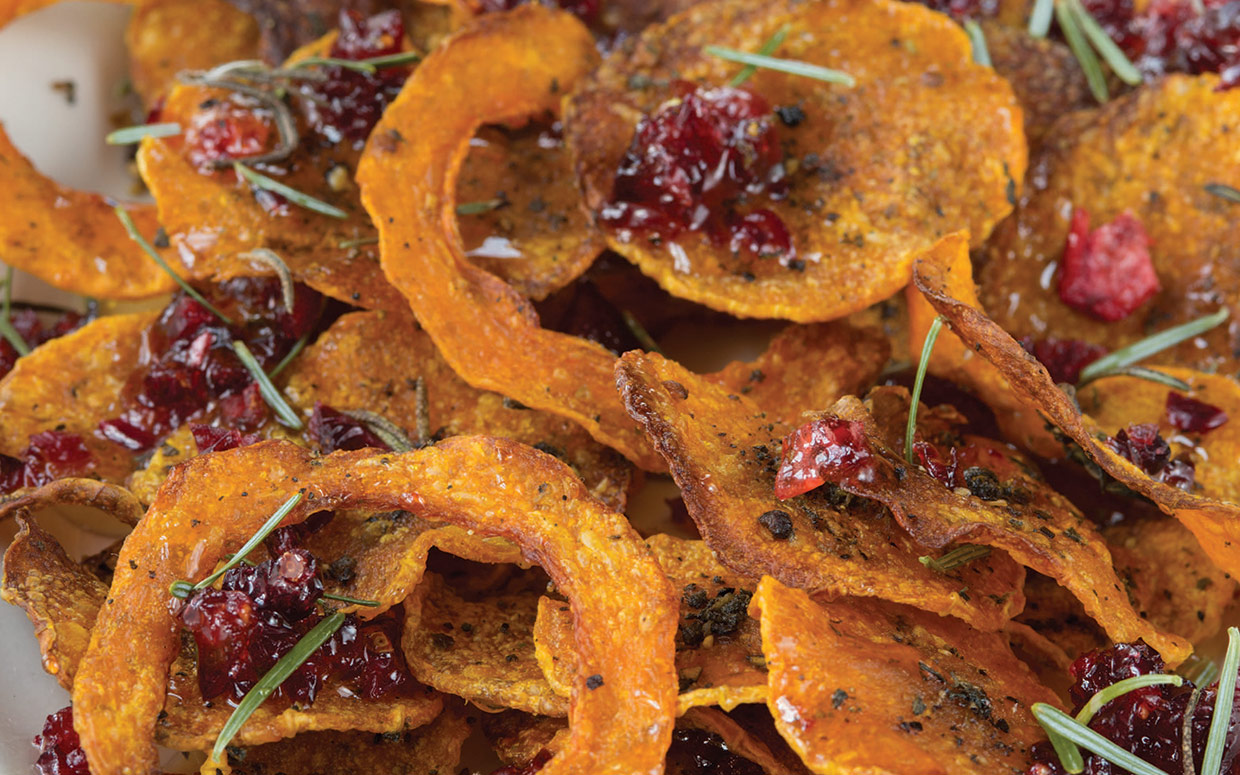
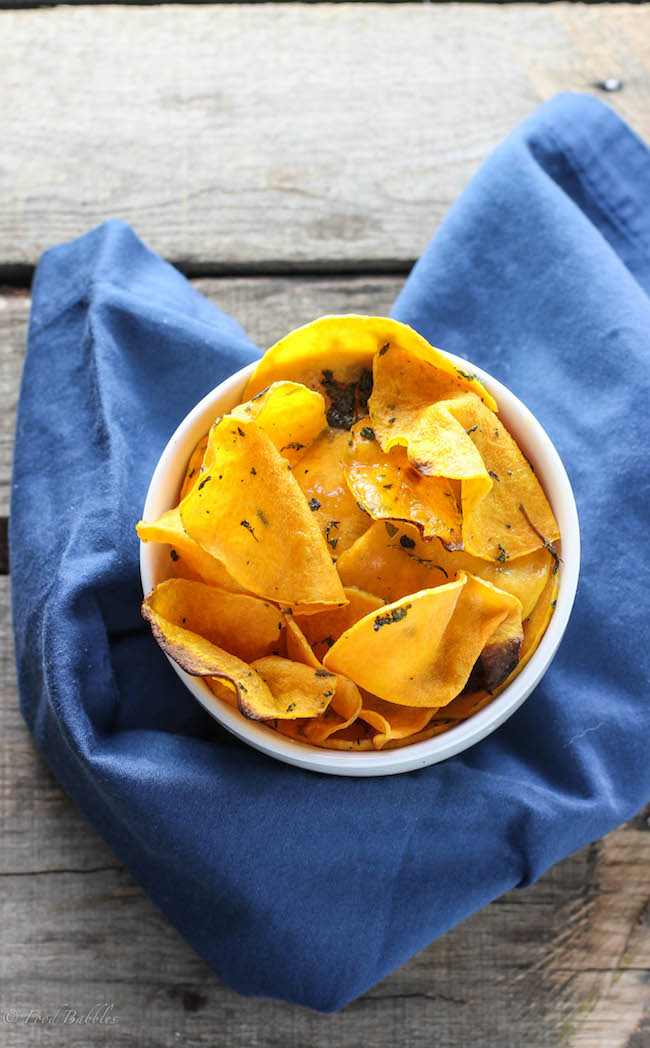
In a mixing bowl combine the sage, black pepper, rosemary, salt, and white pepper. Pour the oil into another bowl for brushing. Combine the cranberries, honey, and lemon juice and set the mixture aside. Arrange the slices in a single layer on the prepared baking sheets so that they’re close but not touching. Brush them generously with the oil, flip and brush the other side, and then sprinkle them with some of the herb mixture. Bake the slices for 15 minutes, flip them and sprinkle them with more of the seasoning, then rotate the baking pans and return them to the oven on opposite racks. Continue cooking the chips until they’re a deep amber-brown and crisp—10 to 15 minutes longer, depending on thickness. Check the chips frequentl – they can burn quickly – and remove the ones that finish early. Note: The chips will get crisper as they cool. To serve, spread the chips on a platter and drizzle them with the cranberry topping, coarse salt, and fresh rosemary.

You can use other winter squash for this recipe – kabocha, delicata, acorn – but I think the butternut squash was custom-designed for chip-making. Its neck section yields perfect rounds, and its sturdy, dense flesh makes it easy to handle. Look for a squash that has a long, straight neck and a small seed bulb on its end.

Fry. Butternut squash chips fry up nicely in a couple of minutes in hot oil! Par-boil and dry the slices as described above, then follow a basic frying technique

Baked Butternut Squash Chips

Baked Butternut Squash Chips

1 small and skinny butternut squash
2 sprigs fresh rosemary, chopped (or another herb if you prefer)
kosher salt
pepper
extra virgin olive oil

Preheat oven to 375 degrees and line two baking sheets with parchment paper. Bring a large pot of water to a boil. Peel squash and slice in half lengthwise. Scoop out any seeds in the base of the squash.Using a very sharp knife (or a mandolin if you have it) thinly slice the squash. The thinner, the better. Mine were probably about 1/8 of an inch thick. Once sliced, boil (in batches) for 1-2 minutes. Remove from water and lay flat in a single layer on a paper towel to dry. Pat completely dry and then transfer to baking sheet, making sure the slices don’t overlap at all. Brush with olive oil to coat and sprinkle generously with salt and pepper. Sprinkle chopped rosemary on top and bake for 20 minutes, checking frequently after 10 minutes to make sure they don’t burn. If your slices are thinner than 1/8 of an inch, they won’t need to bake as long. Remove from oven once they start to brown and crisp up and immediately sprinkle with more salt.

Dilly Beans with Garlic and Hot Chiles

Dilly Beans with Garlic and Hot Chiles

4 C. apple cider vinegar
4 C. water
3T.kosher salt
5 fresh dill sprigs
5 cloves garlic, left whole
5 dried hot red chiles
2 1/2 tsp. crushed red pepper flakes
2 pounds fresh green beans, trimmed to fit in pint jars

Prepare a water bath canner along with five pint jars, lids, and rings. In a medium nonreactive saucepan, combine the vinegar, water, and salt and bring to a boil. Place one dill sprig, one garlic clove, one chile, and 1/2 tsp. pepper flakes into each pint jar. Pack the beans into each jar. Ladle the vinegar mixture into the jars leaving 1/2 inch headspace. Remove the air bubbles from the jars and adjust the headspace accordingly. Wipe the rims of the jars and top with sterilized lids and rings. Process the jars in a boiling water bath for 10 minutes. Remove to a towel to rest for 24 hours before checking seals, labeling, and storing. Allow the pickles to cure at least one week before opening.

Pickled Radishes (makes about 2 pints)

Pickled Radishes (makes about 2 pints)

2 lb. radishes (about 2 bunches), tops and roots removed, scrubbed and cut into 1/8 in rounds
1/4 C. plus 1/4 tsp. pure kosher salt
1 1/2 C. 5% white vinegar
1 T. salt
1 tsp. black peppercorns
1 tsp. fennel seeds
1 tsp. mustard seeds

Combine 1/4 C. salt with 2 1/2 C. water. Stir to dissolve (warm water helps). Put radish rounds into a bowl and pour salt water over. Refrigerate for 8 hours or overnight. Drain and rinse. In a large 6-8 quart pot, combine vinegar, sugar, 1/4 tsp. salt and spices. Bring to a boil, stirring to dissolve salt and sugar. Add radishes and return to a boil. Remove from heat. Pack hot canning jars loosely with radishes and brine. Leave 1/2 in headspace. Process jars in water bath for 10 minutes. Remove from water bath and leave jars undisturbed for at least 12 hours. Check if jars are sealed. Label sealed jars and store.

Garlic Sauteed Mushrooms

Garlic Sauteed Mushrooms

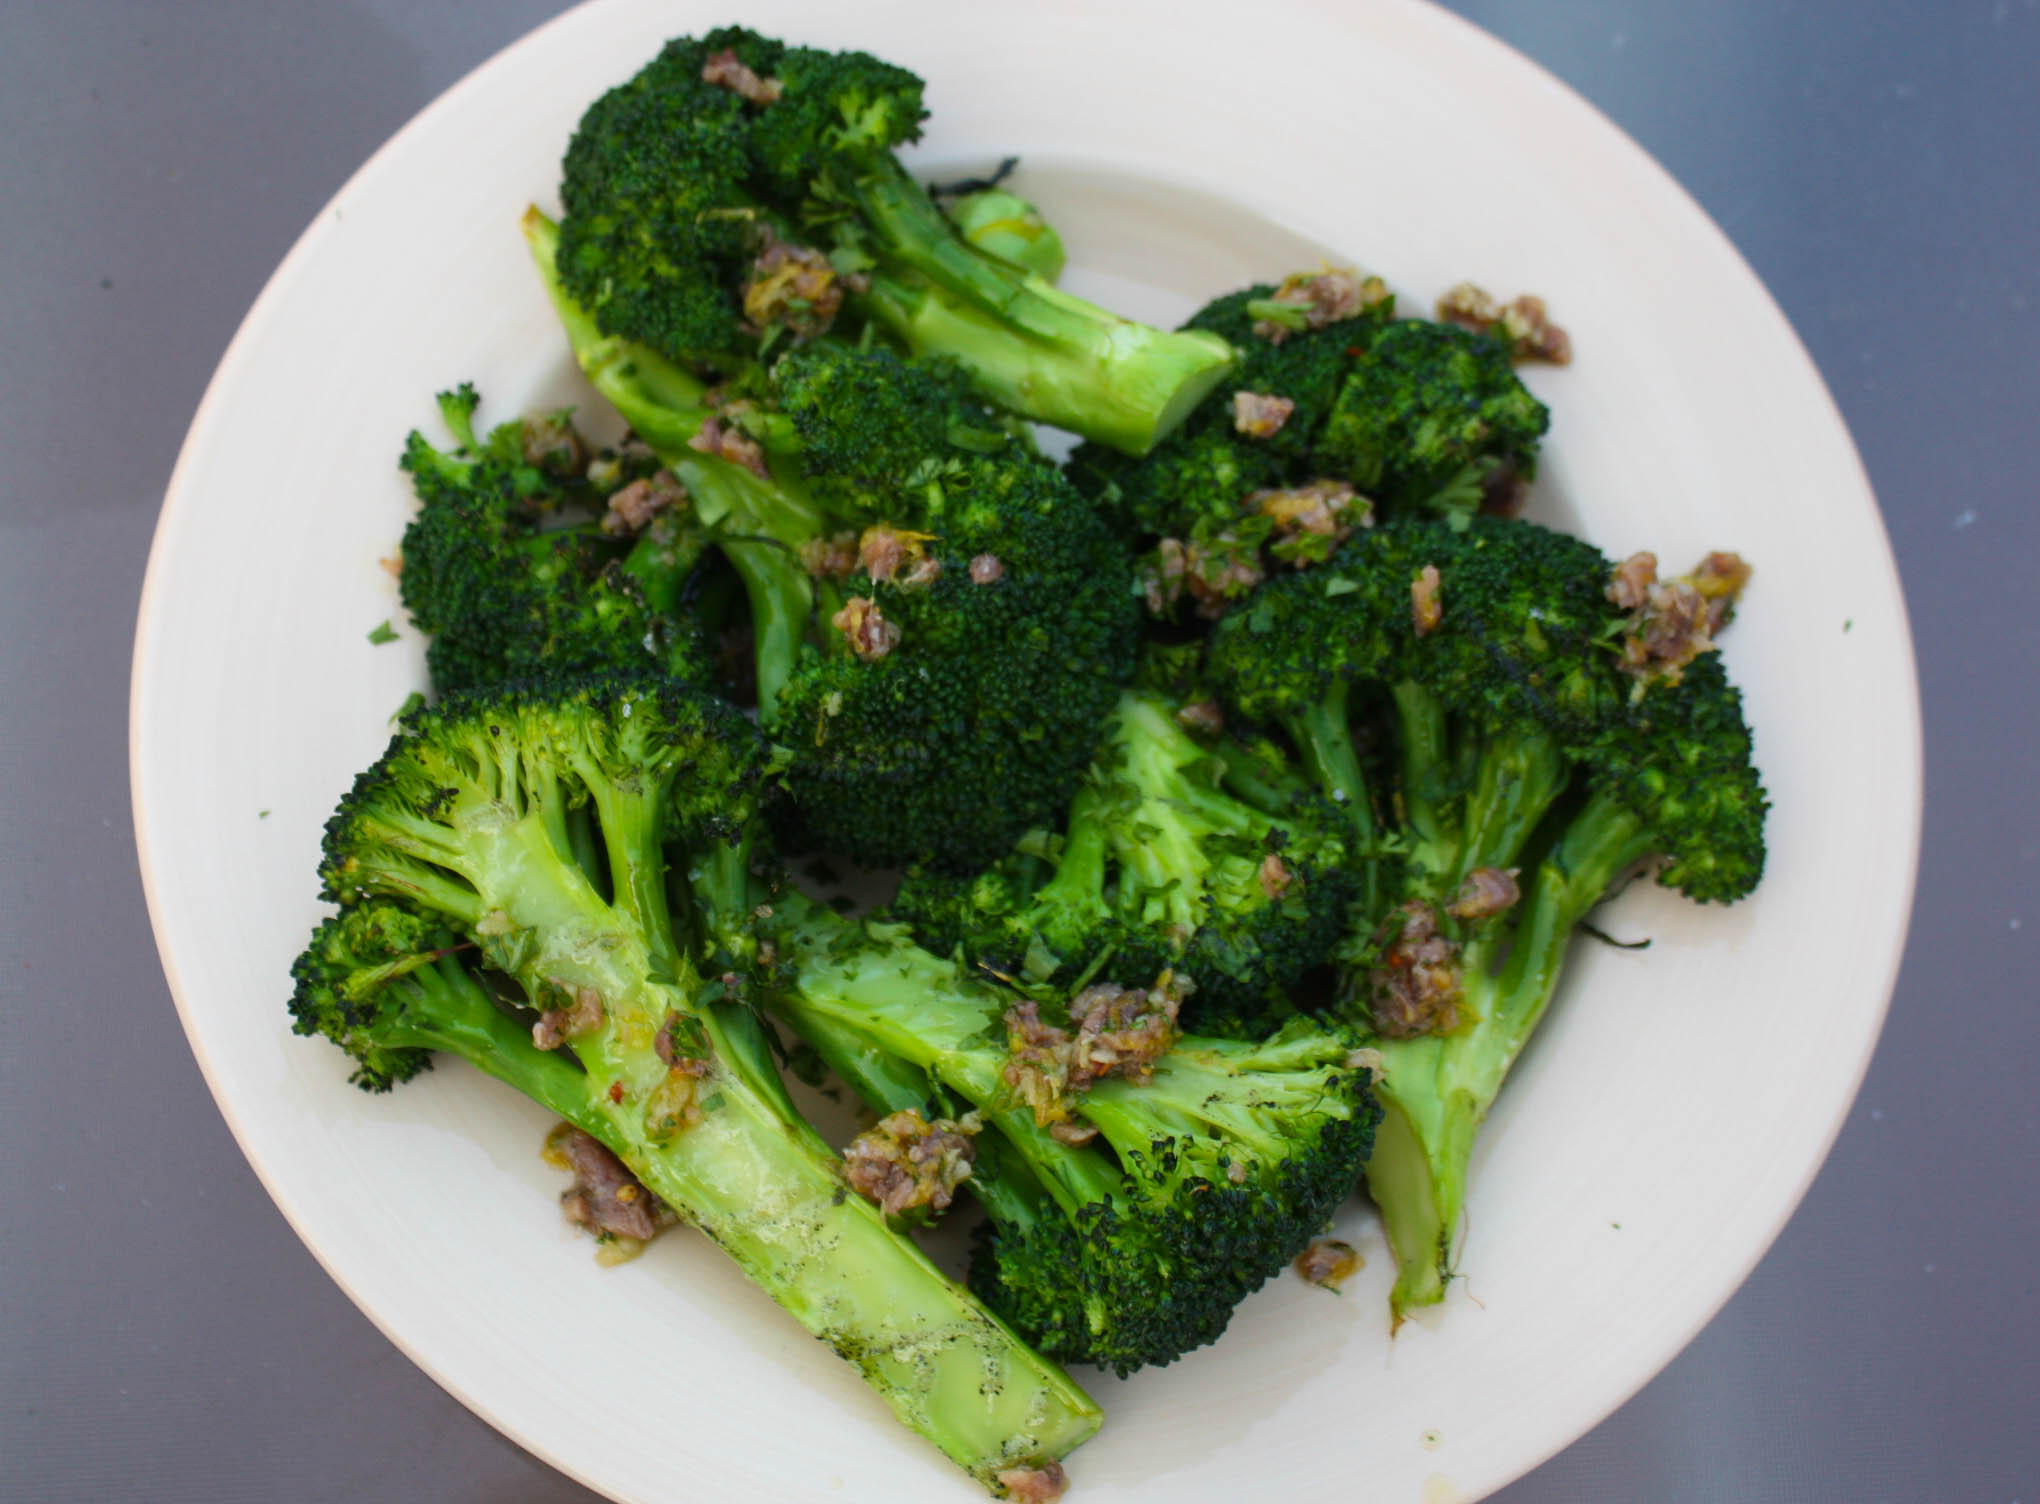
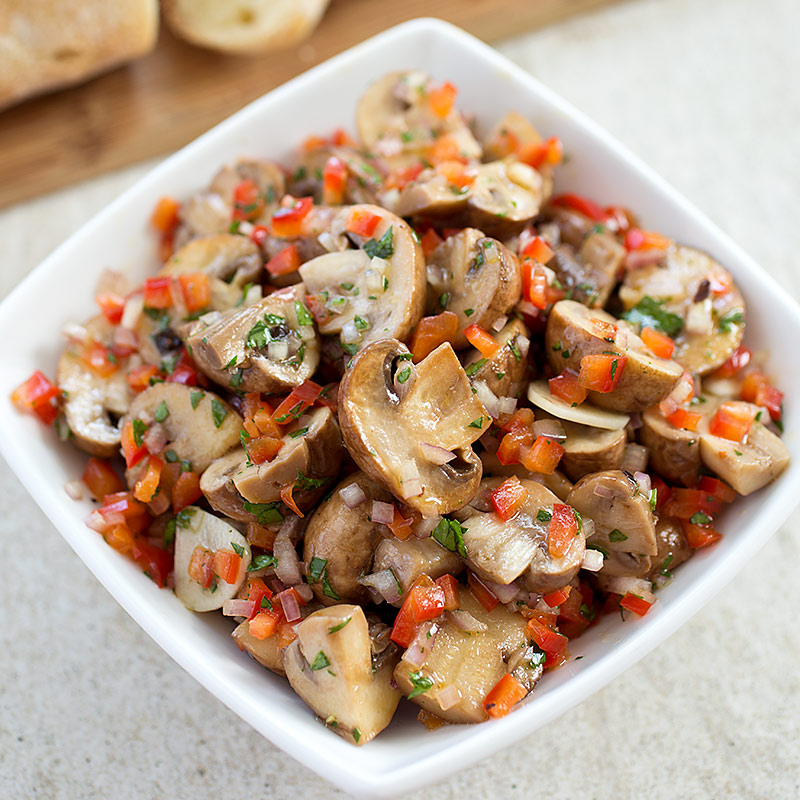
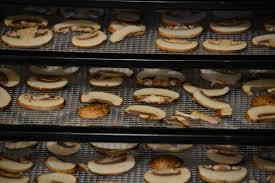
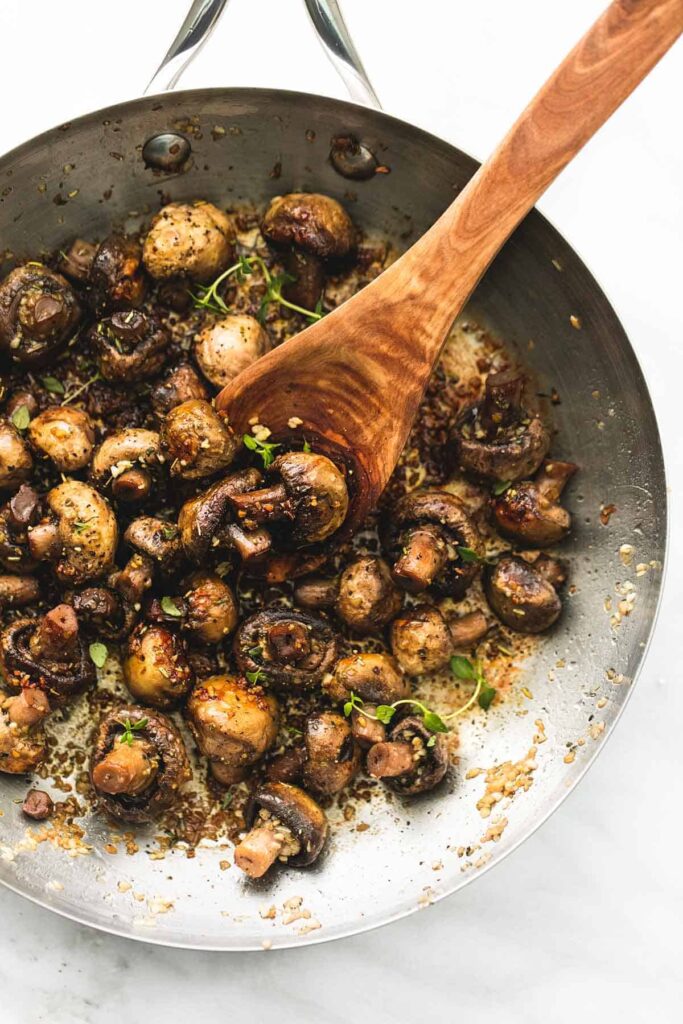
Choose mushrooms that you like. I used 1 pound plain white mushrooms, but others are fine too. Wipe them with a damp paper towel and slice or quarter them. Put about 2-3 T. olive oil in a skillet and heat until hot, add a lot of minced garlic. I used 9 big cloves of a very peppery garlic, and added a pinch of crushed red pepper and freshly ground black pepper. Cook the garlic for about 1 minute and then add the mushrooms and stir them around with the garlic until the mushrooms have cooked the way you like them (5 to 10 minutes usually). Part of the fun is to pull out a mushroom occasionally and eat it. When it’s ready, toss in some chopped herbs (I used parsley) and serve as a side dish or add it to couscous or pasta. Kiss a lot of people, to share the wonderful garlic aroma.

Tangy Grilled Acorn Squash

Tangy Grilled Acorn Squash

1 medium sized acorn squash
1/4 C. pomegranate molasses
3 T. olive oil
2 T. maple syrup
1/4 tsp. white balsamic vinegar powder
2 tsp. Urfa crushed red pepper
pinch of kosher salt
1/2 tsp. fumee de sel sea salt

Cut off both ends of the squash then rest it on a flat end and cut in half lengthwise. Scoop out seeds and cut squash crosswise into 1-inch slices. Place slices in a steamer basket and steam, covered, over high heat for 5 to 10 min. until slices are just tender. Meanwhile, prepare marinade by whisking together all remaining ingredients except the chardonnay sea salt. Remove steamer pan from heat. Drain water from pan and place steamed squash pieces in the pan. Pour 2/3 of the marinade over the squash, reserving remaining 1/3 of the mixture. Toss squash and marinade gently with a rubber spatula. Cover and let cool in pan for 10 min. Pour marinade and squash into a large bowl, toss again, cover and place in refrigerator for at least an hour, gently tossing mixture every 20 min. or so. To finish, heat a well-oiled grill to medium. Place squash slices on the grill; use a grill pan if desired. When slices begin to brown, turn over and brush reserved marinade on cooked sides. Cook until both sides are golden brown and squash feels firm but cooked when inserted with knife. Brush again with any remaining marinade and sprinkle with chardonnay sea salt just before serving.

Home-Canned Artichoke Hearts

Home-Canned Artichoke Hearts

You’ll need 3 sanitized pint jars with new lids and rings

Make Ahead: The artichokes need 1 month to cure, during which time their texture changes from firm to velvety while their structure is retained. If you choose to skip the water-bath canning called for here, refrigerate the sealed jars of artichokes for 1 month before serving. (Artichokes that are not water-bath-canned will not achieve the same silky texture as those that are.) The water-bath-canned jars of artichokes need to cool for 12 hours. They are shelf stable for 1 year. Once opened, the jars should be refrigerated and used within a month.

4 lemons
9 medium or 15 baby artichokes
1/4 C. plus 3 tsp. kosher salt or sea salt
1 C. distilled white vinegar, plus more as needed
1/4 C. white wine vinegar
1/4 C. mild olive oil, or more as needed
1 tsp. dried oregano
3/4 tsp. crushed red pepper flakes
3 cloves garlic, root ends trimmed
Three 1-inch strips lemon zest

Halve and juice the lemons. Place the spent lemon halves in a 5-quart nonreactive (not aluminum or copper) pot; fill it with cold water. Strain and reserve the juice for the marinade. To trim the artichokes, pull the leaves from each one, snapping them where they naturally break. Use a sharp knife or vegetable peeler to peel the choke, then make a clean cut across the end of the stem, retaining the tender portion. Use a grapefruit spoon, melon baller or side of a tsp. to scrape away the fuzzy choke, revealing the meaty part of it, then quarter the entire choke. (For baby artichokes, trim only to any inner leaves without a thorn.) As each choke is trimmed, drop it into the pot. Add 1/4 C. salt. Bring the pot filled with lemon water and artichokes to a boil over high heat, then reduce the heat to medium or medium-low so the water is barely bubbling. Cook, uncovered, until fork-tender, about 10 minutes. Meanwhile, make the marinade: Combine the reserved lemon juice, vinegars, oil, oregano, crushed red pepper flakes and garlic cloves in a small saucepan over high heat. Bring to a boil; cook for 5 minutes, then remove from the heat. Use a slotted spoon to transfer the artichokes to the sanitized jars, dividing evenly and stacking the small ones and first cutting the medium ones into quarters. Tuck them in as tightly as possible without breaking or bruising. Whisk the marinade well and divide among the jars. If there is not enough marinade to cover, add oil as needed to leave 1/2 inch headspace at the top of each jar. Make sure 1 garlic clove, 1 strip of lemon zest and 1 tsp. salt goes into each jar. Run a chopstick or flat plastic knife along the inside of the jar to remove any air bubbles. Clean the rim of each jar with distilled white vinegar to cut residual oils, place the warmed lids on and finger-tighten the rings (not too tight). Process in the boiling water bath for 15 minutes. Turn off the heat and let the jars rest in the pot for 10 minutes. Use tongs to transfer the jars to a clean, folded dish towel to cool over several hours. Store the water-bath-canned jars in a cool space to cure for 1 month.

Smoked Beets with Balsamic Glaze & Herbed Chevre

Smoked Beets with Balsamic Glaze & Herbed Chevre

I got a sample of this bajan seasoning when I placed an order with the spice shop.  I’ve tried a couple of their recipes and I quite enjoy this blend.

Smoked Beets with Balsamic Glaze & Herbed Chevre

6 large beets
1 T. Kosher Salt
Smoker or smoker box for grill
Wood chips

1 cup balsamic vinegar
1/4 cup sugar
1/4 tsp. Kosher Salt

4 oz. chevre or goat cheese
2 tsp. Bajan Seasoning
1 to 2 T. chopped fresh herbs, like chives or tarragon (optional)

For beets: Scrub beets well, slice in half, and place in a large saucepan. Add salt and cover with water by at least an inch. Bring to a boil and cook until beets are easily pierced with a knife, 25 to 35 min. Drain and rinse with cold water to stop cooking. Once cool, peel beets. Meanwhile, soak wood chips and prepare smoker or smoker box for grill. Once smoker is going, smoke beets over indirect heat for 15 to 30 min. depending on how smoky you want them. Remove beets from smoker and cut into bite-size pieces.

For glaze: Stir ingredients together in a small saucepan and bring to a boil over medium heat. Keep mixture at a simmer, stirring occasionally, until thick and syrupy and reduced by about half, 20 to 30 min. Remove from heat and allow to cool; glaze will thicken as it cools. Cover and store at room temperature until ready to use.

For chevre: Mix chevre and seasoning together until well combined. Cover and chill until ready to serve.

To serve: Serve beets drizzled with balsamic glaze and topped with a generous dollop of herbed chevre and fresh chopped herbs if using.

Leek and Lemon Thyme Tarts with Black Trumpet Mushrooms

Leek and Lemon Thyme Tarts with Black Trumpet Mushrooms

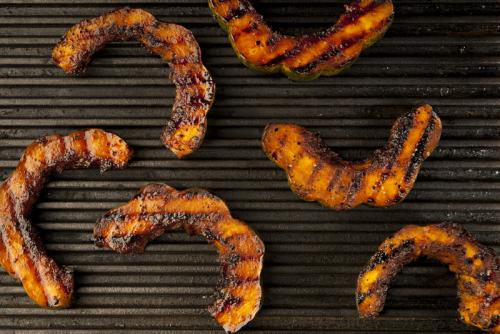
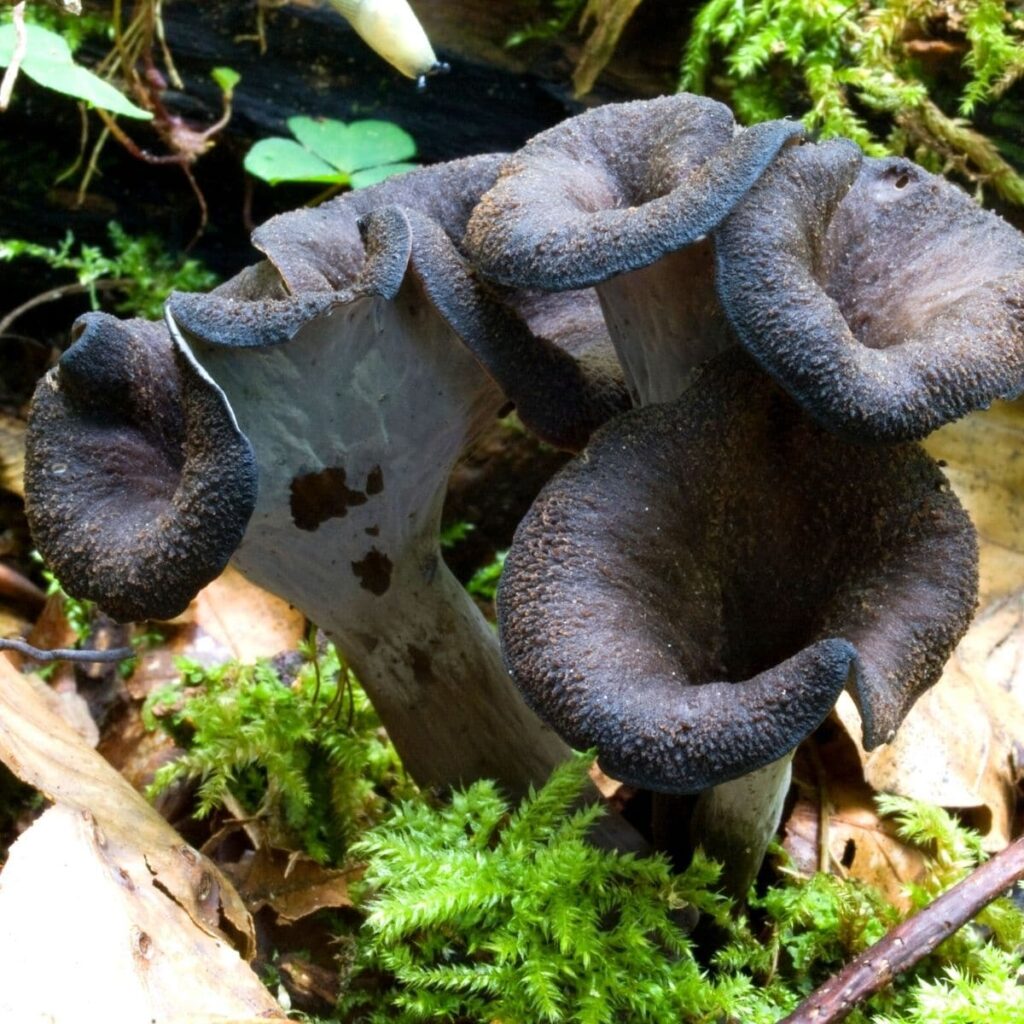
1/4 lb. black trumpets
1 T Oregano
1/2 C. Chèvre
1/4 C. Shallots
1 Leek
2 T. Parsley
1 slice bacon
White wine
Lemon
2 bulb garlic, minced
2 T. thyme
2 tart shells
Juice from 3 Lemons
1 bunch chives

First pre-heat your oven to 400, then cut off dirty ends of mushrooms and wash in several changes of water, lifting the mushrooms out of the water to let the grit fall to the bottom. I’ve found it impossible to get these mushrooms clean without washing. Now dry sauté your mushrooms. Cook them in a pan without any oil on medium heat to get rid of all that moisture. When the water is mostly gone, and before they start to burn, take them off the heat. Chop and start cooking your bacon (add a bit of extra fat if it needs it) while you slice your shallots and leeks thin and pick your herbs. Cut mushrooms into ½ inch pieces. Now sauté your veggies, mushrooms, and herbs until soft, add wine, lemon, salt and pepper to taste then remove to mixing bowl. Mix veggies with chèvre, taste again for seasoning (this recipe wants a good amount of lemon to counter the heavy bacon and cheese). Use a tablespoon to fill tart shells on wax paper lined sheet tray and cook for 15 minutes or until cheese and tarts begin to brown. Take out to cool, chop some chives for garnish, and you’re done!

Dried Mushrooms

Dried Mushrooms

Mushrooms are good for you, and when dehydrated they get an intense mushroom flavor, so you can use less.

Rinse or brush mushrooms clean. If rinsing, pat dry with a towel to get them as dry as possible so they take less time in the dehydrator. Slice them uniformly so they will dry at the same rate. A mandolin or even an egg slicer can help with this. Spread on your dehydrator racks in a single even layer. They can touch a little bit (since they shrink) but should not be stacked. Mushrooms should be dried until they are no longer spongy, but not completely brittle. Time and temperature vary, depending on your dehydrator. Try around 100 overnight, or if hotter, they will need less time. Store in airtight containers in dark place.

Air Dry: Clean shrooms with wiping method. Place clean mushrooms on a metal rack in a warm spot. Make sure they don’t touch. Walk away. Leave them be until they’re dry and brittle, two to five days, and store in a clean, airtight Mason jar on a shelf.

Mushroom Powder: You can process dried mushrooms in a blender to render them down to a fine powder. Carefully open the lid so it doesn’t whoosh up into your face. Strain through a fine mesh sieve into a funnel and into a jar. Re-process any larger mushroom pieces and repeat. This can be added to ground meats for meatloaves or patties, stirred into a soup or stew shortly before serving, sprinkled over salads or steamed vegetables. Use this to encrust steaks along with some salt and pepper. Major umami flavor!

Dehydrated Green or Yellow Beans

Dehydrated Green or Yellow Beans

4-5 lb. Green and/or Yellow Beans

Beans with edible shells are dense and best dried in a dehydrator. They are easily rehydrated and an interesting ingredient to add to stews or rice as it cooks, as they will absorb liquid while also infusing their flavors across the dish. This will also work with shelled peas.

Dehydrator: Fill a large pot with salted water, leaving enough room to add the beans without overflow. I recommend using a pasta pot with a matching colander that will make it easy to remove the beans at one time. Bring the water to a hard boil over high heat. Place the beans in the pot, cover with a lid, and blanch for 4 minutes, filling the sink with cold water as they boil. Remove the beans from the pot and transfer to the cold water. Chop into 1/2-inch pieces and spread on drying racks. Dehydrate at 125°F for 8-10 hours, until brittle. Store in a jar with a lid that will prevent moisture from entering.

Air-Dried: Air circulation is the key to dehydrating food. Spread the shelled peas or beans on drying racks. Thin-shelled beans can be tied into strands, like you would with hot peppers. Place the veggies out of direct sunlight in a dry spot in your kitchen (I often use the top of a cabinet). They are done when bone dry.

Foraged Trumpet Mushrooms with Lemon, Garlic, and Thyme

Foraged Trumpet Mushrooms with Lemon, Garlic, and Thyme

4 T. clarified butter
8 large king trumpet mushrooms, sliced no thicker than 1/4 inch
2 cloves garlic, minced
Finely grated zest and juice of 1 lemon
1 tsp. fresh thyme leaves
Finely ground unrefined sea salt

Melt 2 T. the clarified butter in a large skillet over medium heat. Add the mushrooms and cook for about 1 minute, then turn them over and cook the second sides for another 30 seconds, or until softened slightly and a bit brown at the edges. Transfer the mushrooms to a serving bowl. Add the remaining 2 T. butter to the pan, stir in the garlic, and sauté for about 2 minutes, or until softened and fragrant. Stir in the lemon zest and juice and whisk until the mixture forms a uniform sauce. Stir in the thyme leaves, pour the sauce over the mushrooms, sprinkle with salt, and serve warm.

Ginger-Glazed Grilled Carrot and Pea Shoot Salad

Ginger-Glazed Grilled Carrot and Pea Shoot Salad

1 lb. carrots, peeled, halved and chopped to 1-2″ pieces
about 3 C. fresh pea shoots
1 clove garlic, minced
1 T. grated fresh ginger
juice of 1 lime
2 T. light brown sugar
dash of salt and pepper
2 T. extra-virgin olive oil

Combine the carrot pieces with the garlic, ginger, juice of half the lime, brown sugar, 1 T. the olive oil and a dash of salt and pepper in a bowl and toss well (or combine in a plastic bag and shake). Let marinade for 30 minutes or up to overnight. Heat a grill to a high flame. Place carrots on the rack split-side down. Cover grill and let cook for 3-5 minutes. Remove cover, and flip carefully once. Cook another 2-4 minutes or until the largest chunks have charred on both sides (removing smaller pieces that have charred first). Let cool a few minutes. Meanwhile, toss the pea shoots with the remaining T. olive oil and juice of half the lime. Add a pinch of salt and pepper. Toss in the carrots and serve immediately.

Canning 3 (or more) Bean Salad

Canning 3 (or more) Bean Salad

6 C. green beans (or mix of green and yellow Beans)
6 C. cooked red beans (or mix of kidney, navy, pinto, etc)
4 C. cooked garbanzo beans
1 large sweet onion, peeled and sliced thin
1 C. diced Celery
2 large green peppers, seeded and sliced (or red or yellow or even mix with a little hot pepper)
2 C. white vinegar
1 C. lemon juice
3 C. sugar
1 C. oil
1 tsp. Mustard Seed
1 tsp. Celery Seed
2 tsp. canning salt
5 C. water

Wash green beans, snap off ends and cut into 1 to 2 inch pieces. Blanch and cool immediately. (Not really necessary, but will set the color better.) Prepare and set aside all other veggies. In a large stock pot, combine vinegar, lemon juice, sugar and water. Bring this to a boil and remove from heat. Add the oil, and salt, mix well. Add beans, onions, and green pepper to the mix and bring to a simmer. Marinate for 12 to 14 hours in the refrigerator. When marinating is over, heat entire mixture to a boil. Fill clean jars with the mixture. Add any amount of the hot liquid necessary to bring the level of the jars to ½ inch from the top. Put clean lids and rings on and process in a boiling water bath for 30 minutes.

Artichokes with Lemon and Mint

Artichokes with Lemon and Mint

12 fresh artichokes, small (baby) or medium sized
1 lemon
1 garlic clove
1-3 sprig of fresh mint
1 red or green chile (optional)
100 ml. Extra virgin olive oil
Salt and pepper

Peel the lemon keeping the rind in one piece. Prepare a large bowl with water and the juice of the lemon. Peel the artichokes leaving the hearts clean with the inner tender leaves. Place the artichoke hearts in the bowl with the sprig of mint and leave them soaking for 20 min.  (When peeling the artichokes place them immediately in the water with lemon. It will prevent the peeled artichokes to turn brown)  Rinse several times and dry the water out using a salad spinner. Arrange the artichokes at the bottom of your pan with the tails upwards. Add salt and pepper and add the garlic clove, lemon rind, mint, and chile (if used) among the vegetables. Add olive oil and the same amount of water (until the artichokes are covered half size by the liquids). Cover with the lid and simmer gently for 20 minutes. Serve this dish dressing the plate with the cooking juice. It is scrumptious!

.

Air Fryer Cheesy Tomatoes

Air Fryer Cheesy Tomatoes

Air Fryer Cheesy Tomatoes


1 tomato large

2 T. Parmesan cheese shredded

2 T. Mozzarella cheese or Fresh Mozzarella pearls

4-8 fresh basil leaves

1/2 tsp. coarse sea salt


Slice the tomatoes into 1/4″ slices and lay in air fryer basket. Top each slice with one basil leaf and enough cheese to cover the top. Air fry at 350 for 5 minutes, until the cheese is melted and bubbly. Lightly sprinkle with coarse sea salt and serve

Zesty Pickled Brussels Sprouts

Zesty Pickled Brussels Sprouts

2 lb. Brussels Sprouts, trimmed and cut in half
5 1 pint Canning Jars with Lids and Rings
5 cloves Garlic, divided
1 ½ tsp. Red Pepper Flakes, divided
5 C. Water
5 C. Distilled White Vinegar
7 tsp. Pickling Salt

Soak Brussels sprouts in a large bowl filled with lightly salted water for about 15 minutes. Drain well.
Sterilize the jars and lids in boiling water for at least 5 minutes. Divide the drained Brussels sprouts evenly between jars, filling the jars about 3/4-inch from the top. Place 1 garlic clove and 1/4 tsp. red pepper flakes in each jar. Bring vinegar, water, and pickling salt to a boil in a large pot over medium-high heat until the salt is dissolved, about 5 minutes. Pour the vinegar mixture into the jars, filling the jars to within 1/4 inch of the top. Run a knife or a thin spatula around the insides of the jars after they have been filled to remove any air bubbles. Wipe the rims of the jars with a moist paper towel to remove any food residue. Top with lids, and screw on rings. Place a rack in the bottom of a large stockpot, and fill stockpot halfway with water. Bring to a boil over high heat, then carefully lower the jars into the pot using a holder. Leave a 2-inch space between the jars. Pour in more boiling water if necessary, until the water level is at least 1 inch above the tops of the jars. Bring the water to a full boil, cover the pot, and process for 10 minutes. Remove the jars from the stockpot and place onto a cloth-covered or wood surface, several inches apart, until cool. Once cool, press the top of each lid with a finger, ensuring that the seal is tight (lid does not move up or down at all). Store in a cool, dark area, and wait at least 3 weeks before opening.

Wine-Spiked Julienne Carrots

Wine-Spiked Julienne Carrots

1 ¼ pounds (567 g) carrots, either orange or rainbow (red, orange, yellow)
2 T. coarse sea salt
1 C. (237 g) white wine vinegar
3/4 C. (150 g) sugar
½ C. (118 g) dry white wine, such as Orvieto, Pecorino, or Soave
Pinch of finely grated lemon zest, plus the juice of 1/2 lemon
18 whole peppercorns

3 sterilized 1/2-pint jars and their lids
Basic water-bath canning equipment

Cut the carrots crosswise into 2-inch pieces. Cut each piece lengthwise into slices about Vs inch thick, then cut each slice into matchstick (julienne) strips about Vs inch thick. Place the carrot strips in a bowl as you work. Sprinkle the salt over the carrots and toss well. Transfer the carrots to a colander and set the colander over the bowl. Set a plate over the carrots and weight it down with a heavy object (a container of grains, a jug of maple syrup, whatever you have on hand). Let the carrots marinate for 2 hours to release some of their juice. Rinse and drain the carrots, spread them out on a clean kitchen towel, and pat dry. Combine the vinegar, sugar, wine, and lemon zest and juice in a medium saucepan and bring to a boil over medium-high heat, stirring to dissolve the sugar. Add the carrots, stir once, and return to a boil. Boil for 2 minutes, then remove from the heat. Place 6 peppercorns in the bottom of each jar, and then pack the carrots into the jars. Ladle the hot brine over the carrots, leaving 1/2 inch headspace. Use a bubble remover or a clean chopstick to get rid of any bubbles. Screw the lids on tightly and process for 10 minutes in a boiling-water bath. Store the sealed jars in a cool, dark place. The carrots will keep for up to 1 year, though they may eventually lose their crisp texture. Store any jars that fail to seal properly in the refrigerator and enjoy those first.

Mini-Veggie Pancakes

Mini-Veggie Pancakes

Mini-Veggie Pancakes¼ cabbage, chopped rough
¼ onion, chopped fine
1 whole egg
1 egg white, beaten
1 sundried tomato, chopped fine
¼ tsp. paprika
¼ tsp. mixed herbs
Salt

Mix all ingredients together in a bowl. Heat a non-stick pan on medium to med-high heat. Drop a T. of mixture onto the pan and press down lightly for a few seconds with a spatula. Cook on one side, flip, and press down again until mixture is cooked through.

Nettle Flan

Nettle Flan

Softened butter for the ramekins or flan molds
½ to 1 lb. fresh young nettle leaves (depending on how much nettle you desire, I generally use about ¾ lb.)
4 large fresh farm eggs
1 tsp. salt
1/4 tsp. freshly ground black pepper
Pinch of freshly grated nutmeg
1/3 C. chopped chives
4 fresh sage leaves
1/3 C. grated Pecorino Romano or Parmesan cheese
2 C. heavy cream

Preheat the oven to 275° F and place the rack in the center position. Butter six 8-oz. ceramic ramekins, glass custard C. or glass canning jars. Cook the nettle leaves in a large pot of boiling salted water until tender, about 2-3 minutes. Drain thoroughly, rinse under cold water until cool enough to handle, then with your hands, squeeze out as much water as possible. In a small bowl, whisk the eggs, salt, pepper and nutmeg together until blended. Combine the squeezed nettles, chives and sage in a food processor and process until finely chopped. Add the egg mixture and grated cheese and process until the mixture is extremely smooth, about 3 minutes. Add the cream and process until thoroughly incorporated, about 30 seconds. Divide the nettle mixture among the prepared ramekins. Set the ramekins in a large baking dish so they don’t touch each other. Place the dish on the oven rack and pour in enough hot water to come halfway up the sides of the ramekins. Bake until the centers are firm to the touch, about an hour. Remove the baking dish from the oven and let the flans cool in the water for 10 minutes. Run a thin-bladed knife around the sides of the ramekins and invert the flans onto serving plates. Serve with a light tomato sauce or a simple green salad and a little grated or shaved cheese over the top if desired.

Morel Mushrooms

Morel Mushrooms

The easiest presentation for the washed and ready morels is just to slice them in half lengthwise and give them a sauté in some butter. Play around with some logical additions, such as:

•finely chopped onion, garlic, or shallots (sauté these in the pan first, then add the mushrooms)
•chopped parsley
•more butter!
•some white wine
•a touch of cream
•a bit of salt or soy sauce as desired.


Crispy Herbed Goat Cheese Stuffed Zucchini Blossoms

Crispy Herbed Goat Cheese Stuffed Zucchini Blossoms

Crispy Herbed Goat Cheese Stuffed Zucchini Blossoms3 ounces herbed goat cheese
12 zucchini blossoms, rinsed, stamens removed
oil for frying
1 C. all purpose flour
1 C. ice water
salt

Gently place 1 tsp. of goat cheese into the center of each blossom, being careful not to tear the petals. Heat about 1 inch of oil in a skillet over medium-high heat. Until it reaches 350 degrees or until a bit of batter dropped into it begins frying. While you are waiting for your oil to heat up, make your batter by whisking together flour and ice water until a smooth and thin batter forms. Once your oil is hot, carefully dredge the stuffed zucchini blossoms in the batter. Allow any excess to drip off and then fry until golden brown 1 – 2 minutes on each side. You may need to do this in batches so you don’t over crowd the pan. Use a slotted spoon to transfer to a paper towel lined plate, sprinkle with salt and serve immediately.

Baked Sauerkraut with Apples

Baked Sauerkraut with Apples

1 q.t sauerkraut
1/4 C. sliced onion
2 T. butter or bacon drippings
2 or 3 medium-size apples
1 1/2 C. white wine
1/2 C. beef stock or bouillon
1 tsp. brown sugar
1 tsp. celery seeds

Drain kraut slightly. Cook onion in butter or drippings until transparent. Add sauerkraut and stir; cook slowly. Wash, peel, and core apples; dice fruit and add to sauerkraut. Add wine and enough stock or bouillon to cover. Cook slowly, uncovered, for 30 minutes. Add sugar and celery seeds; cover and finish cooking in moderate 325° oven 30 minutes longer.

Pea Tips Stir-fried with Garlic Recipe Qing Chao Dou Miao

Pea Tips Stir-fried with Garlic Recipe Qing Chao Dou Miao

If you multiply this stir-fry for more people, do it in batches. Otherwise, you’ll not reap the wok-hay benefits and the tips loose a bit of their zest.

6 to 7 oz. pea tips (pea shoots)
6 T. chicken stock
1 tsp. cornstarch
1 1/2 T. rendered chicken or duck fat, or canola or peanut oil
2 or 3 large cloves garlic, minced
Salt

Use your fingers to break off and discard the fine curly tendrils from each pea tip. Then break the pea tip into 3-inch lengths, dropping them into a bowl. Set aside near the stove. (This is a great group task or assignment for kids!) Combine the chicken stock and cornstarch and set aside near the stove. Heat the fat in wok or large skillet over medium-high heat. Add the garlic and stir-fry for about 15 seconds, until aromatic. Add the pea tips and a generous sprinkling of salt. Stir to combine and prevent the garlic from browning. When the pea tips have wilted to about 1/3 of their original volume, about 45 seconds, give the stock a stir, then add to the pea tips. Stir and cook for about 30 seconds, until the liquid has thickened slightly. The pea tips should be now about 1/4 of their original volume, signaling that they are done. Remove from the heat, taste for salt. Transfer to a plate or shallow bowl and serve.

Zucchini “Pasta” Salad

Zucchini “Pasta” Salad

Spiralized vegetables, especially zucchini, make a popular alternative to pasta. I especially like it in this “pasta” salad with a creamy avocado dressing. Add more fresh veggies if you have them on hand.

2 medium green zucchini, cut with a spiral slicer
1 C. thinly sliced cucumber
1 carrot, shredded
1 roasted or fresh red bell pepper, chopped
1/4 C. chopped oil-packed or reconstituted sun-dried tomatoes or 1/3
C. cherry tomatoes, halved
2 scallions, minced
1/4 C. pitted kalamata olives
1/4 C. chopped fresh basil
1 ripe Hass avocado, pitted and peeled
1 garlic clove, pressed
1/4 C. olive oil
1/4 C. lemon juice, fresh squeezed
1/2 tsp. salt
1/4 tsp. ground black pepper
1/4 C. toasted walnut pieces

Place the spiralized zucchini in large bowl. Add the cucumber, carrot, red bell pepper, scallions, tomatoes, olives, and basil. Toss gently to combine. In a blender, combine the avocado, garlic, olive oil, lemon juice, salt, and pepper. Blend until very smooth and creamy. Pour the dressing over the salad, add the walnuts, and toss to coat.

Chiles Toreados (Matador Chiles)

Chiles Toreados (Matador Chiles)

Chiles toreados are jalapeno or serrano chiles that have been rolled against a work surface. The quick massage helps release their oils from the veins and seeds inside, which store the most flavor and heat. Torear means to compete in a bullfight, which gives you an indication of how fierce the result can be. Interestingly, they are common in sushi restaurants, steak houses, and taquerias specializing in meat grilled on big planchas, or griddles. They are charred in oil, then bathed in a mix of freshly squeezed lime juice and soy sauce, with some slivered or chopped white onion tossed in as well. The lime juice and soy cause them to lose some of their heat, so even though they sound like something to shy away from, I would give them a 4 out of 10 in spiciness.

(Matador Chiles)4 jalapeno or serrano chiles
3 tablespoons canola or safflower oil
1 cup thinly sliced or chopped white onion
1/4 cup plus 2 tablespoons freshly squeezed lime juice
¼ cup soy sauce or Maggi

Roll the chiles back and forth a few times under your palm on your kitchen counter. Heat the oil in a medium skillet over medium heat. Add the chiles and cook, flipping them over every 2 minutes, until deeply browned on all sides. 5 to 6 minutes. Transfer the chiles and oil to a heatproof bowl. Once the chiles are cool enough to handle, remove them from the bowl, remove the stems, and chop; discard the seeds, if desired, though I never do. Return the chopped chiles to the bowl with the oil and stir in the onion, lime juice, and soy sauce until well combined. Let sit for at least 10 minutes and serve.

Claudia’s Salsa de Nopal (Cactus Salsa)

Claudia’s Salsa de Nopal (Cactus Salsa)

claudia cactus salsa2 cactus paddles, cleaned and cut into ½ inch cubes
1 cup (240 g) coarse kosher salt
2 medium Roma tomatoes, chopped
½ medium red onion, finely chopped
1 1/2 tablespoons fresh lime juice, or to taste
1 serrano chile, stemmed
Leaves from1/2 bunch fresh cilantro, chopped
1/2 teaspoon freshly ground black pepper

Place the cactus in a large bowl and add the salt. Toss until the cactus is fully covered and set aside to cure for 5 minutes; the cactus will begin to release slime. Turn it with a wooden spoon or spatula to make sure the salt reaches all of the pieces of cactus and allow to rest for an additional 2 to 3 minutes to release more slime. Remove the cactus from the bowl and place it in a strainer. Run it under cold water until all the visible salt has been removed. Taste the cactus for salt; it should be salty and have some give but should not taste raw. If it’s too salty, rinse it some more. Pat dry with a paper towel. Move the cactus to a large bowl and add the tomatoes, onion, and lime juice and toss with a spoon or spatula. Slice the chile in half lengthwise and remove the seeds and veins if you want to keep the heat down. Thinly slice each half widthwise to create half-moon slices and add them to the bowl. Add the cilantro and fold until completely incorporated. Stir in the pepper and taste. If it’s too salty, add a bit more lime juice for additional acidity.

Nopales con Queso Fresco (Cactus & Queso Fresco Salad)

Nopales con Queso Fresco (Cactus & Queso Fresco Salad)

Salt
1 pound (455 g) cactus paddles, cleaned (see this page) and cut into 1/2-inch (12-mm)
cubes
2 large Roma tomatoes, cubed
¼ cup (30 g) diced red onion
1/2 cup (20 g) chopped fresh cilantro leaves
½ teaspoon freshly ground black pepper
1 pound (455 g) queso fresco, cubed

Bring a large saucepan of water to boil and season it well with salt. Add the cactus, return it to a boil, then reduce the heat and simmer for 3 to 4 minutes, until the pieces darken to a slightly muted green and are cooked through. Drain and let them cool. In a large bowl, combine the cactus, tomatoes, onion, cilantro, 1 1/2 teaspoons salt, and the pepper. Gently fold in the queso fresco. Cover the bowl with plastic wrap and refrigerate for 1 hour before serving.

Escabeche de Cebolla (Yucatan Pickled Red Onion)

Escabeche de Cebolla (Yucatan Pickled Red Onion)

escabeche de cebolla1 large red onion, peeled and very thinly sliced
1/4 tsp. black peppercorns
1/4 tsp. cumin
1/2 tsp. Mexican oregano
2 garlic cloves, crushed
1 bay leaf
1/2 tsp. kosher salt
3/4 cup apple cider vinegar

Place the sliced red onion in a large mason jar (or divide if using smaller jars). In a small pot, heat the vinegar to black pepper, cumin, oregano, garlic, bay leaf and salt. Bring to a boil. Remove from heat. Pour the hot vinegar spice mixture over the red onion. Cover and refrigerate. Your onions may not turn bright pink immediately. We found that the gorgeous bright pink color will develop and deepen as the onions rest, covered overnight. These pickled onions will keep for up to 2 weeks refrigerated.

Rajas con Crema (Roasted Poblanos with Cream)

Rajas con Crema (Roasted Poblanos with Cream)

Rajas con Crema (Roasted Poblanos with Cream)6 fresh poblano chiles, fire roasted, stemmed, seeded and skinned
1 T. butter
1 white onion, sliced lengthwise (root to tip), 1/4-inch slices
2 cloves garlic, minced
1/2 tsp. salt
1 cup Mexican crema (Mexican sour cream) or crème fraîche
1/2 cup grated Monterey Jack cheese

Cut the chiles into long strips, about an inch wide. Many recipes call for thin strips, about a half inch wide, which you can do if you want. I just like them with thicker strips. Set aside. Heat the butter (can use vegetable oil instead if you want) in a large cast iron skillet on medium heat. Add the onions and cook until translucent, about 3 to 4 minutes. Add garlic and cook an additional 2 minutes. Add the poblano chiles to the onions. Sprinkle the chiles with salt. Reduce heat to medium-low. Add the Mexican crema. Gently stir to coat the chiles. Let cook for several minutes, until the chiles are completely cooked through and the sauce is bubbly and a little reduced, then sprinkle in the grated jack cheese. Stir with the hot crema sauce until the cheese has melted and mixed in with the crema sauce. Serve with warmed corn or flour tortillas.

Nopales con Cebolla Caramelizada, Chile Guajillo y Queso Fresco (Nopal Cactus with Caramelized Onion, Guajillo Chile and Fresh Cheese)

Nopales con Cebolla Caramelizada, Chile Guajillo y Queso Fresco (Nopal Cactus with Caramelized Onion, Guajillo Chile and Fresh Cheese)

Nopal Cactus with Caramelized Onion, Guajillo Chile and Fresh Cheese3 dried guajillo chiles, seeded and torn into flat pieces
3 garlic cloves, unpeeled
1/214.5-ounce can diced tomato (preferably fire-roasted)
1 pound (8 medium) nopales cactus paddles
3T. olive or vegetable oil
1 large white onion, sliced 1/4-inch thick
Salt
A little sugar, if necessary
1 cup (4 oz.)crumbled Mexican queso fresco or other fresh cheese such as feta or goat cheese
A big handful of cilantro leaves

Prepare the guajillo chile base. Heat a medium (10-inch) skillet over medium. Toast the chiles by using a metal spatula to press them against the hot surface for a few seconds, until very aromatic, then flipping and pressing the other side. Roast the unpeeled garlic, turning from time to time, until soft and blotchy-black in spots, about 15 minutes. Cool and peel off the papery skin. Break the chiles into smaller pieces and combine in a blender jar with the garlic and the undrained can of tomatoes. Blend until smooth—this will take a minute or so because of the tough chile skins. Clean and cut the cactus. Holding a paddle with a pair of tongs, trim off the edge that outlines the paddle, including the blunt end where the paddle was severed from the plant. Slice or scrape off the spiny nodes from both sides of the paddle. When all paddles are cleaned, cut them into squares that are a little larger than ½ inch. Prepare the dish. In a large (4-quart) saucepan, heat the oil over medium. Add the onion and cook, stirring regularly, until richly browned, about 10 minutes. Add the cactus, cover the pan and cook 5 minutes. Uncover, raise the heat to medium-high and cook, stirring frequently, until all of the cactus’s sticky stuff has evaporated and you hear the cactus sizzling in the oil. Immediately, set a medium-mesh strainer over the pan, pour in the chile mixture and press it through. Stir everything together and let it cook until the chile mixture has thickened to the consistency of tomato paste. Stir in ½ cup water, reduce the heat to medium-low and simmer 20 minutes. Taste and season with salt (usually about 1 tsp.) and a little sugar if necessary to balance the chile’s natural astringency. Serving. Serve the warm mixture with the fresh cheese, cilantro and warm tortillas if you want to enjoy the dish as a filling for soft tacos.

Cooking Nopales

Cooking Nopales

Cleaning cactus is no easy feat to accomplish. In fact, I was too scared to attempt it until I was older, for fear of getting pricked. That’s because even though the bigger needles are visible to the naked eye, there are also some tiny needles that are as clear as water and virtually invisible. You can blanch your cactus, boil it, saute it, or even cure it in salt for a different approach. Heck, some people blend cactus into their green smoothies. Note that the smaller the paddle, the more tender the cactus will be.

6 nopales (cactus pads)cactus

1 tomatillo husk (to reduce the viscosity effect)
1/4 white onion
1 garlic clove
1/2 tsp. of salt

VERY IMPORTANT TIP: Use kitchen tongs to hold the nopales or, better yet, wear gloves to protect your hands from the thorns. Once you are familiar working with cactus paddles then you can try to clean them without gloves. Place the cactus paddle on your cutting board and, using a sharp knife, trim off the edge. Scrape the spines, thorns or eyes, running your knife from back to front until completely clean. Turn the cactus paddles and do the same on the other side. Repeat the same steps with the rest of the cactus paddles. Finally rinse the cactus paddles and take them back to your clean cutting board. Place a medium size pot with 4 quarts of water to boil. Cut the cactus paddles in small strips. Once the water is boiling add the cactus, onion, garlic, 1/2 tsp. of salt and the tomatillo husk. Boil uncovered for about 8-10 minutes or until tender. The cactus will exude a sticky substance and most times will foam, so, pay special attention to this step to avoid the foam to spill over. Once cooked, drain and rinse the cactus. Let them drain completely or pat them dry with paper towels. Now, your nopales are ready to be prepared into salads, scrambled eggs, as an addition to your Mexican stews, etc. Note: Nopales also taste good grilled and topped with melted cheese. Just make 3-4 small cuts to each nopal after you cleaned the spines; brush them with oil and grill them for about 3 minutes on each side.

Grilled Corn with Basil Butter & Smoked Paprika

Grilled Corn with Basil Butter & Smoked Paprika

6 earns corn, huskedGrilled Corn with Basil Butter & Smoked Paprika
8 T. Butter, room temperature
1 tsp. Salt
1 tsp. Pepper
3 T. chopped Basil
¼ tsp. Salt
1-2 tsp. Smoked Paprika

Preheat grill to medium high heat. Rub each ear of corn with a tsp. or so of the butter and sprinkle with salt and pepper. Wrap each in a small sheet of aluminum foil (2 layers of foil is all you want). Place directly on grill and cook for 20-25 minutes, rotating every 5 minutes. In small bowl, stir together remaining butter, basil and salt. Spread butter on hot corn and sprinkle with smoked paprika.

Fried Cabbage with Bacon, Onion & Garlic

Fried Cabbage with Bacon, Onion & Garlic

Fried Cabbage with Bacon, Onion & Garlic6 sliced bacon, chopped
1 large onion, diced
2 cloves garlic, minced
1 large head cabbage, cored and sliced
1 T. salt, or to taste
1 tsp. ground black pepper
1/2 tsp. onion powder
1/2 tsp. garlic powder
1/8 tsp. paprika

Place the bacon in a large stockpot and cook over medium-high heat until crispy, about 10 minutes. Add the onion and garlic; cook and stir until the onion caramelizes; about 10 minutes. Immediately stir in the cabbage and continue to cook and stir another 10 minutes. Season with salt, pepper, onion powder, garlic powder, and paprika. Reduce heat to low, cover, and simmer, stirring occasionally, about 30 minutes more.

Roasted Cabbage Wedges

Roasted Cabbage Wedges

Roasted Cabbage1 tsp. olive oil (5g)
2 T. real bacon bits (14g)
2 T. lemon juice
1 T. worcestershire sauce
1/4 tsp. kosher salt
1/4 tsp. ground black pepper (more or less to taste)
1 Medium Head of Cabbage

Preheat oven or grill to 425. Mix olive oil, bacon, lemon juice, Worcestershire, salt and pepper to make a marinade. Cut Cabbage into 4 wedges. Place each wedge on a piece of foil, drizzle with the marinade, getting into all the nooks and crannies, and wrap the foil to enclose wedges. Bake for 20-30 minutes for a cabbage that is still a little crisp, or up to an hour for very soft cabbage.

Summer Cucumber Salad

Summer Cucumber Salad

1 cup apple cider vinegar
½ cup sugar
1½ tsp. kosher salt, plus more to taste
2 English seedless cucumbers
4 shallots, thinly-sliced crosswise
Freshly ground black pepper, to taste
Fresh Mint, cut into thin ribbons for serving, if desired

In a large bowl, whisk together vinegar, sugar, and salt; set aside. Using a vegetable peeler, peel alternate ½-inch-wide strips of skin from cucumbers; discard peeled skins.

Slice cucumber crosswise into 1⁄8-inch-thick rounds; add to bowl with vinegar along with shallots and toss to combine. Season with salt and pepper. Chill, top with mint if using, then serve.