Browsed by
Tag: Canning & Preserving

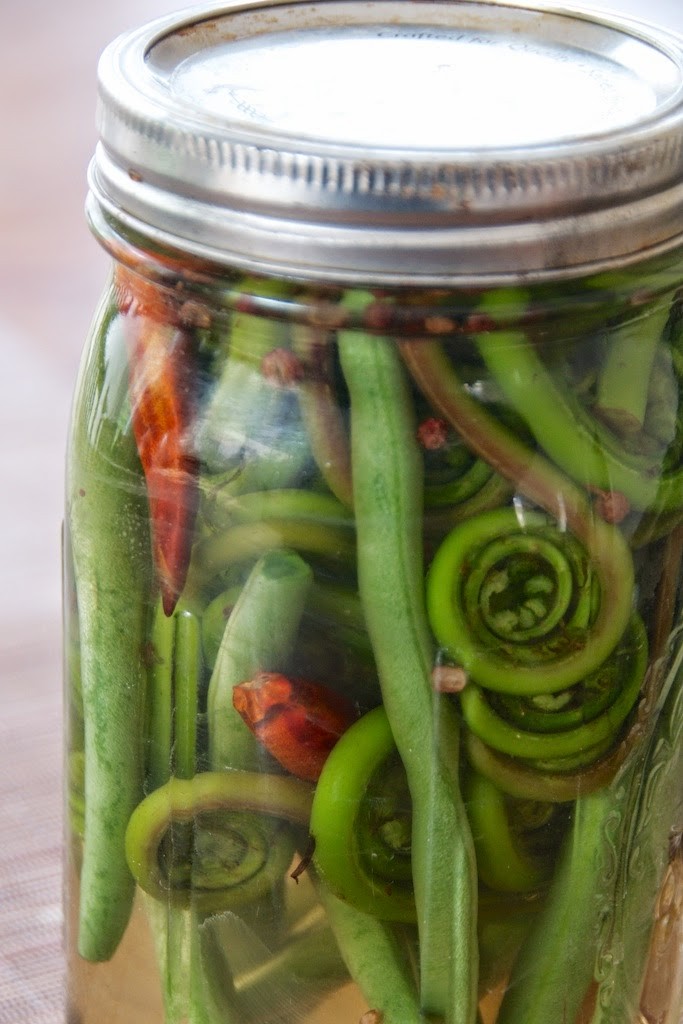
Sichuan Pickled Vegetables

Sichuan Pickled Vegetables

1 quart-sized jar with lidfiddle1
2 1/4 cup water
1/4 cup rock or sea salt
4 dried chiles
1/2 tsp. whole Sichuan peppercorns
2 tsp. rice wine
1/2 star anise
1 T. brown sugar
1-inch piece of unpeeled ginger
1/3 cinnamon stick
1 lb. or more vegetables, such as string beans, slice carrot, daikon radish, etc.

Dissolve salt in boiling water and set aside to cool. Add pickling spices to jar and add cooled water. Cover and shake to mix. Fill jar with vegetables (e.g., fiddleheads), making sure brine covers them. Tighten lid and put aside in a cool, dark place for a minimum 24 hours; a week is better. You can continue to replenish the jar with vegetables by adding more salt, sugar, and wine.

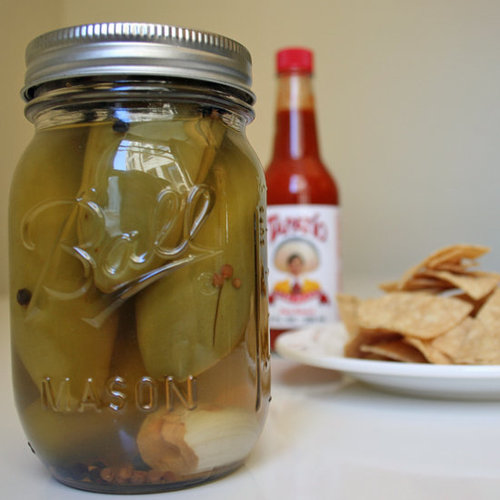
Pickled Jalapeños

Pickled Jalapeños

Pickled-Jalapenos1 pound (450g) fresh jalapeno peppers, washed
2 1/2 cups (625ml) water
2 1/2 cups (625ml) vinegar (I used white distilled vinegar)
3 T. sugar
3 T. coarse salt, such as kosher
2 bay leaves
2 T. whole coriander seeds
3 cloves garlic, peeled
2 T. black peppercorns

Stab each pepper three times with a sharp paring knife and place them in a large glass preserving jar. In a non-reactive saucepan, bring the other ingredients to a boil, then reduce the heat and simmer for five minutes. Remove from heat and pour the brine over the peppers. Place the lid on the jar and let cool. Once cool, refrigerate for at least a week before using, if possible. Serve whole, with Mexican dishes, or remove the seeds then chop and use to season any recipe that is improved by a little bit of sweet heat.

Marinated Fresh Mozzarella Pearls

Marinated Fresh Mozzarella Pearls

Marinated Fresh Mozzarella Pearls


1 lb. fresh mozzarella pearls (or use any type of fresh mozzarella and cut into bite-sized pieces)

1/2 C. olive oil

1/2 C. chopped fresh herbs (measure after chopping)

(I used mostly basil with just a few T. of chopped oregano)

salt and fresh ground black pepper to taste

1/2 tsp. fresh red pepper flakes (more of less to taste)


Drain mozzarella in a strainer placed in the sink while you wash and chop herbs. Be sure mozzarella is drained well, and pat dry with paper towels if needed. Wash herbs, spin dry in salad spinner or blot dry with paper towels, then finely chop enough fresh herbs to make 1/2 C.. Mix chopped herbs with olive oil and red pepper flakes, and season with a generous amount of salt and fresh ground black pepper. Put mozzarella pieces into a plastic or glass container with a tight-fitting lid, add olive oil mixture, and stir to combine. Put lid on container and marinate mozzarella at room temperature for 30-60 minutes, turning container over a few times so the mozzarella stays covered with the olive oil-herb mixture. Serve at room temperature.

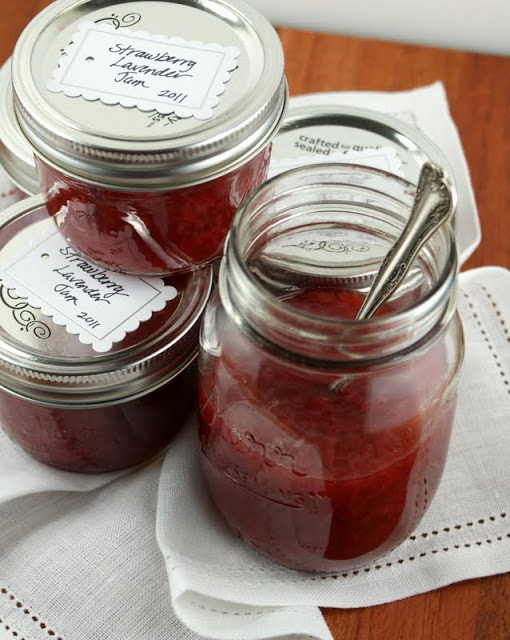
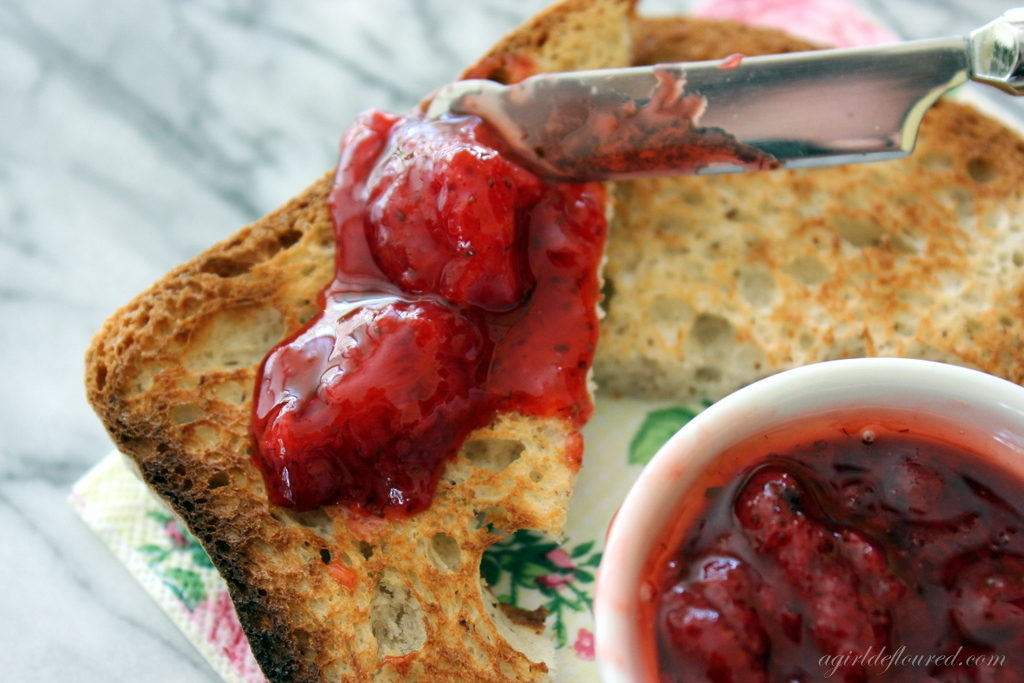
Strawberry Lavender Jam

Strawberry Lavender Jam

16 C. (4 lbs) Strawberries, hulled and halved
2 ½ C. Sugar
½ C. Fresh lemon juice
1 packet of pectin
1 tsp. Fresh or dried lavender

In a large non-reactive pan add the strawberries and sugar. Cover and let stand at room temperature for 1 to 2 hours. Have ready hot, sterilized jars and their lids. You can sterilize by placing in a 225 degree oven on a cookie sheet for 15 minutes or sterilize in hot water or the dishwasher. Place 2 or 3 small plates in the freezer. Add the lemon juice and pectin to the pot. Bring to a boil over medium-high heat, reduce the heat to medium, and cook, uncovered, add lavender, stirring frequently, for 10 minutes. Remove from the heat. Use 1 tsp. jam and a chilled plate to test if the jam is ready. The mixture is ready if it wrinkles when nudged gently with a finger. If it doesn’t, continue to cook for a few minutes longer and retest. Ladle the hot jam into the jars, leaving ¼ inch of headspace. Remove any air bubbles and adjust the headspace, if needed. Wipe the rims clean and seal tightly with the lids. Process the jars for 10 minutes in boiling water bath. Remove and let cool on a towel. The lids will pop and that means they are sealed. To test, simply press down on the lid and if no popping happens, they are sealed. Tighten the lids and store in a dark, cool location.

Strawberry Basil Jam

Strawberry Basil Jam

2 pounds of strawberries, some super ripe, some under ripe
½ C. water
2 tsp. lemon juice (about 1 lemon)
1 C. sugar
¼ C. roughly chopped basil leaves
2 tsp. vodka

Remove the stem from the strawberries and halve or quarter them if they are large. Place them in a large stockpot with the water and bring to a boil. Cover, reduce heat to medium and continue to boil for 10 minutes, stirring occasionally to prevent the berries from sticking to the pot. Meanwhile, put the sugar and basil leaves into a food processor fitted with a steel-blade attachment. Pulse until the basil is finely minced and the sugar turns a pale green color. Set aside. Remove the lid from the pot and stir the lemon juice into the berries (after they have simmered for 10 minutes). Add the sugar, ½ C. at a time, waiting for the liquid to return to a boil before adding more. Continue to boil for another 5 minutes, stirring frequently. Skim any foam that rises to the surface, if desired. Cook only until the jam begins to stick on the bottom of the pot. You should be able to draw a trail through the jam with your spatula. Another sign that the jam is ready is that it will begin to sputter. Pour jam through a funnel into hot, sterilized jars to within ¼ inch of the lips. Wipe the rims clean with a paper towel that you’ve submerged in the vodka. Attach new lids, and screw caps tightly. Invert jars briefly to vacuum seal, or process in a boiling water bath, submerged by 1 inch, for 10 minutes.

Peach-Nectarine Jam

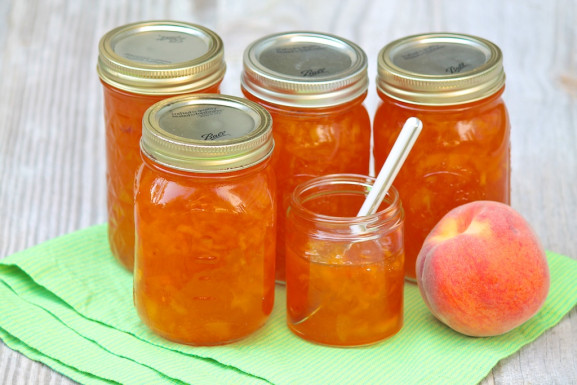
Peach-Nectarine Jam

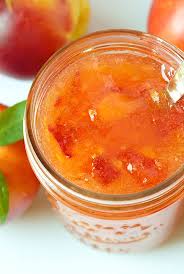
3 C. peeled, chopped peaches
1 1/2 C. peeled, chopped nectarines
2 T. lemon juice
3 C. sugar
1 package powdered pectin
1 cinnamon stick
1/2 tsp. butter (to reduce foam)

First you need to prepare your jars. There are tons of articles on the web that tell you how to do this, so I won’t go into it here. Just make sure that CLEANLINESS is a big priority in your canning process…this is how you avoid contaminating all of your beautiful fruit preserves. I recommend looking at the Ball website or Pick Your Own for basic, safe canning information. Now, get your extra large stockpot/canner filled with water and starting to heat. That much water takes a while to get going. The water level needs to be high enough to cover filled jars by 1-2 inches when submerged in their water bath. Once your supplies are all clean and sterilized, you can start preparing your fruit. Peel, pit, and chop the fruit and place in 6 or 8 qt. stockpot. Stir in lemon juice. Add cinnamon stick. Carefully measure out sugar into a separate bowl. In a small bowl, mix powdered pectin with about 1/4 C. the measured sugar and mix well. Add this mixture to the fruit in the stockpot. Also add optional butter at this point. Bring the fruit mixture to a rolling boil on high heat, stirring constantly. Stir in remaining sugar quickly. Return to a full rolling boil and boil exactly 1 minute, stirring constantly. **NOTE: A full rolling boil is such that when stirred, the boil does not go away. After 1 minute, remove from heat. Skim off any foam. Remove cinnamon stick. Ladle into prepared jars, filling to within 1/4 – 1/8 inch of the top (called “head-space”). Wipe any spills on the jar or rim with a clean damp cloth. Cover with two-piece lids. Screw bands finger-tip tight (this just means screw on tight, but don’t over-do it). Put all of the filled jars into your large stockpot (canner) of boiling water, submerge either with a canning rack (very handy), canning jar grabber, or silicone oven mitts (don’t recommend). The canning rack is great because it keeps the jars off the bottom of the pot preventing etching, scratching, or cracking the glass. If you don’t have a rack, you need to put a tea towel in the bottom of the pot to cushion the jars and make sure there’s space between the jars themselves to allow water to circulate through. The water should cover the jars by 1 to 2 inches. Add more boiling water if necessary. Once the water starts boiling with the jars in the canner, put the lid on and start your timer for 10 minutes. Boil on medium…not a hard boil, but not too gentle. Carefully remove jars from canner–THEY WILL BE HOT! Place on a towel on the counter to cool. When you hear the pop and see that the flat lid is indented, you know you have a good seal. If any jars don’t seal after a couple hours, you can reprocess 10 more minutes, or simply store in the fridge to eat right away. It will keep there for up to a month. Let sealed jars stand at room temp on counter for 24 hours. Store the unopened, sealed jars in a cool, dry, dark place for up to 1 year. Once you open one, store in the fridge for up to a month (any longer and it will start to crystalize).

Persimmon Jelly

Persimmon Jelly

1 C. water
1 tangerine
1 lemon
3 C. sugar
1 pkg. Sure Jell

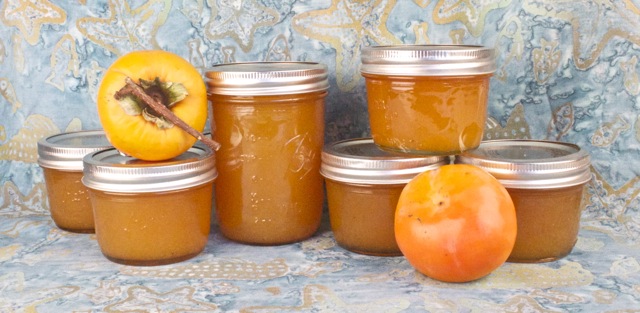
Take wild persimmon, wash and cover with water. Bring to a boil and cook until tender. During cooking, add water as needed to avoid burning. Remove from heat and strain through colander or cloth. To each cup of persimmon pulp add the above ingredients. Mix Sure Jell with pulp, water, juice of lemon and tangerine; bring to boil over high heat, stirring occasionally. At once, add sugar. Bring to rolling boil and cook 1 minute. Remove foam and fill glasses immediately.

Peach Jam

Peach Jam

6-7 half pint jars

4 pounds of fresh Peaches
3 C. Sugar
2 T. Lemon Juice
1/2 C. Water

Prepare the jars for canning. Wash jars and bands in hot, soapy water. Rinse. Place jars inside a canner filled with water, bring to boil. Boil jars for 15 minutes to sterilize. Place lids and bands in warm water, do not boil. Leave until ready to use.

Rinse the peaches under cool running water. Place whole fresh peaches in a pot of boiling water for 2 minutes. Remove and place in a sink with cold ice water. Peel peaches, remove the pit, slice in half, then into quarters. Slice each quarter into 2 or 3 chunks. Place cut peaches in bowl and toss with lemon juice. Place in food processor and pulse into small bits but do not liquefy. Place a saucepot on stove, set to medium heat. Add water, then sugar and stir until sugar is dissolved. Add peach pulp and continue to stir until it thickens. As it thickens, stir frequently to prevent sticking and burning. When done, ladle into hot jars, leaving 1/4 inch headspace. Remove air bubbles, wipe rim, add lid and band. Finger tighten. Process 10 minutes in a boiling water canner or according to the time for your altitude. Remove from canner, and place on folded towel for 24 hours in a draft free location. May be stored

Pickled Garlic Scapes in Oil

Pickled Garlic Scapes in Oil

The city of Sulmona, in Abruzzo, is famous for its red garlic. The bulbs, with their gorgeous, fat, purple-red-clad cloves, grow in the surrounding Peligna Valley. The garlic is prized for its intense fragrance and for its keeping ability. It is a staple at the farmers’ market, where you will often find it hanging or stacked in braided lengths. The scapes from the plant—the long, swirly green stalks—are harvested in spring. This allows the plant to focus its energy on growing the bulb. The scapes, called zolle in the local dialect, are enjoyed fresh or turned into these delicious pickles. The garlic flavor in the scapes is mild and appetizing. Serve pickled scapes with cheese and salumi as part of an antipasto platter.
1 pound (454 g) garlic scapes
2 C. (473 g) white wine vinegar
1 tsp. fine sea salt
Extra-virgin olive oil

4 sterilized 1/2-pint jars and their lids

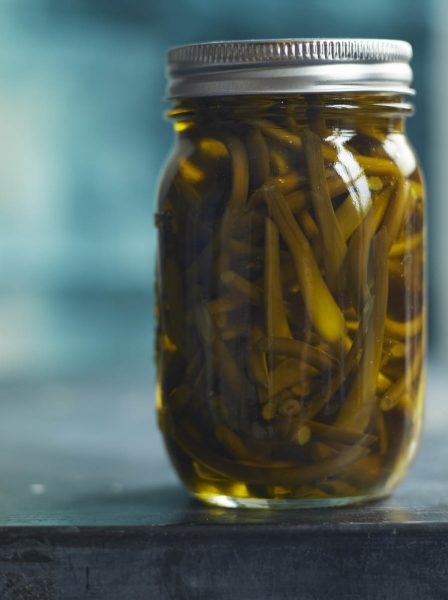
Cut the scapes into 11/2- to 2-inch lengths, removing any tough parts at the bottom and the thinnest part at the top above the small bulbous tip. In a saucepan large enough to hold all the scapes, bring the vinegar to a boil over medium-high heat. Stir in the salt and let it dissolve. Add the scapes to the pot and cover. Return the vinegar to a boil, cover, and boil, stirring once or twice, until the scapes have lost their bright green color and are just tender, 4 to 5 minutes. Drain the scapes in a colander set in the sink. Spread on a clean kitchen towel and let dry for about 1 hour. Shuffle them around once or twice during this time to make sure they dry on all sides. Pack the scapes into the jars, leaving 1 inch headspace. Pour enough olive oil into the jars to cover the scapes completely. Use a bubble remover or a clean chopstick to dislodge any bubbles and press down on the scapes to submerge them. Screw the lids on tightly and let sit at room temperature for 24 hours. Let the scapes cure in the refrigerator for at least 1 week before using, then store in the refrigerator for up to 1 month. To serve, remove from the jar only as much as you plan to use and let it come to room temperature. Top off the jar with more oil as necessary to keep the remaining scapes submerged.

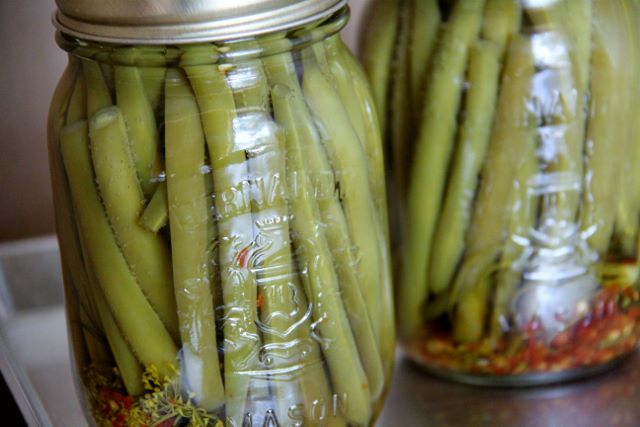
Pickled Green Beans

Pickled Green Beans

5 lb. Green Beans
6 C. Water
6 C. Vinegar
10 cloves Garlic
5 tsp. Mustard Seeds
5 tsp. Dill Seeds
½ C. Salt

Clean and dry 10 mason jars with lids. Clean and cut the green beans to fit in the mason jars. Add garlic clove, 1/2 tsp. mustard seed, 1/2 dill seed into each jar. Boil the water, vinegar and salt in a pan. Pour in each jar while boiling. Put the lids on each jar securely. Place the closed jars in a canner on high for 10 minutes with the water level above the jar lid. Remove the jars using tongs and allow’ to cool for several hours before storing. Each jar will provide two servings and keep for up to a year.

Small Batch Vanilla Rhubarb Jam

Small Batch Vanilla Rhubarb Jam

1 1/4 pounds rhubarb, diced
1 C. granulated sugar
1 tsp. powdered fruit pectin (I use Ball’s Flex Pectin)
1 vanilla bean, split and scraped
juice of 1/2 lemon

Prepare a small boiling water bath canner and 2 half pint jars. Place the chopped rhubarb in a low, wide non-reactive pan. Whisk the pectin and vanilla bean seeds into the sugar and add it to the fruit. Drop the split vanilla bean into the pan and add the lemon juice. Stir well and let it sit until the sugar looks damp. Set the pan on the stove over high heat and bring to a boil. If the sugar begins to caramelize, reduce the heat. Cook, stirring regularly, until the rhubarb breaks down and the liquid looks thick and jammy. Remove the pan from the heat and divide the jam between the two prepared jars (depending on how much water the rhubarb contained, you may have a couple tsp. leftover. I recommend stirring the leftover into some plain yogurt). Wipe the rims, apply the lids and rings, and process in a boiling water bath canner for 10 minutes. When the time is up, remove the jars from canner and set them on a folded kitchen towel to cool and seal.

Strawberry Kiwi Jam

Strawberry Kiwi Jam

2 C. chopped strawberries
1 C. peeled and chopped kiwi
1 1/4 C. granulated sugar
juice of 1/2 lemon

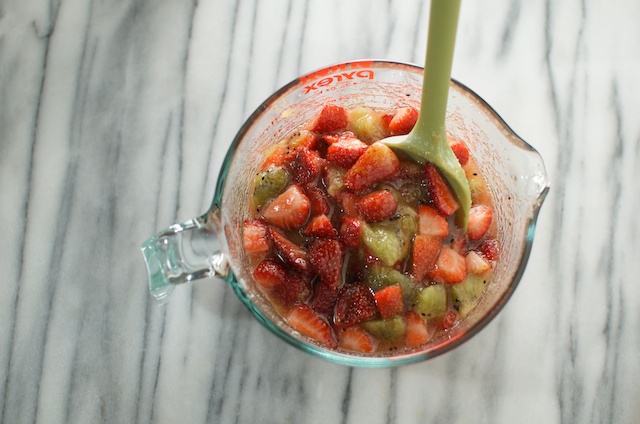
Combine the strawberries, kiwi, and sugar in a bowl and stir until the fruit begins to release its juice. Scrape the fruit and sugar combination into a 12 inch skillet and place over high heat. Bring to a boil and cook at a rapid bubble for 8-10 minutes, stirring regularly, until the jam is thick. You can tell it’s done when you can pull your spatula through the cooking fruit and the jam doesn’t immediately rush in to fill the space. When jam is done, you can do one of two things. Simply scrape it into a pint jar, let it cool, and put it in the fridge. Or funnel it into two clean, hot half pint jars and process them in a boiling water bath canner for ten minutes. As long as the seals are good, the processed jam is shelf stable for up to a year.

Sweet Pickled Cherries

Sweet Pickled Cherries

A few notes on this recipe. You may choose whatever whole spices you like, but don’t change the amount or strength of the vinegar. I also increased the pickling liquid by half so that I would have a little more which is how I ended up with 4 pints rather than 3.

1 3/4 C. apple cider vinegar
1 3/4 C. sugar
3/4 C. water
3 cinnamon sticks
2 pounds sweet cherries with stems and pits intact

Prepare your jars and lids. Jars should be kept warm in the canner. Combine vinegar, sugar, and water in a medium saucepan. Bring to a boil and simmer until sugar is dissolved. Remove hot jars from canner. Pack each jar with cherries, and add one cinnamon stick to each jar. Pour hot syrup over cherries leaving 1/2 inch headspace. Wipe jar rims and place lids and rings on each. Process 15 minutes in a boiling water bath. Remove jars from canner and cool.

Carrots & Fennel in Agrodolce

Carrots & Fennel in Agrodolce

Italians are fond of preserving vegetables—and fruit—in a sweet-and-sour brine known as agrodolce. Sweet peppers are a classic example, but I like this somewhat more unusual combination of crunchy carrots and sliced fennel bulb. Use a mix of colored carrots—gold, orange and red—if you can find them. The darker ones turn the brine a pretty shade of sunset pink.

2 C. (437 g) water
Juice of 2 lemons
2 pounds (907 g) fennel bulbs, plus 4 small fronds
2 pounds (907 g) carrots, peeled
2 C. (437 g) white wine vinegar
2 C. (437 g) apple cider vinegar
2 C. (400 g) sugar or vanilla sugar
2 T. fine sea salt
1 tsp. whole black peppercorns
1 tsp. whole fennel seeds

Combine the water and lemon juice in a bowl. Cut the tops off the fennel bulbs. Cut each bulb into quarters and each quarter into thin wedges. Drop each wedge in the lemon water as you go to keep it from browning. Cut the carrots into 2-inch sticks, and cut any large pieces in half or into quarters lengthwise to yield bite-size pieces. Add the carrots to the lemon water. Combine the vinegars, sugar, salt, peppercorns and fennel seeds in a large, deep saucepan over medium-high heat. Bring the brine to a boil, stirring occasionally to make sure the sugar dissolves. Drain the fennel and carrots and add them to the boiling water. Cover the pot, turn off the heat and let sit for 5 minutes. Place a fennel frond in the bottom of each jar. Pack the vegetables into the jars, taking care to get a mix of vegetables and some spices in each one. Pour the hot brine over the vegetables, leaving ½ inch headspace. Use a bubble remover or a clean chopstick to get rid of any bubbles. Screw the lids on tightly, and process for 10 minutes in a boiling-water bath. Store the sealed jars in a cool, dark place and let the vegetables cure for at least 1 week before serving. They will keep for up to 1 year, though they may eventually lose their crisp texture. Refrigerate any jars that fail to seal properly and enjoy those first.

Strawberry Lavender Jam

Strawberry Lavender Jam

3 pounds strawberries (about 9 C.), rinsed and hulled
1½ C. sugar
3 tsp. fresh lemon juice, strained
1½ tsp. dried lavender (or 1 tsp. fresh lavender)

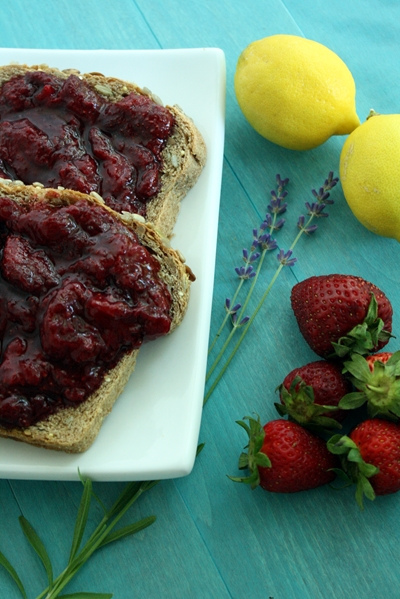
Begin by preparing the jars. Put four, half-pint jars in a stockpot or other large pot and cover with water. Place the pot on the stove over high heat and bring to a boil. Put the jar lids in a separate bowl and set them aside; also, place a small plate in the freezer. While the jars process, begin preparing the jam. Place the strawberries and the sugar in a large saucepan and bring to a simmer over medium-high heat, stirring frequently. Allow to simmer for five minutes. Now pour the mixture into a colander set over a large bowl. Gently stir the berries in the colander to strain off most of the juice. Set the colander and berries aside, preferably over another bowl or plate to catch juice drips, and return the juice to the saucepan. Bring the juice to a boil, stirring occasionally. Allow the juice to boil until reduced to a syrup measuring 1½ C., about 20 minutes. Return the strawberries and any juice that has drained from them while sitting to the saucepan with the reduced syrup. Stir in the lemon juice and the lavender and return the mixture to a simmer. Continue to simmer until a small dab of jam spooned onto the plate in the freezer becomes somewhat firm (it will not gel), about 15 minutes. Spoon off any accumulated foam from the saucepan and stir gently. At this point, ladle boiling water from the pot with the jars into the bowl with the lids until the lids are covered. Place a folded kitchen towel in the designated work area. Use a jar lifter to remove the sterilized jars from the canning pot, being careful to pour the water in each back into the pot, and place upright on the kitchen towel. Note, the jars should have boiled at least 10 minutes in order to ensure they are sterilized. Ladle the hot jam into the hot jars, leaving ¼-1/2 inch of head space. Once the jars are filled, use a damp cloth to wipe the rims of the jars. Drain the water off the jar lids and place the lids (flat lid and ring) on top, securing until finger tight. Return the filled and sealed jars to the pot of water. Make sure the water is at least one inch above the tops of the jars. Return to a boil and allow to boil for five minutes to process. Remove the jars from the water and again place on a folded towel. After one hour, check the seals on the jars by pressing down on the center of each lid. If the lid is easy to press down and then pops back up (just like an open jar of pickles), the lid has not sealed properly and the jar should be refrigerated. Allow the sealed jars to cool for 12 hours before storing in cool dark place. Once open, refrigerate any unused contents.

Pear Cranberry Jam

Pear Cranberry Jam

1 lb. fresh cranberries
1 lb. pears, quartered and cored (no need to peel)
1/2 – 3/4 C. sugar (or to taste)
1 tsp. fresh lemon juice
Spices, as desired (see above)

Prepare water bath canner by filling to 3/4 full of cool water and adding jars. Bring to boil and turn down to keep at simmer. Combine pears and cranberries in a sturdy non-reactive stockpot or deep skillet. Cook over medium heat stirring frequently to prevent burning and to keep mixture evenly cooking. After 5-10 minutes, the cranberries will begin to pop. Add the sugar and lemon juice. Continue cooking until most of the cranberries have popped and juices have been released from the pears. Cook until mixture reaches the desired thickness – about 20 minutes. You can test this by dropping a tsp. the mixture onto a saucer. Let cool for about a minute. Then pick up the saucer and tilt sideways. If the jam appears to keep it’s shape, it’s done. If it separates or runs down the saucer, cook a bit longer and test again. At this point, you may puree the mixture with an immersion blender or by spooning batches into a food processor or mixer. Or if you like the texture as is, you are ready to fill jars. Spoon into hot jars, leaving 1/2 inch headroom. Wipe rims, lid and place in canner. Bring water in canner back to a boil and process for 10 minutes. Remove to protected countertop. After 1 hour, test lids and place any unsealed jars in refrigerator. Let remainder cool for 12 hours. Label and date.

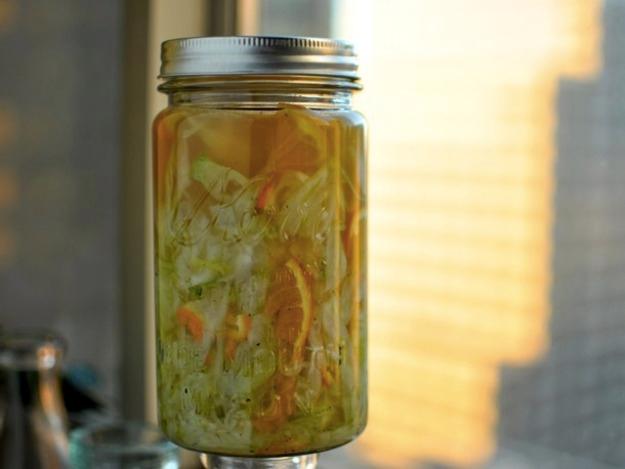
Quick Pickled Fennel with Orange

Quick Pickled Fennel with Orange

3 small fennel bulbs
2 tsp. kosher salt
1 small orange, sliced
1/4 tsp. freshly ground black pepper
1 C. apple cider vinegar

Wash fennel bulbs and remove stems. Slice in half and cut out the hard core. Slice paper-thin on a mandoline. Sprinkle kosher salt over shaved fennel and toss to combine. Let fennel sit for at least an hour. When time is up, pour fennel into a colander and squeeze to remove the liquid that was produced while it sat with the salt. Return fennel to the bowl and toss with orange slices and black pepper. ack fennel and orange into a quart jar and top with the apple cider vinegar. Use a chopstick or the end of a wooden spoon to work the vinegar down into the fennel. Stash jar in the fridge and let sit for at least 24 hours before eating. This quick pickle will keep at least 2-3 weeks in the refrigerator.

Sour Cherry Spoon Fruit

Sour Cherry Spoon Fruit

These sticky, sweet-tart preserves are delicious spooned on Greek yogurt or vanilla ice cream. But my favorite way to enjoy them is this: Toast a slice or two of good Italian bread. Spread fresh ricotta on top and then spoon the fruit on top of that. Heaven.

1 1/2 pounds (680 g) fresh sour cherries (about 4 C.), pitted with pits reserved
1 C. (140 g) dried sour cherries
2 C. (400 g) vanilla sugar (see page 57)
2 T. freshly squeezed lemon juice
1/2 vanilla bean

3 sterilized 1/2-pint jars and their lids
Tight-weave cheesecloth
Kitchen twine
Basic water-bath canning equipment

Combine the fresh and dried cherries, sugar, and lemon juice in a nonreactive heavy-bottomed saucepan or preserving pot. Scrape the seeds from the vanilla bean and add them to the pan, along with the pod. Let the cherries macerate for about 1 hour. Tie the reserved pits in a piece of cheesecloth with the twine and add the bundle to the pot. Set the pot over medium-high heat and bring to a boil. Cook at a lively simmer, stirring often, until the mixture has darkened and begun to thicken, 20 to 30 minutes. Continue to boil until the mixture reaches 220°F and you can drag a path along the bottom of the pot with a silicone spatula. Remove and discard the cheesecloth bundle. Ladle the hot fruit into the jars, leaving V4 inch headspace. Wipe the rims clean if necessary7 with a clean, damp cloth, and screw the lids on the jars. Process the jars in a boiling-water bath for 10 minutes. Remove the jars and set them upright on a clean kitchen towel. Let the jars cool to room temperature before storing in a cool, dark place for up to l year. Refrigerate after opening. Store any jars that fail to seal properly in the refrigerator and use those first. Cook’s Note To remove the pits from sour cherries, unbend a clean paper clip into a long “S”-shaped wire with two curved
ends. Gently push the smaller curved end into the cherry7 through the stem end and scoop out the pit.

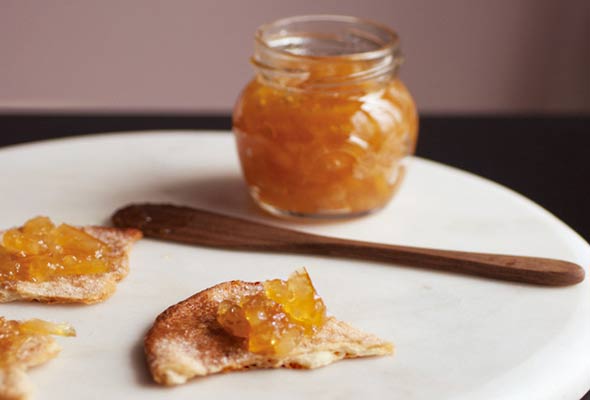
Meyer Lemon Marmalade

Meyer Lemon Marmalade

3 pounds Meyer Lemons (or any lemons)
4 1/2 C. Sugar (I use organic raw sugar)
2 oz. prepared pureed Ginger or 4 tsp. finely chopped fresh Ginger
7 C. water

Prepare water-bath canner with jars by bringing cool jars and cool water to a boil in canner. Turn heat down and let simmer until ready to use the jars.

Scrub lemons thoroughly. If they are not organic, scald with hot water to remove any wax and debris. Prepare lemon peel by cutting the peels from the lemons with a sharp knife or using a vegetable peeler. Avoid cutting into the pith (the white part). You should end up with long swirls of peel. Cut across the swirl into very small slivers. Place the peels into saucepan with 1 C. the water, add saucepan lid, and simmer long enough for the peels to soften – about 30 minutes. Remove from heat and set aside.

Meanwhile, chop the remainder of each lemon into small 1/4 inch pieces, retaining all the pith, fruit and seeds, and juice. Place these pieces into a cheesecloth and tie tightly. Place in non-reactive saucepan and cover with the water. Boil 1 hour. Remove the cheesecloth bag from the liquid and cool. The easiest way to do this is to place in a sieve over a bowl. When cool enough to handle, press as much of the liquid from the bag as possible. It will be milky and sticky – this is the good pectin that will aid in setting the marmalade. Discard the cheesecloth bag.

Now combine the softened peels, the liquid remaining in the saucepan, the additional captured liquid from the bag, ginger and sugar. Bring back to a boil, then lower heat to medium, stirring until sugar is dissolved. Continue cooking uncovered until the liquid reaches 220 degrees on a candy thermometer. Remove from heat.

Immediately spoon into jars and process for 10 minutes after water returns to a boil in a boiling-water bath. Remove jars from canner and cool on heat-proof surface. Check lids after 1 hour, refrigerate any unsealed jars. Let the remainder of the jars cool overnight. Label and date and store in cool, dry place.

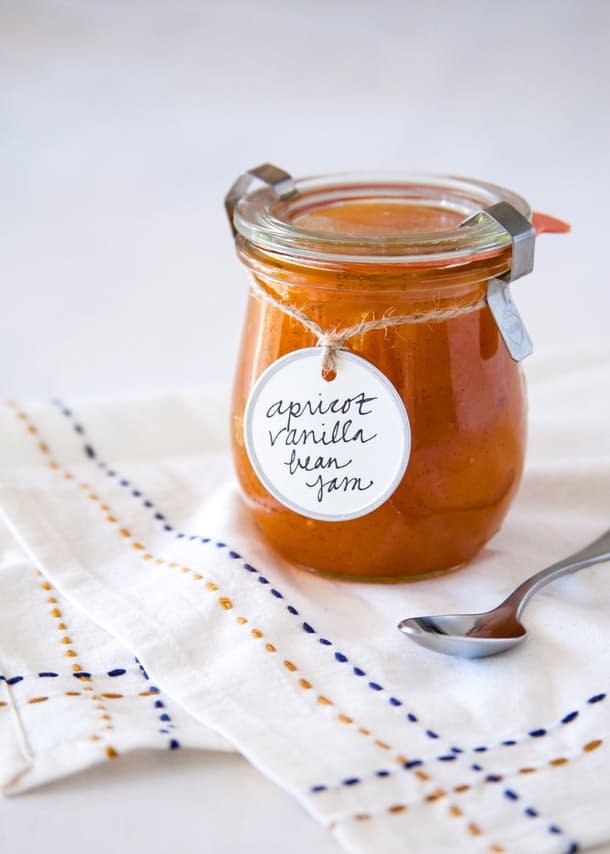
Apricot Vanilla Bean Jam

Apricot Vanilla Bean Jam

2 pounds ripe apricots
1/4 C. water
Small wedge fresh lemon
2 1/2 C. granulated sugar
1 to 2 vanilla beans

Cut the apricots in half and remove the pits. Place apricot halves, water, the juice from the lemon, and the lemon rind itself in a large non-reactive pot. Stirring intermittently, cook over medium-high heat until the juices begin to boil. Reduce the heat, cover, and simmer until the apricots are soft and tender, 5 to 10 minutes. Once soft and tender, stir in the sugar. Split the vanilla beans down their length, scrape out the seeds, then add both the seeds and the pods to the pot. Increase the heat back up to high and bring to a rolling boil. Clip on a candy thermometer and continue to cook, while stirring, until the jam thickens and reaches about 220°F. Carefully remove the vanilla bean pods and lemon rind. Ladle the jam into clean 4-oz., half-pint, or pint-sized glass jars and store in the refrigerator for up to 3 weeks.

Recipe Notes: Taste your fruit first to check for ripeness and sweetness. Additional sugar may be required. This recipes keeps the skin on the apricot before cooking. You can remove the skins before cooking if you like. To check for doneness, place a small plate in the freezer when you start the recipe. As the jam nears completion, place a small amount on the plate and return the freezer. If the jam wrinkles as you nudge it, it is done.

Classic Peach Jam

Classic Peach Jam

3 pounds peaches, peeled, pitted and finely chopped
5 1/2 C. sugar
2 T. fresh lemon juice
1/2 tsp. butter
1 box fruit pectin (I use Sure-Jell)

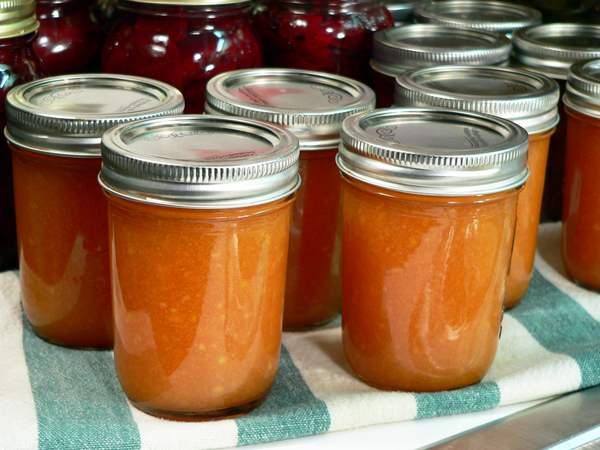
Place the peaches and lemon juice into a large pot. At this point, I like to take my potato masher and mash the peaches a bit. Measure the sugar into a separate bowl and set aside. Stir the package of pectin into the peaches and add the butter. Stirring frequently, bring the peach mixture to a full rolling boil (a boil that does not stop bubbling when stirred), then add the sugar. Stir to fully incorporate.
Return the mixture to a full, rolling boil and boil for exactly 1 minute, stirring constantly. Remove the pot from the heat. Skim any foam from the surface. Ladle quickly into clean jars. (I like to use a wide funnel.) Wipe the rims of the jars with a clean cloth. Place the heated lids (lids that have been placed in simmering water for at least a minute) on the jars and tighten the bands. Place the jars in a canner and process (gently boil) for 10 minutes (water should cover the jars by an inch or two–add boiling water, if necessary), then remove the jars from the canner. Cool completely before storing. Make certain all lids have sealed properly before storing. If the lid springs back when pressed in the middle, it is not sealed and should be stored in the refrigerator.

Mango, Vanilla, Lime and Cardamom Jam

Mango, Vanilla, Lime and Cardamom Jam

10 C. mango, pureed in the food processor, but with some chunks still remaining (about 10 mangos)
8 C. granulated sugar
1/4 C. lime juice
3 vanilla beans, split and scraped out (alternately, you can add 2T.of vanilla AFTER cooking the jam, just before putting into containers)
1/2 tsp. ground cardamom

In a large dutch oven or pot, combine the pureed mango, sugar, lime juice, seeds scraped from the vanilla beans as well as the split vanilla beans (which will be discarded later), and ground cardamom. Slowly bring the mixture up to a boil over medium/high, stirring occasionally to prevent the jam from burning. Once the jam is at a rolling boil, turn the heat down to medium, and continue to boil for 25-30 minutes, stirring occasionally. You can test to see if you have cooked your jam long enough by putting some on a plate or small bowl and putting it in the freezer for a few minutes. Once it has cooled, it should be a nice jam consistency, not too runny. If it is still too runny, continue cooking and checking, until you have reached your desired consistency. Remove and discard the scraped out vanilla bean pods and pour jam into clean jars or containers, allowing to cool to room temperature before storing in the refrigerator or freezer.

Pickled Fermented Garlic Scapes

Pickled Fermented Garlic Scapes

1 quart (8 Servings)

Choose just the tenderest and youngest flowers for these pickled garlic scapes, leaving the scape’s woody stem for use in a naturally probiotic, fermented relish or to use fresh. These pickled scapes are strongly flavored and deeply robust with garlic flavor. You can always add spices to the mixture as well, dill and bay do nicely, but garlic lovers will revel in the simple combination of scape, salt and starter. Fresh whey, sauerkraut juice or packaged starter work well.

1½ tsp. unrefined sea salt
1 package vegetable starter culture (or substitute ¼ C. sauerkraut juice or fresh whey)
1 quart garlic scapes

Stir sea salt and starter culture or whey together with one quart fresh, filtered and dechlorinated water until the salt and starter culture are dissolved into the water completely.
Pack your crock full of trimmed garlic scapes. Pour the mixture of water, salt and starter over the scapes, ensuring that they’re completely covered by the brine. Ferment at room temperature for at least a week, preferably two or even three or four (fermentation is not an exact science), until the scapes achieve a level of sourness that suits you. Once the scapes have pickled to your liking, remove them to the refrigerator or a cool cellar for storage.

Spiced Rhubarb-Cherry Chutney

Spiced Rhubarb-Cherry Chutney

Most home cooks consider rhubarb a fruit, which is why it has earned the nickname “the pie plant.” But rhubarb is actually a vegetable and thus perfectly suited for savory uses as well as desserts. When I spot the first crimson stalks at the farmers’ market, I shuttle them home to make this gently spiced rhubarb-cherry chutney. Try it spooned atop slices of roasted pork tenderloin.

¾ C. packed dark brown sugar
1⁄3 C. red wine vinegar
1 ½ lb. rhubarb, cut into ½-inch pieces (4 C.)
½ C. dried cherries
Zest of 1 orange
½ tsp. ground cinnamon
½ tsp. ground cloves
½ tsp. freshly ground black pepper

Bring the sugar and vinegar to a boil over medium-high heat in a large saucepan. Stir in the rhubarb, cherries, orange zest, cinnamon, cloves, and black pepper with a wooden spoon, and bring the mixture back to a boil. Reduce the heat to medium and simmer, stirring occasionally, until the rhubarb is tender and the mixture thickens slightly, about 6 minutes. Let the chutney cool to room temperature before transferring it to an airtight container. Stored in an airtight container in the refrigerator, it will keep for about 1 week. Bring to room temperature before serving.

Strawberry Balsamic Refrigerator Jam

Strawberry Balsamic Refrigerator Jam

1 tsp. lemon juice
zest of 1 lemon
1 lb. strawberries, stems removed and roughly chopped (good use for overripe berries)
1/3 C. sugar to 1/2 C., depends on sweetness of your strawberries
1 tsp. aged balsamic vinegar

Combine the lemon juice, lemon zest, strawberries, and sugar in a saucepan. Bring to a boil over medium high heat and cook for 10 minutes, stirring frequently. It will look really watery at first, but it will start to thicken up as it reduces. Once you have the thickness you want, reduce the heat to medium and add the balsamic vinegar. Cook for 3 more minutes, then place your jam in a clean glass container. Refrigerate, and spread on biscuits, toast, or whatever you’d like. Enjoy!

Rick Bayless Thin-Sliced Strips Of Beef / Cecina De Res Y Carne Seca

Rick Bayless Thin-Sliced Strips Of Beef / Cecina De Res Y Carne Seca

1 1/2 lb. piece of eye of round
1 1/2 tsp. salt
1 T. freshly squeezed lime juice
1 1/2 tsp. dried oregano

Using a very sharp knife (such as a boning, filleting or slicing knife), trim the ends, top and bottom of the meat to make them flat, giving you a roughly loaf-shaped chunk (weighing about 1 1/4 lbs). Reserve the scraps for another use. Lay the meat so that its length (and the grain) runs crosswise in front of you. Place one hand firmly on top of the meat, then begin slicing at one end, parallel to the work surface and 1/8″ below the top (and, as you guessed, 1/8″ below the level of your hand). Work your way across the meat, but stop 1/8″ short of the other end, DO NOT CUT THROUGH. Remove your knife, turn the meat 180^ and start a second cut across, 1/4″ below the top. When you’ve cut across about 1 inch, open out the top slice, bending it on the 1/8″ “hinge” that you left at the end. Lay your hand firmly on the newly exposed top and continue cutting across, again 1/8″ below the surface, below your hand. Stop 1/8″ from the end, turn the meat around and begin a third slice 1/4″ below what is now the top. Cut across 1 inch, unfold the second slice, then continue your cut, 1/8″ below your firmly held hand. Work your way back and forth across the meat, leaving 1/8″ hinges at the end of each slice, until the entire piece has been stretched out to a long, 1/8″-thick piece of meat.

Notes on Accordion-Cutting Meat: There is really nothing tricky about this technique, but it does require a little practice. Work slowly, slicing with firm, back-and-forth, sawing motions. The firmly held hand compacts the meat and holds it in place, making it much more manageable. If you work carefully, there is little risk of cutting yourself.

Salting & Aging: Mix together the salt, lime juice and oregano, stirring until the salt has mostly dissolved. Spread out the meat, smear the mixture on both sides, then refold into its original shape. Let stand 1/2 hour. Unfold the meat and hang it to dry in a dry place with good air circulation.

For Cecina (fresh or half-dried strips of beef): For dishes that call for cecina, let the meat dry a few hours or overnight. Cut into manageable-size pieces, cover and refrigerate; to ensure that the meat doesn’t dry any further, you may lightly rub both sides with oil.

For Carne Seca (jerky): For dishes that require jerky, let the meat hang for at least 48 hours. If you plan to keep it for an extended period, let it hang several days longer, then loosely wrap and store in a cool, dry place.

Drying the Beef: Some recipes direct you to hang it in the sun during the day, then bring it in at night; a cool, dry kitchen window works well, also. High humidity keeps the meat from drying and can cause it to spoil.

Variation: Chile-Dried Beef: Mix 2 tsp. pulverized, toasted chile guajillo or New Mexico chile with the salt-lime-oregano flavoring; add a little cayenne, if you wish. Prepare the meat as directed in Steps 1 and 2, coating it with the chile seasoning, then hanging it to dry.

Mango Lime Jam

Mango Lime Jam

3 C. mango pulp, coarsely chopped into raisin-sized pieces
3¼ C. granulated sugar
¼ C. fresh lime juice
Zest of 2 limes
Half of 3-oz. pouch of liquid pectin

In a nonreactive pan, mix together mango, sugar, and lime juice, and bring to a boil over medium heat, stirring constantly. When the mixture comes to a boil, add the lime zest, turn up the heat to medium and let the mango mixture boil for 3 minutes, stirring constantly. Stir in the liquid pectin and let the mixture boil for one more minute. Take the pot off the heat and let the jam rest for 5 minutes before putting it into the jars. This allows the jam to thicken up a bit which promotes better suspension of mango pulp; otherwise the mango pieces will rise to the top instead of being interspersed throughout the entire jar. Process with the water bath canning method. Alternatively, the jam can be stored in airtight containers and kept refrigerated.

North Indian Carrot Pickles

North Indian Carrot Pickles

1 pound carrots, scrubbed and patted dry
1½ tsp. crushed red pepper flakes
1 tsp. mustard seeds, coarsely crushed
1 tsp. pure kosher salt
½ tsp. turmeric
½ C. vegetable oil
¼ tsp. asafetida
1/3 C. strained fresh lemon juice

Wash 2 pint jars well, then dry them thoroughly inside and out. Wash and dry the lids. Cut the carrots into ¼- to ½-inch-thick sticks 4 inches long (to fit in pint jars). Pat dry and put in a dry medium-sized bowl. Add the red pepper flakes, mustard seeds, salt, and turmeric; toss to combine. Set aside. In a medium sauté pan, heat the oil over high heat for 30 seconds, then sprinkle in the asafetida, if using. Add the carrots and spices. Cook, stirring constantly but carefully with a clean, dry spoon, for 1 minute. Add the lemon juice and cook, stirring, for 1 minute more. Remove from the heat. Using dry tongs, transfer the carrots to the jars, then divide the liquid and spices between the jars. Let cool to room temperature, then put the lids on and refrigerate for 4 days before serving. The pickle will keep for at least 6 weeks; be sure to use only dry utensils to scoop out the pickle as you use it, as it will spoil if any water comes in contact with it.

Peach Slices with Bourbon

Peach Slices with Bourbon

The trick to canning peaches is to look for the freestone varieties. They typically arrive in markets towards the middle point of peach season and they will make your workload far lighter. You can’t tell by looking what kind you have, so ask your grower or the produce person at your local market. Tell them you want them for canning, they’ll understand.

6 pounds yellow peaches
6 tsp. bottled lemon juice divided
3 C. water
3/4 C. pure maple syrup
1/2 C. bourbon

Prepare a boiling water bath and 4 regular-mouth pint-size jars. Bring a large pot of water to a boil. While it heats, cut all your peaches in half and remove the pits. Fill a large bowl two-thirds the way up with cold water and add 2 tsp. the lemon juice. The cold water stops the cooking, and the lemon helps prevent the fruit from browning.

Working in batches, proceed to blanch all your peach halves for 60 seconds, placing them in the bowl of lemon water to cool as they come out of the pot. Make sure to give the water a chance to come back up to boiling between batches. If the water isn’t hot enough, you will have a hard time removing the skin during peeling.

Once all the peaches have been balanced and they are cooling down, make the syrup. Combine the remaining 4 tsp. lemon juice, the water, and the maple syrup in a nonreactive saucepan large enough to eventually hold all the peaches. Place the pan over medium heat and bring to a gentle simmer.

While the syrup heats, slide the peels off the peaches and cut the peach flesh into wedges, dropping the wedges into the heating syrup as you work. Once all the peaches are in the syrup, increase the heat to high and bring to pot to a boil. Once it boils, remove the pot from the heat.

Using a slotted spoon, funnel the peaches into the prepared jars and top with the syrup, leaving 1 1/2 inches of headspace. Add 2 tsp. bourbon to each jar. Tap the jars gently on the countertop to settle the peaches and use a wood chopstick to dislodge any trapped air bubbles. Add more liquid to return the headspace to 1 1/2 inches if necessary.

Wipe the rims, apply the lids and rings, and process in a boiling water bath for 25 minutes. Note: Most the time I’ll tell you that you can use whatever jar you want, but for these peaches, I actually do recommend opting for regular mouth jars. Their shoulders will help keep the peach slices submerged in the syrup and that will ensure they keep their quality longer

Strawberry Vanilla Jam

Strawberry Vanilla Jam

This recipe is a classic Strawberry Jam. But we’ve brought it to modern taste standards by using Pomona’s Pectin which requires little or no sweetener. Pomona’s Pectin relies on Calcium Water (included in the box of pectin) to make the jam set. It can be found in stores like Whole Foods that sell natural or organic products. When using any pectin product, always follow the package directions exactly. Otherwise your set may be comprised.

Makes about 6 -7 half-pints

½ to 1 ½ C. honey or other sweetener (sugar, agave nectar, maple, etc.) (Sweetener can be added to taste)
4 tsp. Pomona’s Pectin powder
3 pounds rinsed and hulled strawberries, crushed, about 8 C. (you could dice or puree, but this could affect the consistency of the final product)
3 tsp. fresh lemon juice, strained
3 tsp. vanilla extract
4 tsp. calcium powder liquid (made up by following directions in box of pectin)

Prepare canning pot with jars (no lids or bands) by covering jars with water and bringing to a boil. When boiling, turn heat down to medium and hold until ready to use. Stir sugar and pectin power together. Put strawberries, lemon juice, vanilla and calcium solution in a wide 6-8 quart stockpot or deep stainless steel skillet. Bring to a boil over high heat, stirring in the sugar-pectin mixture. Stir until sugar is dissolved, about 1-2 minutes. Return to a boil, then remove from heat. Ladle into hot jars, leaving ¼ inch headspace at the top. Wipe rims of the jars with a damp cloth, bubble with a table knife or jar bubbler, place lid and band on each jar. Return jars to boiling water canning pot, with water covering jars by 1 inch. Bring water back to a boil and boil for 5 minutes to process. Remove jars to a folded towel on heatproof surface. Do not disturb for 12 hours. Remove bands and test lids for seal. If any jar hasn’t sealed, immediately refrigerate. Label and date jars and store.

Small Batch Strawberry Vanilla Jam

Small Batch Strawberry Vanilla Jam

1 quart strawberries (a little over 1 1/2 pounds, should be approximately 4 C. chopped berries)
2 C. sugar, divided
2 vanilla beans, split and scraped
1 lemon, zested and juiced

Wash and chop berries. Toss them with 1 C. sugar and the vanilla beans/seeds and place in a large jar or bowl. Allow the berries to macerate for at least 2-3 hours and up to 72 hours. When you’re ready to make the jam, prepare three half pint jars. Pour macerated strawberries into a large pot and add the remaining C. sugar. Bring to a boil and cook until the jam reaches 220 degrees, stirring very regularly.
6.Add the lemon zest and juice in the final 5 minutes of cooking. Once the jam has reached 220 degrees, remove the pan from the heat. Pour jam into your prepared jars. Wipe rims, apply lids and rings and process in your canner for 10 minutes (normally I’d admonish you not to start your timer until the water has returned to a boil. However, as long as your water is quite hot when the jars go into the canner, the time it will take to return to boiling should be minimal). When time is up, remove jars from canner and let them cool on a towel-lined counter top. When jars are cool enough to handle, remove rings and check seals. If any jars are not sealed, store them in the fridge and use them first. Store sealed jars in a cool, dark place.

Roasted Corn & Tomato Salsa

Roasted Corn & Tomato Salsa

5 ears fresh corn, shucked
3 C. tomatoes, chopped
½ C. jalapeno peppers, chopped
½ C. onion, chopped
½ C. apple cider vinegar
½ C. bottled lime juice
¼ C. sugar
½ tsp. red pepper flakes
½ tsp. ground cumin
½ tsp. sea salt

Prepare water bath canner by filling with jars and water to cover. Bring to a boil and then turn to simmer until ready to use. Roast corn ears under broiler or on grill, turning until all sides are a deep golden brown. When cool, cut kernels from cob. Combine all the rest of the ingredients in a large saucepan and bring to a boil. Reduce heat and simmer until liquid is reduced to about half. Ladle into jars leaving ½ inch of headspace, bubble to remove air pockets, and wipe rims. Apply caps and process in the canner for 15 minutes after water returns to a boil. Add water, if necessary, to bring level to at least 1 inch over the tops of the jars. When time is up, turn off heat and let jars rest for 5 minutes. Remove from canner to a heat-proof counter and let cool for 12 hours. Then remove bands, test seals. Unsealed jars should be immediately refrigerated and used within 3-4 days. Label and date and store in a cool, dark area.

Nectarine and Peach Jam with Lemon Verbena

Nectarine and Peach Jam with Lemon Verbena

This is refrigerator jam, allowing you to skip the fuss and time of canning.

1 lemon
3 pounds ripe nectarines or peaches, or a mix, pitted and sliced
730 grams sugar (3 and 1/4 C.)
Pinch salt
10 sprigs fresh lemon verbena

Grate zest from half the lemon and place zest in a large saucepan. Juice lemon and add the juice to the zest. Toss in fruit, sugar, salt and lemon verbena and bring to a simmer. Turn mixture into a large bowl and refrigerate overnight. The next day, if you plan to can the jam, prepare the jars according to the instructions here. Strain the liquid from the mixture into a wide, shallow pot or large skillet, reserving the fruit. Bring liquid to a simmer and cook until it thickens enough to wrinkle on the surface when you push it with a spoon (a candy thermometer should read 220 degrees). Remove lemon verbena from fruit and add fruit to the pot with the syrup. Simmer fruit gently until mixture looks very thick and jamlike. You can test the jam to see if it’s ready by freezing a small plate. Drop a bit of the jam on the plate, let it cool for a minute and then push it with your finger. The top should wrinkle. If syrup is thin and runny, keep cooking and test again in a few minutes (return plate to freezer in the meantime). If canning, spoon into hot sterilized jars and process as directed. Otherwise, let jam cool, then store in refrigerator or freezer.

Pickled Ramps

Pickled Ramps

Clean your ramps well. They get muddy and sandy so make sure to peel the outer layer and give them a good rinse/soak. Just use the bulbs here but don’t throw out the leaves! The greens are amazing in pesto or risotto, in any kind of pasta, mixed with butter to top fish. Use any combination of spices you like (allspice and juniper are nice additions).

1 C. white wine vinegar
1 C. sugar
1 C. water
1 tsp. kosher salt
1 tsp. mustard seeds
1 tsp. coriander seeds
1 tsp. fennel seeds
2 tsp. pink peppercorns
1 tsp. black peppercorns
â…› tsp. hot chili flakes
2 bay leaves
1 pound ramp bulbs, cleaned and trimmed
Kosher salt for blanching

Trim the root ends off of the ramps and cut off the leaves, saving the green ends for another purpose (like pesto or risotto). Rinse the ramps well under cool, running water. Bring a 2-3 quart pot of water up to boil and add 2 tsp. salt. Drop in the ramps and cook for 2-4 minutes, depending on size) They should be tender but not mushy. Remove and shock them in ice water until cool. Drain the ramps well and place them in the jar you’re going to pickle them in. In a saucepan, combine the vinegar, salt, sugar, and water and bring to a boil. Add the bay leaf and all the spices. Turn off the heat. Pour the hot vinegar mixture over the ramps in the mason jar and let cool on the counter (30 minutes or so). Then seal tightly and transfer to the refrigerator. They’ll be ready to eat in a day or two. The refrigerated pickled ramps will last a few weeks to a couple of months.

Canned Apricots in Honey Syrup

Canned Apricots in Honey Syrup

3 lb. apricots, firm, but not hard
1 C. honey
2 1/2 C. water

Fill canning pot half-way full with water and bring to a boil. Place flat lids in a small pot, cover with hot water and bring to a simmer. Combine honey and water in a medium pot and bring to a simmer. Wash apricots and dry on a towel. Using a paring knife, cut apricots in half and remove pit. Pack jars with apricots, cut side down. TIP: packing apricots cavity side down makes it easier to fit more into the jar. Ladle hot honey syrup into the jars until apricots are covered. Leave 1/2 inch of headspace at the top of the jars. Top jars with hot lids and screw rings. When all the jars have been filled and topped with lids, lower them into the hot water bath. Cover pot, bring water to a boil and process for ten minutes. Turn off the heat, remove lid, and carefully remove preserved apricots.

Sweet & Spicy Pickled Ramps

Sweet & Spicy Pickled Ramps

Serves 1 quart jar
1 C. sugar
2 C. white wine vinegar
1 tsp. yellow mustard seeds
1 tsp. fennel seeds
2 tsp. coriander seeds
1/2 tsp. fenugreek seed
2 pieces dried red chili peppers
1/2 pound ramp bulbs (with stems)

Wash the ramp bulbs very well, discarding any loose membrane around the bulb. Make sure the leaves and any root material is trimmed away. Mix sugar, vinegar, mustard, fennel, coriander, fenugreek, chilies and cloves in a suitably sized pot. Bring to a boil. Meanwhile, put the ramp bulbs into a clean, sanitized glass quart jar. When the brine comes to a boil, carefully pour it into the jar, covering the ramps. Leave at least 1 inch of space at the top of the jar, then cap tightly, allow to cool and refrigerate for three or more days. After three days, your ramps should be ready to enjoy on their own or as a condiment, but you can brine them for longer, and they’ll keep (chilled) for months.

Honeyed Ginger Cardamom Apricots

Honeyed Ginger Cardamom Apricots

Juice of 1 lemon
1 quart plus 1 1/2 C. water
2 lbs apricots
3/4 C. honey
1-inch piece ginger, peeled and thinly sliced
8 cardamom pods, crushed

In a large bowl mix juice of one lemon and 1 quart of water. This will be your anti-browning solution to maintain the vibrancy of the apricots after they’re canned. Half and pit apricots and drop them in the lemon solution until ready to can. In a small saucepan, bring honey and 1 1/2 C. water to a boil, whisking to make sure honey dissolves completely. Working with hot, sterile pint jars, divide ginger slices between 4 jars and add 2 crushed cardamom pods to each. Pack jars with apricot halves, cut side down. Apricots should be tightly packed but not crushed. Ladle over hot syrup, leaving 1/2 inch headspace. Remove air bubbles with a wooden chopstick, apply lids and screw on bands until finger tight. Process in a boiling water bath for 35 minutes.

Cherry Preserves

Cherry Preserves

2 lbs cherries, pitted (6 C.)
1 (3 1/2 ounce) box pectin
1⁄4 C. granulated sugar
1⁄2 tsp. butter
3 C. sugar

Sterilize your jars and keep them hot while you’re cooking the preserves. Place cherries in a large, heavy duty dutch oven. Combine pectin with 1/4 C. sugar; stir into cherries, Add butter. Bring to a full boil, stirring, over high heat. Add 3 more C. sugar and return to a boil , stirring constantly, boil 1 minutes. Remove from heat; skim off foam. Immediately spoon preserves into 3 one pint sterilized jars, leaving 1/4″ headspace. Wipe the sealing surface of the jars with a clean paper towel, dampened with hot water, to remove any preserves or sugar crystals. Place lids and screw on bands fingertip tight. Process in a boiling water bath for at least ten minutes, depending upon your altitude. When the jars have been processed in boiling water for the recommended time, turn off the heat and remove the canner lid; wait 5 minutes. Remove jars from canner using a jar lifter and keeping jars upright. Carefully place them directly onto a towel or cake cooling rack to protect your countertop, leaving at least one inch of space between the jars during cooling. Avoid placing the jars on a cold surface or in a cold draft. After jars have cooled undisturbed for 24 hours, remove ring bands from sealed jars. Put any unsealed jars in the refrigerator and use first.

Mango Preserves with Ginger and Lime

Mango Preserves with Ginger and Lime

6 ataulfo mangos, medium ripe (these are sometimes called “Champagne mangoes”)
2 C. sugar (or enough to equal half the measure of diced fruit)
1½ T. minced fresh ginger
1 juicy lime

Peel the mango and cut it into ½-inch dice. The easiest way to do this is to cut the flesh in a grid pattern while it is attached to the large pit, and then scrape the diced pieces from the pit into a bowl. Measure the mango and place it in a large saucepan along with sugar about half the measure of the fruit (I had 4 C. mango and used 2 C. sugar). Add the ginger. Juice the lime and add the juice to the mango. Cut the shell of the lime into quarters and set aside. If there are seeds, place them in a small cheesecloth bag and set aside. You will later add them to the mango mixture to help develop pectin.

Bring the mango and sugar mixture to a simmer over medium heat, stirring to dissolve the sugar. Pour it into a bowl and add the lime peel and seeds, if any. When the mixture is cool, crumple a piece of parchment paper, set it on top and refrigerate the mixture overnight. (If you have aromatic items in the refrigerator, cover the bowl loosely with plastic wrap. Prepare jars for water bath canning. Place a saucer in the freezer. Remove the lime shells and pour the mango mixture into a large, wide, heavy-bottomed saucepan. Bring it just to a boil over medium-high heat, stirring so that the mixture doesn’t stick to the bottom. Reduce the heat to allow the mixture to simmer just below the boiling point for about 25 minutes or until thick. Stir from time to time to prevent the mixture from scorching. Test for gel by placing a couple of drops on the frozen saucer and pushing it with your finger. If the jam wrinkles, the gel will be fine. You can also tell the jam is done by pulling a spoon across the bottom of the pan. If it leaves a clean line, the mixture is well gelled. Process in a water bath canner for 10 minutes after the water comes to a boil. Turn off the heat, remove the canner lid and let the jars sit for 5 minutes before removing them to a counter to sit undisturbed until sealed.

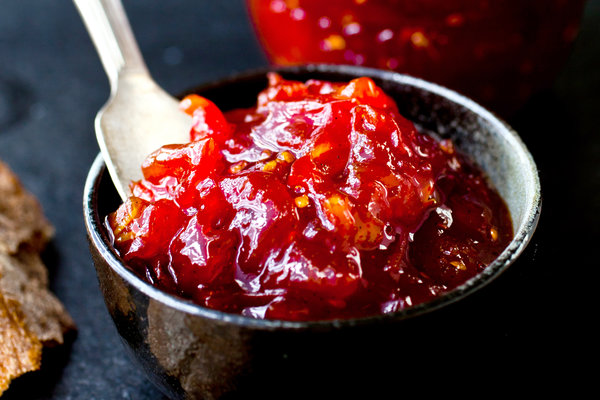
Spicy Tomato Jam

Spicy Tomato Jam

10 lb. tomatoes, cored and finely chopped
5 C. sugar
1 C. fresh squeezed lime juice
1 T. ground ginger
2 tsp. cinnamon
1 tsp. cloves
2 T. sea salt
2 T. red pepper flakes

Combine all, bring to a boil. Simmer and let reduce by at least half, stirring regularly to prevent the pot from scalding. Puree the mixture a little with an immersion blender; you still want it to be a bit chunky. Continue simmering until it reduces by half again and becomes a sticky jammy mess. When jam has cooked down sufficiently, remove pot from heat and ladle into hot, sterile half-pint jars leaving 1/4 inch headspace. Wipe rims, apply lids and bands and process in a boiling water bath for 25 minutes.