Browsed by
Tag: Canning & Preserving

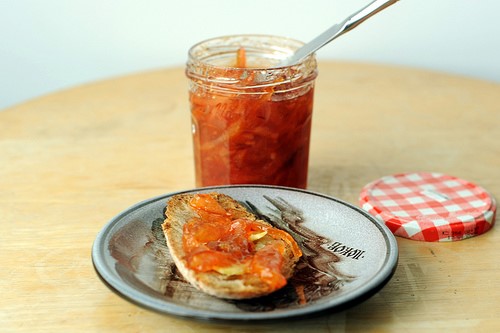
Rhubarb Conserve with Ginger and Lemon

Rhubarb Conserve with Ginger and Lemon

rubarb1 lb. rhubarb, diced (about 4 C. 1/2-inch slices)

2 to 3 medium lemons

3 C. granulated sugar

1/4 C. crystallized ginger, chopped

1/3 C. slivered almonds, toasted and coarsely chopped (see note)


Place rhubarb slices in a wide, heavy 5- or 6-quart saucepan. Zest the lemons to make 3 T.; add to the pot. Squeeze 2 lemons to make 6 T. juice; add to the pot. Mix in the sugar and ginger. Let the pot stand for 3 hours or until sugar is dissolved. Wash 3 half-pint jars and fill with hot water until needed. Prepare lids as manufacturer directs. Stir rhubarb mixture thoroughly, then place pot over medium-high heat and bring the mixture to a boil, stirring often. Cook 10 to 15 minutes, stirring often, until a thermometer reads 220 degrees or the mixture passes the cold saucer test (see note). Remove from heat and stir in the nuts. Drain the jars. Ladle hot jam into 1 hot jar at a time, leaving 1/4-inch head space. Wipe the jar rim with a clean, damp cloth. Attach the lid. Fill and close the remaining jars. Cool until the lids pop, a few hours, then refrigerate for up to 2 months, or freeze for 1 year. For longer storage, process in a boiling-water canner for 10 minutes (15 minutes at 1,000 to 6,000 feet; 20 minutes above 6,000 feet). Note: To toast nuts, heat in a dry skillet over medium heat until they start to brown. Stir occasionally. Be careful not to scorch them. Note: To test for doneness use the cold saucer test. To do a test, remove pan from heat and place a spoonful of hot jam on a chilled plate. Place in freezer for 1 minute; draw finger through jam on saucer. If jam does not flow back and fill in path, it is thick enough.

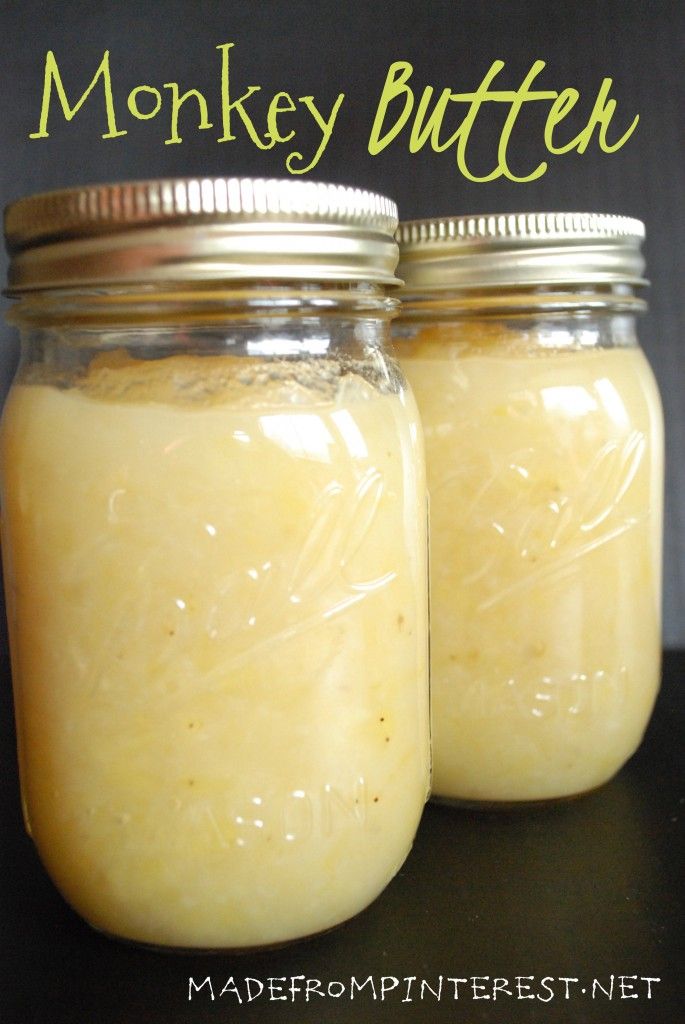
Monkey Butter

Monkey Butter

55f5734572378db61d14cbf42f80fc02a medium-size perfectly ripe bananas (no brown spots)
20 oz. can of crushed pineapple, not drained.
1/4 cup coconut (I prefer ground coconut)
3 cups of white sugar
3 T. lemon juice (use bottled for uniform acidity)

Peel and slice bananas, then add all ingredients to a heavy saucepan. Bring to a boil, stirring often, and then reduce to a simmer. Cook until thick. As the mixture thickens, stir constantly until desired thickness is achieved. When thick, spoon mixture immediately into hot sterilized jars, apply heated lids and rings, and process in a boiling water bath for 15 minutes. (or simply store in fridge)

Other fruits can be added, particularly topical fruits such as mango. Also, it is common for the butter to take on a light pink hue when processed. The sample on the right below was not processed, but just stored in the fridge…which I started to do once it became clear that this ambrosia doesn’t hang around long enough to require canning!)

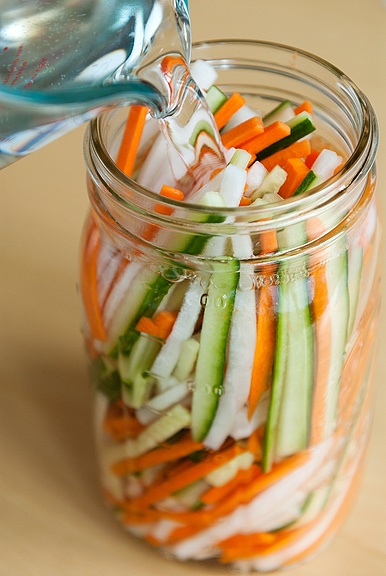
Vietnamese Pickled Vegetables

Vietnamese Pickled Vegetables

viet1/4 lb. cucumber, julienned
1 lb. daikon, peeled and julienned 1 lb. carrots, peeled and julienned
2 tsps kosher or sea salt
1 cup unseasoned rice vinegar
1 cup sugar
1 cup water

Make sure the vegetables are fairly dry (pat them dry) so they don’t dilute the pickling liquid with excess water. Combine the vinegar, salt, sugar, and water together until the sugar dissolves. Place the vegetables in a jar large enough to fit them all and pour the pickling liquid into the jar so that all of the vegetables are submerged. Store them sealed in the jar in the refrigerator for 5 days for best flavor. (I was too impatient and cracked them open after an hour – they were great).


Marinated Roasted Peppers, Olives and Cheese

Marinated Roasted Peppers, Olives and Cheese

6 large red or green bell peppers

1 C. whole Greek or pitted ripe olives

4 oz. mozzarella cheese, cut into cubes

1/4 C. olive or vegetable oil

1/4 C. lemon juice

2 T. chopped fresh parsley

1 tsp. chopped fresh oregano leaves or 1/4 tsp. dried oregano leaves

1 tsp. chopped fresh basil leaves or 1/4 tsp. dried basil leaves

1/2 tsp. chopped fresh sage leaves or 1/8 tsp. dried sage leaves

1/2 tsp. salt

1/8 tsp. pepper

2 large garlic cloves, finely chopped


Set oven control to broil.   Broil bell peppers with tops about 5 inches from heat, turning occasionally, until skin is blistered and evenly browned. Place peppers in a plastic bag and close tightly. Let stand 20 minutes.   Remove skin, stems, seeds and membranes from peppers. Cut peppers into 1/4-inch strips. Place peppers, olives and cheese in glass bowl or jar.   Shake remaining ingredients in tightly covered container; pour over pepper mixture. Cover and refrigerate at least 4 hours to blend flavors, stirring occasionally.    Store tightly covered in refrigerator up to 2 weeks.  Turn this recipe into a scrumptious gift by filling a decorative glass jar with the roasted pepper mixture and tying with a pretty ribbon. Attach a copy of the recipe with a sprig of fresh herbs.


Yield:

Calories:

Fat:

Fiber:


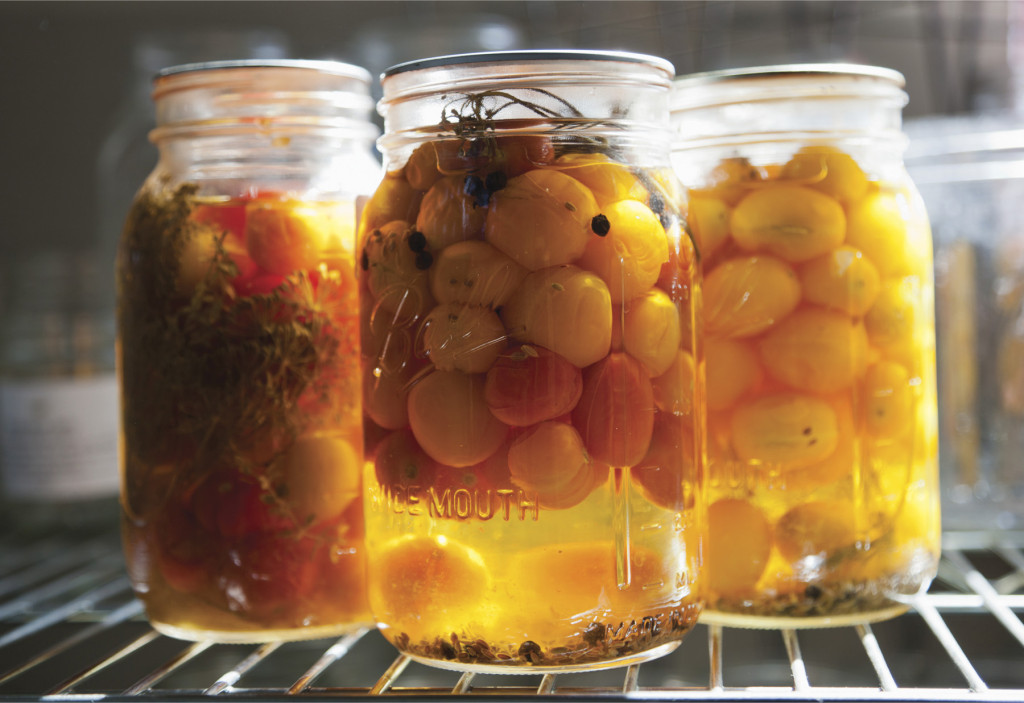
Sweet Pickled Cherry Tomatoes

Sweet Pickled Cherry Tomatoes

4 lb Firm Cherry Tomatoes

4 C. Water

2 ea Lemon

3 1/2 lb Sugar

1 ea Fresh Ginger Root, Grated

1 tsp Pickling Salt

 cherry

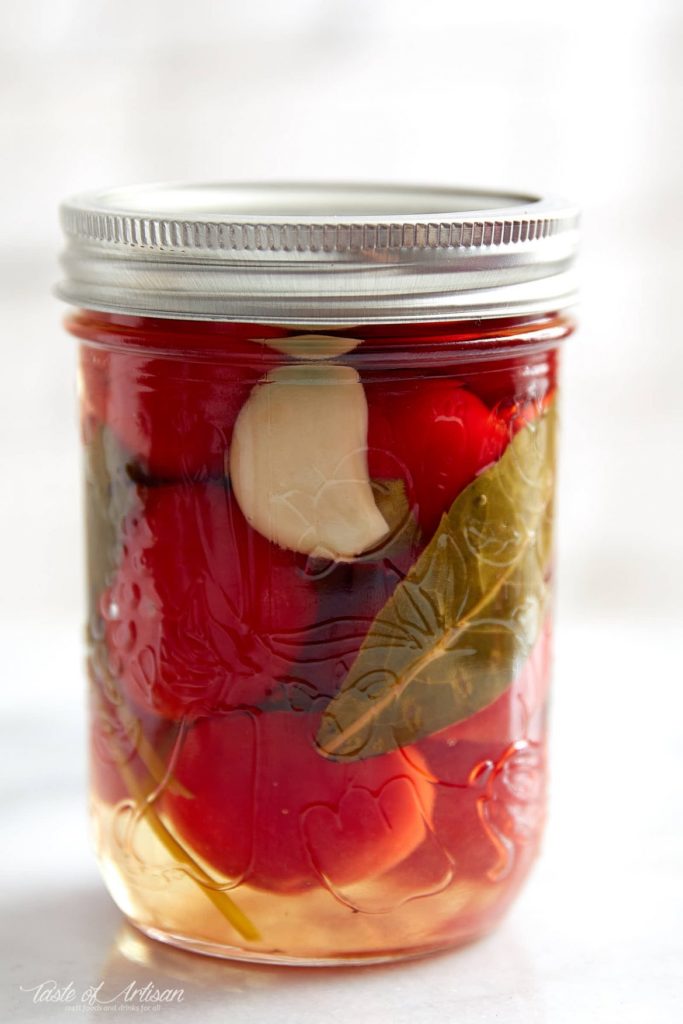
Use only the juice and grated zest of the 2 lemons. Wash the tomatoes and prick each one in several places with the tines of a fork. Dissolve the sugar in the water, bring to a boil and boil rapidly for 5 minutes. Add the tomatoes and cook for 10 minutes. Remove the tomatoes and to the syrup add the ginger root, lemon juice and rind, and salt. Simmer the syrup for 15 minutes, return the tomatoes to the syrup and cook about 30 minutes longer, or till the syrup is thick and the tomatoes are transparent. Turn into hot jars and seal.


Yield:

Calories:

Fat:

Fiber:


Salsa Chili Pepper (Molho de Piri Piri)

Salsa Chili Pepper (Molho de Piri Piri)

Piri-piri is the Portuguese name for an extremely hot variety of pepper that traveled to Portugal via Angola. Much of the pepper’s heat comes from the seeds, so use all or part of them, depending upon how hot you want your sauce. Serve this fiery condiment as a marinade or sauce for grilled marinated shrimp (prawns), lobster or chicken.

molho1/2 C. coarsely chopped fresh hot red chili peppers

3 cloves garlic, finely minced

1 tsp. kosher salt

1 C. olive oil

1/4 C. red wine vinegar, optional


Combine all of the ingredients in a jar. Cover and let stand in a cool, dark place for at least 1 week or for up to 1 month. Shake well before using.


Yield:

Calories:

Fat:

Fiber:


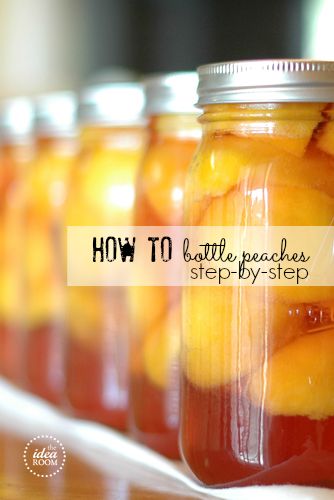
How to Can Peaches

How to Can Peaches

cannedpeaches**You should be able to fit about 4 to 5 peaches per quart size canning jar, depending on the size of your peaches. Peaches should be ripe, but not over-ripe and bruised.

1. Sterilize your wide-mouth canning jars in the dishwasher before beginning your peaches. Wash off your peaches and set aside.

2. Bring a large pot of water (half full) to a boil. Then set up a large bowl of ice water near your boiling water pot. Immerse a few peaches in your boiling water for 30 seconds. Quickly remove them with a large, slotted serving spoon. Immediately tranfer peaches and immerse into your bowl of ice water to quickly cool them. Leave peaches in the cool water for about 1 minute. Remove peaches and set aside on the counter top.

3. Prepare the syrup for bottling your peaches. You can choose from three different consistencies: light, medium or heavy syrup.

light: 1 and 2/3 cup sugar to 4 cups of water

medium: 2 and 2/3 cup sugar to 4 cups of water

heavy: 4 cups sugar to 4 cups of water

Mix together your water and sugar in a pot on the stove and bring to a boil over medium heat.

4. Peel, halve and pit peaches that have been plunged into the boiling and ice baths. Soak the halved peaches in an ascorbic acid solution. To make the ascorbic acid solution you need to mix 8 cups of water with 3 Tablespoon of Fruit Fresh or Citric Acid. Fruit fresh can be found near the canning supplies in most grocery stores.

5. Let the peaches soak fully immersed for a few minutes in your ascorbic acid solution. The ascorbic acid solution will prevent your peaches from turning brown.

6. Fill each jar by placing the cut sides of the peaches down and towards the middle of the jars. Fill the jar with as many peach halves as possible, but be careful not to squish them.

7. Fill the jar with your prepared syrup. Carefully stick a butter knife into the sides of the jar to remove excess air bubbles. Leave a 1/2 inch headspace at the top of the jar.

8. Place lids and rings on your jars and place filled jars into a boiling water bath. Make sure that the water covers the tops of the jars when the rack is lowered into the pot. Boil and process for 25 minutes for quart size jars or 20 minutes if you are using pint sized jars.

9. After 25 minutes remove jars from boiling bath and set on a towel to cool. Do not move until the jars have sealed. You should hear a light popping sound as the lid seals. If a jar does not seal (you can tell by pushing on the lid), you can reprocess the jar, or just put it in your fridge and eat within a few days.

The best part of canning is seeing all your beautiful hard work lined up on your storage room shelf, and eating summery peaches in the middle of winter isn’t so bad either!

Taken from The Idea Room in case the post goes away there.

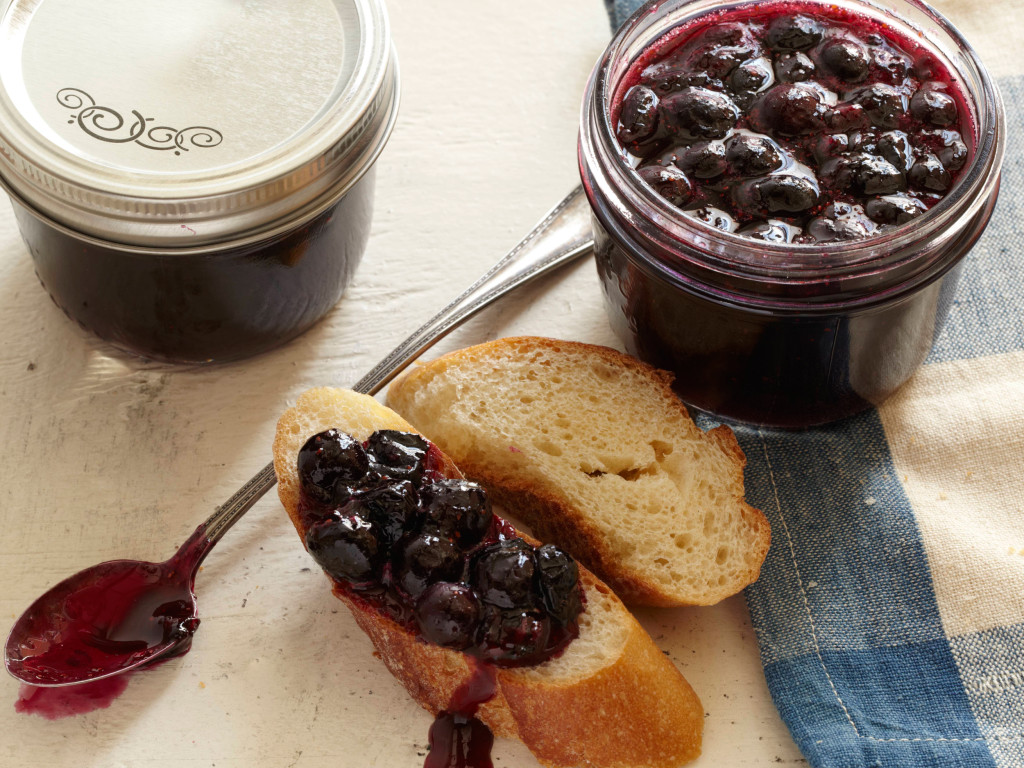
Spiced Blueberry Jam

Spiced Blueberry Jam

spiced4 C. fresh blueberries, rinsed and drained

3 1/2 C. sugar

1 lemon, juiced

1/4 C. cinnamon red hots

6 oz. bottled liquid pectin


In a large saucepan, combine blueberries, sugar, lemon juice and cinnamon red hots.  Bring to a full boil and boil for 1 minute, stirring constantly.  Stir in liquid pectin.  Remove from heat and skim off foam.  Pour hot jam into sterilized jars.  Seal and store in a cool dry place.  Storage life on shelf, one year.


Yield:

Calories:

Fat:

Fiber:


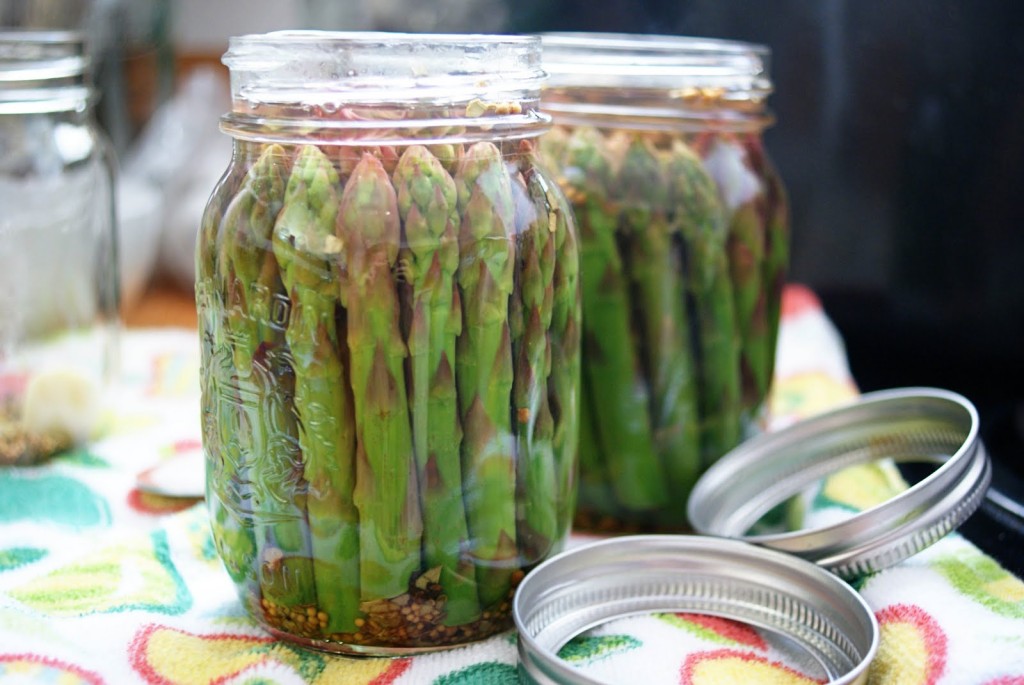
Pickled Asparagus

Pickled Asparagus

asparagus tipsThis recipe averages approximately 6.5 pints per pound of asparagus.


5 lbs fresh asparagus (wash and trim stem)

Lots of Ice (to quick cool after blanching)

Garlic cloves

Chili peppers (dried red peppers)

Brine – combine ingredients and bring to a boil (this is a double batch)

3 quarts water

2 quarts white vinegar

10 tbsp pickling spice

10 tbsp pickling salt


Sanitize canning jars and keep hot.  Clean rings if necessary.  Simmer lids in boiling water.   Prepare brine and bring to boil.  Fill canning kettle and bring to a boil.  Fill blanching pot and bring to a boil.


Blanch asparagus 1 ½ minutes in boiling water, transfer immediately into ice water bath to FAST COOL.


Fill per pint jar:

1 clove garlic

1 red chili pepper (if spicy asparagus is desired)

Asparagus spears (cut to size)

Add brine to fill line (at top of neck of jar)


Clean jar rim with a paper towel with rubbing alcohol.  Place hot lid on jar rim, add ring & tighten.  Process jars in a hot water bath at boil for 15 minutes, cool completely.


NOTE: 10 tablespoons is slightly less than 2/3 cup

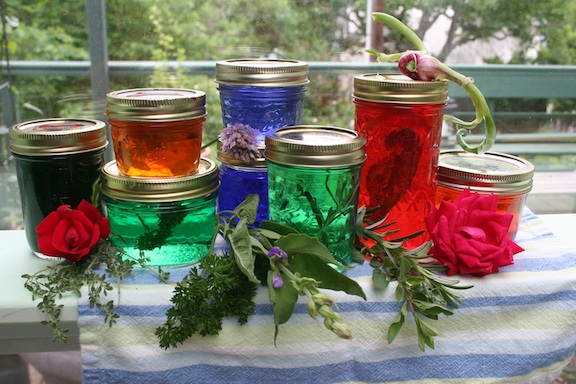
Herb Jelly

Herb Jelly

3 sterile 8oz canning jar with lid

1 C. dry white wine

2 C. sugar

1/2 C. vinegar

1 C. fresh basil leaves, or other herbs as a variation

3 oz. bottled liquid pectin


Combine wine, sugar, and vinegar in a saucepan, over medium heat.  Heat and stir to dissolve sugar.  Stir in basil and bring to a boil.  Stir in pectin and remove from heat.  Pour into sterile jars.  Screw on lids or top with melted wax.  Serve at room temperature.

Herb_jellies_lr

Basic Herb Jelly recipe

2 cups of your favorite fresh herb leaves or flowers (if using dry herbs, use 1 cup)
2 cups water, apple juice or white wine
1/4 cup fresh lemon juice or white wine vinegar
4 cups sugar (white or brown)
3 ounces liquid fruit pectin
pinch of salt
1-2 drops food color, optional

Wash half-pint jelly jars in the dishwasher, or sterilize in boiling water. Keep jars hot until ready to fill with jelly. Use new Ball or Kerr canning lids, and keep them in hot water.

Method:
Coarsely chop your chosen herbs and put in a medium saucepan. Add 2 cups of water or juice and bring to a constant boil for about 10 seconds. Remove from heat and let stand until completely cooled. Strain, discarding herbs, so that you have 1 1/2 cups of the liquid.

Pour the herbal infusion (liquid) into a large cooking pot and add lemon juice or vinegar and the sugar. Bring to a hard boil, then add the liquid pectin and continue to boil for exactly one minute. Remove from heat and skim off any foam and discard it.

Pour the hot jelly immediately into hot, half-pint jelly jars, filling them to within 1/2 inch of the top. Wipe the rims of the jars with a damp cloth and screw on the hot lids, just lightly tightening. Tip the covered jars upside down for about a minute to coat the inside and create a seal. Place right side up on a towel and let cool. Label and store in a cool, dark place. Your jelly will keep for 1-2 years.

Yield:

Calories:

Fat:

Fiber:

Pickle Relish

Pickle Relish

Pickle Relish


3 quarts chopped cucumbers

3 cups each of chopped sweet green and red peppers

1 cup chopped onions

3/4 cup canning or pickling salt

4 cups crushed ice

8 cups water

2 cups sugar

4 tsp. each of mustard seed, turmeric, whole allspice, and whole cloves

6 cups white vinegar (5%)


Yield About 9 pints Add cucumbers, peppers, onions, salt, and ice to water and let stand 4 hours. Drain and re-cover vegetables with fresh ice water for another hour. Drain again. Combine spices in a spice or cheesecloth bag. Add spices to sugar and vinegar. Heat to boiling and pour mixture over vegetables. Cover and refrigerate 24 hours. Heat mixture to boiling and fill hot half-pint or pint jars, leaving 1/2-inch headspace. Adjust lids and use conventional boiling-water canner processing for 10 minutes (under 1000 ft)

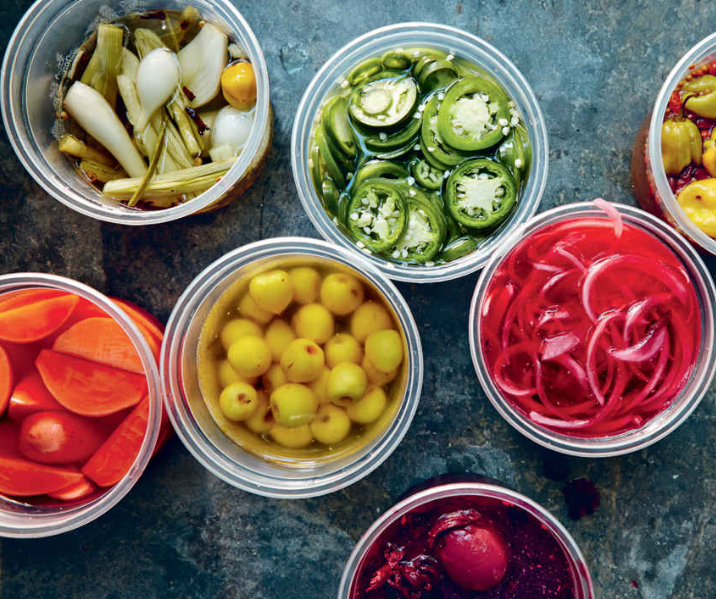
Los Pickles de Yucatán

Los Pickles de Yucatán

Los Pickles

Pickled Radishes


2 bunches small radishes (about 24), trimmed and quartered (2 cups) ¥2 cup white vinegar

1/2 cup fresh lime juice (from 5 to 6 limes)

1 tablespoon kosher salt


Pickled Greens


1 bunch beet greens or mustard greens, thoroughly washed and stemmed

2 tablespoons sugar

1 tablespoon kosher salt

1 cup white vinegar

1/3 cup water


Put the greens in a medium bowl, sprinkle with the sugar and salt, toss, and let wilt for 30 minutes.

Drain the greens and transfer to a 1-pint canning jar. Combine the vinegar and water and pour over the greens, making sure they are completely submerged. Cover and refrigerate for at least 1 hour before using.


Pickled Nopales


2 nopales (cactus paddles)

1/2 habanero

2 tablespoons sugar

1/2 teaspoon kosher salt

1 cup white vinegar


Carefully remove the thorns from the nopales by skimming the surface with a chef s knife in the same direction as the thorns. Cut off the woody stems and discard. Cut the cactus into 1-inch cubes, put in a 1-pint canning jar, and add the remaining ingredients. Let sit for at least 4 hours before using. (Note: The pickles and brine will have a rather slimy texture—this is normal with nopales.)


Pickled Habaneros with Chile Pequm


2 cups habaneros, left whole

1 tablespoon pequm chiles

1 tablespoon coriander seeds, toasted in a small dry skillet until fragrant

1 cup white vinegar

1/2 cup sugar

1 tablespoon kosher salt

Let sit, refrigerated, for 2 days before serving.


Pickled White Onions


1 white onion, thinly sliced on a mandoline or with a sharp knife

1 cup white vinegar

1 tablespoon sugar

1 1/2 teaspoons kosher salt


Pickled Red Onions


1 red onion, thinly sliced on a mandoline or with a sharp knife

1 cup white vinegar

1/4 cup fresh lime juice (from 2 to 3 limes)

1/4 cup sugar

1 tablespoon kosher salt


Pickled Spring Onions


8 spring onions, trimmed and halved, bulbs separated and stalks trimmed to 3-incli lengths

3 habaneros (left whole)

1 cup white vinegar

1 tablespoon sugar

1 1/2 teaspoons kosher salt


Pickled Red Bell Peppers


1 large or 2 small red bell peppers, cored, seeded, and cut into long strips

1/2 cup water

1/2 cup white vinegar

2 tablespoons sugar

1/2 teaspoon kosher salt


Pickled Sandia


3 cups water

1 tablespoon plus 1 teaspoon kosher salt

2 cups 1-inch squares peeled watermelon rind (a little red is okay)

1 cup white vinegar

1/4 cup sugar


Bring water to boil in a medium saucepan and add 1 tablespoon of the salt. Add the watermelon rind, cover, reduce the heat so that the water is at a low boil, and cook for about 30 minutes, until the watermelon rind is soft. Drain the rind and let cool. Combine the vinegar, sugar, and the remaining 1 teaspoon salt. Put the rind in a 1-pint canning jar and add the pickle solution. Let sit for at least 3 hours before using.


Pickled Pina


1/3 ripe pineapple, peeled, cored, and cut into 3 4-inch-thick rounds

2 tablespoons olive oil

1/4cup honey

Pinch of kosher salt, plus 1 teaspoon

1 dried arbol chile

1/2 cinnamon stick

1 teaspoon allspice berries

1/2 teaspoon black peppercorns

1 cup apple cider vinegar

2 tablespoons sugar


Prepare a hot fire in a grill. Toss the pineapple with the olive oil and honey in a medium bowl and season with a generous pinch of salt. Grill over high heat, turning once, until marked by the grill and cooked through, about 1 minute per side. Let cool, then cut into wedges. Set aside.  Toast the chile, cinnamon, allspice, and peppercorns in a dry cast-iron skillet over medium heat until fragrant, about 2 minutes. Set aside. Heat the vinegar, sugar, and the remaining 1 teaspoon salt in a small saucepan over medium-low heat, stirring, until the sugar and salt dissolve. Put the pineapple in a 1-pint canning jar and add the toasted chiles and spices. Add the pickle solution. Let sit for at least 3 hours before using.

Sweet and Spicy Canned Onion Marmalade

Sweet and Spicy Canned Onion Marmalade

Sweet and Spicy Canned Onion Marmalade

2 pounds onions preferably sweet or a mix of sweet and regular

1 C. apple juice

1/2 C. cider vinegar

2 teaspoons fresh minced garlic

1 teaspoon salt

1/2 teaspoon black pepper

1/4 teaspoon ground mustard

1 teaspoon crushed red pepper flakes

3 T. Low or No Sugar Needed pectin – flex batch equals 1 box

1/2 teaspoon butter or oil optional to reduce foaming, but I always use it

1 C. honey

1/2 C. brown sugar


Prepare water bath canner, 6 half pint jars & lids, keeping warm until needed. Cut ends off onions and peel; slice in half and cut each in half again, lengthwise (or in thirds if onions are big). Turn halves and cut into 1/4 inch slices widthwise. Place slices in an 8-quart measuring C. – you should have 6 C. of onion slices. Add prepared onions, apple juice, vinegar, garlic, salt, pepper, mustard and red pepper flakes to an 8-quart stockpot. Gradually stir in pectin and then add butter if using. Bring to a boil that can’t be stirred down over high heat, stirring constantly. Add honey and sugar; return to a full boil and let boil for 1 minute, stirring constantly. Remove from heat (skim foam if needed). Ladle hot marmalade into prepared half pint jars one at a time, leaving 1/4-inch headspace. Wipe rims, attach lids, and place in canner. Place lid on canner and bring to a gentle, steady boil – process for 10 minutes, maintaining steady boil the entire time. Turn off heat and let jars cool in canner 5 minutes before removing jars to a towel lined surface to cool for 24 hours. Check lids for seal before labeling and storing in a cool, dark place (with rings removed). Notes: *You don’t have to can this – it will keep for 2-3 months in the refrigerator.


  • Use as a glaze for meats like chicken, ham and pork, as well as seafood (my favorite is shrimp).
  • Top grilled steak, pork, chicken and seafood.
  • Add on top of Boursin cheese or cream cheese as an appetizer.
  • Mix into sour cream as a dip for crackers, pretzels, or chips.
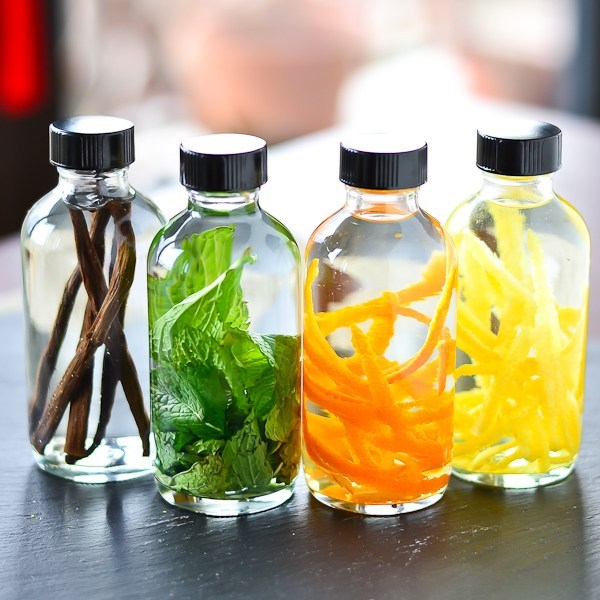
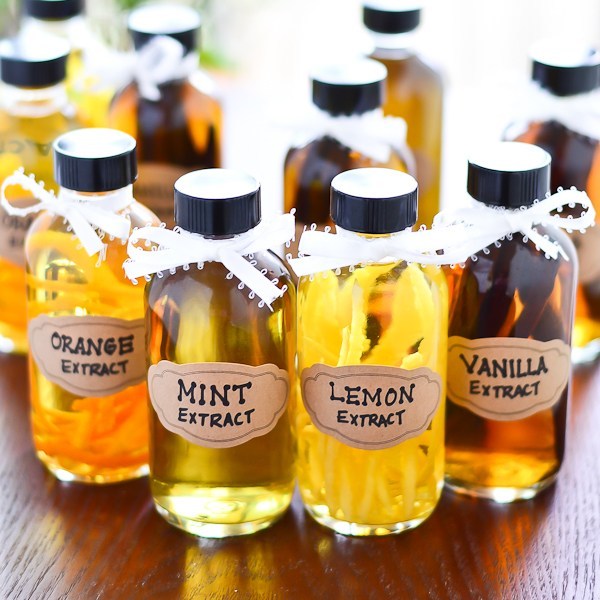
DIY Flavored Extracts

DIY Flavored Extracts

DIY Flavored Extracts

Vanilla Extract (single 4oz bottle)

  • 3 whole vanilla beans
  • Vodka (You can also use bourbon)

Mint Extract (4oz)

  • ½ C. mint leaves
  • Vodka

Orange Extract (4oz)

  • 1 large navel orange
  • Vodka

Lemon Extract (4oz)

  • 1 large lemon
  • Vodka

To make Vanilla Extract:

  1. Cut your vanilla beans in half, then split open each half to expose the vanilla seeds on the inside of the pod.
  2. Place cut vanilla beans inside your glass bottle.
  3. Add vodka, filling up to the neck of the bottle.
  4. Seal tightly and store bottle in a cool, dry place.
  5. Every few days, tilt your bottle upside down to gently mix the liquid inside.
  6. After 5-6 weeks, you have extract! (If you leave in your vanilla beans, when you start running low, just add more vodka and wait a little.)

To make Mint Extract:

  1. Stuff mint leaves into your glass bottle.
  2. Using a chopstick, skewer, or other poking device, lightly bruise/crush the leaves inside the bottle.
  3. Add vodka, filling up to the neck of the bottle.
  4. Every few days, tilt your bottle upside down to gently mix the liquid inside.
  5. After 5-6 weeks, you have extract! (I’m not sure if, like vanilla extract, you can just leave the mint leaves inside. Since it’s leafy plant matter which disintegrates more easily, it may be a good idea to take it out. My leaves went from a vibrant green in the beginning to kind of a dull brown by the end so I took them out just to be safe – I poured my mint extract into another container through a sieve and discarded the mint leaves, then poured the filtered extract back into the bottle.)

To make Orange Extract:

  1. Peel thin strips of zest from ½ of your orange.
  2. Place zest into your glass bottle.
  3. Add vodka, filling up to the neck of the bottle.
  4. Every few days, tilt your bottle upside down to gently mix the liquid inside.
  5. After 5-6 weeks, you have extract! (I think with citrus peels the acid (and alcohol bath), it’s probably safe to leave the peels inside the bottle like a vanilla bean for re-fill purposes. If you don’t feel comfortable doing this, take it out!)

To make Lemon Extract:

  1. Peel thin strips of zest from your lemon.
  2. Place zest into your glass bottle.
  3. Add vodka, filling up to the neck of the bottle.
  4. Every few days, tilt your bottle upside down to gently mix the liquid inside.
  5. After 5-6 weeks, you have extract!
Cherry-Vanilla Jam Recipe

Cherry-Vanilla Jam Recipe

Cherry-Vanilla Jam Recipe

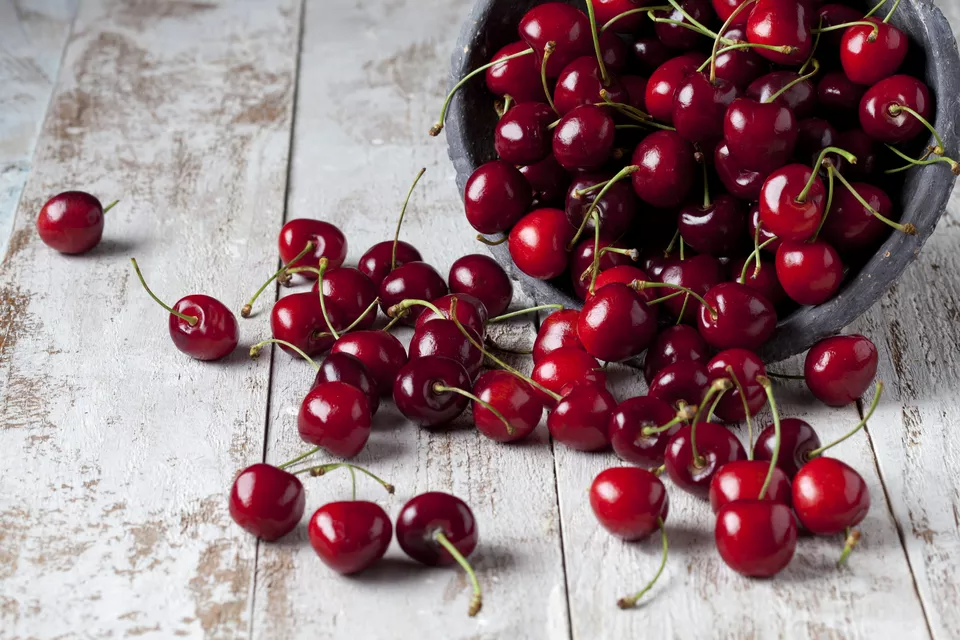
2 pounds cherries, pitted

2 scant C. sugar

1/4 tsp. vanilla powder


Wash, stem, and pit the cherries. If desired, chop them down more finely.  In a large nonreactive pot, combine the cherries, sugar and vanilla powder. Macerate for several hours or overnight in the refrigerator.  Put the pot over medium heat. Heat the macerated fruit, stirring occasionally, until the sugar is fully dissolved. Turn the heat to high, and cook, stirring only to prevent scorching, until ​the gel point is reached.  Pour the jam into clean, heated jars and process in a water bath canner for 10 minutes, adjusting for altitude.

Canning Tomato Paste

Canning Tomato Paste

Canning Tomato Paste


3 gallons quartered Roma or other paste tomatoes

1 red bell pepper, seeded and chopped

1 bay leaf

½ tsp. kosher salt

6 tsp. bottled lemon juice, divided


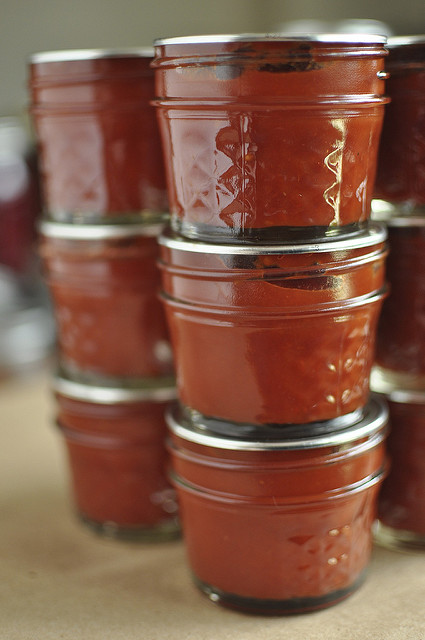
In a large pot set over high heat, combine the tomatoes, red bell pepper, bay leaf, and salt. Bring to a boil. Reduce the heat to low. Simmer for 30 minutes, or until the tomatoes are very soft. Using a potato masher, press the tomatoes down and release their juices while they are cooking. Using a food mill, pass the mixture through to puree. Discard the seeds and skins. Transfer the puree to an uncovered slow cooker set on low.  Cook the tomatoes for 8 hours, stirring hourly. As it thickens and reduces, check more frequently to prevent scorching. Prepare a hot water bath. Place the jars in it to keep warm. Wash the lids and rings in hot, soapy water, and set aside. To each jar, add 3/4 tsp. of lemon juice. Ladle the hot paste into the prepared jars, leaving 1/2 inch of headspace. Use a nonmetallic utensil to release any air bubbles. Wipe the rims clean and seal with the lids and rings. Process the jars in a hot water bath for 45 minutes. Turn off the heat and let the jars rest in the water bath for 10 minutes. Carefully remove the jars from the hot water canner. Set aside to cool for 12 hours. Check the lids for proper seals (see here). Remove the rings, wipe the jars, label and date them, and transfer to a cupboard or pantry. Refrigerate any jars that don’t seal properly, and use within 3 weeks. Properly sealed jars will last in the cupboard for 12 months. Once opened, refrigerate and consume within 3 weeks.

Grapefruit and Vanilla Bean Jam

Grapefruit and Vanilla Bean Jam

Grapefruit and Vanilla Bean Jam

5-6 large pink grapefruits about 5-6 pounds, you can also use Ruby Red grapefruit

1 1/2 C. sugar or more to taste

2 vanilla beans


Remove the rind from the grapefruits. Thickly slice the fruit and then cut or break apart into pieces. Discard any seeds. Puree the fruit in a food processor or blender, and then pour it into a heavy bottomed pot, along with the sugar. Cut the vanilla beans in half and then make a slit down the length of each piece. Pry the beans open with the tip of your knife and scrape out the seeds, adding them to the pot with the grapefruit. Throw the pods right in, too. Bring the pot up to a boil, then turn down and boil for about 40-50 minutes. You won’t have to tend it much at first, but toward the end you’ll need to keep an eye on it and stir often to prevent scorching. It will be greatly reduced, darker, and thicker at about the 40 minute mark. The longer you boil it the thicker the jam will be, but I found about 45 minutes was sufficient. Remove the vanilla bean pods and discard. Pour the hot jam into jam jars and let cool before covering and refrigerating. Use within 2 months, or freeze.

Drunken Rose Hips Jam

Drunken Rose Hips Jam

Drunken Rose Hips Jam


1/2 pound rosehips

2 C. red wine

3/4 C. water

1 1/2 C. sugar


Days 1-3. Rinse the rosehips well. Cut the dark spot off the end of each and halve them. Remove the inner seeds and hairs using a small, sturdy spoon. In a large bowl, cover the rosehips with the wine. Refrigerate, covered, for 3 days.  Prepare a hot water bath. Place the jars in it to keep warm. Wash the lids and rings in hot, soapy water, and set aside. Strain the rosehips. In a small saucepan set over medium-high heat, combine the water and strained rosehips. Cover the pan and bring to a boil. Cook for about 10 minutes, or until the rosehips are tender. Run the rosehips and their cooking water through the fine screen of a food mill. Measure and return the pulp to the saucepan. There should be about 1 1/2 C. of pulp. Add the sugar, adjusting the amount, as needed, to equal the pulp amount.  Over medium-high heat, bring the jam to a full, rolling boil. Turn off the heat. Skim off any foam. Ladle the jam into the prepared jars, leaving 1/4 inch of headspace. Use a nonmetallic utensil to remove any air bubbles. Wipe the rims clean and seal with the lids and rings. Process the jars in a hot water bath for 10 minutes. Turn off the heat and let the jars rest in the water bath for 10 minutes. Carefully remove the jars from the hot water canner. Set aside to cool for 12 hours.  Check the lids for proper seals. Remove the rings, wipe the jars, label, and date them, and transfer to cupboard or pantry. Refrigerate any jars that don’t seal properly and use within 3 weeks. Properly sealed jars will last in the cupboard for 12 months. Once opened, refrigerate, and consume within 3 weeks.

Blackberry & Apple Jam

Blackberry & Apple Jam

Blackberry & Apple Jam


2 large cooking apples, cored and thinly sliced, cores reserved

3 pounds fresh blackberries

5 C. sugar

3 T. freshly squeezed lemon juice

2 to 3 T. blackberry or raspberry cordial, or liqueur (optional)


Prepare a hot water bath (see here). Place the jars in it to keep warm. Wash the lids and rings in hot, soapy water, and set aside.  Put the reserved apple cores in a piece of cheesecloth and tie the ends securely with kitchen twine into a sachet. In a preserving pot or deep pot, combine the apple slices, blackberries, and the sachet. Cover the fruit with water. Bring to a simmer over medium heat and cook for about 10 minutes, stirring frequently, or until the fruit is very tender and starting to fall apart. Remove the pot from the heat. Remove and discard the sachet. Using a sieve or fine strainer, purée the fruit by passing it through into a clean pan. Add the sugar, lemon juice, and cordial (if using). Return the mixture to a simmer over low heat. Continue to cook, stirring often, for 20 to 25 minutes or until the jam gels and the mixture reaches 220°F, measured with a candy thermometer. Test for gel after 20 minutes (see here).  Ladle the jam into the prepared jars, leaving ¼ inch of headspace. Use a nonmetallic utensil to release any air bubbles. Wipe the rims clean and seal with the lids and rings.  Process the jars in a hot water bath (see here) for 10 minutes. Turn off the heat and let the jars rest in the water bath for 10 minutes. Carefully remove the jars from the hot water canner. Set aside to cool for 12 hours. Check the lids for proper seals (see here). Remove the rings, wipe the jars, label, and date them, and transfer to a cupboard or pantry. Refrigerate any jars that do not seal properly and use within 1 month. Properly sealed jars will last in the cupboard for 12 months. Once opened, refrigerate, and consume within 1 month.

Pickled Cherry Peppers

Pickled Cherry Peppers

Pickled Cherry Peppers

You can pickle cherry peppers three ways:


whole, untouched

whole, de-veined and de-seeded

cored, de-veined and de-seeded and cut in halves or quarters

Why does it matter? Here is why:


Whole and untouched look the best of the three. They take the most space in a jar. And they are the hottest due to preserved membranes and seeds.


Whole, de-veined and de-seeded are not as spicy. They are lightly spicy, actually. Not much space-saving here, just a tiny bit. They are great for making stuffed pickled cherry peppers. Even a simple stuffing such as plain cream cheese or ricotta cheese will make them taste heavenly. There is something about that balance of fat, acidity, spiciness and a touch of sweetness.


Halved or quartered cherry peppers will allow you fitting in about twice as many in a jar. They are easier to eat as they are bite-size.


How you pickle your peppers will depend on how you want to use them and whether you want them spicy or mild. Some like them hot, some like them mild.


10 – 15 cherry peppers

1 clove garlic

1 tsp black peppercorns

1 small bunch cilantro

1 bay leaf

1½ cups white wine vinegar

¼ cup white balsamic vinegar

1 cup water

1 tsp coarse salt

2 tsp white sugar


Wash and dry the peppers and put them in a glass jar. You can also use any non-reactive storage container. If you want your peppers de-seeded and de-veined, and cut into pieces, do it now. You can mix and match cut and whole peppers in the same jar, or store them separately. Peel the garlic clove, cut it in half and add it to the cherry peppers along with the black peppercorns, cilantro and the bay leaf. In a small saucepan, combine the vinegars, water, salt, and sugar. Bring to a boil and let it cook for 1 minute. Remove the liquid mixture from the heat and immediately pour over the peppers.  Let the contents of the jar cool completely at room temperature, then cover and refrigerate for 1 week. The peppers will be ready for eating after 1 week and will store in a fridge for up to 2-3 months.

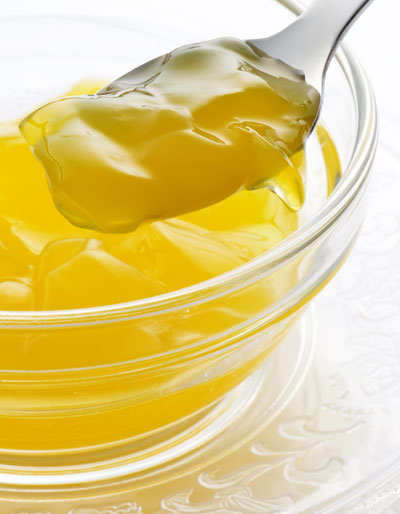
Lemon Verbena Jelly Recipe

Lemon Verbena Jelly Recipe

Lemon Verbena Jelly Recipe


1 1/2 C. lemon verbena leaves, chopped

2 C. water

2 T. apple cider vinegar

3 1/2 C. sugar

3 ounces liquid pectin (such as Certo)


Put lemon verbena leaves and water into a pan. Bring it to a boil, then take it off the heat and let it steep, covered, for 15 minutes. Strain and measure 1 1/2 C. of the infusion into a 3 1/2-quart or larger saucepan. Add the vinegar and sugar. Mix well and bring to a full boil over high heat, stirring constantly. Take off the heat briefly and add the liquid pectin; bring back to a full rolling boil and boil for exactly 1 minute. Have your jars sterilized either in the dishwasher or by boiling them for 10 minutes in water. Lids and rings can be in hot water until needed. (It is not necessary to boil them.) Skim foam from the Lemon Verbena Jelly with a spoon if necessary, pour into jars and add lids. Process jars in boiling water for 5 minutes. When you take them out of the pot, they should seal. If you press the middle of the lid and it pops back, it has not sealed properly. If they don’t, place any unsealed jars in the refrigerator and use them promptly.

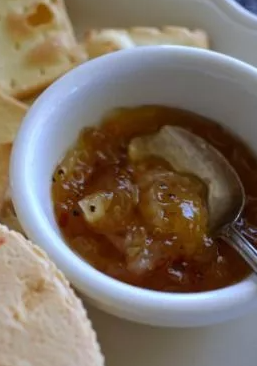
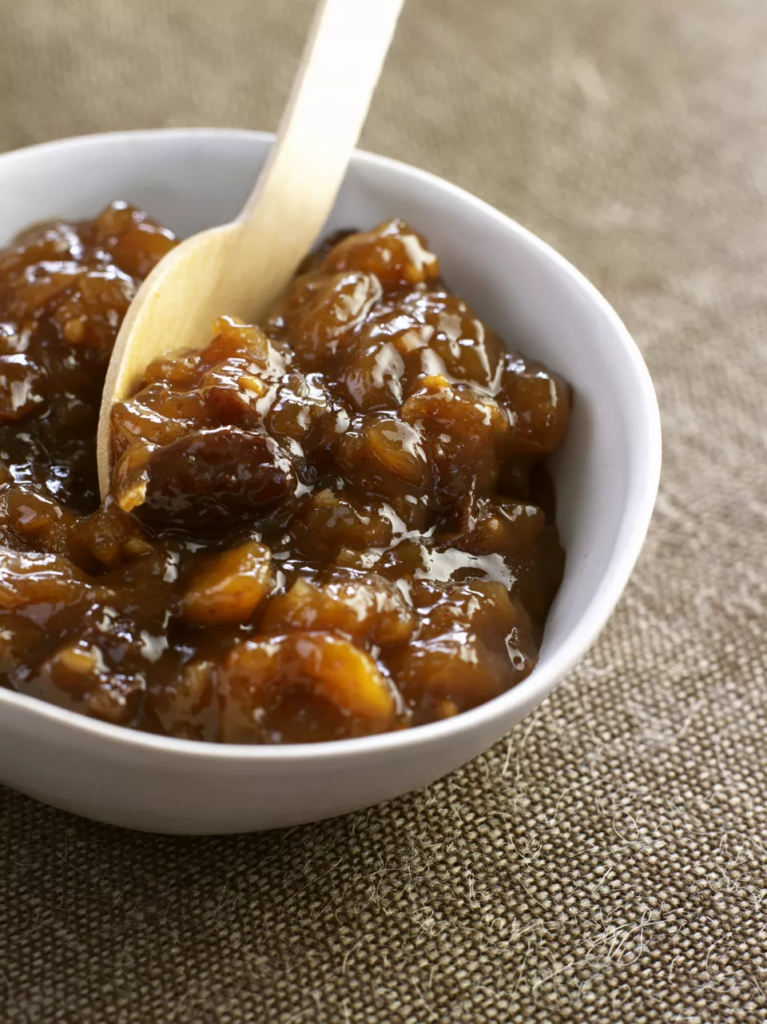
Spicy Lemon Chutney

Spicy Lemon Chutney

Spicy Lemon Chutney

10 to 12 lemons/about 3 pounds, plus 2 or 3 more for juice (see below)

2 tablespoons salt (kosher)

2 cups brown sugar

6 garlic cloves (minced)

1/2 cup dried currants

1/2 cup lemon juice

1/2 cup cider vinegar

1 to 2 tablespoons fresh ginger (grated)

1 teaspoon coriander seeds (crushed)

1/2 teaspoon cayenne

1/2 teaspoon red pepper flakes

4 half-pint (8-ounce) jars and lids


Using a vegetable peeler or sharp knife, remove the zest from lemons. Be careful to remove only the zest (the thin outer yellow skin) and not any of the white pith beneath. Finely chop zest and put in a large bowl. Cut off and discard the white pith. Finely chop the lemon flesh, discarding any seeds, and add to bowl with the zest. Add salt, stir to combine, and let sit at room temperature overnight. Put salted chopped lemons in a large pot. Add sugar, garlic, currants, lemon juice, cider vinegar, ginger, coriander, cayenne, and pepper flakes. Stir to combine over medium heat. Cook until mixture thickens, about 1 hour. Meanwhile, bring a large pot of water to a boil. Add jars and lids and turn off the heat. When chutney is thick, remove jars and lids from their hot water bath and dry. (Bring the pot of water back to a boil.) Fill jars with chutney. Using a wide-mouth funnel makes filling the jars much easier. If you don’t have one, however, just spoon the chutney into jars and clean edges with damp paper towels when jars are full. Firmly screw on lids. Put jars back in the pot of boiling water (jars should be covered by at least 2 inches of water). Boil for 10 minutes. Remove jars and let cool. Store at room temperature for at least 6 weeks and up to 6 months before eating to let flavors blend. Keep opened jars chilled.

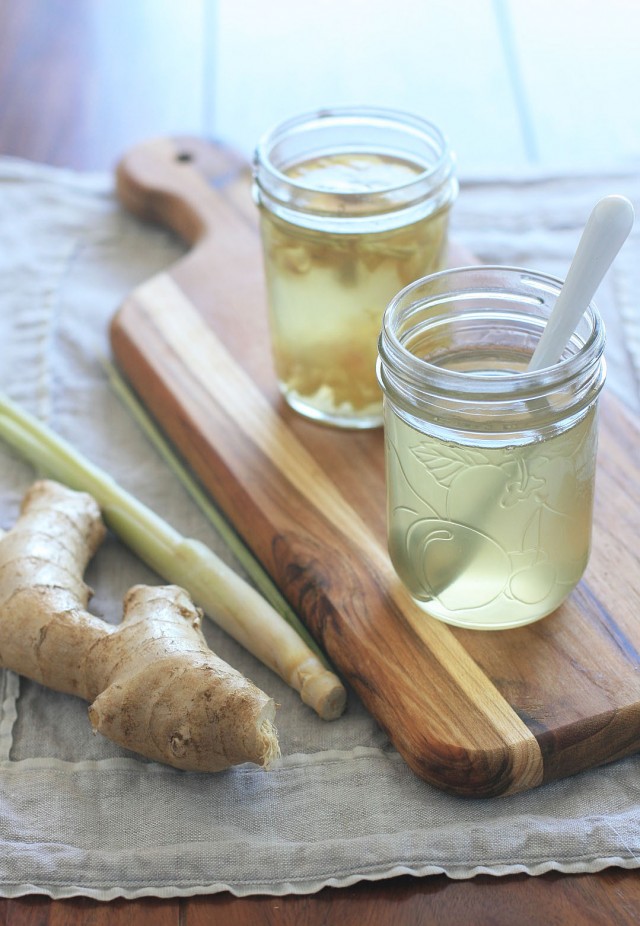
Lemongrass Ginger Syrup

Lemongrass Ginger Syrup

Lemongrass Ginger Syrup

Great way to make use / preserve ginger. Use for marinades, to sweeten tea or other beverages, or mix with sparkling water and lemon juice for a homemade ginger ale.

570 grams fresh ginger

3 stalks lemongrass

2 C. water

6 C. granulated sugar


Thoroughly wash the ginger. You don’t need to peel it, but break off any hanging pieces as dirt sometimes gets trapped between nodes. Roughly chop the ginger and lemongrass and add it to a food processor along with the lemongrass and 2 C. of water. Process until the mixture is pureed, scraping down the sides a few times with a spatula. Line a 2 C. liquid measuring C. with multiple layers of cheese cloth, or a single layer of fine-mesh muslin and scoop the ginger mixture onto the cheese cloth; you’ll probably need to do this in batches. Gather up the edges of the cloth and twist the edges towards the bulge of ginger to wring out as much liquid as you can. Discard the pulp and repeat until you’ve squeezed out all the ginger juice. You should now have 4 C. of liquid. If you don’t have 4 C., the ginger you used may have not been fresh, but just add water to make 4 C.. Add the ginger juice to a large pot along with 6 C. of sugar. Heat the mixture over medium heat to a full simmer. It has a tendency to boil over, so keep a constant eye on it and lower the temperature if it looks like it’s going to boil over. The impurities that made the juice cloudy will float to the top as foam, so use a fine mesh skimmer or spoon to remove the foam from the syrup and discard. After the foam stops forming and the syrup is clear, your ginger syrup is done. You can pour the hot syrup into sterilized glass bottles, or let it cool and transfer it to a suitable container. Stored in the fridge it will last for 6 months.

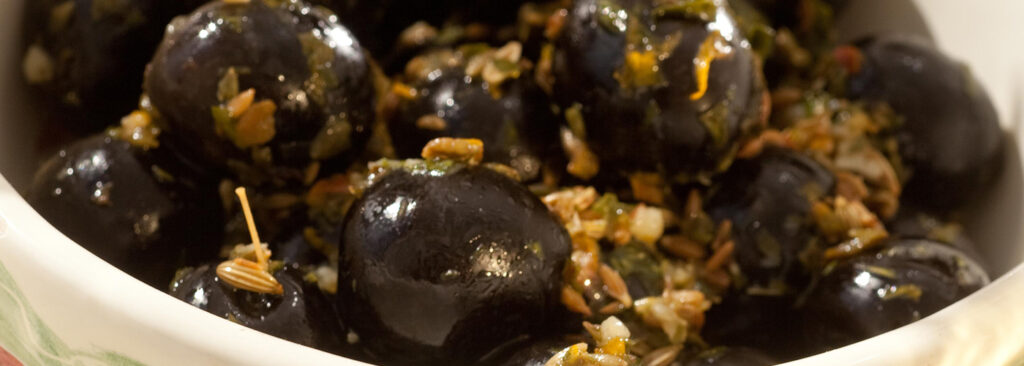
Black Olives with Lemon and Fennel

Black Olives with Lemon and Fennel

1/2 clove garlic

6 small olives

1/2 tsp. fennel seeds

1/3 T. fresh lemon juice

1 1/2 T. olive oil


Mince garlic. Mix olives with other ingredients in a plastic container with a lid then marinate for at least 1 hour so the flavors can blend. Note: These olives can be made in advance and kept in the refrigerator for up to 2 weeks.

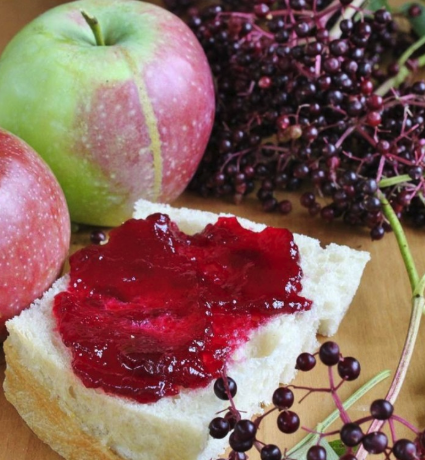
Elderberry Apple Jam

Elderberry Apple Jam

Elderberry Apple Jam

Yield: 3 half-pint jars of jam


6 cups of elderberries, carefully picked over to remove any green berries and pieces of stems and leaves.

8 small-medium, slightly under-ripe apples, diced (roughly 1/2 inch pieces) and cored (leave skin on). I’ve used Liberty, McIntosh, and Jonathan with great results in my various versions of elderberry apple jelly and jam.

1/2 cup water

3 and 1/2 cup sugar

1 tbsp lemon juice


In a large saucepan, gently crush some of the berries with the back of a large spoon. You must be gentle, to avoid crushing the seeds, which releases a bitter flavor into the juice. Add the water and bring to a boil, stirring constantly, and gently crushing the berries with the back of the spoon, until enough of the berries have burst to make it liquidly. You won’t need to do much crushing because the boiling actually makes most of them burst. Add diced apples, return to a boil, and simmer for about 10-15 minutes, until apples are mushy. Strain through a fine mesh metal strainer, to remove seeds. You may gently push the berry and apple pulp through the strainer with the back of a spoon. But, again, avoid crushing the elderberry seeds. Put the juice/pulp, the sugar, and the lemon juice into a large saucepan, and return to a boil. The mixture will be thick, so stir frequently, scraping the bottom of the pot, to prevent scorching. Continue simmering and stirring/scraping for about 10-15 minutes, until it sheets off a spoon (or until it reaches desired thickness). Hint: Do not use the temperature test for doneness. Mine became quite thick and passed the spoon test while still at the boiling point of water, 212 degrees F. It’s a firm gel when cool. Pour into sterile half-pint jars, cover with sterile lids and rings, and process for 15 minutes in boiling water bath.

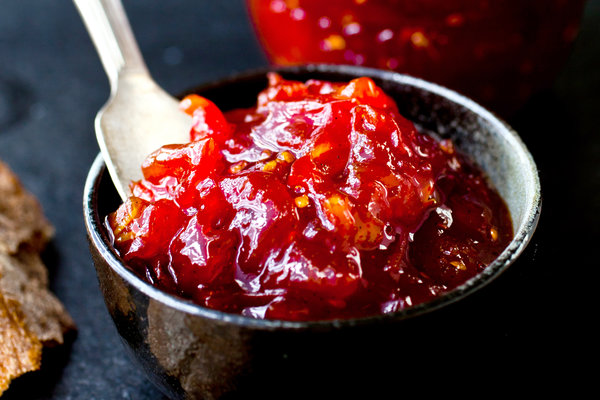
Spiced Cherry Tomato Chutney

Spiced Cherry Tomato Chutney

Spiced Cherry Tomato Chutney


7 onion, finely chopped

2 cloves garlic, chopped

2 to 4 small red chillies, crumbled

Large pinch coriander seeds, pounded

2 cloves, pounded

1/2 tsp. nutmeg, pounded

Small pinch cumin, pounded

Olive oil

4 anchovy fillets

3 ounces ripe red cherry tomatoes, washed, whole

1 lb. 4 ounces brown sugar

8 good lugs vinegar (preferably red wine)

Salt and freshly ground black pepper


Slowly fry the onions, garlic and spices in a little olive oil soft and translucent. Add the anchovies and cherry tomatoes (which you can blanch and remove the skins first if you like.) Shake around and add the sugar, vinegar and salt and pepper at this point. Bring to the boil, stir and simmer gently for 30 minutes before seasoning well to taste and transfer to a few small, sterilized airtight jars, rather than a large one, and seal. If unopened, the chutney will improve in flavour and last up to a year in your cupboard. Once opened, keep in your refrigerator for 1 to 2 months.

Sweet Tomato Jam with Honey and Vanilla

Sweet Tomato Jam with Honey and Vanilla

Sweet Tomato Jam with Honey and Vanilla

3 lb. firm ripe tomatoes, cored and diced (about 8 C.)

1 C. honey

300 grams granulated sugar (1 and 1/2 C.)

½ tsp. lemon zest

2 T. lemon juice

2 vanilla bean pods, split

Pinch fine sea salt


In a large nonreactive pot, combine ingredients, adding both vanilla seeds and pods to the pot. Simmer over medium-low heat until the mixture is very thick and jammy, about 1 and 1/2 hours. Discard vanilla pods. If canning, spoon into hot sterilized jars and process as directed. Otherwise, let jam cool, then store in refrigerator or freezer.

Apple Chutney

Apple Chutney

Apple Chutney

Chutney is a piquant relish. It is usually eaten in small amounts to add flavor and to accent a meal. To can: process chutney in a boiling water bath for 15 minutes for pints and 25 minutes for quarts. The following recipe is flexible as to which fruit is used.


1 cup pitted prunes, chopped

1 1/2 cups apple cider vinegar

2 cups brown sugar

1 teaspoon coriander seeds, ground

1/2 teaspoon ground cinnamon

1/2 teaspoon salt

1/8 to 1 teaspoon ground cayenne pepper (optional)

3 medium-sized (crisp) apples, peeled, cored and chopped

1 cup currents, chopped

1 cup onions, chopped

2 medium tomatoes, peeled, seeded and chopped

Cover the prunes with water and boil for 10 minutes. Drain and chop. Combine vinegar, sugar, coriander, cinnamon, salt and pepper in an enameled or stainless steel pan. Heat to boiling; add prunes, apples, currents, onions, and tomatoes. Cover and boil stirring frequently with a wooden spoon for about 30 to 40 minutes. Chill or serve warm. Refrigerate for up to two weeks or can.


To can: pour hot chutney into pint jars, remove air bubbles, use two-piece lids prepared according to manufacturer’s instructions, adjust lids and process for 15 minutes in a boiling water bath. Makes two pints.

Beet Relish

Beet Relish

Beet Relish


Bright, vibrant color and surprising citrus flavor will turn even the most serious beet-phobe into a beet fanatic.


2 pounds beets

2 oranges

2 cups cider vinegar

1 cup brown sugar, lightly packed

1 cup granulated sugar

1 onion, diced

2 garlic cloves, minced

1 tablespoon salt

4 whole cloves

1 bay leaf

1 cinnamon stick


Prep the beets by boiling or roasting them until nearly tender. Cut into 1/2-inch dice and set aside. Remove the zest from the oranges and set aside. Supreme the oranges by cutting away the peel and slicing between membranes to liberate the pulp. Squeeze the juice from the membranes into a small bowl and discard the solids. Set aside the juice and pulp.  i. Combine the vinegar, brown sugar, granulated sugar, onion, garlic, salt, cloves, bay leaf, cinnamon, and zest in a medium nonreactive saucepan, and bring to a boil. Simmer for 15 minutes. Add the beets and the orange juice and pulp and simmer for 10 minutes longer. Divide the mixture between two clean, hot pint-size canning jars, leaving 1/2 inch of headspace between the top of the liquid and the lid. Refrigerate: Cool, cover, and store in the refrigerator for up to 3 weeks. Can: Use the boiling-water method. Release trapped air. Wipe the rims clean; center lids on the jars and screw on jar bands. Process for 15 minutes. Turn off heat, remove canner lid, and let jars rest in the water for 5 minutes. Remove jars and set aside for 24 hours. Check seals, then store in a cool, dark place for up to 1 year.

Blood Orange Mimosa Jelly

Blood Orange Mimosa Jelly

Blood Orange Mimosa Jelly

3 lbs. whole blood oranges

2 Meyer Lemons – about 1/2 cup juice

1 bottle Prosecco

(All to equal 5 1/2 cups total juice)

3 1/2 cups sugar

1 pkg. Low Sugar Sure Jell Pectin


Prepare 8 half-pint jars and lids and a boiling water bath.  Measure the juices and Prosecco to equal 5 1/2 cups total. Place into a large pot. Measure 3 1/2 cups sugar. Remove 1/4 cup of the measured sugar into a small bowl and stir in the contents of the pectin packet. Stir the sugar and pectin mixture into the juice and bring to a boil. When it has reached a full. rolling boil, stir in the remaining sugar. Return to a full, rolling boil and boil for 1 minute exactly. Remove from the heat and skim any foam. Ladle into hot, prepared jars and process in the boiling water bath for 10 minutes. Remove carefully and let stand, undisturbed, until the lids pop.   Makes about 8 half pints.

Easy Pickled Carrots

Easy Pickled Carrots

1 32-oz. jar pickles
1 1/2 lb. slender carrots, peeled

Remove the pickles from the jar and reserve for another use. Add the carrots to the pickle juice, cutting them to fit the jar, if necessary. Screw on the lid and refrigerate for at least 3 days.

Yield: Makes 12 to 16 servings
Calories: 13
Fat: 0g
Fiber: 1g

Oven-Dried Tomatoes

Oven-Dried Tomatoes

8 plum tomatoes (about 1-1/2 lb.)
1 T. Olive Oil
1 tsp. sugar
1 T. balsamic vinegar OR: red-wine vinegar

Heat oven to 225 Slice each tomato lengthwise into 4 equal slices, discarding seeds. Toss with the olive oil. Spread in a single layer on rimmed sheet pan. Sprinkle with sugar and vinegar. Bake in 225 oven 2-1/2 hours, until dried but still pulpy, turning slices over after first hour. Store in airtight container in refrigerator for 1 week or freeze for longer storage.

Yield: 32 Tomato Pieces
Calories: 10
Fat: .5g
Fiber: .4g

Meyer Lemon and Blood Orange Marmalade

Meyer Lemon and Blood Orange Marmalade

marmalade5 C. of Sugar

1/8 tsp. Butter

1 1/2 C. of Water

2 Medium oranges

1 Medium Size Blood Orange

1 Large Regular Lemon

1 Large Meyer Lemon

1/8 tsp. Baking Soda

1 Pouch of Liquid Pectin such as Sure Jell


Measure sugar into a bowl, top with 1/8 Tsp. butter, cover, and set aside. Pour water in a large saucepan, cover with a lid and set aside. Using a zester, carefully remove zest from all of the fruit and place in the large saucepan, stir into the water, cover with the lid and set aside. Try not to remove any of the white part, known as the pith, as it will give your marmalade a bitter flavor. Segment and chop all of the fruit, catching their juices in a non reactive bowl. (Be sure to remove all pits.) Cover bowl of fruit and juices and set aside. Add baking soda to water and zest. Bring to a boil, reduce heat to medium low, cover, and simmer for 2o minutes. As the zest simmers for 20 minutes, it is a good time to check the dishwasher cycle to be sure it is still on heated dry, re-read instructions for filling and sealing jars, and it is a good time to wash, dry, and put away all dirty dishes used so far. Place Liquid Pectin Pouch standing up in a glass measuring C. and cut off the top of the pouch using clean scissors. Set the pectin near the simmering zest, so it will be handy, when ready to use. As soon as the zest mixture is done simmering, turn the heat up to high and add the fruit, juice, sugar, and mix well. Bring water in the water bath canner, tea kettle, and small sauce pan back to a heavy rolling boil. Quickly remove small saucepan full of boiling water from the stove and place on a trivet. Place clean lids in the water, cover, and allow to rest, until ready to use. Turn heat under tea kettle down to medium low. Bring jam to a heavy rolling boil that will continue even as mixture is stirred. Reduce heat to medium or medium low so mixture is bubbling gently. Continue to stir as mixture simmers for 8 minutes.*It is very important to stir constantly so mixture will not burn. Turn heat back up to high and bring mixture back up to a rapid boil for 1 minute. Add pectin and bring mixture back up to a boil, stirring constantly for 1 more minute. Remove marmalade from the heat, set on trivet, and quickly skim off any foam with a metal skimmer. Remove 1 hot jar from the dishwasher, place funnel on top of jar, and ladle marmalade into jar, being sure to leave 1/4 th of an inch head space. Remove the funnel, use bubble freer to remove bubbles from jar, slightly wet the clean paper towels with water and use to wipe any jam from the top of the jar. Using lid wand, remove 1 lid from the small saucepan of water, line up and place on top of the jar and screw band on, making sure the band is not too tight. Lift canning rack; latch onto sides of canner, and using jar lifter, place jar of marmalade on the rack. Continue this process till all jars are full and are resting lid side up on the rack. The jars should all be half covered with boiling water at this point. Gently lower rack in to the boiling water. The jars should be covered with 1 – 2 inches of water. If more water is needed, pour boiling water from tea kettle into the water bath canner at this point. Bring water in water bath canner to a boil and process the jars for 10 minutes. Meanwhile, begin to clean up the kitchen and set down a dish towel to place under the hot processed jars of marmalade while they cool. (Setting hot jars on a cool surface may cause them to shatter.) Turn off the heat, remove the lid, and allow the pot to cool for 5 minutes. Lift canning rack, latch onto sides of canner, carefully remove jars one by one with the jar lifter, and place 1 – 2 inches apart of the clean dish towel. Do not tilt jars to remove water from the lid as this may affect the seal. The water will easily evaporate from the heat of the jar. Listen for and count the pings, the sound that the jars make as they seal. Allow jars to sit for 24 hours before removing bands and checking lids to be sure they are sealed. Store homemade marmalade in a cool dark place such as a basement for up to 1 year.


Yield:

Calories:

Fat:

Fiber:


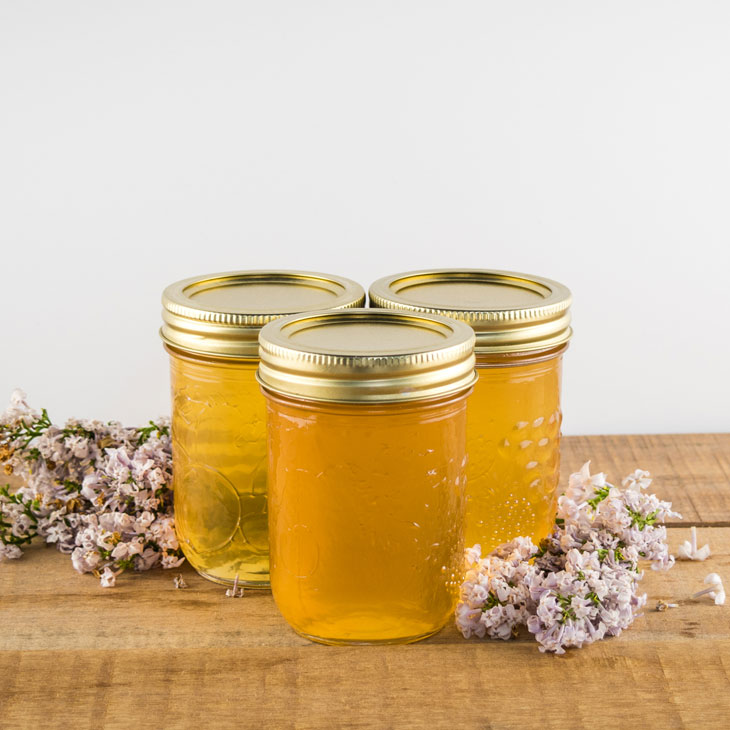
Lilac Jelly

Lilac Jelly

Lilac Jelly

4 c. lilac flowers

4 c. sugar

1 pkg. or 6 tbsp. powdered pectin

3 tbsp. lemon juice

1/4 tsp. butter


Rinse lilac flowers in a colander and remove stems. Place flowers in a bowl and cover them with 4 cups of boiling water. You are essentially going to make “lilac tea.” Let the lilac mixture sit for about an hour. Pour the mixture through a fine mesh strainer to remove the lilac flowers. You should end up with a clear liquid. If not, try pouring it through the strainer again. Measure the tea, adding a little water if necessary to get exactly 4 cups of liquid. Stir in lemon juice. The liquid should change in color to be similar to the original color of the lilacs. The darker the lilacs, the darker the color of the jelly. Violet colored lilacs will make a rose colored jelly. Experiment with different flower colors! Pour liquid into a large stock pot. Sprinkle the pectin on top of the juice and use a whisk to mix it together. Stirring constantly, heat until boiling. Boil for one minute. Add the pinch of butter and return to a boil. Add the sugar to the pot all at one time (measure it and have it ready ahead of time). Stir until sugar is dissolved. Return to a boil and boil for one minute.  How to make and can homemade lilac jelly from fresh lilac flowers. A unique gift idea with a wonderfully floral taste and scent!


Canning Instructions:  Remove the pan from the heat. Remove any foam with a metal spoon. Ladle the jelly into hot sterilized jars, leaving ¼ inch head space, and process in boiling water canner for 5 minutes.  Remove the jars from the canner and place on a towel on the kitchen counter to cool. Sealed jars can be stored in the pantry for 1-2 years. If you have any jars that do not seal, just place them in the refrigerator to eat in the next month or two.  Jelly can take a day or two to set completely, so don’t disturb it for a couple days even if it doesn’t set completely.

Ruby Kraut

Ruby Kraut

4 lb. red cabbage
1 lb. carrots
3 T. pickling salt

2 tsp. celery seeds, divided
2 tsp. dill seeds, divided
2 tsp. black peppercorns, divided
2 bay leaves

4 C. water
2 T. pickling salt

Shred, slice or grate your cabbage using a food processor, knife, or grater… whatever works for you. I cut my cabbage in half lengthwise, remove the cores first, then slice the cores to add into the kraut. Then I thinly slice the rest of the cabbage by hand for a cole slaw-like consistency. Do the same for the carrots. I take a julienne peeler to mine to get those skinny slivers. Now, you should know that 5 lb. is a lot of veggies… at first. I put all of my slices and slivers into a huge soup pot because even my biggest mixing bowl wasn’t big enough to hold everything.

Once you’ve broken down all the cabbage and carrots, add the pickling salt and toss to combine. At this time, I let the veggies sit while I do some clean-up in the kitchen. The salt will start to draw out moisture and make your cabbage nice and limp.

About 20, 30 or however many minutes later, go back to your pot and knead those veggies into submission with your hands. Be sure to press down on them to expel as much water as possible. By the time you’re done, the volume of veggies should be reduced to at least half. You’ll see some water pooling at the bottom of the pot; this is good!

This recipe makes two jars of celery and dill-spiced kraut, and two jars of peppercorn and bay-spiced kraut. Divide your spices equally among the jars.

I like to fill my jar in layers: half a tsp. spices, some cabbage and carrot mix, another half a tsp. spices, more cabbage and carrot mix, and so on. While you do this, tamp the layers down with the back of a spoon to squeeze more liquid out of the vegetables. Pour any remaining liquid from the mixing pot into your jars. Leave at least an inch or two of headspace after filling, since the kraut will continue to expand and release liquid while it’s fermenting.

Run a chopstick or the end of a long spoon around the perimeter of the jar to release any trapped air pockets. It’s important that all the veggies are completely covered in liquid.

To keep the kraut fully submerged during fermentation, I like to fill a zip-top bag with a little water and place that right on top of the vegetables, filling all the empty space in the jar. The water acts as a weight to push them down into the brine. Or, you can place a rock inside the bag as a weight.

Seal your jars with lids and store them at room temperature out of direct sunlight. The kraut may “bubble over” as it ferments, so it’s a good idea to place the jars in a shallow baking dish to catch any overflowing liquid.

If the veggies haven’t released enough liquid by the second day to stay submerged, you’ll want to top them off with brine. Bring water and salt to a boil, stir until the salt is completely dissolved, then let cool and add to the veggies. Don’t forget to leave an inch or two of headspace in the jars. Push down on the veggies, add the baggie liners with some weight, and reseal with lids.

You will see bubbling over the next few days; those bubbles are the off-gassing of carbon dioxide from lactic acid bacteria at work. Once a day or every other day, loosen the lids to let the fermentation gases escape. Pay attention to any stray cabbage or carrot pieces that may have worked their way in between the rim and baggie; you’ll want to push them back into the brine so they don’t become moldy.

As the lactic acid bacteria proliferates, your cabbage will turn into sauerkraut — or “sour cabbage” in German. The sourness comes from all the lactic acid created during lacto-fermentation.

Theoretically, your kraut is “alive” with probiotics by day four and can be eaten, but for the best flavor, you’ll want to wait anywhere from one to three weeks, depending on how warm or cool it is in your house. Warmer temperatures speed up fermentation, while cooler temps slow the process.

Check your jars each day to ensure the veggies are still submerged in liquid, and resist the temptation to fiddle with your ferment too frequently; oxygen is the enemy and will produce mold on the surface. You can begin to taste your kraut after a few days until it has soured enough to your liking.

For me, the right amount of time to perfect sauerkraut was exactly 12 days. (The temperature in my house hovers between 68°F and 70°F.) Once the kraut has achieved a nice flavor, remove the baggies, reseal with lids, and keep the kraut in your fridge to prevent over-fermentation. Your kraut should smell pleasantly sour and salty — like pickles. If it smells rotten or yeasty, chuck it and start over.

Fermented foods don’t necessarily go “bad” if properly sealed and submerged in liquid, but they will eventually reach a point of becoming too sour to be edible. Refrigeration slows down fermentation so you can enjoy your kraut at its peak flavor!
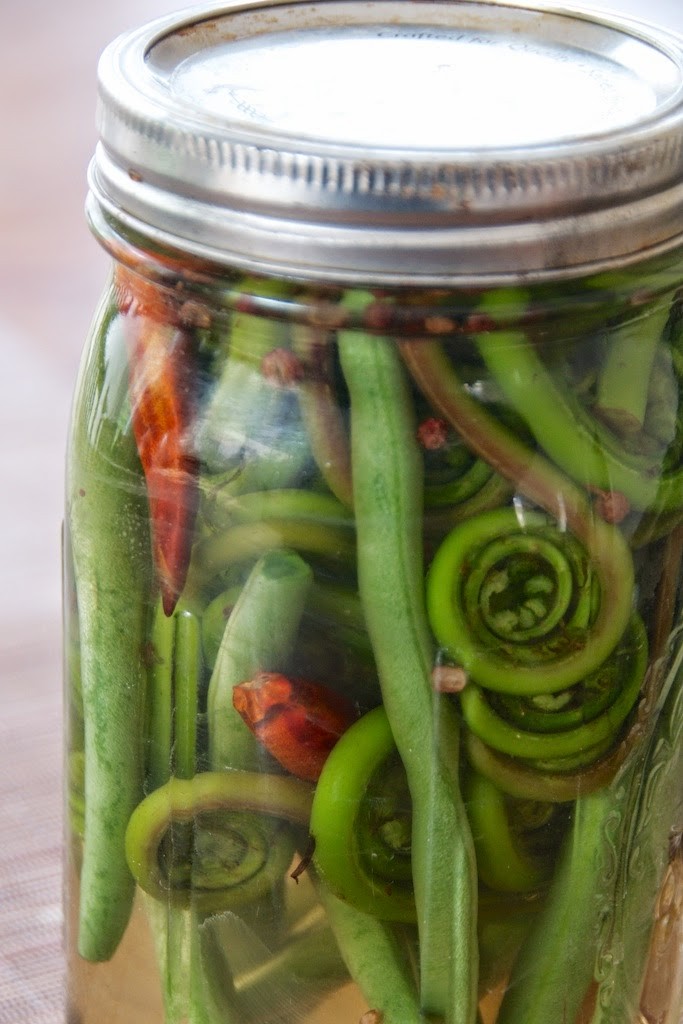
Sichuan Pickled Vegetables

Sichuan Pickled Vegetables

1 quart-sized jar with lidfiddle1
2 1/4 cup water
1/4 cup rock or sea salt
4 dried chiles
1/2 tsp. whole Sichuan peppercorns
2 tsp. rice wine
1/2 star anise
1 T. brown sugar
1-inch piece of unpeeled ginger
1/3 cinnamon stick
1 lb. or more vegetables, such as string beans, slice carrot, daikon radish, etc.

Dissolve salt in boiling water and set aside to cool. Add pickling spices to jar and add cooled water. Cover and shake to mix. Fill jar with vegetables (e.g., fiddleheads), making sure brine covers them. Tighten lid and put aside in a cool, dark place for a minimum 24 hours; a week is better. You can continue to replenish the jar with vegetables by adding more salt, sugar, and wine.

Pickled Jalapeños

Pickled Jalapeños

Pickled-Jalapenos1 pound (450g) fresh jalapeno peppers, washed
2 1/2 cups (625ml) water
2 1/2 cups (625ml) vinegar (I used white distilled vinegar)
3 T. sugar
3 T. coarse salt, such as kosher
2 bay leaves
2 T. whole coriander seeds
3 cloves garlic, peeled
2 T. black peppercorns

Stab each pepper three times with a sharp paring knife and place them in a large glass preserving jar. In a non-reactive saucepan, bring the other ingredients to a boil, then reduce the heat and simmer for five minutes. Remove from heat and pour the brine over the peppers. Place the lid on the jar and let cool. Once cool, refrigerate for at least a week before using, if possible. Serve whole, with Mexican dishes, or remove the seeds then chop and use to season any recipe that is improved by a little bit of sweet heat.

Marinated Fresh Mozzarella Pearls

Marinated Fresh Mozzarella Pearls

Marinated Fresh Mozzarella Pearls


1 lb. fresh mozzarella pearls (or use any type of fresh mozzarella and cut into bite-sized pieces)

1/2 C. olive oil

1/2 C. chopped fresh herbs (measure after chopping)

(I used mostly basil with just a few T. of chopped oregano)

salt and fresh ground black pepper to taste

1/2 tsp. fresh red pepper flakes (more of less to taste)


Drain mozzarella in a strainer placed in the sink while you wash and chop herbs. Be sure mozzarella is drained well, and pat dry with paper towels if needed. Wash herbs, spin dry in salad spinner or blot dry with paper towels, then finely chop enough fresh herbs to make 1/2 C.. Mix chopped herbs with olive oil and red pepper flakes, and season with a generous amount of salt and fresh ground black pepper. Put mozzarella pieces into a plastic or glass container with a tight-fitting lid, add olive oil mixture, and stir to combine. Put lid on container and marinate mozzarella at room temperature for 30-60 minutes, turning container over a few times so the mozzarella stays covered with the olive oil-herb mixture. Serve at room temperature.

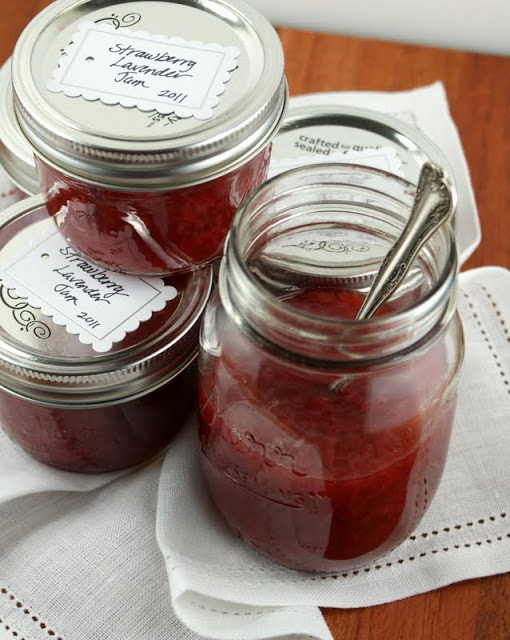
Strawberry Lavender Jam

Strawberry Lavender Jam

16 C. (4 lbs) Strawberries, hulled and halved
2 ½ C. Sugar
½ C. Fresh lemon juice
1 packet of pectin
1 tsp. Fresh or dried lavender

In a large non-reactive pan add the strawberries and sugar. Cover and let stand at room temperature for 1 to 2 hours. Have ready hot, sterilized jars and their lids. You can sterilize by placing in a 225 degree oven on a cookie sheet for 15 minutes or sterilize in hot water or the dishwasher. Place 2 or 3 small plates in the freezer. Add the lemon juice and pectin to the pot. Bring to a boil over medium-high heat, reduce the heat to medium, and cook, uncovered, add lavender, stirring frequently, for 10 minutes. Remove from the heat. Use 1 tsp. jam and a chilled plate to test if the jam is ready. The mixture is ready if it wrinkles when nudged gently with a finger. If it doesn’t, continue to cook for a few minutes longer and retest. Ladle the hot jam into the jars, leaving ¼ inch of headspace. Remove any air bubbles and adjust the headspace, if needed. Wipe the rims clean and seal tightly with the lids. Process the jars for 10 minutes in boiling water bath. Remove and let cool on a towel. The lids will pop and that means they are sealed. To test, simply press down on the lid and if no popping happens, they are sealed. Tighten the lids and store in a dark, cool location.

Strawberry Basil Jam

Strawberry Basil Jam

2 pounds of strawberries, some super ripe, some under ripe
½ C. water
2 tsp. lemon juice (about 1 lemon)
1 C. sugar
¼ C. roughly chopped basil leaves
2 tsp. vodka

Remove the stem from the strawberries and halve or quarter them if they are large. Place them in a large stockpot with the water and bring to a boil. Cover, reduce heat to medium and continue to boil for 10 minutes, stirring occasionally to prevent the berries from sticking to the pot. Meanwhile, put the sugar and basil leaves into a food processor fitted with a steel-blade attachment. Pulse until the basil is finely minced and the sugar turns a pale green color. Set aside. Remove the lid from the pot and stir the lemon juice into the berries (after they have simmered for 10 minutes). Add the sugar, ½ C. at a time, waiting for the liquid to return to a boil before adding more. Continue to boil for another 5 minutes, stirring frequently. Skim any foam that rises to the surface, if desired. Cook only until the jam begins to stick on the bottom of the pot. You should be able to draw a trail through the jam with your spatula. Another sign that the jam is ready is that it will begin to sputter. Pour jam through a funnel into hot, sterilized jars to within ¼ inch of the lips. Wipe the rims clean with a paper towel that you’ve submerged in the vodka. Attach new lids, and screw caps tightly. Invert jars briefly to vacuum seal, or process in a boiling water bath, submerged by 1 inch, for 10 minutes.