Frugal Bones & Beans

Frugal Bones & Beans

Frugal Bones & Beans


Olive Oil

1 Onion, chopped

Leftover Bone (chop, duck, shank, whatever is on hand)

2-3 slices Bacon, raw or cooked

Splash of Vermouth or White Wine

2 C. dried Cannellini Beans or Other Large Beans, soaked overnight and drained

6-8 Sage Leaves, torn

2 T. Salt

Salt & Pepper to taste


Cover the bottom of the large stockpot with a layer of olive oil and set over medium heat.  Cook and stir onions until soft, about 5-7 minutes.  Add leftover bone and bacon.  Cook until the bottom of the stockpot is brown, by leaving over the heat and not stirring often.  You are looking for a golden caramelization in the bottom of the pan.  Deglaze with a splash of vermouth, stirring to scrape up the brown bits.  Add beans and cover with water by 1 ½ inches. Add sage and bring mixture to a boil.  Stir in salt.   Reduce heat to simmer and cook until the beans are soft and can be mashed with the back of a spoon, 1-2 hours.  Most of the water will be absorbed by this time.  Season with salt and pepper to your liking.  Garnish with fresh parsley, if desired.  You can store in fridge 3-5 days.  You can also mash and store the mash in the freezer to use later in a white bean dip (add mashed roasted garlic and a squeeze of lemon).  You can refresh leftover beans by adding a hand to warmed chicken or vegetable stock with some sautéed celery, carrot and onion.

Celery Roses with Herb Cream Cheese

Celery Roses with Herb Cream Cheese

Celery Roses with Herb Cream Cheese


6 or 8 washed and dried Ribs of Celery that have been cut all the same length.


Herb Cream Cheese


1 Tablespoon Fresh Parsley, minced

1 Tablespoon Fresh Chives, minced

1 Tablespoon Fresh Marjoram, minced

1 Teaspoon Fresh Thyme (lemon thyme if you have it)

1/2 Teaspoon Fresh Lemon Zest

1 Tablespoon Lemon Juice

1/4 Teaspoon Garlic Powder

1/8 Teaspoon Sea Salt

4 ounces of Light Cream Cheese (50% less fat), at room temperature


Mix all ingredients together until smooth. Don’t use a food processor for this or the cream cheese will turn green.


Spread cheese mixture on each rib of celery, making sure to clean the sides; do not overfill.  After you have all six ribs filled, stack them together beginning with the smaller center ribs of the celery. Press together gently so as not to squeeze out the cream cheese.  Wipe the edges clean after you have them all formed together.  The more celery ribs you add the more your “flower” will take shape. The celery stalk I used today did not have small center stalks. I think those would make a better center than what I show here so use those if you have them.  Once you get all your stalks together, lay it down on a cutting board and carefully cut into 1 inch thick slices.  Clean you knife off after each cut.  Now that I see them plated, I think it would be a good idea to rotate the celery roll after each cut.  You can see by the top flower that it kept it’s round shape, where as the lower flowers have a flat side to them.

Sticky Onion Tart with Sweet Garlic, Fresh Thyme, Bay and Buttery Puff Pastry

Sticky Onion Tart with Sweet Garlic, Fresh Thyme, Bay and Buttery Puff Pastry

Sticky Onion Tart with Sweet Garlic, Fresh Thyme, Bay and Buttery Puff Pastry


4 medium yellow onions, ends cut off and papery skins removed

1/4 cup unsalted butter

4 sprigs of fresh thyme, leaves removed 2 tablespoons Demerara sugar (or dark brown sugar)

1/4 cup cider vinegar

8 cloves garlic (or more), peeled and cut in half

11 ounce high-quality puff pastry sheet, thawed but cold

Goat cheese


Peel the onions and halve across the middle. Place the butter in a 26cm non-stick ovenproof frying pan on a medium heat. Strip in the thyme leaves and add the bay, shake the pan around and get it bubbling, then add the sugar, vinegar and 100ml of water. Place the onion halves in the pan, cut side down. Peel and halve the garlic cloves and place in the gaps, then season generously with sea salt and black pepper. Cover, turn the heat down to low and leave to steam for 10 minutes to soften the onions slightly, then remove the lid and cook until – very importantly! – the liquid starts to caramelize, gently shaking the pan occasionally to stop it from sticking. Place the pastry over the onions, using a wooden spoon to push it right into the edges of the pan. Bake for 35 minutes, or until golden brown and puffed up (it will look quite dark, but don’t worry!). Using oven gloves to protect your hands, pop a large plate over the pan and confidently but very carefully turn out. Delicious served with goat’s cheese, a simple salad and a cold beer. Tip: Shallots, leeks and spring onions all make wonderful tarts – just make sure they’re soft and caramelized before covering with pastry. Slice into wedges and add a dollop of goat cheese to eat with the tart.

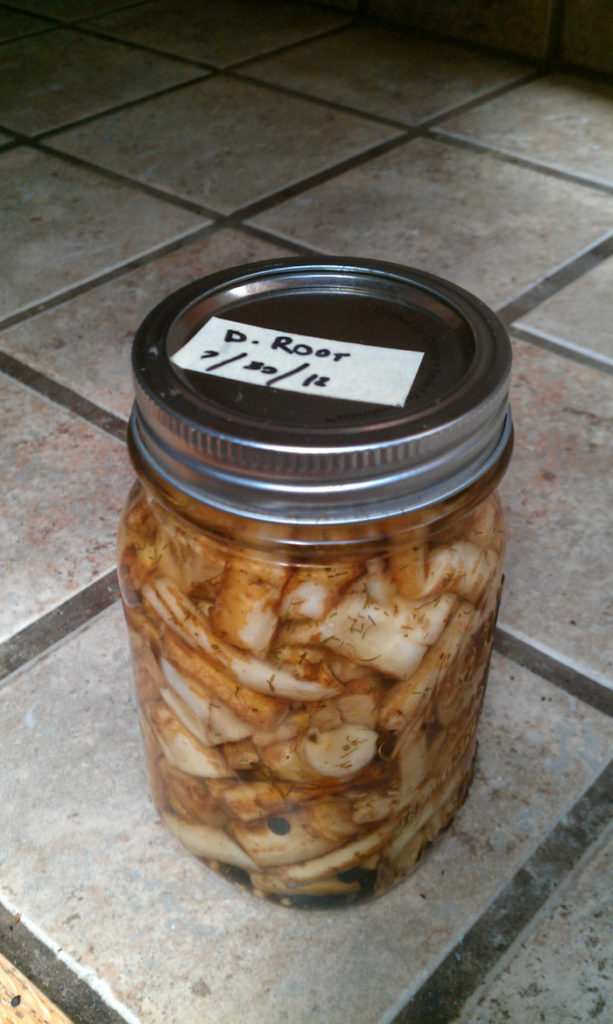
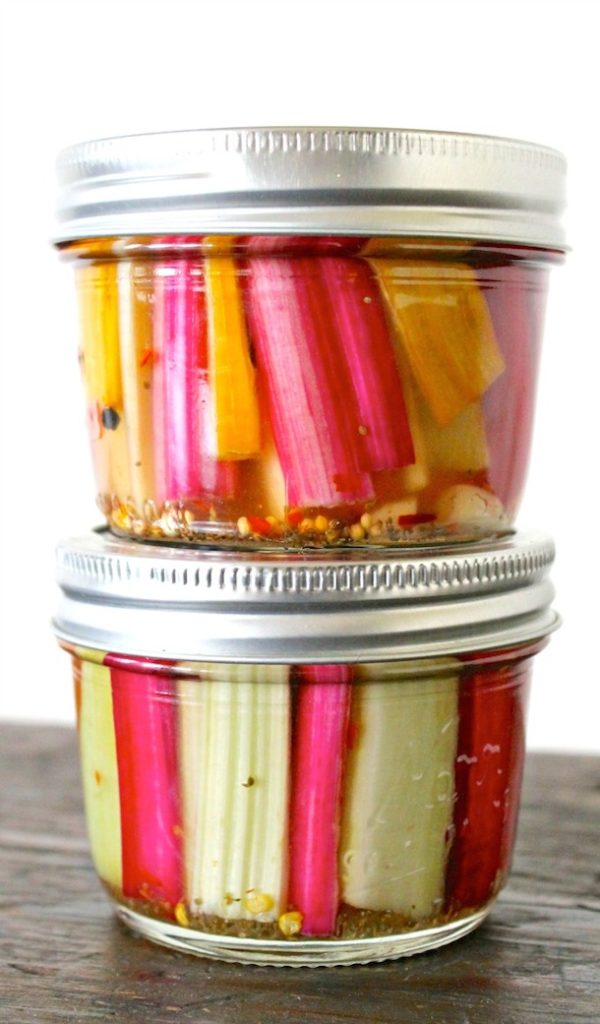
Pickled Mustard Green Stems

Pickled Mustard Green Stems

Pickled Mustard Green Stems


Mustard Green Stems

Clean qt. Jar with Tight Light


In a small bowl add:

1 cup Organic Apple Cider Vinegar

1 generous Tbsp Pickling Spices

1 dried small red pepper, left whole (optional)

1 tablespoon fresh dill, chopped


Stir to blend. Slice the stems of the Mustard Greens into bite-size chunks and fill jar to about 3/4 full.  Pour over the pickling vinegar blend and add just enough water to fill jar.  Add a bit of sea salt if desired.  Place the lid on tightly and shake to distribute the spices.  Refrigerate for 2-3 days, give it a good shake once a day.  These will keep for a month or more refrigerated

Coconut Pandan Waffles

Coconut Pandan Waffles

Coconut Pandan Waffles


1.5 cups gluten free rolled oats, quick cooking 120 grams

1 can coconut milk (13.5 fluid ounces/400 ml or Thai Kitchen is 13.66 fluid ounces/403 ml)

3/4 cup tapioca flour, 85 grams

3/4 cup rice flour, 85 grams

1-3/4 teaspoon of baking powder, 7 grams

3/4 teaspoon of baking soda, 3 grams

pinch of salt

2 eggs

3/4 cup sugar, 158 grams

3 tablespoon coconut, avocado, or olive oil

1 teaspoon vanilla

1 teaspoon coconut extract

2 teaspoon pandan extract

1/2 cup shredded coconut, I prefer unsweetened (Optional)


Place rolled oats and the coconut milk in a blender and blend until smooth.  Add remaining ingredients (except the shredded coconut) and blend until smooth. Let the batter rest while the waffle iron is heating up. Stir in shredded coconut, if using. Cook batter in a waffle iron. Place the waffles on a cooling rack or serve immediately. If you put them on a plate to cool they will get soggy. These waffles are traditionally served plain while hot and crispy on the outside. These waffles are best eaten as they come off the waffle iron, or the day of.

Crunchy Pork Belly

Crunchy Pork Belly

Crunchy Pork Belly


Pork belly, skin on

1 cup water

Salt

3 pieces of lemongrass ( 3 inches each)

3-4 cloves of garlic

6-8 Kaffir leaves


Put the water, lemongrass,  garlic, Kaffir leaves into the Instant Pot/ pressure cooker.  Lightly salt the pork and place it on a trivet in the pressure cooker. Cook on high pressure for 20 minutes. Release pressure.

Pat the pork dry with paper towels.  Pierce the skin of the pork all over with a fork. Wrap the bottom of the pork with foil. Leaving the skin exposed. Place the pork in a 500F degree convection oven on broil with the fan ON until crispy and browned. About 15 to 20 minutes.

Coconut Bacon & Coconut Chips

Coconut Bacon & Coconut Chips

Coconut Bacon


2 cup coconut chips (Toasted coconut chips work well here.)

4 tsp. tamari or soy sauce

4 tsp. maple syrup

1/4 tsp. smoked paprika (or 1/2 tsp. liquid smoke and 1/4 tsp. paprika)


Mix together the tamari or soy sauce, the maple syrup, and the smoked paprika (or the liquid smoke and regular paprika) until well mixed. If you mix them in either a container with a lid or a bag, it will be easier to coat the coconut chips in the next step. Pour the coconut chips into the container with the mixed seasonings. If you are using a container with a lid or a plastic bag, it’s easy to coat all of the coconut chips by shaking them with the seasonings until fully coated. Spread the coated coconut chips over a baking sheet (or a dehydrator tray) so that they don’t overlap too much. Sweet, smoky, and salty, these seasoned coconut chips will remind you of maple sweetened bacon, but they are vegan! I’ll show you how to make coconut bacon in just a few minutes! Dry them out by using the low heat and convection setting of your oven (if you have one), or by using a dehydrator. They will get nice and crispy. If you want them to be a toasted color, you can either use toasted coconut flakes to begin with, or you can put them in the oven at a higher heat setting for a few minutes. Be very careful if you choose to do so, checking on them every minute or so, because they can burn pretty quickly at higher heat settings.

Eat as is or serve on salads or other dishes.

You can purchase coconut chips or make your own.


1 fresh coconut


Open the coconut and pry out the coconut meat.  Using a vegetable peeler, peel off the brown skin from the coconut pieces.   Rinse off and dry the white coconut pieces. Using your vegetable peeler again, peel off strips of coconut until you have finished making coconut chips with the entire coconut. Using either your oven or a dehydrator, dry the coconut chips until they are completely dried out. You can tell by trying to break them. If they are still somewhat flexible and hard to break, you should dry them out a little longer. They should easily snap in half. If you are using your oven, use the lowest heat and the convection setting if you have one. If you want toasted coconut flakes, you can continue to heat the coconut in either the dehydrator or the oven and they will start to slowly become toasted. They will first start to turn a golden yellow, followed by a darker brown color. You can quicken the process by turning up the heat a little, but be very careful! Toasted coconut flakes burn very quickly and easily. Once burnt, they don’t taste very good. Store your dried coconut chips in an airtight container. They are now ready for eating as is or seasoning however you choose.


Smoked Paprika Seasoned Coconut Chips

Matcha Lime Seasoned Coconut Chips

Sweet & Tangy Raspberry Coconut Chips

Pina Colada Coconut Chips

Citrus Herb Basque Chicken

Citrus Herb Basque Chicken

Instant Pot: Citrus Herb Basque Chicken


3 tbsp grass-fed butter, ghee or avocado oil divided

4 bone-in chicken thighs

1¼ tsp sea salt divided

1 medium yellow onion thickly sliced

4 fresh garlic cloves minced

5 fresh thyme sprigs leaves removed and stems discarded

½ lb 230 g chorizo casing removed

1/3 cup sun-dried tomatoes

½ cup pitted green olives

1/3 cup freshly squeezed orange juice

¾ cup chicken bone broth

1 handful fresh cilantro for garnish


Add 2 tablespoons (29 g) of healthy fat of choice to the Instant Pot and press “Sauté.” Once the fat has melted, add the chicken thighs, sprinkle with ½ teaspoon of sea salt and brown for about 2½ minutes per side. Remove the browned chicken to a plate and set aside. Add the remaining 1 tablespoon (14 g) of healthy fat of choice, onion, garlic, thyme leaves and the remaining ¾ teaspoon of sea salt, sautéing for 5 minutes, stirring occasionally. Add the chorizo and sauté for 5 minutes, stirring occasionally. Press the “Keep Warm/Cancel” button. Add the sun-dried tomatoes, olives, orange juice and bone broth. Give it a good stir. Add the browned chicken, making sure it’s submerged and some of the liquid is ladled over it. Place the lid on the Instant Pot, making sure the steam release valve is sealed. Press the “Poultry” setting, then increase the time using the “+” button until you reach 20 minutes. When the Instant Pot is done and beeps, press “Keep Warm/Cancel.” Using an oven mitt, “quick release”/open the steam release valve. When the steam venting stops and the silver dial drops, carefully open the lid. Serve immediately, topped with fresh cilantro.

Ginger Vinegar

Ginger Vinegar

Ginger Vinegar


150 gram ginger root

150 gram sugar

1 quart filtered water


Add 2 cups of filtered water to a jar with a tablespoon of sugar and a tablespoon of grated or finely minced ginger. Mix everything together and cover the jar with a cloth, held in place with a rubber band, to keep bugs and dust out. Leave to rest at room temperature for 24 hours. The next day, add in another tablespoon of sugar and another tablespoon of ginger. (You can also add in a little water if you ever see that the mixture is too overrun with ginger.) Once again, mix everything together and cover it with a cloth. Leave it undisturbed for another 24 hours. Repeat the previous step each day until you get an active ginger bug. You can tell that your ginger bug is active and ready when you start to see bubbles forming at the top and a white precipitate falling to the bottom. (This normally takes around 4-8 days.) Overhead view of ginger, sugar and water turning bubbly. (An actively forming ginger bug) Once the ginger bug is ready, you can make sodas with it by mixing it with juice or mixes of water, flavoring, and sugar syrup and doing a second ferment in airtight bottles to build up carbonation. To make vinegar, add the rest of the ginger, sugar, and water and stop feeding the ginger bug. Cover it with a cloth and allow it to ferment for several weeks. Over the next weeks, it will become more acidic and less sweet. It should also begin to form a cellulose mass on the surface. This is the vinegar mother.  Once you are happy with the flavor and acidity of the vinegar, filter out the solids and bottle the ginger. It can be stored at room temperature or in the fridge.

Nutritional Yeast Vinaigrette Salad Dressing

Nutritional Yeast Vinaigrette Salad Dressing

Nutritional Yeast Vinaigrette Salad Dressing

¼ C cashews

¼ C nutritional yeast

2 tsp. Worcestershire sauce

1 ½ tsp. apple cider vinegar

2 cloves garlic, chopped

1 tsp. miso

1/3 C olive oil

2 tsp. water, give or take as needed


Put the cashews, nutritional yeast, Worcestershire sauce, apple cider vinegar, garlic, and miso in the bowl of a food processor. Blend until the cashews are ground up and you have a uniform paste. With the motor running, add the olive oil in a thin, steady stream until the mixture is creamy. It will be fairly thick, so add water until the dressing has loosened up a bit.

The Best Blue Cheese Dressing

The Best Blue Cheese Dressing

The Best Blue Cheese Dressing

3/4 tsp. minced garlic

1/4 tsp. dry mustard

1/3 tsp. onion salt

1/3 tsp. freshly ground black pepper

1/8 tsp. freshly ground white pepper

2 T. red wine vinegar

1/2 tsp. Worcestershire sauce

A few drops of Tabasco

1/2 C. sour cream

1 1/2 C. mayonnaise

1/4 C. buttermilk

1/4 pound blue cheese


Whisk together in a large bowl the garlic, mustard, peppers, and onion salt. Whisk in the vinegar, Worcestershire, and Tabasco. Whisk in the sour cream, mayonnaise, and buttermilk. Fold in the blue cheese.  It’s best chilled overnight, but I have eaten it immediately, and it’s still good. It keeps for a couple of weeks in the fridge.

New Mex Migas

New Mex Migas

New Mex Migas

2 T. unsalted butter

â…“ C. chopped green onion (green parts only)

¼ C. chopped roasted and peeled green chile (or more to taste)

8 large eggs (beaten until smooth)

salt (to taste)

4 ounce tortilla chips (about 2 3/4 C.) preferably stale

2 C. grated cotija cheese (divided)

½ C. cooked black beans

¼ C. Mexican sour cream (plus more to taste)

1¼ C. coarsely chopped cilantro


Melt the butter over medium heat in a large nonstick skillet. Add the green onions and cook until they wilt slightly, 1 to 2 minutes. Add the green chile and cook until fragrant, another minute or two. Add the beaten eggs and let sit until they just begin to set, about 1 minute. Salt lightly, sprinkle the tortilla chips over top of the eggs and stir, folding the unset egg over the chips. Cook quickly (to keep the chips from softening), stirring until the eggs are almost set, then stir in half of the cotija cheese. When the eggs are set to your taste, an additional 2 to 3 minutes, divide the mixture evenly among 4 to 6 heated plates, or serve it family style on a large platter. Spoon over the black beans, then the remaining cheese, sour cream and the cilantro. Serve immediately.

Spicy Sautéed Shrimp

Spicy Sautéed Shrimp

Spicy Sautéed Shrimp

3 T. unsalted butter

1 T. extra-virgin olive oil

2 clove garlic (peeled and minced)

1 pound large shrimp (16–20 per pound)

3 T. hot sauce

2 T. apple cider vinegar

minced parsley and/or chives (as garnish)


Heat butter in a large cast iron skillet or non stick skillet set over medium high heat. Once it melts and begins to foam add oil, and then the garlic. Sauté until the garlic begins to color, about 1 minute. Add shrimp to the skillet and continue to sauté 3 to 5 minutes, or until shrimp just begins to turn pink. Turn off the heat and stir in hot sauce and cider vinegar. Gently stir the shrimp until well coated. Let rest in the warm skillet about 3 minutes, then serve warm garnished with parsley and/or chives.

Chipotle Lime Braised Clams

Chipotle Lime Braised Clams

Chipotle Lime Braised Clams

1 T. olive oil

1/2 yellow onion, peeled and minced

6 garlic cloves, peeled and minced

3/4 C. white wine

1 T. tomato paste

2 chipotles in adobo, minced

1/2 pint cherry tomatoes

2 T. unsalted butter

2 ears corn, kernels removed

Kosher salt

2 limes, juiced

1 pound 1 pound little neck clams, scrubbed

1 T. minced cilantro


To a medium pot or braising pan, set over medium heat, add the olive oil. When the olive oil is warm, add the onion and cook until softened, about 5 minutes. Next add the garlic cloves and cook for an additional 2 minutes. Turn the heat to high and then pour in the white wine, scraping the bottom of the pan with a spatula. Mix in the tomato paste, chipotles in adobo and butter.  Bring to a gentle simmer and cook for about 5 minutes, just until the flavors are married together; give it a taste and adjust the salt to your liking. I added about 1 tsp. of salt. Add the corn and arrange the little neck clams in one even layer. If some overlap that’s ok. Bring to a gentle simmer and cover the pan; cook the clams for about 5 to 7 minutes. This will depend on the size of the clams.  Some of the clams I had were stubborn that refused to open. I knew they weren’t bad so I removed the clams that were totally open (so they wouldn’t overcook) and covered the pot until all of them opened. The clams I had were sort of large so I think this was the problem. Discard any clams that refuse to open (one of the clams in my batch were discarded). Squeeze the lime juice over the clams and serve immediately; serve alongside the buttery garlic bread.

Crockpot Hrino Psito (Slow Roasted Pork)

Crockpot Hrino Psito (Slow Roasted Pork)

Crockpot Hrino Psito (Slow Roasted Pork)

3-4 pound boneless pork butt or shoulder

10 whole garlic cloves

3 bay leaves

1 tsp. sage

1 tsp. rosemary

1 1/2 tsp. kosher salt

1/2 tsp. pepper

1 T. Worcestershire sauce

1 T. brown sugar

1/4 C. dijon mustard

1/4 C. honey

1/2 C. dried cranberries

1 C. beer


Use a 6 quart slow cooker.  Put the meat into your crockpot, and pour on dry spices, and brown sugar. Flip the meat over a few times in the stoneware so the spices are kind of stuck to all sides. Peel garlic cloves and add whole.   Add Worcestershire sauce, mustard, honey, and cranberries. Top with bay leaves. Pour in the beer. Cover and cook on low for 8-10 hours, or until meat shreds easily with a fork.  I cooked on low for 12 hours, and while the meat was tender and flavorful, it did burn a bit on the top and sides.  Serve over rice or pasta, or on your favorite sandwich rolls.

CrockPot Layered Dinner–Steak, Potatoes, Corn on the Cob

CrockPot Layered Dinner–Steak, Potatoes, Corn on the Cob

CrockPot Layered Dinner–Steak, Potatoes, Corn on the Cob

This is what I used. You can use whatever meat or vegetables you have in the house. The trick is to not use too much liquid when cooking the meat, so the potatoes and the corn (or whatever you’re using) isn’t floating in juice.


1 1/1 lb. rib eye steak

1 T. of your favorite seasoning rub

1 T. dried onion flakes (a tiny fresh onion, diced, would be fine)

2 T. Worcestershire sauce

1/4 C. tequila (or broth, apple juice, etc.)


2-4 potatoes

2-4 ears of fresh corn

aluminum foil


In my 6 quart Smart Pot, I used 2 whole brown potatoes, and 4 ears of corn. I could have fit another potato in, probably.  Put meat in the bottom of the crockpot. Rub with seasoning and onion, and flip over to get the other side. Add tequila and Worcestershire sauce.  Wash potatoes and cover with foil. Add to the pot. Shuck the corn, and wrap each ear in foil. Add to the crockpot. It doesn’t seem to matter if the potatoes are closer to the meat, or the corn. The new crockpots heat from the sides as well as from the bottom, so everything will cook through regardless of location. Cover and cook on high for 5-7 hours, or on low for about 8. I cooked our dinner for 6 hours on high. My crockpot was quite full.

Rice Krispies Treats for Two

Rice Krispies Treats for Two

Rice Krispies Treats for Two

1 T. unsalted butter (1/2 oz)

1 C. tightly packed mini marshmallows

2 C. crisp rice cereal, such as Rice Krispies

Pinch fine sea salt


Line a 9-by-5-inch (23-by-13-cm) loaf pan with parchment paper or wax paper. If making the rice krispies treats for two in the microwave, place the butter in a microwave-safe bowl. Microwave on full power in 15-second increments, until the butter melts completely, 30 to 50 seconds. Add the marshmallows and microwave, again in 15-second increments, until the marshmallows melt, 25 to 50 seconds. Immediately stir the butter and marshmallows together very well. If making the rice krispies treats for two on the stovetop, melt the butter in a medium saucepan over low heat. Immediately add the marshmallows and, working quickly, stir until melted and well blended. Remove from the heat. Add the pinch of salt and the cereal all at once to the melted marshmallow and butter goo. Stir, stir, stir until the cereal is completely coated. Press the mixture evenly into the prepared pan using buttered fingertips or a spatula. If you have the patience, let the treats cool slightly. Slice in half and devour. (Just to warn you, these are generous servings. But c’mon, since when did a little Rice Krispies treat ever satisfy your craving?!)

SBD Mexican Breakfast Bake

SBD Mexican Breakfast Bake

SBD Mexican Breakfast Bake


½ pound bulk chorizo sausage

¼ C. diced onions

1 C. diced bell peppers

½ C. sliced white mushrooms

2 T. minced garlic

2 C. packed chopped baby kale

12 eggs

½ C. whole milk

1 C. shredded full-fat cheddar cheese

1 C. shredded Colby Jack cheese

¼ C. chopped fresh cilantro


Preheat the oven to 375ºF. Lightly coat with butter a 9 × 13-inch baking dish and set it aside. Heat the sausage in a large sauté pan over medium-high heat for 6 to 8 minutes, breaking it up with a spatula as it cooks, until it is cooked through. Remove the sausage, reserving the grease in the pan. Add the onions, bell peppers, and mushrooms to the pan and cook for 3 to 4 minutes, until the mushrooms are browned. Add the garlic and cook for 1 minute, until fragrant. Add the kale and stir until wilted. Remove the pan from the heat and set it aside for 5 minutes to cool slightly. Whisk together the eggs, whole milk, and salt and pepper to taste in a large bowl. Add to the bowl the cooled vegetable and sausage mixture, half the cheddar, and half the Colby Jack. Stir to combine. Transfer the mixture to the prepared baking dish. Top with the remaining cheese. Bake for 30 to 40 minutes, until the eggs are set and the cheese is bubbling. Cut into 8 pieces. Serve warm, garnished with cilantro.


8 servings, 331 calories, 28g Fat, 1g Fiber

Poached Quail’s Egg And Applewood Smoked Bacon With Potato-Chive Bruniose

Poached Quail’s Egg And Applewood Smoked Bacon With Potato-Chive Bruniose

Poached Quail’s Egg And Applewood Smoked Bacon With Potato-Chive Bruniose


8 quail eggs

2 slices Applewood Smoked Bacon

1/2 cup (cut bruniose) potato

2 Tablespoons chives, snipped bruniose*

2 T. Beurre Monté or Butter*


Cook the bacon until crisp. Drain on a paper towel, the finely chop. Set aside. Cut the potato, bruniose style. Blanch in boiling water for about 60 seconds. Drain. In a small skillet over medium heat, heat 1 Tablespoon of Beurre Monté or butter and cook the potatoes until crisp and browned. Remove from pan; Stir in 3/4 of the chives. Set aside or hold in a warm oven. Using a serrated knife cut through the top part (the fat end — about 1/4 the way down) of each quail egg and place the eggs into a glass bowl. Bring a deep pan with about 4-6 inches of water and 1-2 teaspoons of white vinegar, to a high simmer. Using a whisk, get the water swirling rapidly as you slide the eggs into the water. Do not stir; just let them cook for about 30 seconds. They should float up to the surface. When they do, test by picking up a few with a slotted spoon and by pushing against the yolk with your finger. It should be soft. If eggs are done either serve immediately or transfer to a strainer which is set into bowl of the ice water to stop the cooking. Using your fingers or scissors, cut off the tail end and place eggs on a towel lined plate. At this point they can be refrigerated until ready to use. Throw the potatoes back into the pan to re-warm (if necessary) and then wipe out the skillet and put about 1 Tablespoon of Beurre Monté or butter in the pan and re-warm the eggs by gently tossing, about 30-60 seconds. To plate: Divide the potato amongst eight spoons. Divide 3/4 of the bacon amongst the eight spoons and top with one poached egg. Top with remaining 1/4 bacon and the remaining chives. Serve immediately.


Slow Cooker Garlic Herb Mushrooms

Slow Cooker Garlic Herb Mushrooms

Slow Cooker Garlic Herb Mushrooms

1 1/2 pounds mushrooms

2 T. unsalted butter

4 cloves garlic, chopped

1/2 tsp. dried oregano

1/4 tsp. dried thyme (or 1 tsp. fresh thyme, chopped)

1/2 C. vegetable broth (or chicken broth)

salt and pepper to taste

1/4 C. half and half

1/2 C. parmigiano reggiano (parmesan cheese), grated

2 T. parsley, chopped


Toss the mushrooms with the butter, garlic, oregano, thyme, broth, salt and pepper and cook in a slow cooker on low for 2-3 hours or on high for 1-2 hours before mixing in the half and half, parmesan and parsley. Option: Add 1 T. white miso paste to the sauce along with the parmesan.

Butternut Squash Tart with Chile-Honey Drizzle

Butternut Squash Tart with Chile-Honey Drizzle

Butternut Squash Tart with Chile-Honey Drizzle


6 tablespoons unsalted butter, cut into 1/2-inch pieces, at room temperature, plus more for the pan

1 1/4 cups all-purpose flour

1/2 teaspoon sugar

Kosher salt

1 large egg, lightly beaten


1 butternut squash (1 3/4 pounds), peeled and sliced into 1/4-inch thick half-moons

2 tablespoons unsalted butter, melted

2 teaspoons finely chopped fresh sage

3 tablespoons honey

Kosher salt

1/4 cup grated Parmesan

1/4 cup plain breadcrumbs

1 1/2 cups gruyere cheese, cut into small cubes

2 teaspoons white wine vinegar

1/2 teaspoon crushed red pepper


Special equipment: a 9-inch springform pan. For the crust: Butter a 9-inch springform pan. Put the flour, sugar and 1/2 teaspoon salt in a food processor and pulse to combine. Add the butter and process until thoroughly combined with no visible chunks of butter. Add the egg and pulse until the dough just starts to clump. Transfer the dough to the springform pan and press it evenly on the bottom and 1 inch up the sides. Refrigerate for 30 minutes. For the filling: Adjust an oven rack in the middle position and preheat the oven to 375 degrees F. Toss the butternut squash slices with the melted butter, sage, 1 tablespoon honey and 1 teaspoon salt in a large bowl. Sprinkle the Parmesan and breadcrumbs evenly on the bottom of the crust, then scatter over 1/2 cup of the gruyere cubes. Lay out a single layer of butternut squash slices, breaking off pieces of squash to fill any gaps. Scatter another 1/2 cup of gruyere over the squash. Top with the rest of the butternut squash slices and then the remaining 1/2 cup gruyere. Put the springform pan on a baking sheet and bake, until the squash can be pierced easily with a knife, about 1 hour and 40 minutes to 1 hour 50 minutes. (If the crust gets too dark, cover loosely with foil.) Meanwhile, combine the vinegar, crushed red pepper and the remaining 2 tablespoons honey in a microwave-safe bowl large enough to contain it (the honey may boil over in the microwave). Microwave for 30 seconds to heat up the honey and infuse the chile flavor. Reserve. Drizzle the tart all over with the chile-infused honey and serve immediately.

Instant Pot Pork Chops with Mushroom Gravy

Instant Pot Pork Chops with Mushroom Gravy

Instant Pot Pork Chops with Mushroom Gravy

4 Pork loin center chops 2lbs total. Look for bone-in well-marbled about 1.25 inches thick

2 T. butter

Spice Rub

1/2 tsp. smoked paprika

1/2 tsp. onion powder

1/2 tsp. garlic powder

3/4 tsp. black pepper

½ tsp. oregano

3/4 tsp. salt

Gravy

4 ounces baby bella mushrooms sliced

1 T. butter

1 yellow onion medium sized, sliced

1 T. garlic minced

½ tsp. dried thyme

½ tsp. dried rosemary

1 C. chicken stock

1 T. soy sauce

1 T. Worcestershire sauce

2 T. all-purpose flour

½ C. heavy cream


Mix Spice Rub: Combine all the spice rub ingredients in a small bowl, and mix together, then set aside.

Prep Pork Chops: Take your 1.25 inch thick pork chops and use a meat tenderizer and pound them a little to tenderize. Take a paper towel, and pat the pork chops dry. Season both sides of the pork chop with the spice rub.


Brown Pork Chops in Instant Pot: Using a 6 qt or 8 qt Instant Pot, press “Saute” and let the Instant Pot heat up. It will take 5-8 minutes, and will read “Hot” Add the 2 T. butter to the Instant Pot. And use a wooden spoon to spread it around. Make sure to coat the whole bottom of the pot with butter. Place 2 of the seasoned pork chops into the hot pot, and let them cook for 2-3 minutes, to brown. Do not move them, let that nice brown crust form. Then flip and repeat with the other side. Remove from the pot, and repeat the steps to brown the other 2 chops.


Start Gravy: Once chops are removed from the pot, add the mushrooms in. Sauté mushrooms for 6-8 minutes, until the moisture is gone, and the edges are crispy and slightly browned. Add in one T. of butter, then add in sliced yellow onions, minced garlic, thyme, and rosemary. And then sauté everything for 2-3 minutes until onions are fragrant and tender. Deglaze the pan by pouring chicken stock into the pan, and using your wooden spoon to scrape any browned bits off the bottom of the pot and mix it all together. This is very important so you do not receive a “Burn” notice from your pot. But also the brown bits add so much flavor to your sauce. Add Soy Sauce and Worcestershire Sauce, and stir.


Pressure Cook: Add your browned pork chops back into the Instant Pot, pressing them down into the cooking liquid. Place the lid onto the Instant Pot, and lock the lid into place. Turn the valve to the “sealing” position. Pressure Cook for 1 minute on high. (yep you read that right) After 1 minute cook time is up, let the pressure naturally release for 10-15 minutes. After the 10-15 minutes, turn the valve to release pressure, and carefully open the lid (away from you). Remove pork chops from the pot, and set aside.

Turn pot back on to “Saute” and bring the mushroom gravy in the pot to a simmer. While the Instant Pot is naturally releasing pressure, whisk flour and cold heavy cream together. Remove chops from the pot. Then stir the heavy cream mixture into the mushroom sauce in the Instant Pot Taste the gravy, and season with salt and pepper to your preferred taste. Cook down if needed to achieve desired thickness.

Serve pork chops with the mushroom gravy spooned over top.

Acorn Squash with Sun-Dried Tomato Polenta

Acorn Squash with Sun-Dried Tomato Polenta

Acorn Squash with Sun-Dried Tomato Polenta


2 small acorn squash (1 to 1 1/2 lbs. each)

About 2 oz. or 15 sun-dried tomatoes

1/4 cup pine nuts

3 to 4 cloves garlic, minced or pressed

1/2 cup grated Parmesan cheese

1/4 cup plus 2 Tbs. extra virgin olive oil

21/2 cups vegetable stock

1/2 heaping tsp. salt

1/2 cup coarse-ground polenta

2 to 3 Tbs. shredded Parmesan

2 Tbs. chopped parsley


Preheat oven to 350F. Line sheet pan with parchment paper, and spray liberally with nonstick vegetable oil. Cut squashes in half crosswise, and scoop out seeds and a little extra flesh. Cook, face down on parchment paper, about 45 minutes, or until sharp knife easily penetrates outside skin and rim of flesh is lightly browned. Meanwhile, in small bowl, soak tomatoes in very hot water to cover for 15 to 20 minutes. When soft, coarsely chop and set aside. On small sheet pan or in baking dish, toast pine nuts in oven for about 10 minutes, or until lightly browned. Remove and set aside. To make pesto, in food processor, add pine nuts, garlic, sun-dried tomatoes and grated Parmesan cheese. Start machine and, as blade is turning, pour olive oil through shoot. Blend into smooth paste. Set aside in small bowl. (Use same bowl, rinsed and dried, used for soaking tomatoes). Bring stock to a boil in medium to heavy saucepan. Add salt, keeping water boiling at medium-high heat. Add polenta gradually, either slowly from measuring cup or letting a fistful run through nearly closed fingers, constantly stirring with long-handled whisk. When all polenta is added, reduce heat to medium-low, and cook gently. Continue stirring, switching to long-handled wooden spoon. To avoid burning or sticking, use heat-diffusing device. Stir continuously and thoroughly, bringing mixture up from bottom and loosening from sides. (Make sure sides are scooped clean.) Continue to stir for about 20 minutes, or until polenta is creamy and pulls away from sides of pan. Turn off heat, and stir in sun-dried tomato pesto. Remove squash from oven. Spoon tomato mixture into squash “bowls.” Top with shredded Parmesan, dust with paprika and garnish with parsley.

Note: For a faster dish, substitute store-bought sun-dried tomato pesto, which won’t be as fresh or as satisfying. However, making your own is easy. You can prepare the whole dish ahead, minus garnishes. Refrigerate, reheat until hot and garnish with shredded cheese, paprika and parsley. If squashes are particularly misshapen, trim ridged edges so they will stand up straight without rolling over.

Coconut Curry Ramen

Coconut Curry Ramen

Coconut Curry Ramen

1 package ramen noodles

11/2 C. chicken or vegetable stock

1/2 C. coconut milk or cream

1-1 1/2 tsp. red or green Thai curry paste

Optional: 1/2 C. shredded or cubed chicken


Pour the chicken stock and coconut milk into a medium saucepan and bring it to a boil over high heat. Add the curry paste and stir to dissolve and combine. Add the ramen noodles and cook until al dente (about 5 minutes). Pour the ramen noodles and liquid into a large bowl. Top with the chicken and enjoy.

Cheesy Pierogi Casserole

Cheesy Pierogi Casserole

Cheesy Pierogi Casserole


1 package (16 oz) frozen potato and cheese pierogies

7 oz kielbasa sausage, sliced (chicken sausage also tastes yummy)

2 cup shredded Cheddar cheese, divided

4 oz cream cheese, soften

1/2 cup sour cream

1/3 cup chicken broth

1/8 teaspoon black pepper

1/4 teaspoon garlic salt

optional topping: fresh parsley


Heat oven to 375°F Prepare a 2-quart baking dish with cooking spray. Place frozen pierogies evenly in casserole. Top with sausage. In medium bowl, mix together 1 cup of shredded cheese, cream cheese, sour cream, pepper and garlic salt. Spread cream cheese mixture evenly over sausage and pierogies and pour in broth. Cover and bake for bake 30-35 minutes. Uncover, and top with remaining cheese. Continue baking for 3 to 5 minutes, until cheese is melted.

Instant Pot Brisket

Instant Pot Brisket

Instant Pot Brisket

4 pounds beef brisket, trimmed

2 T. olive oil

4 garlic cloves, finely chopped

3/4 C. beef broth


2 T. brown sugar

2 T. paprika

1 T. chili powder

2 teaspoons garlic powder

2 teaspoons onion powder

2 teaspoons salt

1/2 teaspoon ground black pepper

1 teaspoon ground mustard

1/2 teaspoon ground cumin


1 1/2 C. ketchup

1/2 C. apple cider vinegar

3/4 C. brown sugar

2 teaspoons onion powder

2 teaspoons ground mustard

1 T. Worcestershire sauce

1 teaspoon liquid smoke

3 T. molasses

1/4 teaspoon ground black pepper

1/4 teaspoon cayenne pepper (or to taste)


In a small bowl, mix all the rub ingredients. Season the brisket all over with the rub. If you have time, let it sit in the refrigerator wrapped in plastic for up to 24 hours. In a medium bowl, mix all the BBQ sauce ingredients. Turn the instant pot/pressure cooker to “sauté”. Add the oil and allow it to get hot. Add the brisket to the pot and sear both sides for about 4-5 minutes or until golden brown. Remove the brisket from the pot and place it in a bowl or plate. Add the garlic and cook for about 1 minute, making sure the garlic doesn’t burn. Press the keep warm/cancel button on the instant pot. Add the broth and with a wooden spoon or spatula scrape the bottom of the pot to remove some of the bits stuck at the bottom of the pot. Add the BBQ sauce. Return the brisket to the pot with any collected juices. Toss well making sure the meat is well coated. Close the lid. Set the instant pot to meat/stew and set the timer to 75 minutes. *See notes Once the cooking cycle is complete, allow the pressure to release naturally for about 10 minutes. Then do a quick release for the remaining pressure. Transfer the brisket to a cutting board. Cover with aluminum foil and let the meat rest for about 10 -15 minutes. Turn the instant pot/pressure cooker to “sauté” and cook/reduce the sauce for 5 to 8 minutes, stirring a few times. Press the warm/cancel button. Slice the beef brisket against the grain and serve with the BBQ sauce. You can also returned the sliced brisket to the instant pot making sure the slices are covered with the sauce (to prevent the meat from drying). Keep it warm until ready to serve.


If your IP doesn’t have a meat/stew option just chose “Pressure Cook” and set the timer.


2 to 3 pounds brisket: Cook on high pressure for 55 to 60 minutes.

4 to 5 pounds brisket: Cook on high pressure for 75 minutes.

6 to 7 pounds brisket: Cook on high pressure for 90 minutes.


If your brisket is too big, cut it in half so it fits comfortably into the instant pot.


I cut my brisket into 2 pieces and seared it one piece at a time not to over crowd the pot.


If your pressure cooker gets too hot after searing the meat, you can press the warm/cancel button before adding the garlic. The garlic will still get aromatic with the remaining heat.

Fried Bacon & Cabbage

Fried Bacon & Cabbage

Fried Bacon & Cabbage


1/2 lb bacon 1/2 package, chopped

1/2 yellow onion diced

1 clove garlic minced

1 head green cabbage chopped

1 teaspoons sea salt

1/2 tsp black pepper

1/2 tsp paprika

1/4 teaspoon red pepper flakes optional

1 bunch of flat leaf parsley chopped for garnish


Sauté chopped bacon over medium heat until crisp. Remove bacon to a paper towel-lined plate, reserving fat drippings in sauté pan for cooking onions and cabbage. Sauté onion over medium heat until translucent (approximately 5 minutes). Add minced garlic and sauté one minute longer. Add cabbage, salt, pepper, and paprika to onion/garlic mixture and sauté over medium Heat until the cabbage is just beginning to get tender. Return bacon crumbles and red pepper flakes and sauté for one minute longer. Garnish with a light sprinkle of chopped parsley. Serve immediately.

Instant Pot Ramekin Eggs

Instant Pot Ramekin Eggs

Instant Pot Ramekin Eggs

1 T. ghee, plus more for greasing

2 C. mushrooms, chopped (or other veggies of your choosing)

salt

1 T. chives, chopped

3 eggs

3 T. heavy cream


Using the sauté setting of a multicooker, melt ghee, then sauté mushrooms together, until tender, caramelized, and reduced to 3/4 cup. Season with salt to taste. Meanwhile, grease the ramekins. When mushrooms are cooked, divide into ramekins. Top each with a teaspoon of chives, a freshly cracked egg, and a T. of cream.   The multicooker pots are nonstick, and so you shouldn’t need to wash them. Simply add 2 C. of water to the bottom of the Instant Pot.  Add the trivet, and place the egg-filled ramekins on top. Secure and lock the lid of the multicooker. Pressure cook on low for 1-2 minutes. Quick release and immediately remove the top when the pressure has normalized. Carefully remove the ramekins. They’ll be hot, so use heatproof oven mitts or mason jar lifters (if you have them).

Crockpot Guiness Glazed Meatballs

Crockpot Guiness Glazed Meatballs

Crockpot Guiness Glazed Meatballs


Meatballs

2 lbs. extra lean ground beef

¾ cups seasoned dried bread crumbs

½ cup minced onion

⅓ cup Guinness beer

4 garlic cloves minced

2 eggs

1 teaspoon paprika

½ teaspoon salt

½ teaspoon pepper

¼ teaspoon cayenne pepper

Sauce

½ tablespoon oil

½ cup diced onion

3 cloves garlic minced

1 ½ cups Guinness beer

1 6 oz. can tomato paste

½ cup barbeque sauce

½ cup brown sugar

1 tablespoon worcestershire sauce

½ tablespoon whole grain dijon mustard

1 teaspoon thyme

chopped parsley for garnish


Preheat oven to 375℉. Line a large sheet pan with parchment paper. In a large bowl, mix all meatball ingredients (ground beef through cayenne pepper) with hands or a large spoon until thoroughly combined. Form mixture into 1 ½” balls and place on sheet pan and cook for 15 minutes. Place in crockpot. While meatballs are cooking, prepare sauce. In a medium saucepan, heat oil and sauté ½ cup diced onion, and 3 garlic cloves over medium high heat for 5 minutes or until onion is softened.

Whisk in 1 ½ cups Guinness beer, tomato paste, barbeque sauce, brown sugar, Worcestershire sauce, mustard, and thyme. Bring to a boil and then turn heat down to low and simmer for 10 minutes. Pour sauce over meatballs in crockpot. Set crockpot to low and cook for 2-3 hours. Garnish with chopped parsley and serve over mashed potatoes.

Sausage & Rice Casserole

Sausage & Rice Casserole

Sausage & Rice Casserole


Using a stove-to-oven pan (enameled cast iron is my choice), crumble and brown 1 pound bulk sausage.  If excessive fat is produced, pour some off.


Add:

1 green pepper, chopped

2 scallions, chopped

2-3 celery stalks, chopped

2 cups chicken broth (homemade or commercial)

1 cup uncooked long-grain rice

1 Tablespoon Worcestershire sauce

1/2 teaspoon salt

(if using unseasoned sausage), black pepper


Mix, cover, and cook in a 300° oven for one hour.

Instant Pot Popcorn

Instant Pot Popcorn

Instant Pot Popcorn


2 T. butter

3 T. coconut oil

1/2 C. popcorn kernels

Salt


Set Instant Pot to sauté, more (or high) setting.  Add coconut oil and butter and allow to melt completely and start to sizzle. (Important Step!) Add popcorn kernels and stir so all kernels are coated with oil.  Place glass lid on top and hold, popcorn will begin popping in about 2-3 minutes, turn off when 2/3 of kernels have popped and they will continue to pop but not burn. Carefully remove lid. Pour out of pot when done so they don’t continue to cook. Salt and you’re done!

Caraway Spiced Carrot Salad

Caraway Spiced Carrot Salad

Caraway Spiced Carrot Salad


2 pounds carrots, peeled and cut diagonally

2 garlic cloves, minced

1 tsp freshly ground caraway seeds

3 tbsp olive oil

3 tbsp chopped flat leaf parsley

2 tsp fresh lemon juice


Steam the carrots until tender but still retain their shape.   When the carrots are cooked, carefully remove the steaming basket and set aside. Meanwhile,  heat 1 tbsp of olive oil  in a small sauté pan. Add the garlic, ground caraway and parsley. Cook for one minutes stirring constantly until fragrant. Remove the pan from the heat. Add the hot carrots to the herb mixture and toss. Add the remaining 2 tbsp of olive oil and lemon juice and toss again. Transfer to a plate and leave to infuse for at least an hour. Enjoy the salad at room temperature.

Instant Pot Mexican Lentil Soup

Instant Pot Mexican Lentil Soup

Instant Pot Mexican Lentil Soup

1 T. olive oil

2 onion peeled and finely chopped

2 peppers descended and finely chopped

3 carrots peeled and finely cubed

1 bay leaf optional

1 tsp. garlic puree

1 1/2 tsp. smoked paprika

1 1/2 tsp. ground cumin

Chili to taste

1.5 C. green lentils picked thru and rinsed

3 cup vegetable stock

2 X (14 oz) finely chopped tomatoes

Salt

6 T. chopped coriander leaves (cilantro)


Switch the Instant Pot on to the sauté setting. Add the oil to the Instant Pot insert and sauté the onions, peppers, carrots and bay leaf (if using) for 4-5 mins until the onion is soft. Switch off the heat and stir in the garlic, paprika, cumin and chilli. Mix in the lentils, vegetable stock, tomatoes, and salt. Cover your Instant Pot, set the vent to ‘sealing,’ select the manual or pressure cook button (dependent upon IP model), select high pressure and set the timer to 7 mins. When done allow the pot to NPR for 15 mins before releasing the rest of the steam using quick release. Stir in the coriander (cilantro), adjust seasoning and serve.  Serve as soup, or drain with slotted spoon and serve in tortillas.

Cheese Tortellini Antipasti Skewers

Cheese Tortellini Antipasti Skewers

Cheese Tortellini Antipasti Skewers


1 cup Cherry Tomatoes

1 Pack Salami Slices

1 cup Mozzarella Bites

½ cup Green Olives

½ cup Kalamata Olives

2 cup Cooked Cheese Tortellini


⅓ cup Pesto (thinned to dip consistency)

12 6” Wooden Skewers


Thread all ingredients except pesto on skewers.  Serve drizzled with pesto or with pesto for dipping.

Instant Pot Creamy Shells and Beef

Instant Pot Creamy Shells and Beef

Instant Pot Creamy Shells and Beef

1 T. olive oil

1 small yellow onion, chopped

1-pound lean ground beef

1 teaspoon sea salt

1/2 teaspoon ground black pepper

1 T. Italian seasoning

1 teaspoon garlic powder

1 1-pound box medium shell pasta

1 24-ounce jar marinara sauce

3 C. water

1 1/2 C. heavy cream

1 C. shredded Parmesan cheese


Turn Instant Pot to sauté setting and wait for the display to turn to HOT. Add olive oil and onions and cook until slightly soft. Add ground beef, break up with spatula, and cook until no longer pink, stirring frequently to make sure it doesn’t stick to pot Season with sea salt, pepper, Italian seasoning and garlic powder, and  hit CANCEL. Add shells over ground beef, then add the marinara sauce and water. Do not stir but press lightly with spoon to ensure pasta is completely covered with sauce and water. Place lid on Instant Pot, close, and make sure vent is set to SEALING position. Hit PRESSURE COOK for 5 minutes, or half the cooking time on the box of pasta. When pressure cooking is done, do a quick release, then remove lid and hit CANCEL to turn cooker off. Stir in heavy cream and Parmesan cheese and serve.

Herby Cheesy Roasted Brussels Sprouts

Herby Cheesy Roasted Brussels Sprouts

Herby Cheesy Roasted Brussels Sprouts


About 4 cups of Brussels sprouts, cut in half

Olive oil

Salt

Chimichurri

½ cup grated Parmesan cheese


Preheat your oven to 425ºF. Toss the Brussels with a drizzle of oil, a pinch of salt and about 2-3 T.  Chimichurri. Then toss the sprouts with the cheese. Spread the Brussels sprouts on a baking sheet lined with parchment paper, making sure to keep them in one even layer.  Roast the Brussels sprouts for 25 to 30 minutes til the cheese and sprouts are crispy.

Instant Pot Red Beans and Rice

Instant Pot Red Beans and Rice

Instant Pot Red Beans and Rice

1 medium onion diced

1 bell pepper diced

3 celery stalks diced

3 cloves garlic minced

1 pound dry red kidney beans

1 tsp. salt or more to taste

1/2 tsp. black pepper

1/4 tsp. white pepper (optional)

1 tsp. hot sauce (I used Texas Pete.)

1 tsp. fresh thyme or ½ tsp. dried thyme

2 leaves bay

7 C. water

1 pound chicken andouille sausage cut into thin slices

10 C. cooked rice


Add all ingredients, except for sausage and rice to the Instant Pot. Place the lid on, lock it, and set to manual high pressure for 28 minutes. At the end of the 28 minutes, use the quick release method (release the valve). When the Instant Pot is fully depressurized the pin will fall, and you can remove the lid. Run the lid under cold water and set aside. This will help the Instant Pot to re-seal. Add the chicken andouille sausage, place the lid on and lock it. Use the manual setting at 15 minutes high pressure and allow the Instant Pot to release naturally this time (no using the pressure release valve, just let it sit until the pin drops). Mine took about 26 minutes to naturally release, FYI. You can let the beans mixture sit with the lid of for a few minutes to thicken the liquid. Serve the bean mixture over a C. of cooked rice.

Braided Cheddar Loaf

Braided Cheddar Loaf

Braided Cheddar Loaf


3/4 cup (6 fl. oz./180 ml) plus 2 Tbs. warm milk (112°F/44°C)

1 package (2 1/4 tsp.) active dry yeast

2 Tbs. sugar

5 Tbs. (2 1/2 oz./75 g) unsalted butter, melted and cooled slightly

1 egg, at room temperature

3 cups (12 3/4 oz./360 g) bread flour, plus more for dusting

3 tsp. kosher salt

1 tsp. freshly ground pepper

Canola oil for greasing

1 1/2 cups (6 oz./180 g) grated sharp cheddar cheese

1/2 cup (2 oz./60 g) grated Parmesan cheese

Fresh herb leaves, such as thyme, oregano or basil, for garnish


In the bowl of an electric mixer, whisk together the warm milk, yeast and sugar. Let stand until foamy, about 10 minutes. Fit the mixer with the flat beater and add the melted butter, egg, 1 cup (4 1/4 oz./120 g) of the flour, the salt and pepper. Beat on low speed just until combined, about 30 seconds. Stop the mixer and scrape down the sides of the bowl, then beat on medium speed for 30 seconds more. Switch to the dough hook, add the remaining flour and beat on medium speed until the dough comes together and then becomes elastic and pulls away from the sides of the bowl, about 7 minutes. Lightly grease a large bowl with canola oil. Transfer the dough to the prepared bowl and turn to coat with the oil. Cover the bowl with a kitchen towel and let stand in a warm spot until doubled in size, about 2 hours. Lightly grease a 9-by-5-inch (23-by-13-cm) loaf pan with canola oil. Turn the dough out onto a lightly floured work surface and gently punch it down to release some of the air. Roll out the dough into a 15-by-9-inch (38-by-23-cm) rectangle, with a long side facing you. Sprinkle the dough evenly with the cheddar and Parmesan, leaving a 1/2-inch (12-mm) border at the top. Tightly roll the dough away from you into a log and pinch the seam to seal. Place the log seam side down; using a serrated knife, cut the dough in half lengthwise. Cross one half over the other to form an X shape, then cross the ends and tuck them underneath, keeping the cut sides up as much as possible. Some cheese will spill out but that’s okay. Transfer the loaf to the prepared pan and sprinkle the top with any cheese that had spilled out. Cover with a kitchen towel and let stand in a warm spot until the dough has risen just over the edges of the pan, 30 to 45 minutes. Meanwhile, preheat an oven to 350°F (180°C). Remove the towel and place the loaf pan on a baking sheet. Bake until the top of the bread is deep golden brown, the cheese is bubbling and the loaf sounds hollow when tapped, 45 to 55 minutes.  Transfer the loaf pan to a wire rack and let cool for 15 minutes, then turn the bread out onto the rack and garnish with herbs. Cut into slices and serve warm or at room temperature. Serves 6 to 8.

Make-Ahead Freezer Sausage French Toast Roll-Ups

Make-Ahead Freezer Sausage French Toast Roll-Ups

Make-Ahead Freezer Sausage French Toast Roll-Ups

10 slices white sandwich bread, crusts removed

10 fully cooked breakfast sausage links

3 large eggs

½ C. milk

3 T. sugar

1 tsp. ground cinnamon

1 tsp. vanilla extract

Maple syrup, for serving (optional)

Powdered sugar, for serving (optional)


Use a rolling pin to flatten out bread slices. Place a sausage link on the end of one slice of flattened bread and roll up tightly; repeat with remaining bread and sausage. In a shallow dish, whisk together the eggs, milk, sugar, cinnamon, and vanilla. Dip sausage roll-ups into the egg mixture, making sure to coat all sides. Cook on a preheated griddle or skillet, flipping frequently, until evenly browned on all sides. Serve warm with syrup and powdered sugar if desired.


To freeze: wrap each roll-up tightly in plastic wrap or in a plastic baggie, squeezing out as much air as possible.


To reheat: Remove plastic wrap and roll the sausage roll-up in a paper towel. Microwave for 30 seconds, turn, microwave for an additional 30 seconds or until heated through.

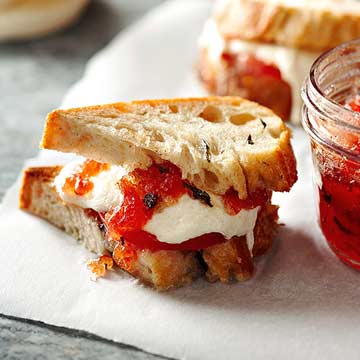
Bruschetta  with Fresh Burrata, Seared Cherry Tomatoes and Roasted Garlic

Bruschetta  with Fresh Burrata, Seared Cherry Tomatoes and Roasted Garlic

Bruschetta  with Fresh Burrata, Seared Cherry Tomatoes and Roasted Garlic


1 head of garlic – large

1½ cup cherry tomatoes

5 slices prosciutto

⅔ cup olive oil

¼ cup kalamata olives

Italian herb seasoning – a small sprinkle

1 tbsp. balsamic vinegar

1 loaf rustic Italian bread

16 oz. burrata – or fresh mozzarella

basil  – for garnish

salt & pepper


Prepare the Bruschetta Topping: Preheat oven to 375 F., and peel a full head of garlic. Remove all of the cloves. Slice off the little ends, and slice the large cloves either in half or in thirds. You want them to be bitesize. Place the garlic in a small bowl with 3 tbsp. of olive oil and a liberal sprinkle of salt and pepper. Gently stir to fully coat garlic in oil. Create a flat “bowl” of foil on a baking sheet or Pyrex that’s large enough that the garlic can lay without overlapping, and all of the oil stays contained. Roast garlic for 20-25 minutes (watching it carefully after 15 minutes and removing when it’s golden brown). While the garlic roasts, place 1½ cups of cherry tomatoes in a pan with 2 tbsp. of olive oil on the hottest burner. Swish them around in the pan to ensure they’re coated in oil. Cover them with a lid. Turn the heat to medium-high, and allow them to cook for 7-8 minutes without stirring them in the pan, or moving them at all. Lift the lid periodically to allow steam to release. Once the tomatoes are done, unstick them from the pan with a spoon and let them sit in the pan until the garlic is ready. Once the garlic is golden brown, remove it from the oven and drain the oil into a bowl to save for later. You’ll use this garlic oil to dip your bread into before toasting. Add roasted garlic and ¼ cup of kalamata olives to the pan with 2 more tbsp. of olive oil, 1 tbsp. of balsamic vinegar and a small sprinkle of Italian herb seasoning. Turn the heat to medium and gently sauté the ingredients for 5 minutes, making sure not to break up the tomatoes. If you intend to serve the bruschetta cold, place the topping in a container and allow it to cool for 45 minutes to an hour in the refrigerator.


Prepare the Prosciutto Roses: Remove a slice of prosciutto as carefully as you can from the package so it does not stick to other pieces. Use kitchen scissors to cut the piece into 4 smaller pieces. Fold each piece in half and roll each piece into a pretty rose. Do the same to another piece so you have 8 roses. Set aside.


Assemble the Bruschetta: Pre-heat your oven or toaster oven to 350 F., and slice bread into ½ inch slices. Add 2 more tbsp. of olive oil to the garlic oil you set aside and pour onto a plate. Dip each bread slice into the garlic oil. Toast breads for 15 to 20 minutes. Lay your garlic toasts down and add a very nice helping of burrata on the right side of each one. Spoon the tomato topping on the right side of the toast, making sure to get a little tomato, garlic and olives on each one. Top with a little prosciutto rose and basil and serve.