Tomatoes Health Information


Uses for Spaghetti Sauce
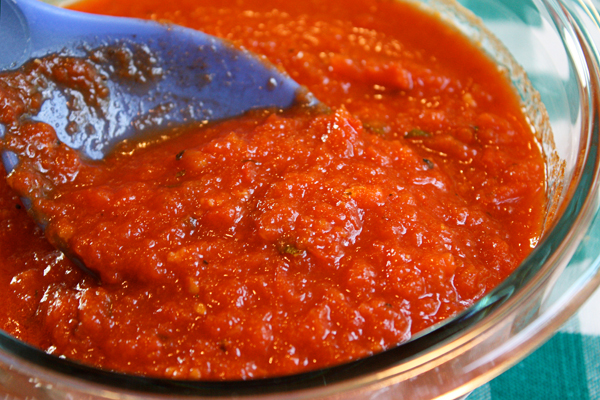 To flavor baked fish and keep it moist, bake fillets or whole fish in spaghetti sauce. Add a few olives, some herbs, and some citrus zest for more flavor.
For a quick sausage or steak sandwich, pan-fry your favorite sausages or thin-sliced top round sandwich steaks in a skillet. Remove the meat, then sauté sliced onions and peppers in the pan. Add your favorite spaghetti sauce and return the meat to the pan. Simmer for 5 minutes then serve on steak rolls.
To mix up a quick marinade for Southwestern-style chicken, combine 1 C. marinara sauce and 1 tsp. pure chile powder such as ancho chile powder.
Or use a blended seasoning such as chili powder. Use to marinate 1 pound chicken parts in the refrigerator for 1 to 3 hours.
For a speedy pizza, spread 3/4 C. spaghetti sauce over a prepared pizza crust (such as Boboli). Or for individual pizzas, use four pita bread rounds. Add 1 C. shredded mozzarella and 1/4 C. grated Parmesan if you like. Add any number of other toppings from anchovies to zucchini. Bake at 450°F until the cheese melts and is lightly browned, about 20 minutes.
To keep beef burritos moist and flavorful, brown 1 pound ground beef along with 1 chopped onion, 1 seeded and chopped red bell pepper, and a few chopped garlic cloves. Stir in 1 C. marinara sauce, 1 tsp. paprika, 1 tsp. dried oregano, 1/2 tsp. ground cumin, and 1/2 tsp. chili powder. Simmer on low for 15 minutes and serve with tortillas, shredded cheese, and salsa.
If you need an instant simmering liquid for clams or mussels, use jarred spaghetti sauce. Doctor up the sauce with saffron, white wine, fresh garlic, and/or chopped fresh herbs.
For a one-dish chicken meal, cook seasoned chicken parts in olive oil in a deep skillet until browned all over. Remove to a plate and keep warm, then add onions and bell peppers to the skillet and sauté until tender. Add mushrooms, thyme, red-pepper flakes, and fennel seeds and cook until the mushrooms begin to give up their liquid, about 5 minutes. Pour in jarred spaghetti sauce and bring to a simmer. Return the chicken to the pan, cover, and simmer until the juices run clear when the chicken is pierced with a fork. Serve over noodles.
To get a jump-start on the sauce for braised meats, use spaghetti sauce as the base. Most sauces include the same ingredients you would be braising with anyway, such as onions, garlic, and tomatoes.
To make gazpacho when you don’t have fresh tomatoes, use spaghetti sauce. Combine the sauce in a food processor along with fresh orange juice, cucumber, bell peppers, scallions, cilantro, and a little hot-pepper sauce. Pulse until the vegetables are just chopped. Thin with a little cold water, if necessary, then refrigerate the soup for 3 hours and serve chilled.


Uses for Soy Sauce
To give steamed rice a savory flavor, add 1 tsp. soy sauce to the cooking water.
For a delicious glaze on roasted pearl onions, mix together equal parts soy sauce and molasses and toss with the onions before roasting.
To make a quick Polynesian sauce, stir together 1/3 C. soy sauce, 1/2 C. pineapple juice, 1 can (5 oz.) crushed pineapple, and 1/2 tsp. hot-pepper sauce. Add to cooked vegetables or meat as a stir-fry sauce or serve over roasted pork, chicken, or fish.
For an Asian-style glaze, mix together 1/4 C. soy sauce or teriyaki sauce, 6 oz. Dr. Pepper, 1 tsp. hot-pepper sauce, 1/2 tsp. ground cloves, and 1/2 tsp. ground ginger. Boil over high heat until reduced in volume by about half and thickened to a syrup, about 10 minutes. Brush over baked ham during the last 20 minutes of cooking.

Uses for Parmesan Cheese
To enrich the breading for pan-fried or baked chicken, add 1/4 to 1/3 C. grated Parmesan cheese to each C. bread crumbs.
For a fun new taste in muffins, add Parmesan cheese. Preheat the oven to 350°F and line 12 muffin C. with paper liners. Sauté 4 shallots and 3 garlic cloves in 1 tsp. olive oil then set aside to cool. Whisk together 2 C. flour, 2 tsp. baking powder, 2 tsp. crumbled dried rosemary (or Italian herb seasoning) and 1/2 tsp. salt in a large bowl. In a small bowl, whisk 1/3 C. olive oil, the cooled shallot mixture, 1 C. milk, 1 egg, and 1/3 C. grated Parmesan cheese. Stir into the dry ingredients until just moistened. Spoon the batter into the muffin C. and sprinkle with another 2 tsp. grated Parmesan. Bake until a toothpick inserted in the center comes out almost clean, about 15 minutes.
For nifty Parmesan cheese baskets, heat a 10-inch nonstick skillet over medium-high heat. Sprinkle about 3 tsp. shredded (not grated) best-quality Parmesan cheese over the bottom of the pan, sprinkling more in the center for stability and less around the edges for a delicate, lacy look. When the Parmesan disk is melted and golden brown on the bottom, 2 to 3 minutes, use a spatula and your fingers to carefully lift it out of the pan. Quickly flip and drape the disk over the bottom of an inverted drinking glass (the golden side of the disk should be on top). Gently press in the sides in a few spots to create folds and the look of an upside-down basket. Let cool until firm, about 5 minutes. When cool, invert and fill with cold chicken salad, tuna salad, green salad, or another cold food. Avoid hot foods as these will melt the cheese again and cause the basket to collapse. The baskets will keep at room temperature for several hours or covered and refrigerated for up to 1 day.
To make Parmesan butter, combine: 1/2 C. (1 stick) softened unsalted butter, 1/4 C. grated Parmesan cheese (preferably Parmigiano-Reggiano), 1/2 tsp. dried oregano, 1/4 tsp. salt, and 1/4 tsp. freshly ground black pepper. Use on crusty bread or melted over broiled chicken, pork, beef, or shrimp.
To add flavor, color, and aroma to a gratin or other casserole, top with a sprinkling of freshly grated Parmesan cheese.
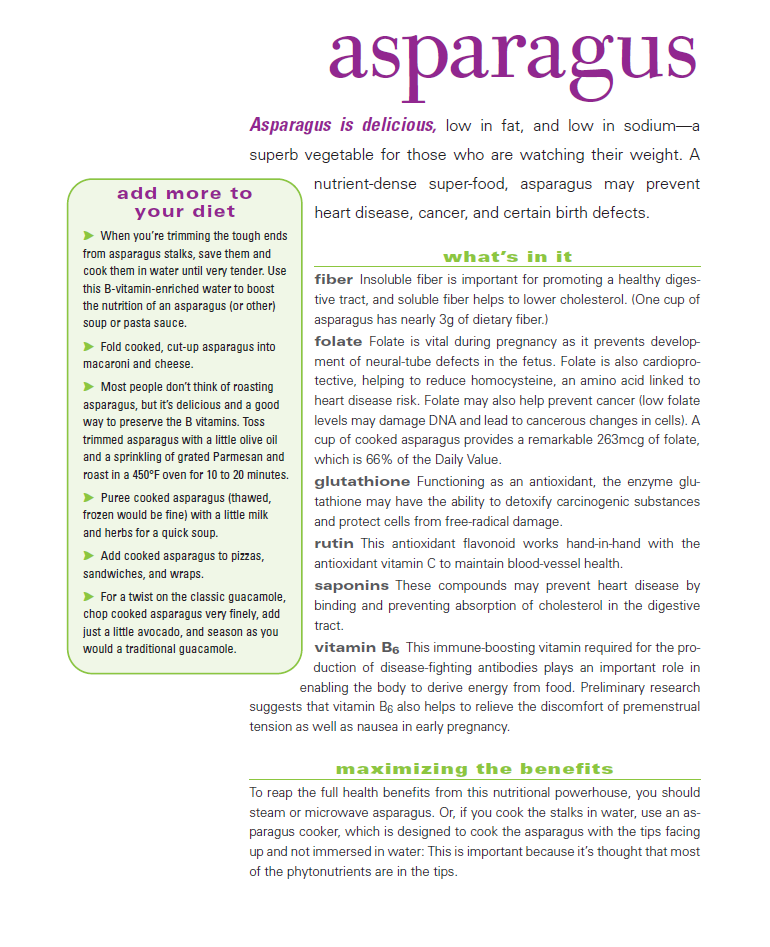
Grilled: Mix asparagus with some olive oil, salt, and pepper, then grill until tender and starting to brown (a grill basket is helpful), 3 to 4 minutes.
In salads: Slice tips and tender stalks very thinly on the diagonal and add, row, to tossed salads.
Steamed: Cook asparagus in a basket or bamboo steamer over boiling water for 3 to 4 minutes. Drizzle with a vinaigrette of lemon juice, olive oil, and chopped fresh mint for an easy side dish.
In a gratin: Lay asparagus stalks in a shallow baking dish. Drizzle with olive oil, sprinkle with salt and pepper, and top with grated parmesan cheese. Bake in a 400[degrees] oven until asparagus is tender and cheese is melted and browning, about 10 minutes. Serve with a squeeze of fresh lemon juice.
Stir-fried: Cut asparagus into bite-size lengths and stir over high heat in a little hot chile oil with minced garlic and ginger until tender-crisp, 3 to 4 minutes. Splash on a touch of rice wine or dry sherry at the end.
Stock Making: Hints and Tips
Poultry, meat, fish, and vegetable stocks all utilize the same techniques, differing only in small details.
The aim of stock making is to produce a rich, flavorful broth; therefore, use only enough water to cover the solid ingredients by 1½ inches.
To make a rich, flavorful stock, you must use a high percentage of meat, rather than bones only. Luckily, however, the cheaper cuts of meat and poultry are generally the most flavorful. You can make a light poultry stock with a carcass from a roasted bird, but it will not have the rich flavor of a stock made from uncooked meat and bones.
A non-corrosive stockpot should be used when acid is included in the list of stock ingredients, as with wine in fish stock.
When meat or poultry is heated in water, it releases albumin particles that will cloud the broth if not removed. The water must be heated very slowly to draw out the impurities, which will form a scum on the surface, where they can be skimmed off. This process usually takes 15-20 minutes.
When making meat, poultry, or fish white stock, the skimming process should be completed before adding aromatic vegetables. If vegetables are included at the beginning, they will interfere with skimming. With brown stocks, there is not much skimming required, so roasting the larger vegetables along with the meat is fine.
All stocks should be cooked at a bare simmer. Rapid boiling will cause solid ingredients to disintegrate and cloud the stock.
Meat stock requires 5-6 hours of cooking time; Poultry stock requires 3-4 hours of cooking time; Fish or vegetable stock requires only 45-60 minutes of cooking time.
Seasonings, particularly salt, should not be added until the stock has been concentrated and reduced; or seasonings can be left out altogether so that the future dish utilizing the stock can be individually flavor-balanced.
Stock can be produced more rapidly if finely chopped meat or poultry is used in place of bone-in carcass pieces. The finer the ingredients are chopped, the more surface area is exposed to the simmering water, and the more quickly the ingredients will give up their flavor to the liquid. In this way, acceptable stock can be produced in 1 ½ hours.
The flavor of a rapidly made stock will be good, but because no bones or trimmings are generally used, it will be short on gelatin, thus much lighter in body.
Rapid stock technique does not involve skimming because the many particles of meat “catch†the albumin particles and hold them until final straining.
Stock should be refrigerated after it is of acceptable strength. A flavor change (souring) may occur if hot stock is refrigerated with a cover, therefore, chill thoroughly first, then cover.
Refrigerated stock should be simmered for several minutes every 2-3 days to keep it from spoiling.
Stock may be frozen. Ladle clear, cool stock into heavy-duty, zip-lock freezer bags, seal carefully, and freeze. (Two C. batches are most convenient.) Still in the plastic bag, thaw in warm water; or remove from the bag and heat gently in a small saucepan; or place in a bowl and thaw in the microwave.
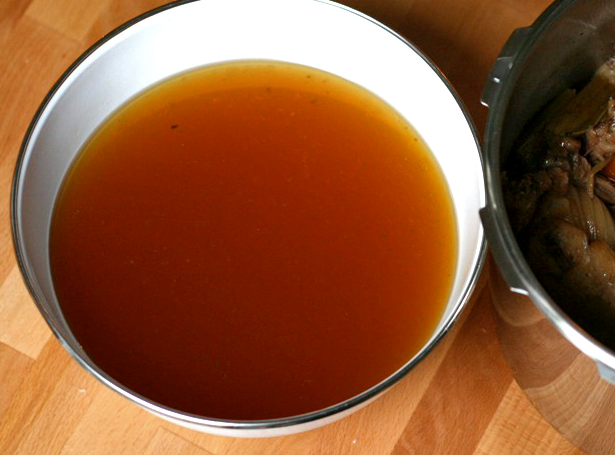
Brown Poultry Stock
According to The New Larousse Gastronomique, Brown Stock can be made from beef, veal, or poultry. It’s the method that’s important, and that involves thorough browning of the meat, bones, and vegetables in fat prior to the long, slow simmering generally associated with stock-making. The following formula is for poultry brown stock, probably the least commonly used of the three types. When I make a brown turkey stock, I buy a small turkey, remove the legs and whole breast to roast later and cut the rest of the bird unto pieces for the stock.
¼ C. vegetable oil
5-6 pounds turkey parts (necks, wings, backs, bones, gizzards)
6 stalks celery, leaves and all, roughly chopped
3 carrots, roughly chopped
2 onions, with skins, quartered
4 unpeeled garlic cloves
small handful of parsley, stems and all
1 bay leaf
2 whole cloves
1 sprig fresh thyme or 1/2 tsp. dried
cold water to cover
In a large roasting pan, put the oil, turkey parts, celery, carrots, onions, garlic, and parsley. (If you have a large Le Creuset casserole, use it. You will be able to take it straight from the oven and onto the burner for the simmering stage. No fuss, no muss.) Roast, at 450°, uncovered, on the middle rack in the oven, turning pieces occasionally until well browned, 1-1½ hours. Remove from the oven and transfer the browned ingredients to a large (10-14 quart) stockpot. Deglaze the roasting pan with a little water, scraping up all the bits and pieces of coagulated meat juices from the bottom and sides. (Don’t worry about the fat at this point. It will come off later and in the meantime contributes flavor to the developing stock.) Pour all of the collected juices (everything) into the stockpot. Add cold water to the stockpot to cover the meat and bones by 1½ inches. Heat slowly. When the liquid comes to a bare simmer, regulate the heat to maintain, and then begin to skim off any scum that forms on the surface. Above all, do not stir the stock at this point, as this action will incorporate the clouding particles into the liquid. Continue skimming until the scum ceases to accumulate, about 15-20 minutes. Now add the bay leaf, cloves, thyme, and more water, if necessary, to maintain the beginning level. Partially cover and continue cooking at a very slow simmer for 3-4 hours, partially covered if desired. (Overnight is fine.) Remove the large ingredients from the stockpot with a large slotted spoon, and put the stock through a triple mesh strainer. There will be virtually no flavor or nutrients left in the solid ingredients at this point; they should be discarded. Allow the hot stock to settle for 5-10 minutes before attempting to remove the fat. Then, skim the surface with a spoon, draw a “grease-catcher†brush across the surface, or use a bottom-pouring degreaser (available in most kitchenware stores and definitely the easiest of the three methods) to remove the fat. If time is not critical, refrigerate the stock, uncovered, until the fat hardens, at which point, it can be easily removed. After the stock is thoroughly degreased, check it for taste. If there is not enough flavor, simply boil it down to concentrate its strength. Salt may be added now if desired, although I think it is generally preferable to wait with this until the final dish is prepared utilizing the stock. Refrigerate, covered, remembering to boil the stock for several minutes every few days to keep it from spoiling, or freeze in 2-C. batches.
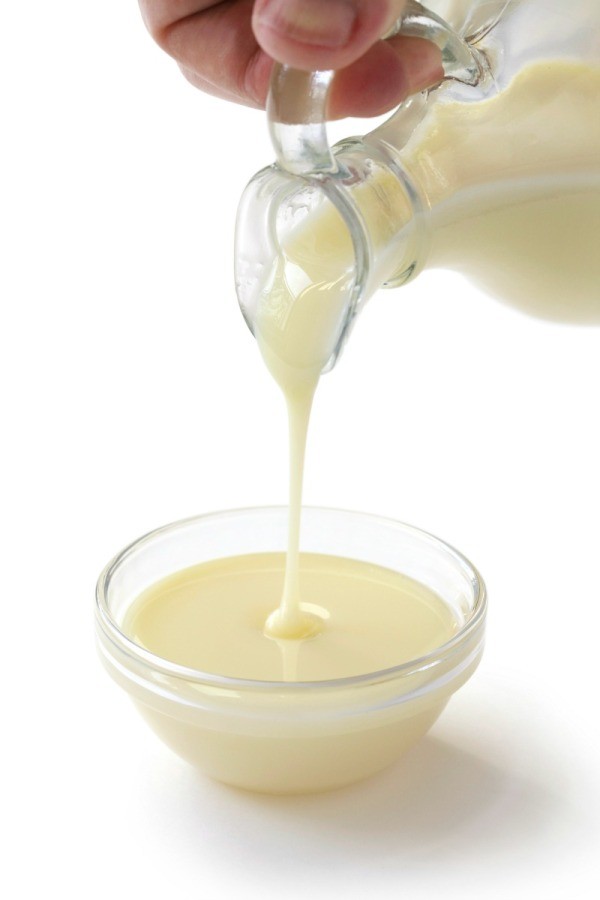 For a creamy marinade for chicken or fish, use evaporated milk. The milk subtly flavors the food without breaking down its delicate fibers. It is especially good paired with spicy sauces or seasonings.
To doctor up gravy for leftover turkey sandwiches, combine 1 can (5 oz.) evaporated milk, 1 can (15 oz.) turkey gravy, and 1/2 tsp. poultry seasoning in a small saucepan. Simmer over medium heat for 5 minutes. Arrange the turkey over toast and pour the gravy over the top.
For quick-and-easy pumpkin pie filling, mix evaporated milk with canned pumpkin, brown sugar, eggs, and pumpkin pie spice.
For a healthy alternative to whipped cream, chill a can of evaporated milk, then whip just like heavy whipping cream. Use to top your favorite desserts.
To make creamy sauces and soups with less fat, use evaporated milk instead of cream.
Enrich the texture with a tsp. or two of sour cream after removing the sauce or soup from the heat. This trick is especially good with cheese soups.
To stir up a quick pasta sauce, mix together evaporated milk, cream cheese, and blue cheese.
To make richer-tasting mashed potatoes, replace 1/2 C. the regular milk with evaporated milk.
For better-tasting meat loaf, soak 2 bread slices in 1 can (5 oz.) evaporated milk until saturated. Break up the bread and use in place of breadcrumbs in your favorite recipe.
For a healthy alternative to sour cream, mix together 1 C. fat-free evaporated milk and 1 tsp. fresh lemon juice.
To give sherbets and ice creams a smooth, rich texture, use evaporated milk in place of the cream.
For rich-tasting gratins and quiches without excess fat, use evaporated milk instead of cream or whole milk.
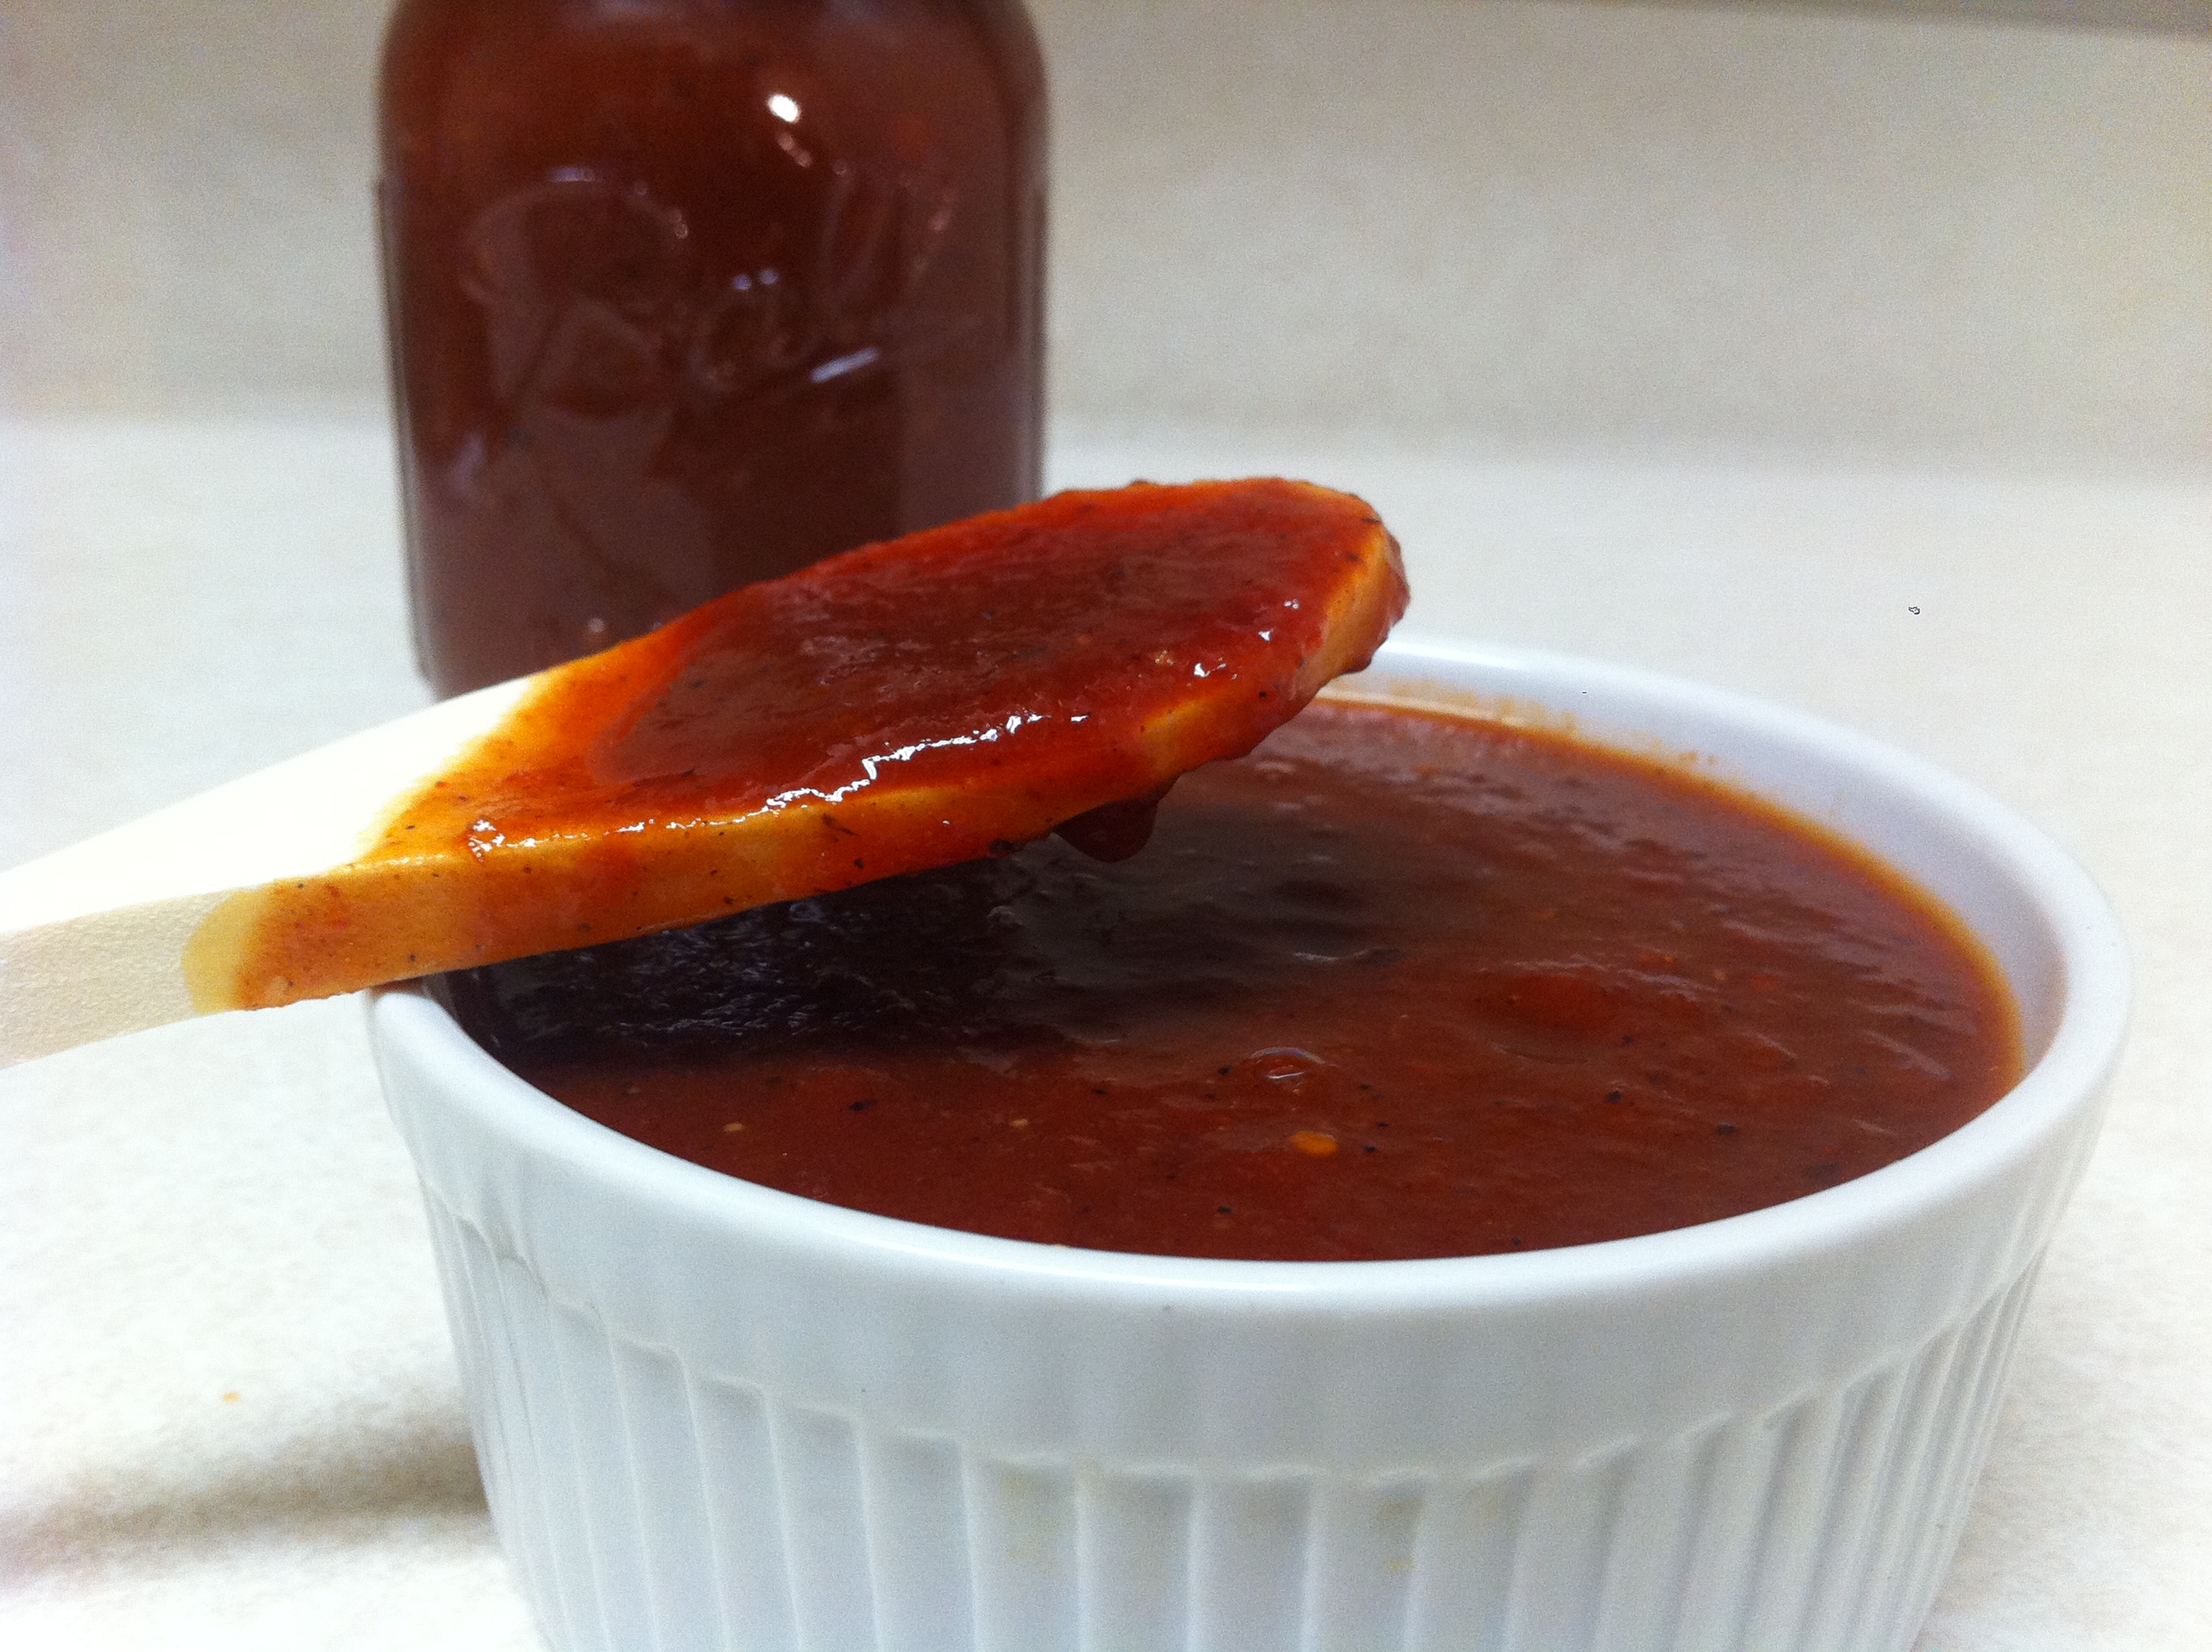 To give meat loaf a whole new taste, replace the tomato sauce or ketchup in your favorite recipe with bottled barbecue sauce. The smoky taste of the barbecue sauce will add a new dimension of flavor to your old recipe.
For a smoky hamburger spread, stir together 1 T. barbecue sauce and 2 T. mayonnaise. Use on hamburgers or in salads.
To mix up a quick steaming liquid for clams, put 3 dozen scrubbed littleneck clams on a very large sheet of heavy-duty foil and drizzle with 1/2 C. spicy barbecue sauce and the juice of 1 lemon. Fold the foil over the clams, leaving ample space for the clams to open, and crimp the edges to seal. Bake at 375°F or put the foil bag on the grill and cook until the liquid in the foil is bubbling and the clams open, 10 to 12 minutes. Slit open the foil and serve the clams with the sauce. Discard any unopened clams.
For moist and marvelous hamburgers, mix 1/4 C. barbecue sauce into 1 to 1 1/2 pounds ground beef. Shape into 4 patties and grill, broil, or pan-fry over medium heat. Cooked to about 160°F on an instant-read thermometer and the meat is no longer pink, about 4 to 6 minutes per side, basting the burgers with additional barbecue sauce as they cook.
To make delicious baked turkey tenderloins, split 2 turkey tenderloins lengthwise in half and remove the vein. Place the tenderloins in a foil-lined baking dish. Mix together 1/2 C. barbecue sauce, 1/4 C. finely chopped onion, 1/2 tsp. dry mustard, and 1/4 tsp. chipotle chile powder. Spoon or brush over the turkey until completely covered. Bake at 350°F until a thermometer inserted into the center of the thickest portion registers 165°F and the juices run clear, 15 to 20 minutes. Let stand for 10 minutes before slicing and serving.
For hot roast beef sandwiches with just the right flavor, bring 1/4 C. bottled barbecue sauce to a simmer in a saucepan. Add 1/4 pound sliced deli roast beef and heat through for 5 minutes. Put on a roll with some prepared horseradish.

Most Canned Meat Products will be good for 2-5 years. So don’t buy 100 cans of deviled ham (tuna/clams/salmon/roast beef/ et all) – unless you are going to be eating and rotating it.
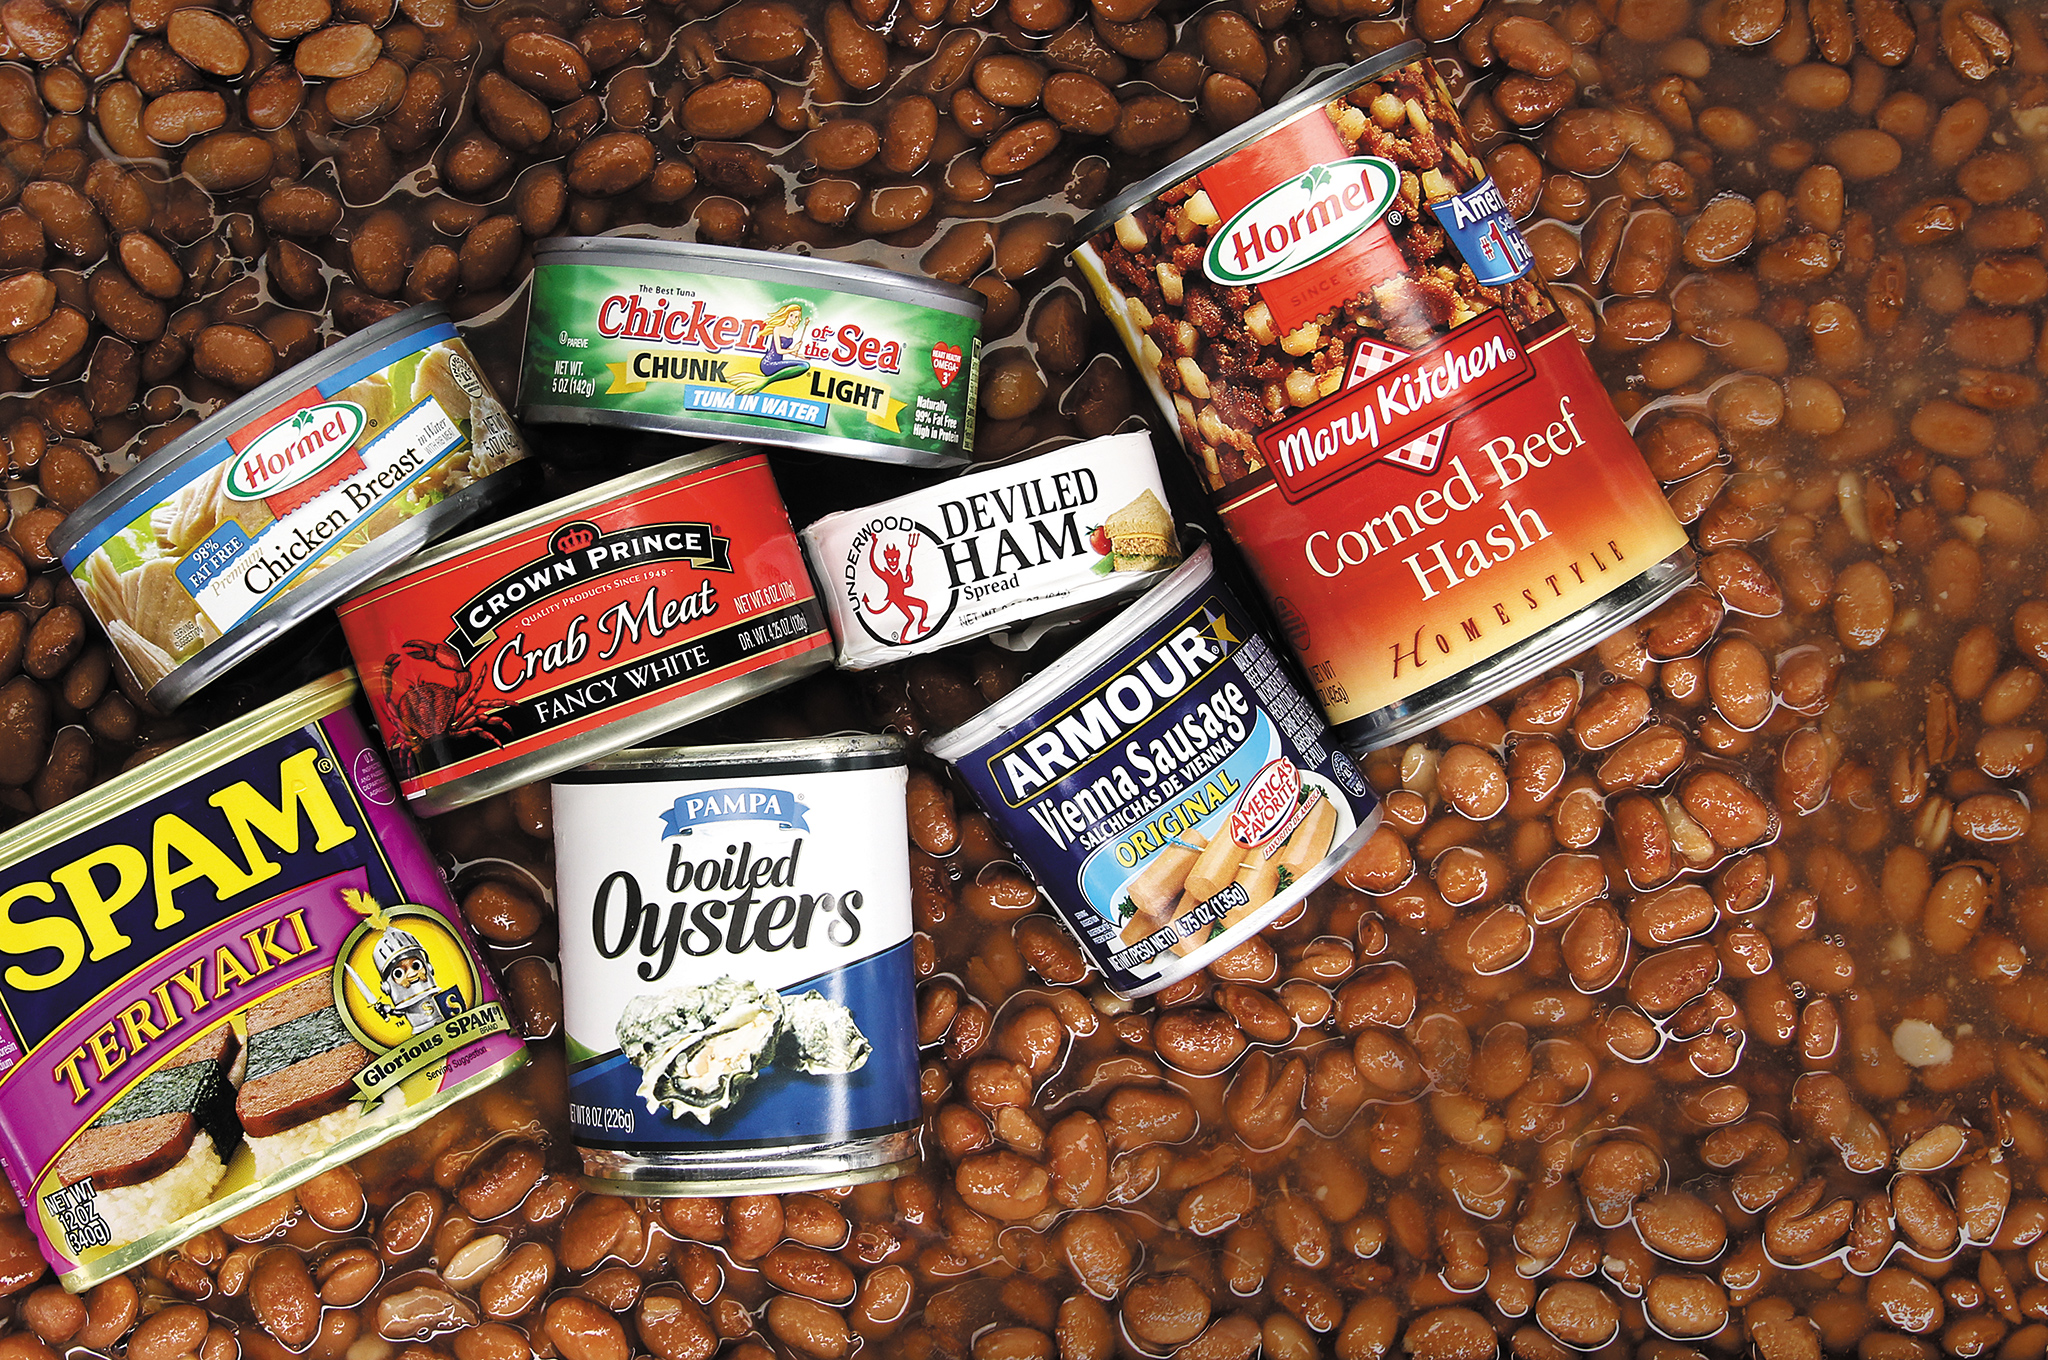
Canned meat products are typically cooked for a long time and at a high temperature in order to can them safely. This can reduce the nutritional value of canned meat. However, it’s better than NO meat for those of us with no space to raise chickens or rabbits! Canned and Dried meats are also very high in sodium, required for preserving them. Eating them with beans (from dried) and rice can help balance the sodium for the meal as long as you don’t add additional salts while cooking your starches.
Summer Sausage
Many Dried Cured Salamis, such as LandJaeger, Sopresatta Salami; check out Molinari & Sons – dry cure products
Tillamook Country Smoker has a line of pepperoni/sausage vacuum packed with oxygen absorbers that last quite some time.
Jerkies – Beef, Game,
Canned Salmon & Tuna
Spam
Canned Chicken
Canned Clams
Canned Sardines / Anchovies
Canned Crab
Underwood Meat Spreads (Deviled Ham, roast beef spread, corned beef spread, chicken spread)
Vienna Sausages
Armor: Potted Meat, Dried Beef
Dak Canned Ham
Keystone Heat & Serve Meats (Pork, Turkey, Beef). I tried the pork. Add a bit of BBQ sauce and it makes an acceptable pulled pork sandwich.
Tyson Chunk While Chicken Pouches
Hormel Smoked Canned Ham
Roast Beef & Gravy
Shelf Stable Bacon – Costco has large pouches of bacon bits that are good at least 2 years, and are much better than “bacosâ€; these actually feel and taste like bacon.
Depending on your grocery, you might find “Sandwich Makers†– meats in 1-2 portion sizes (in plastic trays) with pulled pork, meatballs in sauce, or sloppy joes. Ranchers brand has canned stroganoff, meatballs or beef tips in gravy.
Aside from what you can get in your neighborhood grocery, there are meat options specifically designed for long storage, emergency preparedness, off the grid/camp cooking. Companies such as Yoder, Emergency Essentials, Mountain House, Wise Foods, Thrive, etc. offer canned meats (typically freeze dried), but prepare to pay through the nose. A #10 can of ground beef (equal to about 7 lb. cooked fresh hamburger) will set you back 60-70$ Sodium content is typically better on freeze dried products over canned.
Let me say – In my college days, I spent about 8 months working for Oregon Freeze Dried Foods (Mountain House is their own brand name; they also do government freeze drying and for private companies. They used to do nutria-system foods for instance). And I tried quite a few different types of their freeze dried foods. They really are quite tasty.
 Mushrooms are good for you, and when dehydrated they get an intense mushroom flavor, so you can use less.
Rinse or brush mushrooms clean. If rinsing, pat dry with a towel to get them as dry as possible so they take less time in the dehydrator. Slice them uniformly so they will dry at the same rate. A mandolin or even an egg slicer can help with this. Spread on your dehydrator racks in a single even layer. They can touch a little bit (since they shrink) but should not be stacked. Mushrooms should be dried until they are no longer spongy, but not completely brittle. Time and temperature vary, depending on your dehydrator. Try around 100 overnight, or if hotter, they will need less time. Store in airtight containers in dark place.
Air Dry: Clean shrooms with wiping method. Place clean mushrooms on a metal rack in a warm spot. Make sure they don’t touch. Walk away. Leave them be until they’re dry and brittle, two to five days, and store in a clean, airtight Mason jar on a shelf.
Mushroom Powder: You can process dried mushrooms in a blender to render them down to a fine powder. Carefully open the lid so it doesn’t whoosh up into your face. Strain through a fine mesh sieve into a funnel and into a jar. Re-process any larger mushroom pieces and repeat. This can be added to ground meats for meatloaves or patties, stirred into a soup or stew shortly before serving, sprinkled over salads or steamed vegetables. Use this to encrust steaks along with some salt and pepper. Major umami flavor!
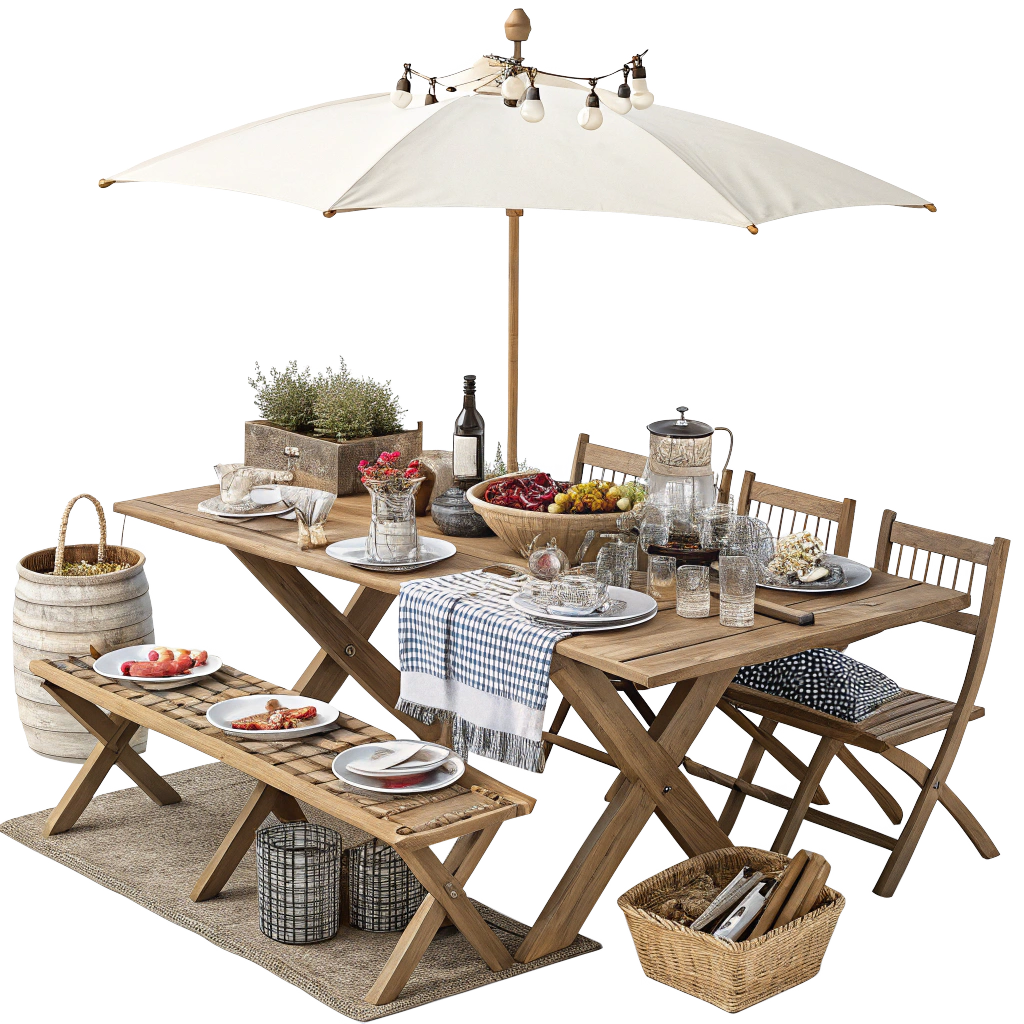 Picnic Supplies
□ Sturdy table and chairs to seat at least 6-8
□ Umbrella or another form of shade
□ A variety of linen and cotton tablecloths and napkins
□ Plate sets for at least 6-8 people
□ Utensils
□ Utensil holder
□ An assortment of platters, serving bowls, and trays
□ Wine glasses, mason jars, water glasses, serving pitcher
□ Bottle and wine openers
□ Picnic knife
□ Galvanized bucket
□ Tea lights, votives, sturdy candles, citronella candles
□ Sturdy floral vases and bud vases
□ Torches
□ Strings of globe bistro lights
□ Mesh food covers
□ Wine glass tags
□ Lawn games
□ Wireless waterproof speaker
Picnic: Latin Vibes
Watermelon Agua Fresca and/or Passion Fruit, Coconut and Lime Batida
Black Bean, Avocado, Kale and Quinoa Salad
Prawn, Red Pepper and Chorizo Empanadas
Corn and jalapeno Muffins
Passion Fruit and Coconut Slices

Picnic: Italian Style
Pea, Tarragon and Mascarpone Arancini
Italo-Greek Picnic Pie
Parma Ham and Buffalo Mozzarella with Spring Vegetables
Tomato and Peach Panzanella with Honey, Smoked Salt and Lavender
Grape, Lemon and Thyme Focaccia
Peaches in Wine with Thyme Ricciarelli
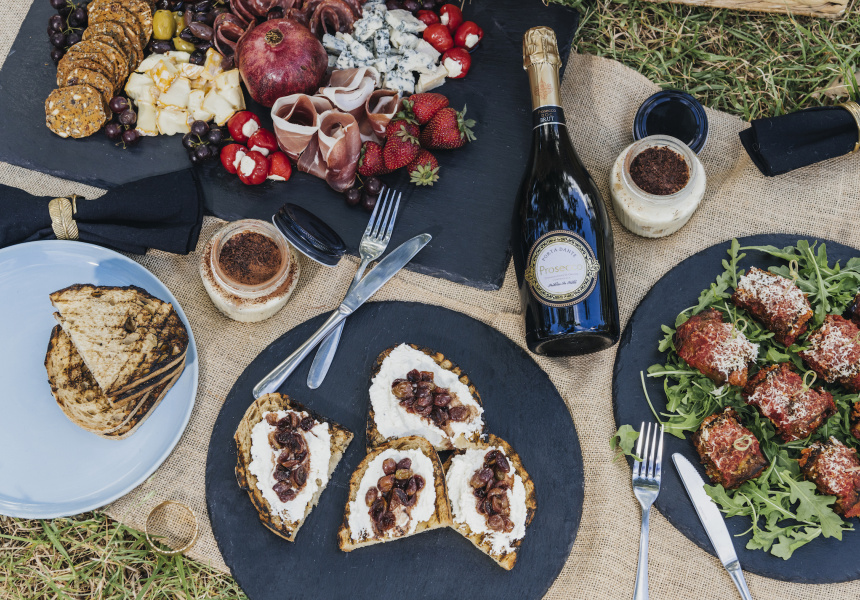
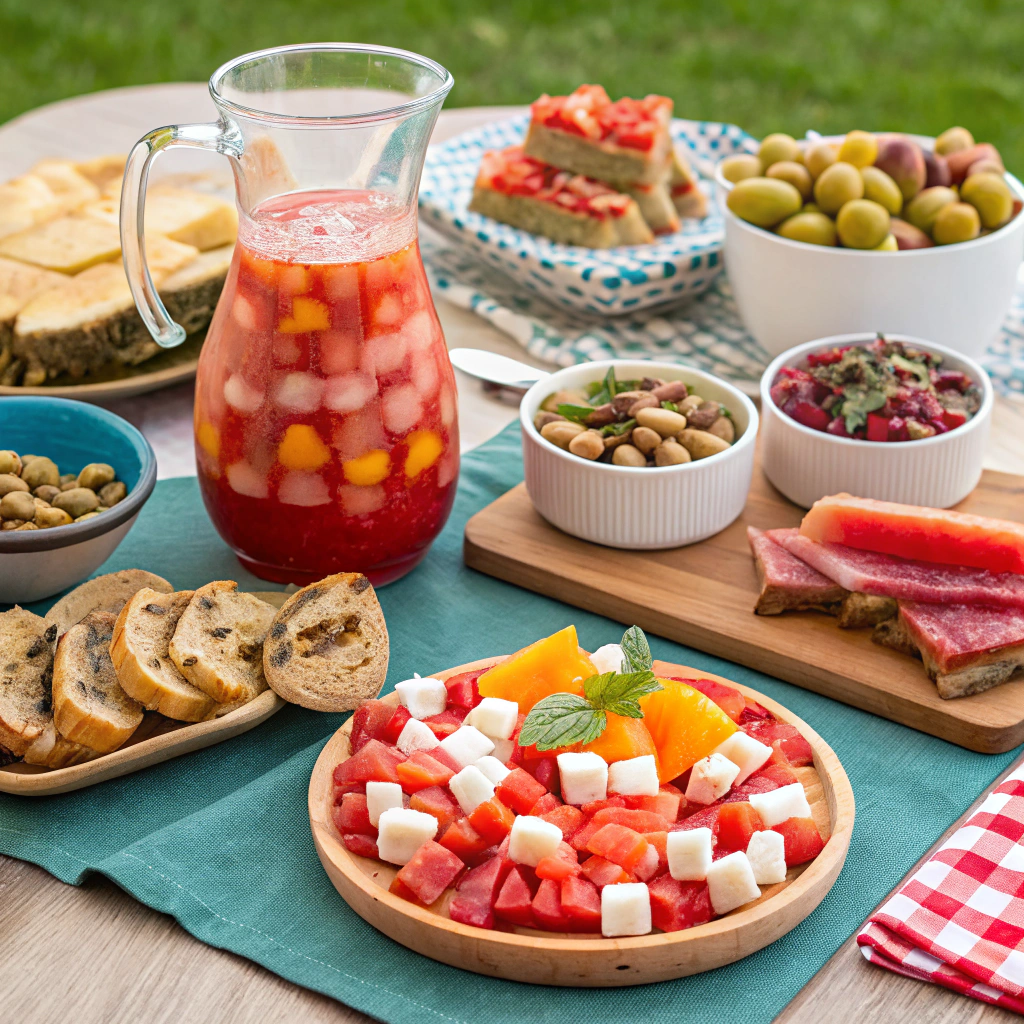
Picnic: No Cook Party
Rose Sangria
A Spanish Feast (bread, tomato, anchovies, caperberries or olives, Romanesco sauce, serrano ham)
Watermelon and Feta Salad
Prawn, Grapefruit and Green Apple Iceberg C.
Smoked Ham Sandwiches with Kimchi Slaw
Wimbledon Buns
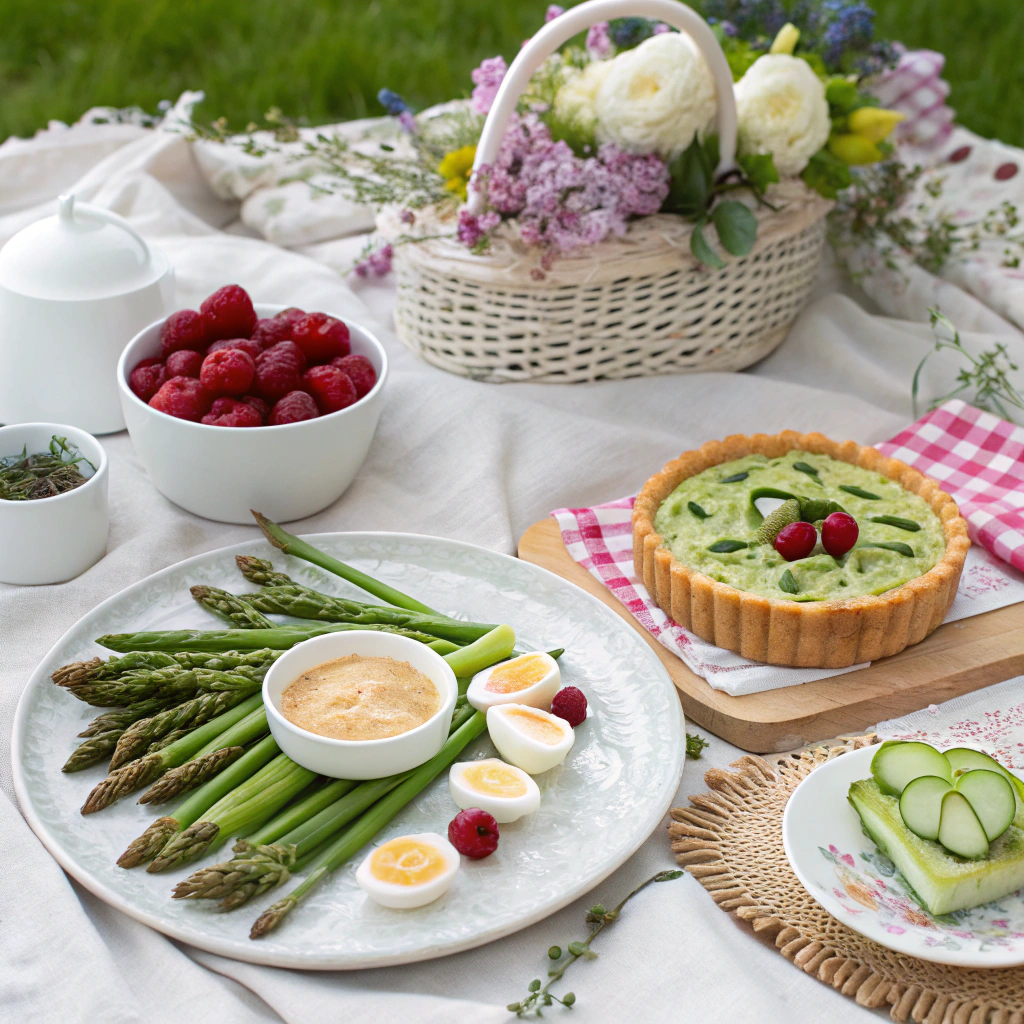
Picnic: Classy Affair
Aioli and Friends (asparagus, quail eggs, little gem lettuce)
Rebel Cucumber Sandwiches (with anchovies)
Crab Tart
Gooseberry and Elderflower Traybake
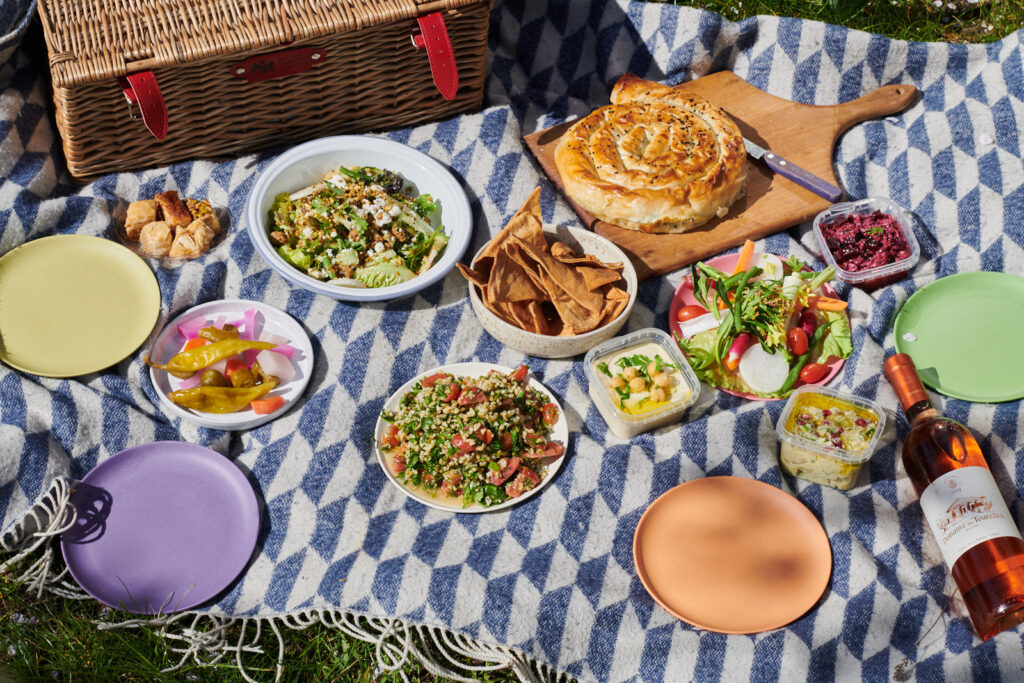
Picnic: Tastes of the Levant
Walnut, Parsley and Sundried Tomato Babka
Labneh, Dukkah, Salted Cucumber and Radishes
Carrot, Cauliflower and Freekeh Salad
Courgette, Chickpea and Feta Salad
Harissa Chicken Sandwich
Fig and Cherry Cardamom Friands
Picnic: Cakes & Bubbly
Blueberry and Raspberry Loaf Cake
lam Lattice Tart
Plum and Ricotta Pastries

Summertime and the beach go hand in hand. There’s no better way to enjoy the warm weather and the company of friends and family than with a beach party picnic. This theme is perfect for those who live near a beach or are planning a day trip. With the right decorations and menu, your beach party picnic can be the highlight of the summer.
The beach party picnic theme is all about embracing the beach vibes and creating a relaxed, fun atmosphere. Think bright colors, beachy décor, and playful accessories. Set the tone for your beach party picnic with the right decorations and accessories.
Characterize Items by Season
Spring
Raw snap peas
Radishes
Blanched asparagus
Artichoke hearts
Apricots
Kumquats
Grapefruit
Strawberries
Summer
Rainbow carrots
Celery
Broccoli florets
Cucumber
Raspberries
Blueberries
Blackberries
Red or green grapes
Watermelon
Pineapple
Peaches
Plums
Tomatoes of all varieties
Anything growing in the garden!
Autumn
Roasted beets—ruby, striped, or golden
Carrots
Roasted sweet potatoes
Roasted squash
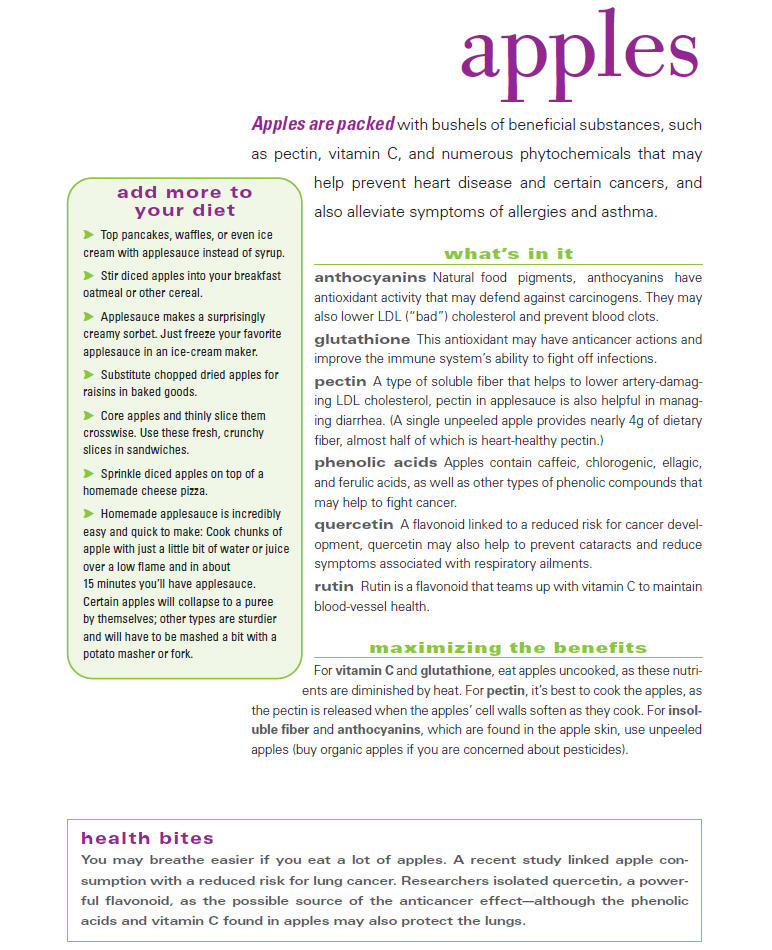
Apples
Pears
Figs
Persimmons
Cranberries
Winter
Pickled beets
Pickled green beans
Dried fruit
Figs
Tangerines
Mandarins
Oranges
Pomegranates
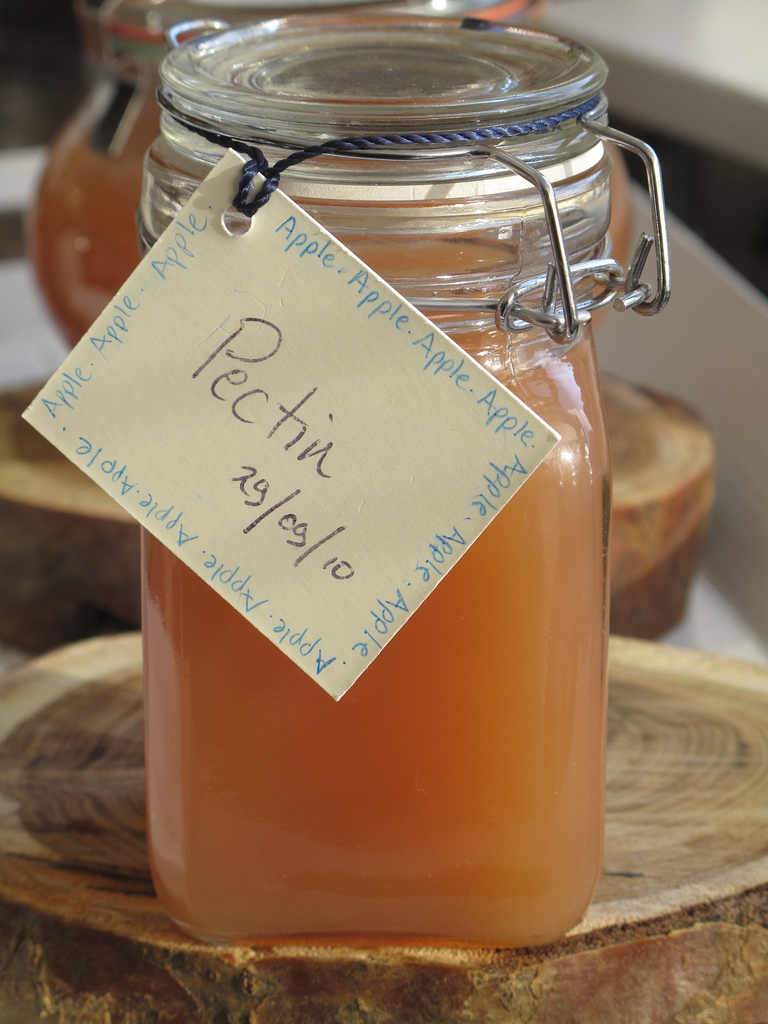 Put 3-4 pounds chopped apples in a non-reactive pan. Add enough water to barely cover apples and bring to a boil. Lower temperature immediately and let simmer until soft, approximately 20-30 minutes. Pour apples and liquid through a fine sieve into a second pot. Without stirring, let this liquid drain overnight. Bring liquid to a boil and cook until it has reduced to half its original volume. Test pectin content (see instructions below) and continue to cook if necessary. Once liquid pectin reaches the desired strength, store it in the fridge or freezer.
Testing the Pectin Level
To determine the amount of pectin in your liquid, put 1 tsp. the liquid on a plate and add 2 tsp. rubbing alcohol to the mix. Swirl the mixture around until clots start to form. It will amaze you, but it will happen: You will know the strength of the pectin by the size of the clots.
You want a fairly large viscous clot to indicate strong pectin. Weak pectin will show up as several small, scattered clumps. If that is the case, bring the liquid back to a boil and reduce further. And toss out the test batch-you don’t want to return that to the pot. Once the pectin reaches the desired strength, refrigerate, freeze, or can it until you make jam. It will keep in the fridge for up to one week.
Using Homemade Pectin
As a general guide, 2/3 C. liquid pectin is enough to set 4 C. low-pectin prepared fruit or fruit juice. Here again, you have room for whimsy. If you use strawberries (low in pectin) alone, use the full amount of liquid pectin. If you throw in a few currants (high in pectin) with the strawberries, use less liquid pectin. If you use half currants and half strawberries, you might not need any liquid pectin at all.
In the end, willingness to learn by trial and error and to love whatever the outcome is what will win the day.
 Let me make this clear, brownie mix begs you to add your magic to them. Below are some suggestions for you to take a 18 to 21oz brownie mix and improve it greatly.
It’s How You Slice a Brownie That Counts
Who says a brownie has to be square. Add some pizazz.
Bake brownies 20-25 minutes and bake them in a pie pan instead of a square pan. Cut them out in wedges instead of squares.
Use a smaller deeper pan for thicker brownies. They’ll bake in about 40 minutes and then cut them out extra-large or smaller for tea parties.
Cut brownies into rounds with a biscuit cutter and sandwich two together with your favorite jam. Dust the top with powdered confectioners’ sugar.
Dust brownie triangles, squares, or rectangles with confectioners’ sugar to jazz them up.
Crumble up brownies and serve them over ice cream.
 To spruce up store-bought coleslaw, stir in some orange marmalade and toasted chopped almonds.
To balance the flavor of tomato sauce, stir in 1/4 C. grape jelly for every 4 C. homemade sauce. The sweetness of the jelly helps to balance the acidity of less-than-perfect tomatoes.
To make muffins with a surprise inside, spoon 2 tsp. muffin batter into each muffin cup. Make an indentation in the muffin batter with the back of a spoon and ladle in 1 tsp. jam, marmalade, or preserves. Spoon the remaining batter over the jam in each muffin C.. Bake as directed in the recipe.
To make overnight stuffed French toast, cut 1 loaf Italian bread crosswise into 8 to 10 slices that are each about 1 1/2 inches thick. Cut a slit through the top crust of each slice to form a deep pocket. In a medium bowl, mix together 1 package (8 oz.) cream cheese, 2 tsp. confectioners’ sugar, and 1/2 tsp. almond extract. Spread the cream cheese mixture equally inside the bread pockets, then spread 1/2 to 3/4 C. strawberry, raspberry or cherry preserves equally inside the pockets, opposite the cream cheese. Lay the stuffed bread in a single layer in a shallow 4-quart baking dish (roughly 15 x 10 inches). In a medium bowl, combine 5 eggs, 1 1/2 C. light cream or half-and-half, 1 tsp. vanilla extract, 1 tsp. confectioners’ sugar, and a pinch of salt. Pour evenly over the bread, tilting the pan and swirling the egg mixture to completely saturate the bread. Cover and chill in the refrigerator overnight. In the morning, bring the bread to room temperature, then cook in unsalted butter or oil on a griddle until golden brown on both sides, 3 to 5 minutes per side. Serve with maple syrup.
To make a quick glaze for baked or grilled chicken, mix together cherry preserves and fresh orange juice. Brush onto the chicken before baking or during the last 5 minutes of grilling to create a glaze.
For a quick carrot slaw with a twist, combine 3 C. pre-shredded carrots, 1/2 chopped red onion, 1/4 C. golden raisins, 1 tsp. orange marmalade, 1/4 C. olive oil, 3 tsp. capers, 3 tsp. red-wine vinegar, 1/4 tsp. salt, and 1/4 tsp. freshly ground black pepper.
For sweet and savory slow-cooked brisket, put a 3-pound brisket in a slow cooker, in one or two pieces. In a medium bowl, combine 1 C. ketchup, 1/4 C. grape jam, 1 envelope onion soup mix, and 1/2 tsp. freshly ground black pepper. Add the mixture to the slow cooker, making sure the meat is well-coated. Cover and cook on low until the meat is tender, 8 to 10 hours.
To thicken a vinaigrette, whisk in a few tsp. orange marmalade, apricot jam, or raspberry preserves.
For a quick filling for thumbprint cookies or nut rolls, mix together raspberry jam and almond extract.
To pull together a fresh strawberry dessert sauce, melt 2 tsp. strawberry preserves over medium heat. Add 2 tsp. brandy, a pinch of salt, and 1 pint sliced strawberries. Cook until the berries begin to fall apart. Cool, then serve the sauce over cake or ice cream.
For an easy cherry marinade for grilled chicken, combine:
1/4 C. cherry preserves
2 tsp. olive oil
6 oz. black cherry soda
1/2 tsp. salt
2 tsp. fresh lemon juice
1/4 tsp. ground cinnamon
Add to the mixture 2 pounds of boneless, skinless chicken breasts or thighs and marinate in the refrigerator for 4 to 8 hours. Grill or broil the chicken, then bring the marinade to a boil in a saucepan. Add another 6 oz. black cherry soda, a drained can of dark sweet Bing cherries, and boil for 5 minutes. Dissolve 1 tsp. cornstarch in 1 tsp. cold water and stir into the marinade until thickened. Serve with the chicken. Some grated orange zest makes a nice touch.
For a wonderful sauce for salmon or chicken, mix 1 part blueberry or raspberry jam into 2 parts barbecue sauce. Spoon a layer of the sauce over the salmon or chicken and broil until finished. Spoon a little more sauce over the salmon or chicken before serving.
For a simply outstanding glaze for roasted or grilled leg of lamb, use red currant jelly mixed with fresh orange juice.
To stir up a quick glaze for barbecued ribs, combine 2/3 C. apricot preserves, 2 tsp. Dijon mustard, 1 tsp. toasted sesame oil, and 1/4 tsp. cayenne pepper in a saucepan. Simmer over low heat for 5 minutes, then brush onto the barbecued ribs during the last 10 minutes of cooking.
For an easy apple glaze for pork, combine 1/4 C. apple jelly, 2 tsp. fresh lemon juice, 1/2 tsp. ground cinnamon, and 1/4 tsp. ground allspice. Place 1 pork tenderloin in a small roasting pan and brush with half of the apple-jelly mixture. Roast in a 375°F oven until the center registers 155°F on an instant-read thermometer and the juices run clear, about 25 minutes. Let stand for 10 minutes. Meanwhile, on a broiler pan, arrange 2 cored and thinly sliced red apples and brush with the remaining apple-jelly mixture. Broil 5 inches from the heat until the apple slices are tender, about 5 minutes. Serve with the sliced tenderloin.
To make an easy orange sauce for fruit desserts or cheesecake, boil 3 C. fresh orange juice until reduced to 1 1/2 C., then stir in 1/2 C. orange marmalade and 1/4 C. firmly packed brown sugar. Thicken with a mixture of 1 tsp. cornstarch dissolved in 1 tsp. fresh lemon juice.
To make upside-down muffins, spoon 1 1/2 tsp. your favorite jam or preserves into the bottom of each greased muffin C. in the pan. Top with your favorite muffin batter and bake as directed in the recipe. Run a knife around the sides and invert the muffins onto a rack to cool.
To make a glaze for Brie cheese, stir together 1/2 C. strawberry or cherry preserves, 1/2 tsp. grated lemon zest, and 1/4 tsp. almond extract. Spread over the wheel of Brie and bake at 350°F until the cheese just begins to melt, 12 to 15 minutes.
For a jump-start on cold strawberry soup, combine strawberry preserves and buttermilk as the base.
For a dessert of strawberries with warm rhubarb sauce, cook 1 pound frozen, cut-up rhubarb and 1/2 C. sugar in a saucepan over medium heat until the rhubarb is softened, about 10 minutes. Stir in 1 C. strawberry preserves. Serve warm over 1 1/2 pints sliced strawberries. Garnish with sour cream or whipped cream, if you like.
To doctor up plain yogurt, stir in strawberry, raspberry, or blueberry jam. It’s both cheaper and healthier than buying yogurt C. that are premixed with “fruit at the bottom.â€
For an easy cake filling, mix 1/2 C. your favorite jam, jelly, or preserves with 1 tsp. brandy or liqueur and microwave until the mixture can be stirred smooth.
To quickly glaze a fruit tart or cheesecake and give it a pretty sheen, melt some red currant jelly in a microwavable bowl. Brush the melted jelly over the top of the fruit tart or cheesecake.
Uses for Ketchup
To make real Russian dressing, whisk together 1/4 C. mayonnaise, 1/4 C. sour cream, 2 tsp. ketchup, and 3 tsp. fresh lemon juice. Then, to be truly authentic, fold in 2 tsp. red or black caviar (remember— salmon eggs are very reasonably priced if you don’t want to splurge on the serious stuff).
For a basic sweet-and-sour stir-fry sauce, dissolve 1 tsp. cornstarch in 1 tsp. cold water in the bottom of a medium bowl. Stir in:
1/3 C. rice vinegar
1/2 tsp. finely chopped fresh ginger
3 tsp. ketchup
2 1/2 to 3 tsp. dark brown sugar
1/2 garlic clove, minced
1 tsp. rice wine or dry sherry
Add the sauce to the hot wok or skillet at the end of stir-frying and cook until thickened, about 1 minute. This sauce tastes great with chicken, pork, and seafood.
To make an easy braising liquid for beef brisket, mix 2 1/2 C. ketchup with 2 1/2 C. beef broth. Scatter 1/2 tsp. salt and 1/4 tsp. freshly ground black pepper over 2 to 3 pounds of beef brisket. Brown the brisket in a Dutch oven in 1 tsp. vegetable oil. Remove the brisket and sauté 2 large chopped onions in the pan. Add the ketchup mixture and simmer for 2 minutes. Add the brisket, cover, and simmer until the meat is fork-tender, about 2 hours. Skim the fat from the gravy, then slice the meat and serve with the gravy.
Supplies
Canning Jars & Lids
Large Pot for Canning Kettle
Rack for inside Pot
Jar Lifter
Jar Bubbler
Canning Funnel
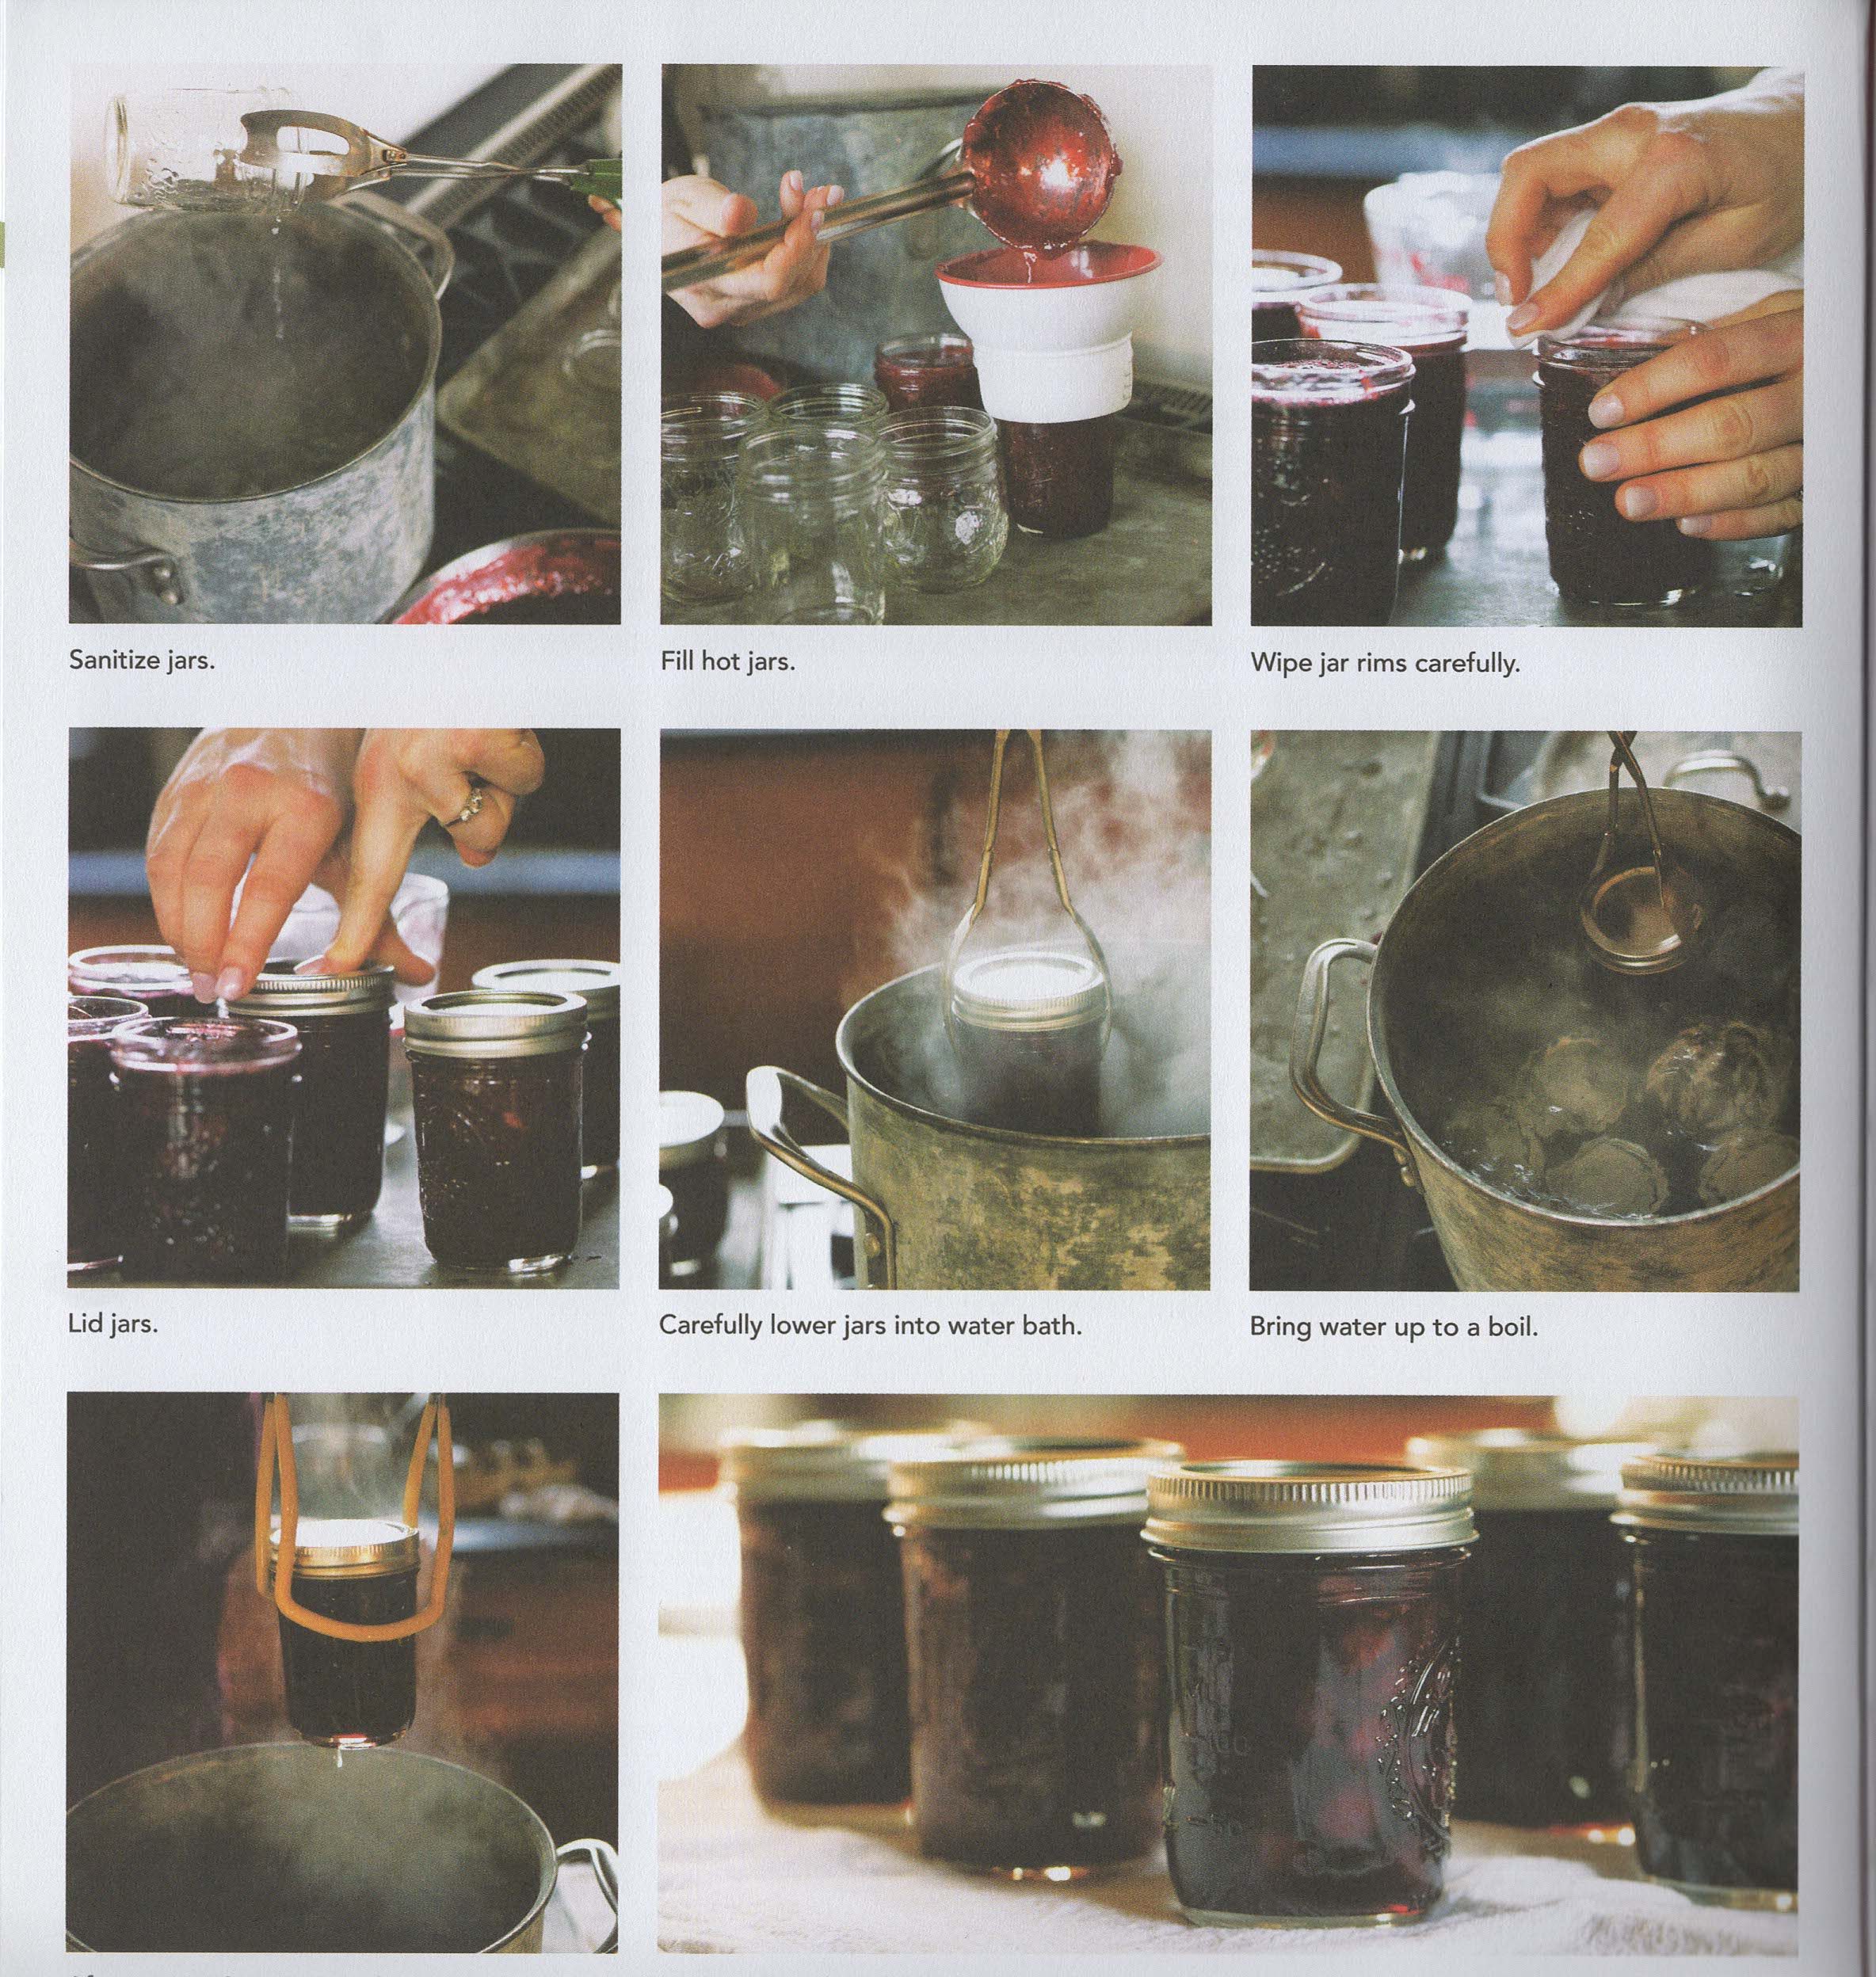
Basic Steps:
1. Read recipe all the way through
2. Take care of advance processing first (such as overnight maceration)
3. Inspect jars & Lids
4. Boil jars, keep sterilized and warm
5. Set out needed tools
6. Prepare recipe
7. Remove Jars from water, pour a little into a bowl for cleaning rims later
8. Fill Jar with funnel
9. Use Jar Bubbler to remove bubbles
10. Repeat until all are full
11. Clear rims with warm wet towel; top with flat lids. Screw on bands to fingertip tight, do not over tighten.
12. Transfer with jar lifter into water bath canning kettle, water should be 2 inches above top of jars.
13. With water at a full boil, process for length f time determined by recipe.
14. Turn off heat, let jars sit 5 minutes. With jar lifter, transfer jars from pot to a clean kitchen towel, lifting straight up and down; tilting could prevent a tight seal. Jars should have a bit of space between them in a room temperature and non drafty place. Don’t touch jars or lids yet.
15. Jars should PING as they seal. Let them sit undisturbed for 8-24 hours. Gently press in center of lid; it should not move or pop up and down. If it does, then place in refrigerator and use in next few days.
16. Remove canning lid rings and wash dry and label your successfully sealed jars. These should be consumed within a year.
Stuff to remember:
Follow your recipe. Changing the ratios of low acid foods can allow the spread of botulism.
Pull out the jars your recipe calls for, plus one more. Recipe quantities aren’t always exact, depending on moisture content or how much the food is cooked down. If you have extra, you’ll be glad you cleaned that extra jar.
Start timing processing time only after water reaches a full boil.
Make adjustments for altitude. Water boils at a lower temperature at higher altitudes, and food might not reach a safe temperature without longer processing.
![]()
Taste of Yucatan: Mexican Sangria, Fiery Habanero Salsa, Fresh Corn Torillas, Yucatan Achiote Seasoned Pork, Yucatan Pickled Red Onions, Refried Black Beans
Christmas Eve Open House: Cranberry Sage Margarita, Roasted Oaxaxan-Spiced Orange & Butternut Soup, Red Chile Pork Tamales, Roasted Pork Leg in Adobo, Lime Tarts with Ancho Graham Crust and Agave Whipped Cream
New Years Dinner: Tequila Old Fashioned, Ancho Glazed Chicken Empanadas, Corn, Poblano and Lobster Bisque, Pumpkin seed Crusted Rack of Lamb with Oaxacan Red Mole Sauce, Classic Mexican Vanila Flan
Summer Fiesta: Watermelon Habanero Margarita, Guacamole, Mezcal Braised Spare Ribs with Spicy Chiptole Molasses Sauce, Mexican Grilled Corn, Flourless Chocolate Ancho Cake
 Professional Tips for the Hands On Home Cook
Essential Equipment for the Hands On Home Cook
Cleaning cactus is no easy feat to accomplish. In fact, I was too scared to attempt it until I was older, for fear of getting pricked. That’s because even though the bigger needles are visible to the naked eye, there are also some tiny needles that are as clear as water and virtually invisible. You can blanch your cactus, boil it, saute it, or even cure it in salt for a different approach. Heck, some people blend cactus into their green smoothies. Note that the smaller the paddle, the more tender the cactus will be.
6 nopales (cactus pads)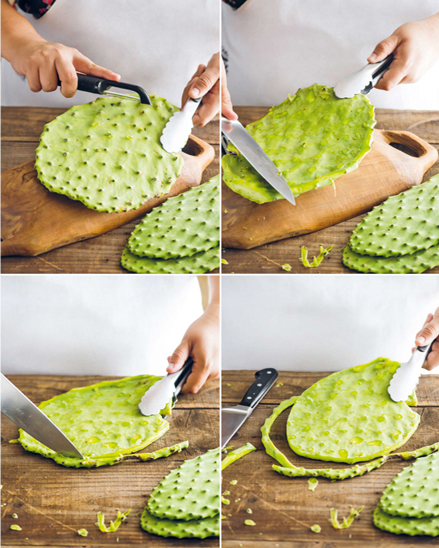
1 tomatillo husk (to reduce the viscosity effect)
1/4 white onion
1 garlic clove
1/2 tsp. of salt
VERY IMPORTANT TIP: Use kitchen tongs to hold the nopales or, better yet, wear gloves to protect your hands from the thorns. Once you are familiar working with cactus paddles then you can try to clean them without gloves. Place the cactus paddle on your cutting board and, using a sharp knife, trim off the edge. Scrape the spines, thorns or eyes, running your knife from back to front until completely clean. Turn the cactus paddles and do the same on the other side. Repeat the same steps with the rest of the cactus paddles. Finally rinse the cactus paddles and take them back to your clean cutting board. Place a medium size pot with 4 quarts of water to boil. Cut the cactus paddles in small strips. Once the water is boiling add the cactus, onion, garlic, 1/2 tsp. of salt and the tomatillo husk. Boil uncovered for about 8-10 minutes or until tender. The cactus will exude a sticky substance and most times will foam, so, pay special attention to this step to avoid the foam to spill over. Once cooked, drain and rinse the cactus. Let them drain completely or pat them dry with paper towels. Now, your nopales are ready to be prepared into salads, scrambled eggs, as an addition to your Mexican stews, etc. Note: Nopales also taste good grilled and topped with melted cheese. Just make 3-4 small cuts to each nopal after you cleaned the spines; brush them with oil and grill them for about 3 minutes on each side.
The key ingredient that gives Mexican chorizo its red color and spiciness is the Ancho chile powder.
1.10 lb. or 500 grams of ground pork
1 tbsp. cumin seed
1 tsp. coriander seed
5 whole cloves
2 bay leaves
¼ tsp. ground cinnamon
½ tsp. oregano
½ tsp. thyme
1 tbsp. granulated garlic
1 tsp. sea salt
5 whole peppercorns (or ½ tsp. ground black pepper)
2 tbsp. Ancho chile powder OR substitute with a combination of 2 tbsp. paprika mixed with ½ tsp. cayenne powder OR 2 tbsp. paprika mixed with 1 tsp. red chili powder
3 tbsp. apple cider vinegar (can substitute with red wine vinegar)
Handling chili powders can cause burning to your hands. I highly advice to use plastic gloves for handling the chili and chorizo. In a mortar and pestle grind the cumin seed, coriander seed and cloves. Break up the bay leaves with your hands as much as possible and add them to the spices in mortar and pestle, grind until you have a fine powder. Next add the remaining spices to the mortar and pestle and grind/mix until everything is well combined. In a large glass bowl using your hands break up the ground pork. Next you may want to put on some plastic gloves to prevent burning and staining to your hands. Pour in the vinegar and half the spices, spread them evenly on the pork, and start working it into the ground pork. Adding more of the spice mixture until it has all been used up. Keep working the meat until it turns red (from the chile) and all the spices have been well combined into the meat. It is best to let the chorizo sit overnight before cooking with it. This will allow all of the flavors to come together and make for a better tasting chorizo. Alternatively, you can freeze the chorizo until you are ready to use it. Since this chorizo does not have casings you can form or shape sausages or patties and keep their form by wrapping them in plastic kitchen wrap. Another way to store the chorizo in the freezer is by portioning out amounts and storing it inside plastic bags. This way you defrost what you need or want without having to use the whole large batch.
8.Now you are ready to use the chorizo in all of your favorite Mexican recipes like tacos, sopes, frijoles charros, chiles rellenos or any of your other favorite fusion recipes.