Browsed by
Tag: Canning & Preserving

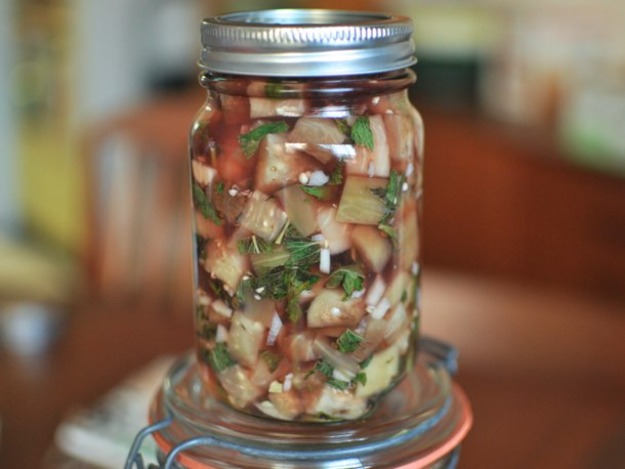
Pickled Eggplant with Mint & Garlic

Pickled Eggplant with Mint & Garlic

2 1/2 C. red wine vinegar
1 1/2 pounds eggplant, peeled and cut into 1/2 inch cubes
1 1/2 tsp. chopped garlic
1/4 C. mint leaves
1 1/2 tsp. pickling salt

Prepare a small canning pot and 2 pint jars. Place 2 new lids in a small pot of water and bring to the barest simmer. Pour vinegar into a medium saucepan and bring to a boil. Once it boils, add eggplant and simmer for 2-3 minutes. When time is up, remove eggplant cubes from vinegar with a slotted spoon and place them in a bowl. Add garlic, mint and salt and stir to combine. Pack eggplant into jars and top with boiling vinegar, leaving 1/2 inch headspace. Tap jars gently to remove any trapped air bubbles. If necessary, add more brine to return the headspace to 1/2 inch. Wipe rims, apply lids and rings and process jars in a boiling water bath canner for 10 minutes (start your timer when the water returns to a boil, not when the jars first go in). When time is up, remove jars from canner and let cool on a folded kitchen towel. When jars are cool enough to handle, remove rings and test seals by grasping edges of lids and carefully lifting jars. If lids hold fast, seals are good. Store jars in a cool, dark place. They are ready to eat within 1 week, but can be kept up to one year.

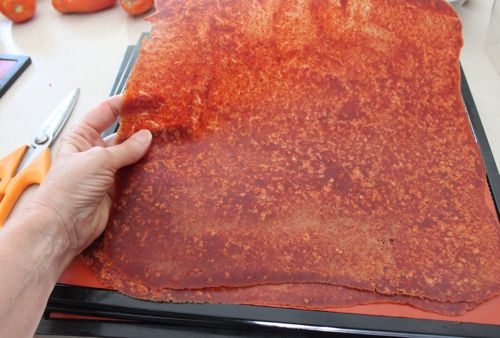
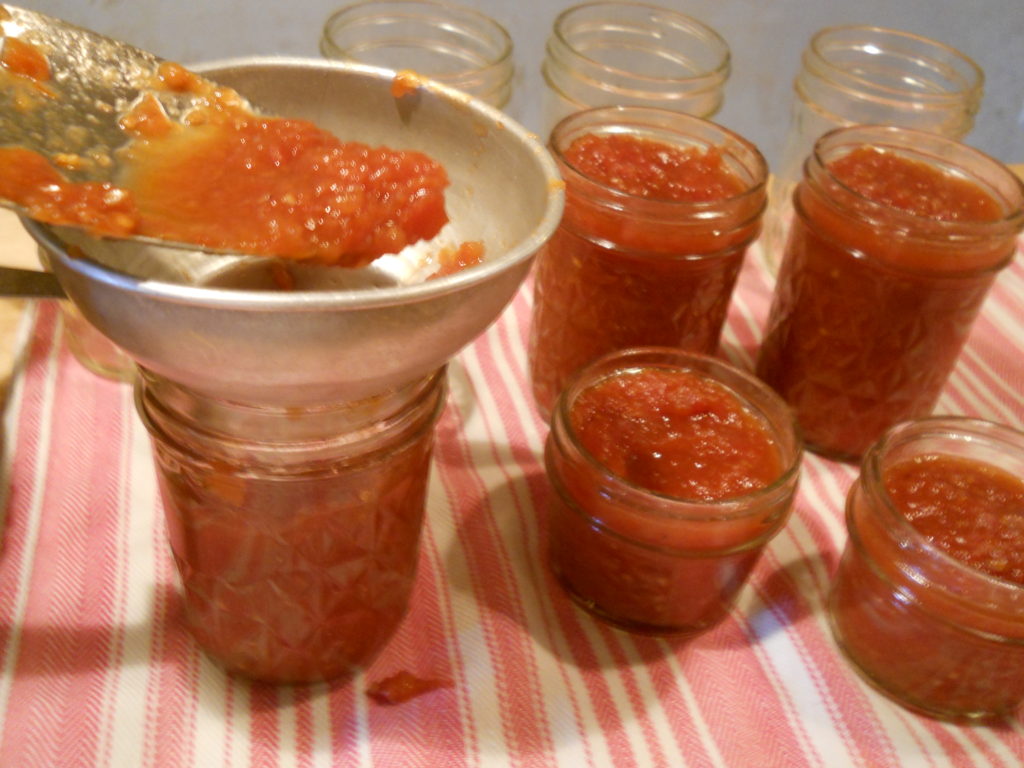
Dehydrator: Tomato Leather

Dehydrator: Tomato Leather

Heirloom organic tomatoes–preferably plum tomatoes or another variety that has more flesh and not as much juice.
Honey–organic and local if possible
Lemon wedges
You can experiment with spices and seasonings once you get the hang of it.

Wash the tomatoes thoroughly and cut out all blemishes and stems. Puree 6 C. tomatoes (large chunks) in a blender (I love my Vitamix). This will give you about 3-4 C. puree depending on how juicy your tomatoes are. Add 1 tsp. honey per C. liquid and a slice of lemon (with the rind). Puree this into the tomatoes. Line the dehydrator tray with kitchen parchment paper (trim it to fit the tray) or Paraflexx®*, which is made by the Excalibur company and is perfect for this sort of thing. I also tried the shiny side of freezer paper and it worked okay. DO NOT USE foil, waxed paper or plastic bags. Pour about 3/4 to 1 C. the mixture onto each tray. Depending on how runny your puree is, you may need more or less per tray. You want it to be about 1/8″ thick at the center and about 1/4″ at the edges. This keeps the edges from drying out too fast and getting brittle. Leave about 1/2″ between the puree and the edge of the tray. Carefully load the trays into the dehydrator. Set the thermostat for 135˚F. Tomato leather should be ready in 8-10 hours depending on the moisture content of your puree. If you want to shorten the drying time, rotate the trays 180˚ halfway through the process. They are ready when there are no sticky spots in the middle but they are leathery and pliable. You can pull a tray out and see if the leather is easy to remove. It should come off in one piece. Place leather on a piece of plastic wrap. You can either roll it up on itself or roll it up in a piece of plastic. Which ever way you prefer, each rolled piece should be wrapped in plastic. Store in airtight containers in a cool dark place. If you make fruit leathers as well, do not store them with vegetable leathers. If you will not eat them all within a month, you might want to keep some of them in the freezer. Sometimes mine have gone bad after a while. But usually we eat them pretty quick. NOTE: One batch of my tomato leathers got a little too crisp around the edges. But after they had been wrapped up for a day, they were just fine.

Variations

You can also add other goodies to your tomatoes. Try some onion, green pepper, and/or garlic. Maybe some fresh basil or other herbs and spices. For starters, add

1 medium onion
1 green pepper
a clove of garlic

to 3 C. tomato puree and process until well blended. Then just follow the same instructions for drying plain tomato leather.
What to Do with Tomato Leather

Marinara Sauce: In a pan sauté onion, garlic, shredded carrot and dried or fresh herbs in olive oil. When everything is cooked, add in your reconstituted sauce and cook for several more minutes.

Pizza Sauce: Place tomato leather into an amount of boiling water. Add dried Italian seasoning and garlic for instant pizza sauce.

Tomato Paste: Add tomato leather pieces to the least amount of hot water possible. Better yet if you can pulverize the leather in a blender or food processor first.

Chili, Soups & Stews: Add squares of tomato leather directly to your pot of simmering chili, soup, or stew to thicken it and add extra tomato flavor.

Tomato Cream Sauce: Sauté onion and garlic until softened, then add in heavy cream or half and half and add tomato leather directly to it; simmer very low until leather has softened.

Tomato Sprinkles: Cut the leather into fine strips or whirl in the food processor or blender to make a fine crumb. Use for a topping on eggs, a green salad or even broccoli. Add some to chicken with pesto, or use in veggie dips. Roll it up in a pork or beef roulade. How about on a turkey sandwich or wrap? It is great in deviled eggs, crock pot recipes, vinaigrette dressings, and in hamburger patties. Tomato basil bread, anyone?

Rangpur Lime Marmalade

Rangpur Lime Marmalade

1 1/2 pounds (about 5 large) Rangpur limes
4 1/2 cups water
3 1/2 cups sugar

Slice off the ends of one Rangpur lime and place it on one of its flat ends. Using a sharp knife or vegetable peeler, remove the peel in strips about 1-inch wide. Leave behind as much white pith as possible. Repeat with the remaining fruit. Use a sharp knife to help peel off any extra pith or remaining patches of skin [from the flesh of the fruit]. It doesn’t need to be perfect. Reserve the flesh of the fruit. Julienne the Rangpur lime peel by stacking 3 or 4 pieces on top of one another and slicing them thin. Place the julienned peel in your preserving pot and set aside. Now, slice the reserved fruit in half lengthwise and slice the half lengthwise again. Cut each quarter crosswise to form many small 1/8-inch-thick Rangpur lime triangles. Reserve the seeds as you go. Put the fruit slices in a medium-size nonreactive bowl as you work. Once the flesh is sliced, tie up the seeds in a square of cheesecloth or scrap of white tea towel. Add them to the preserving pot with the julienned peel and cover with the water. Bring to a boil, reduce heat to low, and simmer for 5 minutes. Remove from heat and pour in the sliced Rangpur lime fruit. Let cool to room temperature and refrigerate overnight.

[Before you start, remove the rangpur lime seed bundle from the preserving pot and give it a good squeeze into the mixture, then discard the seeds.] Add the sugar and, over high heat, bring to a boil that cannot be stirred down. Cook, stirring frequently, until it passes the plate test, about 18 minutes. Ladle into prepared half-pint jars, leaving 1/4-inch headspace. Remove air bubbles. Wipe rims. Place the lids on the jars and screw on the bands until they are fingertip tight. Process in a water-bath canner for 10 minutes, adjusting for altitude as needed. After 24 hours, check the seals. Label, date, and store out of direct sunlight without the bands for up to a year.

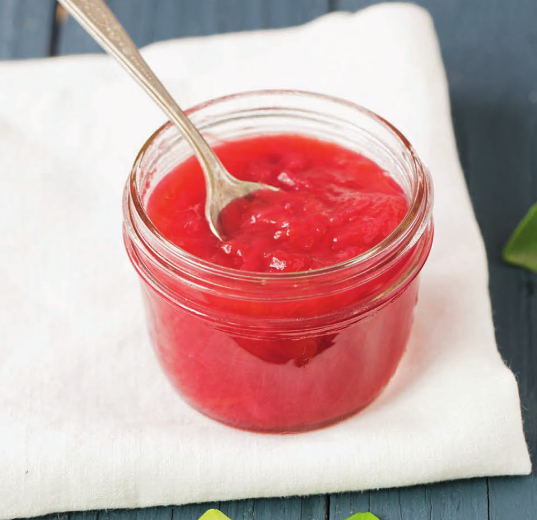
Grapefruit-Rhubarb Preserves

Grapefruit-Rhubarb Preserves

2 lb. (2 medium) Red Grapefruit
1 lb. (4 C.) Rhubarb, sliced 1/2 “ thick
2 C. Sugar

Cut 1-inch-thick strips of peel from the grapefruit, leaving as much pith behind as possible. Stack 3 or 4 pieces of peel together and julienne until youhHave 1/4 cup of julienned peel. Add to the preserving pot. Once you have enough peel, supreme the grapefruit, reserving the seeds and as much juice as possible. I find the easiest way to catch as much juice as possible is to work over a bowl or Pyrex measuring cup. Squeeze the “rag” of the grapefruit, the membrane that remains after you have cut away all the fruit during supreming. to extract as much juice as possible. Measure 1 1/2 cups supremed grapefruit sections and juice. Tie the seeds up in a square of cheesecloth or scrap of white tea towel. Add them to the preserving pot with the julienned peel, grapefruit flesh and juice, rhubarb chunks, and sugar. Over high heat, bring the mixture to a boil that cannot be stirred down. Immediately remove from heat, let cool, and refrigerate overnight. Remove and squeeze the grapefruit seed packet into the
preserving pot. Over high heat, bring to a boil that cannot be stirred down. Reduce to medium-high and cook, stirring frequently, until it passes the plate test. This small batch sets up quickly, in less than 10 minutes. Ladle into prepared half-pint jars, leaving 1/4-inch
headspace. Remove air bubbles and wipe rims. Place the lids on the jars and screw on the bands until they are fingertip tight. Process in a water bath canner for 10 minutes, adjusting for altitude as needed. After 24 hours, check the seals. Label, date, and store out of direct sunlight without bands for up to a year.

Honey Lemon Pear Butter

Honey Lemon Pear Butter

2 lb. Bartlett Pears (5-6)
1/3 C. Honey
1 tsp. Cinnamon
Zest and Juice of 1 Lemon

Prepare a boiling water bath and 2 half-pint/250 ml jars. Place 2 lids in a small saucepan of water and bring to a gentle simmer. Wash, core, and quarter the pears. Place the pears in a medium saucepan with 2 T. of water. Set the pan over medium-low heat and simmer for 10 to 15 minutes, until the pears are quite smooth. Scrape the softened pears into the carafe of a blender and puree until the skins disappear and the flesh is quite tender. Return the puree to the saucepan and place over low heat. Cook, stirring regularly, for 45 to 55 minutes, until the pear puree has thickened a great deal and sits up tall in the bowl of a spoon. If it’s not done, it will run to the edges of the spoon and will be no higher than the rim. Add the honey, lemon juice and zest, and cinnamon. Taste and adjust the sweet and tart levels. Remove the butter from the heat and funnel into the prepared jars, leaving 1/2 inch of headspace. Wipe the rims, apply the lids and rings, and process in a boiling water bath for 10 minutes.

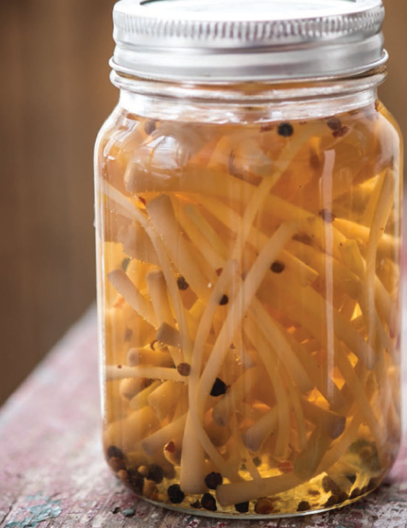
Pickled Ramp Bulbs

Pickled Ramp Bulbs

1 pound ramps
1/2 cup unseasoned rice vinegar
1/4 cup granulated sugar
1 tsp. pickling salt (or any other finely milled salt)
1/2 tsp. coriander seeds
1/2 tsp. black peppercorns
1/8 tsp. red chile flakes
1 bay leaf

Wash the ramps well. Trim away the leafy greens and root ends. Combine the vinegar, sugar, and salt with 1/2 cup/120 ml of water in a small saucepan and bring to a boil. Place all the spices and the bay leaf in the bottom of a clean l-pint/500 ml jar and pack the trimmed ramps into the jar. Pour the brine over the ramps, leaving 1/2 inch/12 mm of headspace. Tap the jar gently to remove any air bubbles. Add more liquid to return the headspace to 1/2 inch/12 mm, if necessary. Wipe the rim and apply a clean lid and ring. Let the jar cool for at least an hour and then place in the refrigerator. Give the ramps at least a week in the pickling liquid before eating. Note: Because nothing about ramps is neat or precisely cultivated, you have to take a bit more care in their preparation. Wash them well in several changes of cold water to ensure you remove all the grit. And don’t toss the green tops! You can either sauté them and serve them as a cooked green or whirl them into an oniony pesto.

Blueberry Syrup

Blueberry Syrup

If you don’t have enough to fill the final jar, refrigerate and use within a month.

6 cups blueberries, fresh or frozen
2 T. fresh-squeezed lemon juice
l tsp. finely grated lemon zest
4-5 cups sugar, to taste
6 pint-size canning jars and lids, sterilized

Have boiling water-bath canner ready. Rinse fruit in cold water, removing any stray stems and blemished berries. Drain well. Reserve 2 cups berries. Place the rest in a food processor and pulse briefly (or mash with a potato masher). Place in a 2-quart saucepan with lemon juice and zest. Bring to a boil over high heat, reduce to a low simmer and cook 5 minutes. Press cooked berries through a fine-mesh colander using the back of a wooden spoon to push through as much pulp and juice as possible. Discard dry pulp. You should have 4 to 5 cups thick juice. Return juice to pan and add an equal amount of sugar. Bring to a boil, reduce to simmer, add 2 cups reserved whole blueberries, and cook 2 minutes. Divide syrup among prepared jars, distributing whole fruit evenly and leaving 1/2 inch of head space. Wipe any spills from lip of jars. Seal with 2-part canning lids and place in a boiling water bath that covers tops of jars by 2 inches. Boil 15 minutes. Remove jars from bath and turn upside-down for 1 minute. Turn upright and cool. Check seals. Variations: Other berries may be substituted or mixed with the blueberries. Recipe may be cut in half. You may substitute a heat-proof sweetener such as Splenda for the sugar. Syrup can also be put up in half-pint jars.

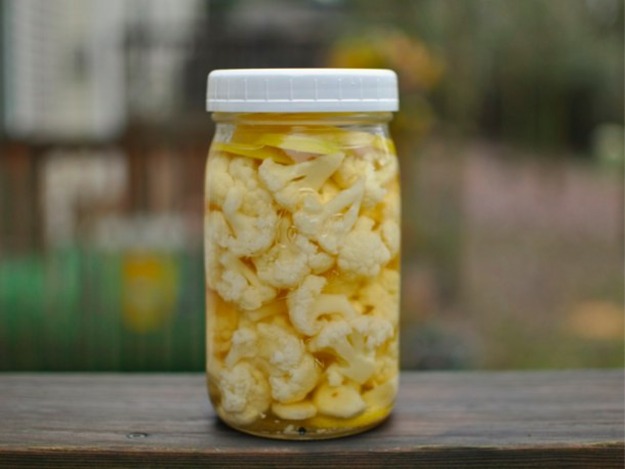
Lemony Pickled Cauliflower

Lemony Pickled Cauliflower

5 C. white vinegar, 5% acidity
3 3/4 C. filtered water
7 1/2T.pickling salt
2 lemons, sliced
2 large heads cauliflower, about 4 lb, cut into small florets

and FOR EACH JAR:
1/2 tsp. whole mustard seeds
1/2 tsp. whole cumin seeds
1/4 tsp. crushed red pepper flakes
1/4 tsp. black peppercorns

Prepare the boiling water bath. Prepare 9 pint jars (use the kind with the shoulders, i.e., not the wide-mouth pints.) Combine vinegar, water, and pickling salt. Bring this brine to a boil. Meanwhile, prep the jars: put a slice of lemon in the bottom of each jar, and then add to each jar both types of seeds, and both types of pepper. Pack the florets into the jars tightly, but do not squish or mash them. When the brine has boiled, slowly pour hot brine over the florets, leaving 1/2″ headspace. Dislodge any bubbles, then check fill level. Add brine if needed. Top each jar with a slice of lemon, tucking it under the neck of the jar. Wipe rims, and apply lids and rings. To seal jars, process in boiling water bath for 10 minutes. Note that as with all pickles, if you need more brine, you MUST use the same proportions of vinegar, water, and salt; and you MUST bring it to a boil before pouring into the jars. I’ve decided that it’s much better to make too much brine than not enough.

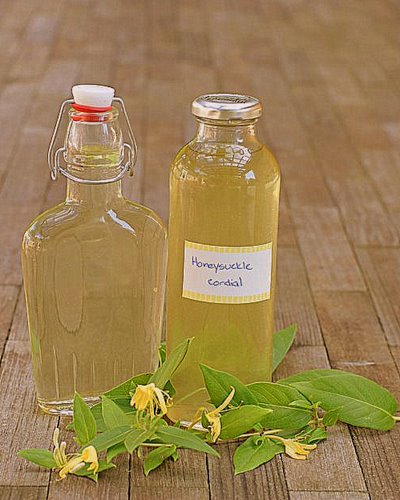
Honeysuckle or Elderflower Cordial

Honeysuckle or Elderflower Cordial

1 quart loosely packed Japanese honeysuckle blossoms or elderberry flowers (no leaves)
Vodka, preferably 100-proof
Simple syrup, to taste

Put the blossoms in a quart-size canning jar and add vodka to cover them completely; push them down with a spoon if necessary. Put the lid on the jar and set it aside in a cool, dark spot for 3 to 4 days. It’ll turn a pretty amber color, and the blossoms will become a dark brown—this is fine. Rinse and squeeze out a heavy-duty paper towel and use it to line a fine-mesh sieve set over a large glass measuring cup. Strain the infused vodka into the cup. and discard the solids. Funnel the vodka into a clean bottle that will hold about a quart. Add simple syrup to taste—the cordial should be fairly sweet; the syrup will also serve to dilute the alcohol content, and you can also add a bit of water now or when you serve it (chilled, over ice, in small doses), or use it in cocktails.

Bergamot-Scented Meyer Lemon Marmalade

Bergamot-Scented Meyer Lemon Marmalade

1/2 pounds (about 4 medium) Meyer lemons
4 cups water
3 1/2 cups sugar
2 T. bergamot zest, grated finely using a microplane (about 1 bergamot)

Slice off the ends of 1 lemon and place it on one of its flat ends. Using a sharp knife or vegetable peeler, remove the peel in strips about 1 inch wide. Leave behind as much white pith as possible. Repeat with the remaining lemons. Use a sharp knife and then your fingers to peel off any extra pith or remaining patches of skin. Reserve the fruit. Julienne the lemon peel very thin by stacking 3 or 4 pieces on top of one another and slicing them. Place the julienned
lemon peel in your preserving pot and set aside. Now slice the reserved fruit in half lengthwise and slice the half lengthwise again. Cut each piece crosswise to form many 1/8-inch-thick Meyer lemon triangles. Reserve the seeds as you go. Put the lemon slices in a medium-size
nonreactive bowl as you work. Once the lemon flesh is sliced, tie up the seeds in a square
of cheesecloth or scrap of white tea towel. Add them to the preserving pot with the julienned peel and cover with the water. Bring to a boil, reduce heat to low, and simmer for 5 minutes. Remove from heat and add the reserved fruit and any collected juices. Refrigerate overnight. Add the sugar and, for a less assertive bergamot flavor, the bergamot zest. (For a more assertive flavor, add it after the mixture has cooked for about 15 minutes.) Over high heat, bring to a boil that cannot be stirred down, stirring frequently. Cook until it passes the plate
test, about 18 minutes. 2 Ladle into prepared half-pint jars, leaving 1/4-inch headspace. Remove air bubbles and wipe rims. Place the lids on the jars and screw on the bands until they are fingertip tight. Process in a water-bath canner for 10 minutes, adjusting for altitude as needed. After 24 hours, check the seals. Label, date, and store out of direct sunlight without the bands for up to a year.

Tomato-Vanilla Jam

Tomato-Vanilla Jam

28 ounces (about 5 cups) red cherry tomatoes, halved
2 vanilla beans
1 1/2 cups sugar
2 tablespoons bottled lemon juice

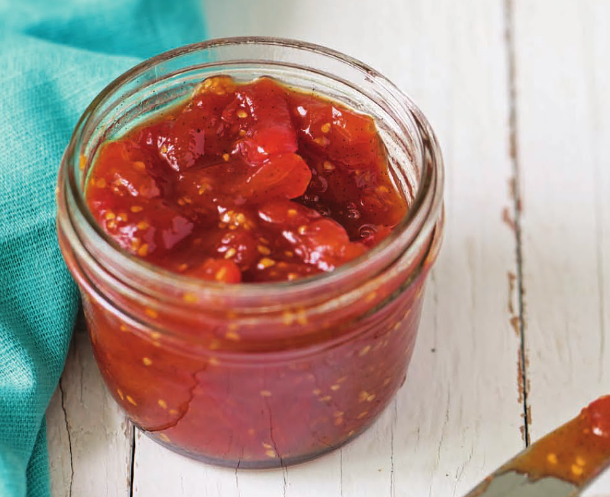
Halve the cherry tomatoes and place them in a large, nonreactive bowl. Using a sharp knife, split the vanilla beans lengthwise and scrape out the seeds. Reserve the pods. Place the sugar and vanilla bean seeds in a separate, smaller nonreactive bowl. Use your hands to rub the vanilla bean seeds into the sugar until all the large clumps of vanilla are broken up. Stir the sugar and vanilla mixture gently into the cherry tomatoes along with the bottled lemon juice. Bottled lemon juice is required in this recipe to make it safe for water-bath processing. Tuck the vanilla bean pods into the fruit sugar mixture so they are submerged, cover, and refrigerate overnight. Transfer the mixture to your preserving pot using a spatula to scrape any sugar that has settled to the bottom of the pan. It is normal for the tomatoes to have let out a lot of liquid. Over high heat, bring the mixture to a boil that cannot be stirred down, stirring to help the sugar dissolve. Continue cooking the mixture on high until the jam passes
the plate test, about 15 minutes. Begin testing earlier it you see signs that the jam is almost done, and reduce the heat to medium-high if the jam shows signs of scorching, such as sticking and burning in spots. Remove from heat and discard the vanilla bean pods. Ladle into prepared half-pint jars, leaving 1/4″-inch headspace. Remove air bubbles and wipe rims. Place
the lids on the jars and screw on the bands until they’re fingertip tight. Process in a water-bath canner for 15 minutes, adjusting for altitude as needed. After 24 hours, check the seals. Label, date, and store cut of direct sunlight without the bands for up to a year.

Blueberries in Their Own Syrup

Blueberries in Their Own Syrup

5 C. Blueberries (1 ½ lb.)
1 ½ C. Sugar
2 T. Lemon Juice

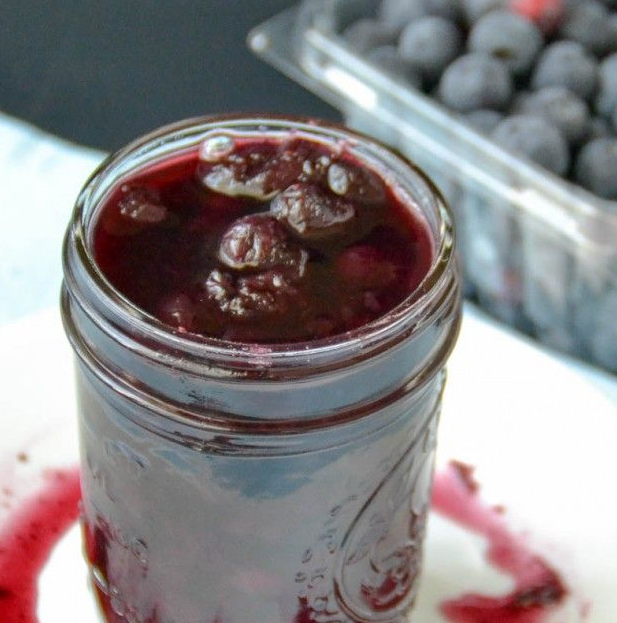
Place the blueberries in a large nonreactive bowl. Take two handfuls of blueberries and smash them in your fists. The goal here is to keep most of the blueberries whole. Add the sugar and lemon juice and use a spatula to toss. Let the mixture sit on the counter for 1 hour. Refrigerate overnight.

Transfer the blueberry mixture to your preserving pot. Over high heat, cook until the bubbles begin to appear large and glassy, about 8 minutes. Remove from heat and test for doneness using the plate test. This preserve is done when you run your finger through a dollop of the cooled preserve, and it doesn’t run back together. Ladle into prepared half-pint jars, leaving 1/4-inch headspace. Remove air bubbles and wipe the rims. Place the lids on the jars and screw on the bands until they are fingertip tight. Process in a water-bath canner for 10 minutes, adjusting for altitude as needed. After 24 hours, check the seals. Label, date, and store out of direct sunlight without the bands for up to a year.

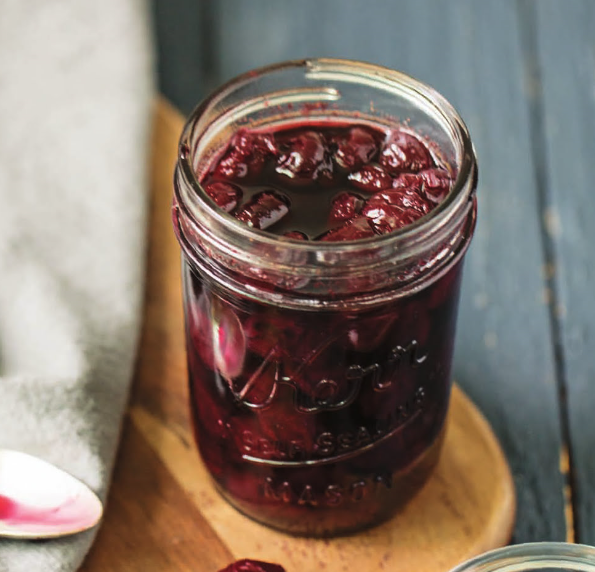
Rummy Rainier Cherries

Rummy Rainier Cherries

A pound or so – of Rainier cherries, pits reserved. (You can use Bing or even sour cherries)
Half strength simple syrup (For every C. sugar, add two C. water)
Dark rum (one T. for each half-pint jar you end up filling)

Pit the cherries.. Do this over the pot you’ll be cooking in, and just drop the pits into the pot along with the cherries. The pits will give the cherries a slight amaretto flavor. Add in the sugar and water, and bring to a boil for five minutes. Remove the pits, and scoop the cherries into sterilized jars. Add one T. dark rum directly to each half-pint jar, then ladle in enough syrup to cover the cherries, leaving 1/2 inch of headroom. Seal the jars with sterilized lids and rings, then process in boiling water for 10 minutes.

Oil-Preserved Butternut Squash with Mint

Oil-Preserved Butternut Squash with Mint

1 Butternut Squash
2 C. White Wine Vinegar
1 ½ C. Sugar
1 fresh or dried Chile Pepper, sliced crosswise or crushed
1 tsp. dried Mint
1 ½ tsp. – 2 tsp. Kosher or Fine Sea Salt
Sunflower Oil

3-4 sterilized ½ pint jars & lids

Slice the squash in half lengthwise. Scoop out the seeds and any stringy pulp and discard (or reserve the seeds for another use). Peel off the rind with a sharp paring knife and cut the squash halves in half again lengthwise, to yield 4 pieces. Slice each quarter crosswise into wedges about V4 inch thick and transfer to a large heatproof bowl. Combine the vinegar, sugar, chile pepper, mint, and salt in a medium saucepan and bring to a boil over medium heat. Stir once or twice to dissolve the sugar. Pour the boiling brine over the squash. Cover with a clean kitchen towel and let steep overnight. Drain the squash, reserving the brine. Return the brine to the saucepan and bring to a boil over medium-high heat. Boil vigorously for 2 minutes, then carefully add the squash. Return to a boil and boil until the squash is just beginning to soften, about 2 minutes—it should still be a little crunchy. Drain the squash and spread it out on clean kitchen towels to air-dry for a couple of hours. Pack the pieces tightly into the jars, leaving about l inch headspace. Pour enough oil over the squash to cover the pieces completely. Cover tightly with the lids and let stand at room temperature for 24 to 48 hours. Store in the refrigerator for up to 3 months. To serve, remove only as much as you plan to use and let it come to room temperature. Top off the jar with more oil as necessary7 to keep the remaining squash submerged. Variation: to preserve the squash in the brine rather than in oil, pack the pieces tightly in sterilized jars, leaving about 1 inch headspace. Pour the hot brine over the squash, taking care to cover all the pieces. Cover tightly with the lids and let come to room temperature. Store in the refrigerator for up to 3 months.

Strawberry Jam with Thai Herbs

Strawberry Jam with Thai Herbs

Makes 8 1/4 pint jars

9 C. clean strawberries diced (3 pounds)
1 1/2 C. sugar
3 tsp. fresh + strained or bottled lemon juice
2 tsp. cilantro
1.5 tsp. thai basil
1 tsp. mint (I used chocolate mint; use whatever you have)
1 tsp. lemon zest

Follow a proper recipe for water bath canning unless you know what you’re doing (e.g. sterilizing jars and lids and all that jazz.) There are tons online or you can get a book.

2. Put the strawberries and sugar into a large, ideally wide pot to aid in evaporating all that water. Bring to simmer and stir stir stir. Cook for about 5 minutes. Then pour the mixture into a colander with a bowl underneath it to catch the liquid and separate it from the fruit. Return the liquid to the pot and cook down boiling over high heat for 20 minutes until it reduces to around 1 + 1/2 C.. Something like it cuts in half. Or, if you’re like me, and fear the high heat boil, put it over medium heat and fret and worry that you might be smelling burning, letting a solid hour pass until it seems thickened enough. Put the fruit you set aside back into the pot with your thickened syrup. Add the lemon juice. Bring to a simmer. Stir frequently for about 25 minutes. If you’re lucky, and bold enough with the heat, it will somehow only take 15. You know it’s ready when a chilled plate from the freezer with a dab of jam, after being returned to the freezer for a minute, seems thickened and jam-like. If it’s sliding around post 1-minute freezer, it needs more time. In the meantime, get the boiling water ready for canning. Turn off the heat, add the herbs and lemon zest and stir it all in. Process the jam in the boiling water for 5 minutes, leaving the requisite 1/4 inch space at the top of each jar. Let rest for 12 hours. Make sure they sealed by trying to push down on each lid. But really, get some solid advice on canning if you haven’t done it before — this book is a great place to start. Canning is fun, and worth trying, and infinitely less dangerous than you might assume. Eat the jam, wondering if a single jar will make it to autumn.

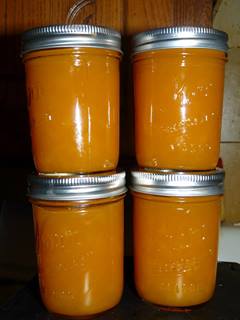
Peach Jam with Lemon Thyme and Almonds

Peach Jam with Lemon Thyme and Almonds

Peach, Lemon Thyme and Almond Jam Perfect served with cheese plate, or a dollop of Creme fraiche and short bread cookies

½ C. slivered almonds
12 oz. (2 large) Granny Smith apples
4 pounds peaches, peeled, pitted and diced
1 ½ C. sugar
3T.lemon juice
2 tsp. fresh lemon thyme leaves

In a small skillet over medium-high heat, toast the almonds, stirring constantly until golden brown and fragrant, about 3 minutes. Remove to a plate and set aside. Cut the apples into quarters and core them. Tie the cores and seeds in a cheesecloth bag and set aside. Put the peaches and sugar in a wide, 6-8 quart preserving pan. Bring to a simmer, stirring frequently, and cook until the juices just cover the peaches. Pour into a colander set over a large bowl and stir the peaches gently to drain off the juice. Return the juice to the pan, along with the apples and cheesecloth bag, and bring to a boil over high heat. Boil, stirring occasionally, until the syrup is thick and reduced, about 15 minutes. Return the peaches and any accumulated juice to the pan, along with the lemon juice, almonds and thyme, and bring to a simmer. Simmer, stirring frequently, until the peaches are very tender and a small dab of the jam spooned onto the chilled plate and returned to the freezer for a minute becomes somewhat firm (it will not gel), about 15 minutes. Remove from the heat and stir gently for a few seconds to distribute the fruit in the liquid. Remove the bag and the apples. Can using the water-bath method.

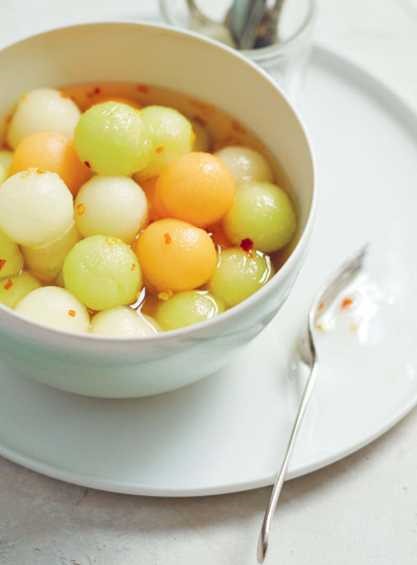
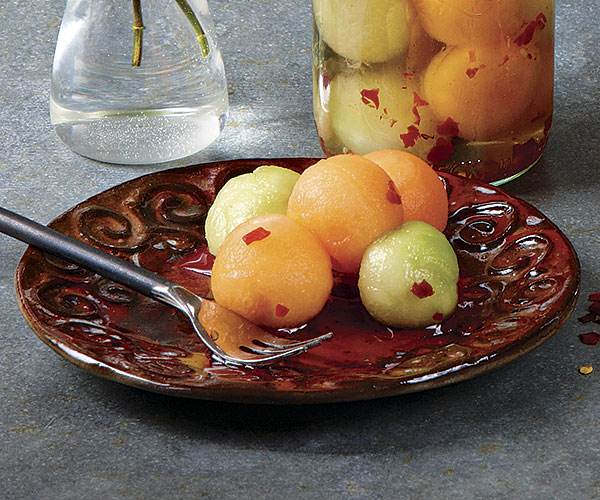
Sweet, Sour, and Spicy Pickled Melon

Sweet, Sour, and Spicy Pickled Melon

6 to 8 lb. (2 large or 3 medium) firm-ripe melons, such as cantaloupe, honeydew, canary, or a mix
2 C. granulated sugar or vanilla sugar
1 C. spring or filtered water
3/4 C. white wine vinegar
1 tsp. fine sea salt
1 tsp. crushed red pepper flakes
3 sprigs fresh mint

Why filtered water? Fruits pickled in agrodolce pick up all of the flavors in the brine—that’s the whole point, after all. Because water is a main component of the brine, I recommend you filter your tap water or use bottled spring water. This way, you can be sure your pickles won’t take on any off flavors from municipal water-treatment chemicals, such as chlorine, or naturally occurring minerals in well water, like sulfur. Run 3 pint-size mason jars and their lids through the hottest dishwasher cycle to sanitize. Run 3 pint-size mason jars and their lids through the hottest dishwasher cycle to sanitize. Halve and seed the melons. Using a melon baller, carve out about 6 C. melon balls, and place them in a bowl. Reserve any leftover melon for another use. Combine the sugar, water, vinegar, salt, and pepper flakes in a small saucepan. Bring to a boil over medium-high heat, stirring to dissolve the sugar and salt completely. While the brine is heating, pack the melon balls into the jars as tightly as you can without crushing them. Pour the hot brine into the jars, leaving a 1/2-inch headspace and making sure the melon balls are completely submerged. Insert 1 mint sprig into each jar, pushing down along the side of the jar with the handle of a spoon to submerge in the brine. Cool to room temperature. Screw the lids on tightly, and let the melon cure in the refrigerator for 4 days before serving. The melon will keep in the refrigerator for up to 1 month, though it will continue to soften over time.

Variations: The recipe calls for curing the pickles in the refrigerator, but if you’d rather make them shelf-stable until they’re open, you can process the melon in a hot-water bath. Though they will soften over time, the pickles will keep for up to 6 months at room temperature. Simply follow instructions for hot-water canning, processing the jars for 25 minutes.

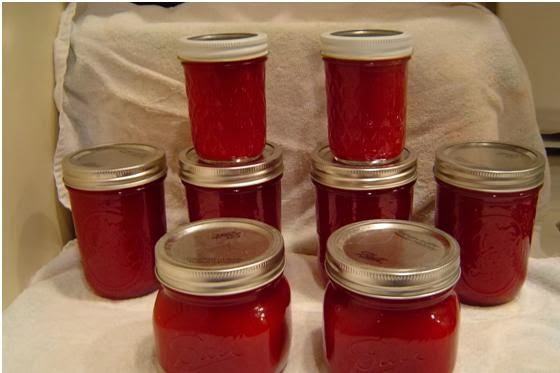
Tomato Jam

Tomato Jam

Makes 3 Pint Jars or 6 Half-Pint Jars or 12 – 4 oz. Jars

5 pounds tomatoes, cored and finely chopped
1 C. sugar** (see note below)
½ C. freshly squeezed lime juice
2 tsp. grated peeled fresh ginger
1 tsp. ground cinnamon
½ tsp. ground cloves
1 tsp. sea salt
1/2 tsp. red pepper flakes** (see note below)

Prepare water bath and jars. After water reaches boiling point, keep on low heat until needed. Place lids in a small saucepan, cover with water and place on very low heat. Tomatoes 032Combine all ingredients in a non-reactive pot. Bring to a boil over high heat, then reduce to low. Simmer the jam, stirring regularly, until it reduces to a consistency similar to jam. If you wish to test it, drop a tsp. onto a saucer. When cooled, the jam should stay in a mound. If it runs down the saucer when titled, it needs more cooking. This will take between 1 1/2 to 2 hours. When jam has cooked down sufficiently, remove pot from the heat and ladle jam into the prepared jars, leaving 1/4 inch headspace. Wipe the rims, apply the lids and rings, and process in a water bath for 20 minutes.

I used organic raw sugar in this recipe. I use less sugar than Marisa does in her recipe since I like to more tangy. It is shelf stable, however, because of the added acid. Marisa suggests 3 ½ C. but I find 1 C. gives it just the savory-ness I like.
I used ½ tsp. red pepper flakes which gives it a bit of heat but not over the top. Adjust to your taste preferences, as is true for all spices.

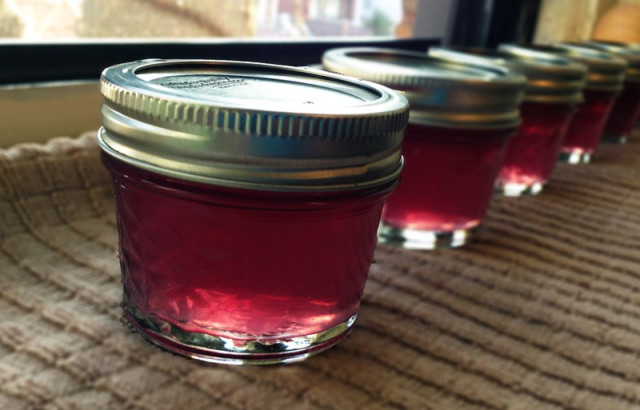
Violet Jelly

Violet Jelly

2 C. tightly packed violet flowers (no stems)
2 C. boiling water
1/4 C. bottled lemon juice
1 1/2 C. white sugar (again, white is essential to retain the violet color)
4 tsp. pectin

Rinse and drain flowers and place in a small stainless steel saucepan or heat-proof glass bowl. Pour over boiling water, cover and let steep for 24 hours. Strain the liquid through a fine mesh sieve into a medium saucepan, using a wooden spoon (or very clean hands) to squeeze out as much liquid as possible. Add lemon juice and gently heat over medium low heat until warm. In a small bowl, whisk sugar and pectin until well incorporated. Add sugar-pectin blend to violet water and whisk until completely dissolved. Turn heat up to medium high and bring mixture to a boil, stirring occasionally. You want to stay close to the pot because it does have a tendency to bubble over if left unattended. Continue cooking until mixture has thickened slightly, about 5-10 minutes, skimming off any foam as you go (there will be a lot). Jelly is ready when it passes the chilled plate test. Make sure all foam has been removed and ladle jelly into clean, hot, sterile jars, leaving 1/4 inch headspace. Wipe rims clean, center lids and screw on jar rings. Process in boiling water bath for 12 minutes. Remove jars and allow to cool for 24 hours. Press on center of lids after about 1 hour to make sure they’ve sealed. If the lid springs back, it did not seal properly and needs to be stored in the refrigerator. After 24 hours, label jars and store in pantry.

Candied Angelica

Candied Angelica
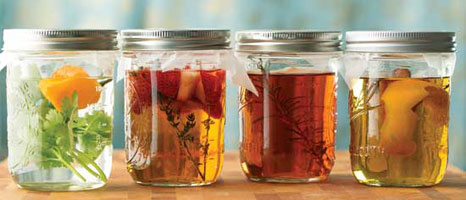
Candied Angelica
 

3 -4 sprigs angelica, at least 2 years old

1 cup caster (superfine) sugar

1 T. baking soda

caster sugar, for sprinkling (optional)


Cut angelica stalks in their 2nd year. Unlike many other plants, the big stalks are better as long as they are still green (not purple or white). De-leaf, remove leaf stalks and cut into pieces of about 6 inches, and soak in cold water for about 8 hours. Boil water and plunge the stalks inches Boil until the stalks begin to soften (add about half tsp. of baking soda per pint of water to keep the vivid green color, which is associated with ‘real’ candied angelica that is found in France) It also helps to soften. Cool under running water, drain, then peel removing the long stringy parts on the outside of the stalks. Put them into a syrup made up of of 1 cup sugar, and 1 cup water: soak for 24 hours. Cook in them in the syrup and repeat once a day for four days, by which time the angelica should be translucent without losing shape. Remove the angelica stems from the pan and let them drain on a covered rack or screen until dry and glossy. You can roll the stems in caster sugar, BEFORE drying them on the rack/screen if you wish.). Store in an airtight tin or jar, and in a cool, dark place; they will last for up to 2 years in the right storage conditions. Cut the stems into appropriate lengths and use to decorate cakes, trifles, desserts, or ice cream sundaes.

Home-Canned Tuna

Home-Canned Tuna

Home-canned tuna can’t be beat. You will need brand-new two-piece jar lids and a pressure canner, which reaches the high temperature needed to kill dangerous bacteria.

2 1/2 pounds boneless, skinless albacore tuna loins
3 tsp. fine sea salt

Sterilize mason jars, bands and lids by running them through the dishwasher or boiling them in water for 30 seconds. Use tongs or a jar lifter to transfer the jars, bands and lids to a clean kitchen towel on a counter, and let air-dry. Wash tuna. Trim off and discard any dark bloodlines, connective tissue and discolored flesh. Cut the meat into large pieces and pack them into the jars, cutting as needed to leaving a 1-inch space between the tuna and the lid. Sprinkle 1/2 tsp. salt into each jar. Wipe the rims clean with a paper towel moistened with vinegar. Seal jars with the lids and screw on the bands until secure but not too tight. Put the rack in the bottom of the pressure canner and place the sealed jars on top. Pour boiling water into the bottom of the canner, 2 to 3 inches high. Following the manufacturer’s instructions and OSU’s step-by-step pressure canning guide, carefully lock the top of the canner in place. Process the jars for 100 minutes at 11 pounds of pressure. Turn off the heat and allow the pressure to drop to zero, about 30 to 45 minutes. Remove the pressure gauge, wait for 2 minutes, and then lift off the top of the canner. Using tongs or a jar lifter, transfer the jars to the kitchen towel on the counter, spaced apart, and let cool for 12 hours. The lids will make a popping sound as the jars cool, indicating that they’ve created a vacuum. To test each seal, check that the lids have sucked down into a slightly dipped shape and are firmly in place. (Place any jars that don’t seal properly in the refrigerator and use within 3 to 4 days.) Store canned tuna in a cool, dark place for up to 1 year. Refrigerate after opening. Makes 6 half-pint jars

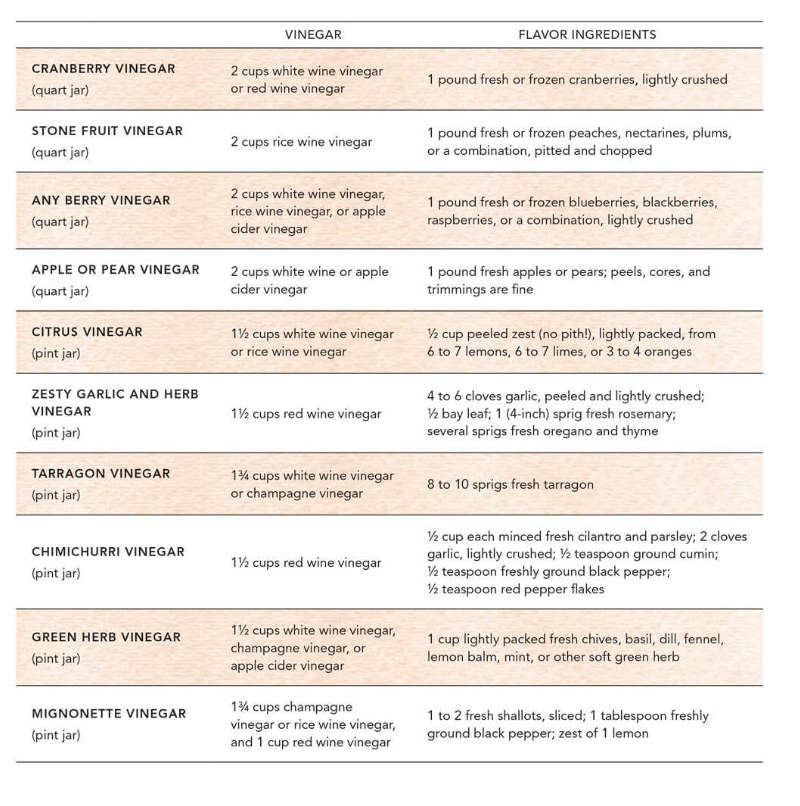
Infused Vinegars

Infused Vinegars

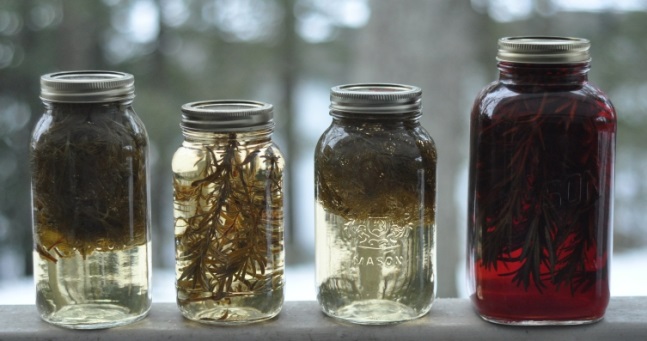
Prepare the flavoring ingredients as necessary. All fruit and herbs should be as fresh as possible, and in top condition. Discard any ingredients with signs of mold or decay. Wash and thoroughly dry your fresh ingredients.

Clean and sanitize a glass jar that will be large enough to hold the vinegar and flavor ingredients comfortably. I typically use pint or quart mason jars.

Combine the vinegar and flavor ingredients in the jar. Make sure there is enough vinegar to fully cover all the flavoring ingredients. If not, add a bit more vinegar to the jar.

Lid the jar and let the vinegar sit in a cool, dark place for 3 to 4 weeks. Taste the vinegar; when the flavor has developed to your satisfaction, it’s done!

Strain the vinegar through a fine-mesh sieve to remove any big chunks, then filter the vinegar through a strainer lined with a paper coffee filter, clean lint-free cloth, or layered paper towels.

If desired, sweeten the vinegar slightly. Many fruit vinegars taste more rounded with about 1 T. sugar added per 1 C. finished vinegar. This is totally optional.

Transfer the vinegar to sanitized dry bottles. Lid tightly and store the vinegar in a cool, dark place. It will keep for about l year.

Spicy Pickled Rhubarb

Spicy Pickled Rhubarb

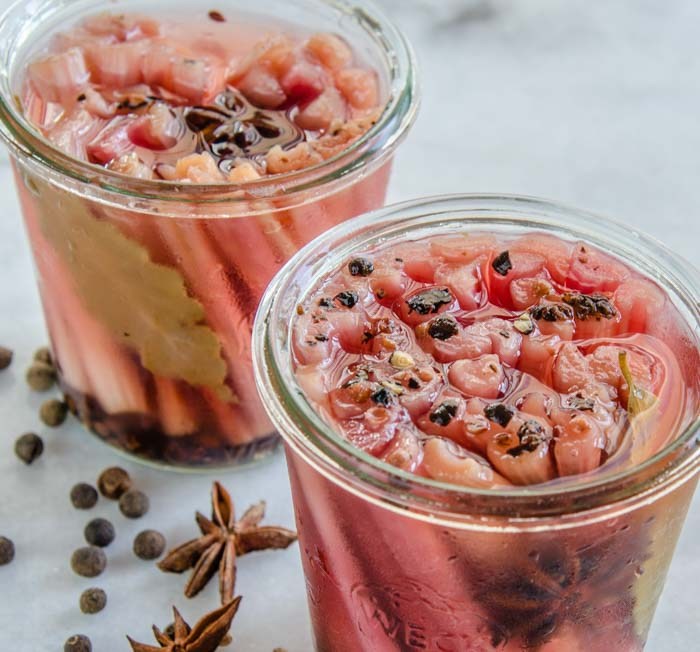
This spicy, sweet-tart pickled rhubarb is infused with the flavors and aromas of juniper, allspice, coriander, black pepper, bay leaf, and star anise. Perfect as an accompaniment to roast pork or chicken, as a topping for goat cheese-slathered crostini, or even with creamy desserts, such as panna cotta or custard.

Testing Note In testing the source recipe, I found that the amount of syrup specified fills two 1¼-C. (290 ml./9.8 fl. oz.) canning jars, rather than two 2-C. canning jars as indicated. It worked perfectly for my small Weck canning jars. Technique Note To crush spices, seal them in a Ziplock bag, and crush with a few light whacks of a mallet.

1 C. rice vinegar
1 C. water ½ C. sugar
½ tsp. fine sea salt

1 tsp. juniper berries, lightly crushed
1 tsp. allspice berries, lightly crushed
1 tsp. coriander seeds, lightly crushed
½ tsp. black peppercorns, lightly crushed
1 small dried red chile (or pinch red pepper flakes)
2 small dried bay leaves
2 star anise

12 oz., ¾-inch thick (or thinner) trimmed rhubarb stalks, cut into 3-inch lengths, or 1-inch shorter than canning jars (peel, and halve or quarter thicker stalks)

Pack prepared rhubarb snugly into two 1¼-C. canning jars. Reserve. Set a small saucepan over medium heat, and add vinegar, water, sugar, and salt. Heat below the simmer until syrup clears, 3-5 minutes. Add juniper, allspice, coriander, peppercorns, chile, bay leaf, and star anise. Bring to a boil, and simmer for 5 minutes. Remove from heat, and distribute syrup with spices between the two canning jars. Cover the jars and refrigerate for 1 to 8 weeks before serving. Serve whole or sliced or chunked. Fills two 9.8 fl. oz. canning jars (Weck 900–1/5 L Mold Jar–tall)

Lemony Pickled Cauliflower

Lemony Pickled Cauliflower

Lemony Pickled Cauliflower


2 lb. cauliflower

1 C. apple cider vinegar

1 C. water

2 tsp. sea salt

1 small lemon, sliced

1 large garlic clove, sliced

1/4 tsp. peppercorns


Wash cauliflower and break it into florets. In a large saucepan, combine the apple cider vinegar, water and sea salt. Bring to a boil. Place two slices of lemon in the bottom of a quart jar and top with garlic clove slices and peppercorns. Set aside. When brine is boiling, add cauliflower to the pot. Stir until the brine returns to a boil and remove from heat. Using tongs, pack cauliflower into the prepared jar and top with brine. Place 2-3 slices of lemon on top of the cauliflower and put a lid on the jar. Let pickles sit out on counter until cool. Once they’ve reached room temperature, refrigerate jar. Pickles are ready to eat within 12 hours, though they will continue to deepen in flavor the longer the rest.

No Pectin Blueberry Maple Jam

No Pectin Blueberry Maple Jam

No Pectin Blueberry Maple Jam


All of that is a very long way to say that this jam can be runny. It’s relatively low sugar, doesn’t have added pectin and adds maple syrup. All of that generally leads to a very, very loose set – but something that really tastes of its ingredients, of the area and isn’t overtly sweet. This tastes like its core ingredients – wild blueberries and maple syrup.


This is a great ingredient for baking, pancakes, ice cream, smoothies or, my favorite use, as a cheese topping for goat cheese (chevre). It’s mad-good with cheese.


Ingredients

6 C. Blueberries

3 C. Brown Sugar

1 C. Maple Syrup

1/3 C. Bottled Lemon Juice (use the bottled stuff to be sure of the acidity).


Place berries in a wide pan. Crush berries with a potato masher. Add lemon, sugar and syrup, stir well. Let rest for an hour. Bring to a simmer over medium heat. Stir frequently until jam is set – about 20 minutes after it starts boiling. Skim foam, pour into sterilized 1-C. (half-pint or 250 ml) jars and process in a hot water bath for 10 minutes. This is a magical taste of late summer and something I just simply adore.

Blueberry Maple Jam with Lemon

Blueberry Maple Jam with Lemon

Blueberry Maple Jam with Lemon


6 C. blueberries

3 C. brown sugar, lightly packed

Peels and cores (seeds included) of 3 apples

1 cinnamon stick

1 C. maple syrup

â…“ C. bottled lemon juice

1T.lemon zest, finely grated


Place the berries in a large pot, crush them lightly, and add the sugar. Stir to mix, cover, and rest for 1– 4 hours on the counter. Place the apple peels and cores and the cinnamon stick inside the cheesecloth to make a teabag. Place the teabag in a large pot with the blueberries, maple syrup, lemon juice, and lemon zest. Prepare your canning pot and rack, and sterilize your jars and lids Bring the fruit to a simmer over medium heat, skimming off any foam that appears. Cook until set, at least 20 minutes. Remove the teabag from the jam. Remove the jars from the canner and turn the heat to high. Using a funnel, pour the jam into the jars. Wipe the rims of the jars, apply the lids, and process for 10 minutes. Remove the jars and allow them to cool.

Spiced Rhubarb Chutney

Spiced Rhubarb Chutney

Spiced Rhubarb Chutney


This russet-red chutney is sweet, tart, spicy, and addictively delicious. I especially love it with Seeded Bread Crisps topped with a creamy brie or fresh chevre, or as an accompaniment to a savory cheesecake.


1 C. white balsamic vinegar

1 C. sugar

2 cinnamon sticks, broken with a mallet

2 tsp. cardamom pods, broken with a mallet

2 tsp. coarsely crushed black peppercorns

2 tsp. whole cloves

1 tsp. anise seeds

zest of 1 large orange


3 C. (14 oz.), trimmed, sliced rhubarb

½ C. plump raisins


½ tsp. vanilla


In a medium saucepan, combine vinegar and sugar, and bring to a simmer, whisking constantly to dissolve the sugar. Add the cinnamon, cardamom, peppercorns, cloves, anise seeds, and orange zest. Cover the pan tightly and macerate for at least 1 hour. Strain the liquid through a triple-mesh sieve into a clean saucepan. Discard the spent spices. Reheat the liquid and add the rhubarb and raisins. Bring to a slow simmer. Simmer slowly, stirring frequently, until the sauce thickens and the liquid reduces by half, about 10 minutes. Remove from the heat, and stir in the vanilla. Let cool, put into a storage container, cover, and refrigerate until cold.

Strawberry Lemon Lavender Honey Jam

Strawberry Lemon Lavender Honey Jam

Strawberry Lemon Lavender Honey Jam


1 lemon, zest and juice

4 C. sliced strawberries

3 T. Dutch Jell All Natural Lite pectin

12 heads of lavender, tied in a bundle.

1 1/2 C. mild honey


Put the lemon juice, lemon zest, berries, lavender, and pectin in a pot. (You can stir with the lavender bundle.) Bring to hard rolling boil. Boil for 1 minute. Remove the lavender bundle. Add honey. Bring to rolling boil and boil for 1 minute. Ladle into jars. BWB 10 minutes. Makes five 8-oz. jars. Notes: If you don’t want the odd lavender flower falling off into the jam, you can strip the flowers off and put them in a tea ball to steep in the jam as it cooks. I found it easier to just use the bundle to stir with as much as I could, then I switched to a spoon when I needed a stronger stirrer.


About the pectin: I’ve been using bulk pectin this year from my local Amish store. You can probably use 1 pkg / 3 T. Ball pectin as well or Sure-Jell. Keep in mind that strawberries often take more pectin than other fruit.

Hawaiian Jam

Hawaiian Jam

Hawaiian Jam

8 Peaches, peeled

3 lg Oranges

Pulp of 1 med. cantaloupe

1 Lemon

1 (8 1/2 oz.) can crushed Pineapple

Sugar


Chop all ingredients fine. Put oranges through food processor. Combine all with 3/4 C. sugar for every 1 C. of fruit. Mix well and let stand overnight. Next morning, gently cook mixture 1 hour, stirring frequently. Pour into hot jars and seal. Makes 8 pints.

Berry Christmas Jam

Berry Christmas Jam

Berry Christmas Jam


3 C. Fresh cranberries

1 md Seedless orange, peeled and quartered

1 pkg. (10 oz.) frozen sliced strawberries, slightly thawed

1/4 tsp. Ground cloves

1/4 tsp. Ground cinnamon

4 C. Sugar

1/2 C. Water

1 Pouch (3 oz.) liquid fruit pectin


In a food processor, combine the cranberries and orange quarters; process until coarsely chopped. Add strawberries, cloves and cinnamon; process until mixture is finely chopped. In a heavy large saucepan, combine fruit mixture, sugar and water until well blended. Stirring constantly over low heat, cook two minutes. Increase heat to high and bring mixture to a rolling boil. Stir in liquid pectin. Stirring constantly, bring to a rolling boil again and boil one minute. Remove from heat; skim off foam. Pour into heat resistant jars with lids. Makes about 3 pints of jam.

Chiles Jalapenos en Escabeche (pickled Jalapeno Chiles)

Chiles Jalapenos en Escabeche (pickled Jalapeno Chiles)

¼ C. Canola Oil
½ lb. Carrots, peeled and sliced on the bias
1 lb. Jalapeno Chiles (do not remove seeds), sliced into strips
1 White Onion, quartered and sliced
30 cloves Garlic
6 Whole Allspice
10 Black Peppercorns
4 whole Cloves
3 sprigs Thyme
3 springs Marjoram
2 C. White Distilled Vinegar
1 C. Water
Salt, to taste

Heat the oil in a large non-reactive pot or Dutch oven. Add the carrots and sauté for 8 minutes or until soft. Add the sliced chiles and sauté for 3 minutes. Add the onion and sauté for 2 minutes. Add the remaining ingredients and bring to a simmer. Cook the escabeche on low heat for 10 minutes. Season with salt. Remove from the heat and cool. Place the escabeche in a sterilized glass container with a tight-fitting lid and refrigerate. Marinate the escabeche for at least 24 hours prior to serving. These will last up to 4 weeks in the refrigerator.

SpicySweet Pickled Ramps

SpicySweet Pickled Ramps

12 oz. ramps with greens (about 3 bunches)
3 C. cider vinegar (5% acidity)
2 tsp. pure kosher salt
1/2 C. sugar
2 tsp. fennel seeds
2 tsp. yellow mustard seeds
1 tsp. whole black peppercorns
1 tsp. hot pepper flakes, or more to taste

Prepare for water-bath canning: Wash the jars, keep them hot in the canning pot, and put the flat lids in a bowl. Wash the ramps well and trim off any damaged leaves. Cut the tops off so that the bulb ends will fit upright in your canning jar with 1/2 inch headspace at the top. Arrange the leafy tops into four stacks. In a saucepan, bring the vinegar, 1 C. water, the salt, sugar, and spices to a boil over high heat, stirring to dissolve the salt and sugar. Using a jar lifter, remove the hot jars from the canning pot, carefully pouring the water from each one back into the pot, and place them upright on a folded towel. Working quickly, pack the ramp bulbs into one of the hot jars. Roll up each stack of leaves and stuff two rolls into each of the other two hot jars. Ladle the hot vinegar mixture into all the jars, leaving 1/2 inch headspace. Use a chopstick to remove air bubbles around the inside of each jar. Use a damp paper towel to wipe the rims of the jars, then put a flat lid and ring on each jar, adjusting the ring so that it’s just finger-tight. Return the jars to the water in the canning pot, making sure the water covers the jars by at least 1 inch. Bring to a boil, and boil for 10 minutes to process. Remove the jars to a folded towel and do not disturb for 12 hours. After 1 hour, check that the lids have sealed by pressing down on the center of each; if it can be pushed down, it hasn’t sealed, and the jar should be reprocessed or refrigerated immediately. Label the sealed jars and store.

Tropea Onion Jam

Tropea Onion Jam

1 pound (454 g) Tropea or other red onions, cut into small dice
2 C. (400 g) sugar
1 C. (237 g) Sangiovese or other sturdy red wine
1/2 to 3/4 tsp. kosher or fine sea salt
10 whole peppercorns
1 whole clove
1 bay leaf
1-inch piece vanilla bean
1/2 cinnamon stick
2 T. red wine vinegar

4-inch square of cheesecloth and a length of kitchen twine
Instant-read thermometer (optional)
2 sterilized 1/2-pint jars and 1 sterilized 4-oz. jar, and their lids
Basic water-bath canning equipment

Combine the onions, sugar, wine, and salt in a wide, heavy-bottomed saucepan. Use the cheesecloth to make a sachet for the peppercorns, clove, bay leaf, vanilla bean, and cinnamon stick and tie it up with the kitchen twine. Put the sachet in the pot with the other ingredients. Bring the onion mixture to a boil over medium heat, stirring to dissolve the sugar. Cook at a simmer, stirring often, until the jam has thickened and reaches 220 to 225°F and you can drag a path along the bottom of the pot with a silicone spatula, about 20 minutes. Stir in the vinegar and remove from the heat. 3 • Ladle the jam into jars, leaving 1/4 inch headspace. Wipe the rims with a clean, damp cloth, if necessary, and screw the lids on the jars. Process in a boiling-water bath for 10 minutes. Remove the jars and set them upright on a clean kitchen towel. Let cool to room temperature before storing in a cool, dark place for up to 1 year. Refrigerate once opened, and use within 6 months. If any jars have failed to seal properly, store them in the refrigerator and enjoy those first.

Garlic Confit

Garlic Confit

Peel the cloves from 2 heads (or more) of garlic. Place the cloves in a small saucepan and pour in enough olive oil to cover them, 1/2 to 3/4 C. for 2 heads. Over medium heat bring the oil to just a hint of a simmer, then reduce the heat to as low as it can go. You want to poach the garlic, not simmer it. Cook for about 45 minutes, until the garlic is soft and tender, but not falling apart. Transfer the garlic with a slotted spoon to a clean jar and pour the oil in to cover the cloves.

Cool the mixture to room temperature. Cover the jar tightly and keep refrigerated for several weeks, or freeze for several months. (Keep the cloves covered in oil and be careful about using a clean spoon to dip into the jar). As a variation, add rosemary and/or thyme to the saucepan along with the garlic to cook.

10 Ways To Use Garlic Confit

1.Whip a few cloves and some of the infused oil with vinegar to make a vinaigrette. Toss it with delicate greens.
2.Smash some of the cloves and whisk them with some of the infused oil. Toss the thick garlicky oil with steamed vegetables. (Excellent with asparagus, green beans, snow and snap peas, broccoli, and cauliflower.)
3.Toss roasted or grilled vegetables with a spoonful of the tender garlic.
4.Spread the tender cloves over toasted bread or cheese-smeared crostini. (Goat cheese is a great option.) For a composed hors d’oeuvre, garnish the garlic toasts with chives or any fresh herbs.
5.Layer garlic confit into a sandwich or pizza.
6.Toss garlic confit into a vegetable pasta. (Just pick a vegetable and pair it with garlic confit and pasta. For an easy option, try fresh tomatoes and basil.)
7.Whip the tender cloves into any vegetable puree for sweet garlic flavor. (Try garlic confit with a potato, celery root, cauliflower, winter squash, or sunchoke puree.) A whipped chickpea or cannellini bean puree will also benefit from a spoonful of garlic confit.
8.Make a vegetable and garlic confit salad. Slice the cloves in half and toss them into a tomato, basil, and toasted bread salad. Use some of the oil to sauté corn-off-the-cob just briefly. Toss the corn with sliced or smashed cloves, fresh basil, and feta. (Add zucchini and/or tomatoes to the corn salad if you wish.)
9.Add garlic confit to sauces and soups.
10.Use the back of a fork to break down cloves into a paste. Stir the garlic paste into plain Greek yogurt or ricotta to make a creamy garlic dip or condiment. If you wish, add summer herbs to the mixture or drizzle the top with a good olive oil or chili oil.

A Warning About Botulism: Garlic is an extremely low-acid vegetable. When it is stored improperly in oil (without oxygen) and in warm temperatures (at room temperature), it can produce a very serious toxin that causes the illness botulism. Botulism can be fatal if not treated immediately. It is very important to refrigerate garlic confit, as per the Center for Disease Control. Use a clean jar with a tight seal to store garlic confit; cool the garlic and oil as quickly as possible, and refrigerate it immediately. If you store the preserved garlic properly, it should keep for several months, however, to be completely safe, I recommend only storing it for up to three weeks. If you’re worried, you can also safely freeze garlic confit for several months.

6 heads of garlic, cloves peeled (2 cups)

6 thyme sprigs

3 small bay leaves

3 dried red chiles, such as chiles de arbol

2 cups pure olive oil

Combine all of the ingredients in a medium saucepan and simmer over low heat until the garlic is tender but not browned, about 30 minutes. Let cool.  Using a slotted spoon, transfer the garlic, herbs and chiles to three 1/2-pint canning jars. Pour the cooking oil on top, seal and refrigerate for up to 4 months.

Cardamom Carrot Marmalade

Cardamom Carrot Marmalade

Handmade gifts are better, but handmade food gifts are the best. Inspired by carrot jam from Afghanistan, this marmalade puts carrots and cardamom to good use and easy enough to make in an afternoon. Because candied grated carrots play the role of citrus peel in this naturally neon orange marmalade, the result is sweet rather than bitter.

2 C. water
1 tsp. green cardamom pods
1 Meyer lemon, zest and juice
1 orange, zest and juice
2 C. grated carrots (about 6 medium or 3 large carrots)
2 C. organic cane sugar
1 tsp. cardamom seeds, ground

In a saucepan, combine the water, cardamom pods, and lemon and orange juices and zests. Bring to a boil. Simmer for 15 minutes. Remove from heat. Take out and discard cardamom pods. Add carrots, sugar and ground cardamom, and simmer for about 30 minutes, stirring constantly, until the carrots absorb most of the liquid and only a small amount of sugar syrup pools when you pull your spoon across the bottom. Remove from heat. Spoon into sterile glass jars with airtight lids and cover. Process in a water bath for 10 minutes (will keep unopened for up to one year), or cool completely and store in the refrigerator (will keep for several weeks). Makes 2 C. (or 2 half-pint jars)

Dehydrator: Watermelon Candy

Dehydrator: Watermelon Candy

Watermelon becomes as sweet as candy when dehydrated and the sugars intensified. Watermelon being mostly water, it will shrink up mightily.

Watermelon

Cut watermelon and remove flesh from rind. Cut flesh into ¼” thickness and remove as many seeds as you can. Place on lined dehydrator trays and dehydrate at 135 for 18-24 hours, or until it is as dry as you like it. Dry less for a chewy snack, more for a crisp version. Store in airtight container.

Chive Oil & Chive Blossom Vinegar

Chive Oil & Chive Blossom Vinegar

Chive Oil & Chive Blossom Vinegar


Clip blossoming chives near the base of the stem, trimming off brown or dried parts. Pick off blossoms. Chop stems into 1/2″ lengths.


For vinegar, pack blossoms into pint jar (or jars, depending on how many blossoms you have and how much vinegar you’ll use). Fill jar with vinegar to within 1/2″ of top. I used white wine vinegar, but some recipes call for white vinegar, which to my taste would be too strong; others call for white balsamic vinegar. Seal with lid, but not too tightly, to allow vinegar to breathe. Store in cool, dark place for two weeks. Strain into clean jar(s) and seal with lid(s). Keep up to six months in a cupboard away from heat or light.


For oil, place chopped chives, a few blossoms and enough oil to cover in a blender. Blend on high until completely pulverized then add more oil to thin it. Pour into lidded container and place in refrigerator for four days. Bring to room temperature, strain through fine mesh sieve or cheesecloth into medium bowl or pint measuring C., then pour strained oil into ice cube tray and freeze. Pop frozen cubes out of trays and place in zip-lock bag. Store in freezer and thaw as needed.

Rhubarb Hot Pepper Jelly

Rhubarb Hot Pepper Jelly

Rhubarb Hot Pepper Jelly


2 cups chopped rhubarb (about 3– 5 medium-size stalks, cut into ½-inch pieces)

6 cups plus 2 T. sugar, divided

1 cup seeded and chopped red bell pepper or banana pepper

½ cup seeded and chopped jalapeño, serrano, or Thai pepper

½ cup chopped red onion

1½ cups white vinegar

2 (3-ounce) pouches liquid pectin


Bring rhubarb, 2 T. sugar, and water to cover to a boil in a large pot over high heat. Reduce heat, and simmer, stirring occasionally, 30 minutes. Strain over a large bowl, reserving 1 cup rhubarb juice and discarding pulp. Return rhubarb juice to pot. Place peppers and onion in the bowl of a food processor with a metal blade; pulse until pepper mixture is finely chopped. Add pepper mixture, vinegar, and remaining 6 cups sugar to rhubarb juice in pot. Bring mixture to a full rolling boil, stirring constantly, 1 minute. Remove from heat, and stir in pectin, mixing well. Using basic canning procedures, pour jelly mixture into hot jars, adjust lids, and process in boiling water bath for 10 minutes. Cool 30 minutes; invert and twist jars to distribute solids.

Guacamole with Preserved Lemon

Guacamole with Preserved Lemon

Guacamole with Preserved Lemon


2 avocados

1 preserved lemon, finely chopped

1 T. brine from preserved lemons

1 T. diced onion (if desired)

2 T. chopped fresh cilantro

1 pinch smoked paprika

1 pinch cayenne pepper (if desired)


Blend all ingredients by hand or in a food processor until smooth. Serve with tortilla chips or with toasted pita wedges