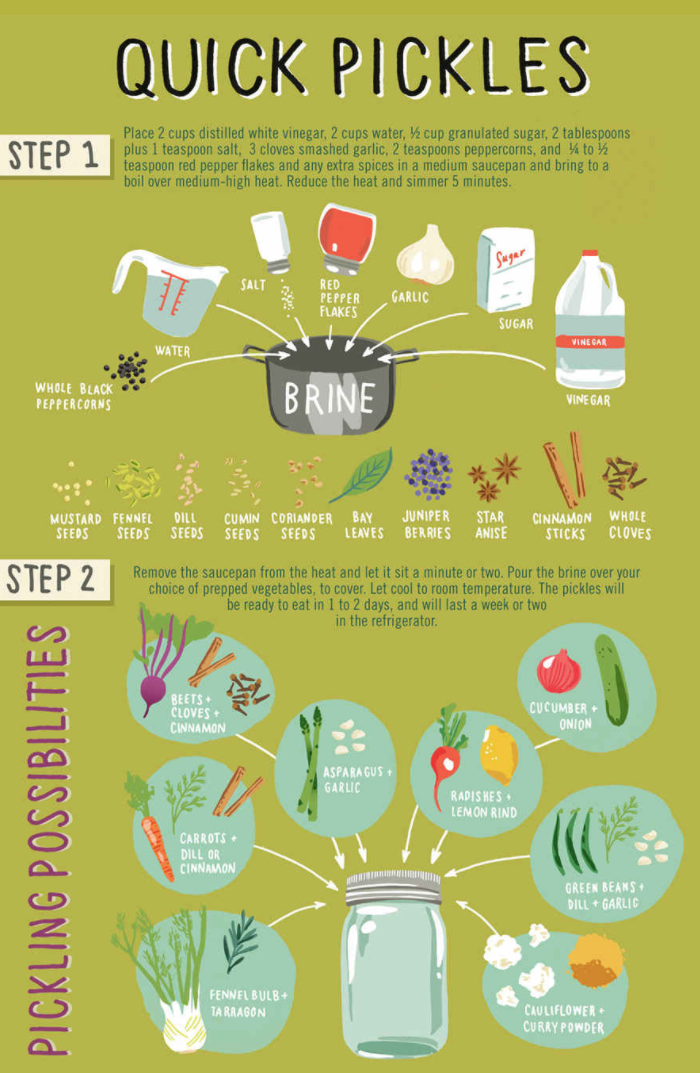
Quick Pickles
Canning Chili Beans
Boiled Water, kept at a simmer
7 quart mason jars
Per Jar:
1 C. dried kidney beans
1/4 C. tomato sauce
1/2 tsp. canning salt
1 tsp. smoked paprika OR plain paprika
1 tsp. granulated garlic
1 tsp. granulated onion
1 tsp. dehydrated onion
1 tsp. chili powder’1/4 tsp. cumin
vinegar to wipe rims of jars
Using clean quart jars…. add 1 C. dried kidney beans.
Add tomato sauce.
Add spices.
Fill remaining jars with boiled, hot water.
Debubble/stir contents. Wipe rims of jars with vinegar, checking for any crack, nicks and making sure rim is clean of debris. Add lid and ring, which has been soaking in hot, simmered water. Place into pressure canner. Canning: 1″ headspace, processed for 90 minutes for quarts, 75 minutes for pints at 10lbs of pressure for Michigan. Check your pressure poundage in your state. When pulling them out of the canner, cover them with a towel and allow them to cool for 24 hours. Check for sealing, remove bands/rings and wash jars in hot soapy water with 1/2 C. vinegar added to the water. Rinse and dry. Label. Place into your pantry.
Basic Herbal Jelly
1 C. of apple juice
2 C. of herbal infusion
2 tsp. lemon juice
4 C. sugar
1 package pectin
6 fresh sprigs of herbs for the jars
Proceed with the jelly directions on the box of pectin. Place a fresh herb sprig or flower into each jar.
Infusion:Â To make an infusion, simply bring 2 C. of water to a boil, and take off the heat. Add a generous handful of herbs to the pan, put on the cover, and let cool to room temperature. Strain off the herbs and measure out 2 C.
Basil (sweet) – basil and water infusion (add 2 T. cloves for spicy flavor), strain.
Cinnamon/cherry juice (make infusion with ¼ C. crushed cinnamon), strain.
Clove/tangerine juice (make infusion with ¼ C. crushed cloves), strain.
Fennel – fennel and water infusion, add vinegar for all or part of the lemon juice.
Lemon balm with red grape juice.
Lemon thyme with white grape juice.
Lemon verbena and lemonade.
Marjoram and grapefruit juice.
Mint with water or apple juice.
Parsley with water or dry white wine.
Sage with cider or apple juice.
Savory and cranberry juice.
Scented geranium with water or apple juice.
Sweet woodruff and white wine.
Tarragon and white wine or with water (add vinegar).
Thyme and purple grape juice.
 1 C. Sugar
3/4 C. Cider
1/2 C. Water
1/2 tsp. Salt
1/2 tsp. minced Jalapeno Chile
1/2 tsp. Mustard Seeds
1/2 tsp. ground Cinnamon
1/2 tsp. ground Allspice
1/4 tsp. dried Red Pepper Flakes
1/4 tsp. ground Cloves
1/4 tsp. ground Nutmeg
4 C. Rhubarb, sliced into 1/2″ pieces
1 lg. Onion, chopped
1 C. sliced Pitted Dates
1/2 C. Golden Raisins
Wash 2 pint jars and keep hot until needed. Prepare lisds as manufacturer directs. In 4 quart non aluminum pan, combine first 11 ingredients (sugar through nutmeg). Heat to boiling, reduce heat and simmer 5 minutes, stirring occasionally. Add rhubarb and onion, cover and simmer over medium low for 35 minutes, stirring occasionally. Add dried fruits and simmer for 20 minutes more, or until mixture is thick. Ladle hot relish into hot jars, leaving 1/2″ head space. Wipe jar rim with a clean damp cloth.  Attach lid.  Process in boiling water canner 15 minutes.
Red Onion Jam
3 C. Peeled, thinly sliced red onions
1 1/2 C. Apple juice
3/4 C. Red wine vinegar
1 tsp. Dried sage
1/2 tsp. Pepper
5 C. Sugar
1/2 C. Packed light brown sugar
1/2 tsp. Margarine
1 Pouch liquid pectin
Mix all ingredients except pectin. Place over high heat; bring to a full rolling boil and stir constantly. Skim off foam with metal spoon, remove from heat. Ladle into sterilized jars, then water bath process for 5 min.
Peach Jam with Lemon Thyme and Almonds
Makes 4-5 half-pints
1/2 C. slivered almonds
12 ounces Granny Smith apples (about 2 large)
4 pounds peaches, peeled, pitted and diced
11/2 C. granulated sugar
3 T. strained fresh lemon juice
2 tsp. fresh lemon thyme leaves (or 1 tsp. regular thyme)
Sterilize jars by boiling for 10 minutes in a large canning pot; leave them in the pot to stay hot. Put a small plate in the freezer. Put the flat lids in a heatproof bowl. Toast almonds in a small skillet over medium-high heat, stirring constantly until fragrant and light brown, about 3 minutes. Remove to a plate and set aside. Quarter and core the apples, reserving the cores and seeds. Tie apple trimmings in cheesecloth (or a jelly bag, if you have one). Put the peaches and sugar in a wide, 6- to 8-quart preserving pan or other wide, shallow pan. Bring to a simmer over medium-high heat, stirring frequently, and continue to cook until the juices just cover the peaches, about 5 minutes. Pour into a colander set over a large bowl. Stir peaches gently to drain off juice. Return juice to pan, along with the apples and the trimmings. Bring to a boil over high heat and cook, stirring occasionally, until syrup is thick and reduced, about 15 minutes. Return peaches and any accumulated juices to pan. Add lemon juice, almonds and lemon thyme. Bring back to simmer and cook, stirring frequently, about 15 minutes, until peaches are very tender and a small dab of jam spooned onto the chilled plate and returned to the freezer for a minute becomes somewhat firm. (It will not gel.) Remove from heat. Discard apples and trimmings, and stir gently to distribute fruit in the liquid.. Ladle hot jam into the jars, leaving 1/4-inch space at the top. Wipe jar rims. Put a flat lid and ring on each jar, and tighten until snug. Return the jars to the canning pot, making sure water covers jars by at least 1 inch. Bring to a boil and boil for 5 minutes. Remove from pot and let sit untouched for 12 hours. (After 1 hour, check to see if the jars have sealed. If the center of the lid can be pushed down, it hasn’t sealed. Store any unsealed jars in the refrigerator.) Label and store, preferably in a cool, dark place.
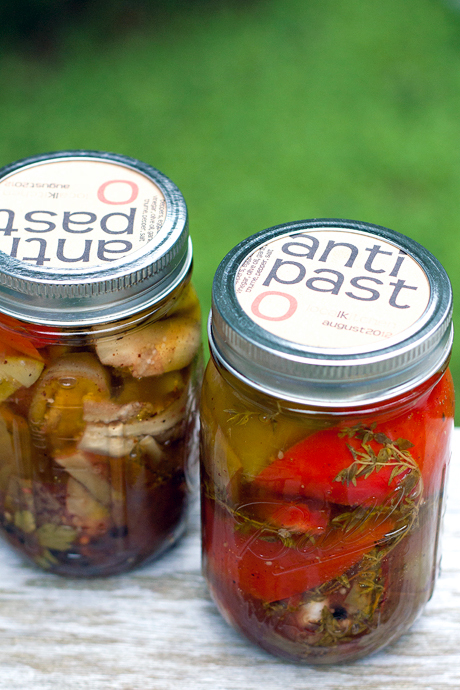
Canning: Garden Antipasto
 1 1/2 lb. sweet peppers, stemmed, seeds & ribs removed, thickly sliced
1 lb. eggplant, sliced into 1/2-inch batons
2 C. red wine vinegar, divided
1 1/2 tsp. Kosher or pickling salt
1 C. olive oil
3 large, or 6 small, cloves garlic
6 sprigs fresh thyme, or other fresh herb
1 1/2 tsp. black peppercorns
Prepare canner, jars and lids. In a medium stockpot, bring 1 C. vinegar + 1 C. water to a boil. Add eggplant and poach, stirring occasionally, until vegetables soften, about 2 – 3 minutes. Scoop eggplant out with a slotted spoon and remove to a clean bowl. Add sliced peppers to the stockpot. Add water to cover: bring to a boil, reduce heat and simmer, covered, until peppers are softened, about 2 – 3 minutes. Drain and remove peppers to the eggplant bowl. Add 2 small garlic cloves, 2 sprigs thyme and 1/2 tsp. peppercorns to each clean, hot pint jar. Pack in eggplant and peppers, squishing them in fairly tightly, to a generous 1/2-inch head space. Fill all pint jars with vegetables before adding brine. Bring remaining 1 C. vinegar and salt to a boil in the stockpot. Add olive oil and bring back to a boil. Ladle boiling brine over peppers & eggplant in the pint jars: remove any air bubbles with a chopstick or spatula, adjusting brine to a head space of 1/2-inch. Wipe rims thoroughly (ensure no olive oil remains on the rims), affix lids and process in a boiling water bath for 10 minutes.
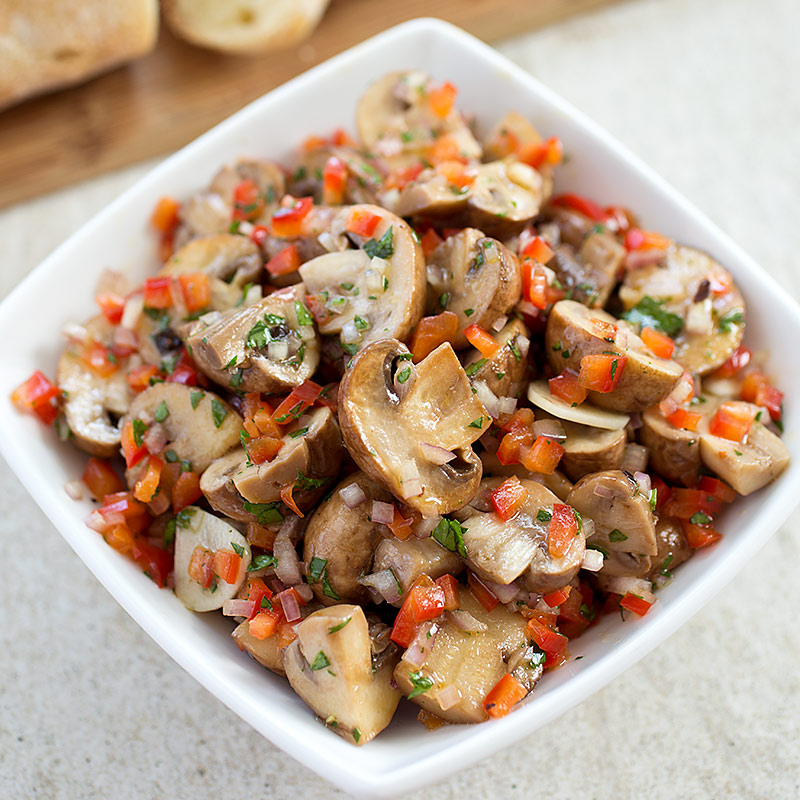
Cook’s Illustrated Marinated Mushrooms
Cooking the mushrooms over relatively high heat encourages them to quickly release liquid, which can then be reduced to a concentrated, flavorful glaze.
1/4 C. extra-virgin olive oil
1/8 tsp. red pepper flakes
Salt and pepper
1 pound cremini or white mushrooms, trimmed, left whole if small, halved if medium, quartered if large
3 tsp. lemon juice
1 garlic clove, sliced very thin
1 large shallot, minced
1/4 small red bell pepper, chopped fine
1 tsp. minced fresh thyme or 1 tsp. chopped fresh parsley or basil
Heat 3 tsp. oil, pepper flakes, and ‘h tsp. salt in 12-inch skillet over medium-high heat until shimmering. Add mushrooms and 2 tsp. lemon juice. Cook, stirring frequently, until mushrooms release moisture, moisture evaporates, and mushrooms have browned around edges, about 10 minutes. Spread mushrooms in single layer on large plate or
rimmed baking sheet; cool to room temperature, about 20 minutes. When cooled, transfer mushrooms to medium bowl, leaving behind any juices. Stir garlic, shallot, and bell pepper into mushrooms, cover with plastic wrap, and refrigerate at least 6 or up to 24 hours. Allow mushrooms to stand at room temperature about 1 hour. Stir in remaining 1 tsp. olive oil, 1 tsp. lemon juice, and thyme and season with salt and pepper to taste before serving.
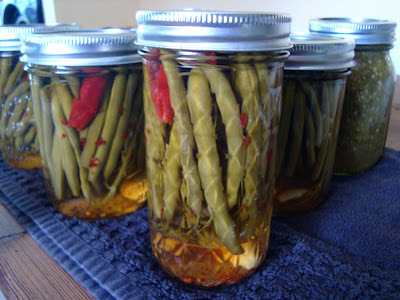
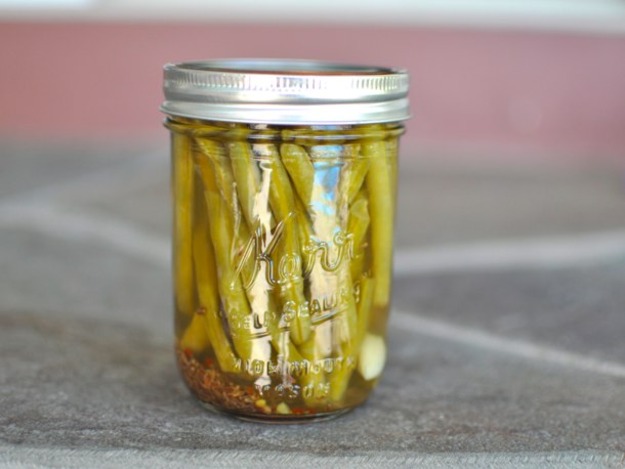 3 pounds green beans
2 1/2 C. white vinegar
2 1/2 C. water
4 T. pickling salt
5 medium cloves garlic
5 tsp. dill seed (not dill weed)
5 tsp. red chili flakes
1-2 dried hot red chiles per jar, optional
Prepare a boiling water bath and 5 regular mouth pint jars. Place lids in a small saucepan over very low heat to simmer while you prepare the pickles. Wash and trim beans so that they fit in jar. If you have particularly long beans, cut them in half. Combine vinegar, water and salt in a medium saucepan and bring to a boil. While the pickling liquid heats, pack your beans into the jars, leaving 1/2 inch for headspace. To each jar, add 1 clove of garlic, 1 tsp. dill seeds, and 1 tsp. red chili flakes. Slowly pour the hot brine over the beans, leaving 1/2 inch for headspace. After all the jars are full, use a wooden chopstick to work the air bubbles out of the jars. Check the headspace again and add more brine if necessary. Wipe the rims, apply lids and rings and process in a hot water bath for 10 minutes. Let pickles sit for at least one week before eating.
 Makes 8 half pints
1 and a half pineapples (about 6 C.), washed, peeled, eyes removed, quartered, and cored.
Chop into small pieces.
6 C. peaches, peeled, pitted, and chop into pieces
2 C. sugar
4 T. lemon juice
1 1/2 T. minced fresh mint
Put pineapple, peaches, and sugar into a pot and bring to a simmer, stirring frequently, until the juices are just starting to cover the fruit. Pour the mixture into a colander or mesh strainer and set it over a large bowl, stirring the fruit around to extract as much liquid as you can. Return that juice to the pan and bring to a boil over high heat, stirring occasionally, until the syrup is thick and reduced, about 10 minutes. Return your fruit along with any excess juices that may have accumulated to the pot, along with 4 T. lemon juice and bring to a simmer. Simmer, stirring frequently, until the fruit is very tender, about 15 minutes. Once it reaches the desired consistency (to a jam consistency, this jam will not gel), remove from the heat and stir in your 1 – 2 T. mint. Ladle into your jars to 1/4 inch headspace, remove air bubbles, wipe rims, and assemble lids. Process in a boiling water bath for 15 minutes
 1 ½ Lb. Fresh Green Beans — 4 1/2 C.
1 ½ Lb. Fresh Wax Beans — 4 1/2 C.
1 Lb. Canned Kidney Beans — or Shelled Lima Beans, rinsed and drained
2 C. Celery — sliced
1 Large Onion — peeled and sliced
1 C. Sweet Pepper — diced
2 ½ C. Sugar
3 C. White Vinegar
1 T. Mustard Seed
1 tsp. Celery Seed
4 tsp. Pickling Salt
1 ¼ C. Water
Rinse beans, trim ends and cut into 1 1/2″ pieces. Mix in large pot with celery, onion and pepper. Cover with boiling water and simmer 10-12 minutes (the recipe calls for 8 minutes, but that wasn’t enough). Drain. Bring sugar, vinegar, spices, and water to a boil. Simmer, covered, 15 minutes. (The amounts are just right, only a little brine left over. Don’t boil the brine away!) Add drained vegetables and kidney beans. Return to a boil. Pack hot vegetables into hot jars, leaving 1/2″ headspace. Ladle hot spiced vinegar over vegetables, leaving 1/2″ headspace. Remove air bubbles. Wipe rim of jar clean; place hot, previously simmered lid on jar and screw down ring firmly tight. Process 15 minutes in a boiling water bath canner. Do not change the ratio of vinegar, water and vegetables. This is a tested recipe for water bath canning.
 3 half pint jars
4 pounds rinsed and hulled strawberries, crushed (about 8 C.)
2 C. sugar
2 chamomile tea bags
1/4 C. fresh lemon juice
Prepare for water-bath canning: Sterilize the jars and keep them hot in the canning pot, put a small plate in the freezer, and put the flat lids in a heatproof bowl. Put the strawberries in a wide, 6- to 8-quart preserving pan. Bring to a simmer, stirring frequently^, then continue to cook for 5 minutes. Working in batches if necessary, pour into a very-fine-mesh sieve or jelly bag set over a large bowl and stir the berries gently to drain off all the juice. Rinse the preserving pan and return the juice to the pan. (Reserve the strawberry pulp for another use; see this page.) Add the sugar, tea bags, and lemon juice and bring to a boil over high heat. Boil, stirring occasionally, until a small dab of the syrup spooned onto the chilled plate and returned to the freezer for a minute becomes somewhat firm (it will not gel), about 30 minutes. Skim off as much foam as you can and remove the tea bag. Ladle boiling water from the canning pot into the bowl with the lids. Using ajar lifter, remove the sterilized jars from the canning pot, carefully pouring the water from each one back into the pot, and place them upright on a folded towel. Drain the water off the jar lids. Ladle the hot syrup into the jars, leaving 1/2 inch headspace at the top. Use a damp paper towel to wipe the rims of the jars, then put a flat lid and ring on each jar, adjusting the ring so that it’s just finger-tight. Return the jars to the water in the canning pot, making sure the water covers the jars by at least 1 inch. Bring to a boil, and boil for 5 minutes to process. Remove the jars to a folded towel and do not disturb for 12 hours. After 1 hour, check that the lids have sealed by pressing down on the center of each; if it can be pushed down, it hasn’t sealed, and the jar should be refrigerated immediately. Label the sealed jars and store.
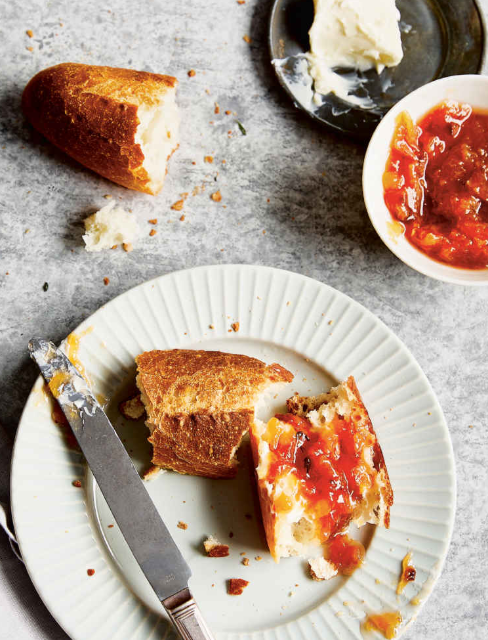
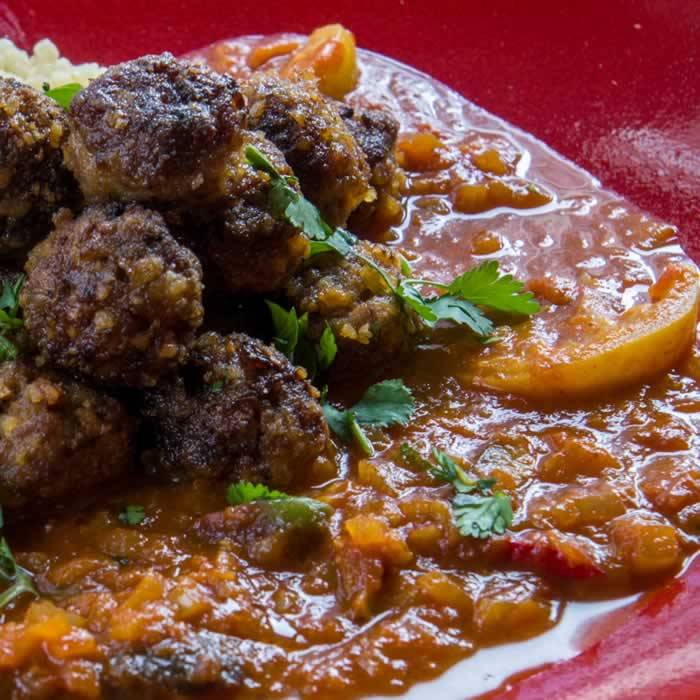
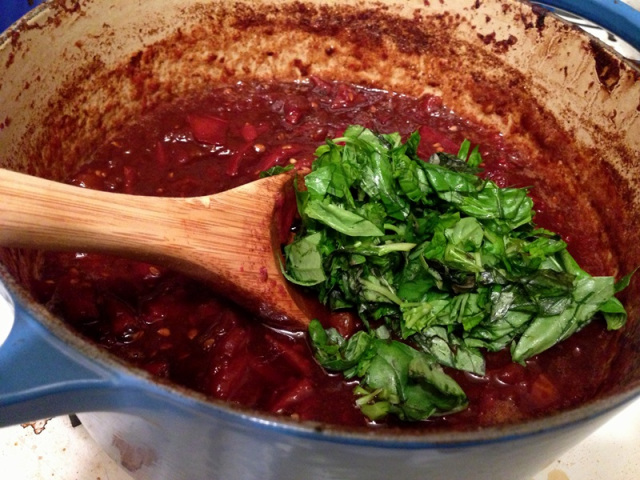
Tomato sauce is infinitely adaptable. This version takes the basic Italian sauce and heads south with it, across the Mediterranean Sea, to Tunisia. It includes either Baharat or Ras el Hanout spice blend, along with paprika, cinnamon, preserved lemons, and olives. It’s fabulous as the base for a Moroccan Tagine (and is specified for Moroccan Kefta Tagine (Spicy Meatballs & Tunisian Tomato Sauce). But it’s also delicious tossed with linguini or strozzapreti pasta, Italian-style.
 ¼ C. cold pressed, extra-virgin olive oil
1 large onion, minced (2½ C. or 10 oz. minced)
4 cloves of garlic, minced or pressed
2 tsp. Baharat or Moroccan Ras el Hanout
2 tsp. ground cumin (only if Ras el Hanout contains no cumin)
2 tsp. ground paprika
1 tsp. ground cinnamon
½ C. dry white wine
28 oz. canned, crushed tomatoes
2 C. chicken stock, plus more as needed
2 tsp. fine sea salt, plus more to taste
1 tsp. freshly ground black pepper, plus more to taste
1 tsp. wildflower honey, plus more to taste
1 C. large cerignola mix, calamata, or green olives, pits removed, and cut into quarters lengthwise
½ C. small preserved lemons, cut into quarters or eighths lengthwise, pits removed
¼ C. chopped cilantro
In a large sauté pan, over medium-low heat, heat the oil and add the onions. Cook the onions slowly, partially covered, until soft and translucent but not browned, about 10 minutes.
Add the garlic and cook for 2 minutes more, stirring to incorporate. Add the baharat or ras el hanout, cumin (if needed), paprika, and cinnamon. Stir to incorporate. Turn the heat up and add the wine. Simmer until almost all liquid is evaporated. Add the tomatoes and chicken stock. Simmer slowly, partially covered for 15 minutes. Add the olives and preserved lemons, and continue cooking for about 15 minutes longer, until sauce is slightly thickened, with a silky sheen. Total cooking time will be about 30 minutes. If the spices still taste harsh at this point, add a little more stock, and simmer longer. If needed, thin the sauce with additional chicken stock. Sauce should not be too thick. Taste for seasoning, and add salt, pepper, and honey to taste. Just before serving, add the cilantro. Sauce can be used immediately or cooled and refrigerated for up to 3 days. It’s even better on day two. Makes about 2 quarts.
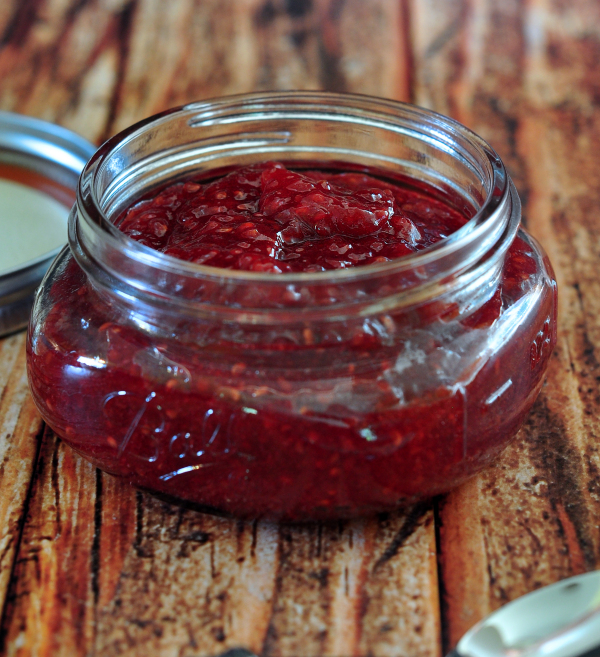
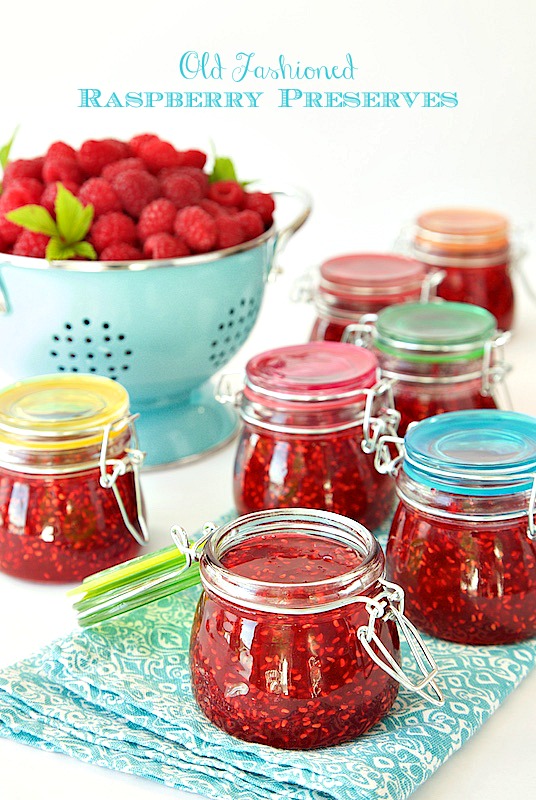 4 C. smashed, fresh raspberries , use a potato masher to smash the raspberries
4 C. sugar
¼ C. fresh lemon juice
Place berries in a large stainless steel or enamel saucepan. Bring to a full boil over high heat, stirring continuously. Boil hard for 1 minute, continuing to stir. Add sugar, return to a boil, and boil until mixture reaches 220ËšF on a candy or instant thermometer. Ladle into clean jars for storage in the freezer or into sterilized jars if processing with a water bath. If water-bath processed, this jam can be stored at room temperature.
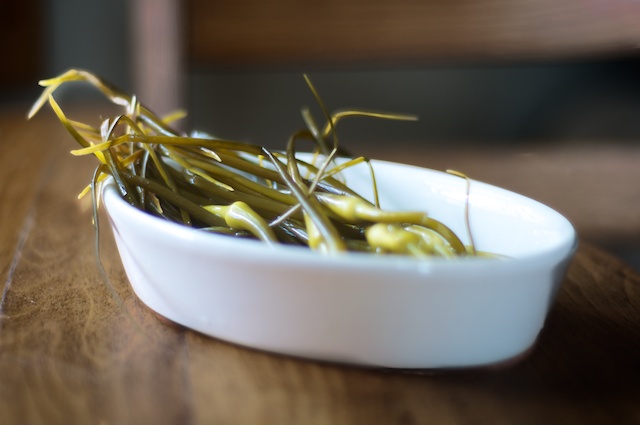
Are you familiar with garlic scapes? They’re the curly, wonky shoots that pop up from garlic plants in late spring and early summer. They range in thickness from hefty-chive to green-onion size and they smell and taste like mild garlic. If you’re a fan of garlic (and I assume you are if you spend much time here on Foodie with Family), then you are quite likely to be a fan of garlic scapes.
Garlic scapes are versatile; they taste amazing chopped up fresh and added to salads, in pesto, sautéed with bacon, on top of pizzas, and more. PICKLED garlic scapes take that fabulousness to an even higher plane. They add a little tang of vinegar and a hint of spice to the party. I’ve been known to fish a cold, pickled garlic scape out of the jar and munch it plain. Granted, this is a pretty bad idea if you’re going to go out to a party where you’re going to be cheek-to-jowl with a lot of people, but if you’re staying home and your sweetheart eats one, too, you’re golden. This may or may not be one of the reasons I’m a homebody.
Leaving all that aside, garlic scapes are really only available at one time of year. NOW. If you want to preserve the deliciousness that is the garlic scape in all it’s glory, there’s only one way to do it. You have to pickle it. Just imagine cracking open a jar of pickled garlic scapes in January and putting it on a pizza or chopping it up and adding it to potato salad or a pasta dish. Shoot, you can even make pickled garlic scape pesto. Can you picture anything more heart-lifting than a bowl of garlic scape pesto while the snow swirls ouside your window? Or a hearty breakfast of frittata or scrambled eggs studded with pickled garlic scapes on a cool fall morning?
To Make about 2 Pints of Pickled Garlic Scapes:
2 bunches garlic scapes (washed and trimmed of any withered or brown areas)
1 ½ C. apple cider vinegar
1 ½ C. water
2 T. kosher salt
2 T. raw sugar (can substitute granulated white sugar if necessary)
Additional ingredients PER PINT:
½ tsp. black peppercorns
½ tsp. mustard seed (not ground mustard)
¼ tsp. crushed red pepper flakes (can omit if you’re sensitive to heat)
¼ tsp. coriander seeds (not ground coriander)
Coil each garlic scape and insert into a sterilized mason or ball jar. When you have filled the jar to within ¼ –inch of the top of the jar, coil or break any extra scapes and stuff them down into the center of the jar. When the jars are full of scapes, add the spices to each pint jar. Set aside.
Bring the apple cider vinegar, water, salt, and sugar to a boil, stirring until the salt and sugar are dissolved. Carefully pour the boiling brine over the garlic scapes. The garlic scapes will probably pop up and look like they are trying to get out of the jar. Use a sterile chopstick or butterknife to push it back into the jar. Wipe the rims of the jars, then fix the lid tightly into place. Let the jars come to room temperature before storing in the refrigerator for 6 weeks before opening and tasting. Be patient. It’s worth it! The pickled garlic scapes will store well for up to 8 months when stored tightly covered in the refrigerator. If at any point the scapes stick above the brine and develop mold, remove the entire scape that has mold. The rest should still be alright.
 12 oz. Granny Smith apples (about 2 large)
4 pounds peaches, peeled, pitted and diced (about 6 C.)
2 C. granulated sugar
3 T. strained fresh lemon juice
Sterilize jars by boiling for 10 minutes in a large canning pot; leave them in the pot to stay hot. Put a small plate in the freezer. Put the flat lids in a heat-proof bowl. Quarter and core the apples, reserving the cores and seeds. Tie cores and seeds in a cheesecloth bag and set aside. Put the peaches and sugar in a wide, 6- to 8-quart preserving pan or other wide shallow pan. Bring to a simmer over medium-high heat, stirring frequently, and continue to cook until the juices just cover the peaches, about five minutes. Pour into a colander set over a large bowl. Stir peaches gently to drain off juice. Return juice to pan, along with the apples and the cheesecloth bag. Bring to a boil over high heat and cook, stirring occasionally, until syrup is thick and reduced, about 15 minutes.
Return peaches and any accumulated juices to pan, along with the lemon juice. Bring back to a simmer and cook, stirring frequently, about 15 minutes, until peaches are very tender and a small dab of jam spooned onto the chilled plate and returned to the freezer for a minute becomes somewhat firm. (It will not gel.) Remove from heat. Remove apples and trimmings, and stir gently to distribute fruit in the liquid. Ladle hot water from the canning pot into the bowl with lids, and remove jars from hot water bath.
Ladle hot jam into the jars, leaving 1/4 inch head space at the top. Wipe jar rims with wet paper towel, if necessary. Put a flat lid and ring on each jar, and tighten until snug. Return the jars to the canning pot, making sure water covers jars by at least 1 inch. Bring to a rolling boil and boil for five minutes. Remove jars from the pot and let sit untouched for 12 hours. (After one hour, check to see if the jars have sealed. If the center of the lid can be pushed down, it hasn’t sealed. Immediately move any unsealed jars to the refrigerator. They should keep for a couple of weeks.) When you’re all done, label your pretty little jars and store them in a cool, dark place.
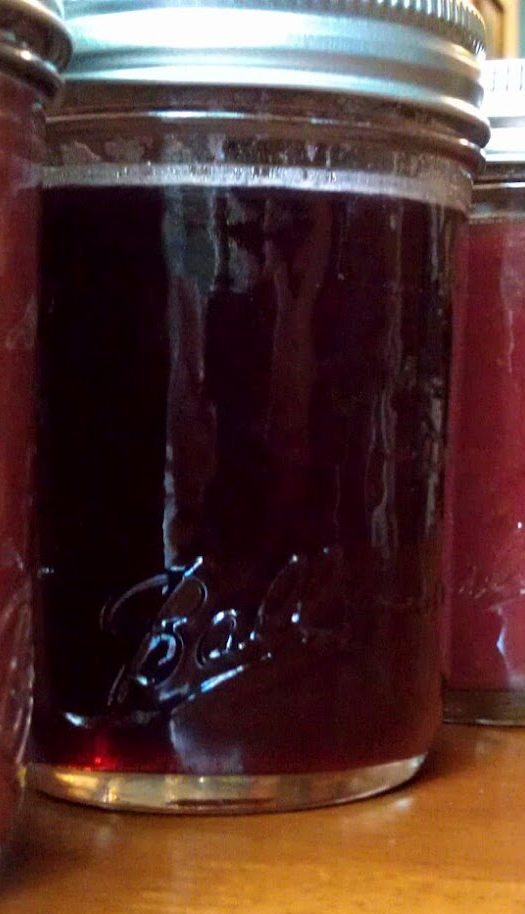
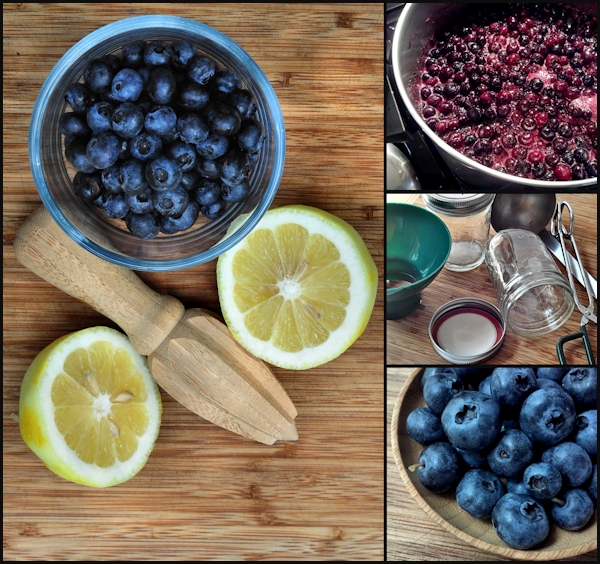 10 C. fresh blueberries
6 C. granulated sugar
¼ tsp. salt
2 T. lemon zest
â…“ C. fresh lemon juice
This is a canned preserve, so it’s important to make sure your jars and lids are sterilized. If you plan to freeze yours, then you can skip over this first part. To begin, fill a large stockpot half full of water [you are going to want the water to be over the tops of your jars by a couple inches, so make sure you have enough water in there for that] and set over a medium burner. Make sure the rack is in the bottom. Carefully put in the jars and lids. Once this comes up to a boil, cover and turn off heat. You are going to turn it back on high for about the last 10 minutes of the preserve cooking time, to sterilize the jars and have the water hot enough to can the final product. Wash blueberries and pick over, removing any debris and spoiled berries. Place about half of the berries in a 5 to 8 quart heavy pot. Crush well with a potato masher. Stir in the other half of the berries, the sugar, salt and lemon zest. Place the pot over a medium flame, and cover with a lid. Stir every few minutes. Once the mixture comes up to a simmer or low boil, remove the lid, and continue to stir every 5 minutes, or more often if they start to stick at all. Place a small plate in the freezer – this will be to test the doneness of the preserves. Cook about 25 minutes, and test a small amount on the cold plate you put in the freezer. After sitting on the plate for a minute or so, the preserves should look pretty thick, and should not run very freely if you tip the plate. If the mixture is still too thin, keep cooking, and check again about every 5 minutes, returning the plate to the freezer after each check. How long it takes is going to depend largely on the moisture content of the berries you are using. This batch took about 40 minutes total. At the 30 minute mark, return your large pot of water and jars to a boil. When the preserves are thick enough, stir in the lemon juice and cook an additional 5 minutes. Carefully remove the jars from the boiling water in the large pot, and set upright on a towel on your work surface. Keep the heat on under the pot. Ladle the preserves into the jars – the big funnel in the canning tools set helps keep the edges of the jars clean. Jams don’t need very much headspace above the surface of the jam itself – about ¼ inch between the top of the jam and the rim of the jar is enough room. Any more than that leaves too much chance for bacteria to grow, so fill them right up to that level. Wipe the edges of the jars clean with a damp cloth, and put on the lids and rings. Don’t screw the rings down super tight – just until they resist a bit is fine. If you have less than enough to fill the final jar, just put that one in the fridge to eat up first. Carefully place the covered jars back in the large pot of water – there are jar tongs in the set of tools, or use regular tongs to gently set the jars upright on the bottom. Once the water is back up to a full boil, set the timer for 10 minutes. When the time is up, carefully remove the jars to a wooden cutting board, or a dry towel on the counter – don’t use same towel as before since it might be damp and cooler and could break the hot jars. You will probably start to hear the centers of the lids popping down pretty quickly. Cool completely and check to make sure all of the centers of the lids have popped down. Refrigerate any jars with a dome still on the lid, and eat up first. When the jars are fully cool, you can remove the rings if you like, though I leave them on. Store in a fairly cool spot, and when opening the jars, inspect the contents, discarding any jars with mold or questionable appearance. Preserves will keep very well for up a year, or even longer, though the quality may suffer somewhat after a year.
 4 C. apple cider vinegar
4 C. water
3T.kosher salt
5 fresh dill sprigs
5 cloves garlic, left whole
5 dried hot red chiles
2 1/2 tsp. crushed red pepper flakes
2 pounds fresh green beans, trimmed to fit in pint jars
Prepare a water bath canner along with five pint jars, lids, and rings. In a medium nonreactive saucepan, combine the vinegar, water, and salt and bring to a boil. Place one dill sprig, one garlic clove, one chile, and 1/2 tsp. pepper flakes into each pint jar. Pack the beans into each jar. Ladle the vinegar mixture into the jars leaving 1/2 inch headspace. Remove the air bubbles from the jars and adjust the headspace accordingly. Wipe the rims of the jars and top with sterilized lids and rings. Process the jars in a boiling water bath for 10 minutes. Remove to a towel to rest for 24 hours before checking seals, labeling, and storing. Allow the pickles to cure at least one week before opening.
 2 & ½ lbs of fresh raspberries
3 & ¾ C. granulated sugar
¼ tsp. kosher salt
juice of 1 lemon
You can freeze these preserves, and they will keep in the fridge for quite awhile, but if you plan to can them, get your canner ready, as well as your jars and lids. This will make around 5 or 6 half pint jars of preserves, so submerge the washed, empty jars in the canner, and boil them for at least 10 minutes. It’s a good idea to have the lids and rings in another smaller pan of boiling water, so that they don’t get knocked around by the jars. [I will put some links after the recipe, so you can find canning supplies. Pick over the berries, and pick out any squishy, overripe berries. Wash the berries and allow to drain for a few minutes. Place all the berries, the sugar and salt in a large, heavy bottomed pot. I have an old Revere Ware stockpot that holds 5 quarts that is perfect for a batch this size. You want to allow enough room for the mixture to boil – it will foam up a bit. Mash the berries somewhat with a potato masher or large spoon, and turn on the heat. Stir as the mixture begins to come up to a boil, to help the sugar get all mixed in and dissolved. Once it is at a hard boil – which means the boil can’t be “stirred down”, back off the heat just a very little bit. You can, if you like, remove some of the seeds at this point. I put about 4 C. the mixture into a wire strainer, over a bowl, and use a ladle or big spoon to push the preserves through, while keeping the seeds in the strainer. Keep at it until you have as much of the preserves through the strainer as is possible. Discard the seeds. Put a small plate in the freezer, for testing the preserves. You need to stir the boiling mixture often, to keep it from sticking and scorching which can ruin the whole batch. [if it does stick and burn, don’t stir or scrape the burned part from the bottom – pour the preserve mixture into another pan, and just leave the burned part in the first pan – you can then cook it down the rest of the way, and then taste it to if it’s okay.] The closer it is to being done, the more you need to stir, because you are boiling away the moisture in the mixture, and it will get thicker and more liable to stick as that process goes on. After about 20 minutes, you can check with an instant read thermometer – you are looking for a temperature of around 210º to 215º . It usually takes around 25 to 30 minutes at a full boil. If your thermometer reads 210º, try the plate test: take the plate out of the freezer and test a dab of the jam – if it sets up, and seems like a good consistency then it’s done. Stir in the lemon juice, and cook another 2 minutes. One at a time, fill the jars by removing each one from the pot of boiling water, fill carefully, leaving ½ inch of headspace. Wipe the jar rim clean with a clean towel that has been dipped in the boiling water in the canner – be careful not to burn your fingers. Place the jar lid and ring on the jar, turning the ring to snug the lid down. Don’t over tighten. Place the filled jars back into the canner, and cover it. The jars should be covered by an inch of water. Bring back up to a full rolling boils, and process for 10 minutes. Turn off the heat, and leave the jars in the covered canner for 5 minutes – no more or water may suction into the jars as they cool. Remove jars and allow to sit undisturbed for 24 hours. Store at normal room temperature for up to one year – refrigerate after opening.
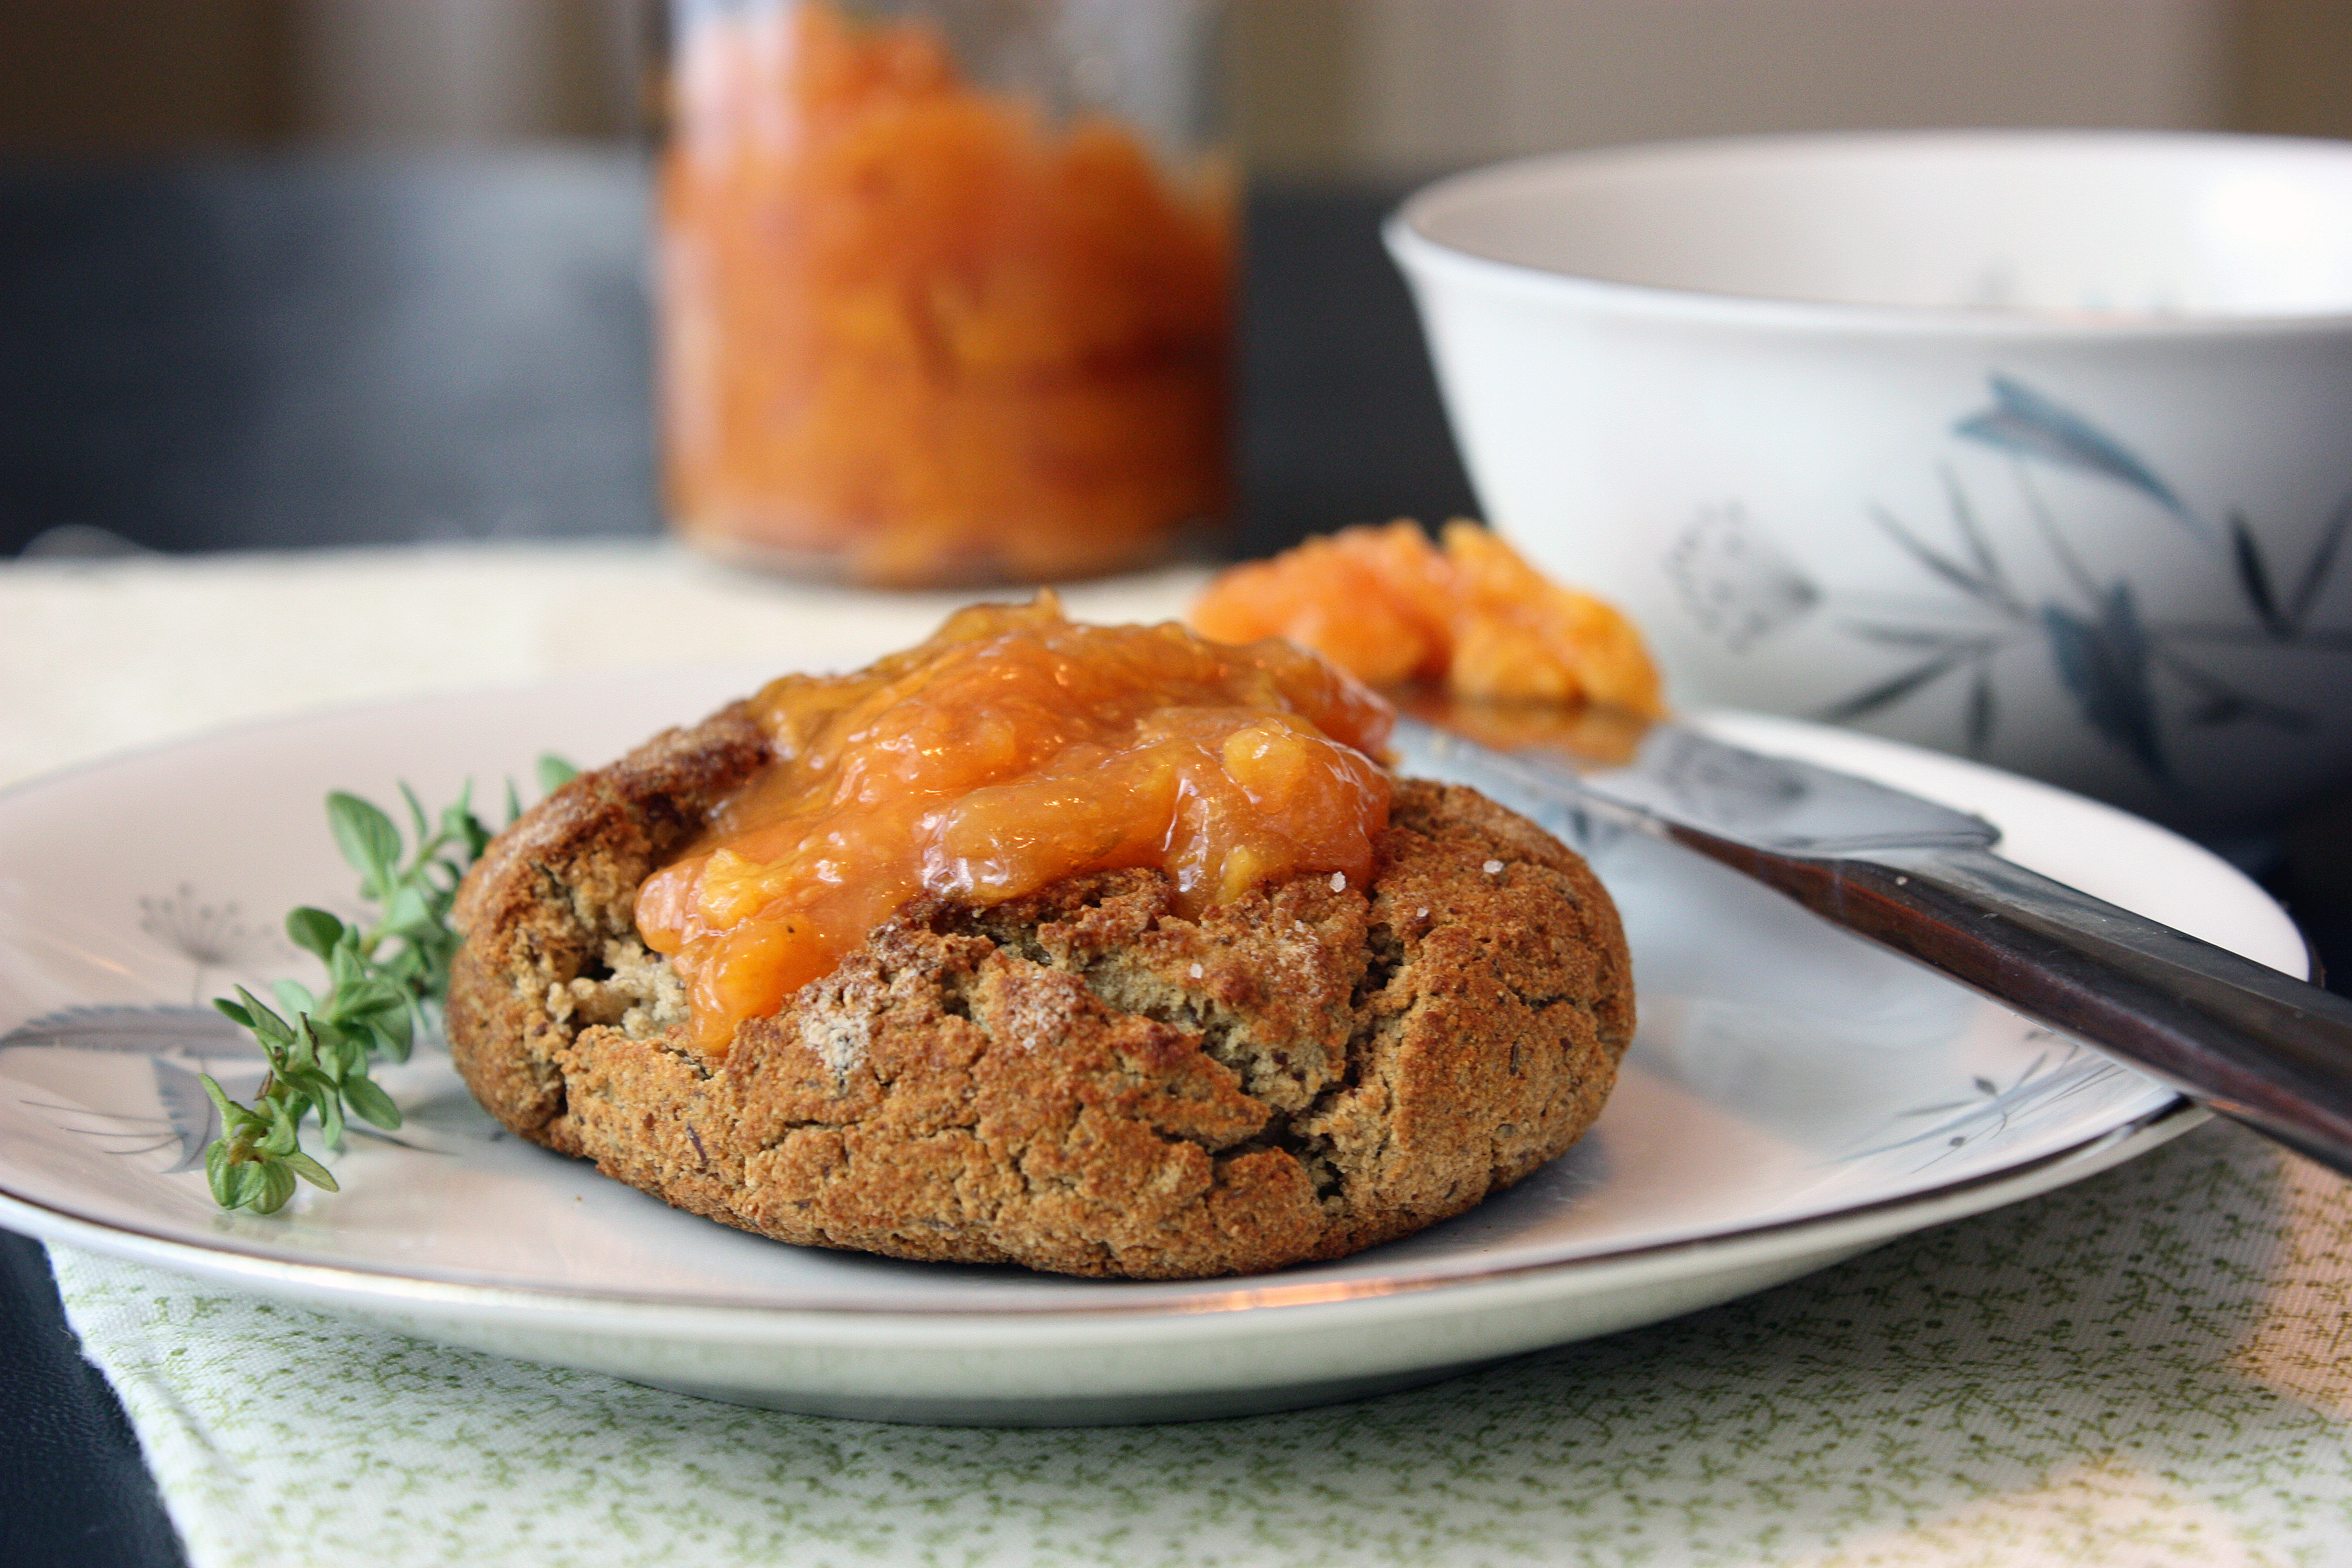 4 C. peeled, chopped, and/or mashed peaches
1/4 C. lemon juice
1/2 C. honey
1 T. lemon thyme leaves, minced
4 1/2 T. pectin powder plus 3 T. calcium water (from a Pomona low-sugar pectin box)
To easily peel peaches: Bring a large pot of water to a boil. Slice an “X†just through the skin on the bottom of each peach. Using a slotted spoon, lower the peaches into the water. Boil for 1-2 minutes, remove with the slotted spoon, and immediately plunge into a bowl of ice water. The peels should slip off easily. Add the calcium water to a medium saucepan. Pour honey into a separate bowl. Mix the pectin powder into the honey. Add the peaches, lemon juice, and thyme to the calcium water. Bring to a boil, stirring occasionally. Add pectin-honey mixture and stir vigorously for 1-2 minutes. Return to a boil and remove from heat. Fill jars or containers to 1/4 inch from top. Allow to cool to room temperature. Place jars in freezer without lids and freeze overnight or until firm. Place lids on jars. To use, thaw jam in refrigerator overnight. Should be used within 2 weeks once opened.
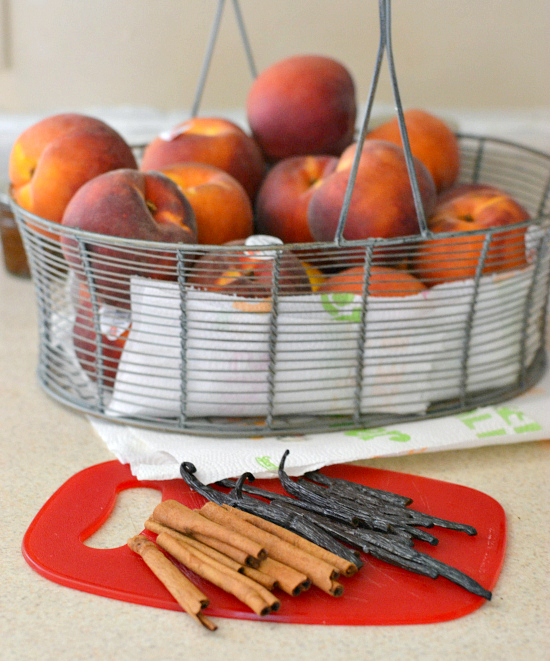 10 C. peaches, peeled and sliced into ¼th (about 20 large peaches)
13 C. water
1½ C. sugar
8-12 vanilla beans
6 medium cinnamon sticks
4-6 fresh lemons
Prepare jars and lids per USDA canning standards. In a large pot put the water and sugar. On low allow the sugar to dissolve while slicing the peaches. Squeeze the juice from ½ a lemon into the bottom of a large bowl. Peel and slice the peaches into ¼ths putting the peach slices into the bowl with the lemon juice to prevent browning. Remove about half of the water & sugar from the pot and reserve. Bring the remaining sugar water to a boil. Add as many of the peach slices as possible into the pot of boiling sugar water. Stir the peach slices for a couple of minutes until the peaches are heated through. Remove a pint jar from the hot water. Into each jar place 1 T. lemon juice, ½ a cinnamon stick, 1 vanilla bean cut in half and split. Carefully ladle peaches into each jar. Fill each jar with the light syrup leaving ½ inch headspace. Remove all air bubbles by running a chop stick or similar non metal item around the edges of each jar. Wipe rim of jar with a damp paper towel. Place a flat lid and band on each jar. Set filled jars aside. Repeat as needed filling all of your jars until you run out of peaches. When the light syrup gets low in the large pot replenish with reserved syrup and bring to a boil. Process filled jars in a hot water bath for 20-30 minutes.
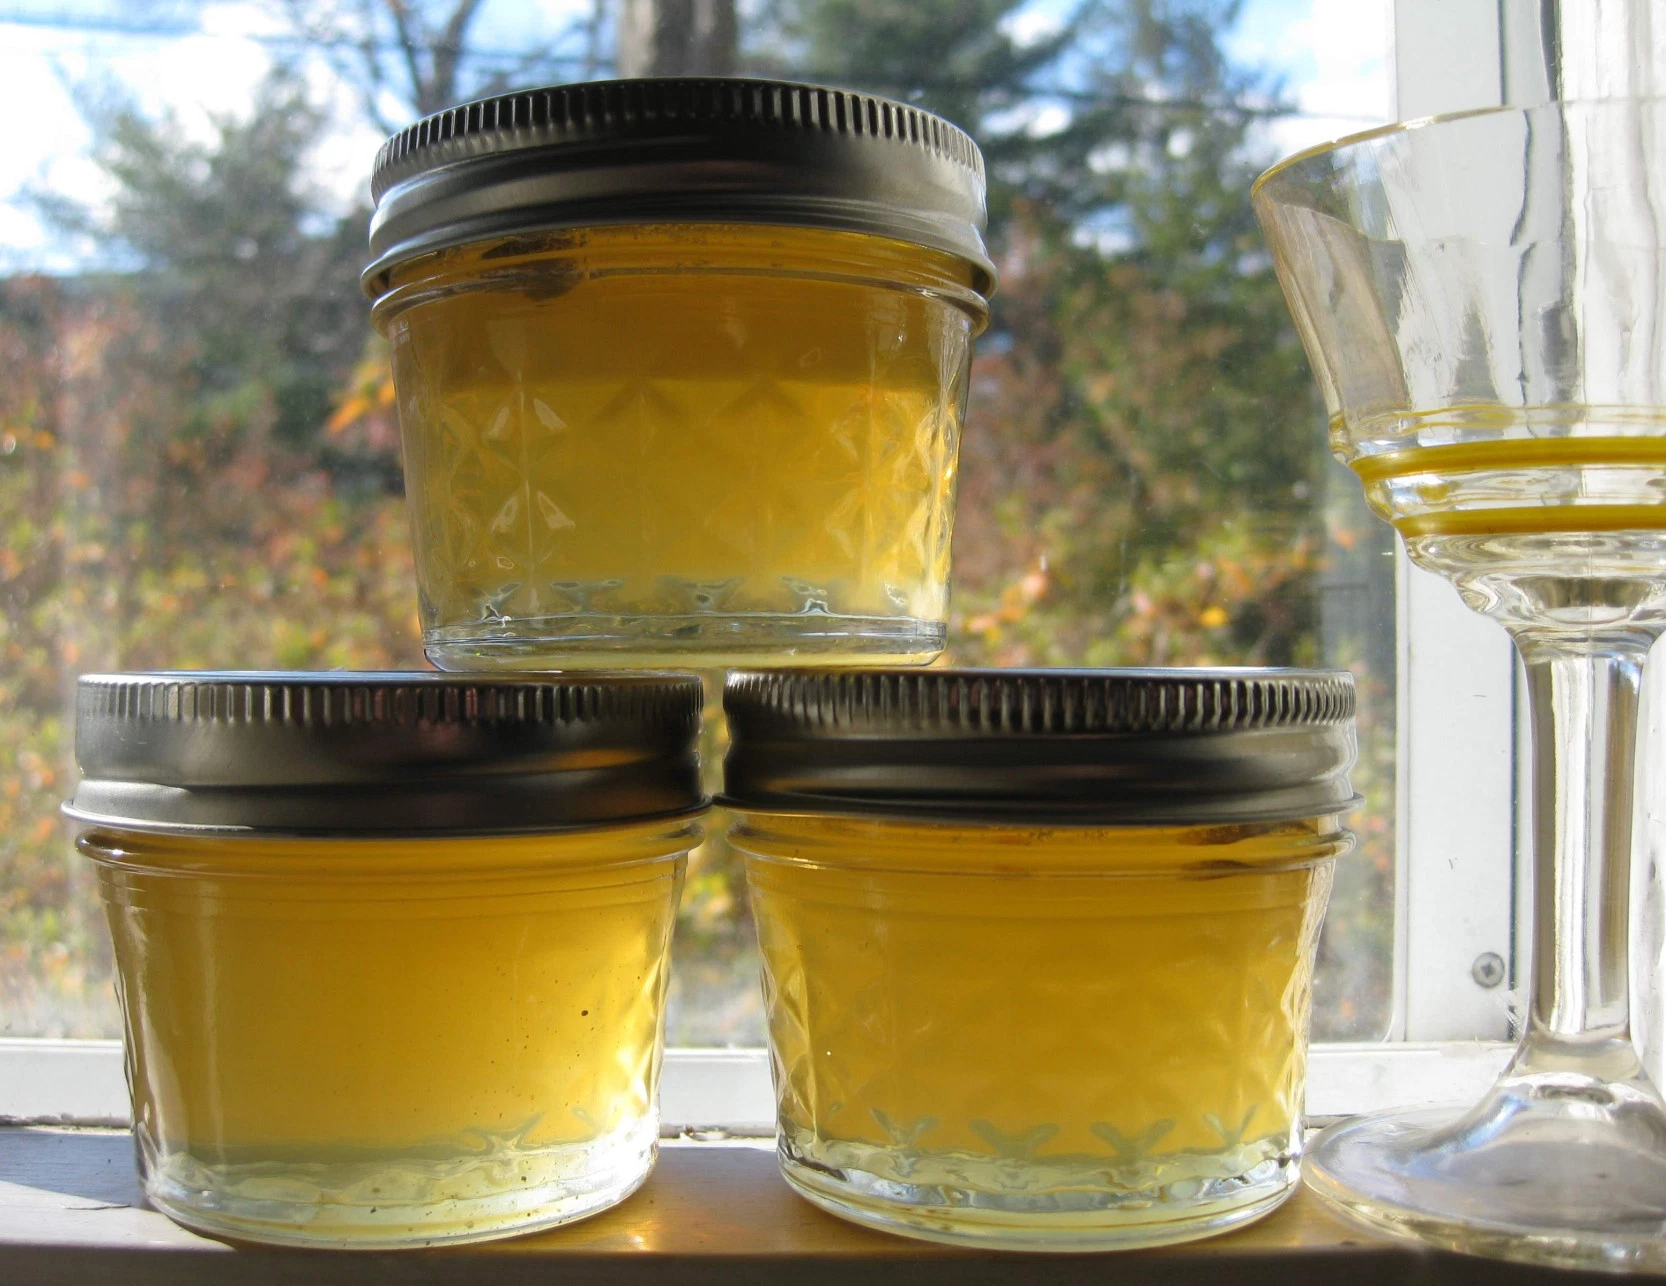
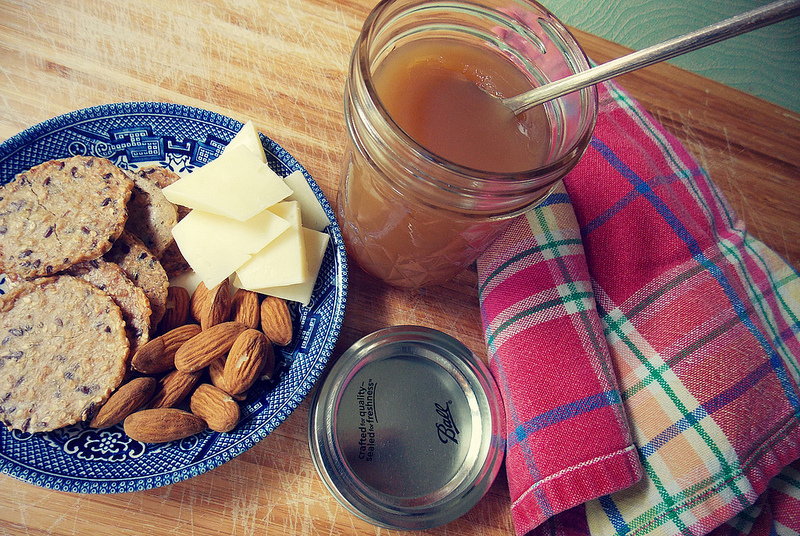
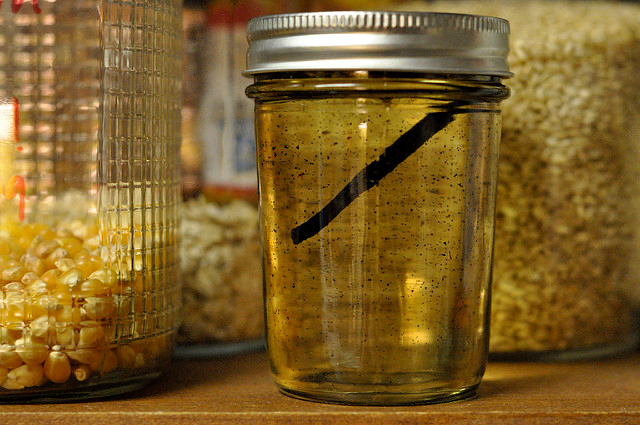 A couple of years ago, I uncovered a secret that completely changed the way I cooked and baked. I discovered that it was possible to order bulk lots of vanilla beans on eBay for cheap. I went from treating the vanilla bean as a precious item to using them freely. And this time of year, they can become an easy path to a sweet, homemade holiday gift. Homemade vanilla syrup can sweeten coffee, is delicious in plain yogurt and is wonderful drizzled as a quick glaze over top of any number of simple baked goods.
To make, combine one C. water with two C. sugar and add three to four vanilla beans, split lengthwise and scraped. Bring to a simmer and cook until the sugar is dissolved. Remove from the heat and pour into half pint jars (when I made this tonight, I filled two half pints and one quarter pint). Include a piece or two of vanilla bean in the jar to keep infusing.
Because this is an unacidified product, it can’t be processed for shelf stability. However, it will keep indefinitely in the refrigerator. Gift this with some pancake mix, freshly baked scones or a pound of coffee.
 12 peaches, peeled and pitted (8 C. macerated)
12 apples, peeled and cored (8 C. macerated)
12 pears, peeled and cored (8 C. macerated)
24 C. sugar (1 C. sugar for each C. fruit)
Fresh ginger- a knob the size of your thumb, grated
.
First, you will want to clean out your mason jars. There are several methods for doing this (I have added some helpful links above) but I like to take a short cut and run them through the dishwasher on the ultra-hot ‘sanitation’ setting, which also heat dries the jars. Do ensure your jars are dry before canning with them. To peel the peaches, bring a large pot of water to a boil. Slice a small ‘X’ into the skin on the bottom of each peach. Place the scored peaches into boiling water for 30-40 seconds then shock them in a bath of very cold or ice water. The skins should peel off quickly and easily. Quarter the fruits, remove the pits and whiz them through the food processor. You should have roughly 8 C. macerated fruit. Pour chopped peaches into your large jam pot. Peel apples and pears with a vegetable peeler. Quarter and core fruits and blitz through a food processor in batches, similar to how you cut the peaches- small chunks are okay but try and get any larger pieces broken up. You should have roughly 8 C. chopped pear and 8 C. chopped apple. Add both to the jam pot. Add 24 C. sugar (1 C. for each C. fruit) and grated ginger and stir well. On the stovetop, turn the heat on the jam pot up to high, stirring frequently to ensure the bottom doesn’t burn. Once the fruit has come to a boil, turn the heat down to med-low and simmer for 40 minutes or so. Using a spoon and a little bowl, skim the ‘foam’ that forms on the top of the jam as it is simmering. This ‘jam waste’ is cloudy but still delicious and is a great way to test for flavor and adjust the ginger to your palette! When the jam is ready, the color will have darkened slightly to a beautiful gold and the bubbles coming to the surface with ‘burp’ slowly, indicating a good thickness. Fill a small saucepan with water and bring the water to a boil. Place the center lids of your mason jars (with the rubber seal) in the boiling water to sanitize them. Using a ladle and a wide funnel, pour your jam into one of the sanitized mason jars. Using a moist cloth, wipe down the edge of the jar to ensure a tight seal. Using tongs, lift one of the mason jar lids out of the boiling water and place on top of the filled jar. Screw on the outer lid tightly and set aside. Repeat with the rest of the jars until all the jam has been canned. As you go through this process you will begin to hear a satisfying ‘popping’ noise as the hot jars seal themselves- that’s a good thing! A ‘pop’ means the jar is well sealed and the jam will keep well in a cool dark place for up to a year or two!
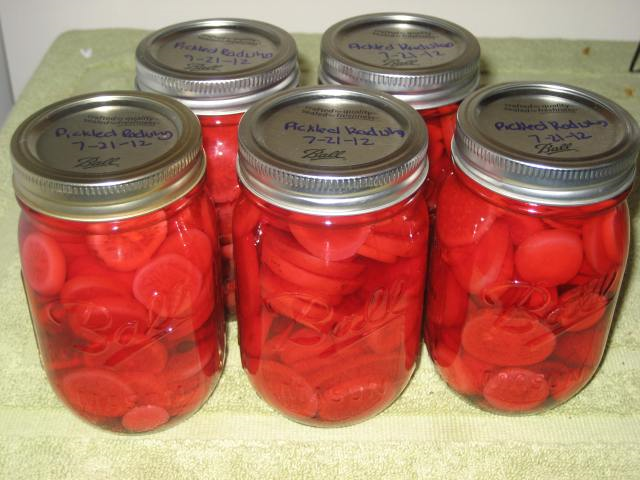 2 lb. radishes (about 2 bunches), tops and roots removed, scrubbed and cut into 1/8 in rounds
1/4 C. plus 1/4 tsp. pure kosher salt
1 1/2 C. 5% white vinegar
1 T. salt
1 tsp. black peppercorns
1 tsp. fennel seeds
1 tsp. mustard seeds
Combine 1/4 C. salt with 2 1/2 C. water. Stir to dissolve (warm water helps). Put radish rounds into a bowl and pour salt water over. Refrigerate for 8 hours or overnight. Drain and rinse. In a large 6-8 quart pot, combine vinegar, sugar, 1/4 tsp. salt and spices. Bring to a boil, stirring to dissolve salt and sugar. Add radishes and return to a boil. Remove from heat. Pack hot canning jars loosely with radishes and brine. Leave 1/2 in headspace. Process jars in water bath for 10 minutes. Remove from water bath and leave jars undisturbed for at least 12 hours. Check if jars are sealed. Label sealed jars and store.
 3 1/2 lbs tomatoes, coarsely chopped
3/4 C. brown sugar
1/2 C. balsamic vinegar
1/4 C. bottled lemon juice
1 tsp. salt
1/2 tsp. coriander
1/4 tsp. cumin
1 T. red pepper flakes
1/2 C. chopped fresh basil
1 tsp. sugar
2 tsp. pectin
Mix tomatoes, brown sugar, balsamic vinegar, lemon juice, salt, coriander, cumin and red pepper flakes in a 3 1/2 quart dutch oven. Bring to a boil then reduce to a simmer and cook until reduced by half, about 30 minutes. Stir in basil. Continue to cook until reduces slightly, about 30 minutes longer. Puree with immersion blender until smooth. In a small bowl mix sugar and pectin. Bring jam to a rapid boil, add pectin and stir until dissolved. Continue boiling jam for 2-3 minutes until reaches jelly point. Ladle jam into hot, sterile half-pint or 4oz. jars leaving 1/4-inch headspace. Process jars in a boiling water bath for 25 min.
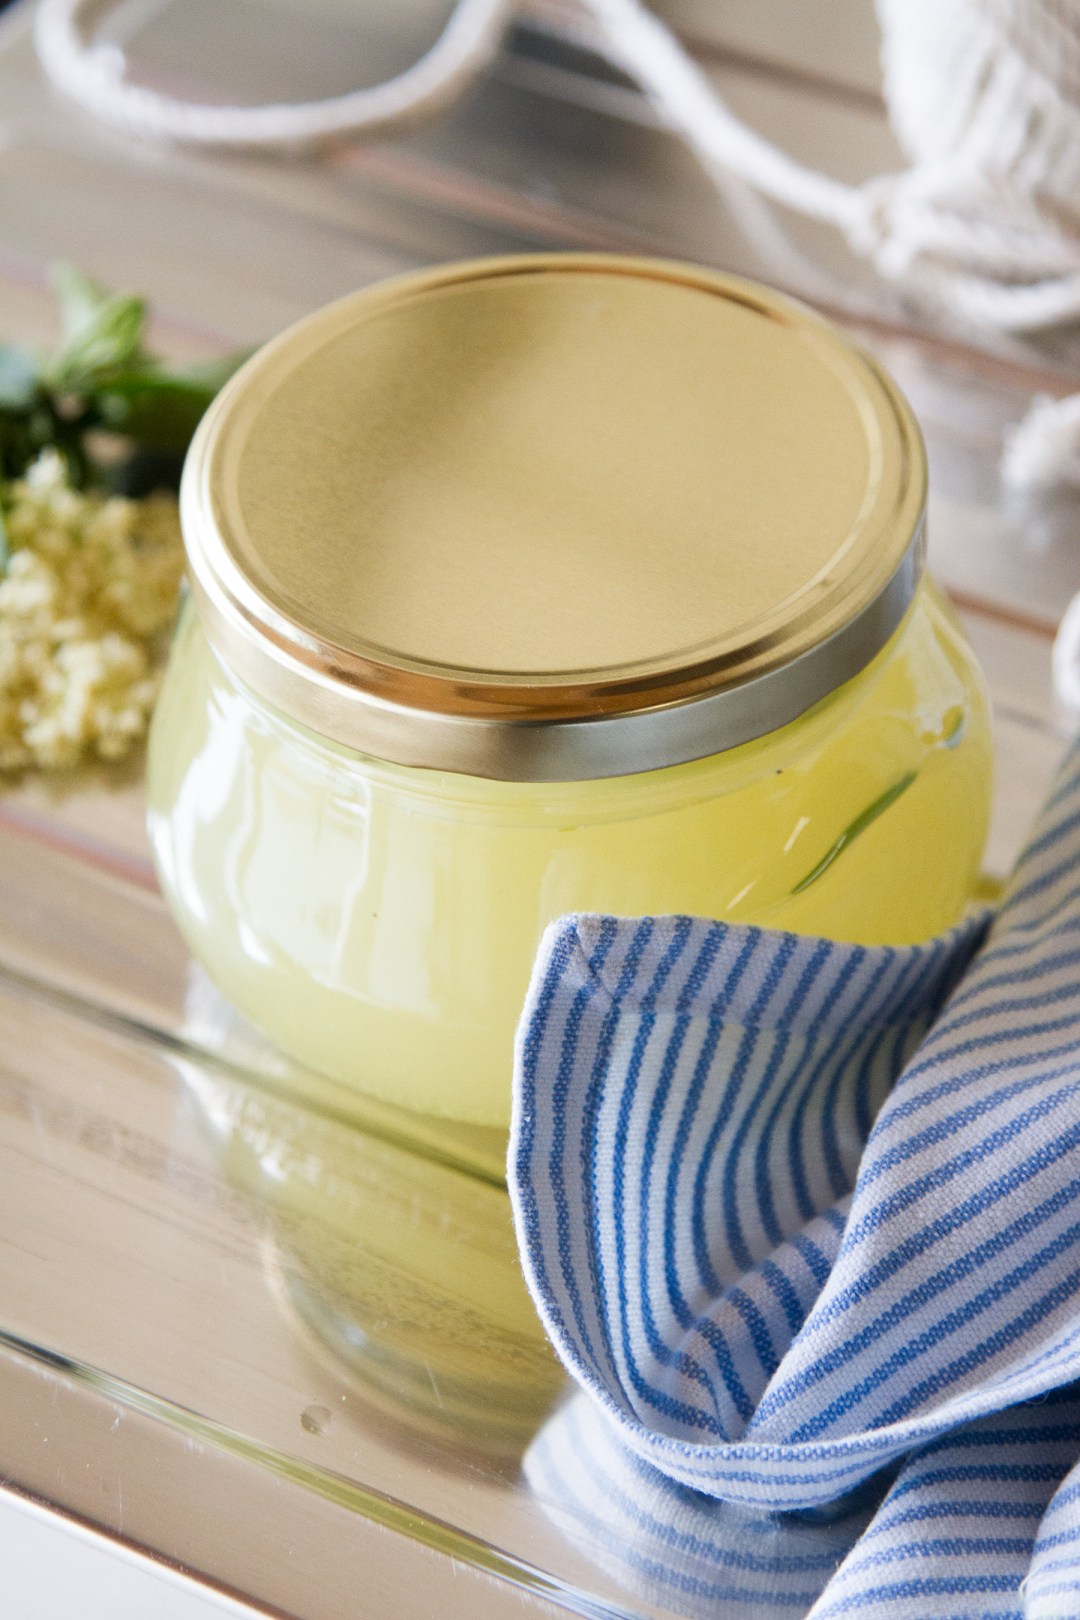 15 heads of elderflowers
2 C. water
2 C. sugar
1 lemon
Over a large bowl, remove the elderflowers from their stems using a sharp knife or pair of scissors. Pick off any offending bits or bugs, but don’t rinse your flowers; you want to retain as much of the pollen as possible. Use the same knife to remove the peel from an organic or otherwise untreated lemon. Place the peel into the bowl with the flowers. Slice the lemon and add the rounds to the bowl, too. In another vessel, mix together sugar with boiling water. Stir until the sugar has dissolved. (Depending on the kind of sugar you use, you might prefer to do this over low-heat on the stovetop so the sugar properly melts.) Pour the sugar water over the top of the bowl, cover with a towel and allow to steep for at least 24 hours. Once steeped to your satisfaction, strain the golden liquid into a clean vessel and refrigerate. The flowers will brown a bit as they steep—not to worry—just make sure that they’re well submerged. If you’re fussy about stray bits, use a bit of cheesecloth, but I found a classic sieve to do a fine job of straining the finished the syrup. Store your cordial in any clean jar with a tight seal and keep refrigerated for maximum longevity. Like other flowery syrups, elderflower cordial is delicious on everything from buttery cakes to sliced strawberries and poured into all manner of summery drinks—alcoholic or otherwise.
 3 C. (packed) fresh lemon balm leaves
6 C. water
1 1/2 – 3 C. local honey (choose amount that suits your tastes)
juice and zest of 2 lemons
8 tsp. Pomona’s Pectin powder
8 tsp. calcium water (made using calcium powder that comes with Pomona’s Pectin, instructions included in package)
In very hot water, wash and rinse 8 half pint canning jars. This can be done by hand or in the dishwasher. Do this right before ready to use so jars are still hot. Add lids and rings to a large pot and cover with water. Bring to a strong simmer but do not boil. Keep lids and rings in hot water as you prepare jam. Bring the water to a boil in a saucepan and stir in the lemon balm . Remove from heat, cover, and let the mixture steep for 20 minutes. Strain the “tea” squeezing the leaves to remove all the liquid. Stir in the fresh lemon juice, zest and calcium water. You should have very close to 6 C. liquid after the lemon juice is added. If you don’t, add enough water to make 6 C. Measure honey and pectin into a separate bowl, stir thoroughly (you can start with less honey and add more later). In a saucepan over the highest possible heat, bring the “tea” mixture to a boil then add the honey/pectin mixture. Check (taste) to see at this time if you would like to add more honey. Bring mixture back up to a hard rolling boil, time it for 2 minutes, stirring constantly. Now it is time to transfer the jelly to jars. Using a sterilized wide mouth funnel and small measuring C. as a scoop, fill hot/clean jars leaving 1/4″ head space at the top. Place lids on the top and screw on bands, not too tightly. Process jars in boiling water for 10 minutes. (Add one minute more for every 1,000 feet of elevation.) Using a jar lifter, remove from water once processed. Allow to sit in one spot and cool completely. Add to your pantry!
Perfect with duck, ham or a cheese course. Or try them over a tart, topped with whipped cream.
2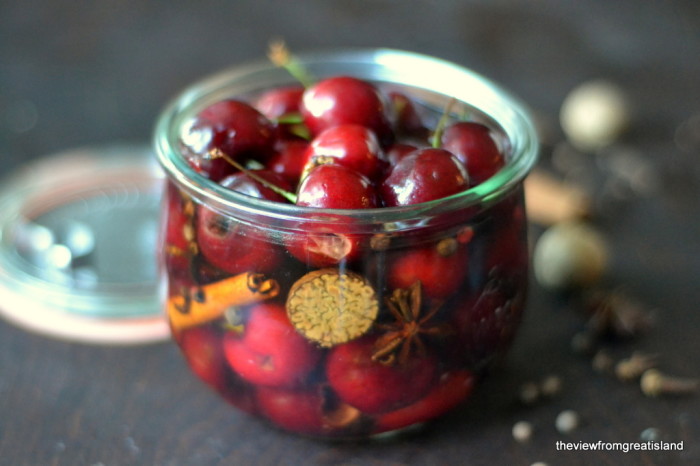 1/2 pounds sweet cherries
3 1/2 C. red wine vinegar
1 1/2 C. sugar
1 tsp. black peppercorns
4 whole cloves
2 (3-inch) cinnamon sticks
2 bay leaves
1 (10 x 1/2-inch) lemon rind strip
Wash and pat the cherries dry. Pierce each of the cherries several times with a fork; set aside.
Place vinegar and remaining ingredients in a nonaluminum saucepan; bring to a boil, stirring to dissolve sugar. Reduce heat; simmer 5 minutes. Remove from heat; let stand 30 minutes. Strain vinegar mixture through a sieve over a bowl; discard solids. Return vinegar mixture to pan; bring to a boil. Spoon cherries into hot jars; cover with hot vinegar mixture, leaving 1/4-inch head space. Cover jars with metal lids; screw on bands. Cool. Refrigerate at least 2 weeks before serving.
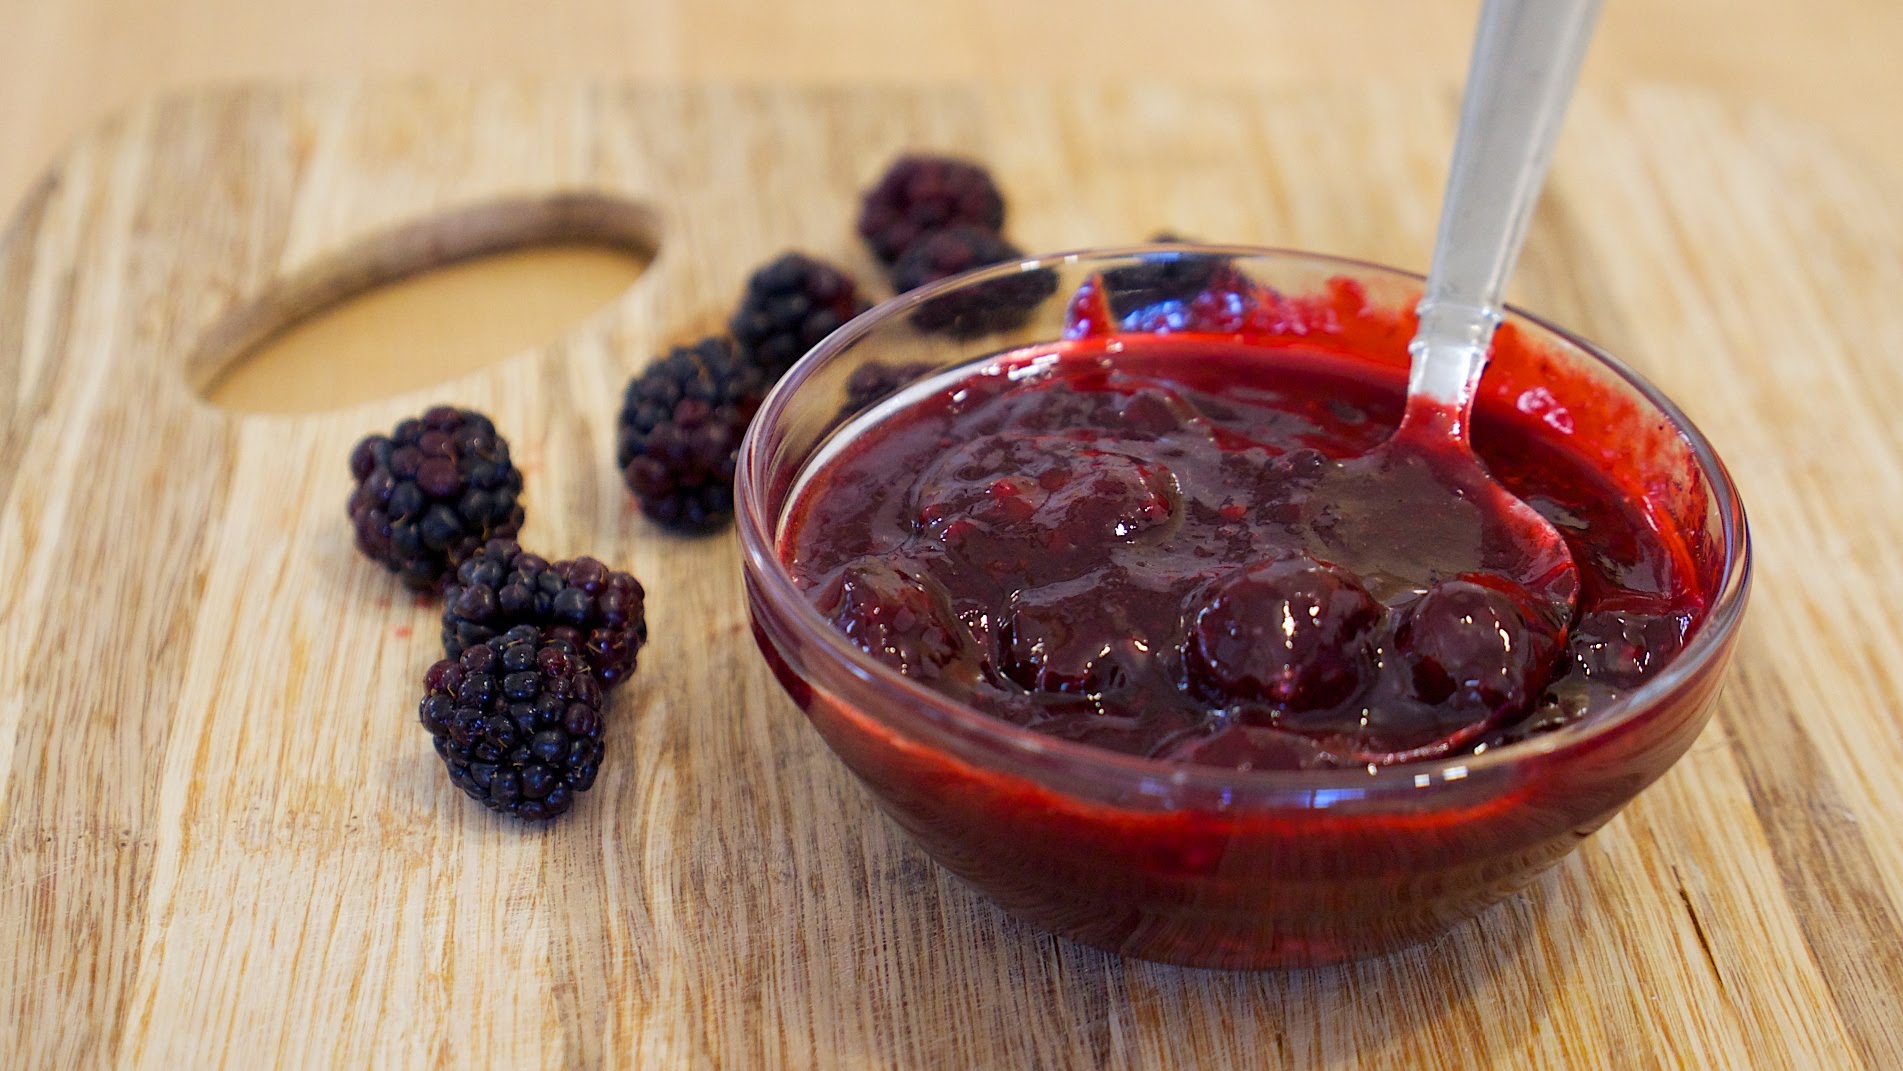 1 pound Granny Smith apples (about 3 small apples)
3 pounds blackberries (about 8 C.), rinsed
2 C. granulated sugar
3 T. strained fresh lemon juice
Grated zest of 2 small lemons
Sterilize jars and lids. Put a plate in the freezer. Quarter and core the apples, reserving the cores and seeds. Tie apple trimmings in cheesecloth. Put blackberries and sugar in a wide, 6- to 8-quart preserving pan or other wide, shallow pan. Bring to a simmer over medium-high heat, stirring frequently, and cook until the juices just cover the blackberries, about 5 minutes. Pour into a colander set over a large bowl. Stir berries gently to drain off juice. Return juice to pan, along with the apples and the trimmings. Bring to a boil over high heat and cook, stirring occasionally, until the thickened mixture measures 220 degrees on a candy thermometer, 15 to 20 minutes. Return berries and any juice to pan. Add lemon juice and zest, and bring to simmer. Cook, stirring frequently, about 15 minutes, until a small dab of jam spooned onto the chilled plate and returned to the freezer for a minute wrinkles when you nudge it. Off the heat, discard apples and trimmings. Ladle hot jam into jars, leaving 1/4-inch space at the top. Wipe rims, cover with lids and rings, and tighten until snug. Return jars to canning pot, making sure water covers jars by at least 1 inch. Bring to a boil and boil for 5 minutes. Remove from pot and let jars sit untouched for 12 hours. (After 1 hour, check to see if jars have sealed. Store any unsealed jars in the refrigerator.) Label and store in a cool, dark place.
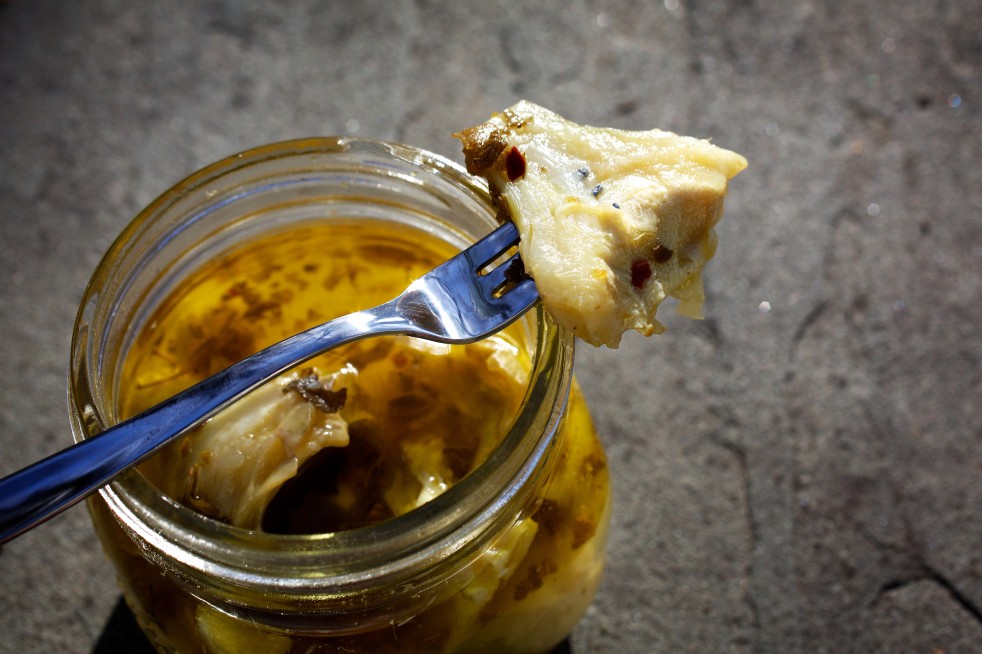
You’ll need 3 sanitized pint jars with new lids and rings
Make Ahead: The artichokes need 1 month to cure, during which time their texture changes from firm to velvety while their structure is retained. If you choose to skip the water-bath canning called for here, refrigerate the sealed jars of artichokes for 1 month before serving. (Artichokes that are not water-bath-canned will not achieve the same silky texture as those that are.) The water-bath-canned jars of artichokes need to cool for 12 hours. They are shelf stable for 1 year. Once opened, the jars should be refrigerated and used within a month.
4 lemons
9 medium or 15 baby artichokes
1/4 C. plus 3 tsp. kosher salt or sea salt
1 C. distilled white vinegar, plus more as needed
1/4 C. white wine vinegar
1/4 C. mild olive oil, or more as needed
1 tsp. dried oregano
3/4 tsp. crushed red pepper flakes
3 cloves garlic, root ends trimmed
Three 1-inch strips lemon zest
Halve and juice the lemons. Place the spent lemon halves in a 5-quart nonreactive (not aluminum or copper) pot; fill it with cold water. Strain and reserve the juice for the marinade. To trim the artichokes, pull the leaves from each one, snapping them where they naturally break. Use a sharp knife or vegetable peeler to peel the choke, then make a clean cut across the end of the stem, retaining the tender portion. Use a grapefruit spoon, melon baller or side of a tsp. to scrape away the fuzzy choke, revealing the meaty part of it, then quarter the entire choke. (For baby artichokes, trim only to any inner leaves without a thorn.) As each choke is trimmed, drop it into the pot. Add 1/4 C. salt. Bring the pot filled with lemon water and artichokes to a boil over high heat, then reduce the heat to medium or medium-low so the water is barely bubbling. Cook, uncovered, until fork-tender, about 10 minutes. Meanwhile, make the marinade: Combine the reserved lemon juice, vinegars, oil, oregano, crushed red pepper flakes and garlic cloves in a small saucepan over high heat. Bring to a boil; cook for 5 minutes, then remove from the heat. Use a slotted spoon to transfer the artichokes to the sanitized jars, dividing evenly and stacking the small ones and first cutting the medium ones into quarters. Tuck them in as tightly as possible without breaking or bruising. Whisk the marinade well and divide among the jars. If there is not enough marinade to cover, add oil as needed to leave 1/2 inch headspace at the top of each jar. Make sure 1 garlic clove, 1 strip of lemon zest and 1 tsp. salt goes into each jar. Run a chopstick or flat plastic knife along the inside of the jar to remove any air bubbles. Clean the rim of each jar with distilled white vinegar to cut residual oils, place the warmed lids on and finger-tighten the rings (not too tight). Process in the boiling water bath for 15 minutes. Turn off the heat and let the jars rest in the pot for 10 minutes. Use tongs to transfer the jars to a clean, folded dish towel to cool over several hours. Store the water-bath-canned jars in a cool space to cure for 1 month.
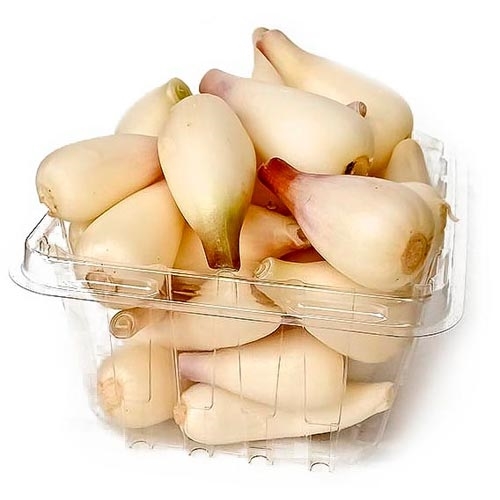
 1 bag of small pearl white onions, preferably organic
Brine:
1 C. clean water (beware tap water with a high chlorine content)
2 tsp. Kosher salt
1 T. maple sugar, maple syrup or dark honey
3 juniper berries
1 allspice berry
1 cardamom pod, opened and the seeds scraped out
6 peppercorns
2 bay leaves
Two large pieces of lemon peel
Cut a shallow X in the root end of each onion and drop into a small saucepan. Cover the onions with water and a generous pinch of salt. Boil for 5 minutes. Strain the onions, then rinse well in cold water.  Shock the onions in ice water to stop the cooking. Using kitchen scissors, snip the root end off each onion, and the very tip if it’s sprouted or browning, Remove the outside peel to reveal a perfect white onion. Drop the onions into the sterilized jar or jars. Make a brine by heating the remaining ingredients to just below a boil. Cover the onions with the hot brine. You may have brine left over, don’t worry, but do make sure all the seeds and leaves are in the jars. Cool the onions, then refrigerate. The pickles will be ready to eat in about a week and have lasted in my refrigerator for more than six months.
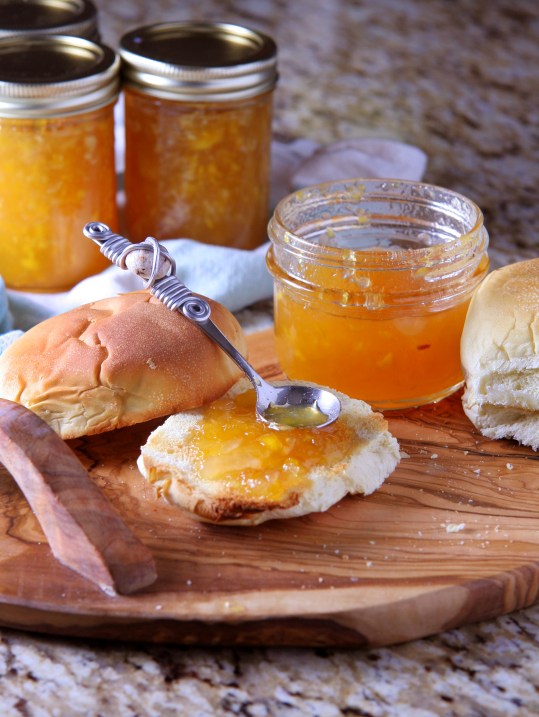
 1 C. orange juice
3 C. fresh cranberries
1 orange, seeded and finely chopped
1 tart apple, cored and minced
12 dried apricots, chopped
1 1/4 C. honey
1/2 tsp. ground cardamom
Combine the orange juice, cranberries and chopped orange in a large, non-reactive pot. Bring to a simmer and let cook until the cranberries begin to burst. Add the apple, apricots, honey and cardamom and cook for approximately 20 minutes, until the orange rinds are tender and it has thickened (watch it carefully, honey scorches easily. I speak from experience here). Once it has reached a consistency you like, remove it from the heat. Should you want to can it, pour chutney into prepared jars. Remove air bubbles, wipe the rims and apply lids/bands. Process in a boiling water canner for 10 minutes (don’t start your timer until the water has returned to a boil). For an even more shelf stable product, replace 3/4 of a C. the honey with one cup unprocessed cane sugar (honey is sweeter than sugar, so you need a bit more to make up the difference).

6 Large Eggs
6 Cups Soft Bread Crumbs — (about 9 ounces)
1½ Cups Water
1 Cup Onion — finely chopped
1 Tablespoon Salt
¼ Teaspoon Pepper
6 Pounds Ground Beef
Parsley, minced (optional)
2 quarts Broth, Tomato Juice or Boiling water (approximate)
In large bowl, combine first 6 ingredients and parsley if desired. (Let mixture soak up water.) Add beef; mix well. (Do not overhandle). Shape into 12 dozen 1 inch meatballs. (I use a size 60 scoop). Place on shallow baking pan. Bake at 425° for 15 minutes. Pack loosely into hot jars, leaving 1 inch headspace. Add boiling water, tomato juice or Meat stock/broth, leaving 1″ headspace. Adjust lids. Process in pressure canner at 10 pounds pressure for 75 minutes (for up to 1000 altitude).
Tagged LTS for after canning (so I can find the recipe easier); obviously this is one case where you can’t MAKE it with LTS ingredients.
6 C. green beans (or mix of green and yellow Beans)
6 C. cooked red beans (or mix of kidney, navy, pinto, etc)
4 C. cooked garbanzo beans
1 large sweet onion, peeled and sliced thin
1 C. diced Celery
2 large green peppers, seeded and sliced (or red or yellow or even mix with a little hot pepper)
2 C. white vinegar
1 C. lemon juice
3 C. sugar
1 C. oil
1 tsp. Mustard Seed
1 tsp. Celery Seed
2 tsp. canning salt
5 C. water
Wash green beans, snap off ends and cut into 1 to 2 inch pieces. Blanch and cool immediately. (Not really necessary, but will set the color better.) Prepare and set aside all other veggies. In a large stock pot, combine vinegar, lemon juice, sugar and water. Bring this to a boil and remove from heat. Add the oil, and salt, mix well. Add beans, onions, and green pepper to the mix and bring to a simmer. Marinate for 12 to 14 hours in the refrigerator. When marinating is over, heat entire mixture to a boil. Fill clean jars with the mixture. Add any amount of the hot liquid necessary to bring the level of the jars to ½ inch from the top. Put clean lids and rings on and process in a boiling water bath for 30 minutes.
A delicious accompaniment to roasted or grilled meats, poultry and game, this sweet/sour/savory condiment is also great with sandwiches and cheese. So who cares whether it’s called a jam, relish, marmalade or chutney – point is, it’s delicious!
 2 lb. wild leek bulbs, fresh or thawed frozen
2 T. unsalted butter
1 cup dry sherry
2 cups dark brown sugar
2 cups cider vinegar
2 tsp. mustard powder
2 T. yellow mustard seed
2 tsp. salt
1/2 tsp. freshly ground pepper
Slice the wild leek bulbs crosswise into 1/4 inch long pieces. Melt the butter in a large heavy skillet over medium heat. Add the sliced ramp bulbs and cook, stirring occasionally, until they soften and become a light golden brown. This should take about 15 minutes. Add the sherry and continue to cook until the sherry is reduced by half. Add the rest of the ingredients and raise the heat to medium-high. When the mixture comes to a low boil, reduce the heat slightly and continue to simmer, stirring occasionally, for about 40 minutes. Reduce the heat further, if necessary, to make sure that the bottom does not burn.When the mixture has become thick and bubbly, remove from the heat and allow to cool. Place the wild leek marmalade in a container with a tightly fitting lid and refrigerate for up to a month. Serve with roasted meats and poultry, on sandwiches and with cheese – anywhere you want to add the sweet/sour tangy flavor of wild leeks!
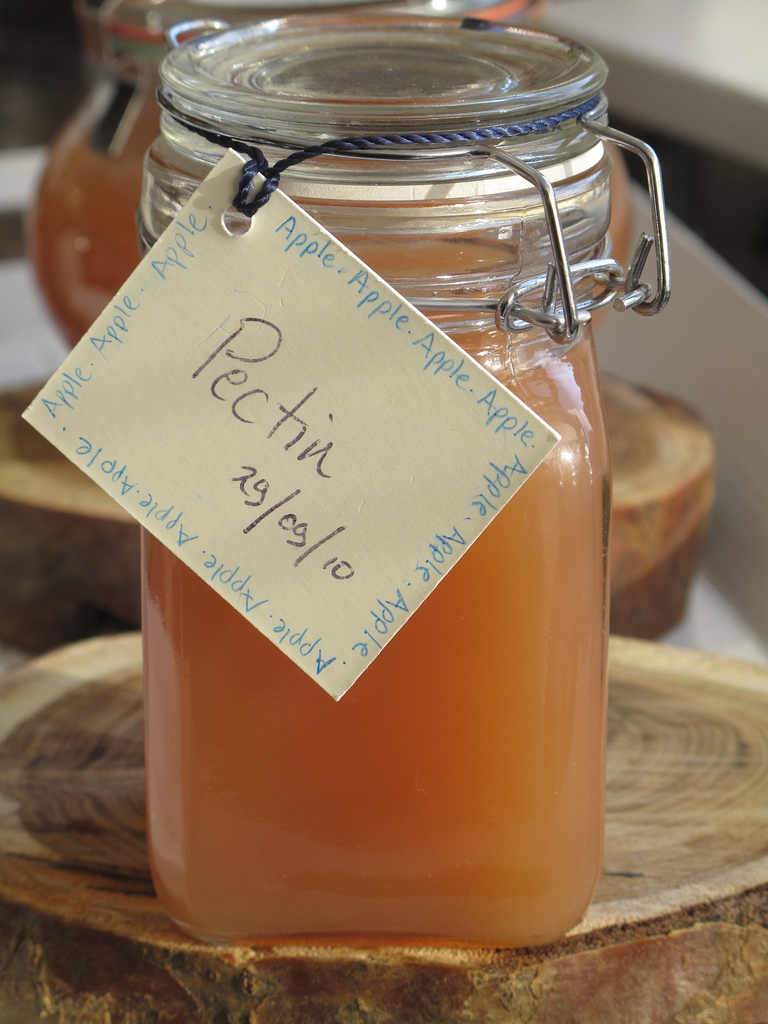 Put 3-4 pounds chopped apples in a non-reactive pan. Add enough water to barely cover apples and bring to a boil. Lower temperature immediately and let simmer until soft, approximately 20-30 minutes. Pour apples and liquid through a fine sieve into a second pot. Without stirring, let this liquid drain overnight. Bring liquid to a boil and cook until it has reduced to half its original volume. Test pectin content (see instructions below) and continue to cook if necessary. Once liquid pectin reaches the desired strength, store it in the fridge or freezer.
Testing the Pectin Level
To determine the amount of pectin in your liquid, put 1 tsp. the liquid on a plate and add 2 tsp. rubbing alcohol to the mix. Swirl the mixture around until clots start to form. It will amaze you, but it will happen: You will know the strength of the pectin by the size of the clots.
You want a fairly large viscous clot to indicate strong pectin. Weak pectin will show up as several small, scattered clumps. If that is the case, bring the liquid back to a boil and reduce further. And toss out the test batch-you don’t want to return that to the pot. Once the pectin reaches the desired strength, refrigerate, freeze, or can it until you make jam. It will keep in the fridge for up to one week.
Using Homemade Pectin
As a general guide, 2/3 C. liquid pectin is enough to set 4 C. low-pectin prepared fruit or fruit juice. Here again, you have room for whimsy. If you use strawberries (low in pectin) alone, use the full amount of liquid pectin. If you throw in a few currants (high in pectin) with the strawberries, use less liquid pectin. If you use half currants and half strawberries, you might not need any liquid pectin at all.
In the end, willingness to learn by trial and error and to love whatever the outcome is what will win the day.
 Easy Peasy Tomato Sauce
15 pounds tomatoes, stems removed
8 T. bottled lemon juice (optional, if canning)
Working in batches, quarter or coarsely chop the tomatoes and add them to the bowl of a food processor. Pulse a few times to your desired level of chunkiness. Transfer the tomato puree to a large stockpot, then repeat Step 1 until all tomatoes are processed. Place the stockpot over medium-high heat and bring the puree to a boil. Reduce the heat and simmer uncovered, stirring occasionally, for 30 to 90 minutes until the tomato sauce is thickened to your liking. When the sauce is finished, let cool to room temperature, then transfer to jars and refrigerate for up to 1 week. Alternatively, you can transfer the cooled sauce to freeze-proof containers or zip-top bags and freeze for up to 3 months.
Canning Method: Prepare a boiling water bath and 4 to 6 quart-sized canning jars. Follow the directions above through Step 3. Remove the stockpot from heat. Transfer the hot tomato sauce to warmed jars, leaving about 1 inch of headspace. Stir in 2 T. of bottled lemon juice per jar. Wipe the rims with a towel, then seal with lids and bands. Process the jars in a boiling water bath for 40 minutes, adjusting time for altitude as needed. Properly canned tomato sauce will be shelf stable for at least 1 year.
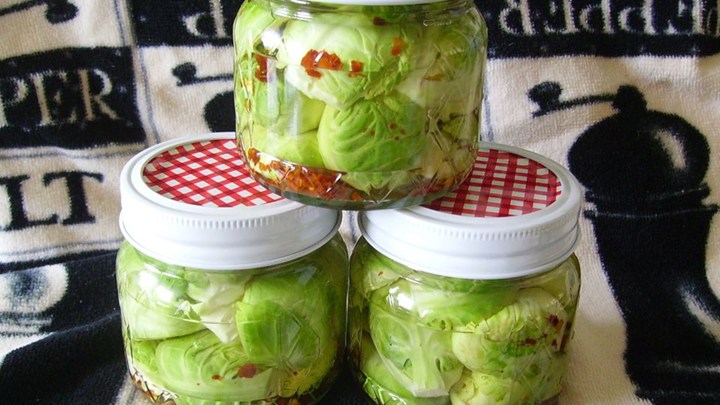 2 lb. Brussels Sprouts, trimmed and cut in half
5 1 pint Canning Jars with Lids and Rings
5 cloves Garlic, divided
1 ½ tsp. Red Pepper Flakes, divided
5 C. Water
5 C. Distilled White Vinegar
7 tsp. Pickling Salt
Soak Brussels sprouts in a large bowl filled with lightly salted water for about 15 minutes. Drain well.
Sterilize the jars and lids in boiling water for at least 5 minutes. Divide the drained Brussels sprouts evenly between jars, filling the jars about 3/4-inch from the top. Place 1 garlic clove and 1/4 tsp. red pepper flakes in each jar. Bring vinegar, water, and pickling salt to a boil in a large pot over medium-high heat until the salt is dissolved, about 5 minutes. Pour the vinegar mixture into the jars, filling the jars to within 1/4 inch of the top. Run a knife or a thin spatula around the insides of the jars after they have been filled to remove any air bubbles. Wipe the rims of the jars with a moist paper towel to remove any food residue. Top with lids, and screw on rings. Place a rack in the bottom of a large stockpot, and fill stockpot halfway with water. Bring to a boil over high heat, then carefully lower the jars into the pot using a holder. Leave a 2-inch space between the jars. Pour in more boiling water if necessary, until the water level is at least 1 inch above the tops of the jars. Bring the water to a full boil, cover the pot, and process for 10 minutes. Remove the jars from the stockpot and place onto a cloth-covered or wood surface, several inches apart, until cool. Once cool, press the top of each lid with a finger, ensuring that the seal is tight (lid does not move up or down at all). Store in a cool, dark area, and wait at least 3 weeks before opening.
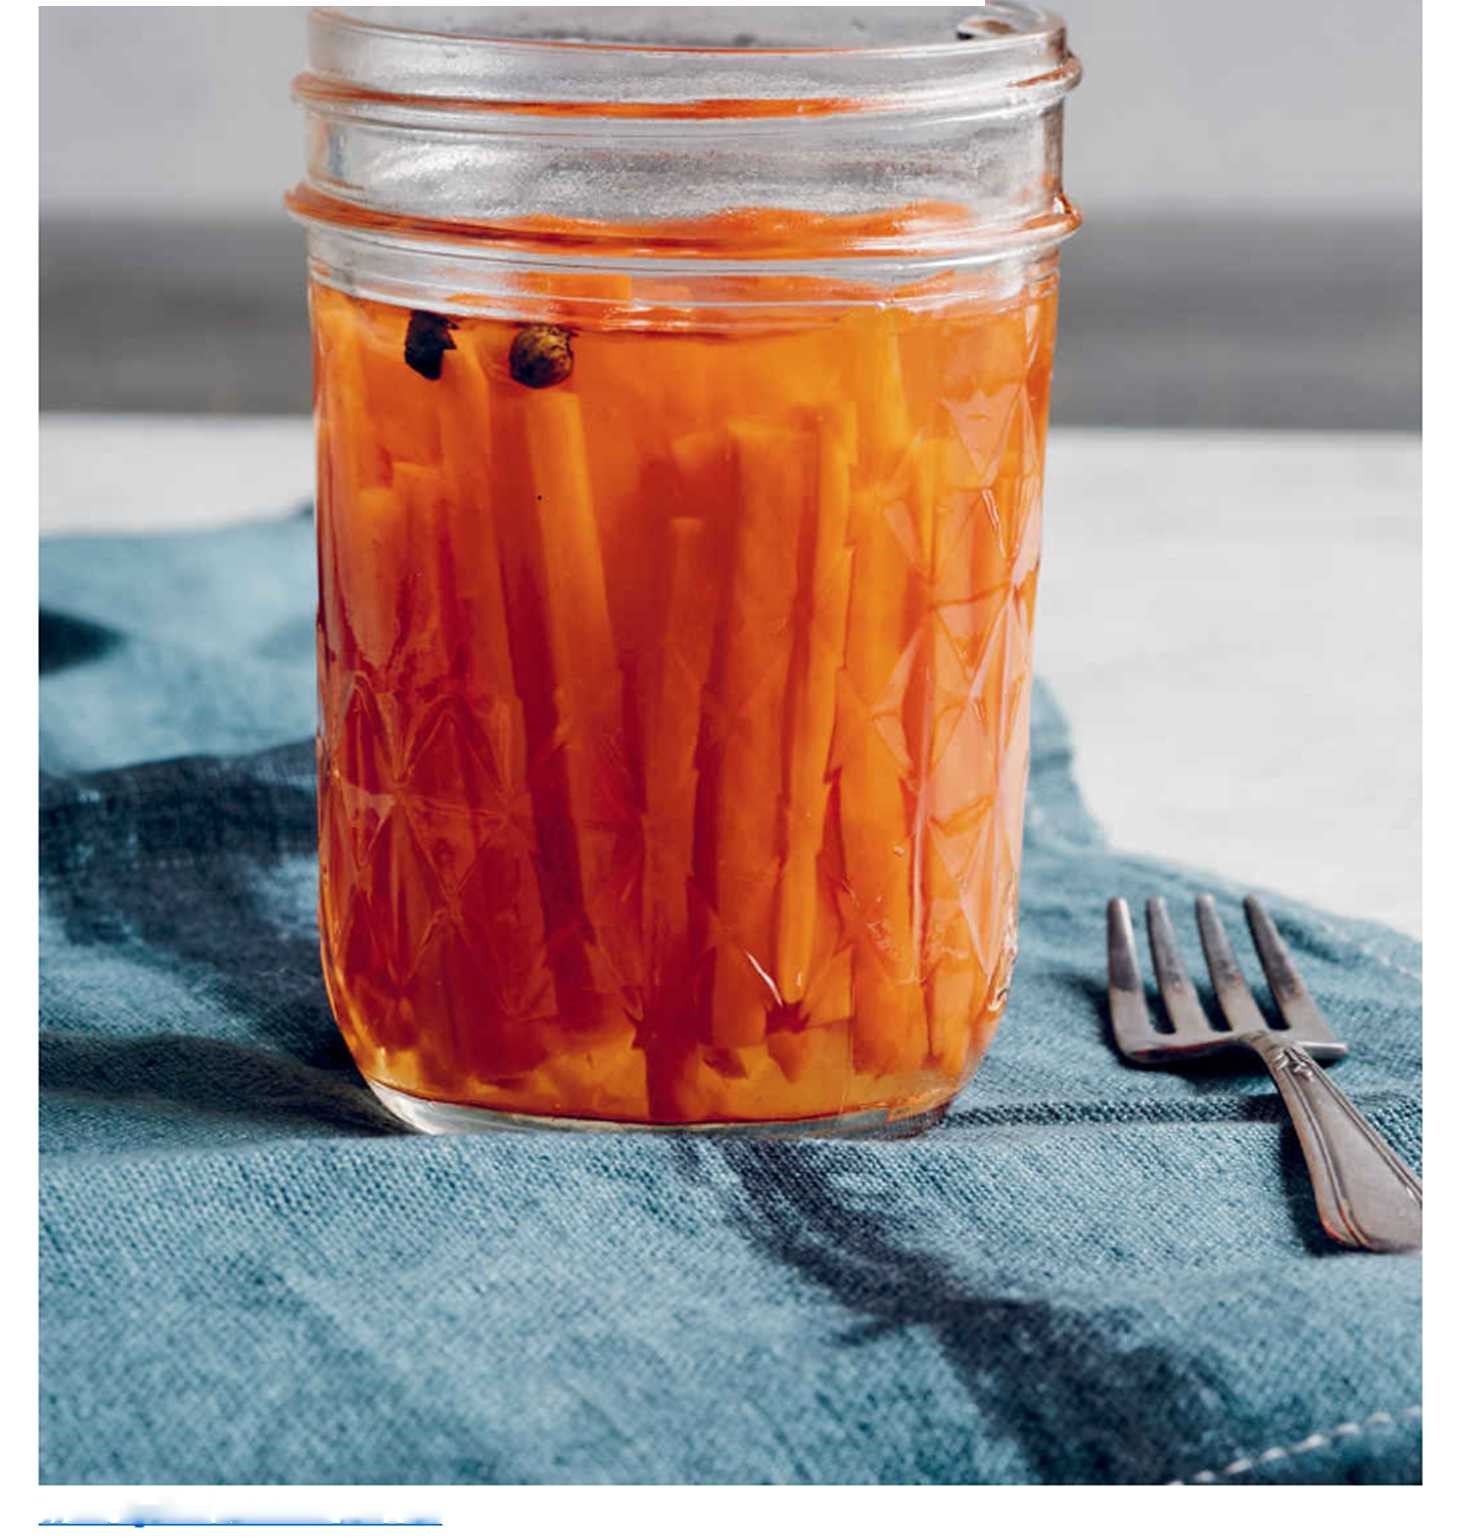 1 ¼ pounds (567 g) carrots, either orange or rainbow (red, orange, yellow)
2 T. coarse sea salt
1 C. (237 g) white wine vinegar
3/4 C. (150 g) sugar
½ C. (118 g) dry white wine, such as Orvieto, Pecorino, or Soave
Pinch of finely grated lemon zest, plus the juice of 1/2 lemon
18 whole peppercorns
3 sterilized 1/2-pint jars and their lids
Basic water-bath canning equipment
Cut the carrots crosswise into 2-inch pieces. Cut each piece lengthwise into slices about Vs inch thick, then cut each slice into matchstick (julienne) strips about Vs inch thick. Place the carrot strips in a bowl as you work. Sprinkle the salt over the carrots and toss well. Transfer the carrots to a colander and set the colander over the bowl. Set a plate over the carrots and weight it down with a heavy object (a container of grains, a jug of maple syrup, whatever you have on hand). Let the carrots marinate for 2 hours to release some of their juice. Rinse and drain the carrots, spread them out on a clean kitchen towel, and pat dry. Combine the vinegar, sugar, wine, and lemon zest and juice in a medium saucepan and bring to a boil over medium-high heat, stirring to dissolve the sugar. Add the carrots, stir once, and return to a boil. Boil for 2 minutes, then remove from the heat. Place 6 peppercorns in the bottom of each jar, and then pack the carrots into the jars. Ladle the hot brine over the carrots, leaving 1/2 inch headspace. Use a bubble remover or a clean chopstick to get rid of any bubbles. Screw the lids on tightly and process for 10 minutes in a boiling-water bath. Store the sealed jars in a cool, dark place. The carrots will keep for up to 1 year, though they may eventually lose their crisp texture. Store any jars that fail to seal properly in the refrigerator and enjoy those first.
Supplies
Canning Jars & Lids
Large Pot for Canning Kettle
Rack for inside Pot
Jar Lifter
Jar Bubbler
Canning Funnel
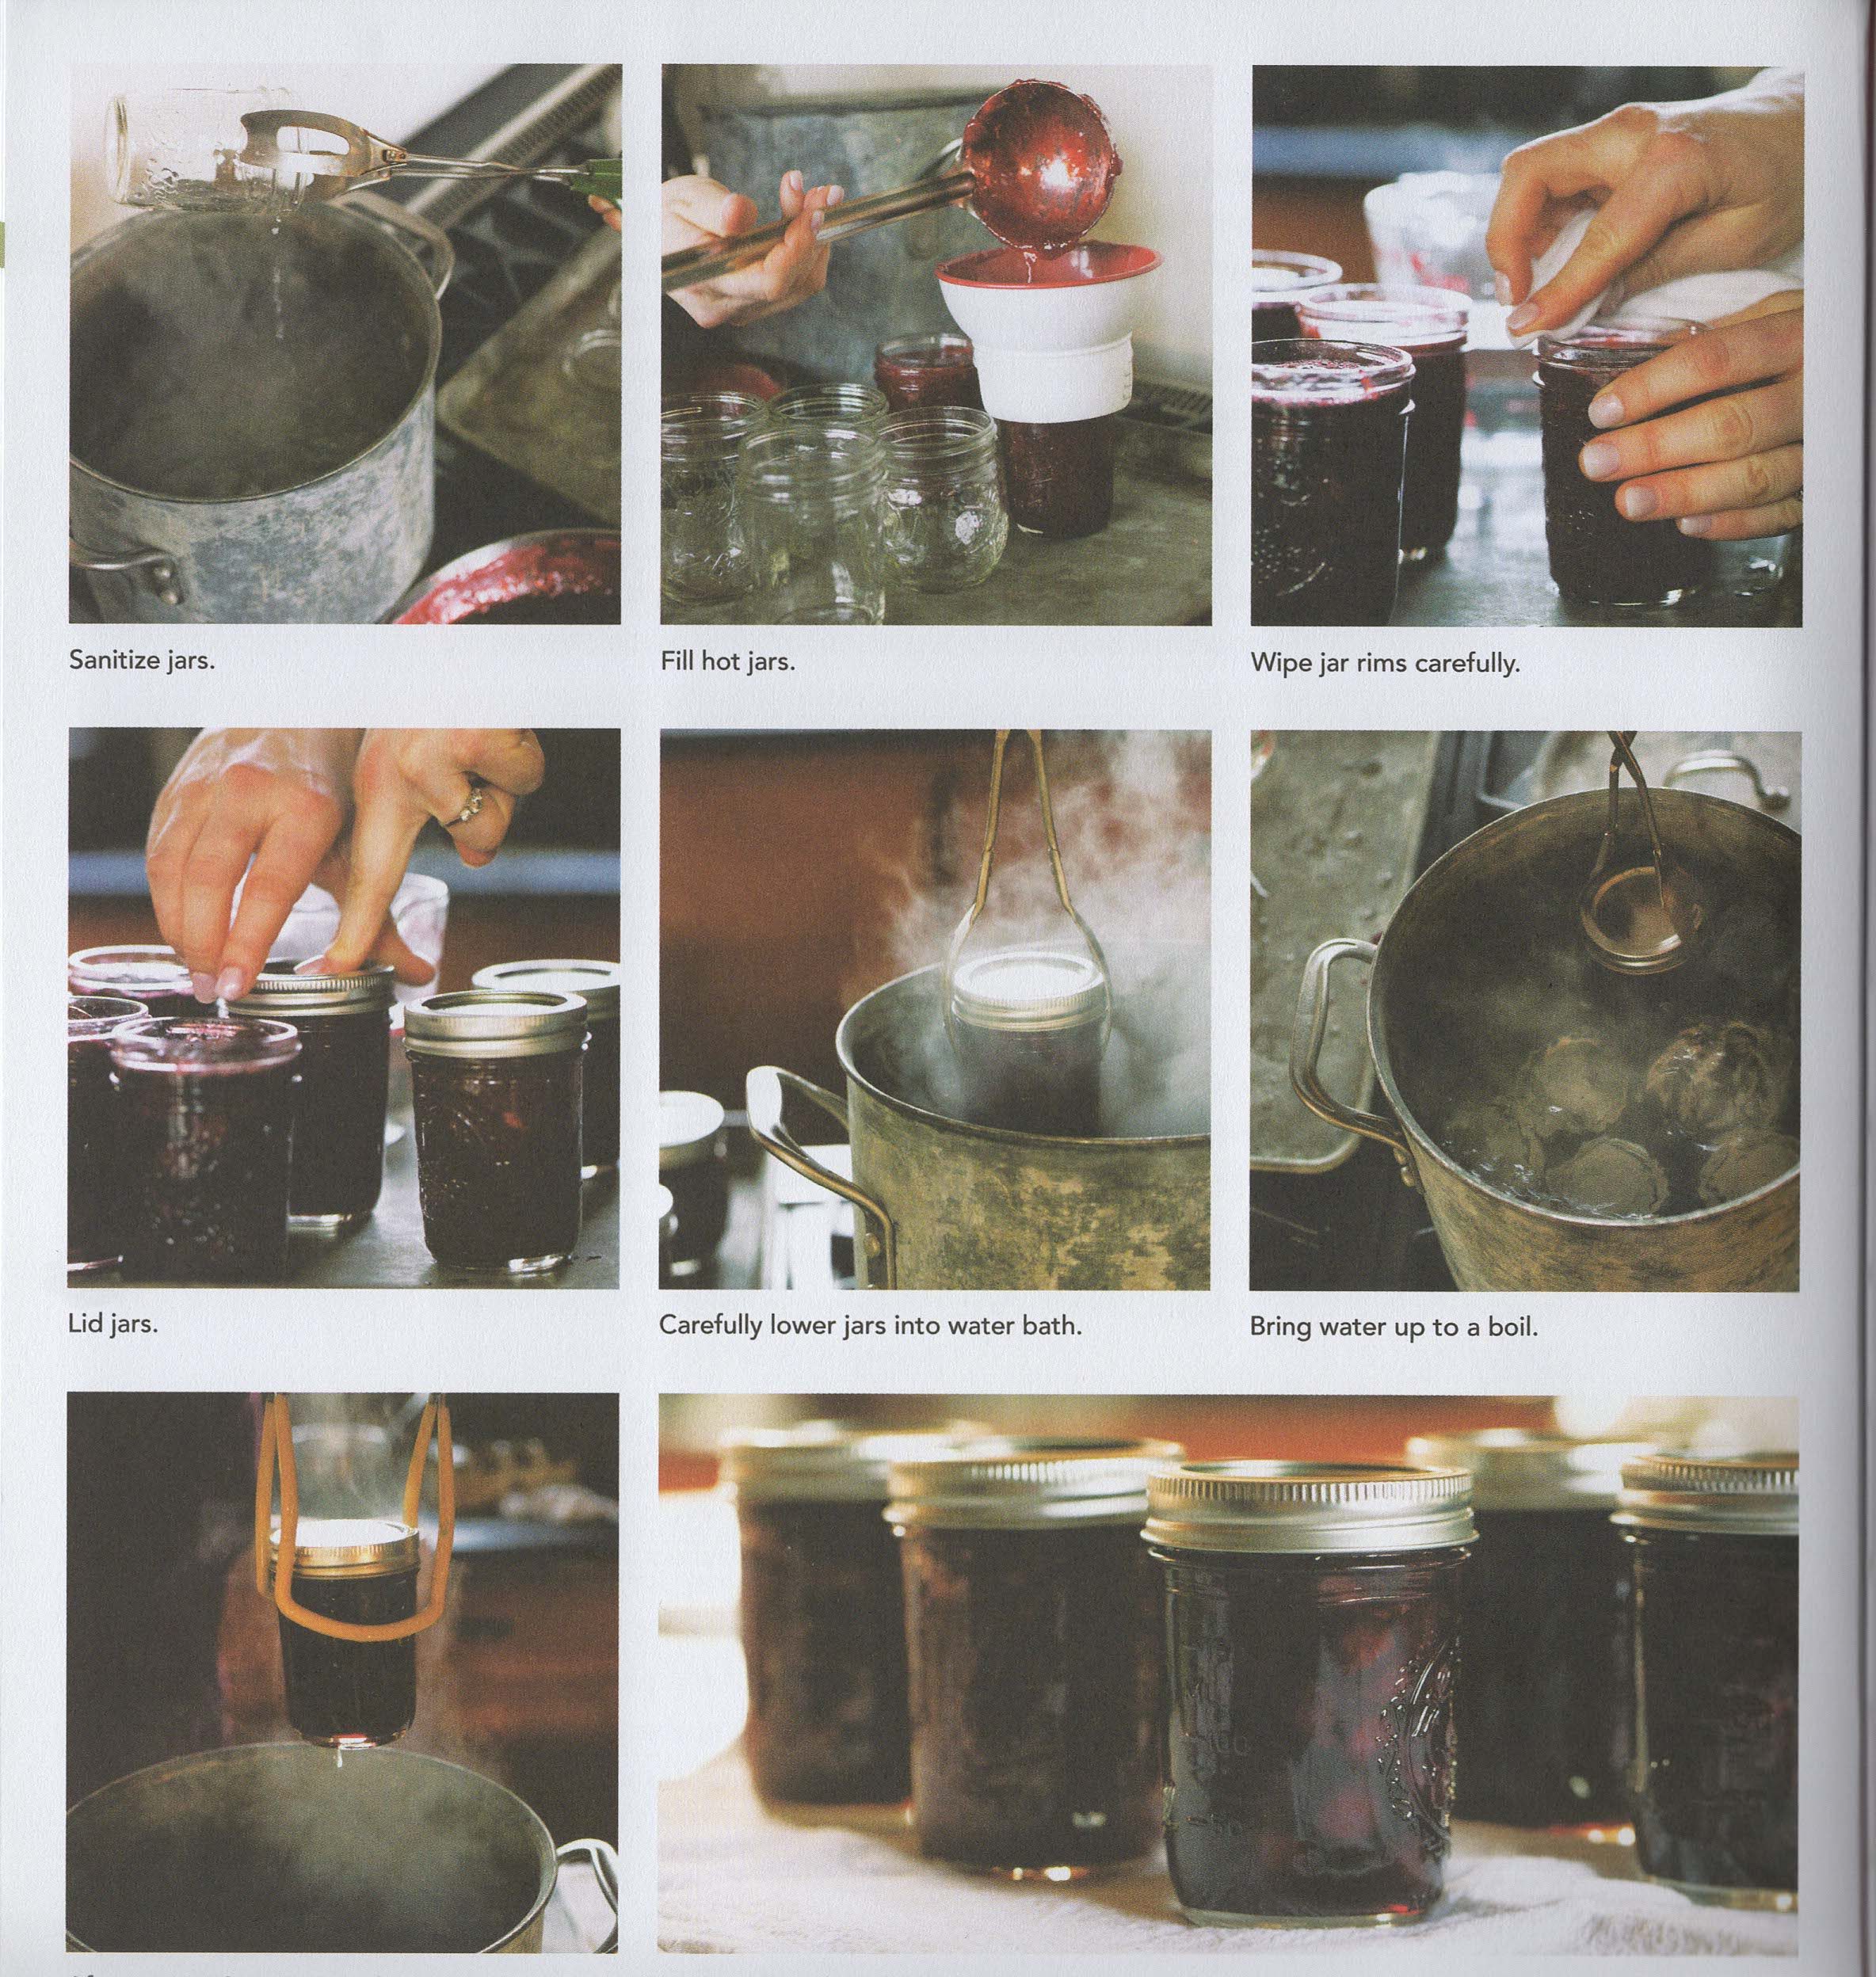
Basic Steps:
1. Read recipe all the way through
2. Take care of advance processing first (such as overnight maceration)
3. Inspect jars & Lids
4. Boil jars, keep sterilized and warm
5. Set out needed tools
6. Prepare recipe
7. Remove Jars from water, pour a little into a bowl for cleaning rims later
8. Fill Jar with funnel
9. Use Jar Bubbler to remove bubbles
10. Repeat until all are full
11. Clear rims with warm wet towel; top with flat lids. Screw on bands to fingertip tight, do not over tighten.
12. Transfer with jar lifter into water bath canning kettle, water should be 2 inches above top of jars.
13. With water at a full boil, process for length f time determined by recipe.
14. Turn off heat, let jars sit 5 minutes. With jar lifter, transfer jars from pot to a clean kitchen towel, lifting straight up and down; tilting could prevent a tight seal. Jars should have a bit of space between them in a room temperature and non drafty place. Don’t touch jars or lids yet.
15. Jars should PING as they seal. Let them sit undisturbed for 8-24 hours. Gently press in center of lid; it should not move or pop up and down. If it does, then place in refrigerator and use in next few days.
16. Remove canning lid rings and wash dry and label your successfully sealed jars. These should be consumed within a year.
Stuff to remember:
Follow your recipe. Changing the ratios of low acid foods can allow the spread of botulism.
Pull out the jars your recipe calls for, plus one more. Recipe quantities aren’t always exact, depending on moisture content or how much the food is cooked down. If you have extra, you’ll be glad you cleaned that extra jar.
Start timing processing time only after water reaches a full boil.
Make adjustments for altitude. Water boils at a lower temperature at higher altitudes, and food might not reach a safe temperature without longer processing.