Pineapple Spam and Green Bean Stir

Pineapple Spam and Green Bean Stir

1 C. rice
2 C. water
1 can of spam
2 small onions, sliced thinly into half moons
2 cloves of garlic, minced
1 T. minced ginger
20 oz. can of pineapple slices, cut into cubes (or chunks)
1 C. juice reserved from the canned pineapple
3 T. teriyaki sauce (or more to taste)
1 1/2 C. frozen green beans

Place rice in water in a covered pot. Simmer for 30 minutes. Meanwhile, carefully remove the SPAM from its container and cube into bite size pieces. Fry in a skillet on medium to medium high heat. While the SPAM is cooking, slice the onions. Once the SPAM begins to turn light brown, add the onions. Once the SPAM and onions are a nice shade of brown, add the pineapple slices. Add splashes of reserved pineapple juice from the can to help everything get caramelized. Once the pineapple begins to turn light brown add the garlic, ginger, teriyaki, green beans and any left over juice. The green beans should start to get little black specks on them right about the time the rice is done. Serve the stir fry over the rice. Top with red pepper flakes and soy sauce if that is your sort of thing.

Chops with Cabbage and Apples

Chops with Cabbage and Apples

4 pork loin chops, 3/4 inches thick
Salt & Pepper
3 cloves fresh garlic, peeled
4 tsp. water
1 tsp. salt
1/2 small bay leaf
3 medium apples, peeled, cored and coarsely chopped
1 medium head cabbage, cored and coarsely chopped
1/2 small onion, chopped
1/4 C. sugar
2 tsp. EACH vinegar and water
1 1/2 tsp. flour

Trim fat from chops; cook fat in a skillet to oil its surface. Discard fat, Season chops with salt and pepper; brown chops in the skillet Add garlic, 2 tsp. water, 1/2 tsp. salt, and bay leaf, cover and simmer for 30 minutes. Remove chops and discard garlic and bay leaf. To the skillet add apples and cabbage. Blend onion, sugar, vinegar, and water, flour, and remaining 1/2 tsp. salt. Cover and simmer 5 minutes. Return chops to the skillet, cover and cook 20 minutes until chops are fork tender.

Coastal Stew

Coastal Stew

Of course like any ciopinno or seafood stew, you can add or subtract your choice of seafood.

As needed, EVOO
6 cloves garlic, chopped
2-3 shallots, chopped
1 medium onion, diced
1 medium carrot, diced,
1 bulb fennel, diced
1 C. dry red wine
2 each 16 oz. cans diced tomatoes with juice
1 tsp. sea salt 2 tsp. dried oregano
1 tsp. cracked coriander
1 lb. razor clams, cleaned, chopped
1 inch dice 2 medium potatoes, peeled,
1 inch diced
1 lb. halibut, 2 inch pieces
2 lb. mussels and clams
1 lb. rockfish, 2 inch chunks
1 bunch fresh basil, Chiffonade, just before service

Add EVOO to bottom of preheated Dutch oven. Add next five ingredients and cook until vegetables are aromatic and still firm. Add wine, tomatoes, sea salt, oregano and coriander. Bring to simmer and add razor clams; cover and simmer 45 minutes. Add potatoes and continue cooking an additional 15 minutes. Test the clams for tenderness, and if not, continue cooking until clams are tender. Hold warm until service. At service: Gently stir in halibut and rockfish and cook for 3-5 minutes. Taste the broth and adjust seasoning with sea salt, coriander, and black pepper. Dish up into large “pasta size” bowls. Drizzle with your favorite EVOO and top with shredded basil. *Alternative: place large ladle of stew over your favorite polenta or pasta.

Razor Clam Po’ Boy with Apple Cabbage Slaw on House-made Ciabatta

Razor Clam Po’ Boy with Apple Cabbage Slaw on House-made Ciabatta


½ head of cabbage, very thinly sliced
2 red bell peppers, seeded and cut julienne
1 Granny Smith apple, grated
3 carrots, grated
1 jalapeno, very thinly sliced
¼ C. cilantro
1 C. mayonnaise
1 C. orange juice
¼ C. granulated sugar
2 T. lemon juice
Salt and freshly ground black pepper

3 Pacific razor clams, shelled, cleaned, and butterflied
1 C. all-purpose flour
Salt and freshly ground black pepper
1 C. milk
1 egg
2 C. panko crumbs
4 T. canola oil
3 pats butter

1 baguette
2 pats butter
3 T. aioli

For the Apple Slaw: Combine the cabbage, bell peppers, apple, carrots, jalapeno, and cilantro in a large mixing bowl. In a separate bowl, combine the mayonnaise, orange juice, sugar, and lemon juice. Season with salt and black pepper to taste. Dress the cabbage with this mixture, stirring to coat thoroughly. Reserve chilled. For the Razor Clams: With a tenderizing hammer, tenderize the foot of each razor clam thoroughly. Put the flour in a mixing bowl and lightly season with salt and pepper. In another bowl, whisk the milk and egg. Put the panko crumbs in a separate bowl. Dredge the razor clams in the flour, followed by the egg wash, and finish in the bread crumbs. Set a large frying pan over medium to high heat. Once the pan is hot, add enough canola oil to come up ¼-inch in the pan. When the oil shimmers, gently ease each breaded clam into the oil, being careful to drop them in away from yourself. Add 3 pats of butter to the pan and fry the clams on one side until golden brown. Using tongs, gently flip the razor clams (again, away from yourself) and cook for 30 seconds to 1 minute (until just barely golden brown). Remove the clams from the pan and drain on a paper towel-lined plate. To Assemble and Serve: Cut the baguette lengthwise and toast in a pan over medium heat with the butter. When the bread is toasted, spread both sides with aioli. Add the fried razor clams and finish with a healthy helping of apple slaw.

Rummy Rainier Cherries

Rummy Rainier Cherries

A pound or so – of Rainier cherries, pits reserved. (You can use Bing or even sour cherries)
Half strength simple syrup (For every C. sugar, add two C. water)
Dark rum (one T. for each half-pint jar you end up filling)

Pit the cherries.. Do this over the pot you’ll be cooking in, and just drop the pits into the pot along with the cherries. The pits will give the cherries a slight amaretto flavor. Add in the sugar and water, and bring to a boil for five minutes. Remove the pits, and scoop the cherries into sterilized jars. Add one T. dark rum directly to each half-pint jar, then ladle in enough syrup to cover the cherries, leaving 1/2 inch of headroom. Seal the jars with sterilized lids and rings, then process in boiling water for 10 minutes.

Make Ahead Muffin Melts

Make Ahead Muffin Melts

12 whole Hard-boiled Eggs, Peeled and Chopped
2 C. Grated Cheddar Cheese
1 C. Mayonnaise
12 slices Bacon, Fried and Crumbled
1 tsp. (heaping) Dijon Mustard
1/2 tsp. Garlic Powder
3 dashes Worcestershire Sauce
6 whole English Muffins Split

Combine eggs with all other ingredients. Fold together gently. Cover and store in the fridge overnight. Spread on English muffin halves, then broil for 3 to 5 minutes or until hot and bubbly. (Don’t set them too close to the heating element.) Serve immediately!

Brown Butter Sugar Snap Peas with Mint

Brown Butter Sugar Snap Peas with Mint

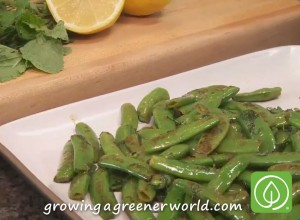
1 pound sugar snap peas, strings removed
1 tsp. unsalted butter
15 medium-sized fresh mint leaves, chopped roughly
1 tsp. freshly squeezed lemon juice
Kosher salt, to taste
Freshly ground black pepper, to taste

In a large sauté pan over high heat, add the butter. The butter will foam up, subside, and after approximately 30 to 40 seconds, begin to turn golden brown. Brown butter has a slight nutty favor that works well with this dish. Once the butter has turned golden brown, mix in the sugar snap peas. Cook, stirring occasionally, for 3 minutes. Remove from the heat and add the mint and the lemon juice. Season to taste with salt and pepper, mix together, then serve immediately.

Faro Salad with Preserved Winter Squash and Dried Cherries

Faro Salad with Preserved Winter Squash and Dried Cherries

1 C. pearled faro, rinsed, any small stones or debris removed
1/2 tsp. fine sea salt
1 shallot, thinly sliced
3/4 C. (113 g) Oil-Preserved Butternut Squash with Mint
1/4 C. (28 g) oven-dried cherries or store-bought
2 T. extra-virgin olive oil
1 T. white balsamic vinegar
1 T. honey
Freshly ground black pepper
1/2 C. (70 g) coarsely chopped toasted hazelnuts
2 oz. (57 g) ricotta salata, diced
1 bunch arugula, for serving

Put the faro in a high-sided saucepan with water to cover by 2 inches. Add 1 tsp. the salt and bring to a boil over medium-high heat. Reduce the heat to medium-low and cook, partially covered, until the faro is tender but still a little firm and chewy (al dente), 20 to 25 minutes. Drain the faro in a colander set in the sink and transfer it to a bowl. Fold in the shallot, preserved butternut squash, and dried cherries. In a small bowl, whisk together the oil, vinegar, and honey. Spoon in a little oil or brine from the squash, if you like. Season with the remaining 1/2 tsp. salt and a little pepper and whisk again. Pour the dressing over the faro and fold until thoroughly combined. Fold in the hazelnuts and ricotta salata. Spread the arugula on a platter and spoon the faro salad on top. Serve warm or at room temperature.

Oil-Preserved Butternut Squash with Mint

Oil-Preserved Butternut Squash with Mint

1 Butternut Squash
2 C. White Wine Vinegar
1 ½ C. Sugar
1 fresh or dried Chile Pepper, sliced crosswise or crushed
1 tsp. dried Mint
1 ½ tsp. – 2 tsp. Kosher or Fine Sea Salt
Sunflower Oil

3-4 sterilized ½ pint jars & lids

Slice the squash in half lengthwise. Scoop out the seeds and any stringy pulp and discard (or reserve the seeds for another use). Peel off the rind with a sharp paring knife and cut the squash halves in half again lengthwise, to yield 4 pieces. Slice each quarter crosswise into wedges about 1/4 inch thick and transfer to a large heatproof bowl. Combine the vinegar, sugar, chile pepper, mint, and salt in a medium saucepan and bring to a boil over medium heat. Stir once or twice to dissolve the sugar. Pour the boiling brine over the squash. Cover with a clean kitchen towel and let steep overnight. Drain the squash, reserving the brine. Return the brine to the saucepan and bring to a boil over medium-high heat. Boil vigorously for 2 minutes, then carefully add the squash. Return to a boil and boil until the squash is just beginning to soften, about 2 minutes—it should still be a little crunchy. Drain the squash and spread it out on clean kitchen towels to air-dry for a couple of hours. Pack the pieces tightly into the jars, leaving about l inch headspace. Pour enough oil over the squash to cover the pieces completely. Cover tightly with the lids and let stand at room temperature for 24 to 48 hours. Store in the refrigerator for up to 3 months. To serve, remove only as much as you plan to use and let it come to room temperature. Top off the jar with more oil as necessary7 to keep the remaining squash submerged. Variation: to preserve the squash in the brine rather than in oil, pack the pieces tightly in sterilized jars, leaving about 1 inch headspace. Pour the hot brine over the squash, taking care to cover all the pieces. Cover tightly with the lids and let come to room temperature. Store in the refrigerator for up to 3 months.

Blackberry Anise Hyssop Sorbet

Blackberry Anise Hyssop Sorbet

4c Blackberry
1/3 C. Sugar
1 tsp. Lemon Juice

Toss blackberries with sugar and let it sit half a day to overnight. In a non-reactive pan, bring the mixture to a gentle simmer. Puree all ingredients on low speed in your blender; be careful not to grind up the seed. Strain and cool over ice bath.
Anise Hyssop syrup

30g/1oz. Anise hyssop, cleaned and destemmed
¾ C. sugar
I tsp. honey or agave nectar
1 ½ C. water

Bring sugar, honey and water to a boil. While it’s hot, pour it over the cleaned anise hyssop. Let it steep for one hour. Strain anise hyssop and cool the syrup over an ice bath.

Combine cooled puree and syrup together with:

1 tsp. freshly juiced lemon
1/8 tsp. salt

Chill mixture in the fridge at least 3 hours or overnight. Churn it in an ice cream maker. Enjoy with more fresh berries, toasted almond, and fresh whipped cream on top!

Crispy Gnocchi with Zucchini, Sweet Corn and Basil

Crispy Gnocchi with Zucchini, Sweet Corn and Basil

1-1/2 tsp. extra virgin olive oil
16oz. packaged gnocchi
1-1/2 tsp. butter
1 small zucchini, chopped
1/2 C. frozen corn
1/4 small onion, chopped
salt & pepper
2 garlic cloves
8 leaves basil, chopped & divided
1/4 C. half & half
2 tsp. freshly grated parmesan cheese

Heat extra virgin olive oil in a large skillet over medium-high heat. Add gnocchi then spread in one layer and sauté undisturbed for 3-4 minutes, or until golden brown on the bottom. Toss then continue sautéing for 3-4 more minutes or until golden brown on all sides. Remove skillet from heat then set aside. Meanwhile, heat butter in another large skillet then add zucchini, corn, and onion, and then season with salt and pepper. Sauté until vegetables are tender, about 3-4 minutes, then add chopped garlic and half the basil, and then sauté for 30 more seconds. Remove skillet from heat then add half & half and parmesan cheese, and stir to combine. Pour mixture into skillet with gnocchi then toss to combine. Season with more salt and pepper if necessary then serve topped with remaining chopped basil.

Strawberry Jam with Thai Herbs

Strawberry Jam with Thai Herbs

Makes 8 1/4 pint jars

9 C. clean strawberries diced (3 pounds)
1 1/2 C. sugar
3 tsp. fresh + strained or bottled lemon juice
2 tsp. cilantro
1.5 tsp. thai basil
1 tsp. mint (I used chocolate mint; use whatever you have)
1 tsp. lemon zest

Follow a proper recipe for water bath canning unless you know what you’re doing (e.g. sterilizing jars and lids and all that jazz.) There are tons online or you can get a book.

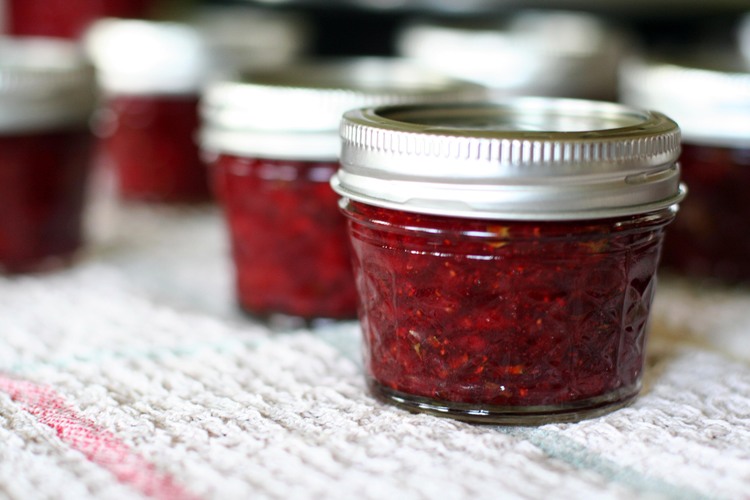
2. Put the strawberries and sugar into a large, ideally wide pot to aid in evaporating all that water. Bring to simmer and stir stir stir. Cook for about 5 minutes. Then pour the mixture into a colander with a bowl underneath it to catch the liquid and separate it from the fruit. Return the liquid to the pot and cook down boiling over high heat for 20 minutes until it reduces to around 1 + 1/2 C.. Something like it cuts in half. Or, if you’re like me, and fear the high heat boil, put it over medium heat and fret and worry that you might be smelling burning, letting a solid hour pass until it seems thickened enough. Put the fruit you set aside back into the pot with your thickened syrup. Add the lemon juice. Bring to a simmer. Stir frequently for about 25 minutes. If you’re lucky, and bold enough with the heat, it will somehow only take 15. You know it’s ready when a chilled plate from the freezer with a dab of jam, after being returned to the freezer for a minute, seems thickened and jam-like. If it’s sliding around post 1-minute freezer, it needs more time. In the meantime, get the boiling water ready for canning. Turn off the heat, add the herbs and lemon zest and stir it all in. Process the jam in the boiling water for 5 minutes, leaving the requisite 1/4 inch space at the top of each jar. Let rest for 12 hours. Make sure they sealed by trying to push down on each lid. But really, get some solid advice on canning if you haven’t done it before — this book is a great place to start. Canning is fun, and worth trying, and infinitely less dangerous than you might assume. Eat the jam, wondering if a single jar will make it to autumn.

Pesto Chicken Veggie Meatballs

Pesto Chicken Veggie Meatballs

1 pound ground chicken breast
1/2 medium bell pepper, red
1 medium carrot
1 cup zucchini
3 tablespoon pesto
1/2 teaspoon salt
1 tablespoon olive oil

Preheat the oven to 375 degrees. Start by preparing the vegetable mixture: Gently pat the zucchini dry with a paper towel or clean dish towel (no need to squeeze all the liquid out of it, just pat off some of the extra moisture). Add to a large bowl with the finely minced carrot and bell pepper. Add in the pesto and salt and stir to combine. Fold in the ground chicken breast using your hands or a large fork, and toss together the chicken and vegetable mixture until it’s well-combined. Try not to over-work the mixture. Line a baking sheet with foil or a slipat and drizzle with oil. Using a 1″ scoop or a Tablespoon, make small (1-1 1/2″) meatballs and place them on the baking sheet. (you can also just use your hands to roll them out) Bake at 375 degrees for 10 minutes. For a bit of browning, broil the meatballs an additional 1-3 minutes. If browning isn’t important, continue baking meatballs another 2-3 minutes, or till cooked through. Serve with your favorite sauce, pasta, or on a sandwich. Enjoy!

Fresh Zucchini & Arugula Salad

Fresh Zucchini & Arugula Salad

1 large zucchini
1/2 C. feta crumbles
1/4 C. chopped parsley
2 scallions, sliced
2 tsp. good quality olive oil
1 tsp. good quality aged balsamic vinegar
salt and pepper
2.5 oz. arugula

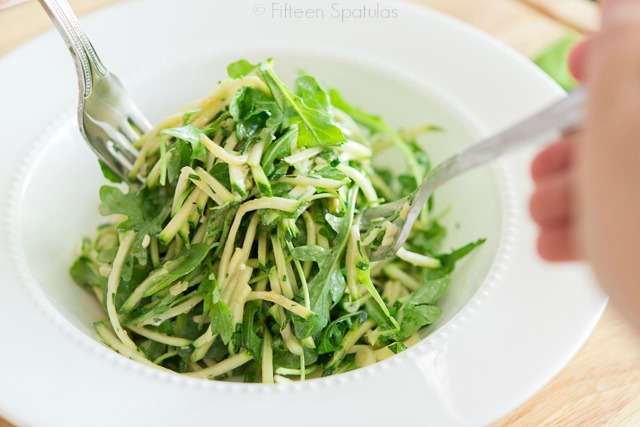
Grate the zucchini with a mandolin, and combine with the feta, parsley, scallions, olive oil, and balsamic in a large bowl. Season to taste with a pinch or so of salt and pepper. Add the arugula and toss to combine. Serve and enjoy!

Warm Shrimp Salad with Mushroom Vinaigrette

Warm Shrimp Salad with Mushroom Vinaigrette

Mushroom Vinaigrette:
1 lb. (31-40 shrimp, peeled and de-veined)
8 oz. Olive oil
3 C. raw mushrooms sliced (approx. 10 oz.)
2-3 T. Fresh sage
1 tsp. Cracked black pepper
1 tsp. Salt
1 tsp. Splenda
2 oz. White vinegar
2 tsp. Roased sesame seed

Salad:
8 C. lettuce – rinced and torn into serving pieces
2 C. alfalfa sprouts
½ C. shaved red onion

Preheat 12″ sauté pan over medium high heat. Add olive oil, mushrooms, sage, black pepper, Splenda and vinegar. Cook until mushrooms are soft (about 4-5 minutes). Add shrimp and cover with lid. Turn off heat and shrimp will cook in about five minutes. Pour over salad.

Spam Steaks in Port Wine

Spam Steaks in Port Wine

1 bunch of spring onions
¼ C. butter
2 tsp. olive oil
2 C. chestnut mushrooms, or a mixture of mushrooms
12oz. Spam, cut into thick slices
¼ C. Port
2 tsp. Dijon mustard
carrot and zucchini ribbons to serve

Trim away and discard the green stalks from the spring onions and roughly chop the white part. Heat the butter and oil in a large frying pan, add the spring onions and cook until just golden in color. Add the mushrooms, cook for 3 minutes then remove from the pan with a slotted spoon onto a warmed plate. Put the Spam steaks into the pan and heat until slightly brown on both sides. Pour the port over the Spam and add the mustard. Return the spring onions and mushrooms to the pan and heat well. Arrange the spring onions and mushrooms on a warm serving platter and place the Spam steaks on top. Serve with carrot and zucchini ribbons. If you wanted, you could flavor the ingredients with grated ginger instead of mustard.

“Wojapi”: Judy’s Wild Berry Soup

“Wojapi”: Judy’s Wild Berry Soup

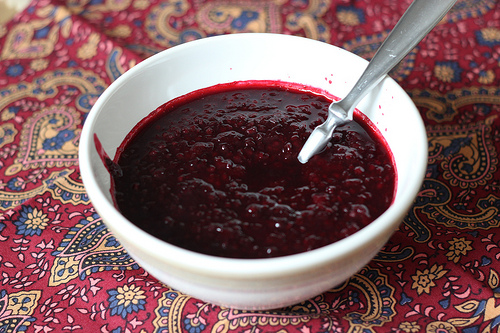
This soup is sometimes called Wojapi, a Lakota word that loosely translates as “all mixed up.” It’s been tested by hundreds of children and elders over the years, and is always a hit.

2 quarts of naturally sweet cherry juice, grape juice, blueberry juice, or spring water
2 C. blueberries (fresh, frozen or dried)
2 C. blackberries (fresh, frozen or dried)
1 C. huckleberries (fresh, frozen or dried)
1 C. raspberries (fresh, frozen or dried)
Also optional: Handful of blue or black elderberries 6 to 10 juniper berries

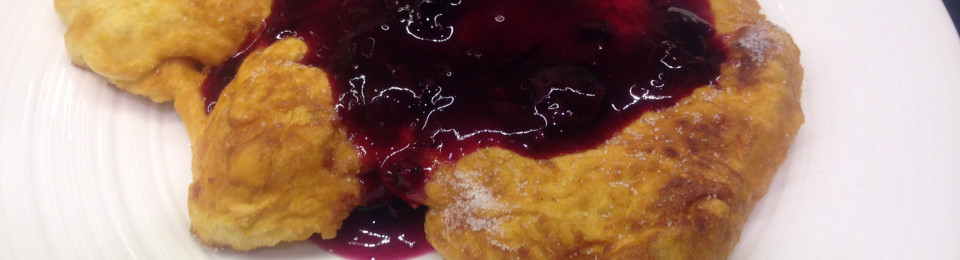
Combine all ingredients and simmer gently until berries pop and cook down. Serve hot or cold, depending on the weather. Spices like cinnamon and cloves, while not part of the traditional recipe, can be added. I like to spice the soup with Juniper berries and add pieces of dried/smoked salmon for a hardier savory meal. The pectin found in chokecherries and many berries will naturally thicken the soup. Serve over Fry Bread.

Sweet, Sour, and Spicy Pickled Melon

Sweet, Sour, and Spicy Pickled Melon

6 to 8 lb. (2 large or 3 medium) firm-ripe melons, such as cantaloupe, honeydew, canary, or a mix
2 C. granulated sugar or vanilla sugar
1 C. spring or filtered water
3/4 C. white wine vinegar
1 tsp. fine sea salt
1 tsp. crushed red pepper flakes
3 sprigs fresh mint

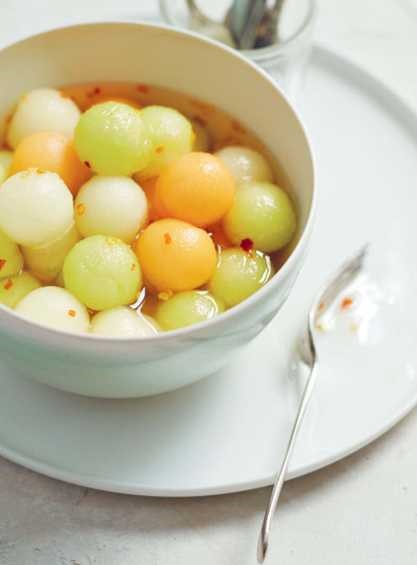
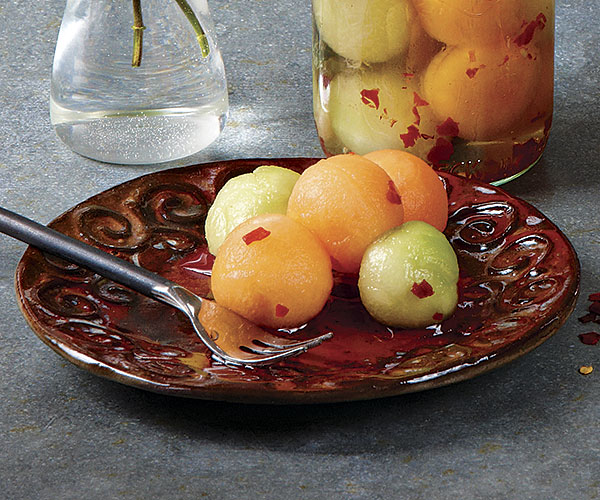
Why filtered water? Fruits pickled in agrodolce pick up all of the flavors in the brine—that’s the whole point, after all. Because water is a main component of the brine, I recommend you filter your tap water or use bottled spring water. This way, you can be sure your pickles won’t take on any off flavors from municipal water-treatment chemicals, such as chlorine, or naturally occurring minerals in well water, like sulfur. Run 3 pint-size mason jars and their lids through the hottest dishwasher cycle to sanitize. Run 3 pint-size mason jars and their lids through the hottest dishwasher cycle to sanitize. Halve and seed the melons. Using a melon baller, carve out about 6 C. melon balls, and place them in a bowl. Reserve any leftover melon for another use. Combine the sugar, water, vinegar, salt, and pepper flakes in a small saucepan. Bring to a boil over medium-high heat, stirring to dissolve the sugar and salt completely. While the brine is heating, pack the melon balls into the jars as tightly as you can without crushing them. Pour the hot brine into the jars, leaving a 1/2-inch headspace and making sure the melon balls are completely submerged. Insert 1 mint sprig into each jar, pushing down along the side of the jar with the handle of a spoon to submerge in the brine. Cool to room temperature. Screw the lids on tightly, and let the melon cure in the refrigerator for 4 days before serving. The melon will keep in the refrigerator for up to 1 month, though it will continue to soften over time.

Variations: The recipe calls for curing the pickles in the refrigerator, but if you’d rather make them shelf-stable until they’re open, you can process the melon in a hot-water bath. Though they will soften over time, the pickles will keep for up to 6 months at room temperature. Simply follow instructions for hot-water canning, processing the jars for 25 minutes.

Buttermilk Crackers

Buttermilk Crackers

6.25 oz. all purpose flour (1.25 C.)
1/4 tsp. salt
1.5 tsp. sugar
5 tsp. butter, cubed
1/2 C.+2 tsp. whole buttermilk
1 egg, beaten
sesame seeds, optional, for garnish
salt and pepper for sprinkling

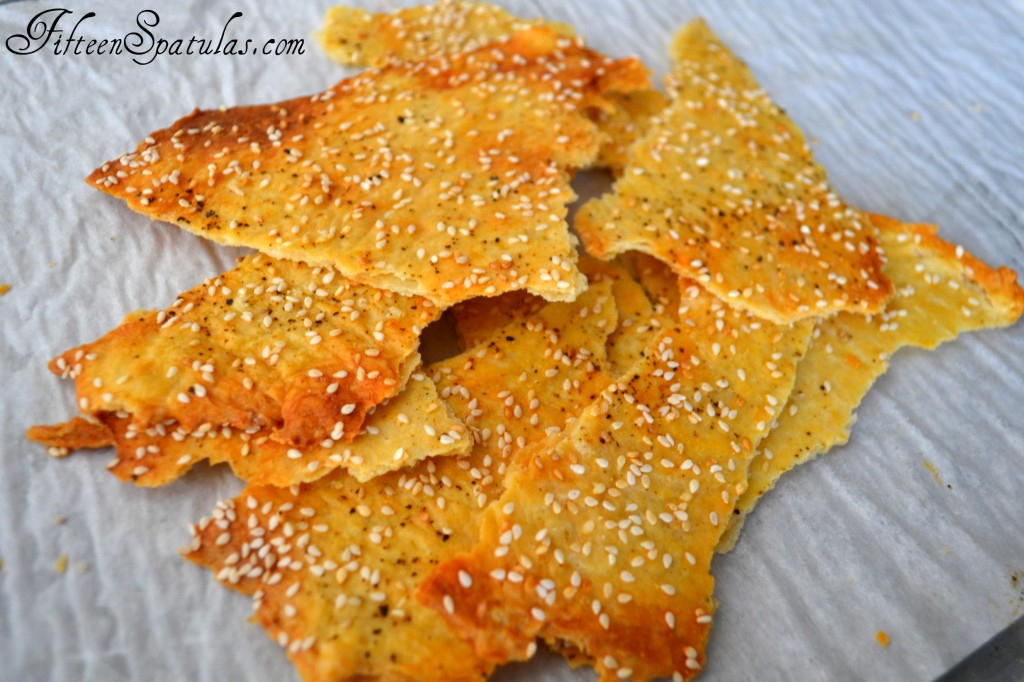
Preheat the oven to 350 degrees F. Whisk to combine the flour, salt and sugar. Add the butter and work with your fingertips until you get coarse crumbs (break it down more than you would a biscuit). Make a well in the center and pour in the buttermilk. Stir with a spatula to distribute the liquid, and once the dough starts to come together and there is no liquid dripping anywhere, stop mixing (and be conscious of not overmixing*). Lay a sheet of plastic wrap onto your counter and sprinkle with flour. Scrape the dough out onto it, then sprinkle more flour on top. Press it out into a flat disk and chill for at least 1 hour until it’s firm. Roll the dough out onto a piece of parchment paper fitted to a sheet pan (this way you can transfer it easily to the sheet pan later). You should make the dough as thin as possible and it should be rolled to cover all available space. Prick all over with a fork, brush with the egg wash, then sprinkle with salt and pepper, and any other garnishes you would like. Bake for about 35-40 minutes until golden brown. If you want them to be extra crispy, you can break them into shards and keep baking. Cool completely on a wire rack (and keep in mind that they crisp more as they cool). Enjoy!

Bacon-Cheddar Potato Croquettes

Bacon-Cheddar Potato Croquettes

4 C. cold mashed potatoes (with added milk and butter)
6 bacon strips, cooked and crumbled
1/2 C. shredded cheddar cheese
2 large eggs, lightly beaten
1/4 C. sour cream
1 T. minced chives
1/2 tsp. salt
1/4 tsp. pepper
40 Ritz crackers, crushed
1/4 C. butter, melted
1 tsp. paprika
Barbecue sauce, Dijon-mayonnaise blend or ranch salad dressing

In a large bowl, combine the first eight ingredients. Shape mixture by tablespoonfuls into balls. Roll in cracker crumbs. Place on parchment paper-lined baking sheets. Cover and refrigerate for 2 hours or overnight. Combine butter and paprika; drizzle over croquettes. Bake at 375° for 18-20 minutes or until golden brown. Serve with dipping sauce of your choice. Freeze option: Prepare croquettes as directed, omitting chilling step. Transfer to waxed paper-lined baking sheets. Prepare butter mixture; drizzle over croquettes. Cover and freeze until firm. Transfer to resealable plastic freezer bags; return to freezer. To use, bake croquettes as directed, increasing time to 20-25 minutes. Serve with dipping sauce. Yield: about 5 dozen.

West Bay Johnnycakes

West Bay Johnnycakes

1 C. white cornmeal
1 tsp. granulated sugar
1/2 tsp. kosher salt
2 tsp. butter, plus extra for serving
Maple syrup, for serving

Preheat a frying pan or griddle over low-medium heat. Meanwhile, in a large bowl combine the corn meal, sugar and salt. In a microwave-safe bowl or measuring C., or on the stovetop, bring 1-1/2 C. water to a boil, and pour into the cornmeal mixture. Combine with a whisk; the mixture will be very thick, like white polenta. Melt the butter in the preheated pan, and drop the cornmeal mixture by tsp. into the pan. Flatten each one slightly with the back of the spoon. Let the jonnycakes cook, undisturbed, for 6 minutes, until they’re browned and crispy on the bottom. Flip, and cook for 5 minutes more to crisp the other side. Serve hot, with butter and maple syrup.

Tomato Jam

Tomato Jam

Makes 3 Pint Jars or 6 Half-Pint Jars or 12 – 4 oz. Jars

5 pounds tomatoes, cored and finely chopped
1 C. sugar** (see note below)
½ C. freshly squeezed lime juice
2 tsp. grated peeled fresh ginger
1 tsp. ground cinnamon
½ tsp. ground cloves
1 tsp. sea salt
1/2 tsp. red pepper flakes** (see note below)

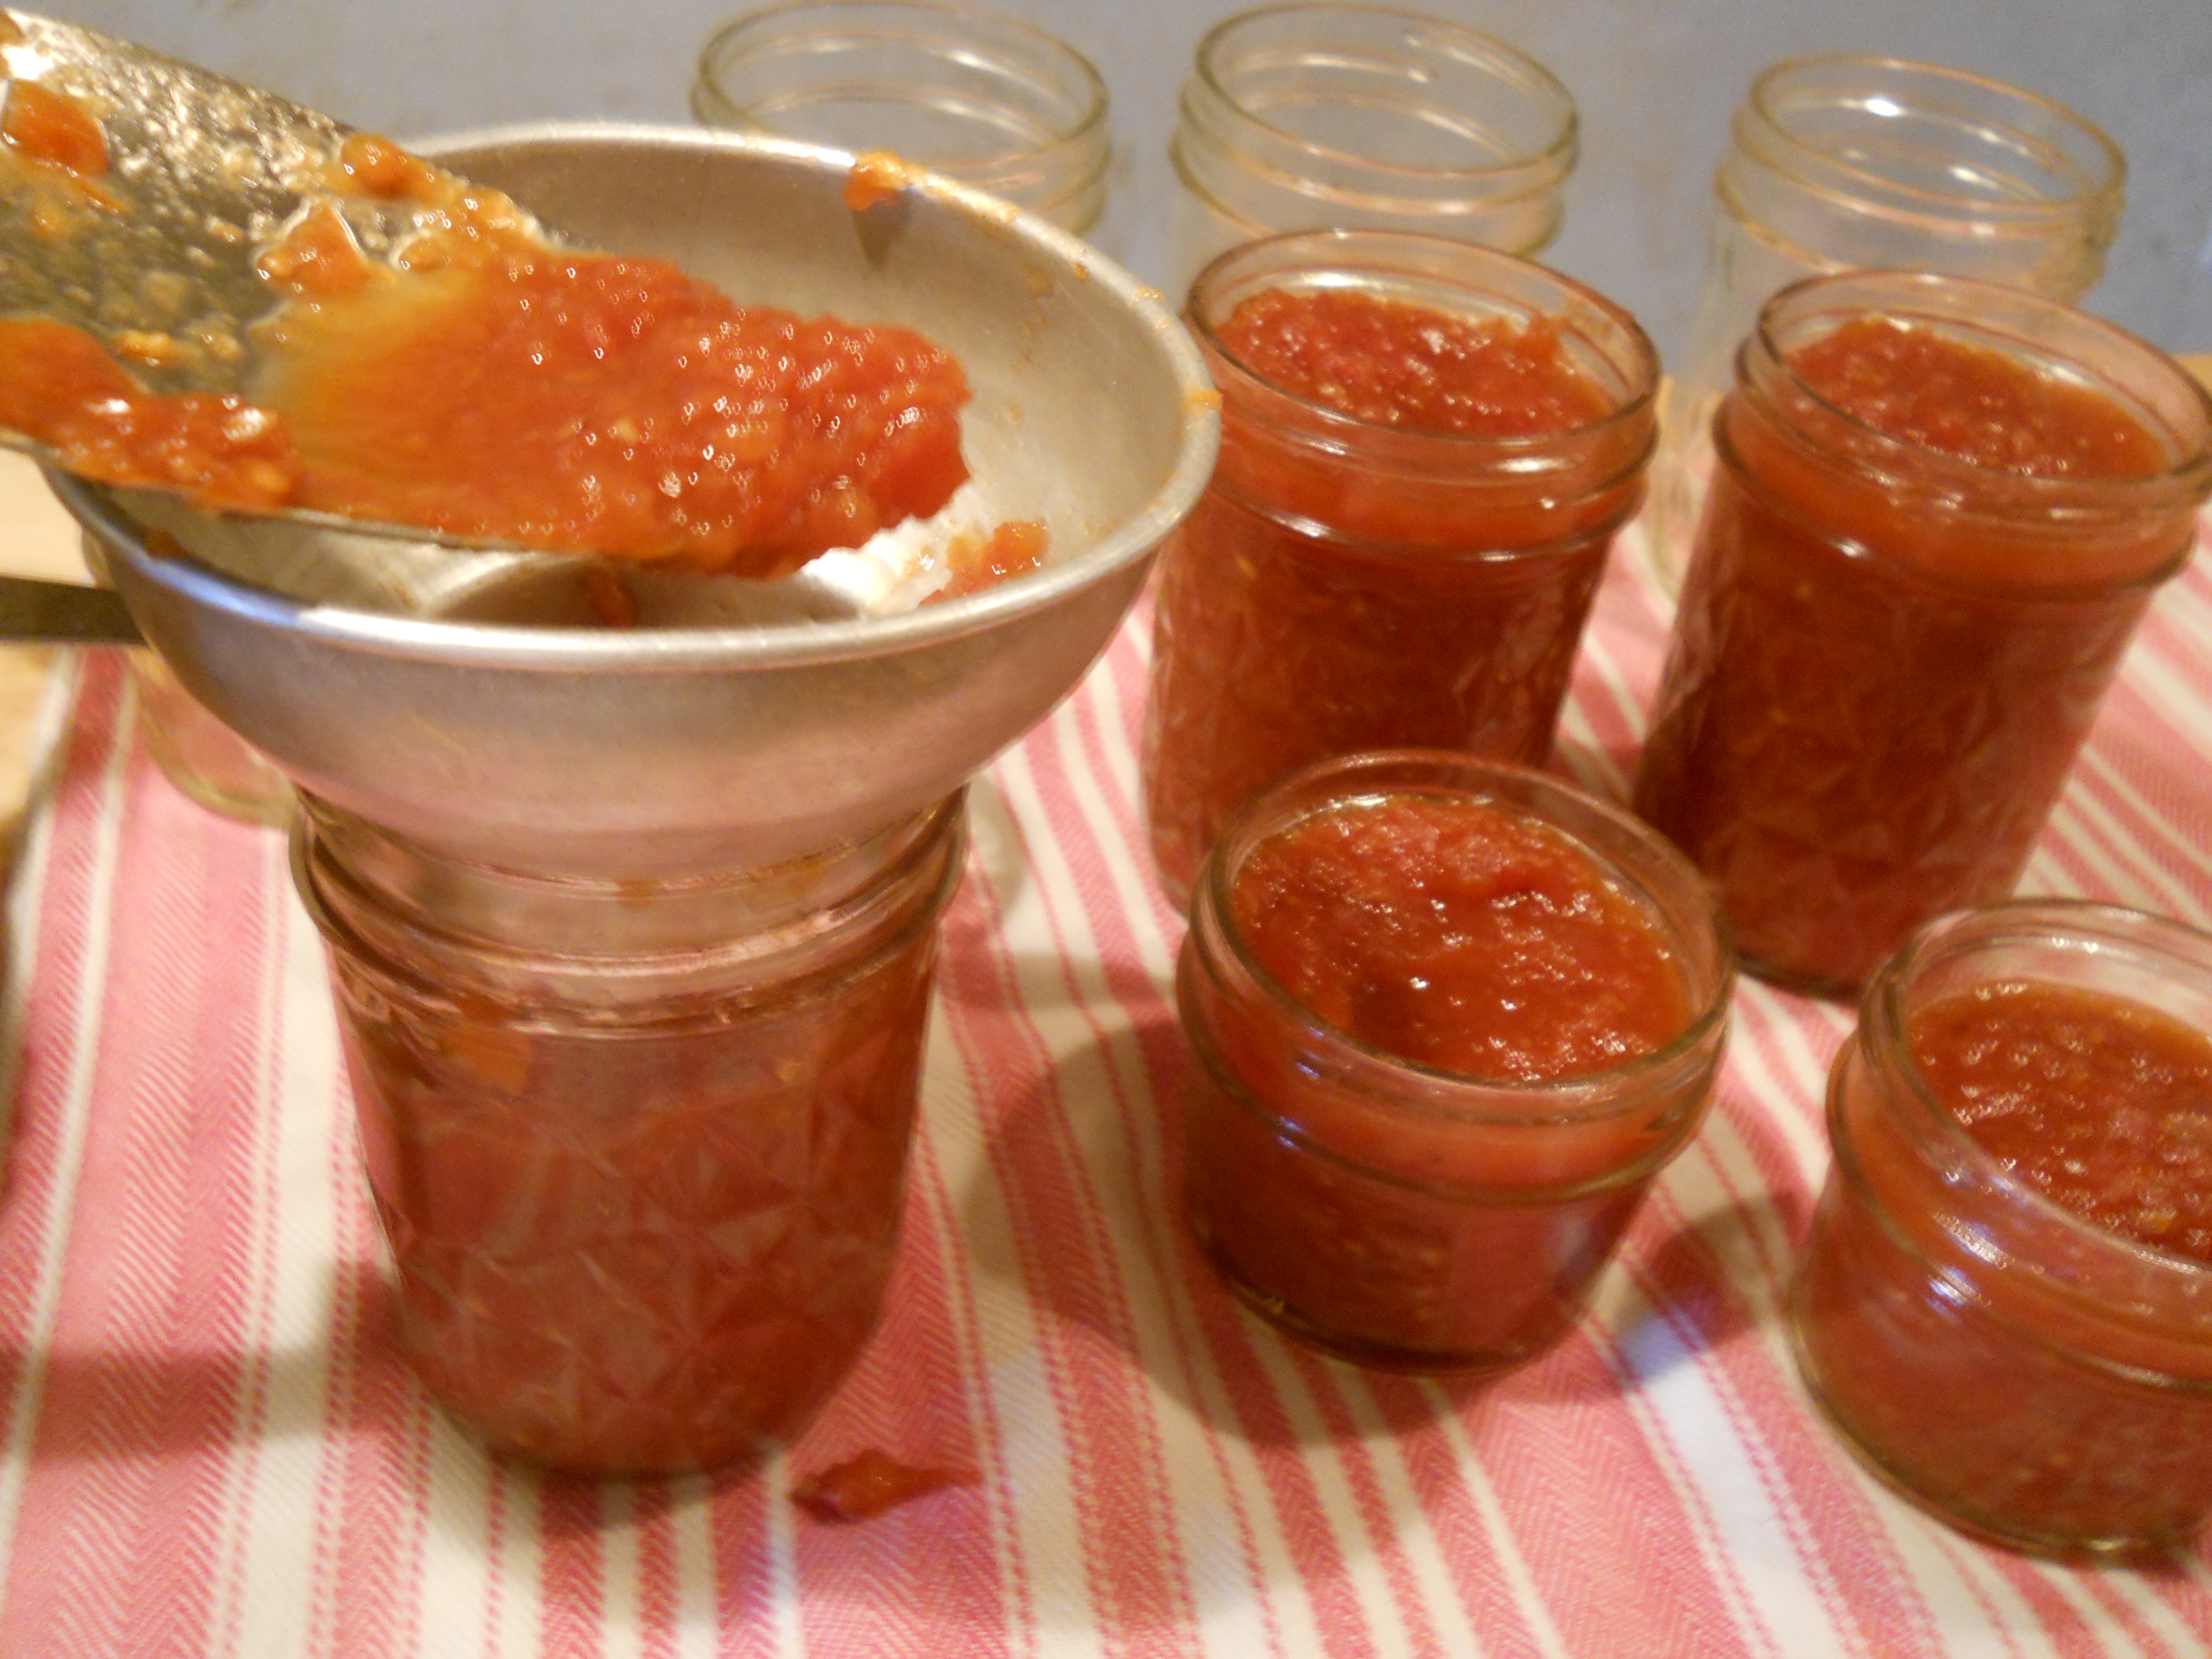
Prepare water bath and jars. After water reaches boiling point, keep on low heat until needed. Place lids in a small saucepan, cover with water and place on very low heat. Tomatoes 032Combine all ingredients in a non-reactive pot. Bring to a boil over high heat, then reduce to low. Simmer the jam, stirring regularly, until it reduces to a consistency similar to jam. If you wish to test it, drop a tsp. onto a saucer. When cooled, the jam should stay in a mound. If it runs down the saucer when titled, it needs more cooking. This will take between 1 1/2 to 2 hours. When jam has cooked down sufficiently, remove pot from the heat and ladle jam into the prepared jars, leaving 1/4 inch headspace. Wipe the rims, apply the lids and rings, and process in a water bath for 20 minutes.

I used organic raw sugar in this recipe. I use less sugar than Marisa does in her recipe since I like to more tangy. It is shelf stable, however, because of the added acid. Marisa suggests 3 ½ C. but I find 1 C. gives it just the savory-ness I like.
I used ½ tsp. red pepper flakes which gives it a bit of heat but not over the top. Adjust to your taste preferences, as is true for all spices.

Thai Basil Chicken Phyllo Rolls

Thai Basil Chicken Phyllo Rolls

8 cloves garlic
1 inch fresh ginger, chopped
4 stalks lemongrass, chopped
1/2 red bell pepper, chopped
1 pound boneless, skinless chicken breast, chopped
2 handfuls Thai basil, divided
1/2-2 tsp. crushed red pepper
4 tsp. soy sauce
2 tsp. fish sauce
1 tsp. cornstarch
1 lemon, juiced, divided
salt to taste
2 tsp. olive oil, + additional for brushing phyllo
1 pound phyllo sheets

2 eggs
2 tsp. water
Sesame seeds for garnish

In the bowl of a food processor, add garlic, ginger, lemongrass, and bell pepper. Pulse until finely chopped. Add the chicken breasts and pulse until finely chopped, but not completely ground. Place the mixture in a large bowl. Thinly slice the Thai basil and add 2 tsp. to the chicken mixture. Stir in crushed red pepper, soy sauce, fish sauce, cornstarch, splash of lemon juice, and salt. Cover and refrigerate for at least 30 minutes. Drizzle olive oil in a large wok or skillet over high heat. Add chicken and cook, stirring constantly and breaking up the pieces, until browned, 5-7 minutes. Remove from heat and stir in remaining lemon juice and Thai basil. Preheat oven to 400 degrees F and line 2 baking sheets with parchment or lightly grease. Remove the phyllo sheets from package and cover with a damp cloth. Place one sheet on work surface and brush with olive oil. Fold in about 1 inch on the long sides. Place a couple of tsp. filling across a short side, leaving a 1 inch border. Fold the short end over the filling and fold in the sides again to enclose the filling. Roll the filling to the other end and place seam side down on prepared baking sheet. Repeat with remaining filling and phyllo sheets. In a small bowl, beat eggs with water. Brush the egg mixture over the rolls and sprinkle with sesame seeds. Bake in preheated oven until golden brown, 15-20 minutes. Serve immediately.

Asian Pork Belly Kabobs

Asian Pork Belly Kabobs

1kg pork belly, bone and skin removed but with some fat left

150ml C. reduced salt or light soy sauce
100m water
3 cloves of garlic, mashed
3 tsp. honey
2 tsp. sesame oil
1 thumb fresh ginger, peeled and finely grated
1 fresh chili, chopped (optional)
1 lemon grass stem, bruised
chopped spring onions and toasted sesame seeds for garnish
8 – 10 kebab sticks

Slice the pork belly in 1cm thick and 5cm long slices. Make the marinade by whisking all the ingredients except the lemon grass stem. Pour the marinade over the pork belly, add the lemon grass stem and let it marinate in the fridge for at least 6 hours or overnight. Remove the pork from the marinade and thread the strips on the kebab sticks. Grill on a griddle pan or on the barbecue turning on each side until cooked through.

Herbed Lemony White Bean Salad

Herbed Lemony White Bean Salad

2 15oz. cans of cannellini beans, rinsed and drained
3 tsp. chopped parsley
2 tsp. minced fresh rosemary
1/4 C. minced red onion
1 tsp. freshly squeezed lemon juice
2 tsp. good quality olive oil
salt and pepper

Mix all the ingredients together in a bowl, and season the salad to taste with salt and pepper. Let the salad sit in the fridge for at least an hour before serving to let the flavors meld together.

Violet Jelly

Violet Jelly

2 C. tightly packed violet flowers (no stems)
2 C. boiling water
1/4 C. bottled lemon juice
1 1/2 C. white sugar (again, white is essential to retain the violet color)
4 tsp. pectin

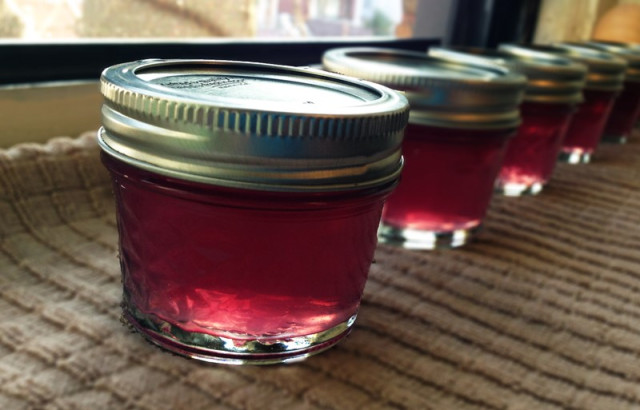
Rinse and drain flowers and place in a small stainless steel saucepan or heat-proof glass bowl. Pour over boiling water, cover and let steep for 24 hours. Strain the liquid through a fine mesh sieve into a medium saucepan, using a wooden spoon (or very clean hands) to squeeze out as much liquid as possible. Add lemon juice and gently heat over medium low heat until warm. In a small bowl, whisk sugar and pectin until well incorporated. Add sugar-pectin blend to violet water and whisk until completely dissolved. Turn heat up to medium high and bring mixture to a boil, stirring occasionally. You want to stay close to the pot because it does have a tendency to bubble over if left unattended. Continue cooking until mixture has thickened slightly, about 5-10 minutes, skimming off any foam as you go (there will be a lot). Jelly is ready when it passes the chilled plate test. Make sure all foam has been removed and ladle jelly into clean, hot, sterile jars, leaving 1/4 inch headspace. Wipe rims clean, center lids and screw on jar rings. Process in boiling water bath for 12 minutes. Remove jars and allow to cool for 24 hours. Press on center of lids after about 1 hour to make sure they’ve sealed. If the lid springs back, it did not seal properly and needs to be stored in the refrigerator. After 24 hours, label jars and store in pantry.

LTS Fideo with Vienna Sausage

LTS Fideo with Vienna Sausage

Fideo is a pasta that look like short thin strands of spaghetti. We sometimes see it as vermicelli. Typically it is found in the Latin section of a market. It is thinner and cooks more quickly than spaghetti. You could substitute angel hair pasta, broken into smaller lengths.

2 T. Vegetable Oil
2 (4.6oz) cans Vienna Sausages, drained and cut into 1/2 “ pieces
7 oz. dry Fideo Noodles, uncooked
3 (8oz.) cans Tomato Sauce
1-2 T. dehydrated Bell Pepper
2 T. dehydrated Onion
1 ½ C. Water
1 tsp. dehydrated Garlic

Heat 1 T. oil in large skillet over medium heat. Add sausages; cook 3 to 5 minutes or until browned. Remove from skillet; set aside. Add remaining 1 T. oil and fideo to skillet. Stir to coat fideo with oil; cook over medium heat 1 to 2 minutes or until fideo is golden brown, stirring constantly. Stir in tomato sauce and water and mix in your dried/dehydrated vegetables. Return sausages to skillet. Reduce heat to medium-low; cover and simmer 10 minutes or until fideo is tender.

Fried Mozzarella, Basil and Nectarine Stacks with Balsamic Glaze

Fried Mozzarella, Basil and Nectarine Stacks with Balsamic Glaze

4 large nectarines or peaches, sliced into rounds
12 large basil leaves
12 oz. fresh mozzarella, sliced into 8 thick round slices
1 C. panko bread crumbs
1/4 C. flour
1/3 C. parmesan cheese, grated
2 eggs, beaten
1/2 tsp. salt
1/2 tsp. pepper
1/4 tsp. cayenne

1/2 C. balsamic vinegar
1 tsp. brown sugar (optional)

Add vinegar and brown sugar, if using, to a small saucepan and bring to a boil. Reduce to a very low simmer and cook for 10-15 minutes, until liquid reduces by about half and is slightly syrupy. Remove from heat, pour vinegar in a bowl or glass to pour, and set aside to cool and thicken. In a large bowl, combine panko, flour, parmesan, salt, pepper and cayenne, mixing thoroughly to combine. In a small bowl, lightly beat the eggs. Take each slice of fresh mozzarella and coat it in the beaten egg, then dredge it through the bread crumb mix, pressing on both sides to adhere. Repeat with the remaining slices. Heat a large skillet over high heat. Add 1 tsp. olive oil and sear both sides of the nectarines for 1 to minutes until just warmed, but still somewhat firm. Alternately you can also grill the nectarines directly on the grill. Keep the nectarines warm. Add the remaining olive oil to the skillet and when hot, fry coated mozzarella, turning carefully once or twice, until golden and cheese starts to melt but still retains its shape, about 1 minute on each side. Drain on paper towels. To assemble, place one nectarine to a plate, top with 1 slice of fried mozzarella and then a basil leaf. Repeat the layer one more time and finish with a nectarine. Garish with basil and freshly grated pepper. Drizzle on the balsamic glaze.

Lagana (Once a Year Bread)

Lagana (Once a Year Bread)

2 tsp. Active Dry Yeast
Pinch Sugar
2 ½ C. Bread Flour
½ tsp. Salt
¼ C. Olive Oil

Topping:
1 tsp. Bread Flour
½ tsp. Olive Oil
¼ tsp. Salt
1 1.2 tsp. Sesame Seeds

Sprinkle dried yeast into large bowl. Add sugar and 7 oz. lukewarm water and leave until it starts to activate and bubble. Add flour, salt, and olive oil and mix together with a wooden spoon until a loose dough forms. If it seems dry, add a few drops of water. Knead for 6 to 7 minutes on lightly floured surface, until smooth and spongy. Wipe out bowl with oiled paper towels and place dough in bowl. Cover with plastic wrap, then a dish cloth, and leave in a warm spot for 2 ½ hours or until puffed and doubled in size. Line a baking sheet with parchment paper. Punch dough down and shape by stretching and rolling into a rough 10×12 rectangle, 3/8 – ¼ inch thick. Place on lined sheet and dent the top with many holes with the tips of your fingers for the traditional puckered look. Cover with dish cloth and leave to rise another 30 minutes. Preheat oven to 400. Whisk topping flour, oil, salt and 2 tsp. water together. Gently brush over the top of the bread and sprinkle with sesame seeds. Bake 20 minutes, or until golden.

Chicken Biscuits with Bacon Gravy

Chicken Biscuits with Bacon Gravy

2 C. plus 3 tsp. flour
1 ½ tsp. baking powder
Salt
1 stick unsalted butter, cut into small pieces and chilled, plus 2 T.
1 C. chopped leftover fried chicken
¾ C. buttermilk, plus more for brushing
3 slices bacon, chopped
1 C. chicken broth
1 C. whole milk
¼ tsp. cayenne pepper

Preheat the oven to 450. In a large bowl, sift 2 C. flour with the baking powder and ½ tsp. salt. Using your fingertips, blend in the chilled pieces of butter until the mixture resembles coarse meal, then mix in the chicken. Stir in the buttermilk just until incorporated. On a lightly floured surface, knead the dough until just blended, then pat into 8” round. Using a 3” cookie cutter, cut out 6 biscuits; combine the scraps and cut out 2 more biscuits. On a baking sheet, arrange the biscuits 2 inches apart and brush lightly with buttermilk. Bake until golden, about 15 minutes. Meanwhile, in a medium skillet, fry the bacon over medium heat until crisp, about 4 minutes. Stir in the remaining 2 tsp. butter until melted, then whisk in the remaining 3 tsp. flour until incorporated. Whisk in the chicken broth, milk, ½ tsp. salt, and the cayenne and simmer over medium-low heat until thickened, 3-4 minutes. Serve the gravy alongside the chicken biscuits.

White Bean, Sausage, Duck Confit Casserole (Cassoulet)

White Bean, Sausage, Duck Confit Casserole (Cassoulet)

Cassoulet is perhaps the signature dish from the Languedoc region in southern France. Despite its reputation, cassoulet isn’t really difficult to make, but it does require quite a time commitment. It’s a multi-step, multi-day process where each individual element gets cooked separately and then layered into a final casserole. So set aside a weekend, source out your ingredients, and reward yourself with supremely rich, hearty, and most of all, comforting French dish!

The Confit – This can be either duck or goose confit, but confit you must make! It adds richness and a silky mouthfeel to the final dish, and cassoulet just wouldn’t be the same without it.

The Pork – This is usually shoulder or some other lean cut. It gets braised slowly until absolutely succulent and fork-tender, and then it’s cut into bite sized pieces before going into the cassoulet.

The Sausage – As if the confit and the pork weren’t enough, you get to add some sausage too! Brownie points if you make your own, but given everything else you’ve got going on, there’s no shame in buying it from the butcher!

The Beans – Classically, cassoulet is made with white beans cooked separately with herbs and sometimes a ham hock or bacon. Go for a creamy variety like great northern or cannelini.

Tomato Sauce – Sometimes this is made along with the pork braise, but it can also be made separately. This will be the main cooking liquid for the casserole – as well as the only veggies you’re going to get!

The Cassoulet – By the time you get to this step, the cassoulet is easy! You just spoon a layer of the beans and tomatoes into the bottom of a casserole dish or dutch oven, add a layer of meat, and top with the rest of the beans and tomatoes. A breadcrumb topping gives the final dish some crunch. Bake until bubbly and enjoy. And about time!

4 C. (2 pounds/950g) good-quality dried beans
2 pounds (950g) unsmoked ham hock
1¾ C. (160g) diced, thick-cut unsmoked pork belly or pancetta
2 carrots, peeled
2 onions, peeled and halved
6 cloves garlic, peeled
2 bay leaves
10 sprigs thyme
1 tsp. sea salt or kosher salt (optional)
4 confit duck thighs (thigh and leg attached)
1 pound (450g) fresh pork sausage, unseasoned or lightly seasoned, such as mild Italian sausage
Freshly ground black pepper
1 C. (135g) dried or fresh bread crumbs
3 tsp. neutral-tasting vegetable oil or walnut oil

Rinse the beans and sort for debris. Soak them overnight covered in cold water. The next day, put the ham hock in a separate large pot of water, bring it to a boil, decrease the heat to a steady simmer, and cook for about 2 hours, until the meat is tender and pulls easily from the bone. Remove the ham hock from the water and set it on a plate. When cool enough to handle, remove the meat from the bones, shred it in large, bite-size pieces, and refrigerate it. Discard the liquid. Drain the beans; put them in the pot you used to cook the ham hock and cover with cold water. Add the ham bones to the pot of beans along with the diced pork belly, carrots, onions, garlic, bay leaves, and thyme. Bring the beans to a boil, decrease the heat so the beans are simmering gently, and cook until the beans are soft and tender, about 1 hour, or longer, depending on the beans. As the water boils away during cooking, add more water as necessary. Taste the beans toward the end of cooking, add up to 1 tsp. salt, if necessary. While the beans are cooking, scrape any excess fat from the duck confit pieces (save it for making duck fat–fried potatoes, page 220) and fry them in a skillet over medium heat until they’re golden brown and crisp on both sides, 5 to 8 minutes per side. (If using the Counterfeit duck confit on page 179, the duck will already be browned and ready, so there’s no need to recook it for this step.) Transfer the duck pieces to a plate and pour off any excess duck fat from the pan. Prick the sausages a few times with a sharp knife, then fry the sausages just to brown them on the outside; they don’t need to be fully cooked through. Set the sausages on the plate with the duck pieces. When cool enough to handle, cut the sausages on the diagonal into 2-inch pieces. Cut each duck thigh into three pieces; cut the drumstick off, and then use a knife to divide the thigh portion into two equal pieces, cutting it in half by holding the knife parallel to the bone. When the beans are done, turn off the heat. Discard the bay leaves, thyme, and ham bone, and pluck out the carrots, onions, and garlic cloves. Cut the carrots into cubes, and mix them back into the beans, along with the shredded meat from the ham hock. Puree the onion and garlic in a blender or food processor with a bit of the bean liquid until smooth. Stir the mixture back into the bean mixture, season with pepper, and taste, adding more salt if desired. (Some pork products are quite salty, so at this point, you can adjust the salt to your taste.) Preheat the oven to 325°F (160°C) with an oven rack to the top third of the oven. In a wide casserole that holds at least 8 quarts (8l) or a roasting pan, assemble the cassoulet. Ladle a layer of the bean mixture and some of the liquid into the casserole. Put half of the duck pieces and half of the sausage evenly spaced over the beans. Add another layer of beans, and then put the rest of the duck and sausage pieces over the beans. Top with the remaining beans and enough of the liquid so that the beans are just barely floating in the liquid. (Refrigerate any extra bean liquid, as you may need it later. Or if there isn’t enough bean liquid, add a bit more water, just enough to moisten the beans.) Toss the bread crumbs with the oil until thoroughly moistened, then spread the bread crumbs evenly on top of the cassoulet. Bake the cassoulet for 1 hour. After an hour, use the side of a large spoon or a heatproof spatula to break the crust on top in several places. Decrease the oven temperature to 250°F (120°C) and bake the cassoulet for another 2 ½ hours, breaking the crust two more times while cooking. Remove the cassoulet from the oven and let it rest for 15 minutes. If you want to serve the cassoulet reheated, as many prefer it, let it cool to room temperature for 1 ½ hours, and then refrigerate it.

To serve the cassoulet reheated, remove the cassoulet from the refrigerator 1 hour before you plan to reheat it. Preheat the oven to 350°F (180°C). Break through a piece of the top of the cassoulet, and if you don’t see much liquid surrounding the beans beneath the surface, add some of the reserved bean liquid (or warm water)—just enough to moisten the insides a little, about ½ C. (125ml). Bake the cassoulet for 1 ½ hours, or until it’s completely heated through. If the topping isn’t crusty, turn the oven up to broil—if you’re using a ceramic dish, turn the oven just to 450°F (230°C), or whatever maximum heat is indicated by the manufacturer—and watch carefully until the top is browned to your liking. Remove the cassoulet from the oven and let it rest for 15 minutes. Serve the cassoulet in its dish at the table. It requires no other accompaniment, although a glass of Armagnac after (or in place of) dessert is considered obligatory to aid digestion. As is a pat on the back for making the cassoulet.

Minted Sugar Snap Pea and Radish Salad

Minted Sugar Snap Pea and Radish Salad

Mint Chive Dressing:
3 T. white wine vinegar
1 T. chopped fresh mint
1 T. snipped fresh chives
2 tsp. honey
1/2 tsp. sea salt
1 clove garlic, minced
1/4 C. extra virgin olive oil

Snap Pea Salad:
2 (8- oz.) bags Sugar Snap Peas
1 C. very thinly sliced radishes
1 C. thinly sliced and quartered red onion
pepper to taste freshly ground
Baby arugula (optional)

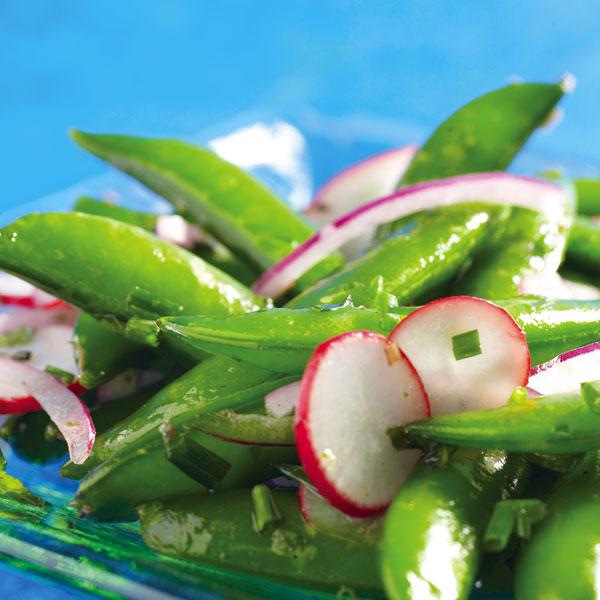
Whisk together vinegar, mint, chives, honey, salt and garlic in a medium bowl. Slowly drizzle in olive oil, whisking constantly, until oil is incorporated. Place sugar snap peas, radishes and red onion in a large bowl. Drizzle with dressing and toss to coat; season with pepper. Cover and chill for 1 hour. Serve over arugula, if you like.

Mexican Baked Polenta with Salsa Beans & Sautéed Veggies

Mexican Baked Polenta with Salsa Beans & Sautéed Veggies

1 (24-oz.) tube polenta, cut into 16 slices (I used Sun-Dried Tomato)
1 T. olive oil
1 medium yellow onion, diced
2 cloves garlic, minced
1 tsp. ground cumin
1/2 tsp. chili powder
1/2 tsp. oregano
Pinch of cayenne
1 medium zucchini, diced
1 red bell pepper, diced
Salt and pepper to taste
1 (15-oz.) can black beans, drained and rinsed
1/2 C. jarred salsa
4 oz. queso fresco, crumbled
Chopped cilantro, lime wedges, and additional salsa for serving

Preheat oven to 450ºF. Use an oil mister filled with a high smoke point cooking oil (like grapeseed or olive oil (light, not extra-virgin) to coat a large baking sheet. Place the polenta slices on the sheet and spray the tops with additional oil. Bake for about 30 minutes, flipping halfway through cooking time, until the polenta is crispy and golden brown on the edges. While the polenta is baking, start the sautéed veggies. Heat the oil in a large skillet over medium-high heat. Add the onion and cook until softened and starting to brown, about 5 minutes. Stir in the garlic, cumin, chili powder, oregano, and cayenne; cook for about 30 seconds, until fragrant. Add the zucchini and red pepper to the skillet and cook, stirring often, about 3 minutes more, until slightly softened. Remove from heat and season with salt and pepper. Combine the beans and salsa in a small saucepan over medium heat and cook until warmed through, about 5 minutes. Divide the polenta slices onto 4 plates, then top each with salsa beans, veggies, and queso fresco. Serve with chopped cilantro, lime wedges, and additional salsa.

Mildly Decadent French Toast Souffle

Mildly Decadent French Toast Souffle

1/2 lb. croissants (2 or 3)
About 1/2 C. (1/4 lb.) butter or margarine, at room temperature
2 packages (3 oz. each) Neufchatel cheese, at room temperature
1 1/4 C. maple syrup
10 large eggs
3 C. lowfat milk
1 tsp. ground cinnamon
2 T. chopped pecans
Powdered sugar
Raspberries or edible flowers, such as rose petals or nasturtiums, rinsed and drained, optional

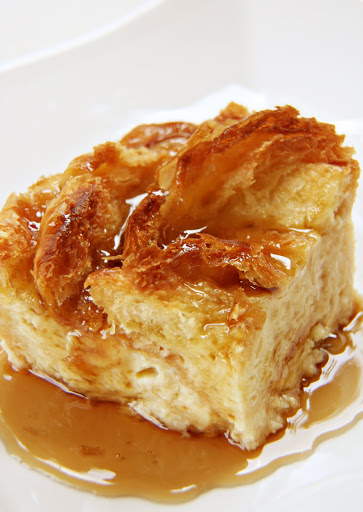
Tear croissants into 1/2-inch chunks. Whirl in a food processor until coarsely chopped, or chop with a knife. Butter 8 soufflé dishes (1- to 1 1/4-C. size) and fill equally with croissant pieces. In a food processor, combine Neufchatel cheese, 1/2 C. butter, and 1/4 C. maple syrup; whirl until blended. (Or, in a bowl, beat with a mixer until smoothly blended.) Drop equal portions into each soufflé dish. In a bowl, beat eggs to blend with 1/2 C. maple syrup and the milk. Pour equally into each soufflé dish. Sprinkle with cinnamon. Cover and chill at least 8 hours or up to 1 day. Set dishes slightly apart in a 10- by 15- inch pan. Bake, uncovered, in a 350° oven until pudding-soufflés are richly browned and centers barely jiggle when gently shaken, 45 to 50 minutes. About 5 minutes before pudding-soufflés finish baking, in a 1- to 1 1/2 quart pan over medium-high heat, frequently stir remaining 1/2 C. maple syrup until hot. Sprinkle pudding-soufflés with pecans, dust with powdered sugar, garnish with berries or flowers, and add hot syrup to taste.

LTS Shrimp Ramen

LTS Shrimp Ramen

1 Package Ramen, shrimp flavor
1 can salad Shrimp, drained
3 tsp. chopped Peanuts
1 tsp. Soy Sauce
½ tsp. Honey
Dash of Bottled Lime Juice

Cilantro, for garnish, optional

Place 1 C. water in a saucepan. Break dry ramen noodles into 8 relatively even chunks and add to pan. Heat to close to boiling and allow to cook until most liquid is absorbed and noodles are almost ready. Add shrimp, toss with noodles and cover the pan; cook a few more minutes to complete noodles cook and allow shrimp to warm. Stir in peanuts, soy sauce, honey, lime juice and seasoning packet. Simmer another minute, gently tossing noodles and shrimp to coat in sauce. If you have cilantro in your garden, it makes a nice garnish.

24 Hour Onion Soup

24 Hour Onion Soup

When you make onion soup in a slow cooker, the flavor becomes intense – especially when you cook it for 24 hours. First, you create the broth and leave it overnight in the slow cooker. The resulting beef stock is rich in vitamins and minerals including calcium, magnesium, and phosphorus. It promotes strong, healthy bones and is good for your digestion and immune system. In the morning, you add the rest of the ingredients and let everything simmer together all day on low heat. Your deeply flavored soup will be ready by dinnertime. Top each serving with crusty bread and a slice of cheese and broil until bubbly before digging in.

2 to 3 pounds grass-fed beef bones
3 carrots, coarsely chopped
3 celery stalks, coarsely chopped
1 large onion, coarsely chopped
2 bay leaves
5 garlic cloves
Fine sea salt
2 T. ghee
6 large yellow onions, sliced
2 T. all-purpose flour
1/2 C. dry white wine
8 slices crusty bread
8 slices Gruyere cheese

Preheat the oven to 350°F. Place the beef bones in a large roasting pan and cook them until well browned, about 30 minutes. Place the bones in the slow cooker. Deglaze the roasting pan with 1/4 C. hot water; use a wooden spoon to scrape off the parts that stick. Add this flavorful water to the slow’ cooker along with the carrots, celery’, onion, bay leaves, and garlic. Fill the slow’ cooker with water. Set the temperature to low’ and leave it overnight, about 12 hours. In the morning, strain the broth through a large colander, discarding any solid pieces. Turn off the heat and let the broth cool down. The stock will set like gelatin and the fat will rise to the top and harden. Skim the fat off. Taste the broth; season with salt to taste. Pour 10 C. stock back into the slow’ cooker. (Refrigerate the remaining stock in an airtight container for up to 4 days, or freeze for up to 6 months.) Melt the butter in a large sauté pan over medium heat. Add the onions and sauté, stirring frequently, until they brown, about 20 minutes. Add the flour to the onions. Cook, stirring with a wooden spoon, for about 1 minute. Deglaze the pan with the white wine. Add 1 T. salt and cook for 1 minute, then add the mixture to the slow cooker. With the slow’ cooker still on low, cook until the onions are very soft, about 8 hours. Before serving, preheat the oven to 400°F. Arrange bread slices in a single layer on a baking sheet and bake until crispy, about 10 minutes. Divide the soup between individual ovenproof bowls. Float a slice of the crispy bread in each soup bowl and top with a thick slice of Gruyere cheese. Set the oven to broil and broil until the cheese is golden brown, about 3 minutes. Serve hot.

LTS Cheddar Cheese Sauce Mix

LTS Cheddar Cheese Sauce Mix

1 C. dry milk
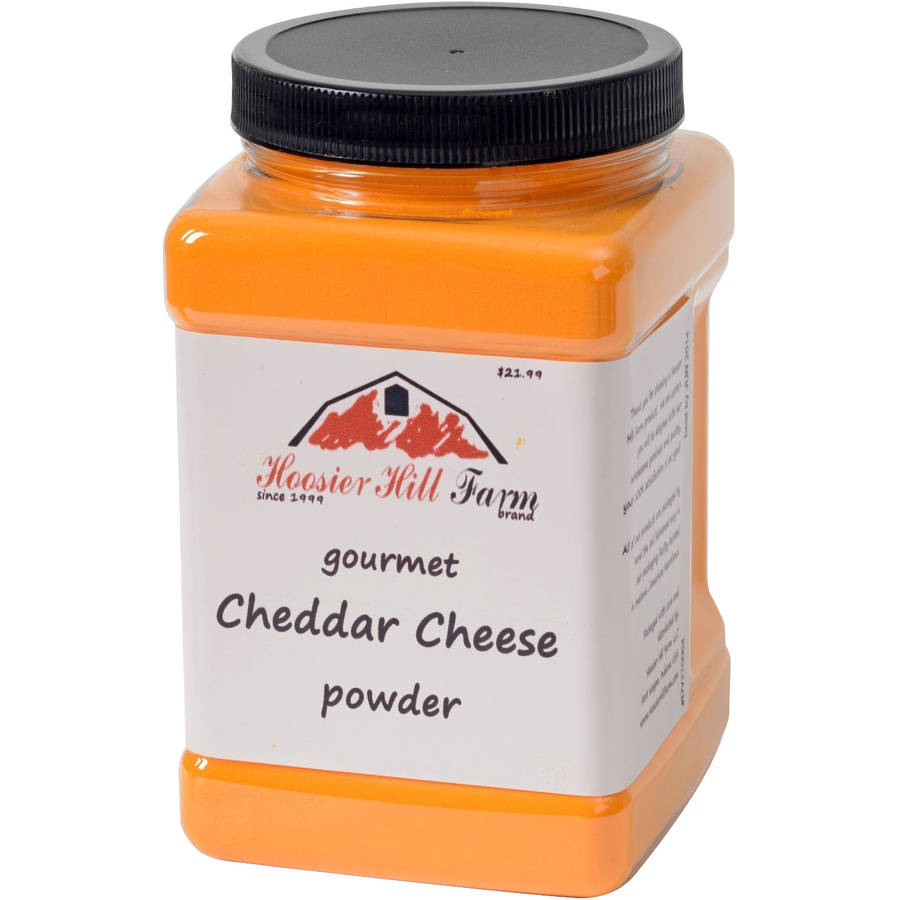
6 T. cheddar cheese powder
1⁄4 C. butter powder
1 1⁄2 tsp. dried garlic
1⁄2 tsp. onion powder (not onion salt)
1⁄2 tsp. ground black pepper

Mix all the ingredients together. Store in a tightly sealed container. Keeps for up to 4 months, keep away from heat and for best long term storage, store in your refrigerator.

To use: Each serving is about 7 T. To make s sauce combine 1 serving mix with ¼ C. water. You can cook up 4-ounces pasta, drain off all but ¼ C. water and mix the sauce in, adding a T. of oil if desired, for a homemade mac and cheese. Also, use the powder in any number of recipes calling for ‘cheese sauce powder’ for a natural version (some commercial brands contain artificial dyes).