Browsed by
Category: Vegetables

Creamed Corn with Bacon and Blue Cheese

Creamed Corn with Bacon and Blue Cheese

5 me9027892714dium ears fresh corn, husks and silk removed
4 slices bacon, cut into 1/2-inch pieces
1 medium shallot, minced
1 clove garlic, minced
1 1/2 C. heavy cream
1/2 tsp. dried thyme
1 pinch cayenne pepper
2 ounces blue cheese, crumbled
Salt and ground black pepper

Cut the kernels from three ears of corn and transfer them to a medium bowl. Firmly scrape the cobs with the back of a butter knife to collect the pulp and milk in the same bowl. Grate the remaining two ears of corn on the coarse side of a box grater set into the bowl with the previously cut kernels. Firmly scrape the remaining two cobs with the back of a butter knife to collect the pulp and milk in the same bowl. Cook the bacon pieces in a large nonstick skillet over medium-high heat until crisp and brown, about 5 minutes. Transfer the bacon to a paper towel-lined plate to drain; set aside. Remove and discard all but 2 T. rendered bacon fat from the pan. Add the shallot and cook until softened but not browned, 1 to 2 minutes. Add the garlic and cook until aromatic, about 30 seconds. Stir in the corn kernels and pulp as well as the cream, thyme and cayenne. Bring the mixture to a simmer and cook, adjusting the heat as necessary and stirring occasionally, until the corn is tender and the mixture has thickened, 10 to 15 minutes. Remove the pan from the heat and stir in the cheese and bacon. Adjust the seasonings with salt and pepper to taste and serve immediately.

Ruby Kraut

Ruby Kraut

4 lb. red cabbage
1 lb. carrots
3 T. pickling salt

2 tsp. celery seeds, divided
2 tsp. dill seeds, divided
2 tsp. black peppercorns, divided
2 bay leaves

4 C. water
2 T. pickling salt

Shred, slice or grate your cabbage using a food processor, knife, or grater… whatever works for you. I cut my cabbage in half lengthwise, remove the cores first, then slice the cores to add into the kraut. Then I thinly slice the rest of the cabbage by hand for a cole slaw-like consistency. Do the same for the carrots. I take a julienne peeler to mine to get those skinny slivers. Now, you should know that 5 lb. is a lot of veggies… at first. I put all of my slices and slivers into a huge soup pot because even my biggest mixing bowl wasn’t big enough to hold everything.

Once you’ve broken down all the cabbage and carrots, add the pickling salt and toss to combine. At this time, I let the veggies sit while I do some clean-up in the kitchen. The salt will start to draw out moisture and make your cabbage nice and limp.

About 20, 30 or however many minutes later, go back to your pot and knead those veggies into submission with your hands. Be sure to press down on them to expel as much water as possible. By the time you’re done, the volume of veggies should be reduced to at least half. You’ll see some water pooling at the bottom of the pot; this is good!

This recipe makes two jars of celery and dill-spiced kraut, and two jars of peppercorn and bay-spiced kraut. Divide your spices equally among the jars.

I like to fill my jar in layers: half a tsp. spices, some cabbage and carrot mix, another half a tsp. spices, more cabbage and carrot mix, and so on. While you do this, tamp the layers down with the back of a spoon to squeeze more liquid out of the vegetables. Pour any remaining liquid from the mixing pot into your jars. Leave at least an inch or two of headspace after filling, since the kraut will continue to expand and release liquid while it’s fermenting.

Run a chopstick or the end of a long spoon around the perimeter of the jar to release any trapped air pockets. It’s important that all the veggies are completely covered in liquid.

To keep the kraut fully submerged during fermentation, I like to fill a zip-top bag with a little water and place that right on top of the vegetables, filling all the empty space in the jar. The water acts as a weight to push them down into the brine. Or, you can place a rock inside the bag as a weight.

Seal your jars with lids and store them at room temperature out of direct sunlight. The kraut may “bubble over” as it ferments, so it’s a good idea to place the jars in a shallow baking dish to catch any overflowing liquid.

If the veggies haven’t released enough liquid by the second day to stay submerged, you’ll want to top them off with brine. Bring water and salt to a boil, stir until the salt is completely dissolved, then let cool and add to the veggies. Don’t forget to leave an inch or two of headspace in the jars. Push down on the veggies, add the baggie liners with some weight, and reseal with lids.

You will see bubbling over the next few days; those bubbles are the off-gassing of carbon dioxide from lactic acid bacteria at work. Once a day or every other day, loosen the lids to let the fermentation gases escape. Pay attention to any stray cabbage or carrot pieces that may have worked their way in between the rim and baggie; you’ll want to push them back into the brine so they don’t become moldy.

As the lactic acid bacteria proliferates, your cabbage will turn into sauerkraut — or “sour cabbage” in German. The sourness comes from all the lactic acid created during lacto-fermentation.

Theoretically, your kraut is “alive” with probiotics by day four and can be eaten, but for the best flavor, you’ll want to wait anywhere from one to three weeks, depending on how warm or cool it is in your house. Warmer temperatures speed up fermentation, while cooler temps slow the process.

Check your jars each day to ensure the veggies are still submerged in liquid, and resist the temptation to fiddle with your ferment too frequently; oxygen is the enemy and will produce mold on the surface. You can begin to taste your kraut after a few days until it has soured enough to your liking.

For me, the right amount of time to perfect sauerkraut was exactly 12 days. (The temperature in my house hovers between 68°F and 70°F.) Once the kraut has achieved a nice flavor, remove the baggies, reseal with lids, and keep the kraut in your fridge to prevent over-fermentation. Your kraut should smell pleasantly sour and salty — like pickles. If it smells rotten or yeasty, chuck it and start over.

Fermented foods don’t necessarily go “bad” if properly sealed and submerged in liquid, but they will eventually reach a point of becoming too sour to be edible. Refrigeration slows down fermentation so you can enjoy your kraut at its peak flavor!
Tomates Provençale

Tomates Provençale

untitledPreheat the oven to 400 degrees F. Cut the stem end off of each tomato and remove about a third to half of the core and discard. If necessary, cut a thin slice from the bottom so the tomato will stand upright. Sprinkle the insides of the tomatoes liberally with good sea salt and turn the tomato over and let drain on a rack or paper towels. In a bowl mix together equal parts seasoned dried bread crumbs and Panko bread crumbs with your choice of chopped fresh herbs (I like flat-leaf parsley, thyme and rosemary, or if fresh basil is in season, use in place of the rosemary). Drizzle a little good extra-virgin olive oil in the crumb mixture and mix until it comes together, then stuff the crumb mixture into the tomatoes, mounding on top with a spoon. Place the tomatoes, crumb side up, in an ovenproof pan and drizzle a little more extra-virgin olive oil over the tops, letting some fall into the pan. It’s fine if the tomatoes touch. It helps them hold themselves upright. Roast for 20 to 25 minutes until the tops are golden and the tomatoes have started to soften. Check the tomatoes at 15 minutes to make sure the crumbs aren’t burning. Serve hot, warm, or at room temperature as a side dish.

Variations: Add a small piece of raw bacon on top of the crumbs before placing in the oven. Include some finely chopped garlic in the crumb stuffing. Vary the fresh herbs according to your taste.

Delectable Zucchini Fritters

Delectable Zucchini Fritters

3 cups grated zucchini (I used 3 small to medium)
1 cup grated carrot (2-3 carrots)
1 medium onion, grated
3 cloves garlic, minced
1 1/2 cups seasoned bread crumbs
2 eggs
2-3 T. Old Bay Seasoning (or to taste)
Salt and pepper to taste
Flour for dredging (about 1 cup or so)
Oil for frying

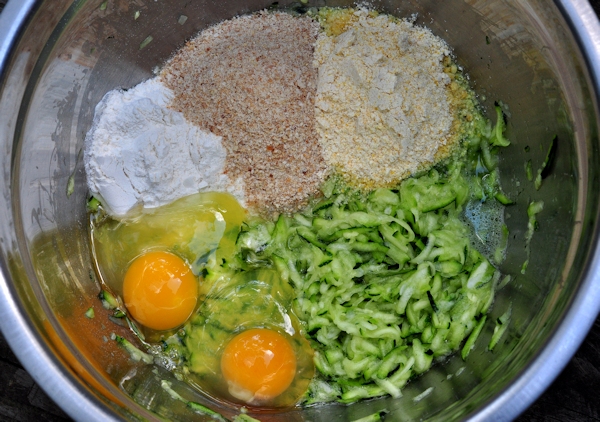
Combine all ingredients except flour and oil in a large mixing bowl. Cover and refrigerate for a few hours. If the mixture seems a bit watery, add a few more bread crumbs or some flour to firm them up a bit. Gently form patties with the mixture. Dredge in flour and place on a plate.
Heat oil to medium heat using a larger skillet. With the help of a spatula, slide patties into hot oil. Fry for about 4-5 minutes on each side. Drain on paper towels.

Stuffed Onions

Stuffed Onions

4 large Spanish Onions
4 slices Bacon, chopped
8oz. can Water Chestnuts, drained and chopped
¼ C. Breadcrumbs
½ tsp. Salt
¼ tsp. Pepper
1 C. Apple Cider

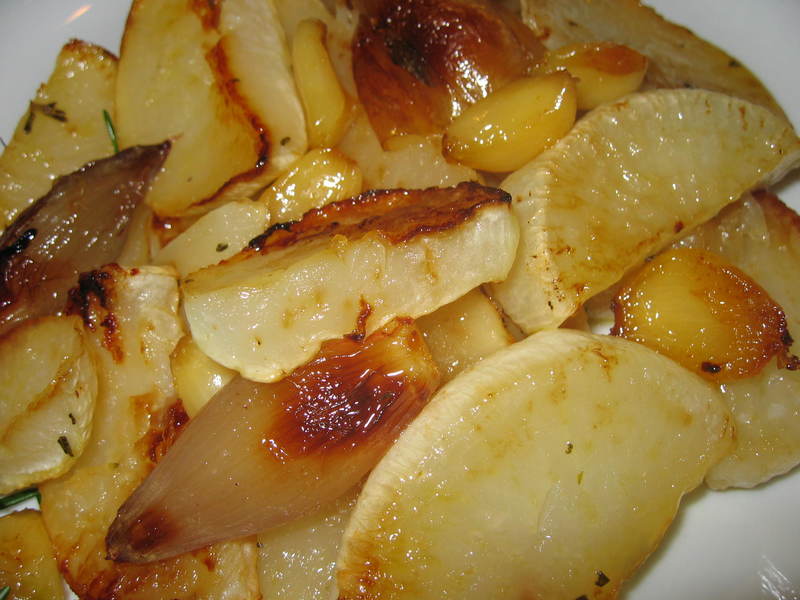
Put the unskinned onions in boiling water for about 5 minutes. Remove and cool. Cut of tops, peel, and scoop out the insides. Chop the insides of onions. Set aside. In frying pan cook bacon until crisp. Drain off fat, add butter and sauté the bacon bits, chopped onion, and the chopped cloves of garlic until just lightly brown. Add the water chestnuts and bread crumbs and continue to brown for another 3 minutes. Add salt and pepper. Fill each onion with the mixture. Place in casserole. Pour apple cider over and bake at 375 degrees for 45 to 50 minutes.

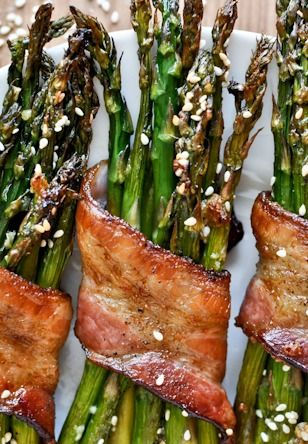
Bacon Wrapped Caramelized Sesame Asparagus

Bacon Wrapped Caramelized Sesame Asparagus

73ff3adc4df2a2931378b353865d2cc51 bunch of asparagus, about 20-25 spears, stems removed
4 slices thick-cut bacon
1 1/2 tablespoons olive oil
1/2 tablespoon toasted sesame oil
1 1/2 tablespoon brown sugar
1 garlic clove, minced or pressed
1/2 tablespoon toasted sesame seeds

Preheat oven to 400 degrees F. Line a baking sheet with aluminum foil and place a wire rack on top. Spray the rack with nonstick spray. In a small bowl, whisk together oils, brown sugar and garlic. Set aside. Bunch together 5-6 asparagus spears and tightly wrap a piece of bacon around the bundle. Place on the wire rack seam-side down and repeat. Using a pastry brush, a spoon or even your hands (I did this…), brush the spears thoroughly with the oil/sugar mixture. Give each bundle a hefty sprinkle of sesame seeds. Roast for 35-40 minutes, or until bacon is crispy. Serve warm.

Stir-Fried Sweet Carrot Slivers

Stir-Fried Sweet Carrot Slivers

1 T. EVOOIMG_7854
8 oz. pre-Shredded Carrot
¼ C. Orange Juice
2 tsp. light Brown Sugar
Salt
Scallion, minced

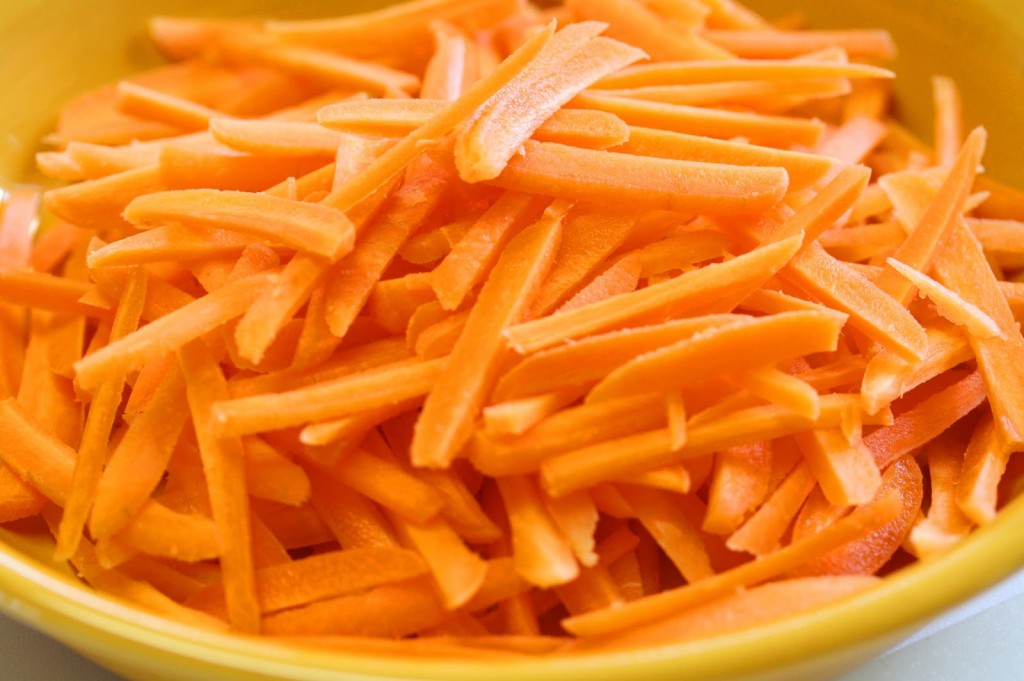
Heat oil in a large skillet over medium heat. Stir in carrots and cook, stirring constantly to prevent sticking, until they soften, 2-3 minutes. Add orange juice and brown sugar and season with salt to taste. Cover skillet, reduce heat to low, and let cook until carrots are softened a bit more, another 2-3 minutes. Sprinkle scallions over carrots and serve.

Sichuan Pickled Vegetables

Sichuan Pickled Vegetables

1 quart-sized jar with lidfiddle1
2 1/4 cup water
1/4 cup rock or sea salt
4 dried chiles
1/2 tsp. whole Sichuan peppercorns
2 tsp. rice wine
1/2 star anise
1 T. brown sugar
1-inch piece of unpeeled ginger
1/3 cinnamon stick
1 lb. or more vegetables, such as string beans, slice carrot, daikon radish, etc.

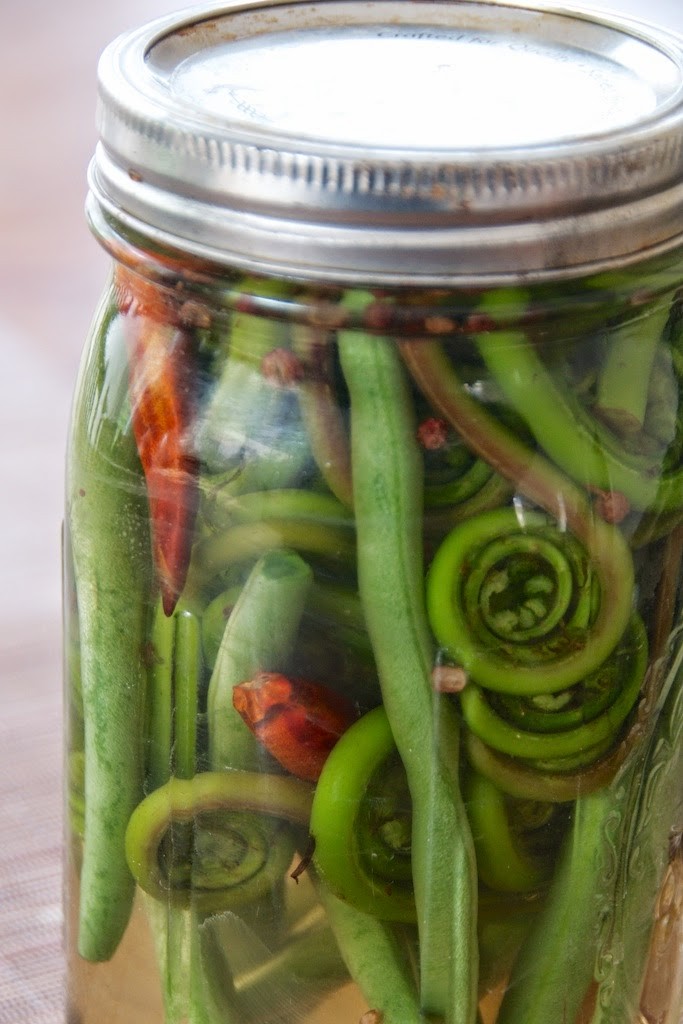
Dissolve salt in boiling water and set aside to cool. Add pickling spices to jar and add cooled water. Cover and shake to mix. Fill jar with vegetables (e.g., fiddleheads), making sure brine covers them. Tighten lid and put aside in a cool, dark place for a minimum 24 hours; a week is better. You can continue to replenish the jar with vegetables by adding more salt, sugar, and wine.

Zesty Parmesan Corn

Zesty Parmesan Corn

Zesty_Parmesan_Corn4 ears corn
2 T. Mayo (or Butter)
1/4 C. Grated Parmesan Cheese
4 fresh lime wedges

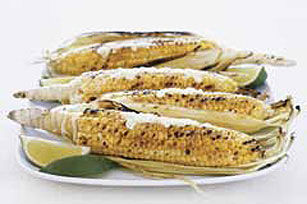
Remove silk from ears of corn; rewrap ears in husks. Soak corn in husks in enough water to completely cover at least 2 hours. Preheat grill to high heat. Grill corn 20 min. or until tender. Remove husks. Spread corn evenly with mayo. Sprinkle each with 1 T. cheese. Squeeze 1 lime wedge over each ear of corn.

Yummy Summer Soup

Yummy Summer Soup

3 lb. tomatoes, halved
2 yellow bell peppers, seeded, stemmed, and quartered
2 garlic cloves
2 T. olive oil
Salt
Pepper
8 fresh basil leaves
6 cups chicken stock or low-sodium chicken broth
1/2 C. light whipping cream or 1 percent
milk
Parmesan cheese, shaved or grated

Preheat the oven to 450°F. Place the tomatoes, peppers, and garlic on 2 large baking sheets or roasting pans, drizzle with olive oil, and sprinkle with a pinch of salt and pepper. Roast until the peppers are slightly dark and the tomatoes are bubbling and slightly brown, about 40 minutes. Let the vegetables cool. Once the veggies are cool, put them in a blender, along with the basil, and blend until coarsely chopped. Put the chopped veggies in a large pot and add the chicken stock. Bring to a boil, then lower the heat to a simmer and slowly add the cream or milk. Continue simmering until the soup is hot, about 15 minutes. Carefully spoon the soup into bowls and top with shaved or grated Parmesan cheese.

German Red Cabbage

German Red Cabbage

red-cabbage2-560x3701 head of red cabbage
1/3 cup apple cider vinegar
3 tablespoons water
1 tablespoon butter
1/4 cup brown sugar
1 teaspoon salt
1/4 teaspoon pepper
1/4 teaspoon cloves (The secret! The magical, delicious, make-you-want-more ingredient)

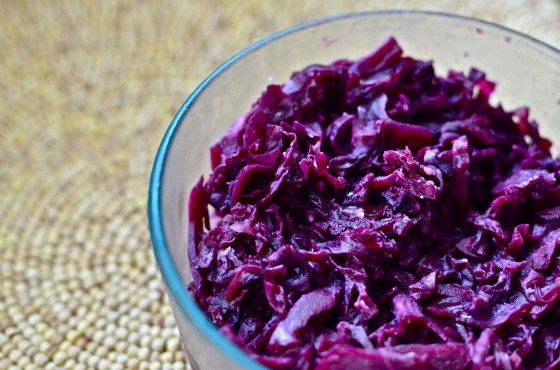
Wash and shred cabbage. Add to pot with remaining ingredients and stir. Cook about an hour, on medium, until the cabbage is tender.

Easy Balsamic Roasted Brussels Sprouts

Easy Balsamic Roasted Brussels Sprouts

Easy-Balsamic-Roasted-Brussels-Sprouts1 lb. of Brussels sprouts
2-3 T. olive oil
2-3 T. Balsamic vinegar
Course kosher salt, to taste
Fresh ground pepper, to taste

Preheat oven to 400 degrees. Clean and check Brussels sprouts well, then cut in half length-wise. Toss Brussels sprouts with oil and vinegar and spread out into one layer on a cookie sheet. Sprinkle with salt and freshly ground pepper. Roast for 20-25 minutes until the Brussels sprouts begin to caramelize. Cool, serve and enjoy!

Cheesy Baked Tomatoes

Cheesy Baked Tomatoes

Cheesy Baked Tomatoes recipe at TidyMom.net2 tomatoes
1/4 cup fresh grated parmesan cheese
1/4 cup mozzarella, grated
fresh basil, chopped
Extra Virgin Olive Oil
Kosher salt
fresh ground pepper

Preheat the oven to 450 F. Cut the tomatoes into slices, approximately 1/3 to 1/2 -inch thick. Place tomato slices in baking dish. Season with kosher salt, then top with parmesan, mozzarella, basil and pepper. Drizzle with olive oil. Bake in center of oven for 10-15 minutes, or until tomatoes are tender and the cheese is melted.

Sautéed Mushrooms

Sautéed Mushrooms

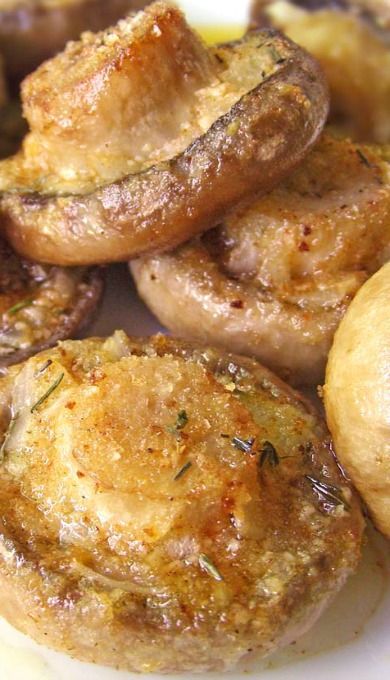
Choose mushrooms that you like. I used 1 pound plain white mushrooms, but others are fine too. Wipe them with a damp paper towel and slice or quarter them. Put about 2-3 T. olive oil in a skillet and heat until hot, add a lot of minced garlic. I used 9 big cloves of a very peppery garlic, and added a pinch of crushed red pepper and freshly ground black pepper. Cook the garlic for about 1 minute and then add the mushrooms and stir them around with the garlic until the mushrooms have cooked the way you like them (5 to 10 minutes usually). Part of the fun is to pull out a mushroom occasionally and eat it. When it’s ready, toss in some chopped herbs (I used parsley) and serve as a side dish or add it to couscous or pasta. Kiss a lot of people, to share the wonderful garlic aroma.

Mediterranean Greens with Pine Nuts & Raisins

Mediterranean Greens with Pine Nuts & Raisins

Mediterranean Greens with Pine Nuts & Raisins


1 T. extra-virgin olive oil

2 to 3 cloves garlic, minced

3 to 4 shallots, thinly sliced, optional

2 to 3 T. pine nuts

10 to 12 oz. spinach (any variety), chard, or broccoli rabe

1 T. lemon juice

1⁄4 to 1⁄2 C. raisins to taste

Salt and freshly ground pepper to taste


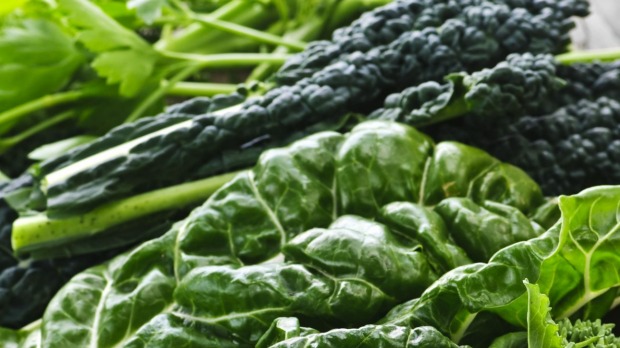
Heat the oil in a large skillet or steep-sided stir-fry pan. Add the garlic and the shallots (if you’re using them), and sauté over low heat for 1 minute, stirring frequently. Add the pine nuts and continue to sauté, stirring often, until they and the garlic are golden, about 3 minutes longer. If you’re using spinach, stem, and chop the leaves (baby spinach leaves can be used whole). If you’re using chard, cut the leaves away from the stems and chop them into bite-size pieces, or stack a few leaves at a time, roll them up snugly from one of the narrow ends, then slice them thinly. You can chop the rolls in a few places to shorten the ribbons. If you’d like to use the stems, trim an inch off the bottoms, then slice them thinly. For broccoli rabe, trim a half-inch or so off the base of the stems, slice them into 1⁄2- to 1-inch sections, and then use the stems, florets, and leaves. Add the greens, cover, and set the heat to medium. For spinach, uncover and stir, then cover and cook just a minute or so longer, until the leaves are just wilted and still bright green. For chard and broccoli rabe, add tiny amounts of water to the pan, just enough to keep it moist; cook for 3 to 5 minutes longer for the chard, and 5 to 7 minutes longer for the broccoli rabe. The greens should be just tender, and the exact time will depend on the heat and the way they are cut. Once the greens are cooked to your liking, remove them from the heat. Stir in the lemon juice and raisins, then season with salt and pepper and serve at once.

Fresh Mushroom Three Bean Salad

Fresh Mushroom Three Bean Salad

10 oz. fresh white mushrooms, quartered (about 3 C.)
1 (7 oz.) jar roasted red peppers, drained, cut in strips
1 (15 oz.) can cannellini (white kidney) beans, rinsed and drained
1 (15 oz.) can red kidney beans, rinsed and drained
1 (15 oz.) can black beans, rinsed and drained
2 ribs celery, sliced (1 C.)
½ C. coarsely shredded Parmesan cheese, divided
¾ C. homemade or prepared fat-free Italian salad dressing
¼ C. chopped fresh parsley

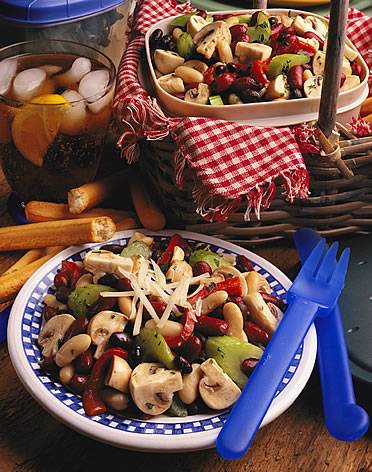
In a large bowl combine mushrooms, peppers, the three kinds of beans, celery and ¼ C. of the cheese. Add dressing and parsley; toss to coat well. Stir in parsley. Serve topped with remaining cheese.

Yield: 4 servings
Calories: 148
Fat: 5g
Fiber:

Tomato Dandelion Salad

Tomato Dandelion Salad

½ medium sized onion cut in half and sliced thin
2 T. light vinegar, (apple cider, rice, or white wine)
1 C. hot water
2 large red ripe tomatoes
3 C. chopped young dandelion greens
2 T. fresh basil cut into large pieces

1½ T. balsamic vinegar
¼ tsp. salt
¼ tsp. coarse cracked black pepper
extra virgin olive oil to taste
Optional 1 oz. crumpled Chèvre goat cheese

Thinly slice onion and place in a small bowl. Pour 2 T. light vinegar and 1 C. hot water over onions and marinate while making rest of salad. Whisk together dressing ingredients adding oil at end a little at a time. Rinse and chop dandelion greens. Slice tomatoes and place on greens. Chop dandelion greens, place in basket of a salad spinner, rinse and spin dry. Toss dandelion greens with 2/3 of the dressing. Cut tomatoes in half crosswise and squeeze out juice. Cut into quarters, remove inner pulp and slice. Place on greens. Squeeze dry marinated onions and lay on top of sliced tomatoes and greens. Drizzle the rest of the dressing over tomatoes, onion and top with basil and goat cheese if desired.

Pickled Garlic Scapes in Oil

Pickled Garlic Scapes in Oil

The city of Sulmona, in Abruzzo, is famous for its red garlic. The bulbs, with their gorgeous, fat, purple-red-clad cloves, grow in the surrounding Peligna Valley. The garlic is prized for its intense fragrance and for its keeping ability. It is a staple at the farmers’ market, where you will often find it hanging or stacked in braided lengths. The scapes from the plant—the long, swirly green stalks—are harvested in spring. This allows the plant to focus its energy on growing the bulb. The scapes, called zolle in the local dialect, are enjoyed fresh or turned into these delicious pickles. The garlic flavor in the scapes is mild and appetizing. Serve pickled scapes with cheese and salumi as part of an antipasto platter.

1 pound (454 g) garlic scapes
2 C. (473 g) white wine vinegar
1 tsp. fine sea salt
Extra-virgin olive oil

4 sterilized 1/2-pint jars and their lids

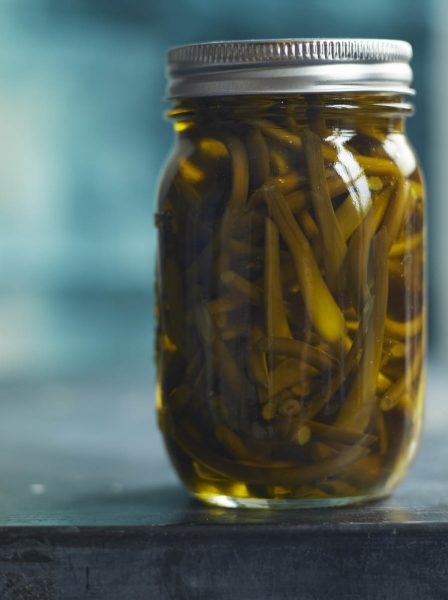
Cut the scapes into 11/2- to 2-inch lengths, removing any tough parts at the bottom and the thinnest part at the top above the small bulbous tip. In a saucepan large enough to hold all the scapes, bring the vinegar to a boil over medium-high heat. Stir in the salt and let it dissolve. Add the scapes to the pot and cover. Return the vinegar to a boil, cover, and boil, stirring once or twice, until the scapes have lost their bright green color and are just tender, 4 to 5 minutes. Drain the scapes in a colander set in the sink. Spread on a clean kitchen towel and let dry for about 1 hour. Shuffle them around once or twice during this time to make sure they dry on all sides. Pack the scapes into the jars, leaving 1 inch headspace. Pour enough olive oil into the jars to cover the scapes completely. Use a bubble remover or a clean chopstick to dislodge any bubbles and press down on the scapes to submerge them. Screw the lids on tightly and let sit at room temperature for 24 hours. Let the scapes cure in the refrigerator for at least 1 week before using, then store in the refrigerator for up to 1 month. To serve, remove from the jar only as much as you plan to use and let it come to room temperature. Top off the jar with more oil as necessary to keep the remaining scapes submerged.

Pickled Green Beans

Pickled Green Beans

5 lb. Green Beans
6 C. Water
6 C. Vinegar
10 cloves Garlic
5 tsp. Mustard Seeds
5 tsp. Dill Seeds
½ C. Salt

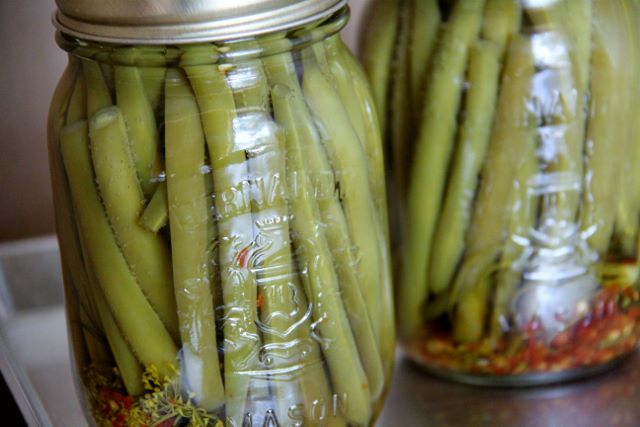
Clean and dry 10 mason jars with lids. Clean and cut the green beans to fit in the mason jars. Add garlic clove, 1/2 tsp. mustard seed, 1/2 dill seed into each jar. Boil the water, vinegar and salt in a pan. Pour in each jar while boiling. Put the lids on each jar securely. Place the closed jars in a canner on high for 10 minutes with the water level above the jar lid. Remove the jars using tongs and allow’ to cool for several hours before storing. Each jar will provide two servings and keep for up to a year.

Leeks with Mustard-Bacon Vinaigrette (poireaux vinaigrette a  la moutarde et aux lardons)

Leeks with Mustard-Bacon Vinaigrette (poireaux vinaigrette a  la moutarde et aux lardons)

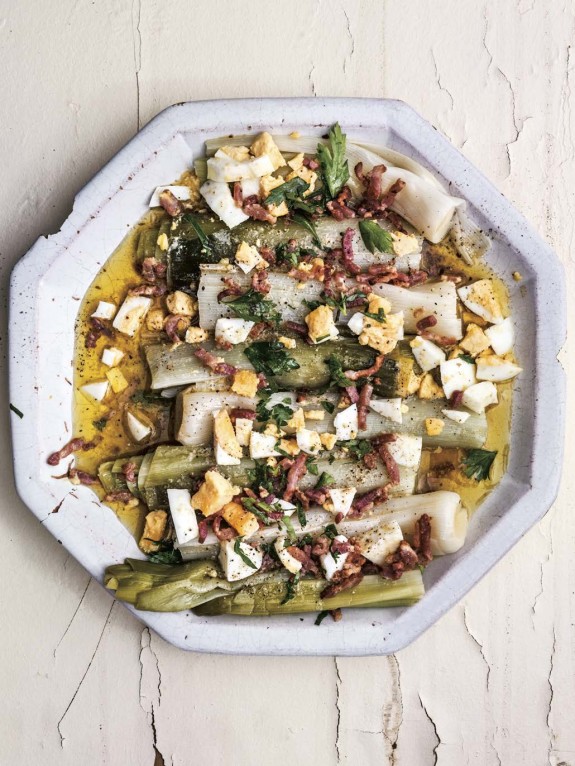
Traditionally the leeks were cooked in a big pot of boiling water. However, it’s better to steam them, which prevents them from getting waterlogged. Smaller leeks, which appear in the springtime in Paris markets, are preferable for this dish because they’re quite tender, although larger leeks are just fine, too. Just make sure that you clean the leeks very well and cook them until they’re completely soft all the way through. When Romain and I made this together and we plated up the leeks, I got an unexpected lesson in the art of arranging the poireaux: I learned that it’s imperative you lay them with the queue (tail) alternating with the tête (head). So I recommend you follow those instructions, if you want don’t want to raise any Parisian eyebrows.

2 C. (200g) thick-cut smoked bacon cut into lardons (see here)
1 tsp. sherry vinegar or red wine vinegar
1 tsp. Dijon mustard
1/2 tsp. sea salt or kosher salt
3 tsp. neutral-tasting vegetable oil
2 tsp. olive oil
2 tsp. chopped fresh flat-leaf parsley
5 large or 10 small leeks, cleaned
2 hard-cooked eggs

To make the vinaigrette, cook the bacon over medium heat in a skillet until nearly crisp. Transfer the bacon to a paper towel to drain. When cool, chop the bacon into pieces about the size of tiny peas. Whisk together the vinegar, mustard, and salt. Whisk in the oils, 1 tsp. at a time (the sauce may emulsify, which is fine), then stir in 1 tsp. the parsley and two-thirds of the bacon. Set aside. To prepare the leeks, fill a large pot fitted with a steamer with a couple of inches of water. Bring it to a boil over high heat and add the leeks. Cook the leeks until tender; when you poke them with a sharp paring knife, it should meet no resistance at the root ends. (Smaller leeks will take about 15 minutes, and larger ones will take about 30 minutes.) Remove the leeks and let drain and cool on a plate lined with paper towels. Cut the leeks in half crosswise, and arrange on a serving platter, alternating them head to tail. Peel and dice the hard-cooked eggs and scatter them over the leeks. Pour the vinaigrette over the leeks and toss them and the pieces of egg in the dressing so they’re thoroughly coated, then scatter over the remaining bacon pieces and parsley.

Baked Creamed Spinach

Baked Creamed Spinach

2 lb. of fresh spinach, or canned
1 1/2 C. of hot milk (fresh, canned or evaporated)
1 C. of cheddar cheese, grated
2 T. of butter
2 T. of flour
1 tsp. of salt
Pinch of pepper
Pinch of nutmeg

Trim and wash 2 lb of fresh spinach. Place in a suitably-sized pot with water still on the leaves. Cover; then cook only until wilted. Allow to cool, then squeeze out the excess water. If using canned spinach you can start here by putting the spinach in pot and heat. In a saucepan, melt the butter; then add the flour. Whisk and gently cook for 3-4 minutes. Add the milk; then bring to a boil. Add the salt and a pinch of pepper and nutmeg. Cook for about 5-6 minutes. Combine the sauce with the spinach and Vi C. of grated cheese. Spoon into a baking dish, then top with the other 1/2 C. of grated cheddar. Bake at 375°F for 20 minutes.

Carrots & Fennel in Agrodolce

Carrots & Fennel in Agrodolce

Italians are fond of preserving vegetables—and fruit—in a sweet-and-sour brine known as agrodolce. Sweet peppers are a classic example, but I like this somewhat more unusual combination of crunchy carrots and sliced fennel bulb. Use a mix of colored carrots—gold, orange and red—if you can find them. The darker ones turn the brine a pretty shade of sunset pink.

2 C. (437 g) water
Juice of 2 lemons
2 pounds (907 g) fennel bulbs, plus 4 small fronds
2 pounds (907 g) carrots, peeled
2 C. (437 g) white wine vinegar
2 C. (437 g) apple cider vinegar
2 C. (400 g) sugar or vanilla sugar
2 T. fine sea salt
1 tsp. whole black peppercorns
1 tsp. whole fennel seeds

Combine the water and lemon juice in a bowl. Cut the tops off the fennel bulbs. Cut each bulb into quarters and each quarter into thin wedges. Drop each wedge in the lemon water as you go to keep it from browning. Cut the carrots into 2-inch sticks, and cut any large pieces in half or into quarters lengthwise to yield bite-size pieces. Add the carrots to the lemon water. Combine the vinegars, sugar, salt, peppercorns and fennel seeds in a large, deep saucepan over medium-high heat. Bring the brine to a boil, stirring occasionally to make sure the sugar dissolves. Drain the fennel and carrots and add them to the boiling water. Cover the pot, turn off the heat and let sit for 5 minutes. Place a fennel frond in the bottom of each jar. Pack the vegetables into the jars, taking care to get a mix of vegetables and some spices in each one. Pour the hot brine over the vegetables, leaving ½ inch headspace. Use a bubble remover or a clean chopstick to get rid of any bubbles. Screw the lids on tightly, and process for 10 minutes in a boiling-water bath. Store the sealed jars in a cool, dark place and let the vegetables cure for at least 1 week before serving. They will keep for up to 1 year, though they may eventually lose their crisp texture. Refrigerate any jars that fail to seal properly and enjoy those first.

Making Use of Greens – Garden, Forage or Bartered

Making Use of Greens – Garden, Forage or Bartered

If using foraged greens – please be sure you are CERTAIN of what you are harvesting. Some of these plants have look alikes that are most definitely NOT safe to eat.

2 large bunches Greens. So many options — Swiss Chard, Spinach, Mustard Greens, Turnip Greens, Dandelion Leaves, Purslane, Lamb’s Quarters, Milk Thistle Leaves (Just handle carefully, use scissors to snip off the edges), Plantain (the wild plant, not the banana like food), Collards, Chickweed, Garlic Mustard, Field Mustard, Wintercress, Burdock, Broadleaf Dock, Curly Dock

2 T. cooking fat (I like olive oil, but coconut oil, leftover bacon grease, whatever you have)
1 (15-oz.) can butter beans or white kidney beans, drained and rinsed (or soak overnight and boil until ready to use from dried)
2 T. tabasco brand Green Jalapeño Pepper Sauce
1 tsp. salt

If dealing with a green that has a thick stem that extends into the leave, remove this first, then coarsely chop. Heat oil in 5-quart Dutch oven over medium-high heat until hot. Add greens and cook until wilted, but still bright green, stirring frequently. Stir in beans, tabasco Green Sauce and salt. Cook over medium heat until mixture is heated through.

Quick Pickled Fennel with Orange

Quick Pickled Fennel with Orange

3 small fennel bulbs
2 tsp. kosher salt
1 small orange, sliced
1/4 tsp. freshly ground black pepper
1 C. apple cider vinegar

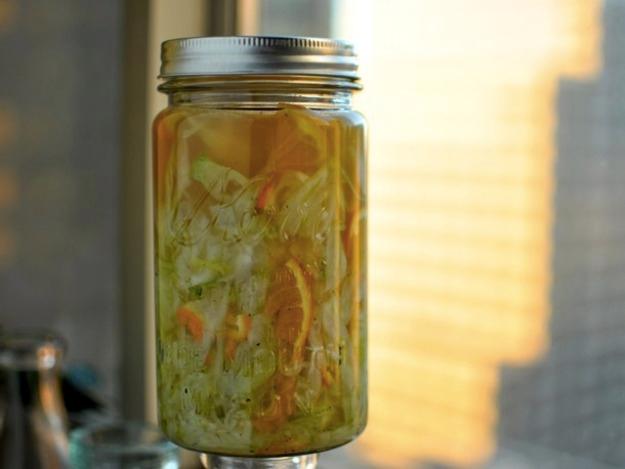
Wash fennel bulbs and remove stems. Slice in half and cut out the hard core. Slice paper-thin on a mandoline. Sprinkle kosher salt over shaved fennel and toss to combine. Let fennel sit for at least an hour. When time is up, pour fennel into a colander and squeeze to remove the liquid that was produced while it sat with the salt. Return fennel to the bowl and toss with orange slices and black pepper. ack fennel and orange into a quart jar and top with the apple cider vinegar. Use a chopstick or the end of a wooden spoon to work the vinegar down into the fennel. Stash jar in the fridge and let sit for at least 24 hours before eating. This quick pickle will keep at least 2-3 weeks in the refrigerator.

Chickpea Pancakes with Spicy Vegetables

Chickpea Pancakes with Spicy Vegetables

1 C. chickpea flour
3/4 C. cold water
2 T. olive oil
1 egg
1/4 tsp. salt
1/4 tsp. ground black pepper
1/2 small onion
1 zucchini
2 large cauliflower florets
1 tsp. fresh ginger
.12 tsp. crushed red pepper flakes
2 T. tomato sauce
1 scallion

Generously coat an 8″ nonstick skillet with cooking spray and heat over medium heat. Place the flour in a bowl and gradually whisk in 3/4 C. cold water to make a smooth batter the consistency of thin cream (add more water if needed). Whisk in 2 T. of the oil, the egg, 1/8 tsp. of the salt, and 1/8 tsp. of the pepper. Pour 3 T. batter into the skillet and quickly tilt the skillet to coat the bottom with a thin layer of batter. Cook the first side until nicely browned, about 1 minute. Turn the pancake with a spatula and cook the second side for 30 to 45 seconds (it will look spotty). Slide the pancake onto a plate and cook the rest in the same fashion. Cover with foil to keep warm. Heat the remaining 1 T. oil in another skillet over medium heat. Stir in the onion, zucchini, cauliflower, ginger, cumin, and pepper flakes. Cover and cook, stirring occasionally, for 3 minutes. Stir in the tomato sauce, cover, and cook until the vegetables are tender and the liquid is evaporated, 10 to 15 minutes. Stir in the scallion, the remaining 1/8 tsp. salt, and the remaining 1/8 tsp. pepper. Arrange a pancake, attractive side down, on a plate, and spoon the vegetables in a line one-third of the way from one edge and roll up. Assemble the remaining pancakes in the same manner.

Calories: 214
Fat: 13g
Fiber: 3g

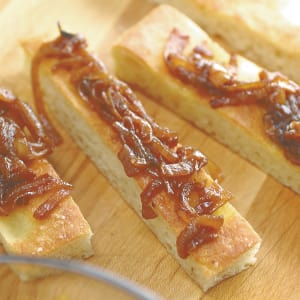
Cook’s Illustrated Caramelized Onions

Cook’s Illustrated Caramelized Onions

If the onions are sizzling or scorching in step 2, reduce the heat. If the onions are not browning after 15 to 20 minutes, raise the heat.

1 tsp. unsalted butter
1 tsp. vegetable oil
1 tsp. light brown sugar
½ tsp. salt
2 pounds onions, halved and sliced pole to pole into 1/4-inch-thick pieces
1 tsp. water
Pepper

Heat butter and oil in 12-inch nonstick skillet over high heat and stir in sugar and salt. Add onions and stir to coat. Cook, stirring occasionally, until onions begin to soften and release some moisture, about 5 minutes. Reduce heat to medium and cook, stirring frequently, until onions are deeply browned and slightly sticky, about 40 minutes longer. Off heat, stir in water. Season with pepper to taste. (Onions can be refrigerated for up to 1 week.)

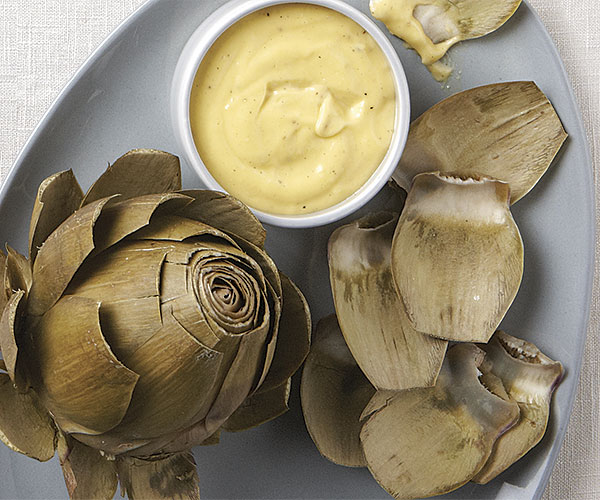
Artichokes with Lemonnaise

Artichokes with Lemonnaise

3 T. distilled white vinegar
1 tsp. black peppercorns
4 artichokes (each about 4 in. wide; 3 lb. total)
1/2 C. drained extra firm, firm, or soft silken tofu
2 T. lemon juice
2 tsp. extra-virgin olive oil
1/2 tsp. dry mustard
Salt and fresh-ground pepper

Fill a 6- to 8-quart pan halfway with water. Add vinegar and peppercorns; bring to a boil over high heat. Meanwhile, slice about 1 inch off tops of artichokes; discard tips. Trim stems flush with bottoms. Pull off and discard small leaves from bottoms. With scissors, cut thorny tips from remaining outer leaves. Add artichokes to water and simmer, covered, until bottoms pierce easily, 30 to 35 minutes; drain. While artichokes cook, make lemonnaise. In a blender or food processor (a blender produces the best results), whirl tofu, lemon juice, oil, and mustard until smooth. Season with salt and pepper. (If making ahead, chill airtight up to 1 day; stir before using.) Serve artichokes with sauce for dipping.

Varying your dunk sauce: For variations on lemmonaise, add ingredients to the basic recipe and whirl in a blender or food processor until smooth.

Aioli: Add 1 clove minced garlic.
Caper-anchovy sauce: Add 2 tsp. drained capers and 1 1/2 tsp. anchovy paste.
Chili-cilantro sauce: Instead of lemon juice, use 4 tsp. lime juice. Add 1/2 to 1 stemmed fresh serrano chili and 1/3 C. packed fresh cilantro.
Dried-tomato sauce: Add 1/4 C. dried tomato halves (not oil-packed).
Green sauce: Add 1 C. each lightly packed spinach leaves and parsley, and 1/2 C. chopped green onions.
Madeira sauce: Add 2 T. each madeira and minced chives.
Orange-coriander sauce: Use only 1 T. lemon juice. Add 4 tsp. orange juice and 1/2 tsp. each ground coriander and grated orange peel.
Tamari-sesame sauce: Substitute Asian (toasted) sesame oil for olive oil. Add 1 1/2 tsp. tamari.

Pickled Fermented Garlic Scapes

Pickled Fermented Garlic Scapes

1 quart (8 Servings)

Choose just the tenderest and youngest flowers for these pickled garlic scapes, leaving the scape’s woody stem for use in a naturally probiotic, fermented relish or to use fresh. These pickled scapes are strongly flavored and deeply robust with garlic flavor. You can always add spices to the mixture as well, dill and bay do nicely, but garlic lovers will revel in the simple combination of scape, salt and starter. Fresh whey, sauerkraut juice or packaged starter work well.

1½ tsp. unrefined sea salt
1 package vegetable starter culture (or substitute ¼ C. sauerkraut juice or fresh whey)
1 quart garlic scapes

Stir sea salt and starter culture or whey together with one quart fresh, filtered and dechlorinated water until the salt and starter culture are dissolved into the water completely.
Pack your crock full of trimmed garlic scapes. Pour the mixture of water, salt and starter over the scapes, ensuring that they’re completely covered by the brine. Ferment at room temperature for at least a week, preferably two or even three or four (fermentation is not an exact science), until the scapes achieve a level of sourness that suits you. Once the scapes have pickled to your liking, remove them to the refrigerator or a cool cellar for storage.

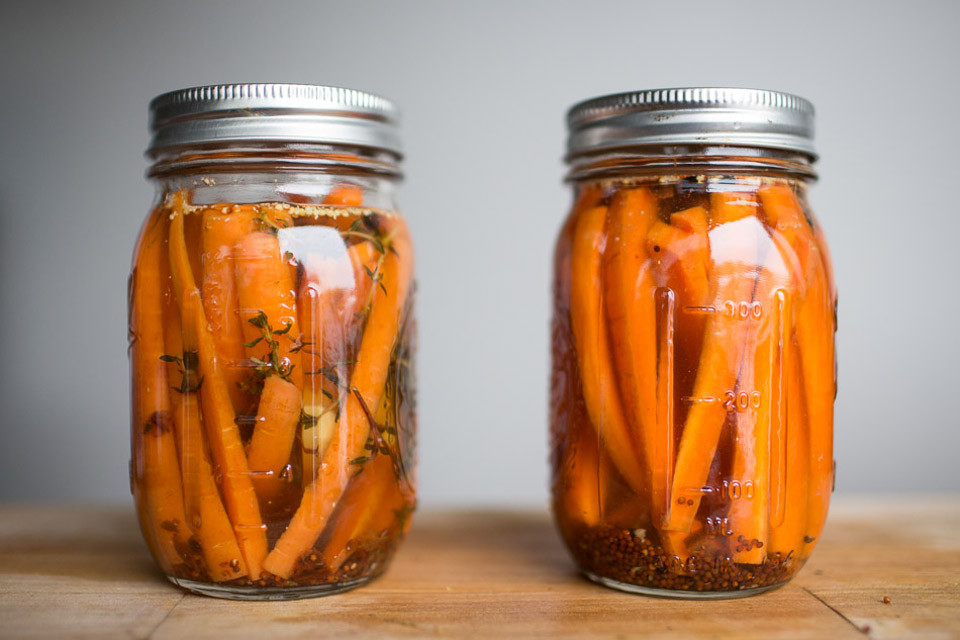
North Indian Carrot Pickles

North Indian Carrot Pickles

1 pound carrots, scrubbed and patted dry
1½ tsp. crushed red pepper flakes
1 tsp. mustard seeds, coarsely crushed
1 tsp. pure kosher salt
½ tsp. turmeric
½ C. vegetable oil
¼ tsp. asafetida
1/3 C. strained fresh lemon juice

Wash 2 pint jars well, then dry them thoroughly inside and out. Wash and dry the lids. Cut the carrots into ¼- to ½-inch-thick sticks 4 inches long (to fit in pint jars). Pat dry and put in a dry medium-sized bowl. Add the red pepper flakes, mustard seeds, salt, and turmeric; toss to combine. Set aside. In a medium sauté pan, heat the oil over high heat for 30 seconds, then sprinkle in the asafetida, if using. Add the carrots and spices. Cook, stirring constantly but carefully with a clean, dry spoon, for 1 minute. Add the lemon juice and cook, stirring, for 1 minute more. Remove from the heat. Using dry tongs, transfer the carrots to the jars, then divide the liquid and spices between the jars. Let cool to room temperature, then put the lids on and refrigerate for 4 days before serving. The pickle will keep for at least 6 weeks; be sure to use only dry utensils to scoop out the pickle as you use it, as it will spoil if any water comes in contact with it.

Roasted Kale with Preserved Lemons

Roasted Kale with Preserved Lemons

1 1/4 lb. dinosaur or curly green kale (about 2 bunches), rinsed
2 T. olive oil
Salt and pepper
3 T. chopped preserved lemons (see notes) or 1 T. slivered lemon peel

Tear kale leaves away from tough center stems; discard stems. Cut kale into 2-inch pieces and place in a large bowl. Add oil and sprinkle lightly with salt and pepper; mix well to coat. Spoon into a 9- by 13-inch baking dish (kale will fill dish). Bake in a 450° regular or convection oven, stirring occasionally, until top pieces of kale are crisp and remaining are tender to bite, 20 to 25 minutes. Stir in preserved lemons or lemon peel and spoon into a bowl. Serve hot or at room temperature.

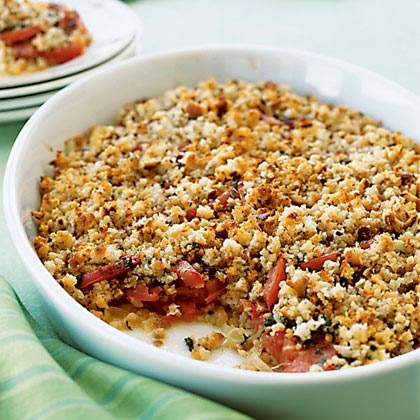
Tomato and Sweet Onion Crumble

Tomato and Sweet Onion Crumble

1 T. olive oil
2 sweet onions (about 1 lb. total), such as Walla Walla or Oso, peeled and thinly sliced
3 cloves garlic, peeled and minced
2 lb. ripe tomatoes, rinsed, cored, and sliced (1/4 in. thick)
1/3 C. chopped fresh basil
3 T. chopped fresh oregano leaves
Salt and pepper
4 slices crusty artisan-style bread (each about 1 in. thick and 3 by 5 in.), cut into chunks
1/4 C. (1/8 lb.) butter
1/2 C. grated parmesan cheese

Heat oil in a 10- to 12-inch frying pan over medium heat. When hot, add onions and garlic. Stir frequently until onions are limp and beginning to brown, about 6 minutes. Pour into a 2- to 3-quart baking dish with sides at least 2 inches high, and spread onions level. Top evenly with tomato slices, basil, and oregano. Sprinkle generously with salt and pepper. In a food processor, whirl bread with butter and cheese until mixture forms coarse crumbs. Sprinkle evenly over tomatoes. Bake in a 350° oven until topping is golden brown and juices are bubbling, 20 to 25 minutes. Cool 5 minutes and serve warm.

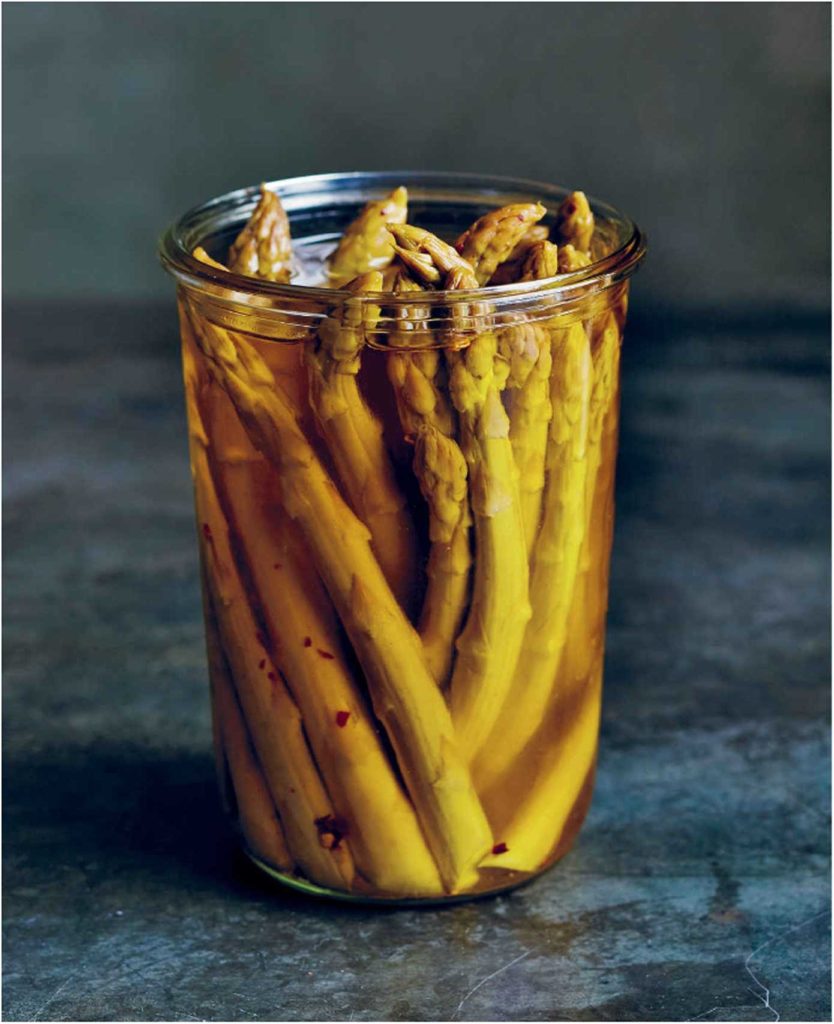
Oil-Preserved Asparagus

Oil-Preserved Asparagus

2 pounds asparagus spears
l C. white wine vinegar
1 C. water
1 tsp. fine sea salt
1/2 tsp. whole black peppercorns
1 bay leaf
2 C. (220 g) extra-virgin olive oil
1/4 tsp. crushed red chile pepper

3 sterilized 12-oz. jars and their lids

Trim the asparagus spears from the bottom so they will fit upright in the jars with 1 inch headspace—enough to cover them with oil. Depending on the length of the spears, reserve the bottom halves for another use, or, if you like, preserve them along with the tops. Combine the vinegar, water, salt, peppercorns, and bay leaf in a pot large enough to hold the trimmed asparagus. Bring to a boil over medium-high heat and then add the asparagus. Almost immediately they will turn from green to yellow-green and some of the tips will turn reddish. Cook until barely tender, about 2 minutes. Place a clean kitchen towel near the stove. Using tongs, remove the asparagus from the pot and line them up on the towel to dry. Once dry, pack the spears, tip side up, in the jars, taking care to pack them in tightly. You should be able to fill two or three jars, depending on whether you use some of the bottom halves of the spears along with the tips. In a large skillet, heat the olive oil with the crushed red pepper until warmed through. Carefully fill the jars with the oil, taking care to cover the asparagus completely. Screw the lids on tightly and let the jars sit at room temperature for 24 to 48 hours. Check to make sure the asparagus remain completely covered; if not, add additional oil. Let the asparagus cure in the refrigerator for at least 1 week before eating, then store in the refrigerator for up to 3 months. To serve, remove from the jar only as much as you plan to use and let it come to room temperature. Top off the jar with more oil as necessary to keep the remaining asparagus submerged.

Sour Cream Coleslaw

Sour Cream Coleslaw

1/2 C. thick Sour Cream
1 tsp. Salt
Dash Pepper
1 tsp. Celery Seeds
2 T. Lemon Juice or Vinegar
1 tsp. Sugar
1 tsp. prepared Mustard
1 tsp. minced Onion
4 C. shredded Cabbage

Combine all ingredients except cabbage in bowl and beat until well mixed. Add cabbage and toss to coat. Serve Chilled.

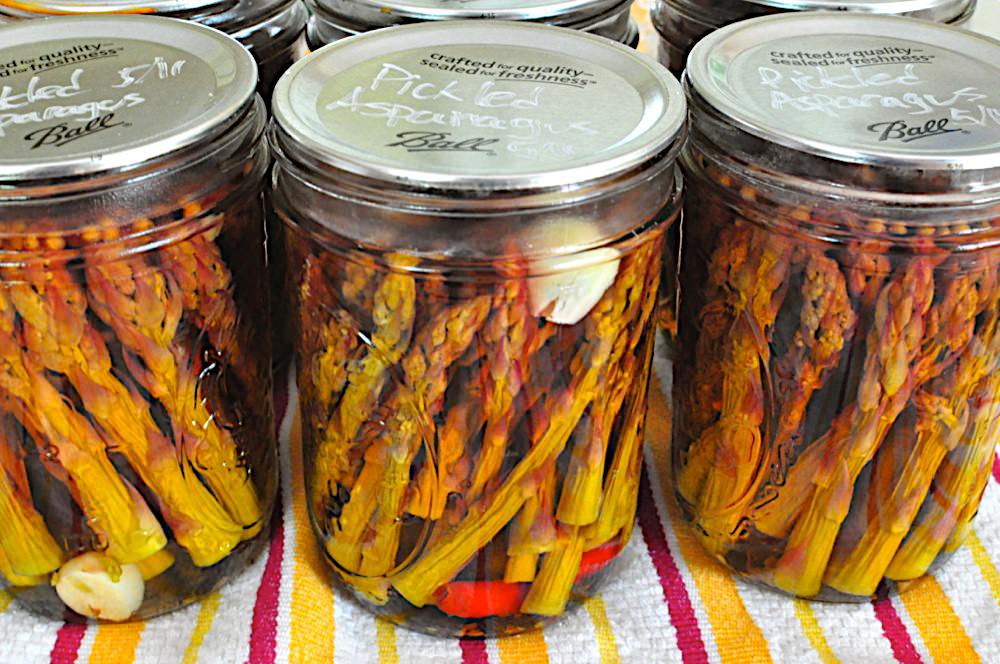
Pickled Asparagus with Garlic and Hot Pepper

Pickled Asparagus with Garlic and Hot Pepper

8 pounds asparagus
6 cloves garlic
3 dried hot chiles, rinsed and halved (or 1/4 tsp. red pepper flakes per jar)
1 1/2 tsp. whole black peppercorns (1/4 tsp. times 6)
1 1/2 tsp. whole coriander seed (1/4 tsp. times 6)
4 1/2 C. water
2 1/4 C. white vinegar (5%)
2 1/4 C. cider vinegar (5%)
1/2 C. pickling salt

Prep the vegetables: Rinse the asparagus, garlic, and hot chiles. Peel the garlic, and cut the chiles in half. Trim the hard ends from the asparagus and throw away. Cut the asparagus into 4 inch pieces, measured from the tips, so it fits in the jars with a 1/2 inch of headroom. Prep the jars: Sterilize the pint jars in a pot full of boiling water (or run them through the dishwasher). Into each jar, put 1 clove of garlic, half a chile, 1/4 tsp. peppercorns, and 1/4 tsp. coriander. Tightly pack the each jar with asparagus, tips pointing up. In a large saucepan, bring the water, vinegar, and pickling salt to a boil to make the brine. Carefully ladle the hot brine over the asparagus, leaving at least 1/2 inch of headroom in each jar. *It’s OK if the asparagus tips are a little above the brine. Process the jars: Wipe the edge of the jars clean with a damp cloth, then put the lids and rings on the jars. Process the pickles in a boiling water bath for 10 minutes (more at higher altitudes). Wait 2 days before opening to let the asparagus pickle.

Pickled Beets

Pickled Beets

Makes 1 qt. or 4 half pints

8 small Beets ( 2lb.)
1 C. Cider Vinegar
1 tsp. Salt
1/4 C. Sugar
5 Peppercorns
1 tsp. Pickling Spice
1 Bay Leaf
Fresh Dill (optional)

Wash and rinse canning jar(s) and lid(s). Keep jars in simmering water. Scrub beets; trim leaving inch of the top and the root ends attached. Cook, covered, in boiling salted water to cover, 40 minutes or until barely tender. Beets should be somewhat firm. Drain, reserving 1 C. of the cooking liquid. Rinse beets in cold running water; slip off skins, roots and tops; slice. Fill the jar or jars with beet slices. Combine the reserved cooking liquid with remaining ingredients; bring to boiling; pour into filled jars until 1/4″ from top. Seal jar and refrigerate for 10 days before serving. For “putting up”, seal the half pint jars and process for 10 minutes in boiling water bath. Cool and check seals. Store in a cool dry place.

Bread and Butter Pickles

Bread and Butter Pickles

2 lb. medium Pickling Cucumbers
5 C. thinly sliced Onion
½ C. Salt
3 C. Water
1 ½ C. granulated Sugar
2 tsp. Mustard Seed
1 ½ tsp. Ground Ginger
1 tsp. Ground Turmeric
3 C. Distilled White Vinegar
2 cloves Garlic

Wash cucumbers; cut crosswise into 1/9” slices. Combine with onions in large crock or non-metallic container. Dissolve salt in water; pour over vegetables. Weight vegetables down with a plate almost as large as the crock. Lay something heavy on top to keep vegetables under brine and let stand 2 hours. Combine sugar and remaining ingredients in large saucepot. Bring to a boil and remove garlic. Drain vegetables and add to hot syrup; heat just to boiling. Simmer while quickly packing one clean hot jar at a time. Fill to within ½ inch of top making sure vinegar solution covers vegetables. Cap each jar at once. Process five minutes in boiling water bath. Makes 3-4 pints.

Stuffed Baby Zucchini   

Stuffed Baby Zucchini   

Stuffed Baby Zucchini


12 Baby Zucchini (3” long)

2 T. Olive Oil

1 Clove Garlic, Pressed

2 Green Onions, with Green Tops, Minced

2  Plum Tomatoes, Diced

2 T. Parsley

½ tsp. Thyme Leaves, dried, or double, fresh

Salt & Pepper to taste


Scrub the zucchini and cut in half lengthwise. Scoop out the zucchini pulp leaving a thin shell which will still hold its shape. Finely chop the zucchini pulp. Heat the oil in a large skillet. Add the garlic, onions, tomatoes, parsley, zucchini pulp, thyme and ground black pepper to taste. Sauté over medium heat until the vegetables are soft and blended (about 5 minutes). Add salt to taste. Spoon the filling into the zucchini shells. Arrange on a serving tray. Cool to room temperature. Serve as a finger food.

Pressure Canning Green Beans with Bacon

Pressure Canning Green Beans with Bacon

50 pounds of cut beans will produce approximately 45 quarts
10 pounds of cut beans will produce approximately 9 quarts or 18 pints
2 pounds of cut beans will produce approximately 1 quart or 2 pints

Bean Prep: Using a colander, wash the beans under cold running water. Disregard any ill-looking and rusty beans. Remove stems and leave the end tip. Cut beans in bite size pieces approximately 2” in length.

Bacon Prep: If you plan to make at least 9 quarts of home canned green beans, then plan on using about 1 pound of bacon. A great deal depends on the type and cut of the bacon you are using so be sure to have extra on hand just in case. And feel free to get creative! I once made a batch using peppered bacon and it was DELICIOUS!

In a large skillet, fry up your bacon slices until crispy but not burnt. Cool bacon in paper towel so excess grease is soaked up – the goal is getting the bacon flavor not the fat! When bacon has cooled, crumble into small pieces and set aside in a clean bowl

Jar prep: Prior filling the jar with green beans the clean, empty jars need to be prepped. For each quart-sized jar, add 1 T. bacon and 1 tsp. salt (optional). For each pint-sized jar, use a ½ T. bacon and ½ tsp. salt (optional).

Now, I don’t know about you, but I do not like eating mushy green beans with my meal. For that reason, I use the raw pack method when home canning green beans. Pack each jar tightly as many raw green beans as the jar will hold – being sure to leave a ½ inch head space. I use the end of my wooden spoon to tamp down the beans. This allows me to pack as many as I can inside the jar. Reason we pack them tight: When the jars are processed, the green beans will shrink up some so you want to have the jar packed full so you don’t wind up with more water than beans.

Because we raw packed cold beans you may cover the beans using cool/room temp water. I use purified water because we have well water with a water softener… When adding water be sure to keep the ½ inch headspace.

Wipe each rim with a clean washcloth, add lids and hand tighten the rings. Place jars in pressure canner and process at 10 pounds of pressure; process quarts for 25 minutes and pints for 20 minutes.

Baby Artichokes with Lemon and Olive Oil

Baby Artichokes with Lemon and Olive Oil

6 pounds baby globe artichokes
1 C. bottled or strained fresh lemon juice, plus 2 tsp. for the
trimmed artichokes
2 C. white wine vinegar (6% acidity)
1 C. extra-virgin olive oil
2 cloves garlic, sliced
2 tsp. pure kosher salt

Using a sharp serrated knife, cut off the top ¾ inch of each artichoke, then pull off the tough green outer leaves until you reach the pale yellow center. Use a paring knife to smooth the base of the artichoke a bit and peel the stem. As you trim each artichoke, put it in a large bowl of water with the 2 tsp. lemon juice. Prepare for water-bath canning: Wash the jars and keep them hot in the canning pot, and put the flat lids in a heatproof bowl. In a wide, 6- to 8-quart preserving pan, combine the 1 C. lemon juice, vinegar, oil, garlic, and salt. Bring to a boil, then drain the artichokes and add them to the pan. Boil for 10 minutes. Ladle boiling water from the canning pot into the bowl with the lids. Using a jar lifter, remove the hot jars from the canning pot, carefully pouring the water from each one back into the pot, and place them upright on a folded towel. Drain the water off the jar lids. Use a slotted spoon to transfer the hot artichokes to the jars and ladle in the liquid, leaving l/2 inch headspace at the top. Use a chopstick to remove air bubbles around the inside of each jar (be diligent about removing the bubbles here). Use a damp paper towel to wipe the rims of the jars well, then put a flat lid and ring on each jar, adjusting the ring so that it’s just finger-tight. Return the jars to the water in the canning pot, making sure the water covers the jars by at least 1 inch. Bring to a boil, and boil for 25 minutes to process. Remove the jars to a folded towel and do not disturb for 12 hours. After 1 hour, check that the lids have sealed by pressing down on the center of each; if it can be pushed down, it hasn’t sealed, and the jar should be refrigerated immediately. Label the sealed jars and store.