Browsed by
Tag: Basics

Pie Crust

Pie Crust

Pie Crust

1/3 – 1/2 C. Shortening
1 C. Flour
Dash of Vinegar

1 C. Flour will make a single pie shell. Use 2 C. flour for two crust pie.
Pie Crust (Double-Crust Pie)

2 C. All-Purpose Flour
½ tsp. Salt
2/3 C. Shortening or Lard
6-7 tsp. Cold Cold Cold Water

In a mixing bowl, stir together flour and salt. Cut in shortening with a pastry blender until the pieces are the size of small peas. Sprinkle 1 tablespoon of water over part of the mixture; toss it gently with a fork. If you over-toss/mix, the dough will be tough. It should be moist enough to hold together, but not wet. Push that to the side of the bowl. Repeat until all the dough is done. Divide dough in half. Form each half into a ball.

On a lightly floured surface, flatten one ball of dough with your hands. Roll dough with rolling pin from center to edge, forming a circle about 12 inches in diameter. The dough will not usually be uniform in color. It normally has small white striations from the shortening. It is good to keep the rolling pin VERY cold. Transfer the dough by rolling it carefully around the pin, then un-rolling it into your 9” pie pan. Do not stretch. Trim around edge if necessary.

Fried Chicken

Fried Chicken

1 Broiler Fryer, cut up
3 C. Water
1 T. Salt
2 tsp. Fines Herbes
2 tsp. Onion Powder
2 tsp. Seasoned Salt
2 envelopes Instant Chicken Broth
1/4 tsp. Pepper
1 C. Flour
Fat for Frying
Chicken Broth
Chicken Gravy

Cover chicken with a mixture of water and salt in medium bowl. Chill at least 1 hour. Whirl fines herbs, onion powder, seasoned salt, instant chicken broth and pepper in blender or crush in mortar and pestle until very fine powder. Combine with flour in plastic bag. Remove chicken pieces from cold water. Shake in bag in flour mixture while still wt until thickly coated with flour. Melt enough shortening or pour in enough salad oil to make 1 inch depth in a heavy skillet or chicken fryer. Fry chicken pieces, turning once, 5 minutes on each side. Lift out with slotted spoon; drain well on paper toweling. When all pieces are fried, drain fat from skillet. Add 1 cup chicken broth; return chicken pieces, cover skillet. Cook 15 minutes or until chicken pieces are fork tender. Remove from pan. Keep warm while making gravy.

Chicken Broth: Place salted water in which chicken soaked and chicken giblets in a small saucepan. Add 2 onion slices and a handful of celery tops. Cover and simmer 30 minutes.

Chicken Gravy: Strain and add remaining broth to skillet that chicken was cooked in. Heat to boiling, stirring and scraping bottom and sides of pan. Make a paste with 4 T. flour and 1/2 C. cold water in a small cup. Stir into boiling liquid; continue stirring and cooking 1 minute. Season with salt and pepper. Darken with gravy coloring, if desired. Add chopped giblets and simmer 2 minutes longer.

Corn Muffins

Corn Muffins

1 C. Flour
1 C. Corn Meal
2 T. Sugar
1/2 tsp. Salt
3 tsp. Baking Powder
2 Eggs, well beaten
1 1/4 C. Milk
3 T. melted Shortening

Mix all wet ingredients and stir until well blended. Sift together dry ingredients. Add dry ingredients to wet ingredients all at once. Stir till just blended, batter may be slightly lumpy. Pour into greased muffin pan. Bake at 425 degrees for 15-20 minutes. (If cooking in 8×10 pan, increase cooking time to 25-30 minutes)

Roast Chicken in a Crock Pot

Roast Chicken in a Crock Pot

2 tsp. paprika
1 tsp. salt
1 tsp. onion powder
1 tsp. thyme
½ tsp. garlic powder
¼ tsp. cayenne (red) pepper
¼ tsp. black pepper
1 onion
1 large chicken

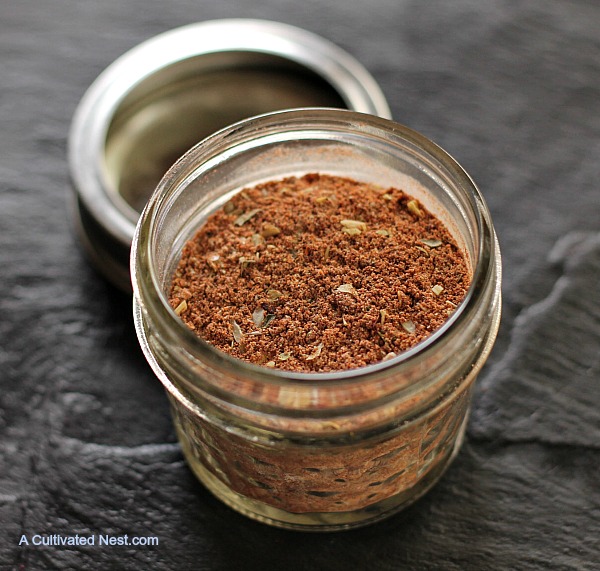
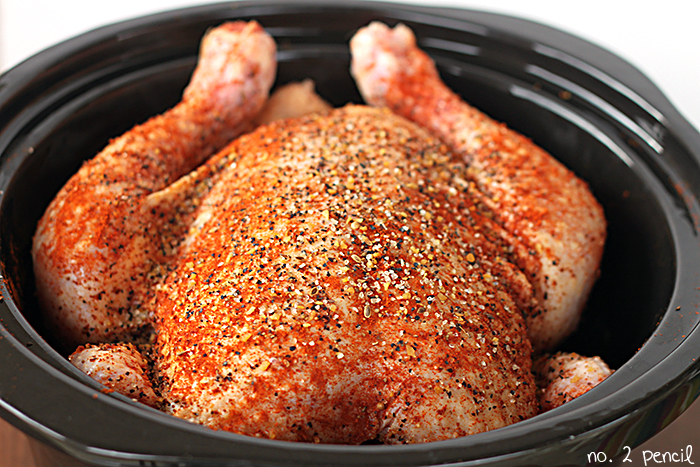
Combine the dried spices in a small bowl. Loosely chop the onion and place it in the bottom of the slow cooker. Remove any giblets from the chicken and then rub the spice mixture all over. You can even put some of the spices inside the cavity and under the skin covering the breasts. Put prepared chicken on top of the onions in the slow cooker, cover it, and turn it on to high. There is no need to add any liquid. Cook for 4 – 5 hours on high (for a 3 or 4 pound chicken) or until the chicken is falling off the bone. Don’t forget to make your homemade stock with the leftover bones

Rich Turkey Gravy

Rich Turkey Gravy

1/4 – 1/3 C. sifted Flour
1/4 C. Turkey Pan Drippings
2 C. Water
2 tsp. Chicken Bouillon

Add drippings to pan and heat over medium heat. Add flour; cook and stir until dark brown. Stir in water and bouillon; cook and stir until thickened and bouillon is dissolved. If desired, stir in parsley.

Beef Stock

Beef Stock

14 – 16 pieces of beef shin bone (between 5 & 6 lbs.)
1 tomato (approx. 1/2 C.)
3 T. olive oil
Salt & pepper to taste
2 small carrots – approx. 1 C. (peeled and cut in three)
2 medium onions – approx. 2 C. (peeled and cut in quarters)
2 stalks celery, with leaves if possible, chopped in three
A few mushrooms, halved
Bouquet garni – leek, thyme, parsley
6 cloves garlic (rough chopped)
1 Head of leek top, cut off and halved. Thoroughly washed.
6 – 8 whole black peppercorns
2 T. olive oil
1 C. red wine
5 -6 quarts water

Beef Stock Preparation: Oil bones and place in large roasting pan. Cut tomato in half add to pan with 2 cloves garlic and all other ingredients except wine to roasting pan. Roast 400 degrees for 45 minutes to 1 hour until bones are brown.

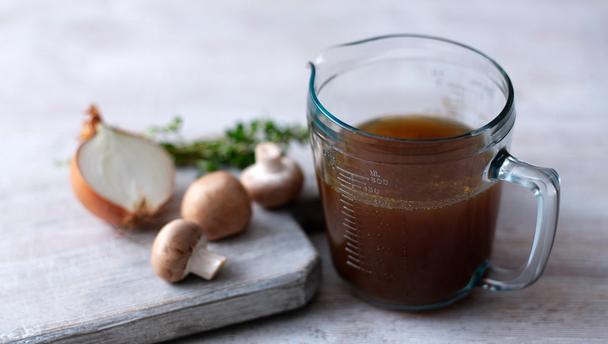
Add oil to 12 – 16 quart stock pot. Remove roasting pan from oven – deglaze roasting pan with red wine and scrape pan bottom for any roasting residue. Add wine and roasted bones with tomato garlic to pot with vegetables. Cover with 5 – 6 quarts of water and add Bouquet of Garni. Bring to boil and skim. Reduce heat to medium for slow rolling boil and skim occasionally. Reduce by 1/2 and check for flavor. Strain, discard solids and refrigerate. Skim fat off after stock has refrigerated overnight.

Dumplings

Dumplings

1 1/2 C. Flour
1 T. Sugar
2 tsp. baking Powder
1/2 tsp. Salt
1 Egg
2 2/3 C. Milk
2 T. Melted Shortening
1/4 tsp. Dry Mustard, optional
1 1/2 tsp. Caraway Seed, optional

Sift flour, add baking powder and salt and sift again (add mustard and seed with salt if using). Combine egg, milk and shortening in small bowl, then pour all at once to the dry ingredients. Mix just enough to moisten. Drop by tablespoonfuls into simmering pot. Cover tightly and cook 25 minutes.

Tim Love’s Grilled Texas Ribeye

Tim Love’s Grilled Texas Ribeye

Three 1 1/2-pound, bone-in rib eye steaks, about 1 inch thick, at room temperature
Canola oil, for brushing
Kosher salt and coarsely ground black pepper

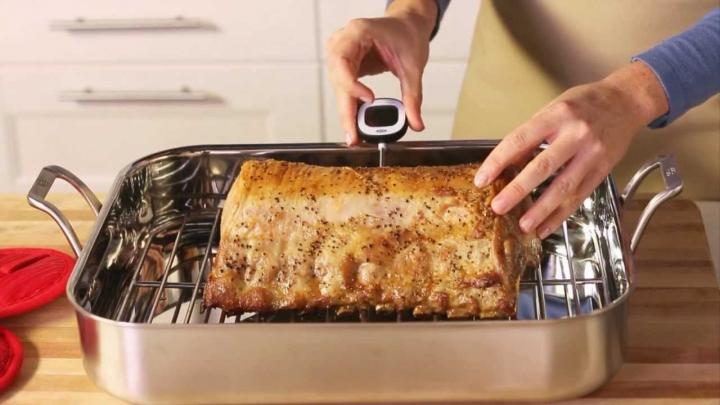
Light a grill and heat, covered, until hot. Brush the steaks with oil and season with salt and with pepper. Grill the steaks over high heat for 1 1/2 minutes on each side. Transfer the steaks to a carving board and let rest for 10 or up to 30 minutes. Return the steaks to the hot grill, cover and cook for 4 to 6 minutes, turning once; the steaks are done when an instant-read thermometer inserted in the center of the meat registers 130° for rare or 135° for medium-rare. Return the steaks to the carving board and let rest for 10 minutes. Thinly slice the steaks across the grain and serve.

Momofuku’s Soy Sauce Eggs (Shoyu Tamago)

Momofuku’s Soy Sauce Eggs (Shoyu Tamago)

6 tablespoons warm water
1 tablespoon sugar
2 tablespoons sherry vinegar
3/4 C. soy sauce (we used low-sodium—if yours is regular strength, you might want to err on the side of shorter marination time)
6 large eggs
Maldon or other flaky salt, for serving
Black pepper, for serving

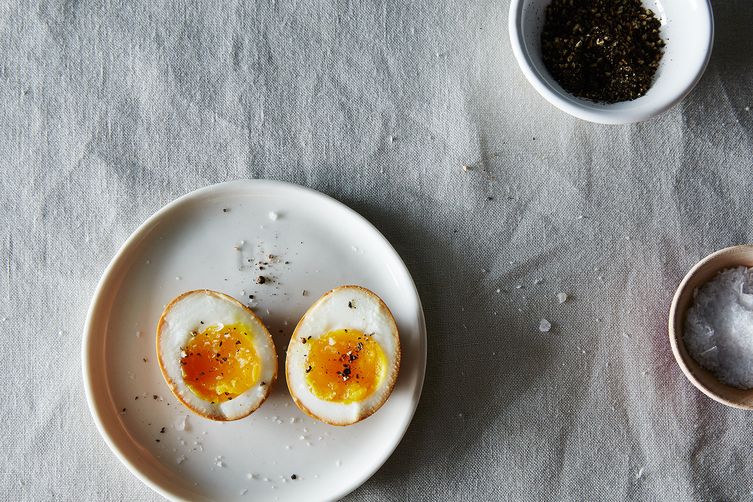
In a medium bowl, whisk together the water and sugar to dissolve the sugar, then stir in the sherry vinegar and soy sauce. Bring a large pot of water to a boil. Carefully put the eggs into the boiling water and cook for exactly 6 minutes and 50 seconds, stirring slowly for the first 1 1/2 minutes to distribute the heat evenly. Meanwhile, fill a large bowl with cold water and ice. When the eggs are done, transfer them to the ice bath. Once the eggs are cool (and the water isn’t uncomfortably icy), peel them (in the water—this will help them keep a perfect exterior). Transfer the eggs to the soy sauce mixture and marinate in the fridge for at least 2, and up to 6, hours, making sure they are completely submerged. If necessary, top the eggs with a small plate to ensure submersion. Remove the eggs from the sweet and salty solution. You can save the soy sauce mix for another round of eggs, if you wish. The eggs will keep, refrigerated in a tightly sealed container, for up to a month. To serve, cut the eggs in half lengthwise and season with salt and pepper.

Pantry Friendly Cottage Cheese & Bakers Cheese

Pantry Friendly Cottage Cheese & Bakers Cheese

1/4 rennet tablet
1 quart warm water
3 C. non-instant powdered milk
½ C. buttermilk

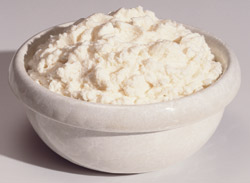
In 1 quart warm water, dissolve 14 of a rennet tablet. (Junket is a brand name of rennet that you can find in most grocery stores in the Jell-O section.) Combine water, milk, and buttermilk in blender. Blend 011 low. Add to dissolved rennet-water mixture. Stir well, then let set in warm room 6—12 hours. It is set when it’s firm and has a touch of whey on the sides. When it is set, cut into 14-inch squares and set the bowl in a sink or bigger bowl of hot water. Gently stir the curds at frequent intervals to warm evenly and break up the curds. When they have warmed through and broken into curds and whey, pour through a strainer with a cheesecloth lining. Drain and rinse with cold water until it is cool and well washed. Add salt (around 1 tsp., depending on taste). To make it creamy, you can then add milk and cream.

To make bakers cheese instead, transfer cheese when it has set after 6-12 hours and place in cheesecloth lined colander. Strain out whey until it reaches the consistency of cream cheese. This usually takes 12-24 hours. This can be substituted for most soft cheeses in recipes, especially cream cheese in dips in baked goods.

Infused Vinegars

Infused Vinegars

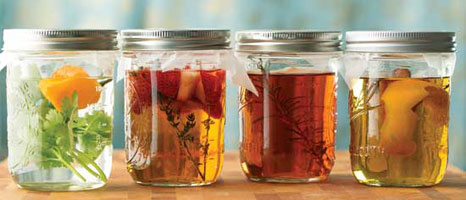
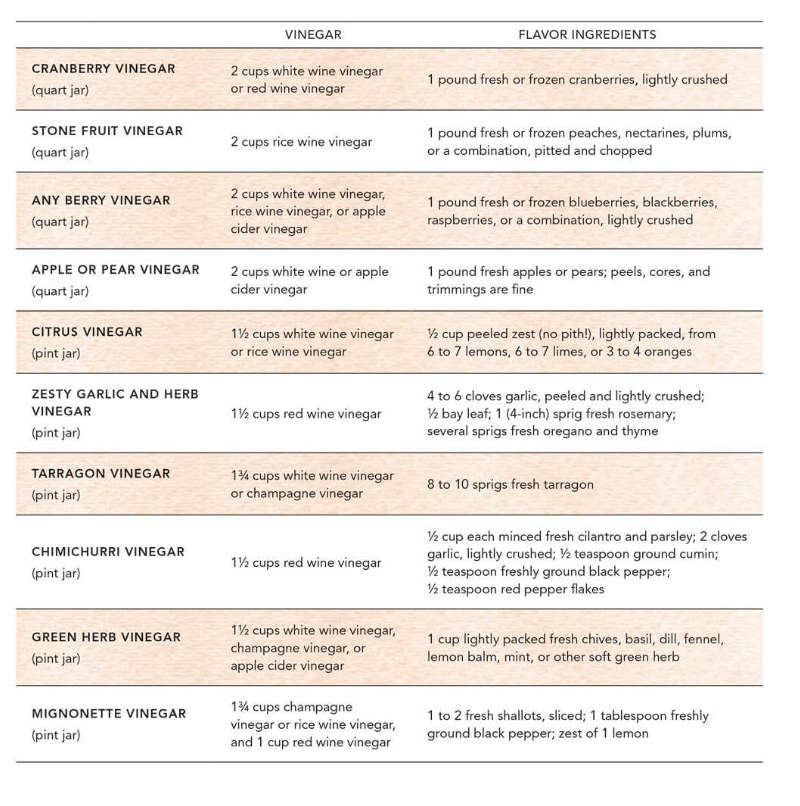
Prepare the flavoring ingredients as necessary. All fruit and herbs should be as fresh as possible, and in top condition. Discard any ingredients with signs of mold or decay. Wash and thoroughly dry your fresh ingredients.

Clean and sanitize a glass jar that will be large enough to hold the vinegar and flavor ingredients comfortably. I typically use pint or quart mason jars.

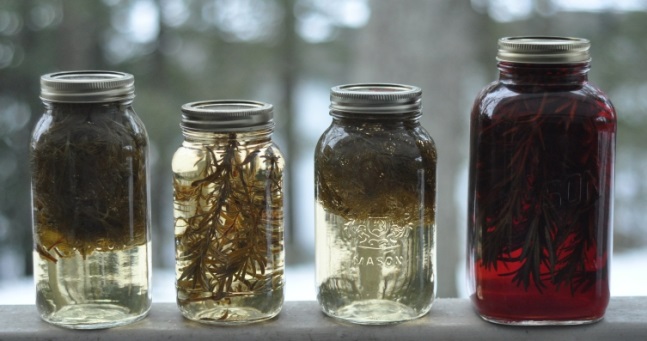
Combine the vinegar and flavor ingredients in the jar. Make sure there is enough vinegar to fully cover all the flavoring ingredients. If not, add a bit more vinegar to the jar.

Lid the jar and let the vinegar sit in a cool, dark place for 3 to 4 weeks. Taste the vinegar; when the flavor has developed to your satisfaction, it’s done!

Strain the vinegar through a fine-mesh sieve to remove any big chunks, then filter the vinegar through a strainer lined with a paper coffee filter, clean lint-free cloth, or layered paper towels.

If desired, sweeten the vinegar slightly. Many fruit vinegars taste more rounded with about 1 T. sugar added per 1 C. finished vinegar. This is totally optional.

Transfer the vinegar to sanitized dry bottles. Lid tightly and store the vinegar in a cool, dark place. It will keep for about l year.

Basic Creamy Herb Dressing

Basic Creamy Herb Dressing

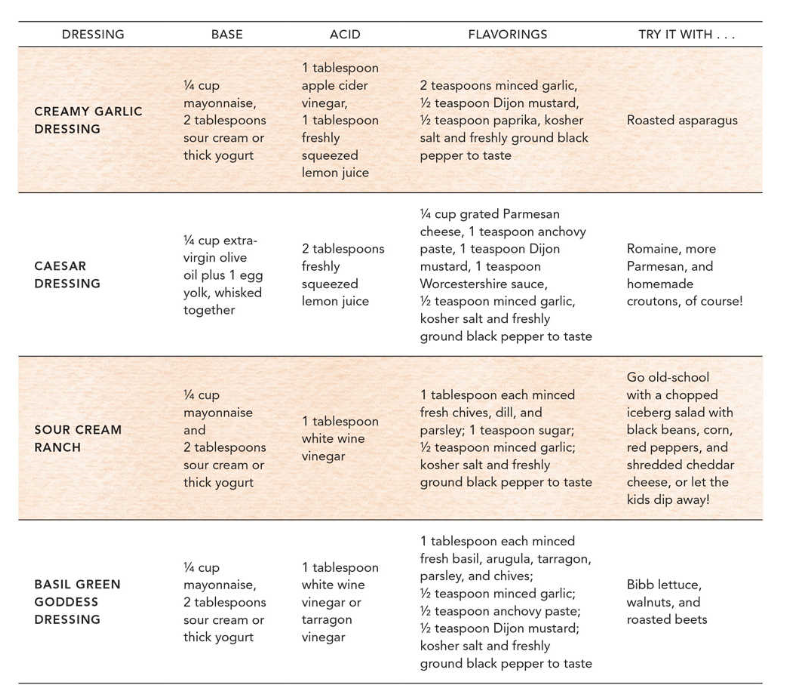
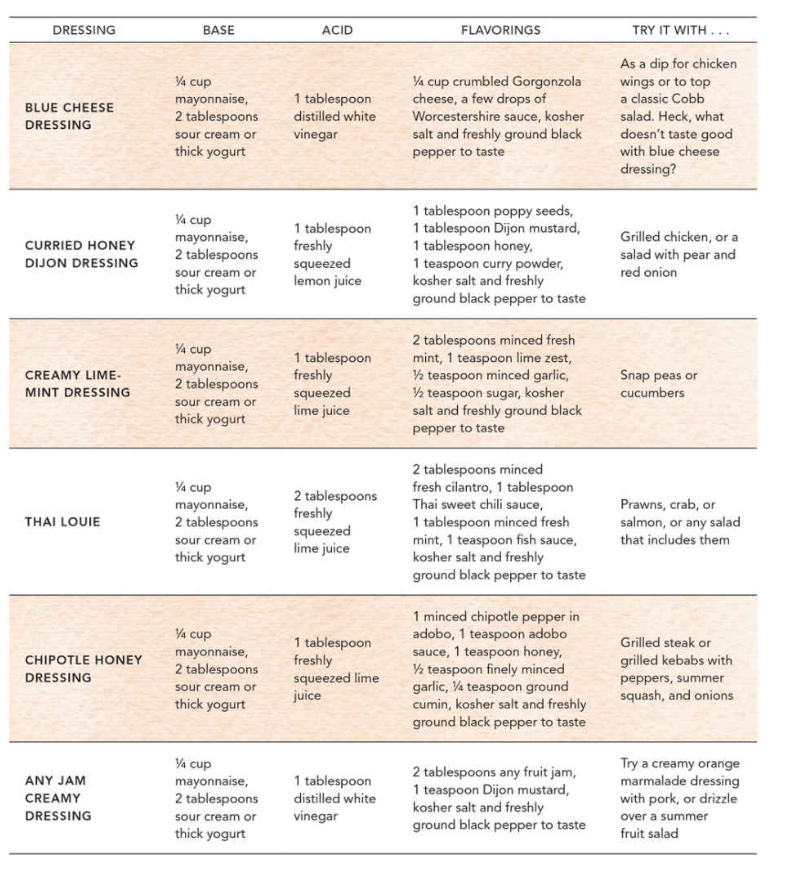
Like vinaigrettes. creamy dressings—blue cheese, Caesar, ranch, and the like—also contain oil, an acid like vinegar, and an emulsifier. Most creamy dressings use egg yolk as an emulsifier, because one of the components in egg yolk is lecithin, a particularly strong emulsifier. This allows for the thick, almost whipped texture that is desirable in creamy dressings. Although we tend to think of it as a sandwich spread, the most basic creamy dressing is mayonnaise. Mayonnaise relies on eggs to emulsify oil with lemon juice or vinegar and a few flavorings. I make Magic Mayonnaise and use that as a base for other creamy dressings, but store-bought mayonnaise will work just as well in these recipes. Some creamy dressings (Caesar, most famously) skip the intermediary of mayonnaise and rely on raw egg yolk directly for its emulsifying properties. If you are uncomfortable using raw egg in your dressings, you can substitute two T. commercial mayonnaise for each raw egg yolk in a recipe.

1/4 C. mayonnaise
2 T. plain yogurt, sour cream, or buttermilk
2 T. minced soft green herbs, such as parsley, chives, basil, or dill
2 tsp. apple cider vinegar, plus more as needed
1 tsp. Dijon mustard
Kosher salt and freshly ground black pepper

In a small bowl, whisk together the mayonnaise, yogurt, herbs, vinegar, and mustard. Season to taste with salt, pepper, and additional apple cider vinegar, if desired. Serve immediately, or transfer the dressing to a clean jar and refrigerate. Creamy dressings made with commercial mayonnaise will last for about 1 week in the refrigerator, and those made with raw egg mayonnaise should be used within a few days.

Preparing & Cooking Dry Beans

Preparing & Cooking Dry Beans

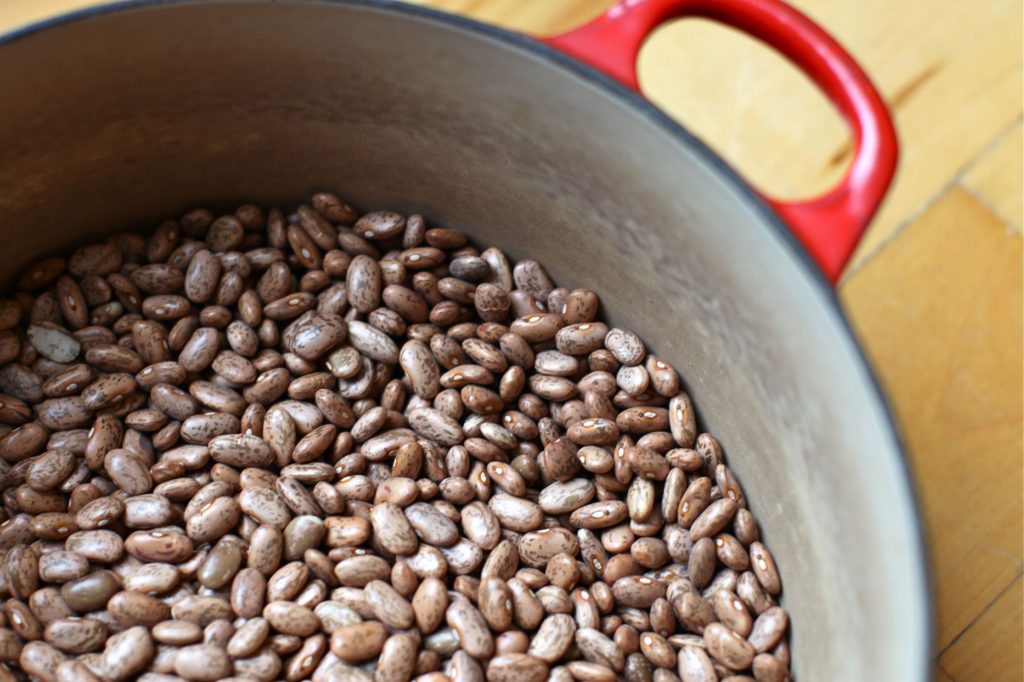
Preparing & Cooking Dry BeansFollow these 3 easy steps for cooking dry beans:

1. Sort: Before soaking beans, pick them over and remove any damaged beans, small stones or dirt.

2. Soak: Most beans will rehydrate to triple their dry size, so be sure to start with a large enough pot. Choose one of the following ways to soak your beans:

Hot Soak: Hot soaking helps reduce intestinal gas. For each pound of dry beans, add 10 C. hot water; heat to boiling and let boil 2 to 3 minutes. Remove from heat, cover and set aside for up to 4 hours.

Quick Soak: For each pound of dry beans, add 10 C. hot water; heat to boiling and let boil 2 to 3 minutes. Remove from heat, cover and set aside for at least one hour.

Overnight Soak: For each pound (2 C.) dry beans, add 10 C. cold water and let soak overnight, or at least 8 hours.

3. Cook: Drain soaking water and rinse beans. Cover beans with fresh water. Simmer for 11/2 -2 hours until tender.

Simple Cooking Tips

• To avoid broken or mushy beans, boil gently and stir very little.

• Taste-test beans often for desired tenderness.

• Foods containing acid such as tomatoes, chili sauce, lemon juice, vinegar or catsup will slow the cooking and softening of the beans. Add these items last so they will not add to the cooking time.
• Any of the following can be added during the last half hour of cooking: minced onion, garlic or green pepper, diced carrots or celery, chopped tomatoes or cooked meat.

Quick Tip: While you are preparing dinner tonight, prepare a pot of beans for tomorrow’s dinner. Use the Overnight Soak Method. In the morning the beans will be ready for your favorite recipe.

Homemade Pizza Crust

Homemade Pizza Crust

Homemade Pizza Crust4 ½ C. Flour
2 tsp. Instant Dry Yeast
2 tsp. Salt
2 T. Sugar
2 T. EVOO
1 ¾ C. Cold Water

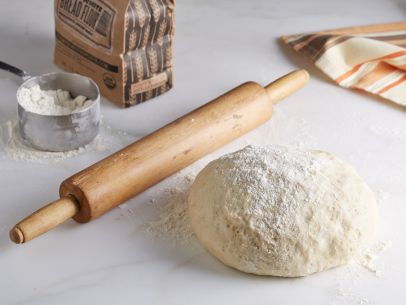
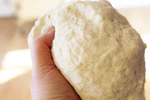
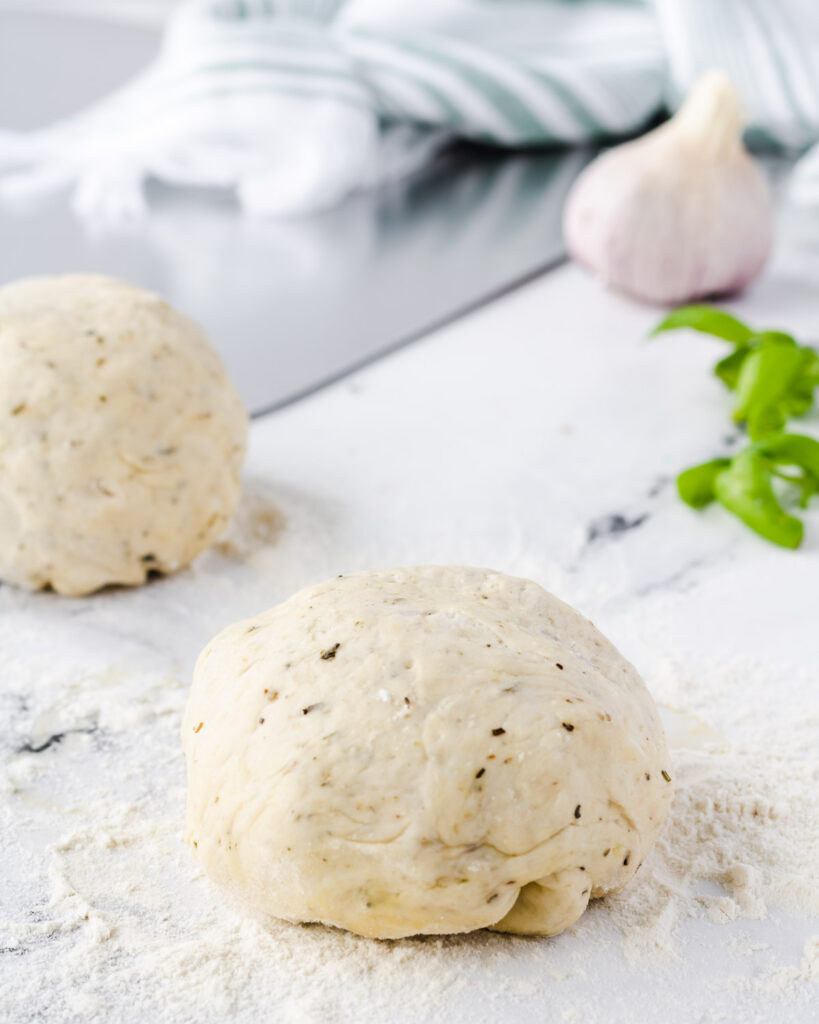
In large bowl, food processor, or standing mixer, combine 4 C. flour, yeast, salt and sugar. Add oil and water; stir until mixtures comes together into a dough. Knead 10 minutes, or until elastic, adding more flour as needed to keep it from sticking. Form into 2 large balls; place in 2 lightly oiled bowls. Cover and set aside to rise for 1-2 hours. When doubled in size, punch down and let rest another 20 minutes. Roll dough out on floured surface to form a large flat disk.

Best Pizza Dough, Period

Best Pizza Dough, Period

Best Pizza Dough, Period


Makes two 1-pound (454-gram) balls

(each makes a proper 16-inch 140.5-cm pie)


Important note while making dough: Turn your phone off and don’t speak; it’s a great time to listen, it’s a great time for new ideas, it’s not busy, you are present, and you are somewhere else. Making dough should be a calming, meditative process and a great time to think of new ideas about pizza, or about life in general.


114 cups (355 g) cool water

2 tsp. sugar

About 14 tsp. active dry yeast

1 T. extra-virgin olive oil

314 cups (500 g) all-purpose or bread flour

1 T. + 14 tsp. fine sea salt


Pizza is bread. It’s really simple and a little complicated at the same time. Dough takes planning to develop good flavor, and if you do it right you’ll thank me later. You can make dough with a sourdough starter, but I’ve found that a nice, slow fermentation is more consistent and the results are always perfect. Sourdough can be unpredictable. Find yourself a nice all-purpose or bread flour. I use organic flour, but regular King Arthur will do fine. Traditionally, four ingredients are used in making dough (flour, water, salt, and yeast), but we’re adding sugar to help with fermentation and a little oil to relax and fatten the dough. It took me a couple of years to come up with this process, which produces a dough with excellent flavor, a crispy exterior, and a chewy interior. These measurements are in metric, as traditional Italian recipes always are. This is how I initially learned how to do it. They are more exact, which is vital in baking.

Cooking and Serving Meat Temperatures

Cooking and Serving Meat Temperatures

MEAT TYPE COOK TO SERVE AT
Beef/Lamb
Rare 115–120°F 125°F
Medium-Rare 120–125°F 130°F
Medium 130–135°F 140°F
Medium-Well 140–145°F 150°F
Well-Done 150–155°F 160°F
Ground Beef
Medium-Rare 125°F 125°F
Medium 130°F 130°F
Medium-Well 140°F 140°F
Well-Done 160+°F 160+°F
Pork
Medium 140–145°F 150°F
Well-Done 150–155°F 160°F
Chicken/Turkey
White Meat 160°F 160°F
Dark Meat 175°F 175°F
All About Steaks

All About Steaks

All About Steaks


The Best Cuts


For grilling, broiling, and pan frying, the best cuts of meat are rib eye steaks, strip or shell steaks, and tsp. bone, which contains both the strip and tenderloin steaks. Sirloin and round steaks are generally going to be tough and dry. Flank steaks are good when quickly cooked and sliced across the grain, as described above.


For roasting, top sirloin, tenderloin, standing rib roasts, and top rump roast are good candidates.


For stir frying, flank, top round, and sirloin steak are good. These cuts are best cooked quickly, and since elastin is broken because the meat is cubed, they are more tender.


For kebabs, tenderloin is the best bet. This mild cut absorbs flavors easily and it is very tender.


For pot roasting and braising, chuck and rump are the best cuts. These cuts have more collagen and need long, slow cooking in a wet environment to reach their optimum tenderness. Chuck has the most flavor and is the most tender.


For ground beef, chuck is the way to go. It has optimal amounts of fat and is tenderized mechanically by the grinding action. Most lean ground beef is chuck, but if you’re not sure, ask!


How to Buy Steak

Before you begin cooking, pick the cut of meat that best suits your dinner plan. Tender, less lean cuts are perfect for the grill and are delicious plain or dressed up with sauces. Leaner, chewier cuts become more tender and delicious when marinated, thinly sliced, and grilled quickly or braised.

For any cut of steak, look for red meat with white fat that is marbled evenly across the grain.

Prime grade meat (the highest grade) is tender and highly marbled. Unfortunately, prime grade is expensive and difficult to find. The average supermarket carries choice grade meat as well as the less flavorful, and less tender, select grade. The best steak you can buy is dry-aged in special meat coolers to develop the flavor and tenderize the meat. Most beef, however, is wet-aged, if aged at all, in vacuum-packed bags for one to four weeks. This process improves the tenderness of the beef, but does not improve the flavor.


Testing for Doneness

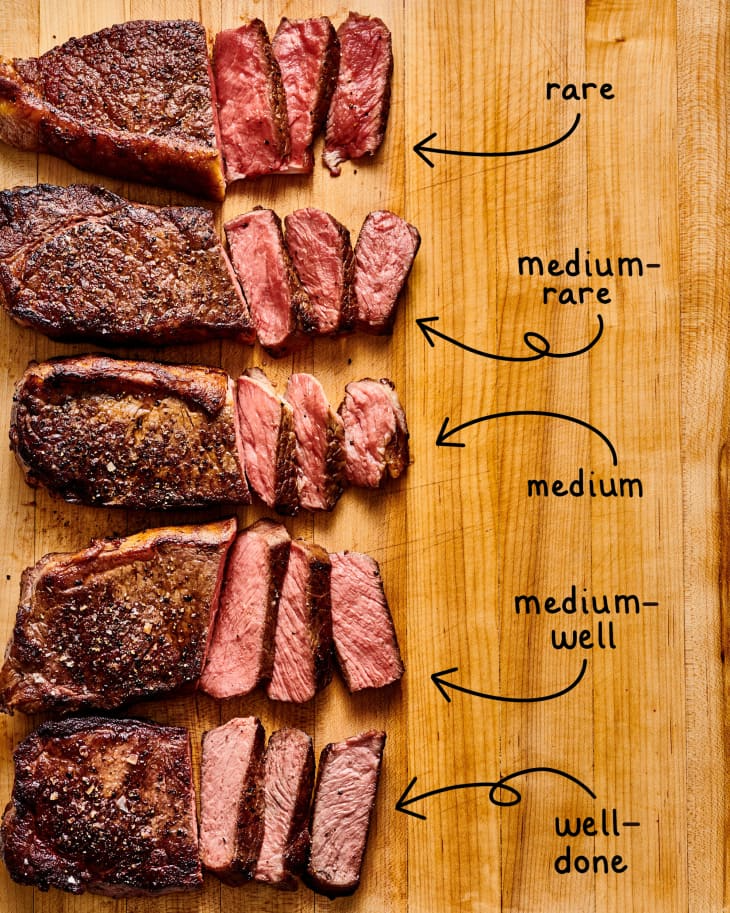
The best way to tell if a steak is done is to (carefully!) touch or squeeze the meat itself.

Rare meat feels a bit like the texture of the flesh between your thumb and index finger; medium meat has a slight spring to it; well-done meat is firm.

You also can check by cutting a small slice into your meat with a thin knife.

If you have an instant-read thermometer, the internal temperature for rare steak is 125 to 130 degrees, medium-rare is 130 to 140 degrees, medium is 140 to 150 degrees, and well done is 165 degrees.
Browned Butter

Browned Butter

Browned Butter


To make brown butter (also called beurre noisette), simply start by melting unsalted butter over medium heat. Use a pan with a light-colored bottom so you can keep track of the color as the butter begins to brown. Swirl the pan occasionally to be sure the butter is cooking evenly. As the butter melts, it will begin to foam. The color will progress from yellow to tan to a toasty-brown. Once you smell a nutty aroma, take the pan off the heat and transfer the browned butter to a heat-proof bowl to cool. The milk solids cook fast and you’ll see them settle on the bottom of the pan like the dregs in a bottle of wine. When you transfer the brown butter to a new container, you can leave as much of this sediment in the pan as possible. You can also strain the butter through a fine meshed strainer or cheese cloth to remove all the particles. Now, I like the slightly burnt taste that these solids give to the butter…so try it both ways to see what you like. It’s easy enough to brown just what you need for your recipe, but you can also brown large batches of butter at a single time. It keeps for quite a while in the fridge, or you can freeze it in ice cube trays. You can use brown butter in just about any recipe that calls for butter, including cookies, cakes, or sauces. I love spooning a little bit over pasta, fish dishes, or even steamed vegetables. It also makes an excellent spread for dinner rolls when whipped together with regular butter.

Cinnamon Vanilla Sunflower Butter

Cinnamon Vanilla Sunflower Butter

Cinnamon Vanilla Sunflower Butter


2 cups / 225 g raw sunflower seeds
1/4 cup / 60 ml sunflower oil, divided
1/2 tsp. fine grain sea salt, plus more as needed

2 T. vanilla bean paste (or seeds scraped from 2 plump vanilla beans)

3 tsp. ground cinnamon
zest of 1/2 a lemon, or to taste


Toast the sunflower seeds in a 325F / 165C oven, on a rimmed baking sheet, until fragrant and golden. You’ll want to stir them once or twice along the way to ensure even roasting. Let cool for ten minutes. Puree the seeds in a food processor along with 1 T. sunflower oil, and the sea salt (if using). As the motor runs drizzle in another 2 T. of sunflower oil. Scrape down the sides once or twice along the way, you’re aiming for an even, creamy consistency, and it may take some time. Once the mixture starts to look smooth, add the vanilla paste and cinnamon, and pulse to incorporate. At this point, evaluate the consistency, if your sunflower seed butter is on the thick side, drizzle in the remaining T. of oil while the processor is running. Taste, and add more salt if needed (and the lemon zest. if using), as well. Makes about 1 1/2 cup