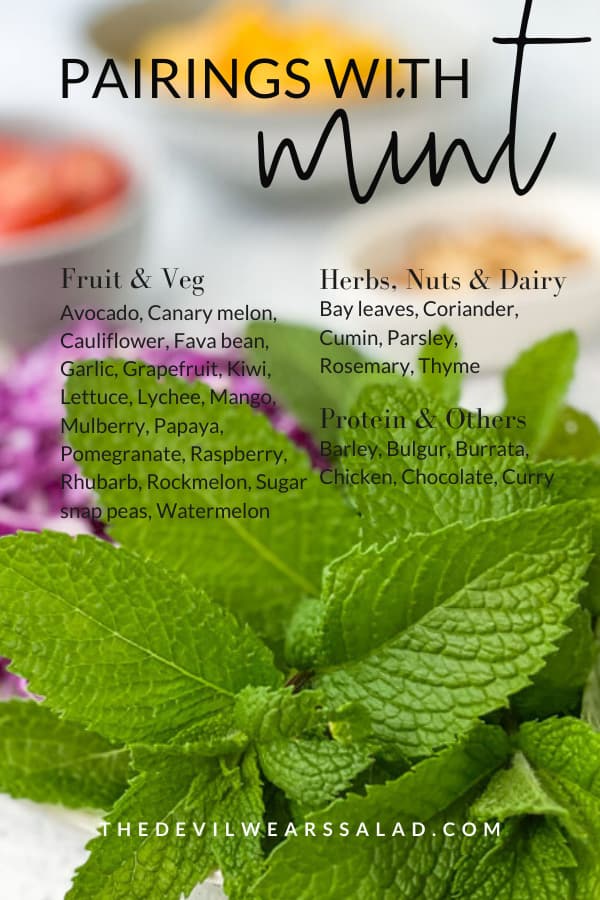
What Goes with Mint

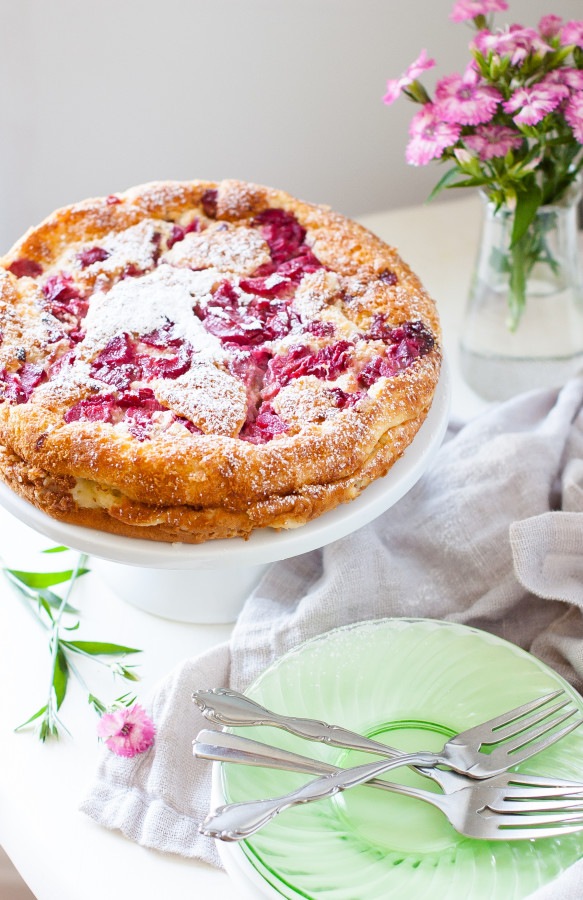 Rhubarb Magic Custard Cake
2 Rhubarb Stalks, sliced into ¼” pieces
2 T. Sugar
⅓ cup Water
4 Large Eggs, separated
¾ cup sugar
1 T. Lemon Juice
1 tsp. Vanilla
1 stick(1/2 cup) Butter, melted
¾ cup All-purpose Flour
2 cups Whole Milk, lukewarm
Powdered Sugar, for dusting
Add the sliced rhubarb, 2 T. of sugar, and water in a small saucepan. Bring to a simmer, stirring gently on occasion, until all the water is evaporated and rhubarb is soft. Remove from heat and set aside. Preheat the oven to 325 degrees. Grease an 8×8 baking pan. Place the egg whites in a mixing bowl and beat with an electric mixer to stiff peaks. Set aside. In another mixing bowl, whisk together the egg yolks and sugar until creamy. Whisk in the lemon juice and vanilla. Whisk in the melted butter. Add the flour to the bowl and whisk in until fully combined. Add the milk to the batter, ½ cup at a time, whisking in well before adding in the next ½ cup. Note that the batter will be extremely runny. Fold the egg whites gently in the batter, just until there are no large lumps left. Pour batter into the prepared baking pan. Spoon the cooked rhubarb slices evenly over the top of the batter. The egg whites that remain on the top of the batter should be strong enough to support the fruit slices.
Bake for 40-60 minutes, or until the cake no longer jiggles when tapped. Bake time will vary depending on how hot your oven gets, so check the cake after 40 minutes.
Remove the cake from the oven and let sit for 10 minutes. Invert cake onto a cooling rack. Cake should fall right out of the pan, but if you are worried about sticking, run a knife around the edge of the cake before inverting. Place cake on a serving dish or cake stand and dust with powdered sugar right before serving.
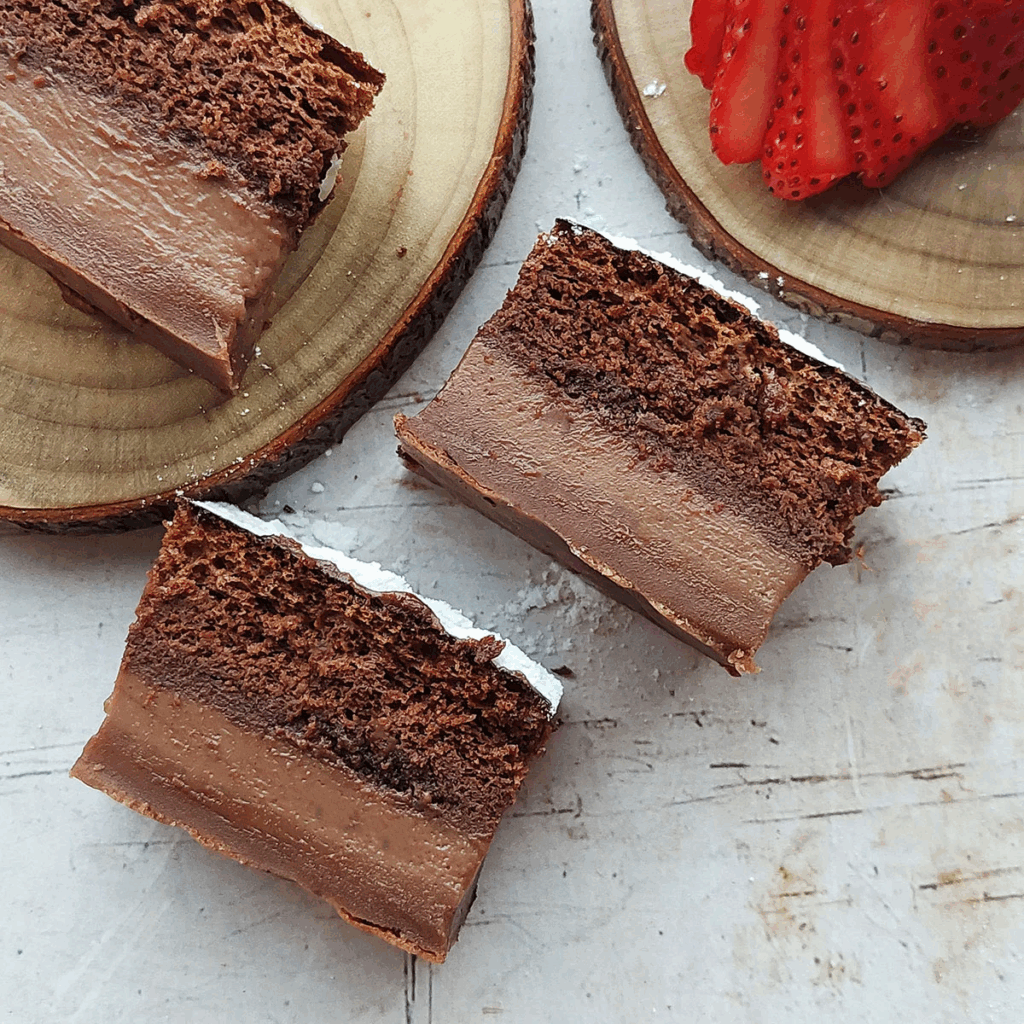 Chocolate Magic Custard Cake
For the egg yolk mixture
4 egg yolks at room temperature (see note)
⅔ cup granulated white sugar
1 tsp. vanilla extract
½ cup / 1 stick salted butter, melted (see notes)
2 cups of milk at room temperature or lukewarm (see notes)
¾ cup cake or all-purpose flour (see notes if you prefer a gluten-free option)
⅓ cup unsweetened cocoa powder
For the egg white mixture
4 egg whites
1 T. white granulated sugar
½ tsp. salt
Grease and line an 8×8-inch (20x20cm) baking pan with parchment paper. Leave an overhang of parchment paper making it easy to lift out the cake after baking Separate the eggs. Yolks in one bowl and whites in another. Add sugar and vanilla extract to the bowl with the yolks. Beat until the mixture turns pale and creamy (about 4 to 5 minutes). Pour in the cooled melted butter and mix for 1 minute on low speed. Sift in the flour and unsweetened cocoa powder. Beat or whisk to combine. Slowly pour in the milk while beating the mixture and until just combined. Set the bowl aside. Preheat the oven now to 325° F / 170°C (150°C if you are using a fan assisted oven). Rinse out and dry the whisk or beaters (if you were using for the yolk mixture). Beat the egg whites on medium speed for 1 minute. Then add in the 1 T. white granulated sugar and salt. Continue beating for about 4 minutes. When the beaters are lifted from the bowl, the whites should now form stiff peaks. Be careful not to overbeat the egg whites past this stage. Or the result will be curdled egg whites. Combine the egg yolk mixture with the egg white mixture. Use a spatula to transfer the beaten egg whites to the yolk mixture. Fold the beaten whites (½ of the mixture at a time) gently into the yolk mixture with a spatula. Don’t worry if you see a few specks of egg white on the surface. You don’t want to overbeat it. The mixture will look thin and quite runny even as you pour it into the baking pan. This is also perfectly normal.
 Cuban Style Flatbread
1 T. active dry yeast
2 tsp. sugar
1 1/4 cups warm water
3 1/2 cups of sifted flour (all-purpose)
2 tsp. sea salt
1/4 cup bacon fat, soft or melted
Dissolve yeast and sugar in water in mixer bowl. When bloomed or when it demonstrates action, add salt and small amount of flour, mixing slightly to incorporate. Add melted fat and remaining flour. Mix with dough hook on medium speed of the mixer for about 4 minutes. Place in a lightly greased bowl and cover until doubled, approximately 1 hour. Remove dough to floured surface and scale to desired size. We use 1 1/2 ounces per serving). Scale and place dough balls on floured surface and rest 10-15 minutes. Shape into desired shape–we rolled into an oblong shape. Meanwhile preheat grill pan over medium high heat, without oil. Place shaped dough onto grill to brown, about 30-60 seconds per side. Remove and serve or hold for service. Reheat for service with a drizzle of EVOO and sea salt.
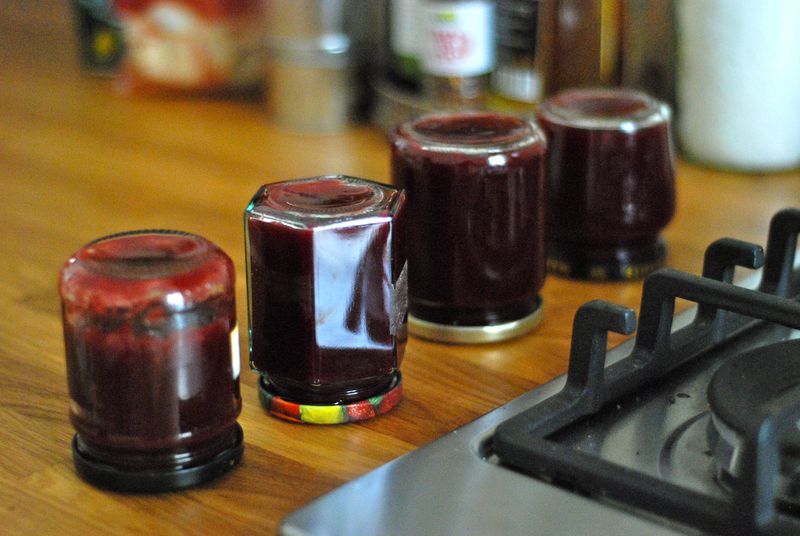 Marisa McClellan’s Cherry Butter
3 pounds (1.4 kilos) sweet cherries
2 cups (400 grams) sugar
Juice of 1 lemon
Pit the cherries. Wash four small jam jars and their lids in hot soapy water and rinse well. Set aside to air dry. Place the cherries and 1 1/2 cups (300 grams) in a large pot. Set over medium-high heat and bring to a boil, stirring occasionally. Reduce the heat so that the mixture simmers and let the mixture cook for 60 minutes, stirring every 15 minutes or so. After an hour, the mixture will be reduced and a deep wine color. Take off the heat and purée thoroughly (taking care not to burn yourself with any splatters) with an immersion blender. When the mixture is velvety smooth, taste it – if it needs more sugar, add some of the reserved sugar and stir well. Then stir in the lemon juice. Return the pot to the stove and place over medium heat. The butter will start sputtering pretty quickly. Let it cook for another minute or so, until the butter is thick and spreadable (remember that it will thicken and set more as it cools). Pour the boiling hot butter into the prepared jars, filling them up as far as you can. Wipe the rims, if necessary, then screw on the lids and turn the jars upside down to cool completely. The jam will keep, unopened, for at least 6 months.
 Breakfast Pigs in a Blanket
8 breakfast sausage links
1 cup pancake mix
3/4 cup milk
1 egg
2 T. vegetable oil
Maple syrup for serving
Preheat your oven to 375°F (190°C) and line a baking sheet with parchment paper.
Cook the breakfast sausage links according to package instructions until slightly browned but not fully cooked. Set aside to cool. In a medium bowl, combine pancake mix, milk, egg, and vegetable oil. Stir until just combined; the batter should be slightly lumpy. Take a spoonful of batter and spread it out on the prepared baking sheet into an oval shape. Repeat this process for the remaining batter, making sure to leave some space between each one. Place a sausage link at the edge of each pancake oval and roll up, ensuring the sausage is fully encased. Bake for 12-15 minutes, or until the pancakes are golden brown and sausages are cooked through. Serve warm with maple syrup for dipping.
 Easy Air Fryer Cheeseburger Egg rolls
1 T. olive oil to cook the ground beef
1 pound ground beef
¼ cup yellow onion diced
⅓ tsp. salt
⅓ tsp. ground black pepper
⅓ tsp. garlic powder
1 tsp. Worcestershire sauce
½ cup ketchup
½ cup pickles diced
½ cup cooked bacon crumbles
4 slices American cheese
12 egg roll wraps
½ cup water cold
½ tsp. olive oil for brushing egg rolls
1 cup mayonnaise
½ cup ketchup
1 tsp. Worcestershire sauce
½ tsp. smoked paprika
⅓ tsp. ground black pepper
½ tsp. garlic powder
Make the dipping sauce: To a small bowl, mix together the mayo, ketchup, Worcestershire sauce, smoked paprika, black pepper and garlic power. Cover and chill in the refrigerator while you make the cheeseburger egg rolls. Make the egg roll filling: To a medium skillet, add the olive oil, ground beef, and onions. Cook over medium heat breaking up the ground beef into crumbles until the ground beef is no longer pink and the onions are soft – about 10 minutes. Add in the salt, pepper, garlic powder, Worcestershire sauce, ketchup, pickles, bacon crumbles, and cheese, then stir until well blended and the cheese has melted. Let simmer for about 3 minutes, stirring occasionally, until the filling has thickened. Remove from heat. Preheat air fryer to 380 degrees Fahrenheit and set the timer for 10 minutes. Lay an egg roll wrapper out flat and rub some water on the outer edges. Add 2 T. of the beef mixture to the middle of the wrapper. Roll the egg wrapper up folding the bottom corner over the beef, then fold the outer left and right edges in, and then roll up the egg roll. Brush the outside of the egg rolls with olive oil. Add the egg rolls to the air fryer in a single layer and air fry for 8 to 10 minutes, until brown and crispy. Flip the egg rolls halfway through. Remove the egg rolls from the air fryer, let cool, then enjoy with some dipping sauce.
 Garlic Herb Butter Sirloin Steak
2 sirloin steaks, about 1-inch thick
Salt and freshly ground black pepper to taste
2 T. olive oil
4 T. unsalted butter
3 cloves garlic, minced
1 T. fresh rosemary, finely chopped
1 T. fresh thyme, finely chopped
1 T. fresh parsley, finely chopped
Season the steaks generously with salt and pepper. Heat olive oil in a large skillet over medium-high heat. Once hot, add the steaks and cook until they reach your desired doneness, about 4-5 minutes per side for medium-rare. Remove the steaks from the skillet and set aside. In the same skillet, reduce the heat to low and add the butter and garlic. Cook for 1-2 minutes, until the garlic is fragrant. Stir in the rosemary, thyme, and parsley, and cook for another minute. Spoon the garlic herb butter over the steaks. Let the steaks rest for a few minutes before serving.
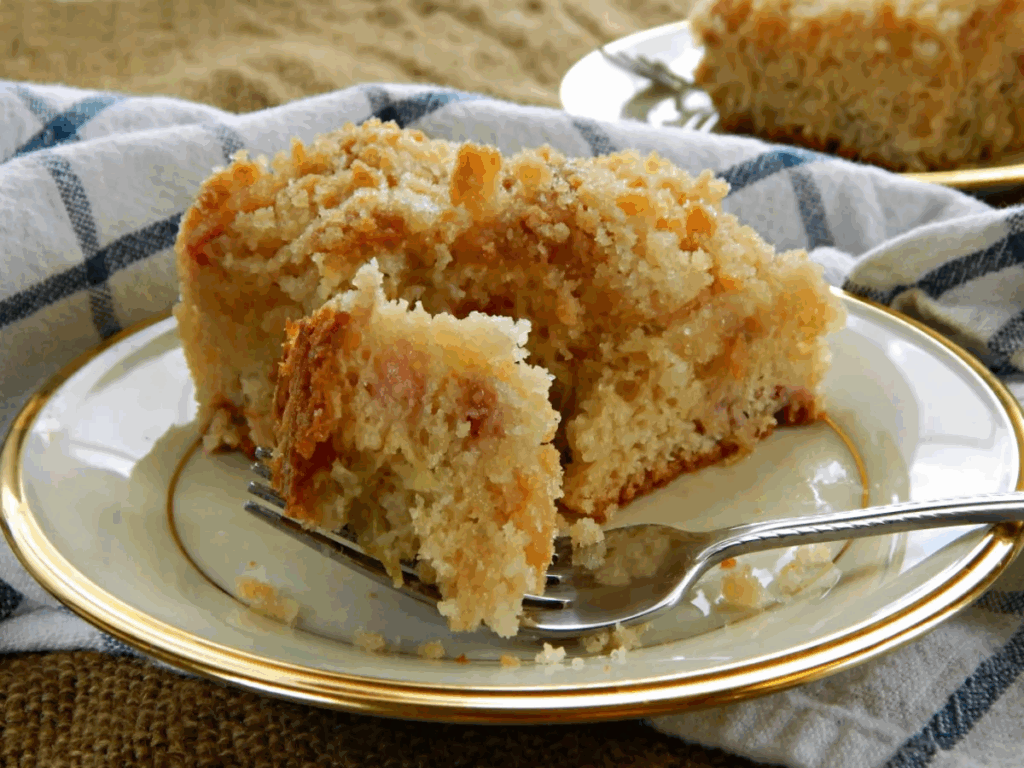 Rhubarb Coffee Cake
8 ounces fresh Rhubarb, 1/4″ dice
2 cups granulated sugar
1/2 cup (1 stick) butter
2 eggs, large
2 cups AP flour
1 tsp. baking soda
1 tsp. cinnamon ground
1/4 tsp. salt
1 cup buttermilk, room temp
1 tsp. vanilla
Set oven rack in center of oven; preheat 350ºF. Choose pan. 13×9″, 9″x 2″ round. Grease bottom. Flour and shake out excess or line bottom after greasing with parchment paper cut to fit. Leave sides ungreased. Set pan aside. Cover chopped rhubarb with sugar and set aside. Beat the butter and remaining 1 1/2 cups sugar in large mixer until well combined and creamy. Add eggs one at a time, until fluffy. Set aside Sift flour, soda, cinnamon and salt together. Add to creamed mixture, ALTERNATING with buttermilk, beginning and ending with flour. On slow speed, mix just to combine. Fold in rhubarb, sugar mixture. Add vanilla. Pour into prepared pan. Bake 35-40 minutes or until toothpick comes out clean. Cool in pan 30 minutes before removing. Or cut and serve from pan. To Glaze: Whisk together 1/2 cup confectioner’s sugar and juice from 1/2 lemon. working out lumps as you go and making it almost clear. Remove warm cake from pan. Discard paper bottom; place cake on serving plate. While cake is still hot, brush glaze over top of cake. Continue cooling cake.
 Rhubarb Parsley Syrup
Makes 4 (half-pints/250 ml) jars
11/2/ pounds/680 g rhubarb stalks, roughly chopped
3 cups/710 ml filtered water
1/2 cup packed parsley leaves and stems
11/2 cups/510 g honey
2 T. bottled lemon juice
Prepare a boiling water bath and 4 half-pint/250 ml jars. Combine chopped rhubarb, parsley, and filtered water in a medium pot. Bring to a boil and let simmer for 15 minutes until the parsley has wilted and the rhubarb is soft enough to be easily mashed with a wooden spoon. Place a fine mesh sieve over a large bowl and strain the rhubarb and its juice through the sieve. Let it drip undisturbed. Do your best to resist the urge to press the pulp to help it release its liquid as this will result in cloudy syrup. Return the strained juice to the pan. Add the honey and lemon juice and bring to a boil. Skim any foam that appears on the top. Pour the hot syrup into the prepared jars, leaving a 1/2 inch of headspace. Wipe the rims, apply the lids and rings, and process in a hot water bath for 10 minutes.
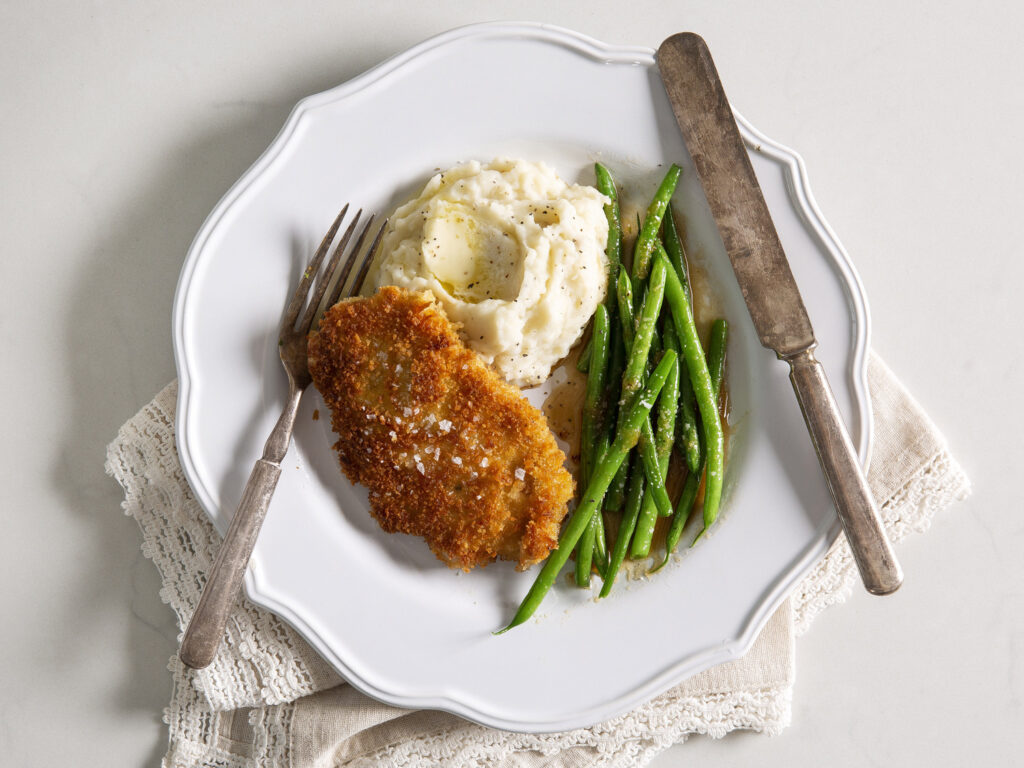 Pan-Fried Pork Chops with Mashed Potatoes and Green Beans
4 T. butter, divided
6 pork rib chops
11⁄4 tsp. salt, divided
11⁄4 tsp. pepper, divided
1⁄4 cup chopped onion
3⁄4 cup chicken broth
1 T. Dijon mustard
1⁄4 cup chopped fresh chives, divided
2 T. chopped fresh parsley, divided
2 lb Yukon gold potatoes, peeled and cubed
1⁄2 cup whole milk
1 lb fresh green beans, trimmed
2 tsp. minced garlic
For Pork Chops: Melt 1 T. butter in a large nonstick skillet over medium heat. Season pork chops evenly with 1⁄2 tsp. salt and 1⁄2 tsp. pepper. Add pork chops to skillet; cook 7 minutes per side or until done. Remove pork chops from pan, and keep warm. Add onion to pan; cook 3 minutes or until tender. Add broth. Bring to a boil, and cook 3 minutes or until reduced to about 1⁄2 cup. Stir in mustard, 1 T. chives, 1 T. parsley and 1⁄4 tsp. pepper. For Potatoes: Place potatoes in a large saucepan; add water to cover. Bring to a boil; simmer 10 minutes or until tender. Drain. Return potatoes to pan. Add milk, 2 T. butter, 3 T. chives, 1 T. parsley, 1⁄2 tsp. salt and 1⁄4 tsp. pepper; mash. For Green Beans: Melt remaining 1 T. butter in a large skillet over medium-high heat. Add green beans, garlic, 1⁄4 tsp. salt and 1⁄4 tsp. pepper. Sauté 5 to 7 minutes or until tender.
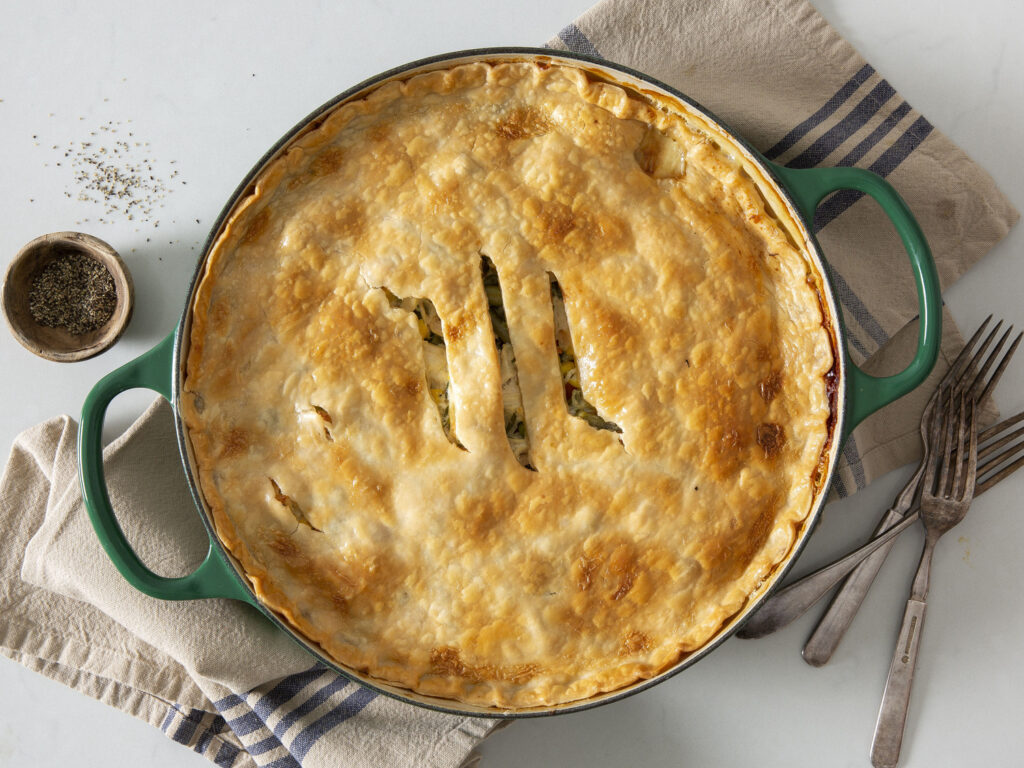 Chicken Pot Pie
4 T. butter
3 stalks celery, finely chopped
3 medium carrots, peeled and finely chopped
1 cup finely chopped onion
1⁄3 cup flour
2 cups chicken broth
1 cup heavy cream
2 cups chopped cooked chicken (or rotisserie chicken)
½ cup frozen green peas, thawed
1 tsp. ground thyme
1 tsp. salt, ½ tsp. pepper
1 refrigerated pie crust, softened as directed on box
Preheat oven to 400 degrees. Heat butter in a large skillet over medium-high heat. Add celery, carrot and onion; cook, stirring often, 7 minutes or until tender. Add flour; stir until smooth. Add chicken broth; bring to a boil, stirring constantly. Reduce heat, and stir in cream. Cook, stirring frequently, 5 minutes or until thickened. Stir in chicken, peas, thyme, salt and pepper. Pour chicken mixture into a 9-inch deep-dish pie plate coated with cooking spray. Unroll pie crust on a work surface. Cut small slits in center to vent, and place over filling. Fold edges under. Bake 30 minutes or until crust is lightly browned and filling is bubbly. Cool 10 minutes before serving.
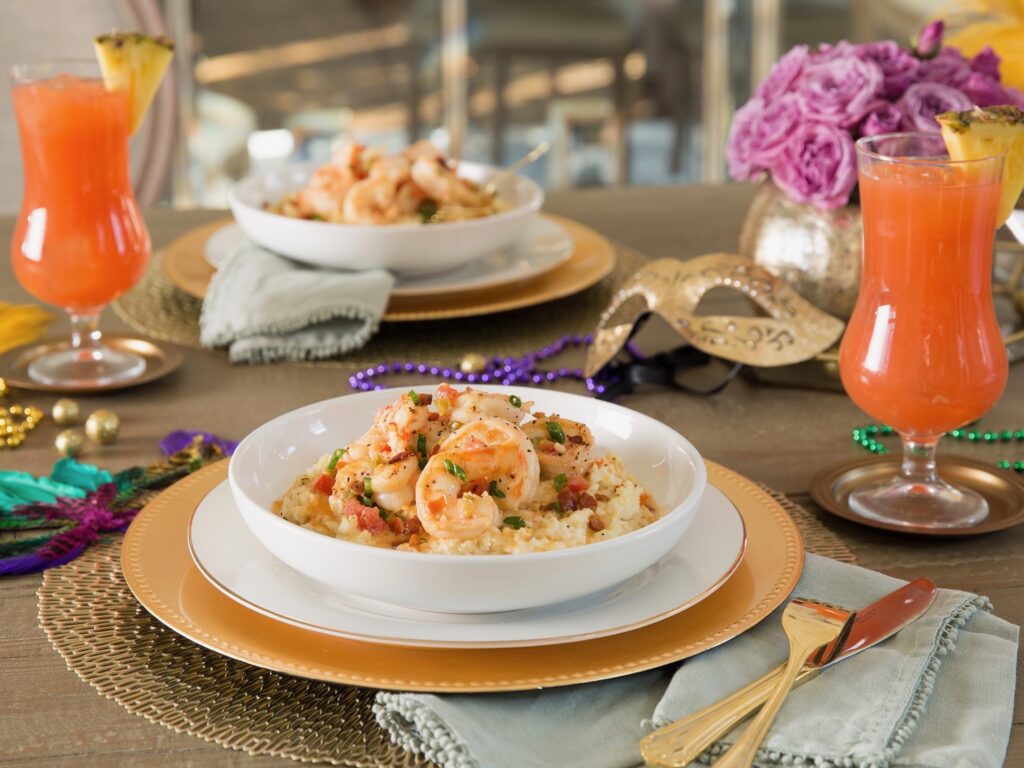
Shrimp and Grits
2 cups quick-cooking grits
1 cup freshly shredded Parmesan cheese
6 T. butter, divided
1 tsp. garlic salt
6 slices bacon, chopped
1 large green bell pepper, chopped
1 large red bell pepper, chopped
3 cloves garlic, minced
2 tsp. Creole seasoning
1 cup dry white wine (or use chicken broth)
2½ lb. peeled and deveined medium shrimp
2 T. fresh lemon juice
4 green onions, chopped
Cook grits according to package directions. Stir in Parmesan, 4 T. butter and garlic salt. Cook bacon in a large nonstick skillet over medium heat 5 to 6 minutes or until crisp. Remove bacon with a slotted spoon, reserving drippings in skillet. Drain on paper towels. Add remaining 2 T. butter to skillet over medium heat. Add bell peppers, garlic and Creole seasoning; cook 2 minutes. Add wine (or broth); cook 2 minutes or until wine almost evaporates. Increase heat to medium-high. Add shrimp and cook 3 minutes or just until shrimp turn pink. Stir in lemon juice; sprinkle with green onions. Serve shrimp mixture over grits; sprinkle with bacon.
Creamy Onion Soup
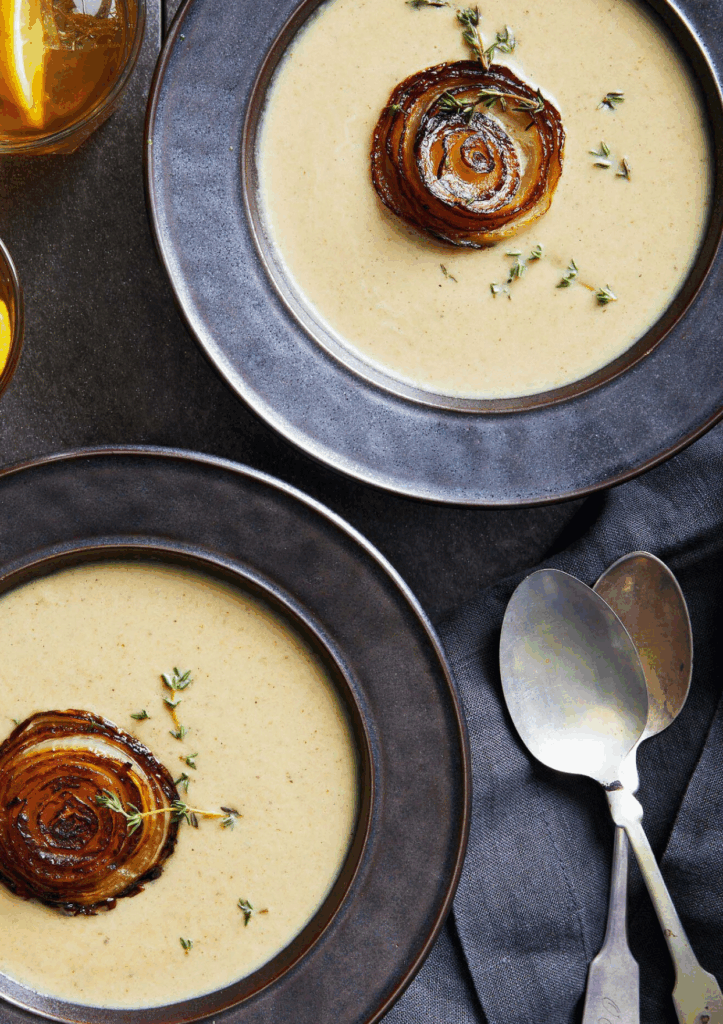
This light and creamy onion soup gets its texture from oat or almond milk. Or, if you want a more indulgent treat, you could stir in a little half-and-half at the end to enrich the soup. Either way, this oniony soup is delicious and satisfying, especially with its roasted onion rings on top.
7 large onions
2 T. olive oil
1 T. thyme leaves (or 1 ¥2 tsp. dried), plus more for garnish
2 tsp. kosher salt, plus more for seasoning
1/2 tsp. freshly ground black pepper, plus more for seasoning
1 or 2 fresh thyme sprigs
4 cups low-sodium chicken or vegetable broth
1 tsp. unsalted butter
1 cup plain unsweetened oat or almond milk
Sauté the onions: Chop 6 of the onions (to make about 6 cups of chopped onions). Heat 1 T. of the olive oil in a large (at least 6-quart) soup pot over high heat. Add the chopped onions, the thyme leaves, 1 ¥2 tsp. of the salt, and the pepper. Cook, stirring, until the onions begin to soften, about 10 minutes. Reduce the heat to low and continue to cook the onions until they are golden and caramelized, stirring often to prevent them from burning and sticking to the pot, adding 1 to 2 T. of water as needed. This should take 30 to 35 minutes. Roast the onion rings: Preheat the oven to 375°F. Peel the remaining onion and cut it into four Va-inch rounds. Line a baking sheet with parchment paper. Brush both sides of the onion rounds with the remaining 1 T. olive oil and season generously with salt and pepper; scatter on the thyme sprigs. Roast the onion rounds until tender and golden, 30 to 35 minutes. Discard the thyme sprigs. Make it soup: Add the broth to the pot with the onions, then add the butter and remaining V2 tsp. salt. Bring the soup to a boil over high heat, reduce the heat to medium, and simmer until the onions have absorbed a bit of the liquid, about 10 minutes. Add the milk and stir to incorporate, then use an immersion blender to puree until smooth (or transfer in batches to a stand blender or food processor), 30 to 45 seconds. Season to taste with more salt and pepper. Serve the soup: Divide the soup among 4 bowls, top each bowl with a roasted onion round, then garnish with the remaining thyme leaves. Serve hot.
Serving: 1 2/3 C.
Calories 226
Fat 10.6g
Fiber 4.6g
 Creamy Baked Macaroni and Cheese
2 cups elbow macaroni
2½ cups shredded Cheddar cheese, divided
2 cups small curd cottage cheese
1 (8-oz) carton sour cream
1 egg, beaten
1 tsp salt
½ tsp pepper
2 T. butter, cut into small pieces
Preheat oven to 350°F. Cook macaroni according to package directions. Stir together macaroni, 2 cups Cheddar, cottage cheese, sour cream, egg, salt, and pepper in a large bowl. Spoon into a lightly greased baking dish; dot with butter. Sprinkle with ½ cup cheese. Bake, uncovered, 45 minutes.
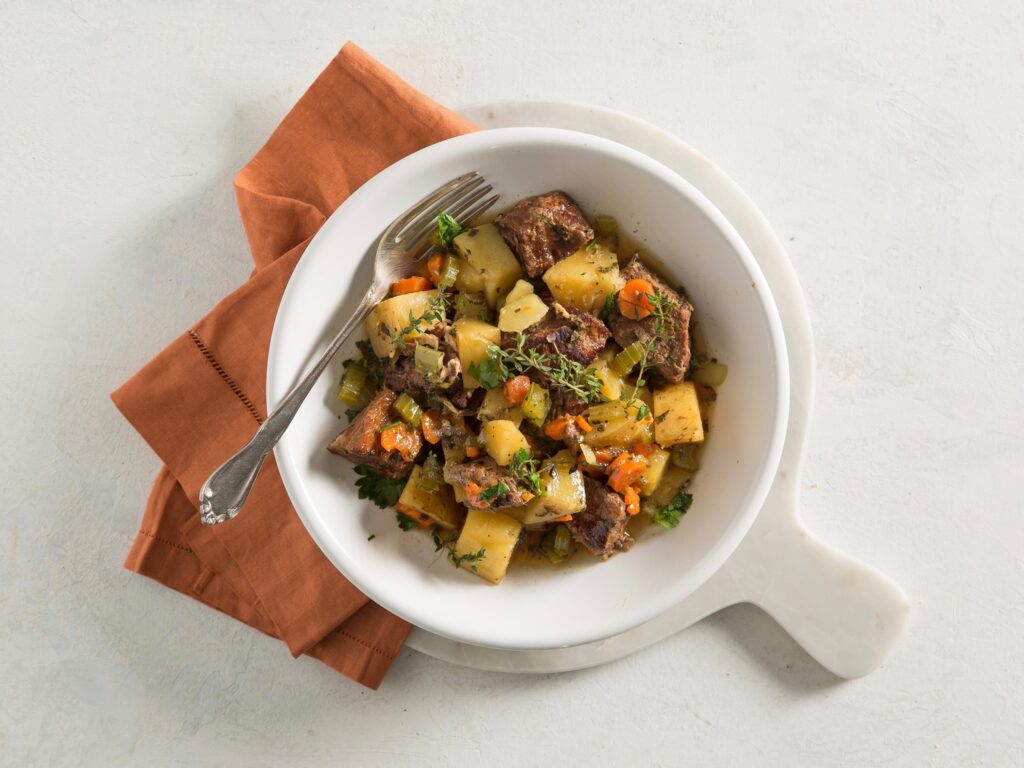 Garlic-and-Herb Beef Roast and Potatoes
1 lb beef rump roast, trimmed and cut into 2-inch pieces
1 tsp olive oil
3 cloves garlic, peeled and halved
2 T. chopped fresh parsley
2 tsp chopped fresh chives
2 tsp chopped fresh thyme
¼ tsp salt
⅓ cup low-sodium beef broth
1 cup cubed organic potatoes
1 large carrot, sliced
1 stalk organic celery, chopped
Cook beef in hot oil in a large skillet over medium-high heat 8 minutes or until well browned. Transfer beef to a 4-quart slow cooker; add garlic and next 5 ingredients. Sprinkle with desired amount of freshly ground pepper. Cover and cook on LOW 5 hours. Stir in potatoes, carrot, and celery; cover and cook on LOW 2 hours longer or until meat and vegetables are tender.
 Dark Chocolate Cake
1¾ cups all-purpose flour
2 cups sugar
¾ cup unsweetened baking cocoa
2¼ tsp baking soda
½ tsp baking powder
1 tsp salt
1 cup sour cream
½ cup vegetable oil
1 T. vanilla extract
2 large eggs
1 cup hot water
2 tsp instant coffee powder
Preheat oven to 350°F. Grease and flour a 13- x- 9-inch pan. Combine flour, sugar, cocoa, baking soda, baking powder, and salt in a bowl. Beat sour cream, oil, vanilla, and eggs using a handheld mixer or an electric mixer fitted with paddle attachment. Combine water and instant coffee in a separate bowl. Alternately beat dry ingredients and coffee mixture into egg mixture, beginning and ending with dry ingredients until just blended, scraping sides of bowl as needed. Pour batter into prepared pan. Bake 30 to 35 minutes or until a wooden pick inserted in center comes out clean. Cool. Frost with Chocolate Buttercream recipe.
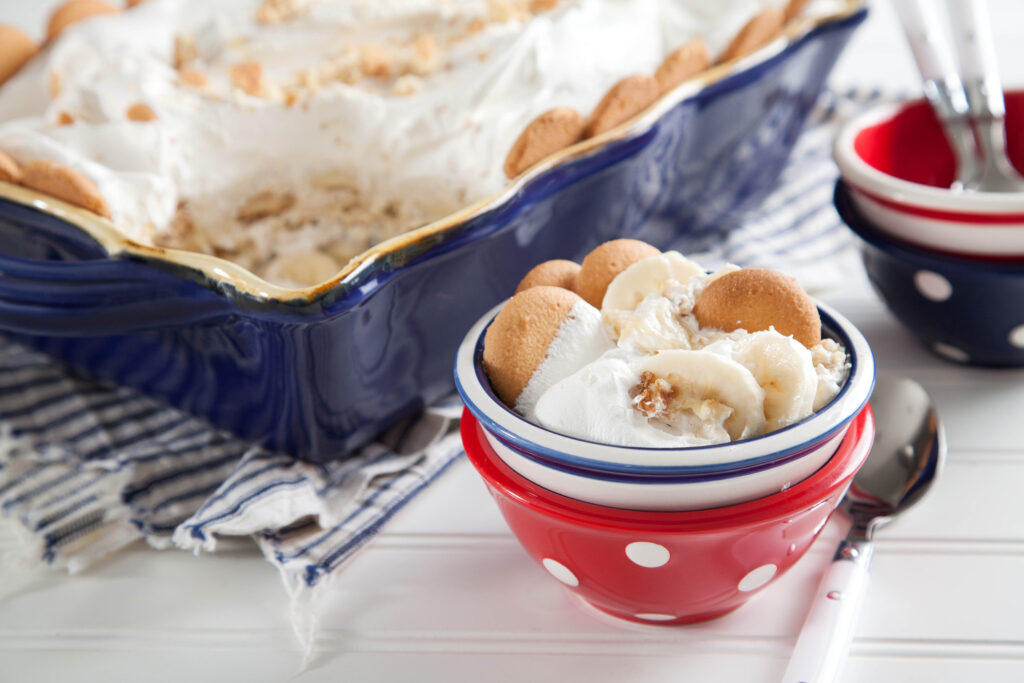 Rich and Creamy Banana Pudding
1¼ cups sugar
½ cup all-purpose flour
½ tsp salt
4½ cups milk
8 large egg yolks
3 T. butter
1 tsp vanilla extract
1 (12-oz) box vanilla wafer cookies
8 bananas, sliced
1 (16-oz) carton frozen whipped topping, thawed
Garnish: crumbled vanilla wafers
Whisk together sugar, flour and salt in a medium saucepan. Whisk together milk and egg yolks in a medium bowl; add to sugar mixture, whisking until smooth. Cook over medium heat, stirring constantly, 8 to 10 minutes or until very thick. Remove from heat; whisk in butter and vanilla until butter is melted. Layer half of cookies, half of custard, and half of bananas in a 3-quart baking dish; top with remaining cookies and custard.
Cover tightly with plastic wrap, and chill at least 4 hours or up to 2 days. Top with remaining bananas and whipped topping before serving. Garnish with crumbled vanilla wafers, if desired.
 Orange Muffins with Orange Glaze
2½ cups all-purpose flour
1/3 cup sugar
1 T. baking powder
1 T. minced fresh thyme
½ tsp. salt
¾ cup milk
¼ cup butter, melted
2 tsp. orange zest
½ cup fresh orange juice
2 large eggs
½ cup confectioners’ sugar
1 T. fresh orange juice
Preheat oven to 375°F. In a large bowl, whisk together flour, granulated sugar, baking powder, thyme, and salt. In a small bowl, combine milk, melted butter, orange zest, orange juice, and eggs, stirring with a whisk until well blended. Add milk mixture to flour mixture, stirring just until combined. Spoon batter into a muffin pan that has been filled with paper liners or sprayed with cooking spray and dusted with flour. Bake for 15-20 minutes, or until a toothpick inserted in center comes out clean. In a small bowl, whisk confectioners sugar and 1 T. orange juice until smooth. Drizzle glaze over hot muffins, and serve warm.
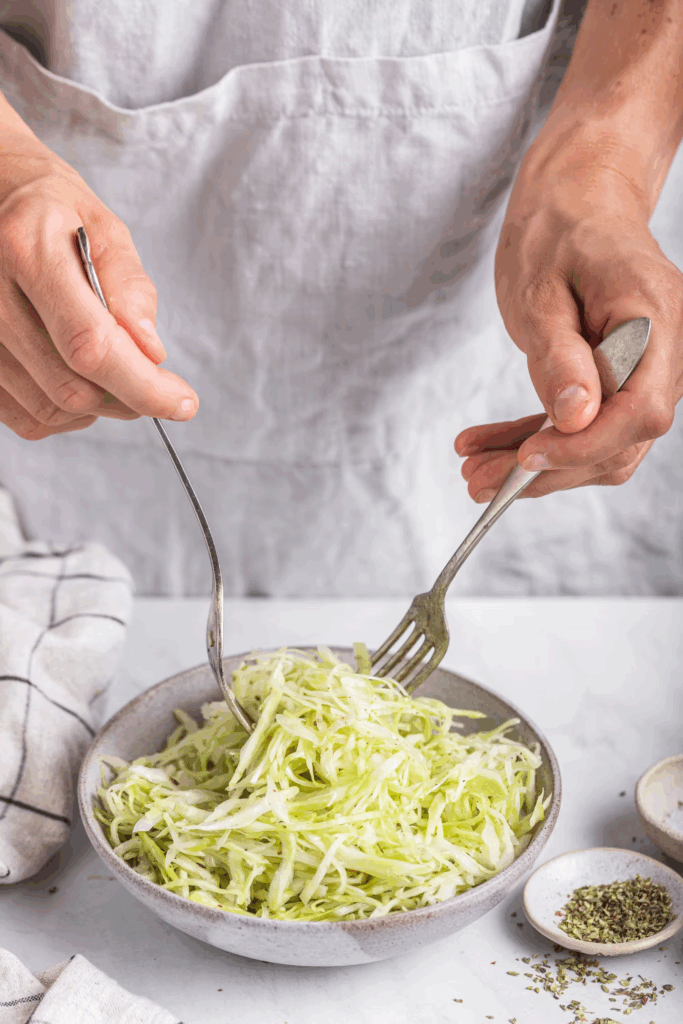 Shredded Cabbage Salad
1 lb green cabbage, finely shredded
3 T. olive oil
¼ cup white wine vinegar
1 T. dried oregano
1 tsp freshly ground black pepper
1 tsp salt
Finely shred the cabbage using a food processor, knife, mandolin, or vegetable peeler. Add the olive oil, white wine vinegar, oregano, freshly ground black pepper, and salt to a bowl large enough to comfortably fit all the shredded cabbage. Mix well. Add the shredded cabbage and massage it into the vinaigrette with clean hands. This helps to soften and flavor it. Serve the salad immediately, or set aside for at least an hour allowing the cabbage to marinate even longer in the vinaigrette.
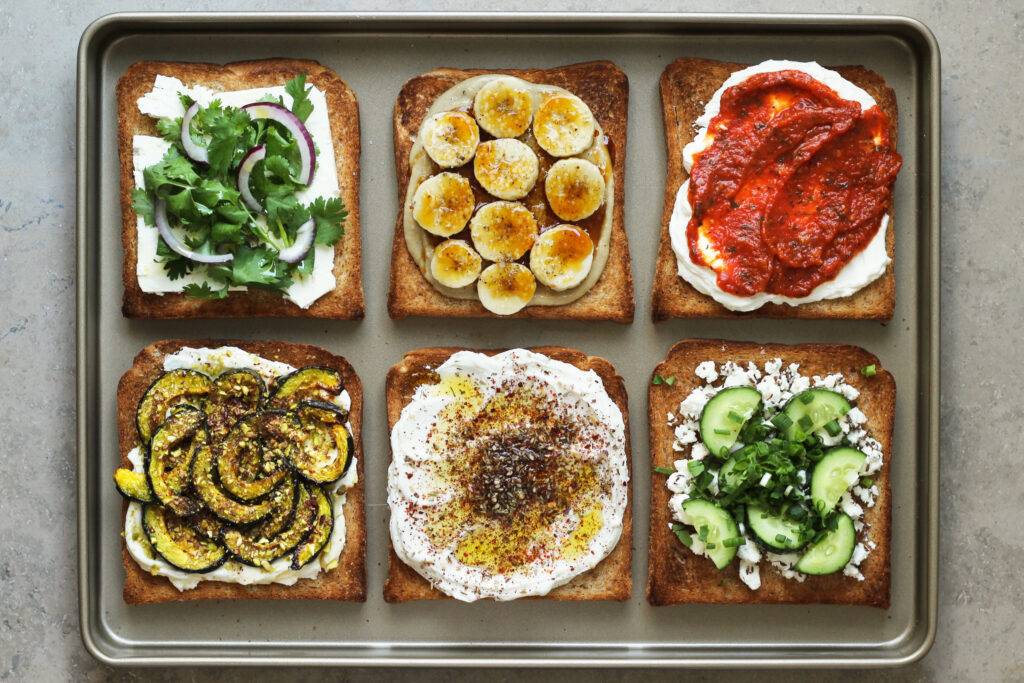
Tahini + Banana + Cardamom + Honey
Combine 1 part honey with 2 parts tahini, and spread it on toast. Top it with banana slices, sprinkle with a very, very small pinch of cardamom, and (optionally) top with a little more honey and/or coarse sugar to make it extra sweet and pretty.
Labneh + Banadurah Harrah (Lebanese Salsa)
Not much explanation necessary: smear some labneh, then smear some banadurah harrah.
Roast Squash + Pistachios + Honey + Cinnamon + Cream Cheese
If you like pumpkin pie, you’ll like this toast. If you don’t like pumpkin pie, you’ll like this toast. Slice your squash of choice (pictured here: mini kabocha) into 1/2-inch slices and roast at 400° F until soft on the inside and a little crispy on the outside. Spread cream cheese on toast, top with roast squash, drizzle with honey, and finish with finely chopped pistachios and a sprinkle of cinnamon.
Cilantro + Feta + Olive Oil + Sliced Red Onions
Thinly slice or crumble feta on toast, top with a big heap of cilantro (or parsley, mint, or basil), a few thin slices of red onion, and a drizzle of extra virgin olive oil. If there’s one thing I’ve learned from my mother and grandmother, it’s that you can eat leafy herbs in a salad-like-quantity (not much sprinkling going on around here).
Labneh + Za’Atar + Red Pepper Flakes + Olive Oil
This is another easy one. Simply spread some labneh, sprinkle liberally with za’atar and a pinch of crushed red pepper, and drizzle with extra virgin olive oil.
Crumbly Cheese + Caraway + Green Onions + Cucumber
Combine your favorite crumbly cheese with caraway seeds (or make gubta mtumarta / buried cheese), crumble on toast, and top with chopped green onions and sliced cucumber.
 Everything but the Bagel Omelet
½ tsp. unsalted butter
2 large eggs
1 tsp. bagel seasoning
1 oz. cooked bacon, chopped
2 oz. deli turkey, chopped
2 tsp. sun-dried tomatoes, chopped
2 T. cream cheese
Prepare the sun-dried tomatoes, turkey, and bacon. Divide the cream cheese into small pieces. Set aside. Melt the butter in a small skillet or omelet pan over low heat. Whisk the eggs in a small bowl with the bagel seasoning until frothy. Pour the eggs into the skillet. When the egg begins to cook add the bacon, turkey, tomatoes, and cream cheese to one side of the omelet. Fold the other side of the omelet over the filling and continue cooking to warm the filling and melt the cream cheese. Carefully flip the omelet to warm the other side if necessary. Serve with a garnish of fresh herbs such as chives, basil, or thyme if desired.
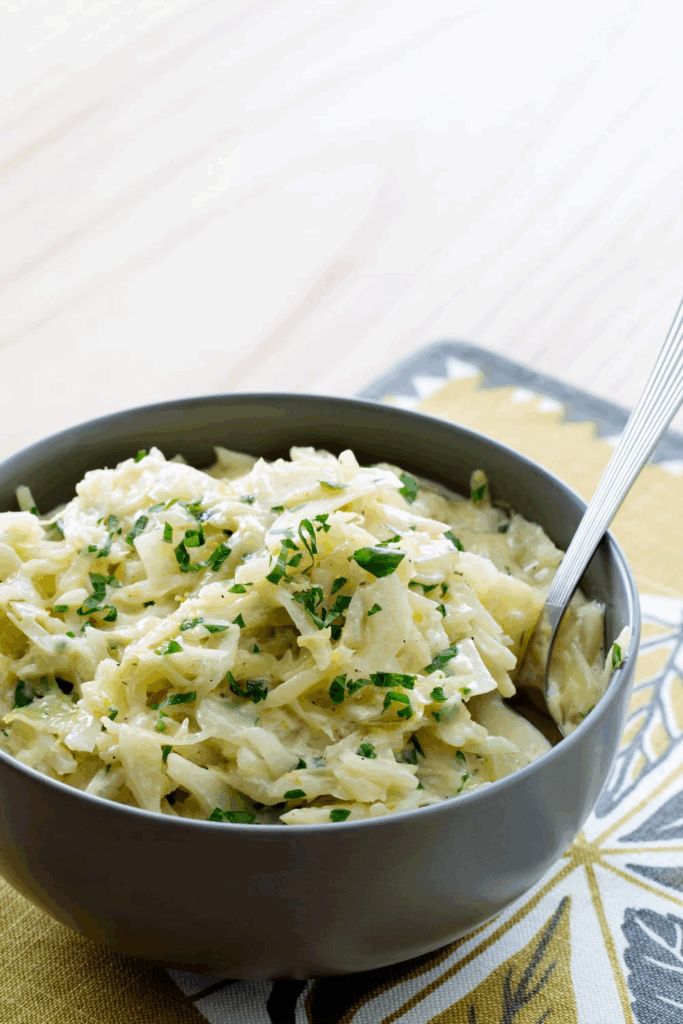 Creamed Green Cabbage
1½ lbs green cabbage
2 oz. butter
1¼ cups heavy whipping cream
salt and pepper, to taste
½ cup (¼ oz.) fresh parsley, finely chopped
1 T. lemon zest
Shred the cabbage using a food processor or, slice it thinly using a sharp knife. Melt the butter in a large, frying pan over medium-high heat. Add the cabbage and sauté for a few minutes, or until soft and golden brown. Add the heavy whipping cream and stir to combine. Reduce the heat to medium-low and simmer uncovered for 3-5 minutes, or until the cream is reduced and texture is creamy. Season with salt and pepper to taste. Add the parsley and lemon zest just before serving
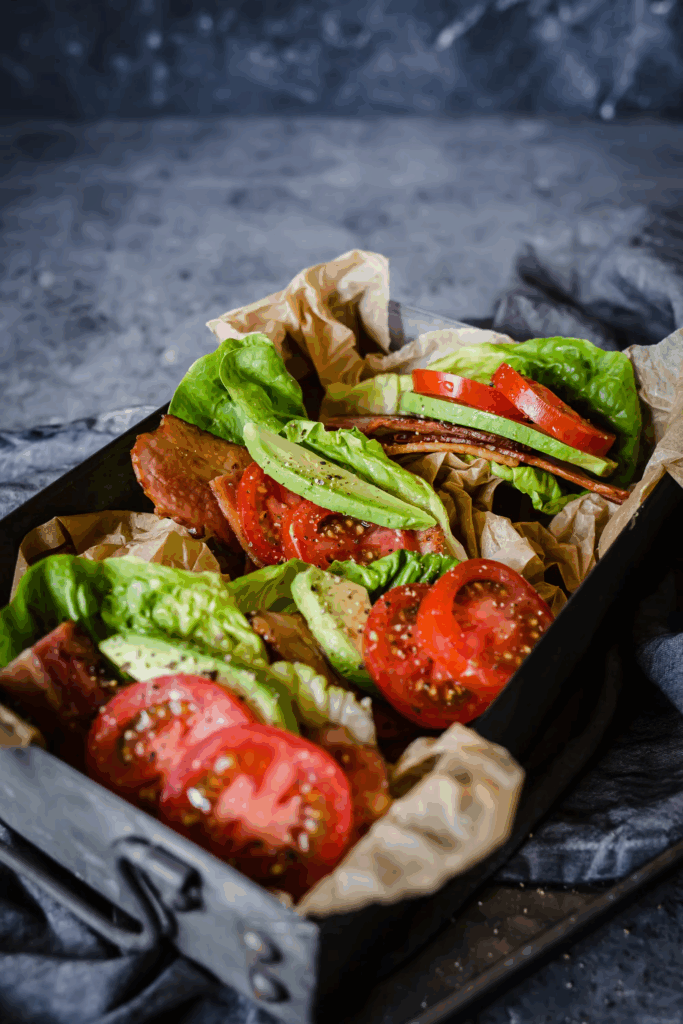 BLTA Lettuce Wraps
6 oz. bacon in slices
2 T. mayonnaise
2 oz. (1½ cups) lettuce (2 leaves per serving)
½ (3½ oz.) avocado
1 (4 oz.) tomato, in slices
salt and pepper
In a large skillet over medium heat, fry the bacon until crispy, about 5 minutes. Set aside on a paper towel–lined plate to cool. When cool enough to handle, cut each strip in half crosswise. Squeeze a line of mayonnaise onto each of the lettuce leaves. Top each leaf with a half-slice of tomato, 3 half-slices of bacon, and a slice of avocado. Season to taste with salt and pepper and enjoy!
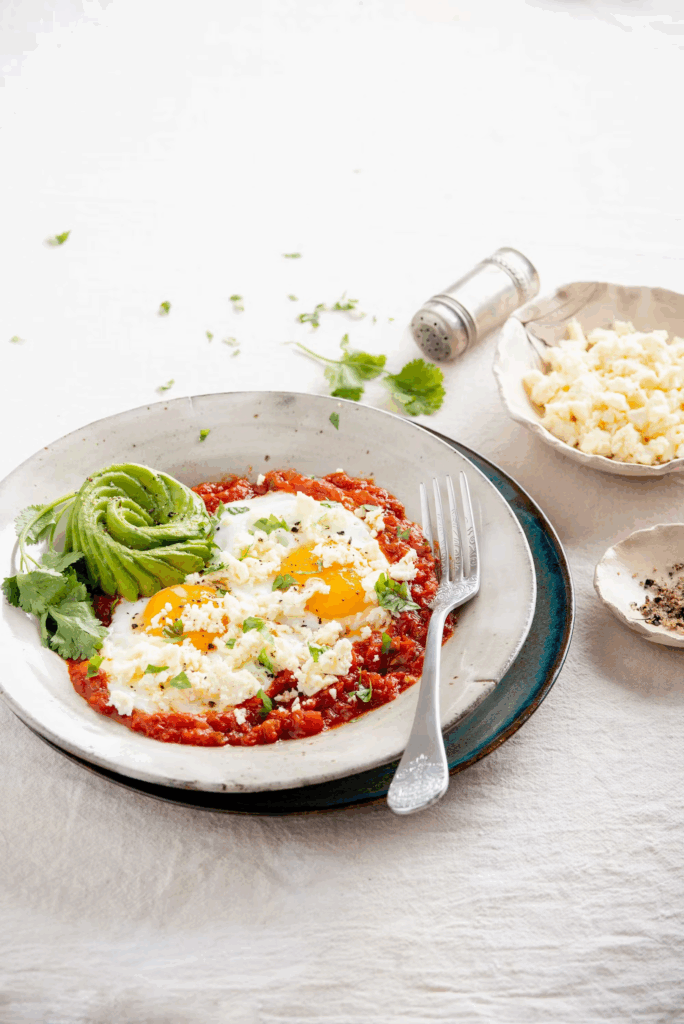 Low Carb Huevos Rancheros
½ cup olive oil
1 (4 oz.) white onion, minced
2 garlic cloves, minced
2 fresh jalapeños, minced
2 cups (1 lb) crushed tomatoes
2 tsp salt, or to taste
1 tsp pepper, or to taste
8 eggs
½ cup shredded queso fresco
4 T. fresh cilantro, chopped
1 (7 oz.) avocado, sliced
Heat one third of the oil in a saucepan over medium heat. Add the jalapeños cooking until they becomes slightly tender. Then add the onion and garlic, and cook stirring until the onions start to become translucent. Pour in the tomatoes and lower the heat. Simmer covered until the tomato is cooked through and the mixture has reduced to a thick sauce. Season with some of the salt and pepper to taste, remove it from the heat and set aside. Heat the remaining oil over medium temperature in a frying pan. Fry the eggs one at a time until the white has set and the egg has a crispy edge and runny yolk. Sprinkle the eggs with a bit of salt and pepper. Serve the eggs on the tomato sauce, and garnish with the queso fresco and cilantro. Serve with avocado on the side
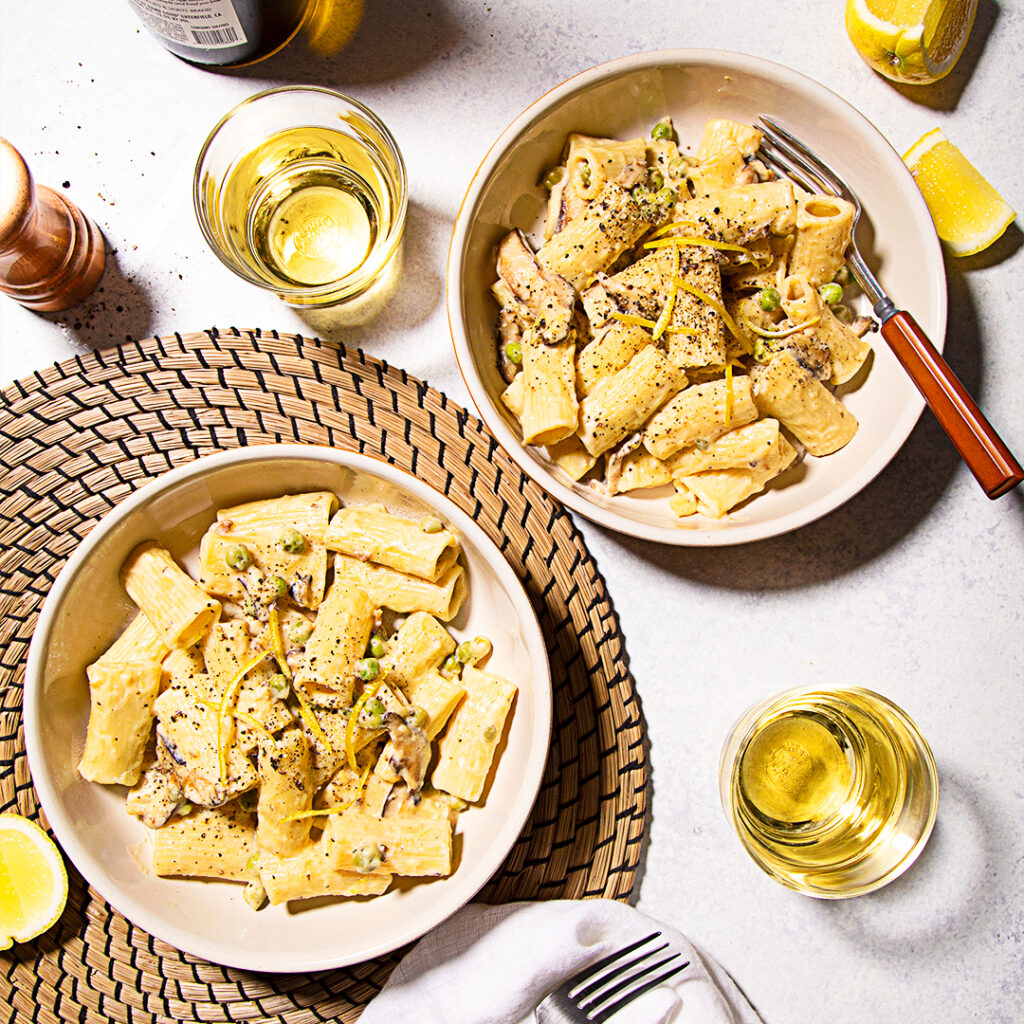 One Pot Lemony Rigatoni Alfredo with Mushrooms and Peas
1 pound rigatoni
2 T. olive oil
8 ounces shiitake mushrooms, sliced
6 ounces fresh English peas or frozen peas
Kosher salt
Freshly ground black pepper
12 ounces premade Alfredo sauce
1 lemon
In a large pot, bring heavily salted water to a boil. Cook pasta according to package instructions or until al dente. Strain pasta and set aside In the same pot, heat oil over medium-high heat. Once the oil is shimmering, add mushrooms and cook, tossing occasionally until golden browned and crispy, 4-5 minutes. Season generously with salt. Add peas and cook until bright green, 2 minutes. Turn heat to low, add alfredo sauce, and bring to a gentle simmer. Use a peeler to remove three 2-inch strips of zest from the lemon. Thinly slice the strips lengthwise and set them aside for garnish. Zest the rest of the lemon straight into the pot. Turn off heat, squeeze 1 T. of lemon juice into the sauce, and mix to combine. Taste the sauce and add more lemon juice if desired. Season with salt and pepper to taste. Divide pasta into bowls and garnish with the strips of lemon zest. Serve immediately and enjoy!
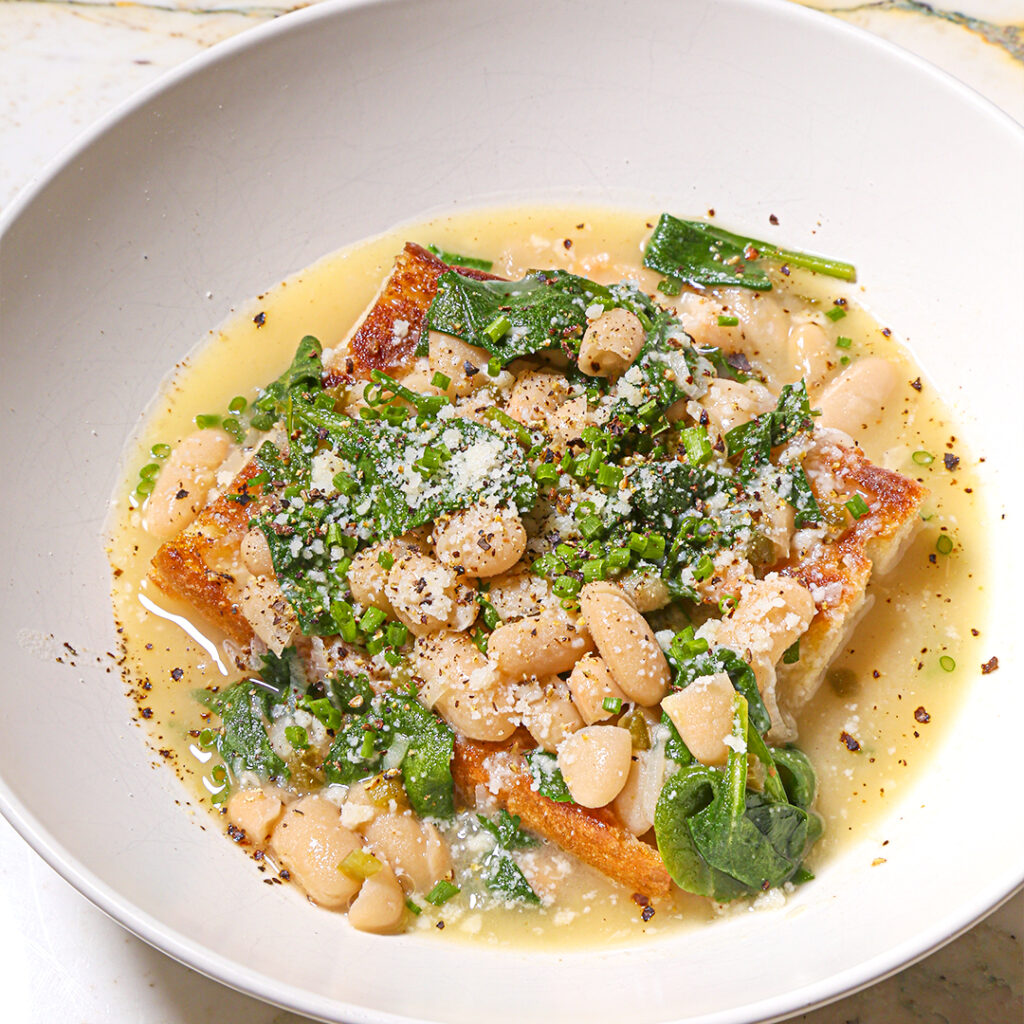 A Brothy Bean Dinner
3 T. extra-virgin olive oil, divided
1 T. unsalted butter
1 shallots, thinly sliced
2 garlic cloves, thinly sliced
1 jalapeño, seeded, finely chopped
½ tsp. kosher salt
½ tsp. cumin
¼ tsp. pepper
1/2 cup dry white wine
1 ½ cup vegetable broth
1 (14-ounce) can cannellini beans (undrained)
1 cup lightly packed fresh spinach
¼ cup parsley, leaves and tender stems, roughly chopped
1 T. lemon juice
Thickly sliced sourdough bread
½ cup Parmesan cheese
¼ cup chives, thinly sliced
In a medium saucepan, heat butter and 2 T. olive oil over medium heat. Once butter has melted. add shallots, garlic, and jalapeño, season with salt. Cook, stirring occasionally, until shallots are soft and fragrant, about 5 minutes. Add cumin and pepper and cook for another minute. Add wine and cook, stirring occasionally, until wine has mostly evaporated. Add broth, turn heat to medium-high, bring to a simmer. Stir in cannellini beans with their liquid and bring back to a simmer. Turn heat down to medium-low and add in spinach and parsley until wilted. Take beans off heat and stir in lemon juice. Season with more salt and pepper to taste. In another saucepan, heat remaining 1 T. olive oil over medium-high heat. Fry bread in olive oil until both sides are golden brown and toasty. To serve, place bread in a shallow bowl and spoon saucy beans over top. Sprinkle Parmesan and chives to finish.
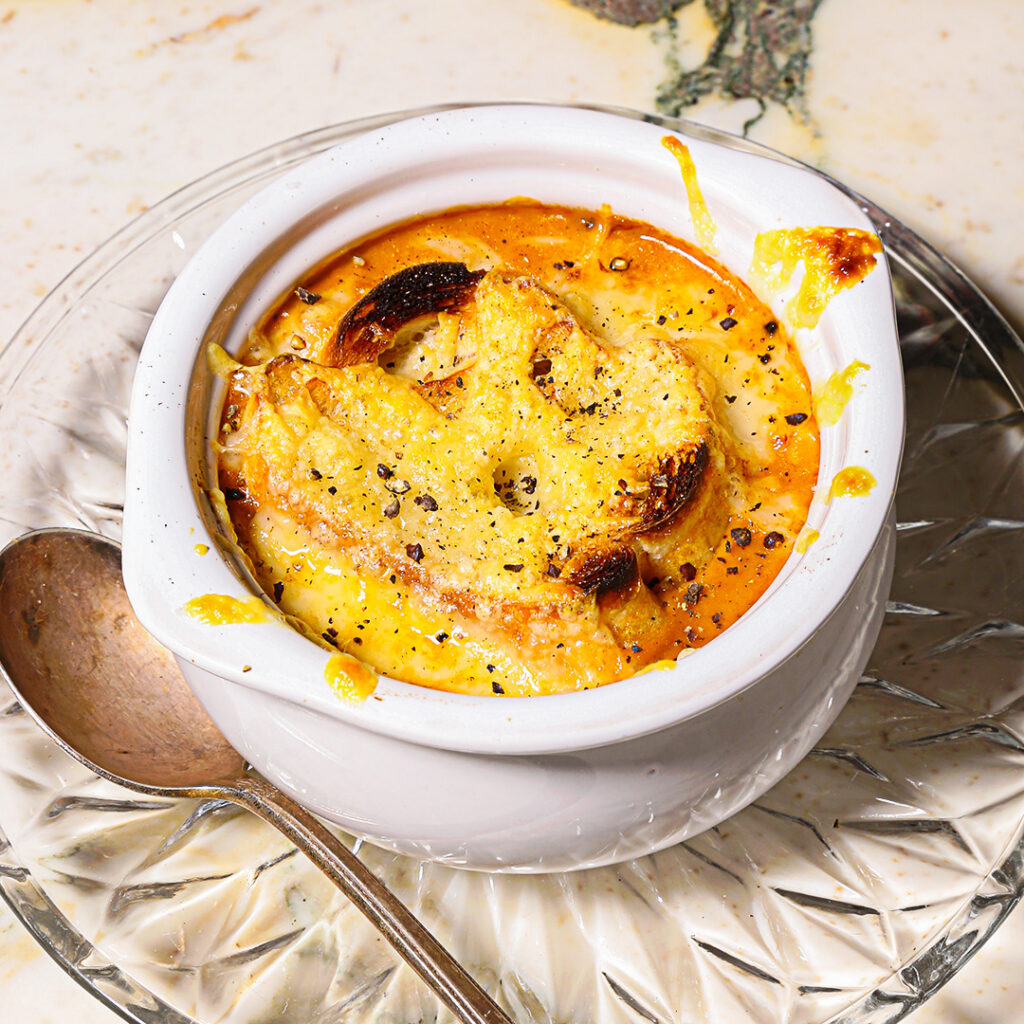 Roasted French Onion Tomato Soup
3½ pounds tomatoes, halved
4 T. olive oil, divided
2 large onion, quartered
1 head garlic, trimmed ½ inch from the top
3 sprigs thyme
1 tsp. kosher salt
½ tsp. pepper
½ tsp. smoked paprika
¼ tsp. red pepper flakes
1–1 ½ cups vegetable broth
½ cup basil leaves
½ cup heavy cream
6 slices baguette
1 cup shredded sharp cheddar or gruyere
Heat oven to 450°F. Add tomatoes—we used Roma and Campari tomatoes, but you can really use anything!—onions, head of garlic, and thyme to a baking dish. Drizzle with 3 T. olive oil and season with salt, pepper, paprika, and red pepper flakes. Roast until tomatoes have softened and are golden brown on top, 35 to 45 minutes. Remove thyme and discard. Squeeze garlic cloves from the bulb into a blender and discard skins. Transfer remaining tomato mixture to the same blender and add in basil. Blitz until smooth, add broth, and blitz again. Add remaining ½ cup broth if the soup’s too thick. Transfer soup to a large pot. Bring soup to a simmer, stir in heavy cream, and season with salt and pepper to taste. Preheat broiler, place bowls on a baking sheet, and divide soup among bowls. Layer a slice of bread on top of each bowl of soup, evenly sprinkling cheese on top of each. Broil until cheese is bubbly and brown, 3 to 4 minutes.
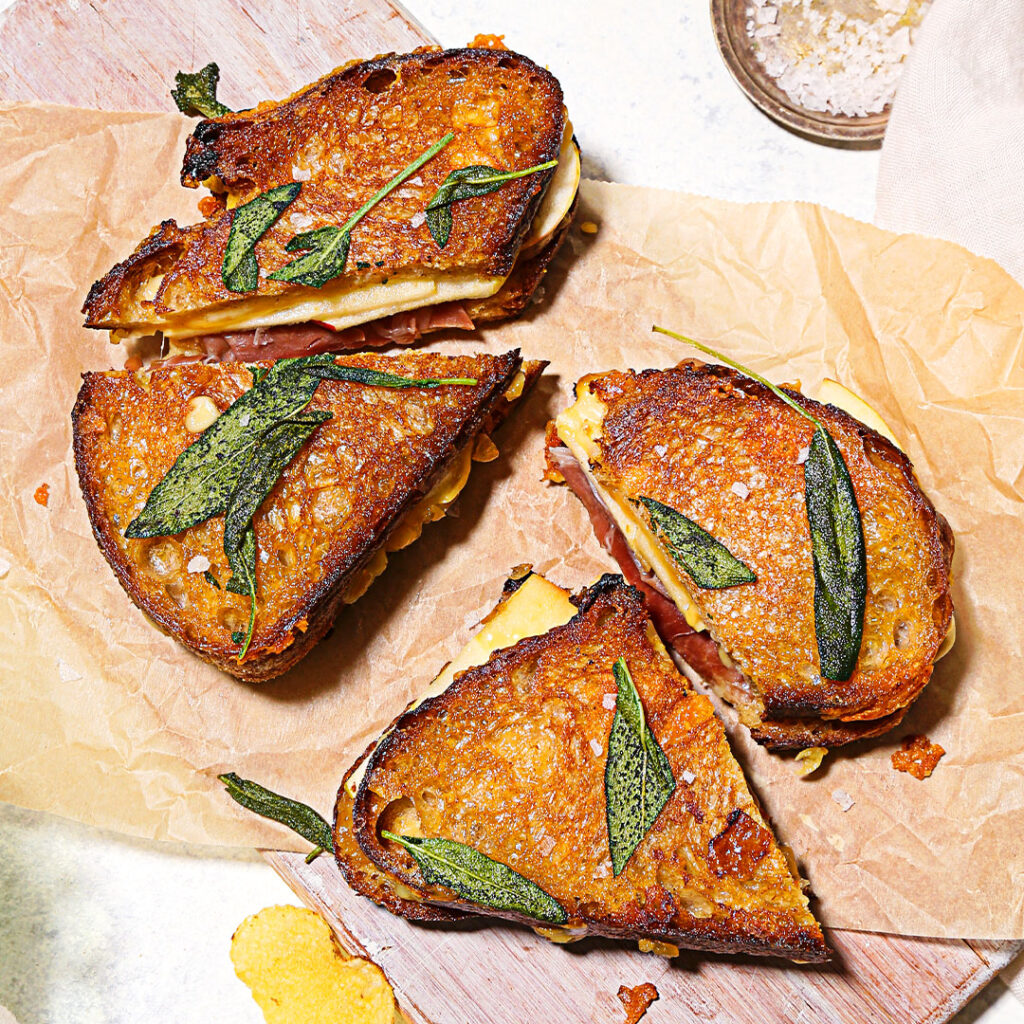 Caramelized Onion and Apple Grilled Cheese
4 slices sourdough or country style bread
Onion jam
4 slices prosciutto
½ apple (or pear), thinly sliced
¾ cup white cheddar, coarsely grated
½ cup gouda, coarsely grated
2 T. butter
2 T. olive oil
1½ T. fresh sage, roughly chopped
Start with a slice of bread and top with a generous smear of onion jam, 2 slices of prosciutto, a few slices of apple (or pear), and half of the cheddar and gouda cheeses. Place another slice of bread on top and press down firmly. Heat 1 T. of olive oil in a pan over medium heat. Carefully transfer assembled grilled cheese onto the pan and cook until golden and cheese has melted, about 4-5 minutes. Add ½ T. of butter to the pan with a pinch of sage leaves. Let butter melt and swirl the pan so the grilled cheese can absorb the sage butter. Flip the sandwich over, cook until bread is golden, another 4-5 minutes, and repeat melting ½ T. of butter in the pan with a pinch of sage leaves. Swirl the second side to absorb sage butter and remove grilled cheese from the pan. Repeat with remaining ingredients for a second grilled cheese, then serve immediately.
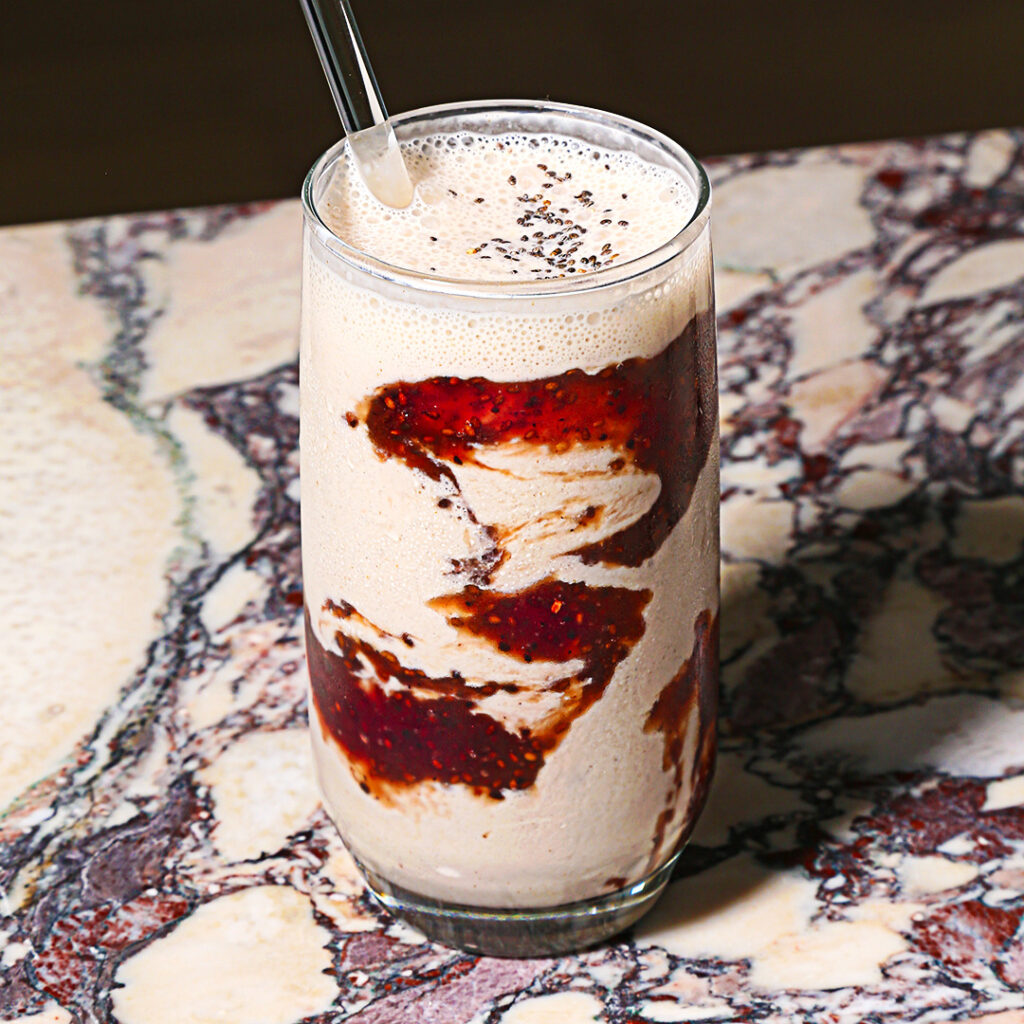 Tahini-Cherry Swirl Smoothie
1½ cups ice
½ cup plain yogurt
½ cup milk of choice
¼ cup tahini
2 T. cherry Oswald Co. Chia Smash, plus more for swirling onto glasses
2 tsp. maple syrup
¼ tsp. vanilla extract
Pinch of kosher salt
Add ice, yogurt, milk, tahini, jam, maple syrup, vanilla extract, and salt to a blender and blend until smooth and creamy. Using a spoon, swirl small dollops of chia smash jam around the inside of each glass. Divide smoothie between the glasses to reveal the tie-dye effect and enjoy immediately.
 Bobby Flay’s Colcannon with Cabbage, Scallions, and Bacon Butter
2 pounds Yukon Gold potatoes, peeled and cut into 1-inch cubes
Kosher salt and freshly ground black pepper
1 cup whole milk
6 bacon slices, cut into thirds
8 T. (1 stick) unsalted butter, softened at room temperature, divided
½ head Napa cabbage, thinly sliced
2 T. apple cider vinegar
1½ T. whole-grain mustard
2 T. honey
⅓ cup scallions, thinly sliced, divided
Place the potatoes in a large saucepan, cover with cold water by 2 inches, and add a generous amount of salt. Bring to a boil, reduce to a simmer, and cook the potatoes until they are fork-tender, about 20 minutes. While potatoes are cooking, add milk to a small saucepan and bring to a gentle simmer over low heat, cover and keep warm. For the bacon, place a large sauté pan over medium heat. Add the bacon to the pan and cook until crisp, flipping them occasionally to ensure even cooking. Transfer the bacon to a paper towel-lined plate, reserve the bacon fat, and set aside. For the cabbage, place a large sauté pan over medium heat. Add 2 T. of butter to the pan. Once the butter begins to foam, add the cabbage, season with salt and pepper, and cook for 3 minutes. Add the apple cider vinegar, mustard, and honey. Stir to combine and cook until wilted, about 5 minutes. Fold in 2 T. of scallions and set aside. Once the potatoes are completely cooked through and very soft, drain them well. Return the potatoes to the hot pot to help them dry out further. (Alternatively, you can dry them out in the oven.) Using a potato masher, crush the potatoes until they are just mashed and fluffy. Add 4 T. of butter to the crushed potatoes and fold to combine. Slowly add the warm milk to the crushed potatoes, a little at a time (you may not need all of the milk), folding the mixture until smooth. Season with salt and pepper and then cover to keep warm. For the bacon butter, in a small bowl add the remaining 2 T. of butter and 2 T. of reserved bacon fat. Mix to combine and set aside. To assemble the colcannon, add the cabbage mixture to the mashed potatoes and fold to combine. Transfer the potatoes to a serving bowl, top with the bacon butter, the remaining scallions, and crumbles of the bacon.
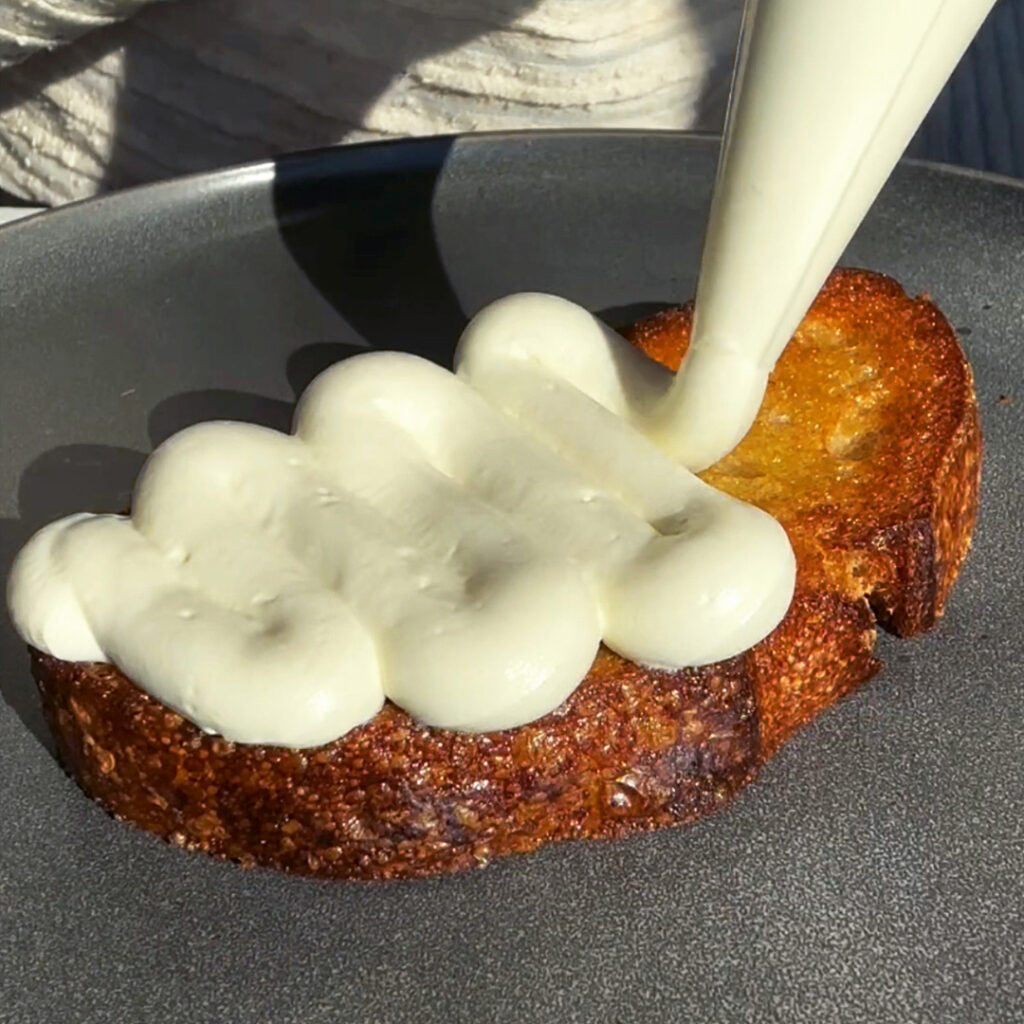 Whipped Ricotta Toast with Jam
1 16-ounce container whole-milk ricotta
½ tsp. kosher salt
3½ T. olive oil, divided, plus more for drizzling
2 T. jam
2 slices sourdough
Flaky sea salt
Add ricotta and salt to a food processor and blitz until smooth. With the motor running, slowly stream in 2½ T. olive oil until fully incorporated and ricotta is creamy, about 2 minutes. Transfer whipped ricotta to a piping bag, set aside. Add jam to a separate piping bag, set aside. Heat remaining 1 T. of oil in a large pan over medium heat. Fry up both pieces of sourdough until golden and toasted on both sides. Cut ½-inch off the tip of the piping bag with whipped ricotta and pip a layer over the toasted sourdough. Cut ¼-inch off the tip of the piping bag with jam and pip lines of jam over the whipped ricotta. Repeat with remaining toast and serve immediately.
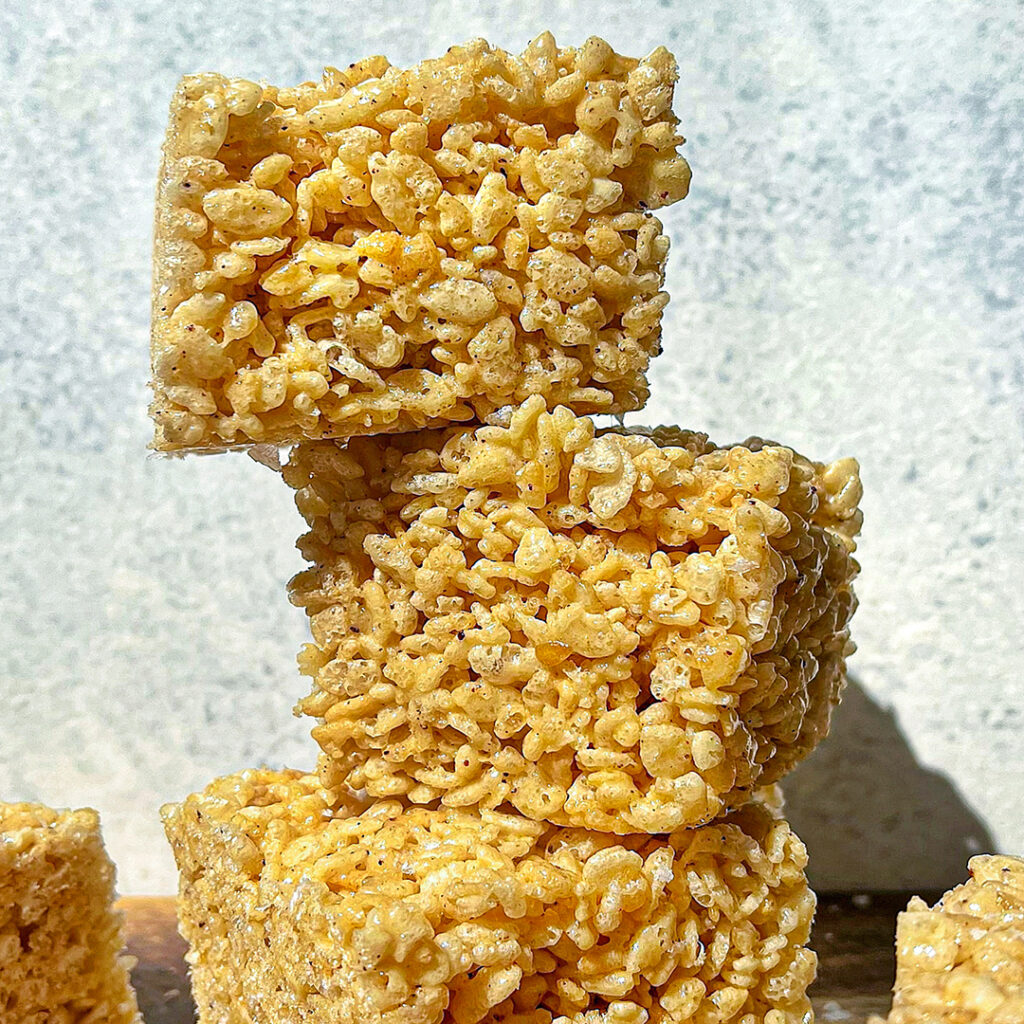 Salted Brown Butter Rice Cereal Treats
1½ sticks (12 T.) salted butter
1 12-ounce bag marshmallows
1 12-ounce box rice cereal
1 tsp. vanilla extract
Flaky sea salt
In a large pot, brown butter over medium heat until butter is golden and smells nutty, about 5-7 minutes. Add marshmallows to the browned butter and mix with a silicone spatula until melted. Remove pot from heat and mix in vanilla extract. Add rice cereal slowly and mix to combine. Transfer cereal mixture to a parchment-lined baking dish and press down to form a 2-inch tall rectangle. (Tip: Use a small sheet of parchment to press down cereal mixture to keep your hands mess free). Sprinkle flaky sea salt on top. Let rice cereal treats completely cool, then cut into squares. Store in an airtight container.
 Blackberry-Lemon Icebox Cake
2½ cups blackberries, divided
¾ cup granulated sugar
2 tsp. lemon zest
3 T. lemon juice
8 ounces mascarpone
½ cup powdered sugar
Zest of 1 lemon
¼ cup lemon juice
2 cups heavy whipping cream
16–18 graham crackers
For the jam: Add 2 cups of blackberries, sugar, and lemon zest to a medium saucepan over medium heat. Cook, stirring occasionally, until the blackberries begin to burst and the sugar melts. Use a large spoon or fork to press down on the berries to help release their juices. Turn the heat up to medium-high and cook for another 7-10 minutes until jam thickens and reduces to half the volume. Remove from heat, stir in lemon juice, then allow to cool completely. Prepare a 9”x5” loaf pan with plastic wrap, leaving at least a 5 inches of overhang on each side. With an electric hand or standing mixer, whip mascarpone, lemon juice, powdered sugar, and lemon zest on medium speed until light and fluffy, about 5 minutes. With the mixer running on low, stream in the cream and beat until medium-stiff peaks form. Arrange a single layer of graham crackers along the bottom of the pan, cutting the crackers to fit as needed. Add a ⅕ of the mascarpone mixture on top and smooth out with a spatula. Dollop a ⅓ of the jam on top of the mascarpone and evenly distribute with a clean spatula. Add another ⅕ of the mascarpone over the jam and smooth with the same spatula as the first round. Add another layer of graham crackers over top and repeat layering the mascarpone mixture and jam one more time. Finish by covering the last layer of mascarpone with a layer of graham crackers. Wrap the icebox cake with the plastic overhang and freeze for at least 8 hours or overnight. Transfer remaining jam and mascarpone mixture into airtight containers and refrigerate. Remove the jam and mascarpone mixtures from the refrigerator. Slice the remaining ½ cup of blackberries in half and mix them into the jam. Remove the icebox cake from the freezer and unwrap the top. Transfer the cake onto a serving plate. Remove the loaf tin and the remaining plastic wrap. With a spatula, evenly “frost” the entire cake with the remaining mascarpone mixture. Transfer the cake back to the freezer for 15-20 minutes. Top cake with remaining jam and slice to serve.
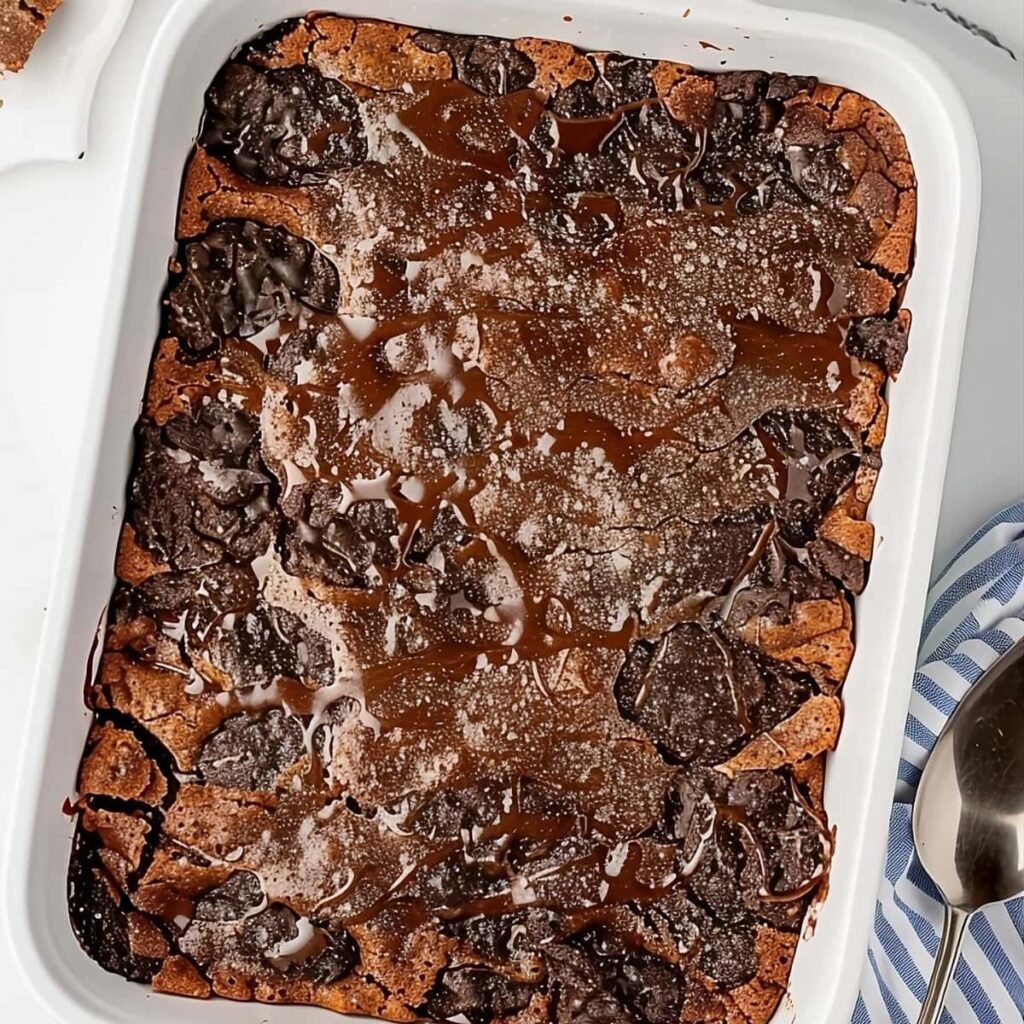 Oreo Dump Cake
24 Oreo cookies, divided
1 can sweetened condensed milk
1 tub whipped topping (Cool Whip), thawed
1 box chocolate fudge cake mix
1 1/2 sticks (12 T.) salted butter, sliced
Preheat the oven to 350°F. Grease a 9×13-inch baking pan with non-stick cooking spray. Arrange 18-20 Oreo cookies in a single layer on the bottom of the prepared pan, covering as much surface area as possible. Pour the sweetened condensed milk evenly over the layer of Oreo cookies. Spread the thawed whipped topping over the sweetened condensed milk in an even layer. Sprinkle the dry chocolate fudge cake mix evenly over the whipped topping layer. Use a fork to break up any large lumps in the cake mix. Arrange the butter slices in a single layer on top of the cake mix, covering as much surface area as possible. Roughly chop the remaining 4-6 Oreo cookies and sprinkle them on top of the butter layer. Bake in the preheated oven for 35-40 minutes, until the top is set and the butter has been absorbed into the cake mix. Remove from the oven and let cool for 5-10 minutes. Serve warm, scooping out portions with a large spoon. If desired, top individual servings with a scoop of vanilla ice cream and a drizzle of chocolate syrup. Enjoy!
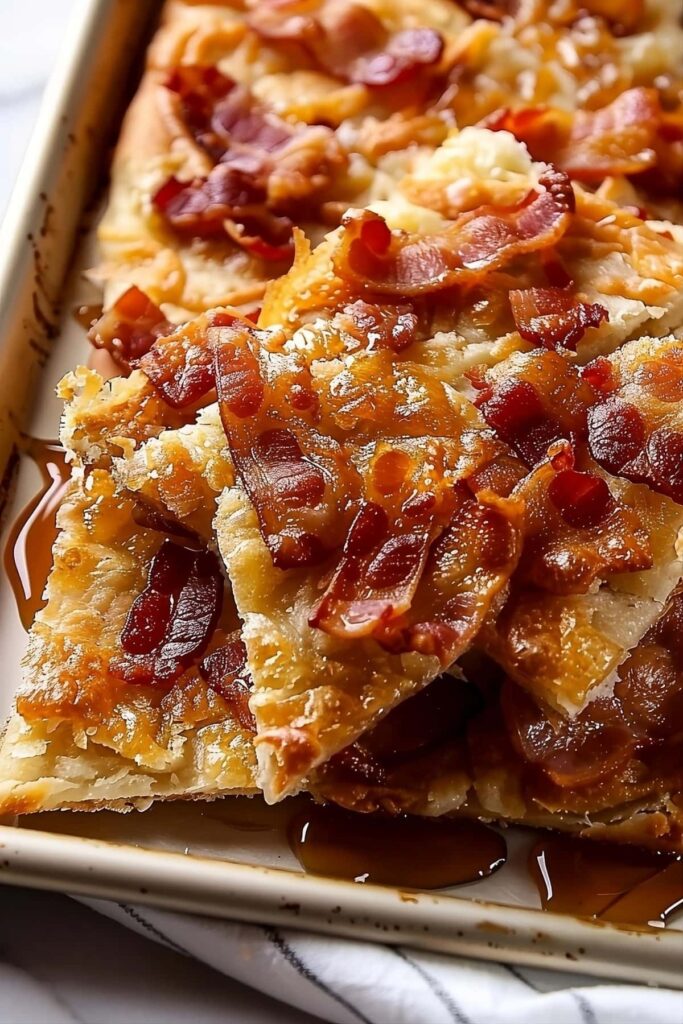 Maple Bacon Crack
8 -10 slices bacon, chopped
1 (8-ounce) package crescent rolls (sheet style preferred)
1/4 cup pure maple syrup, divided
3/4 cup light brown sugar, packed
1/3 cup chopped pecan pieces (optional)
Preheat the oven to 375°F (190°C). Line a large-rimmed baking sheet with parchment paper and spray with cooking spray. Cook the chopped bacon until soft but not crunchy, about 10 minutes at 400°F (200°C). Drain on a paper towel-lined plate and set aside. Roll out the crescent roll dough onto the prepared baking sheet. Pinch the seams together to make a single sheet. Use a rolling pin to fill the pan as much as possible. Prick the dough all over with a fork. Brush half of the maple syrup evenly over the dough using a pastry brush. Sprinkle the brown sugar evenly on top, doing your best to cover the entire surface. Distribute the cooked bacon pieces evenly over the brown sugar. If using, sprinkle the chopped pecans on top. Drizzle with the remaining maple syrup. Bake for 22-25 minutes, until golden brown. Allow to cool completely before cutting into small pieces and serving.
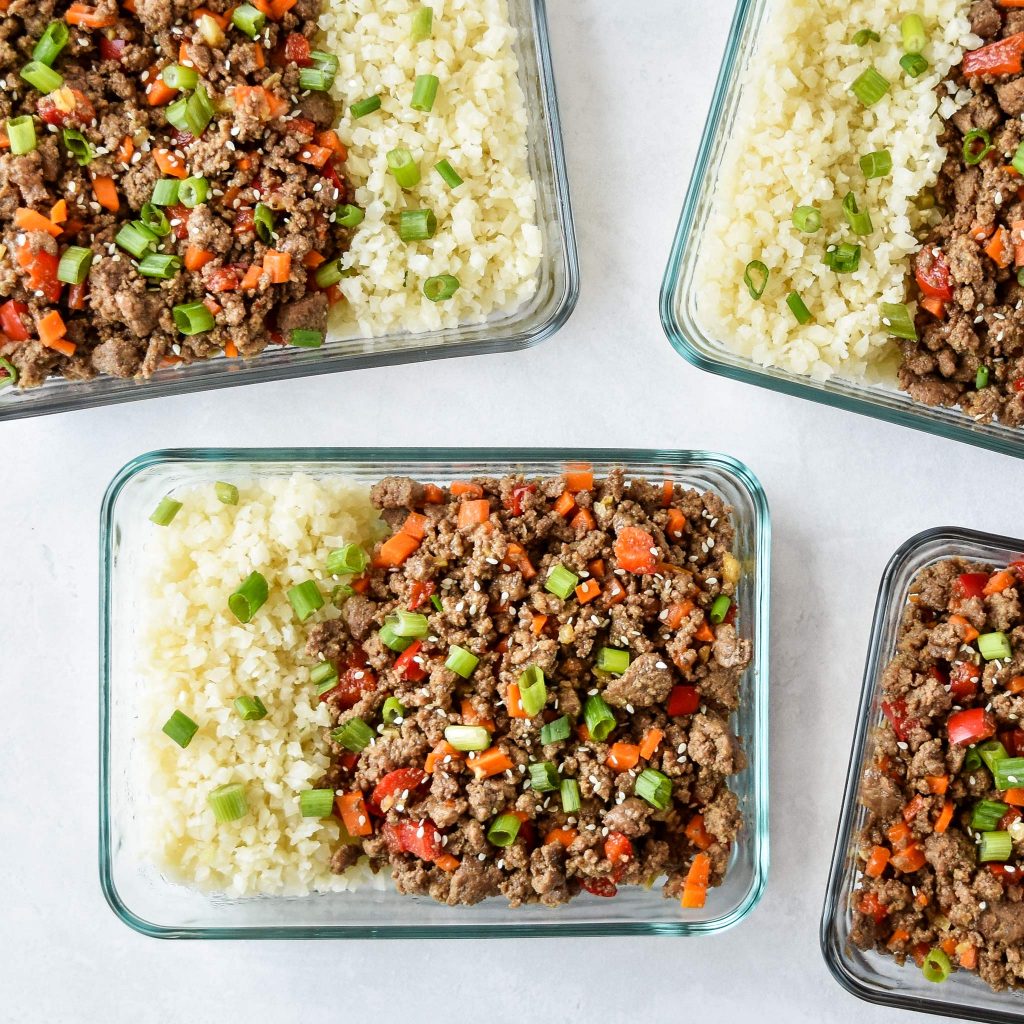 Meal Prep Ginger Ground Beef Bowls
1/2 cup coconut aminos
1 T. toasted sesame oil
1 tsp. onion powder
1 tsp. crushed red pepper flakes
1 tsp. fish sauce
2 pounds ground beef
1 tsp. salt
3 cloves garlic, minced
2 T. fresh ginger, minced (about a 1.5 inch long root)
1 red bell pepper, finely diced
2 medium carrots, finely diced
4–5 cups frozen riced cauliflower
garnish with green onions & sesame seeds
Make the sauce: In a bowl or jar with a lid, combine coconut aminos, sesame oil, onion powder, red pepper flakes and fish sauce. Shake or stir until combined, then set aside. Cook the stir fry: Place a large deep non-stick skillet or Dutch oven over medium heat. When hot, add ground beef and salt. Use a wooden spoon or spatula to break the meat into small pieces as it cooks. Cook the meat for about 6 minutes or until cooked through, stirring occasionally. Reduce heat to medium-low and make a small well in the center of the pan. Add garlic and ginger, then sauté until fragrant, about 30 seconds. Finally, add the red bell pepper, carrots, and sauce to the pan. Cook for 6-8 minutes, stirring occasionally, until the vegetables have softened. Meal prep it: Add 1 cup frozen cauliflower rice to each meal prep container. Portion the ginger ground beef evenly between 4 meal prep containers. Garnish with green onions and sesame seeds if you wish. Store in an airtight container for up to four days in the refrigerator, or up to 3 months in the freezer.