Browsed by
Category: Condiments & Extras

20 Uses for Kool-Aid

20 Uses for Kool-Aid


1. Make Easy Flavored Kool-Aid Frosting

Stir a package of Kool-Aid into a can of vanilla frosting.


2. Frosting for a Jello Cake

Fold in a pack of Kool-Aid into a container of thawed whipped topping. If the frosting tastes a little too sour, add in a little sweetener to taste.


3. Make Kool-Aid Lip Gloss

To make a fruity lip gloss put a small amount of petroleum jelly into a microwave-safe bowl. Stir some Kool-Aid in, enough to make it the color you desire. Add a little sugar, then, place the bowl in a microwave oven for about five or six seconds, just enough to soften it.


4. Make Sand Art With Kool-Aid

Draw pictures on paper, spread a thin layer of Elmer’s glue over one part of the picture. It’s better to start at the top of the picture and work down. Sprinkle Kool-Aid over the glue and press it down gently. Shake off the excess powder off, and go on to the next color.


5. Temporarily Dye Your Hair With Kool-Aid

In a glass bowl mix a packet of Kool-Aid with a teaspoon of corn starch and just enough water to make a paste. Apply the paste to clean, dry hair and let set for five minutes, rinse the paste out.


6. Make Spooky Party Decorations

Just place some dry ice- don’t touch it with your hands!- into a glass, and pour a packet of any flavor Kool-Aid into it. Kids will watch with fascination as the dry ice and Kool-Aid bubbles and mists.


7. Make Kool-Aid Clay for the Kids

Mix together 1 cup of flour, a 1/4 cup of salt, 2 tablespoons cream of tartar and a pack of Kool-Aid in a pan. Stir in 1 cup of water and 1 tablespoon of vegetable oil. Heat over medium heat stirring until the mixture thickens, remove from heat and let it cool. Knead the Kool-Aid clay until smooth. Store in airtight container in the refrigerator until use.


8. Remove Chlorine From Your Hair

Use Lemonade flavored Kool-Aid. Pour a little Kool-Aid in your hand, then add shampoo and lather up. Let the Kool-Aid/shampoo set on your hair for fifteen minutes before you rinse it and then shampoo out well. (and we drink this??)


9. Kool-Aid Water Colors

Pour Kool-Aid into ice cube tray, one compartment per color. Stir 1 tablespoon of water into each compartment; stir until the powders are completely dissolved.


10. Tie Dye with Kool-Aid

You can dye any cotton item such as tee shirts, socks, bed sheets, towels, as long as it is cotton. The article you want to tie dye must be clean and dry. Pour each color package of Kool-Aid into an individual glass bowl. Stir an ¼ cup of white vinegar into each bowl; make sure the powders dissolve completely. Gather the fabric up in several places and secure with several rubber bands. Dip each bunch into a bowl of Kool-Aid. Leave the rubber bands in place and set aside to dry. Once dry, remove the rubber bands and spread it out so it can completely dry. Put it in the clothes dryer by itself and dry on high for 15 minutes to set the colors in.


11. Use Kool-Aid to Check for Toilet Tank Leaks (this is funny to me)

Lift the lid off the toilet tank and pour Kool-Aid into the tank. The darker colors work the best. Don’t flush the toilet! Just watch the toilet bowl, if you see the Kool-Aid float through from the tank, then you have a leak. The test can take fro 10 to 30 minutes, depending on the size of the leak.


12. Removing Rust Stains

Remove rust stains on your driveway by mixing unsweetened lemon Kool-Aid with just a little water and scrub. (see #8)


13. Cleaning the Inside of your Dishwasher

Dump a packet of unsweetened lemon Kool-Aid into the soap dispenser, run the wash cycle. Removes stains and hard water deposits.


14. Dyes for Easter Eggs

Mix a packet of Kool-Aid in a cup with 2 tablespoons of vinegar and ½ cup of water


15. Kool-Aid Stands

Send the kids out to sell and play–they can sugar up other people’s kids.:)


16. Decorating Cookies

Use in place of colored sugars, just sprinkle a little across the top


17. Science Project with Plants

Place a stalk of celery in water with Kool-Aid in it to demonstrate how the Kool-Aid is drawn up into the stalk with the water.


18. Coloring Flowers

Place carnations, daisies or any white flower in water with Kool-Aid in it and watch the flowers turn colors.


19. Demonstrate a Non-Newtonian Substance

Mix equal parts cornstarch and water that has been colored with a pack of Kool-aid. Mix with fingers and observe that this substance fluctuates between solid and liquid.


20. Shower Prank (look out, Gourmet Dad!)

This is a simple prank. All you have to do remove the shower head from your shower and pour in the kool-aid packet into the shower head. NOTE: Make sure you are not the next one to take a shower.:)


As a side note:

A dab of toothpaste on a damp paper towel cleans up stubborn Kool-Aid stains off both skin and countertops.


Yield:

Calories:

Fat:

Fiber:
Edible Cookie Paint Color

Edible Cookie Paint Color

(for painting sugar cookies)

2 Large Egg Yolks

Liquid Food Coloring

Beat yolks and divide into several small containers (5).  Add food coloring while mixing, drop by drop until desired color is achieved.  Paint cookies BEFORE baking.


Yield:

Calories:

Fat:

Fiber:

Pickled Mushrooms a’la Grecque

Pickled Mushrooms a’la Grecque

1 lb. fresh medium Mushrooms

1/8 tsp. Thyme

2 or 3 whole Black Peppercorns

1/8 tsp. Fennel seed

1 piece (1 inch) Bay Leaf

4 Cloves of Garlic, crushed

1 small Onion, chopped fine

3 T. Red Wine Vinegar

2 T. Olive Oil

1/4 tsp. Lemon Peel

3 tsp. Seasoned Salt

1/2 tsp. parsley


Wash mushrooms in cold water; trim off tip of the stalk. Crush Thyme, Pepper, and the Fennel Seed and combine with mushrooms in saucepan. Add Bay leaf, Garlic, Onion, Vinegar, Olive Oil, Lemon peel, Seasoned Salt, and Parsley. Cook over low heat, turning mushrooms frequently, until the mushrooms are tender, about 15 minutes. Pour mushrooms and marinate into glass jar or refrigerator dish. Chill for several hours or, preferably over night. Serving day: Drain and serve cold with party picks.


Yield:

Calories:

Fat:

Fiber:


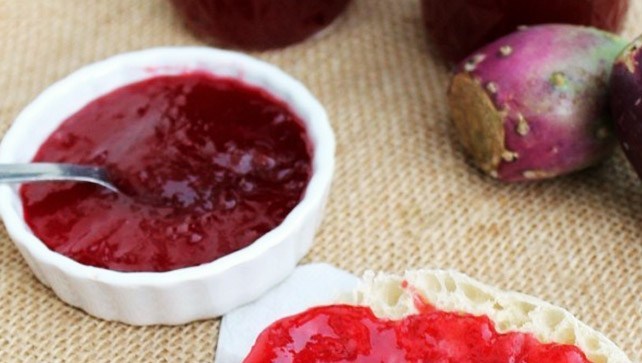
Prickly Pear Preserves (Yucatán)

Prickly Pear Preserves (Yucatán)

Prickly Pear Preserves (Yucatán)

In order to preserve the beautiful dark-purple color of the prickly pears, be sure to cook the preserves over medium heat so they simmer, not boil. Keep an eye on them toward the end of cooking; overcooking can also turn them brown.


2 prickly pears

One 1/2-inch piece ginger, peeled and cut into 1/4-inch slices

1 tablespoon white vinegar

1 tablespoon water

1 tablespoon sugar

1/4 teaspoon kosher salt


Remove the skin from the prickly pears. Put the flesh in a bowl and break it apart with a spoon until liquefied. Combine the prickly pear, ginger, vinegar, water, sugar, and salt in a medium-size saucepan, bring to a simmer over medium heat and simmer until the liquid is reduced by half and syrupy, 20 to 25 minutes. Let cool, then strain out the seeds and ginger.

Zesty Seafood Spread

Zesty Seafood Spread

1 package (8 ounces) reduced fat cream cheese, softened

1/4 C. Heinz Chili Sauce

1 tsp. lemon juice
1/4 to 1/2 tsp. hot pepper sauce
1 C. (about 1/2 pound) chopped cooked

seafood (shrimp, crab, sea legs)

4 sliced green onions, including some tops

1/4 C. finely chopped red bell pepper

1/4 C. finely chopped celery

Crackers, bagel chips, pita crisps


Thoroughly combine cream cheese, chili sauce, lemon juice and hot pepper sauce; stir in seafood, onions, bell pepper and celery. Serve with crackers, bagel chips or pita crisps.

Tomato, Cucumber, and Red Pepper Relish

Tomato, Cucumber, and Red Pepper Relish

1 red pepper, seeded and finely diced

1 English cucumber, seeded and finely diced

2 large tomatoes, seeded and finely diced

2 T. olive oil

2 T. balsamic vinegar

1 tsp. dried oregano

Salt and freshly ground black pepper


In a large bowl toss together the red pepper, cucumber, and tomato. Add the oil, vinegar, oregano, salt and pepper, and toss to combine.


Yield:  4 servings

Calories:  101

Fat: 7g

Fiber: 3g

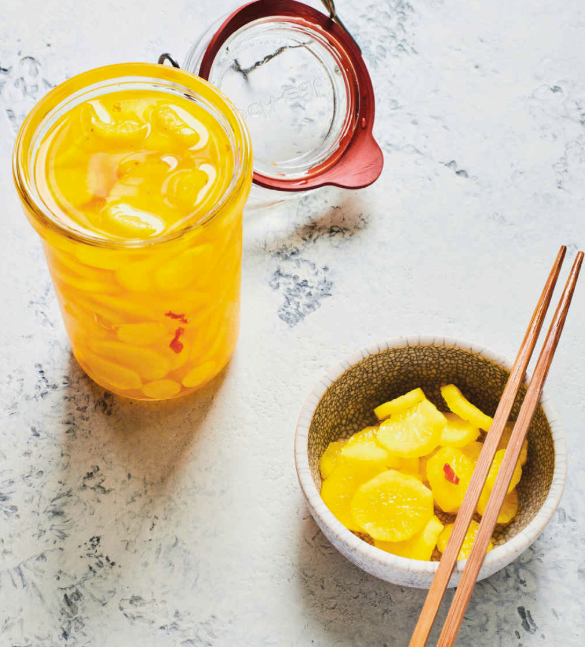
Takuan (Pickled Daikon Radish)

Takuan (Pickled Daikon Radish)
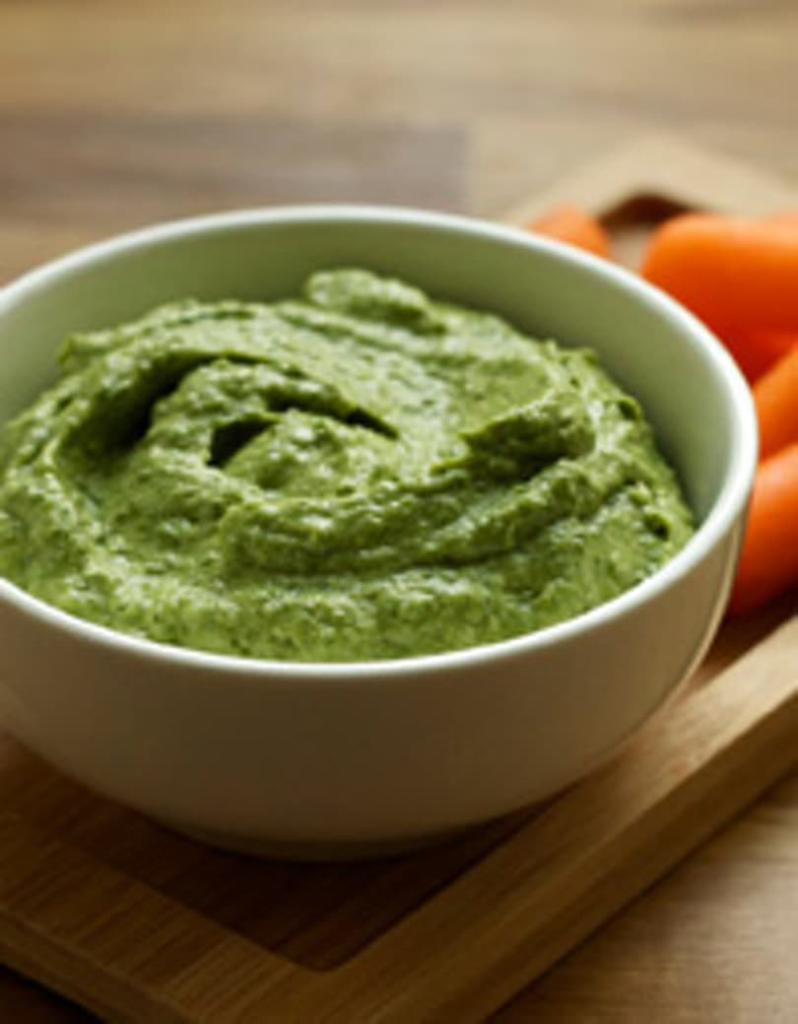
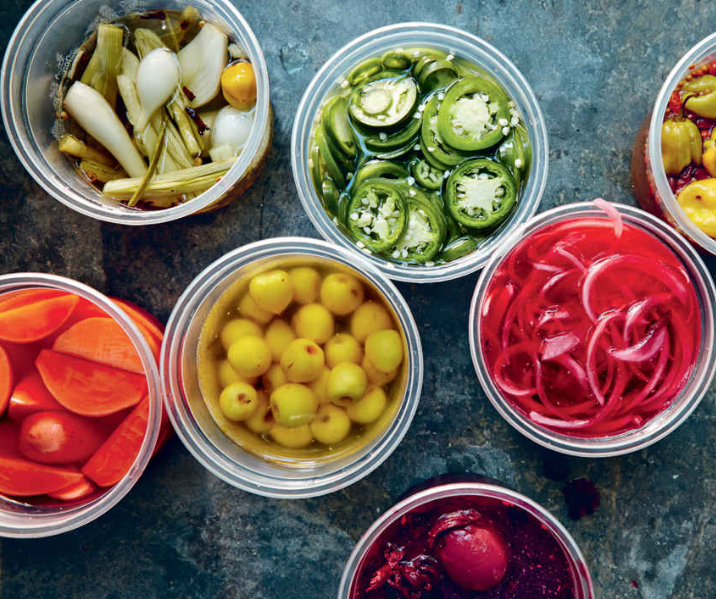
Takuan (Pickled Daikon Radish)
 

1 large or 2 small firm daikon radishes (about 2 1/2 pounds), peeled

1/4 C. Hawaiian salt (‘alaea)

1/2 C. rice vinegar

1 1/1 C. sugar

3 or 4 squeezes of yellow food coloring gel (optional)

1 Hawaiian chili pepper (moi), thinly sliced (optional)


Cut the daikon into 3/8-inch-thick rounds and toss with the salt. Let sit uncovered at room temperature for 3 hours, then rinse and squeeze out the excess water before packing it into a jar. Meanwhile, combine the vinegar, sugar, food coloring, and chili pepper (if using) in a small, nonreactive saucepan and bring to a boil. Cool the sugar-vinegar sauce to room temperature while the daikon sits. Pour it over the prepared daikon slices in the jar and store in the refrigerator for at least 3 days but preferably a week before serving. This will keep for 2 weeks in the refrigerator.


Bone Broth Tomato Sauce

Bone Broth Tomato Sauce

Bone Broth Tomato Sauce


1 bay leaf

4 large hothouse tomatoes (approximately 4 C. tomatoes, pureed)

1 T. butter, ghee, or coconut oil

1/2 C. bone broth (flavored or neutral, or stock)

2 cloves garlic, minced or pressed

1 T. dried oregano

2 tsp. dried thyme

2 tsp. dried basil

1 tsp. black pepper

1 tsp. sea salt


Put 4 C. of water into a saucepan and bring to a boil. Put another 4 C. of cold water into a large bowl. Make an X cut in the bottom of each tomato (this makes it easier for the skin to come off); put the tomatoes into the boiling water and boil until the skin starts to come off (about 1 minute). Once skin starts to come off, remove tomatoes from boiling water with a slotted spoon and put them into the cold water. (The cold water will make it easier for you to handle them.) Once the tomatoes are cool enough to handle, peel them. Some people recommend that you squeeze the tomatoes to remove the seeds as well. If you like a really smooth sauce or if you have diverticulitis or a related large intestine challenge, this is a good idea for you. Otherwise, you can skip that step.  Put the tomatoes into a food processor with the S-blade or a high-speed blender and puree. Alternatively, you can mash them up with a large fork or potato masher. Add the butter (or ghee or coconut oil) into a medium-sized deep skillet or braising pan (with lid) with the burner on low. With the lid off, heat the butter and add the minced or pressed garlic, oregano, thyme, basil, and black pepper. Allow to heat on low for 2 minutes, until the aromas are released. This releases the medicinal properties of the herbs and spices. Add the pureed tomatoes into the skillet. Now add the sea salt and bay leaf. Put the lid on the skillet and simmer on low for at least 30 minutes. When finished, remove the bay leaf and serve warm.

Pickle Relish

Pickle Relish

Pickle Relish


3 quarts chopped cucumbers

3 cups each of chopped sweet green and red peppers

1 cup chopped onions

3/4 cup canning or pickling salt

4 cups crushed ice

8 cups water

2 cups sugar

4 tsp. each of mustard seed, turmeric, whole allspice, and whole cloves

6 cups white vinegar (5%)


Yield About 9 pints Add cucumbers, peppers, onions, salt, and ice to water and let stand 4 hours. Drain and re-cover vegetables with fresh ice water for another hour. Drain again. Combine spices in a spice or cheesecloth bag. Add spices to sugar and vinegar. Heat to boiling and pour mixture over vegetables. Cover and refrigerate 24 hours. Heat mixture to boiling and fill hot half-pint or pint jars, leaving 1/2-inch headspace. Adjust lids and use conventional boiling-water canner processing for 10 minutes (under 1000 ft)

Pink Pickled Onions

Pink Pickled Onions

Pink Pickled Onions


1 ¼ C. Cider Vinegar

3 T. Sugar

1 T. Sea Salt

6 Peppercorns

6 Coriander Seeds

1 Star Anise

1 Bay Leaf

3 small Red Onions, sliced into thin rings


Pour the vinegar into a pan, add the sugar, sea salt, the spices and bay leaf, and bring to a simmer. After 1 min, check that the sugar and salt have dissolved. Remove from the heat. Boil the kettle. Put the onion slices in a sieve or colander. Pour over the hot water from the kettle and drain well. When cool enough to handle, pack the onion rings into a sterilized jar. Pour vinegar mixture over; seal jar. Cool, chill and leave to pickle for at least 2 hours. Will keep 6 months unopened or 2 weeks in fridge, opened.

Very Green Avocado-Tahini Dip

Very Green Avocado-Tahini Dip

Very Green Avocado-Tahini Dip3 to 4 ounces baby spinach or arugula, or a combination
1 large, ripe avocado, peeled and diced
1⁄3 C. tahini (sesame paste)
Juice of 1 lemon
1⁄2 tsp. ground cumin
2 T. minced fresh parsley, cilantro, or dill
Salt and freshly ground pepper to taste

Rinse the greens and place them in a large skillet or saucepan. With just the water clinging to the leaves, cook the greens until just wilted down. Remove from the heat. Place all the ingredients in the container of a food processor, and process until smooth. Add 1⁄4 C. water, as needed, to achieve a medium-thick consistency. Transfer to a serving bowl. Keep covered until ready to serve. Serve at once as suggested above. Store any leftovers in an airtight container in the refrigerator for up to two days.

Los Pickles de Yucatán

Los Pickles de Yucatán

Los Pickles

Pickled Radishes


2 bunches small radishes (about 24), trimmed and quartered (2 cups) ¥2 cup white vinegar

1/2 cup fresh lime juice (from 5 to 6 limes)

1 tablespoon kosher salt


Pickled Greens


1 bunch beet greens or mustard greens, thoroughly washed and stemmed

2 tablespoons sugar

1 tablespoon kosher salt

1 cup white vinegar

1/3 cup water


Put the greens in a medium bowl, sprinkle with the sugar and salt, toss, and let wilt for 30 minutes.

Drain the greens and transfer to a 1-pint canning jar. Combine the vinegar and water and pour over the greens, making sure they are completely submerged. Cover and refrigerate for at least 1 hour before using.


Pickled Nopales


2 nopales (cactus paddles)

1/2 habanero

2 tablespoons sugar

1/2 teaspoon kosher salt

1 cup white vinegar


Carefully remove the thorns from the nopales by skimming the surface with a chef s knife in the same direction as the thorns. Cut off the woody stems and discard. Cut the cactus into 1-inch cubes, put in a 1-pint canning jar, and add the remaining ingredients. Let sit for at least 4 hours before using. (Note: The pickles and brine will have a rather slimy texture—this is normal with nopales.)


Pickled Habaneros with Chile Pequm


2 cups habaneros, left whole

1 tablespoon pequm chiles

1 tablespoon coriander seeds, toasted in a small dry skillet until fragrant

1 cup white vinegar

1/2 cup sugar

1 tablespoon kosher salt

Let sit, refrigerated, for 2 days before serving.


Pickled White Onions


1 white onion, thinly sliced on a mandoline or with a sharp knife

1 cup white vinegar

1 tablespoon sugar

1 1/2 teaspoons kosher salt


Pickled Red Onions


1 red onion, thinly sliced on a mandoline or with a sharp knife

1 cup white vinegar

1/4 cup fresh lime juice (from 2 to 3 limes)

1/4 cup sugar

1 tablespoon kosher salt


Pickled Spring Onions


8 spring onions, trimmed and halved, bulbs separated and stalks trimmed to 3-incli lengths

3 habaneros (left whole)

1 cup white vinegar

1 tablespoon sugar

1 1/2 teaspoons kosher salt


Pickled Red Bell Peppers


1 large or 2 small red bell peppers, cored, seeded, and cut into long strips

1/2 cup water

1/2 cup white vinegar

2 tablespoons sugar

1/2 teaspoon kosher salt


Pickled Sandia


3 cups water

1 tablespoon plus 1 teaspoon kosher salt

2 cups 1-inch squares peeled watermelon rind (a little red is okay)

1 cup white vinegar

1/4 cup sugar


Bring water to boil in a medium saucepan and add 1 tablespoon of the salt. Add the watermelon rind, cover, reduce the heat so that the water is at a low boil, and cook for about 30 minutes, until the watermelon rind is soft. Drain the rind and let cool. Combine the vinegar, sugar, and the remaining 1 teaspoon salt. Put the rind in a 1-pint canning jar and add the pickle solution. Let sit for at least 3 hours before using.


Pickled Pina


1/3 ripe pineapple, peeled, cored, and cut into 3 4-inch-thick rounds

2 tablespoons olive oil

1/4cup honey

Pinch of kosher salt, plus 1 teaspoon

1 dried arbol chile

1/2 cinnamon stick

1 teaspoon allspice berries

1/2 teaspoon black peppercorns

1 cup apple cider vinegar

2 tablespoons sugar


Prepare a hot fire in a grill. Toss the pineapple with the olive oil and honey in a medium bowl and season with a generous pinch of salt. Grill over high heat, turning once, until marked by the grill and cooked through, about 1 minute per side. Let cool, then cut into wedges. Set aside.  Toast the chile, cinnamon, allspice, and peppercorns in a dry cast-iron skillet over medium heat until fragrant, about 2 minutes. Set aside. Heat the vinegar, sugar, and the remaining 1 teaspoon salt in a small saucepan over medium-low heat, stirring, until the sugar and salt dissolve. Put the pineapple in a 1-pint canning jar and add the toasted chiles and spices. Add the pickle solution. Let sit for at least 3 hours before using.

Salsa Criolla (Peru)

Salsa Criolla (Peru)

1/2 medium red onion, finely sliced from top to root
1 aji amarillo, cut in thin slices (or any other fresh chili pepper)

1/2 bell pepper, thinly sliced (optional)

2 tablespoons cilantro leaves, chopped

Salt and pepper

Juice of 1 lime

1 tablespoon olive oil


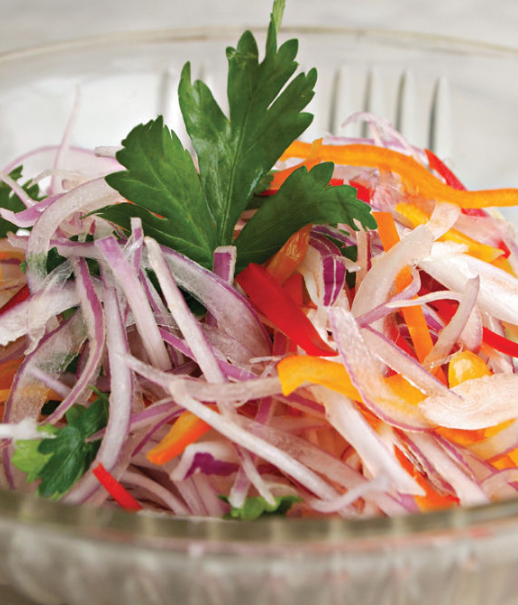
Onion, aji amarillo, cilantro, and lime juice. Salsa criolla accompanies most of our dishes, such as tamales, sandwiches, and any kind of beans. Make it right before serving to fully enjoy its crispness and vibrant flavor.


Put the onion in a bowl, cover with ice water, and let rest for 5 minutes. Drain thoroughly. In a bowl, combine the onion, aji amarillo, bell pepper, cilantro leaves, salt, pepper, lemon juice, and olive oil. Mix carefully. Use immediately or keep refrigerated up to 1 hour. Note: When you put onions in ice water they remain crunchy and lose their harsh taste. Season them at the very last minute to keep the onions crisp. If you prefer to enjoy this salsa’s flavor without the heat, use bell peppers instead of aji amarillo.

Artichoke Cream

Artichoke Cream

10 whole artichokes

2 T. roasted garlic

1 T. minced shallots

1 T. extra virgin olive oil

4 C. vegetable stock or chicken stock

2 oz. unsalted butter

3 oz. heavy cream

sea salt & freshly ground black pepper to taste


Remove all of the hard outer leaves and core from the artichoke and place in cold water with the juice from 1 lemon. (Be sure to remove all hair and fibers). In a large frying pan, heat olive oil over medium heat. Add the garlic and shallots and cook, stirring frequently for about 4 minutes. Add the artichokes and the stock, bring to a low boil, reduce heat to low and cook for 20 minutes. Once artichokes have cooked and are tender, place in the blender and add butter, heavy cream, salt and pepper. Blend until smooth, and pass through a strainer. Serve on your favorite pasta or as a dipping sauce for your favorite bread

LTS Cream of Anything Soup Mix

LTS Cream of Anything Soup Mix

LTS Cream of Anything Soup Mix


2 C. non-fat dried milk powder

1 1/2 C. cornstarch

1/2 C. chicken, beef, or veggie bouillon

1/2 C. dried minced onions

2 tsp. dried basil

2 tsp. dried thyme

1 tsp. dried parsley

1 to 1 1/2 tsp. black pepper


Mix together in a large bowl.  Pour into lidded container.  For the equivalent of one can of condensed cream soup, mix 1/3 C. mix with 1 1/4 C. cold water.  Cook until thickened.  Add additional ingredients as desired. For cream of mushroom, add 1/4 C. chopped fresh, canned or freeze dried mushrooms. For cream of celery, add 1/4 C. of freeze dried celery, etc.

Applesauce with Dried Cranberries

Applesauce with Dried Cranberries

2 1/4 lb. large McIntosh apples-peeled, quartered and cored

2 T. fresh lemon juice

Three 1-by-3-inch strips of lemon zest

1/2 C. sugar

1/2 C. sparkling apple cider

1/2 C. dried cranberries


In a large saucepan, bring the apples, lemon juice and zest, sugar, sparkling cider and cranberries to a boil. Cover and simmer over moderately low heat until the apples soften, 20 minutes; stir to break up the apples slightly. Transfer to a bowl; discard the lemon zest. Serve warm or at room temperature. Make Ahead: The applesauce can be refrigerated for up to 1 week.


Yield:

Calories:

Fat:

Fiber:

All Purpose Honey-Lime Dressing and Dipping Sauce

All Purpose Honey-Lime Dressing and Dipping Sauce

2 T. fresh lime juice

2 T. Dijon mustard

2 T. rice vinegar

2 T. honey

2 T. fresh chives, minced (or 1 Tbs. dried)

1 tsp. kosher salt

1 clove garlic

1/2 tsp. black pepper

1/4 tsp. cayenne pepper (don’t skip it, it’s not too hot!)

1/4 c. extra virgin olive oil

Mix all ingredients except for oil in a blender or food processor. With the blender running, slowly add the olive oil to the rest of the ingredients to make a smooth, emulsified dressing.


Yield:

Calories:

Fat:

Fiber:

1000 Island Dressing

1000 Island Dressing

1 C. fat-free mayonnaise

1/2 C. ketchup

1/4 C. sweet relish

1 T. regular or apple cider vinegar

Salt and pepper to taste


Place all ingredients into a pint jar with a tight-fitting lid and shake until thoroughly Mixed. Refrigerate and shake well before each use.

Parmesan Cream Sauce

Parmesan Cream Sauce

Parmesan Cream Sauce

1/4 C. unsalted butter

2 T. all-purpose flour

1/2 C. heavy cream

1/4 C. whole milk

1/4 C. finely grated Parmesan cheese

1 ounce cream cheese, at room temperature

salt and pepper to taste

Melt butter in a large skillet over medium heat. Whisk in the flour and cook until lightly browned, about 1 minute. Gradually whisk in the cream, milk, Parmesan, and cream cheese until slightly thickened, about 2 minutes. If the mixture is too thick, add more heavy cream as needed.

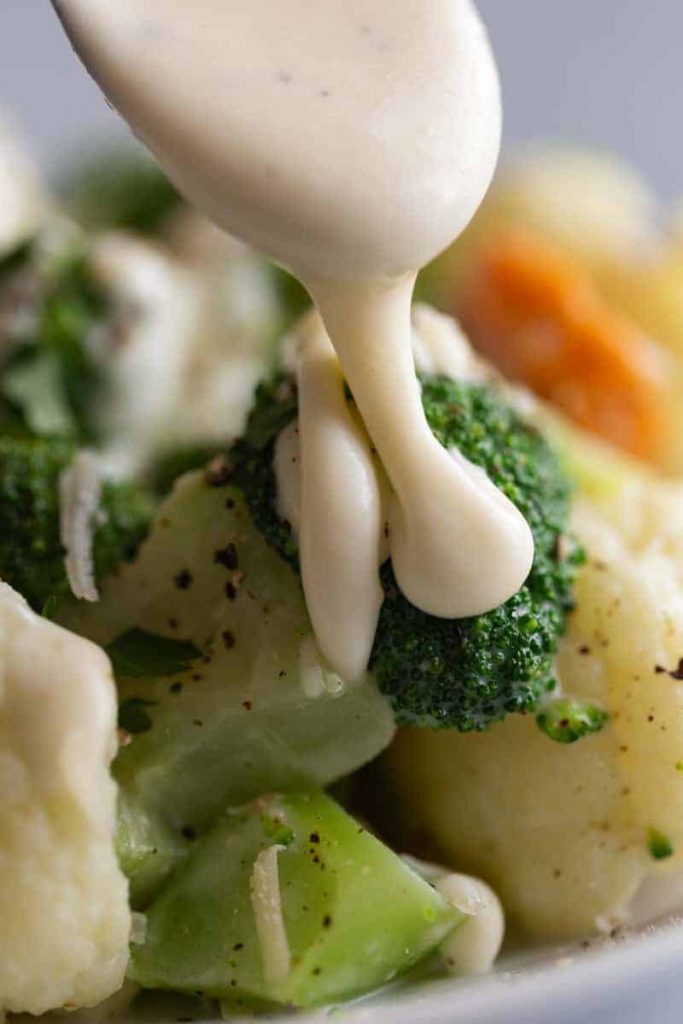
Season with salt and pepper to taste. Serve over steaks or steamed veggies.

Peach and Blueberry Cobbler

Peach and Blueberry Cobbler


3 T. unsalted butter

3 T. canola oil

1 C. whole-wheat flour

1 1/2 tsp. baking powder

1/2 tsp. salt

1 C. reduced-fat milk

1/2 C. sugar

1 tsp. vanilla extract

3 ripe but firm peaches, (about 1 pound), pitted and sliced into eighths, or 3 1/2 C. frozen

2 C. (1 pint) fresh or frozen blueberries


Preheat oven to 350°F. Place butter and oil in a 12-inch cast-iron skillet or a 9-by-13-inch baking pan. Heat in the oven until melted and fragrant, 5 to 7 minutes. Meanwhile, combine flour, baking powder and salt in a large bowl. Add milk, sugar and vanilla; stir to combine. Add the melted butter mixture to the batter and stir to combine. Pour the batter into the hot pan. Spoon peaches and blueberries evenly over the batter. Return the pan to the oven and bake until the top of the cobbler is browned and the batter around the fruit is completely set, 50 minutes to 1 hour. Remove to a wire rack to cool for at least 15 minutes. Serve warm.


Yield: 10 servings

Calories: 182

Fat: 8g

Fiber: 3g

Better Butter

Better Butter

1/2 C. butter (1 stick), at room temperature

1/2 C. canola oil or olive oil


Put butter and oil in a blender or food processor and blend until thoroughly combined. This “Better Butter” will be the consistency of yogurt or thick cream. Spoon it into a bowl, or mold. Cover and put in the refrigerator to firm. Variations: Add herbs or fresh crushed (not powdered) garlic.


Yield: 48 (1 tsp.) servings

Calories: 37

Fat: 4g

Fiber: 0g

Lemon Marinade for Fresh Mozzarella

Lemon Marinade for Fresh Mozzarella

1 1/2 C. extra-virgin olive oil

1-2 inch x 1- inch strip of lemon peel (yellow part only)

1 garlic clove, minced

1 fresh bay leaf

1 sprig fresh rosemary

1 sprig fresh thyme

1 sprig fresh oregano

1/2 tsp. crushed red pepper

1/4 tsp. salt

1 pound mozzarella bocconcini or ciliegini, drained


In a small saucepan over low heat, warm the olive oil. Add the lemon peel, garlic, bay leaf, rosemary, thyme, oregano, crushed red pepper and salt and let steep for 3 to 5 minutes over low heat. Remove from heat and allow to completely cool. When cool, pour over the bocconcini and allow to marinate for 2 to 4 hours and up to 1 week before serving.

Shallot Jam

Shallot Jam

1 T. olive oil

5 medium shallots, peeled and sliced thin

1/2 C. chicken broth

1/4 C. balsamic vinegar

2 heaping T. apricot jam or preserves

salt and pepper


Heat 1 T. of olive oil in a medium to large sauté pan over medium heat. Add the shallots, season with salt and pepper, and cook for about 5 minutes, until they begin to get soft and the bottom of the pan begins to brown. Add the 1/2 C. chicken broth to the shallots, scraping the brown bits off the bottom of the pan while the broth reduces. Add the balsamic vinegar, reduce the heat to medium-low, and cook for about 5 more minutes. Add the apricot jam and stir to combine. The sauce will thicken but should still be easily stirred.

Sweet and Spicy Canned Onion Marmalade

Sweet and Spicy Canned Onion Marmalade

Sweet and Spicy Canned Onion Marmalade

2 pounds onions preferably sweet or a mix of sweet and regular

1 C. apple juice

1/2 C. cider vinegar

2 teaspoons fresh minced garlic

1 teaspoon salt

1/2 teaspoon black pepper

1/4 teaspoon ground mustard

1 teaspoon crushed red pepper flakes

3 T. Low or No Sugar Needed pectin – flex batch equals 1 box

1/2 teaspoon butter or oil optional to reduce foaming, but I always use it

1 C. honey

1/2 C. brown sugar


Prepare water bath canner, 6 half pint jars & lids, keeping warm until needed. Cut ends off onions and peel; slice in half and cut each in half again, lengthwise (or in thirds if onions are big). Turn halves and cut into 1/4 inch slices widthwise. Place slices in an 8-quart measuring C. – you should have 6 C. of onion slices. Add prepared onions, apple juice, vinegar, garlic, salt, pepper, mustard and red pepper flakes to an 8-quart stockpot. Gradually stir in pectin and then add butter if using. Bring to a boil that can’t be stirred down over high heat, stirring constantly. Add honey and sugar; return to a full boil and let boil for 1 minute, stirring constantly. Remove from heat (skim foam if needed). Ladle hot marmalade into prepared half pint jars one at a time, leaving 1/4-inch headspace. Wipe rims, attach lids, and place in canner. Place lid on canner and bring to a gentle, steady boil – process for 10 minutes, maintaining steady boil the entire time. Turn off heat and let jars cool in canner 5 minutes before removing jars to a towel lined surface to cool for 24 hours. Check lids for seal before labeling and storing in a cool, dark place (with rings removed). Notes: *You don’t have to can this – it will keep for 2-3 months in the refrigerator.


  • Use as a glaze for meats like chicken, ham and pork, as well as seafood (my favorite is shrimp).
  • Top grilled steak, pork, chicken and seafood.
  • Add on top of Boursin cheese or cream cheese as an appetizer.
  • Mix into sour cream as a dip for crackers, pretzels, or chips.
DIY Flavored Extracts

DIY Flavored Extracts

DIY Flavored Extracts

Vanilla Extract (single 4oz bottle)

  • 3 whole vanilla beans
  • Vodka (You can also use bourbon)

Mint Extract (4oz)

  • ½ C. mint leaves
  • Vodka

Orange Extract (4oz)

  • 1 large navel orange
  • Vodka

Lemon Extract (4oz)

  • 1 large lemon
  • Vodka

To make Vanilla Extract:

  1. Cut your vanilla beans in half, then split open each half to expose the vanilla seeds on the inside of the pod.
  2. Place cut vanilla beans inside your glass bottle.
  3. Add vodka, filling up to the neck of the bottle.
  4. Seal tightly and store bottle in a cool, dry place.
  5. Every few days, tilt your bottle upside down to gently mix the liquid inside.
  6. After 5-6 weeks, you have extract! (If you leave in your vanilla beans, when you start running low, just add more vodka and wait a little.)

To make Mint Extract:

  1. Stuff mint leaves into your glass bottle.
  2. Using a chopstick, skewer, or other poking device, lightly bruise/crush the leaves inside the bottle.
  3. Add vodka, filling up to the neck of the bottle.
  4. Every few days, tilt your bottle upside down to gently mix the liquid inside.
  5. After 5-6 weeks, you have extract! (I’m not sure if, like vanilla extract, you can just leave the mint leaves inside. Since it’s leafy plant matter which disintegrates more easily, it may be a good idea to take it out. My leaves went from a vibrant green in the beginning to kind of a dull brown by the end so I took them out just to be safe – I poured my mint extract into another container through a sieve and discarded the mint leaves, then poured the filtered extract back into the bottle.)

To make Orange Extract:

  1. Peel thin strips of zest from ½ of your orange.
  2. Place zest into your glass bottle.
  3. Add vodka, filling up to the neck of the bottle.
  4. Every few days, tilt your bottle upside down to gently mix the liquid inside.
  5. After 5-6 weeks, you have extract! (I think with citrus peels the acid (and alcohol bath), it’s probably safe to leave the peels inside the bottle like a vanilla bean for re-fill purposes. If you don’t feel comfortable doing this, take it out!)

To make Lemon Extract:

  1. Peel thin strips of zest from your lemon.
  2. Place zest into your glass bottle.
  3. Add vodka, filling up to the neck of the bottle.
  4. Every few days, tilt your bottle upside down to gently mix the liquid inside.
  5. After 5-6 weeks, you have extract!
Cherry-Vanilla Jam Recipe

Cherry-Vanilla Jam Recipe

Cherry-Vanilla Jam Recipe

2 pounds cherries, pitted

2 scant C. sugar

1/4 tsp. vanilla powder


Wash, stem, and pit the cherries. If desired, chop them down more finely.  In a large nonreactive pot, combine the cherries, sugar and vanilla powder. Macerate for several hours or overnight in the refrigerator.  Put the pot over medium heat. Heat the macerated fruit, stirring occasionally, until the sugar is fully dissolved. Turn the heat to high, and cook, stirring only to prevent scorching, until ​the gel point is reached.  Pour the jam into clean, heated jars and process in a water bath canner for 10 minutes, adjusting for altitude.

Canning Tomato Paste

Canning Tomato Paste

Canning Tomato Paste


3 gallons quartered Roma or other paste tomatoes

1 red bell pepper, seeded and chopped

1 bay leaf

½ tsp. kosher salt

6 tsp. bottled lemon juice, divided


In a large pot set over high heat, combine the tomatoes, red bell pepper, bay leaf, and salt. Bring to a boil. Reduce the heat to low. Simmer for 30 minutes, or until the tomatoes are very soft. Using a potato masher, press the tomatoes down and release their juices while they are cooking. Using a food mill, pass the mixture through to puree. Discard the seeds and skins. Transfer the puree to an uncovered slow cooker set on low.  Cook the tomatoes for 8 hours, stirring hourly. As it thickens and reduces, check more frequently to prevent scorching. Prepare a hot water bath. Place the jars in it to keep warm. Wash the lids and rings in hot, soapy water, and set aside. To each jar, add 3/4 tsp. of lemon juice. Ladle the hot paste into the prepared jars, leaving 1/2 inch of headspace. Use a nonmetallic utensil to release any air bubbles. Wipe the rims clean and seal with the lids and rings. Process the jars in a hot water bath for 45 minutes. Turn off the heat and let the jars rest in the water bath for 10 minutes. Carefully remove the jars from the hot water canner. Set aside to cool for 12 hours. Check the lids for proper seals (see here). Remove the rings, wipe the jars, label and date them, and transfer to a cupboard or pantry. Refrigerate any jars that don’t seal properly, and use within 3 weeks. Properly sealed jars will last in the cupboard for 12 months. Once opened, refrigerate and consume within 3 weeks.

Grapefruit and Vanilla Bean Jam

Grapefruit and Vanilla Bean Jam

Grapefruit and Vanilla Bean Jam

5-6 large pink grapefruits about 5-6 pounds, you can also use Ruby Red grapefruit

1 1/2 C. sugar or more to taste

2 vanilla beans


Remove the rind from the grapefruits. Thickly slice the fruit and then cut or break apart into pieces. Discard any seeds. Puree the fruit in a food processor or blender, and then pour it into a heavy bottomed pot, along with the sugar. Cut the vanilla beans in half and then make a slit down the length of each piece. Pry the beans open with the tip of your knife and scrape out the seeds, adding them to the pot with the grapefruit. Throw the pods right in, too. Bring the pot up to a boil, then turn down and boil for about 40-50 minutes. You won’t have to tend it much at first, but toward the end you’ll need to keep an eye on it and stir often to prevent scorching. It will be greatly reduced, darker, and thicker at about the 40 minute mark. The longer you boil it the thicker the jam will be, but I found about 45 minutes was sufficient. Remove the vanilla bean pods and discard. Pour the hot jam into jam jars and let cool before covering and refrigerating. Use within 2 months, or freeze.

Drunken Rose Hips Jam

Drunken Rose Hips Jam

Drunken Rose Hips Jam


1/2 pound rosehips

2 C. red wine

3/4 C. water

1 1/2 C. sugar


Days 1-3. Rinse the rosehips well. Cut the dark spot off the end of each and halve them. Remove the inner seeds and hairs using a small, sturdy spoon. In a large bowl, cover the rosehips with the wine. Refrigerate, covered, for 3 days.  Prepare a hot water bath. Place the jars in it to keep warm. Wash the lids and rings in hot, soapy water, and set aside. Strain the rosehips. In a small saucepan set over medium-high heat, combine the water and strained rosehips. Cover the pan and bring to a boil. Cook for about 10 minutes, or until the rosehips are tender. Run the rosehips and their cooking water through the fine screen of a food mill. Measure and return the pulp to the saucepan. There should be about 1 1/2 C. of pulp. Add the sugar, adjusting the amount, as needed, to equal the pulp amount.  Over medium-high heat, bring the jam to a full, rolling boil. Turn off the heat. Skim off any foam. Ladle the jam into the prepared jars, leaving 1/4 inch of headspace. Use a nonmetallic utensil to remove any air bubbles. Wipe the rims clean and seal with the lids and rings. Process the jars in a hot water bath for 10 minutes. Turn off the heat and let the jars rest in the water bath for 10 minutes. Carefully remove the jars from the hot water canner. Set aside to cool for 12 hours.  Check the lids for proper seals. Remove the rings, wipe the jars, label, and date them, and transfer to cupboard or pantry. Refrigerate any jars that don’t seal properly and use within 3 weeks. Properly sealed jars will last in the cupboard for 12 months. Once opened, refrigerate, and consume within 3 weeks.

Blackberry & Apple Jam

Blackberry & Apple Jam

Blackberry & Apple Jam


2 large cooking apples, cored and thinly sliced, cores reserved

3 pounds fresh blackberries

5 C. sugar

3 T. freshly squeezed lemon juice

2 to 3 T. blackberry or raspberry cordial, or liqueur (optional)


Prepare a hot water bath (see here). Place the jars in it to keep warm. Wash the lids and rings in hot, soapy water, and set aside.  Put the reserved apple cores in a piece of cheesecloth and tie the ends securely with kitchen twine into a sachet. In a preserving pot or deep pot, combine the apple slices, blackberries, and the sachet. Cover the fruit with water. Bring to a simmer over medium heat and cook for about 10 minutes, stirring frequently, or until the fruit is very tender and starting to fall apart. Remove the pot from the heat. Remove and discard the sachet. Using a sieve or fine strainer, purée the fruit by passing it through into a clean pan. Add the sugar, lemon juice, and cordial (if using). Return the mixture to a simmer over low heat. Continue to cook, stirring often, for 20 to 25 minutes or until the jam gels and the mixture reaches 220°F, measured with a candy thermometer. Test for gel after 20 minutes (see here).  Ladle the jam into the prepared jars, leaving ¼ inch of headspace. Use a nonmetallic utensil to release any air bubbles. Wipe the rims clean and seal with the lids and rings.  Process the jars in a hot water bath (see here) for 10 minutes. Turn off the heat and let the jars rest in the water bath for 10 minutes. Carefully remove the jars from the hot water canner. Set aside to cool for 12 hours. Check the lids for proper seals (see here). Remove the rings, wipe the jars, label, and date them, and transfer to a cupboard or pantry. Refrigerate any jars that do not seal properly and use within 1 month. Properly sealed jars will last in the cupboard for 12 months. Once opened, refrigerate, and consume within 1 month.

Sesame Ginger Sauce

Sesame Ginger Sauce

Sesame Ginger Sauce


½ C. Tahini

2 T. fresh lemon juice

1 tsp. white miso

1 T. finely grated ginger

2 pitted dates

1 clove garlic, crushed

Freshly ground pepper

2/3 C. water


Blend all ingredients in a high-powered blender or food processor. Additional water can be added to achieve desired consistency. Serve with steamed or water-sautéed vegetables. This sauce goes well with bok choy, asparagus, or kale.


Yield: 4 servings

Calories: 190

Fat: 14.5g

Fiber: 3.2g

Carbs: 13g

Red Lentil Sauce

Red Lentil Sauce

Red Lentil Sauce


1/2 C. red lentils

1 medium onion, chopped

1 clove garlic, chopped

1 C. carrot juice

1 T. VegiZest or other no-salt seasoning blend

1 tsp. cumin

1/2 tsp. balsamic vinegar

1/2 C. water

1.4 C. chopped pecans


Add lentils, onions, garlic, and carrot juice to a saucepan over high heat. Bring to a boil, cover, and simmer until the lentils are soft and pale (20-30 minutes). Add more carrot juice if needed. Put the cooked lentil mixture into a food processor or blender with VegiZest, cumin, and balsamic vinegar and blend to a smooth puree. Add additional water if it is too thick. Serve with steamed broccoli, cauliflower, or other vegetables. Top with chopped pecans.


Yield: 4 servings

Calories: 176

Fat: 5.4g

Fiber: 9.1

Carbs: 25g

Herbed White Bean Hummus

Herbed White Bean Hummus

Herbed White Bean Hummus


1 2/3 C. cooked white beans or 1 (15-ounce) can, no salt added, drained

1 T. lemon juice

2 T. un-hulled, raw sesame seeds

2 T. red wine vinegar

1/2 tsp. Dijon mustard

2 T. water

1/4 C. chopped fresh basil

2 T. fresh thyme


Place beans, lemon juice, seeds, vinegar, mustard, and water in a high-powered blender or food processor. Blend until smooth. Add basil and thyme and pulse very briefly. Do not over process herbs; they should be visible in small pieces. Serve, or refrigerate in an airtight container for up to 4 days.


Yield: 2 servings

Calories: 180

Fat: 2.7g

Fiber: 7.1g

Carbs: 30g

Stinging Nettle Pesto

Stinging Nettle Pesto

Stinging Nettle Pesto

6 C. stinging nettles (about one bunch), stems carefully removed — they do sting

1/2 C. Parmesan

1/2 C. pine nuts or walnuts, lightly toasted

4-5 garlic cloves, peeled

1/2 C. olive oil

1 T. lemon juice

salt and pepper, to taste


Bring a large, salted pot of water to a boil. Add the nettles and blanch for about one minute. Transfer to a colander to drain. Once cooled a bit, give the nettles a squeeze to wring out additional water.  Add the nettles, nuts, Parmesan, garlic and lemon juice to a food processor and pulse a few times. Add about half the olive oil and process again. Season with salt and pepper and add the remaining olive oil; process until the mixture reaches your desired consistency. Makes about 2 C. of pesto.

Fresh-Peach-Infused Vinegar

Fresh-Peach-Infused Vinegar

Fresh-Peach-Infused Vinegar

6 pounds peaches (overripe, pitted and roughly chopped)

3 cups white wine vinegar

1/2 cup honey


Bring peaches, vinegar, and honey to a simmer in a large saucepan. Cook, stirring occasionally, for 15 minutes. Cover, and let cool completely. Working in batches, puree peach mixture in a food processor until smooth, about 10 seconds. Strain through a fine sieve into a large nonreactive bowl. Line sieve with cheesecloth, and place over another large nonreactive bowl. Pour strained peach mixture into sieve. (Do not press solids in sieve.) Cover with plastic wrap and let mixture strain in refrigerator overnight (or up to 2 days). Uncover, and remove sieve from bowl. Discard solids. Pour peach vinegar into a resealable nonreactive bottle or jar.

Pickled Cherry Peppers

Pickled Cherry Peppers

Pickled Cherry Peppers

You can pickle cherry peppers three ways:


whole, untouched

whole, de-veined and de-seeded

cored, de-veined and de-seeded and cut in halves or quarters

Why does it matter? Here is why:


Whole and untouched look the best of the three. They take the most space in a jar. And they are the hottest due to preserved membranes and seeds.


Whole, de-veined and de-seeded are not as spicy. They are lightly spicy, actually. Not much space-saving here, just a tiny bit. They are great for making stuffed pickled cherry peppers. Even a simple stuffing such as plain cream cheese or ricotta cheese will make them taste heavenly. There is something about that balance of fat, acidity, spiciness and a touch of sweetness.


Halved or quartered cherry peppers will allow you fitting in about twice as many in a jar. They are easier to eat as they are bite-size.


How you pickle your peppers will depend on how you want to use them and whether you want them spicy or mild. Some like them hot, some like them mild.


10 – 15 cherry peppers

1 clove garlic

1 tsp black peppercorns

1 small bunch cilantro

1 bay leaf

1½ cups white wine vinegar

¼ cup white balsamic vinegar

1 cup water

1 tsp coarse salt

2 tsp white sugar


Wash and dry the peppers and put them in a glass jar. You can also use any non-reactive storage container. If you want your peppers de-seeded and de-veined, and cut into pieces, do it now. You can mix and match cut and whole peppers in the same jar, or store them separately. Peel the garlic clove, cut it in half and add it to the cherry peppers along with the black peppercorns, cilantro and the bay leaf. In a small saucepan, combine the vinegars, water, salt, and sugar. Bring to a boil and let it cook for 1 minute. Remove the liquid mixture from the heat and immediately pour over the peppers.  Let the contents of the jar cool completely at room temperature, then cover and refrigerate for 1 week. The peppers will be ready for eating after 1 week and will store in a fridge for up to 2-3 months.