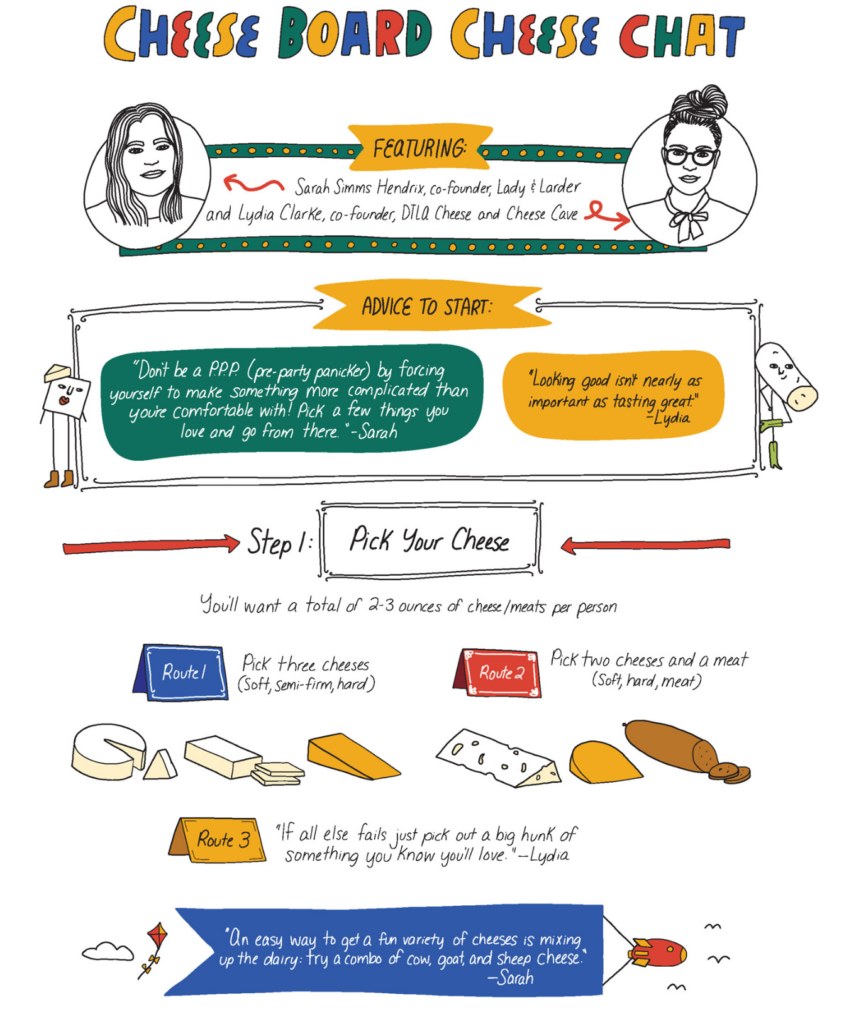
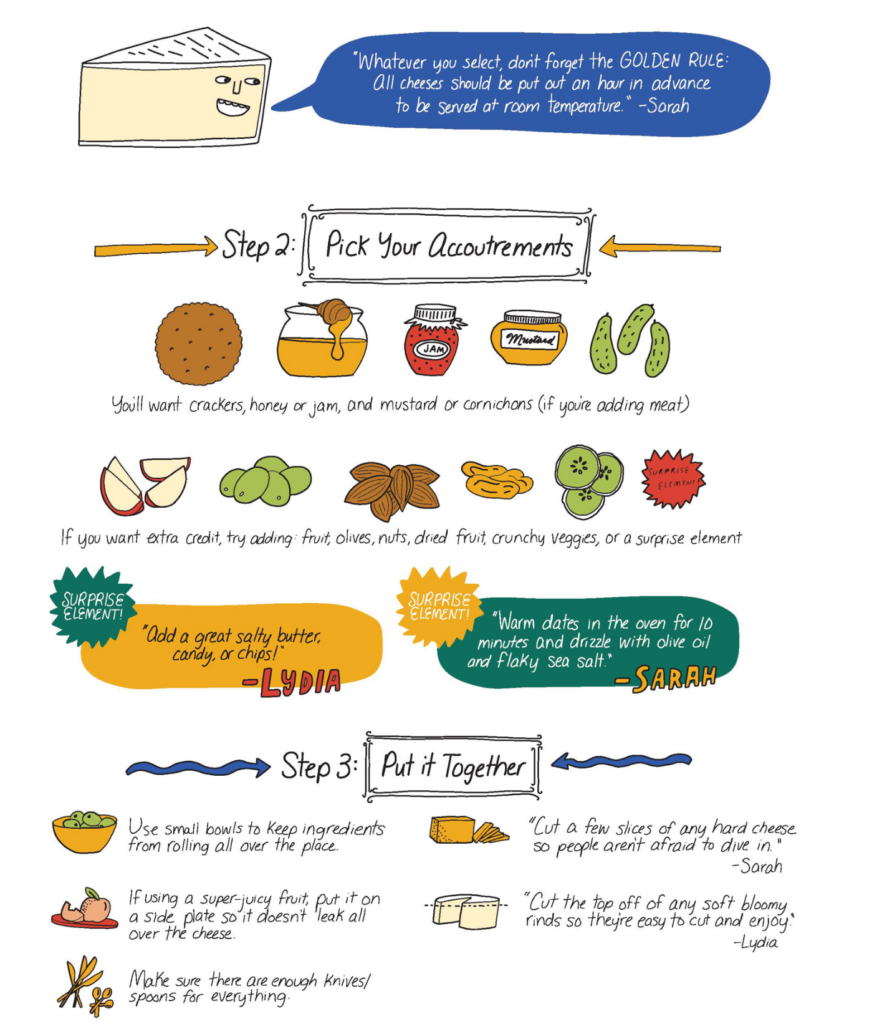
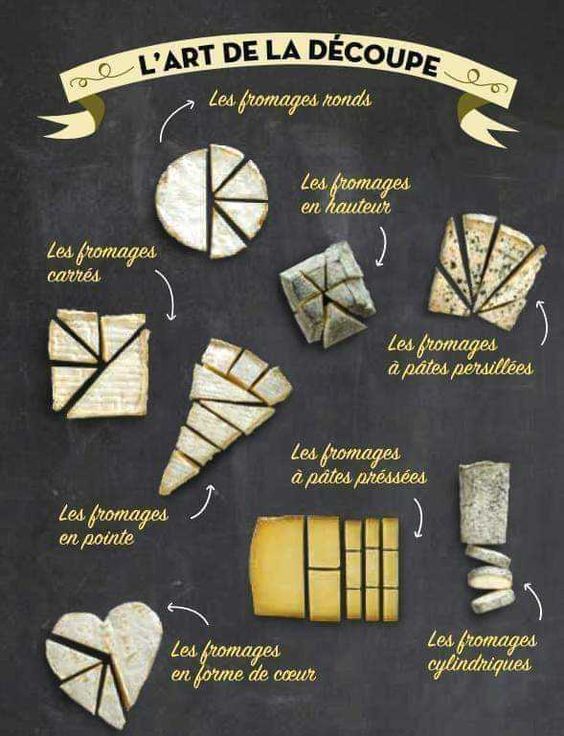
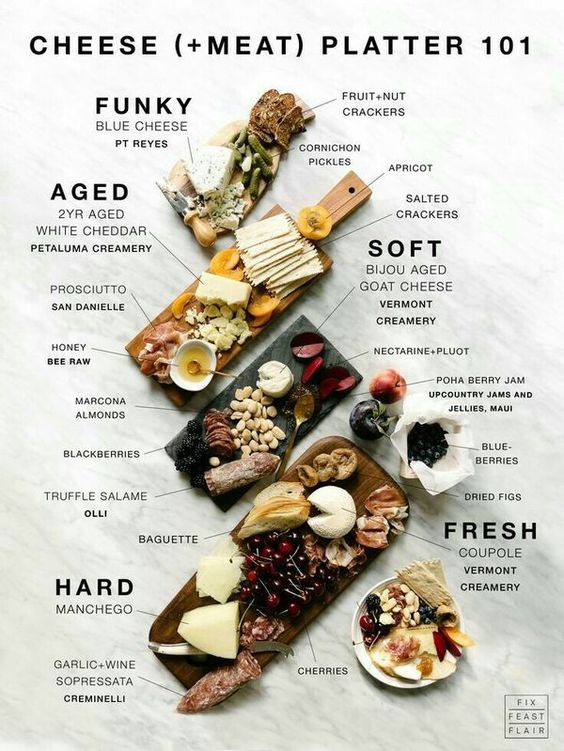
Cheese Board Cheese Chat
Wild Berries

For juicy, plump, downright kaleidoscopic summer berries, look not to the familiar varieties in the produce aisle but to their relatives growing wild in forests and marshes across the country. CHOKEBERRIES get their name from the berry’s intense tartness, but tempered with some sugar, the fruit makes pleasantly bright jelly. Tiny ELDERBERRIES ripen quickly and often ferment on the bush, so they’re ideal for wine making. Because silk moths eat MULBERRIES, the plant came to the American colonies in a failed attempt to establish a silk industry. GOOSEBERRY fool is a traditional dessert combining the translucent-green berries with swirls of cream and BLACK NIGHTSHADE BERRIES are closely related to poisonous deadly nightshade, but they are edible when they have ripened to a dark purplish-black hue. Jam made from the LINGONBERRY, a Scandinavian import to the northeast and northwest coasts of the United States, is a sweet-tart topping for rich meat or game. Be careful picking BARBERRIES—the red fruits are pleasantly puckery, but the plant’s leaves and nodes are riddled with spines, some of which can measure a centimeter long. Versatile HASKAP BERRIES, which some say taste like a combination of raspberries, blueberries, and strawberries, are a stunning addition to pies, crumbles, and muffins. WINEBERRIES may be the most beautiful of the bramble fruits (berries composed of small drupelets), but the fast-growing shrub is considered invasive in several states. A relative of the wineberry, the juicy, floral CLOUDBERRY grows almost exclusively in cold regions, such as the tundra and forests of Alaska. The 49th state is also home to the prized, but elusive, NAGOONBERRY, whose name comes from the word for ‘jewel” in the language of the Tlingit, a Pacific Northwest Indigenous people.
![]()
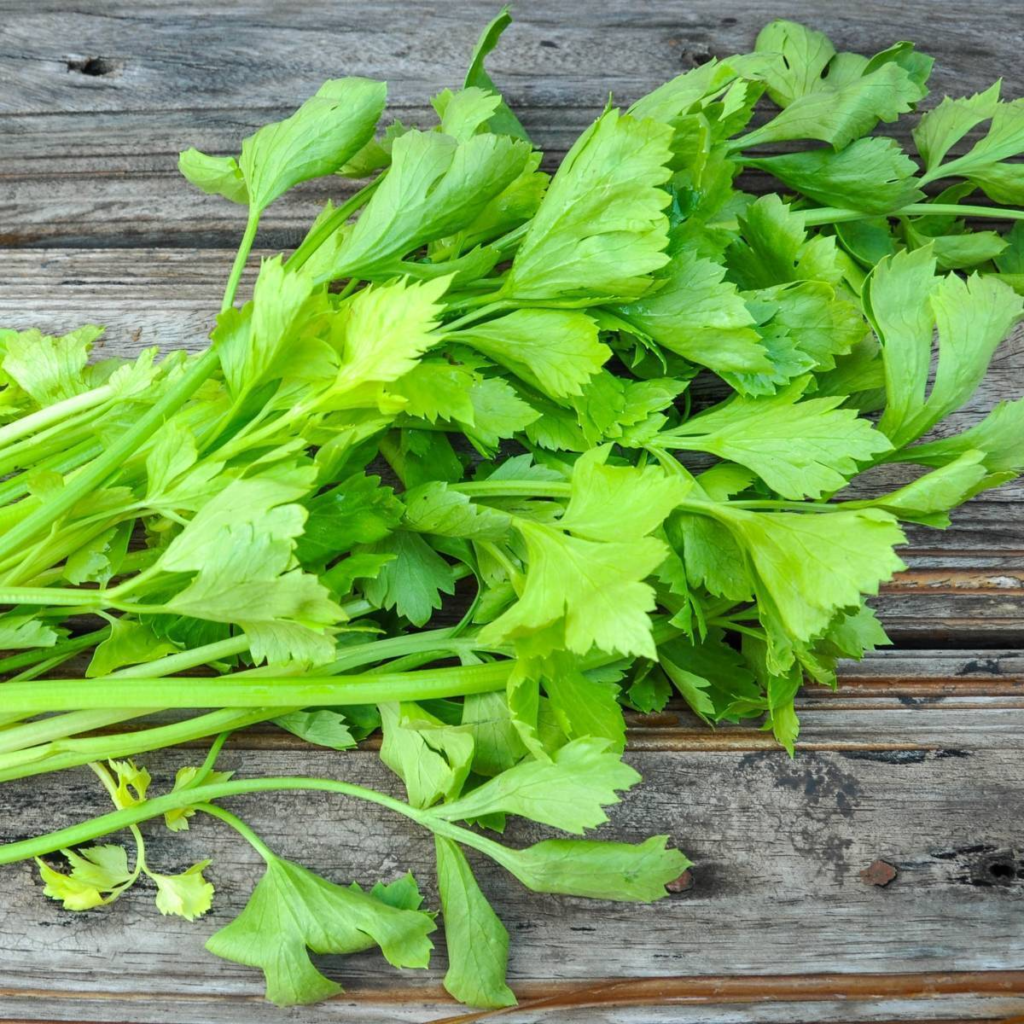 What to do with Celery Leaves
Celery leaves are actually quite tasty and incredibly versatile.
Add celery leaves to salads: My aunt likes to cut up the leaves and add them to her green salads. I had never tried it myself until I went to her house for lunch one day. I was surprised to find that it can be a delicious addition to change up and add a burst of flavor to your raw greens. (I think that it especially pairs up well with salads with apple slices.) I think the best leaves for salads are the lighter green, younger leaves, but that is a matter or taste, of course.
Add celery leaves and stalk pieces to stocks and bone broths: I like to freeze some of the leaves, and the small, ugly stalk bits I cut from my snacking pieces, so I can have them handy whenever I make stock or bone broth. Celery is probably my favorite vegetable for adding to stocks and broths. Not only is it incredibly healthy, adding its vitamins and antioxidants to your already healthy broths, but it also adds delicious flavor. I also often blend celery leaves and stalk pieces, along with onions, into soups with an immersion blender to give them great flavor and a thicker consistency. (That was a tip I learned from another one of my aunts.)
Chop celery leaves and use them as an herb. Celery leaves make a great replacement for fresh parsley in many recipes. You can chop the fresh leaves and add them to salsa and homemade salad dressings, for example. You can also dry the leaves and crumble them, using them as you would dried parsley.
Make pesto sauce with celery leaves.
Make celery powder with leftover leaves and ugly stalk pieces. This is actually probably my favorite use of leftover celery leaves and bits and pieces. It’s simple enough to dehydrate the leftover pieces and grind them into a fine powder once they are fully dry. The nice thing about celery powder is that it doesn’t take up much space at all and it keeps very well. I like to add it to soups, sauces, and all sorts of other dishes to add flavor and nutrients.
Make celery salt. Celery salt is just a modified use of celery powder. It is often made with ground celery seed that is mixed with salt. Don’t have celery seeds? You can also make a wonderful celery salt using the leaves and other not-so-pretty celery bits. Celery salt is often asked for in recipes, but I like to use it in place of regular sauce in all sorts of recipes to add extra nutrients and flavor!
Save for chickens or compost. If you don’t want to use the celery leaves yourself, don’t throw them away! When I’m short on time (and my freezer is full, and I have an abundance of celery powder on hand already), I throw them to my hens and they seem to love them. You can also add them to your compost bin.
Celery Powder
Wash and dry celery leaves and other celery bits and pieces. (To reduce drying time, consider chopping stalks into smaller pieces.) Fully dry leaves and stalk pieces in a dehydrator or at the lowest heat and convection setting of your oven. (Check occasionally and remove dry, brittle pieces, leaving the rest of the celery pieces to continue drying until brittle.) Once they are fully dry, grind up the celery leaves and stalk pieces until you obtain a fine powder. Celery leaves can be easily pulverized with a mortar and pestle. If using stalk bits, though, I find it much easier to use a spice grinder of coffee grinder. Store the homemade celery powder in a well-sealed container to keep moisture out, preferably out of direct sunlight.
Celery Salt
2 Tbsp celery powder
2 Tbsp salt
Mix together celery powder and salt. Store in a well closed container in a cool, dark place.

Sweet Crepe Bar
Fruit (Berries, Slice Banana, cooked stone fruit or apples
Filling (ricotta, whipped cream, Whipped honey Cream Cheese, Fruit Curd, Pudding, mascarpone, Jam, Peanut Butter, Dulce du Leche
Toppings (Shredded Coconut, slivered almonds, granola, chia seeds, mini–Chocolate Chips, Sprinkles
Savory Crepe Bar
Protein (Prosciutto, Crumbled Bacon, scrambled egg, sliced boiled egg, thinly sliced steak
Cheese (Brie, Goat Cheese, Cheddar, Mascarpone, Whipped Cream Cheese, Mozzarella, Cottage
Sauce (Pesto, Mojo Sauce, Balsamic Reduction, Marinara, Tapenade,
Vegetables (Sun Dried Tomatoes, spinach, Roasted Red Pepper, Sauteed Mushroom, Caramelized Onions, Tomato Relish,
Fruits (sliced Pears,
Toppings (Herbs, Chopped Scallions
Quick Uses for Leftover Chicken
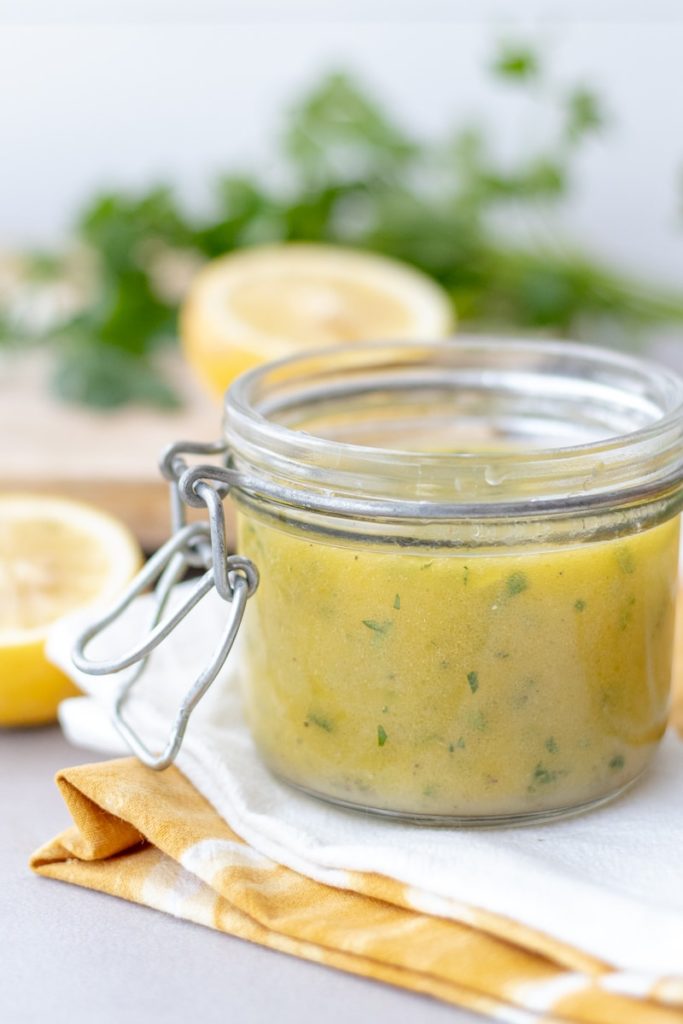 Make a Marinade
⅓ cup vinegar:
Rice wine vinegar
Apple cider vinegar
Balsamic vinegar
½ cup soy sauce
2 T. liquid sweetener:
Honey
Maple syrup
Agave nectar
2 T. Dijon mustard
4 garlic cloves, minced
2 tsp. Italian seasoning
½ tsp. freshly ground black pepper
¼ cup oil:
Olive oil
Avocado oil
Canola oil
In a bowl, whisk together the vinegar, soy sauce, sweetener, mustard, garlic, Italian seasoning, and pepper. Slowly whisk in the oil to emulsify and combine. Alternatively, shake all the ingredients together in a jar with a tight-fitting lid. 2 Pour into a shallow dish and add your desired protein or vegetables, turning to coat. 3 For beef, chicken, vegetables, or tofu, marinate for at least an hour but not more than 24 hours. For fish, marinate for at least 30 minutes but not more than 2 hours. This recipe will make enough marinade for 4 to 6 portions of protein, tofu, or vegetables.
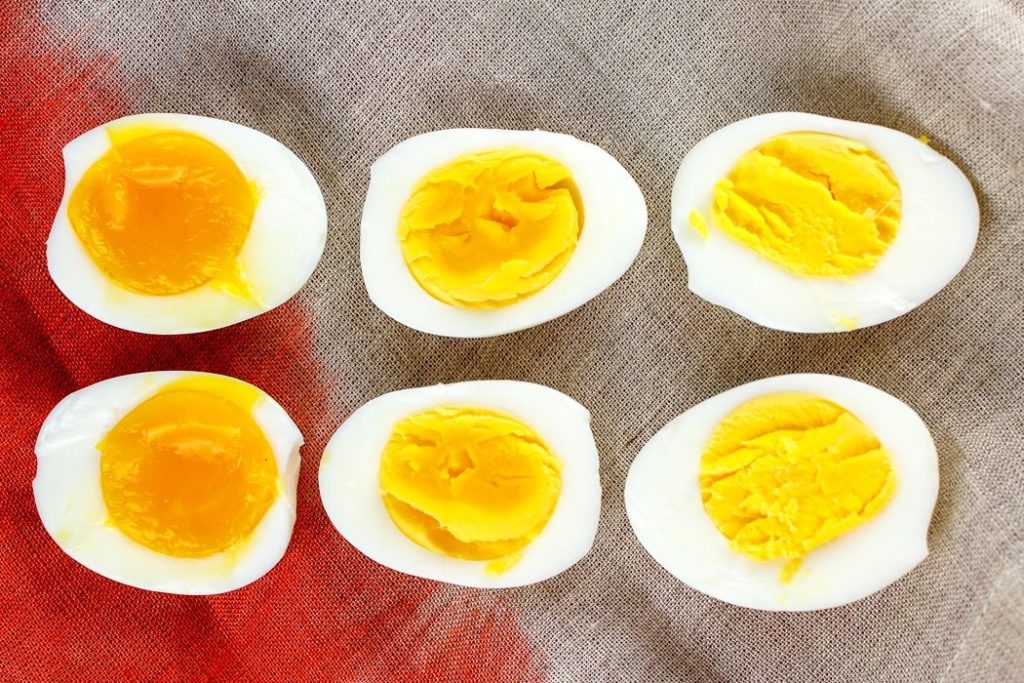 Air Fryer Boiled Eggs
6 eggs
Set six eggs in the air fryer basket
Soft boiled – air fry at 250 for 11 minutes
Medium boiled – air fry at 250 for 14 minutes
Hard boiled – air fry at 250 for 17 minutes
Once the eggs are done, transfer them to an ice bath so they can cool off.
 The Witches Tavern
Beverage
Blood Spritzer – Cherry Fizz
Appetizer
Eyeball Soup – Tomato Soup with Cheese Tortillini
Or
Grave Digger Bones – Bread Sticks
Main Dish

Shrunken Troll Heads – Stuffed Acorn Squash
Or
Stuffed Hobgoblin Hearts – Quinoa Stuffed Bell Peppers
Dessert
Shrunken Stuffed Mummy Heads-Â Baked Apples
Sourdough Starter

Whether it conjures up a crusty, flavorful loaf of bread or a bubbling crock of flour/water starter, sourdough is a treasured part of many bakers’ kitchens. But where does the path to sourdough bread begin? Right in your own kitchen, with your own homemade sourdough starter.
Sourdough baking is as much art as science. The method you’ll read here for making sourdough starter isn’t an exact match for the one you read on another site, or in a cookbook, or in your great-grandma’s diary
Getting it started takes a lot of steps, but once its established, its easy to maintain and use.
1 cup (113g) whole rye (pumpernickel) or whole wheat flour
1/2 cup (113g) cool water
To feed your starter
scant 1 cup (113g) Unbleached All-Purpose Flour
1/2 cup (113g) cool water (if your house is warm), or lukewarm water (if your house is cool)
Day 1: Combine the pumpernickel or whole wheat flour with the cool water in a non-reactive container. Glass, crockery, stainless steel, or food-grade plastic all work fine for this. Make sure the container is large enough to hold your starter as it grows; we recommend at least 1-quart capacity.
Sourdough Starter – Step 1
Stir everything together thoroughly; make sure there’s no dry flour anywhere. Cover the container loosely and let the mixture sit at warm room temperature (about 70°F) for 24 hours. See “tips,” below, for advice about growing starters in a cold house.
Day 2: You may see no activity at all in the first 24 hours, or you may see a bit of growth or bubbling. Either way, discard half the starter (113 grams, about 1/2 cup), and add to the remainder a scant 1 cup (113 grams) King Arthur Unbleached All-Purpose Flour, and 1/2 cup (113 grams) cool water (if your house is warm); or lukewarm water (if it’s cold).
Sourdough Starter – Step 3
Mix well, cover, and let the mixture rest at room temperature for 24 hours.
Perfect your technique
How to make sourdough starter-1
BLOG
How to make your own sourdough starter
BY PJ HAMEL
Day 3: By the third day, you’ll likely see some activity — bubbling; a fresh, fruity aroma, and some evidence of expansion. It’s now time to begin two feedings daily, as evenly spaced as your schedule allows. For each feeding, weigh out 113 grams starter; this will be a generous 1/2 cup, once it’s thoroughly stirred down. Discard any remaining starter.
Add a scant 1 cup (113 grams) King Arthur Unbleached All-Purpose Flour, and 1/2 cup (113 grams) water to the 113 grams starter. Mix the starter, flour, and water, cover, and let the mixture rest at room temperature for approximately 12 hours before repeating.
Day 4: Weigh out 113 grams starter, and discard any remaining starter. Repeat step #6.
Day 5: Weigh out 113 grams starter, and discard any remaining starter. Repeat step #6. By the end of day #5, the starter should have at least doubled in volume. You’ll see lots of bubbles; there may be some little “rivulets” on the surface, full of finer bubbles. Also, the starter should have a tangy aroma — pleasingly acidic, but not overpowering. If your starter hasn’t risen much and isn’t showing lots of bubbles, repeat discarding and feeding every 12 hours on day 6, and day 7, if necessary — as long as it takes to create a vigorous (risen, bubbly) starter. Note: see “tips,” below.
Sourdough Starter – Step 8
Once the starter is ready, give it one last feeding. Discard all but 113 grams (a generous 1/2 cup). Feed as usual. Let the starter rest at room temperature for 6 to 8 hours; it should be active, with bubbles breaking the surface. Hate discarding so much starter? See “tips,” below.
Remove however much starter you need for your recipe — typically no more than 227 grams, about 1 cup. If your recipe calls for more than 1 cup of starter, give it a couple of feedings without discarding, until you’ve made enough for your recipe plus 113 grams to keep and feed again.
Sourdough Starter – Step 10
Transfer the remaining 113 grams of starter to its permanent home: a crock, jar, or whatever you’d like to store it in long-term. Feed this reserved starter with 1 scant cup (113 grams) of flour and 1/2 cup (113 grams) water, and let it rest at room temperature for several hours, to get going, before covering it. If you’re storing starter in a screw-top jar, screw the top on loosely rather than airtight.
Store this starter in the refrigerator, and feed it regularly; we recommend feeding it with a scant 1 cup (113 grams) flour and 1/2 cup (113 grams) water once a week.
Tips from our Bakers
Why do you need to discard half the starter? It seems so wasteful… But unless you discard starter at some point, eventually you’ll end up with a very large container of starter. Also, keeping the volume down offers the yeast more food to eat each time you feed it; it’s not fighting with quite so many other little yeast cells to get enough to eat. You don’t have to actually discard it if you don’t want to, either; you can give it to a friend, or use it to bake. There are quite a few recipes on our site using “discard” starter, including pizza crust, pretzels, and waffles, and even chocolate cake. If you’re still uncomfortable dealing with discard, though, try maintaining a smaller starter: the smaller the starter, the smaller the amount of discard.
Why does this starter begin with whole-grain flour? Because the wild yeast that gives sourdough starter its life is more likely to be found in the flora- and fauna-rich environment of a whole-grain flour than in all-purpose flour. What if all you have is all-purpose flour, no whole wheat? Go ahead and use all-purpose; you may find the starter simply takes a little longer to get going. Also, if you feed your starter on a long-term basis with anything other than the all-purpose flour called for here, it will probably look different (thicker or thinner, a different color) and act differently as well. Not to say you can’t feed your starter with alternate flours; just that the results may not be what you expect.
Canning  Chicken (Raw Pack Method)
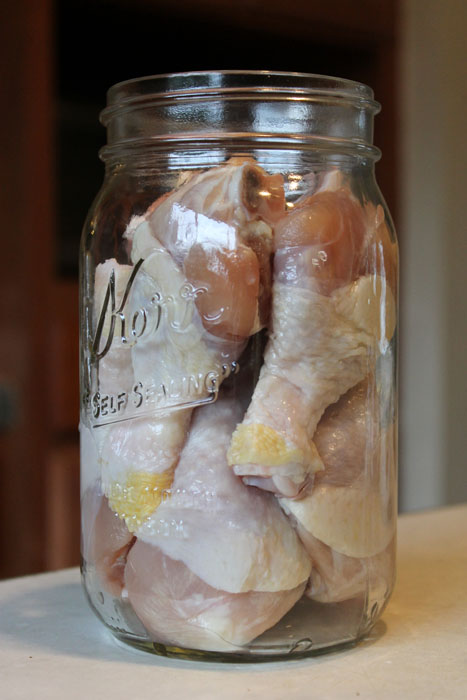
4 whole roasting chickens or 35 assorted chicken pieces
8 whole bay leaves
8 teaspoons lemon juice
8 teaspoons salt (optional)
8 teaspoons dried parsley or 8 teaspoons dried cilantro
Remove fat and skin from chicken pieces. Have sterilized hot quart canning jars ready. Have damp hot cloth ready to wipe rim of jars. Seals should be hot in water. Lay out the chicken pieces in groups for each jar. Pack each jar half full. Add to each jar, 1 bay leaf, 1 tsp lemon juice, 1 tsp salt and 1 tsp parsley or cilantro. Fill the jar with hot water. Leave at least 1 1/2 inch head room. Wipe jar rim with damp clean cloth. Place seal and ring and tighten. Have the pressure cooker ready, fill the jars in the rack, lower the rack. Please the lid on the pressure cooker. Pressure cook 15 lb. pressure for 90 minutes.
DO NOT LEAVE THE KITCHEN. You must adjust the heat to stabilize the pressure and maintain the 15 lb pressure. This is not hard to do. When 90 minutes have passed. Turn off the heat, take off the burner or leave on, let it cool naturally. Do not remove the pettcock, the pressure gauge. Let the steam go out naturally. Take the jars out, place on a towel, out of drafts. Let seal.
Canning Spaghetti Sauce
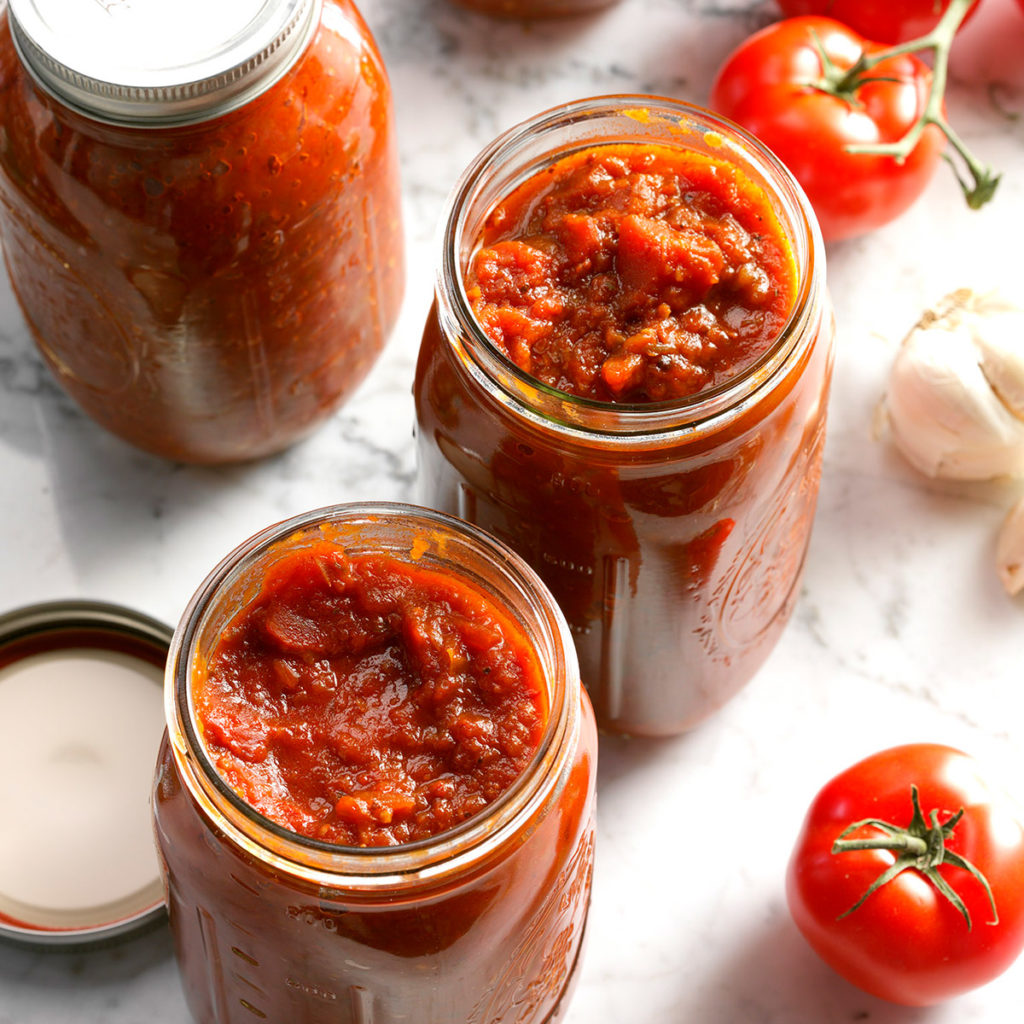
10 lbs fresh tomatoes
3 tablespoons oil
4 1â„2 cups onions, chopped
3 cloves garlic, minced
1 1â„2 teaspoons oregano, crushed
2 bay leaves, crushed
1 tablespoon plain non-iodized salt
1 tablespoon granulated sugar
1 teaspoon black pepper
1â„2 teaspoon red pepper, crushed
1 tablespoon dried parsley
1 tablespoon celery leaves, minced
Peel, core and chop tomatoes. Combine with remaining ingredients in heavy saucepan. Simmer 2 hours stirring often until desired consistency. Pour into hot jars to 1/2 inch from top. Wipe jar top and threads carefully with damp cloth making sure they are thoroughly clean. Put on lids and bands. Place in water canner with at least 2 inches of hot water over tops of jars. Bring canner to gentle boil and process 30 minutes. At end of processing time, remove jars to draft free area to cool at least 12 hours. Inspect each jar to make sure it is sealed, remove bands and wipe with damp cloth. Label with date and store.
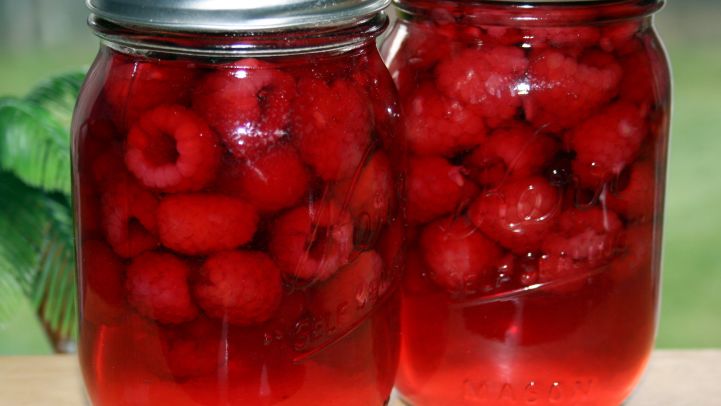
Canning Raspberries
4 C. water
1 -4 3â„4 C. sugar
1 1â„2-3 lb. berries
Use 1 C. sugar for VERY LIGHT SYRUP; 2 C. sugar for LIGHT SYRUP; 3 C. sugar for MEDIUM SYRUP; 4 3/4 C. sugar for HEAVY SYRUP. Boil sugar& water together for 5 minutes& skim, if necessary; keep hot but not boiling. Wash fruit, drain& fill hot sterile jars, leaving 1/2-inch headspace. Bring syrup to a full boil& cover berries with syrup, leaving 1/2-inch headspace. Remove any trapped air bubbles (I use a chopstick to do this) & adjust lids. Process in a boiling water bath, 10 minutes for pints or 15 minutes for quarts.
Canning Pizza Sauce
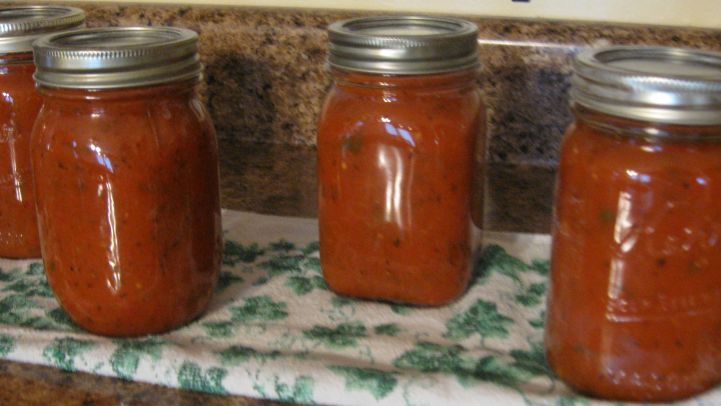
4 pints
25 -28 tomatoes
2 large onions, minced
4 garlic cloves, minced
3 tsp. olive oil
2 tsp. lemon juice
1 tsp. cracked pepper
1 tsp. sugar
2 tsp. parsley, chopped
1 tsp. oregano
1 tsp. basil
1 tsp. rosemary
1 tsp. celery seed
2 tsp. salt
1â„2 tsp. summer savory
Peel and puree the tomatoes. Mince the onion and garlic. Put olive oil in deep pan and sauté the onions and garlic until transparent. Add the tomato puree and the rest of the ingredients; stir well to blend. Cook on low until mixture is reduced by ½, stirring occasionally. This will take 1-1/2 to 2 hours. When sauce is done and nicely thickened, ladle into hot pint size jars, clean the rims of the jars, and seal. Process for 25 minutes in water bath.
Canning Navy Beans (Easy Method)
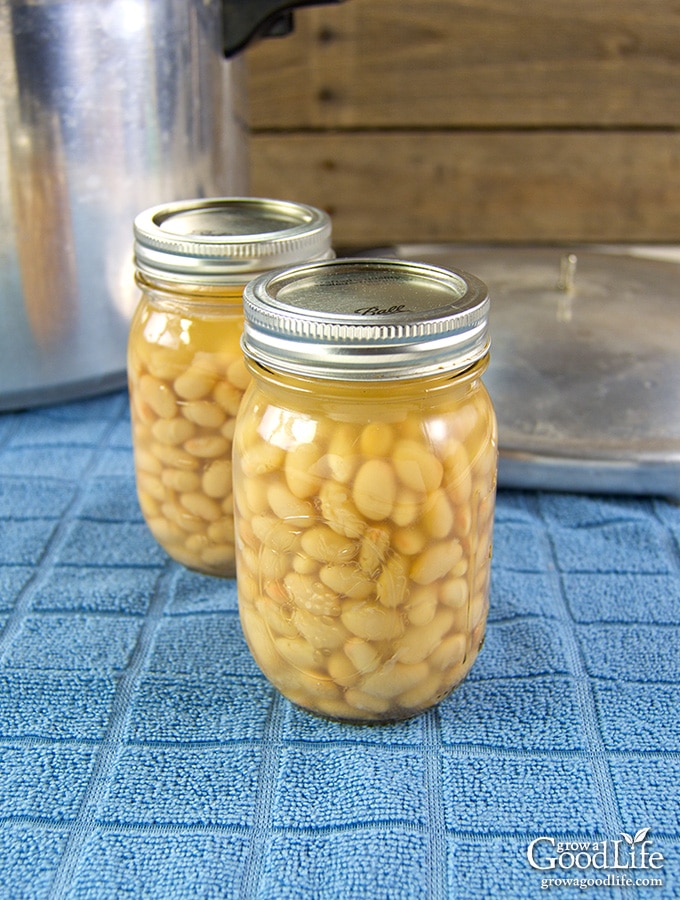
1 1â„2 cups dried navy beans
1â„2 teaspoon salt (optional)
Put 1 1/2 Cups Dry Navy Beans in each quart jar. Add salt as desired. Fill Jar with boiling water to 1 inch from the top. Put on lids and rings. Place in canner with hot water. Pressure can at 10 lb. pressure for 20 minutes. Beans will continue to soften when you use them in either your soup or for baked beans.
Canning Baked Beans
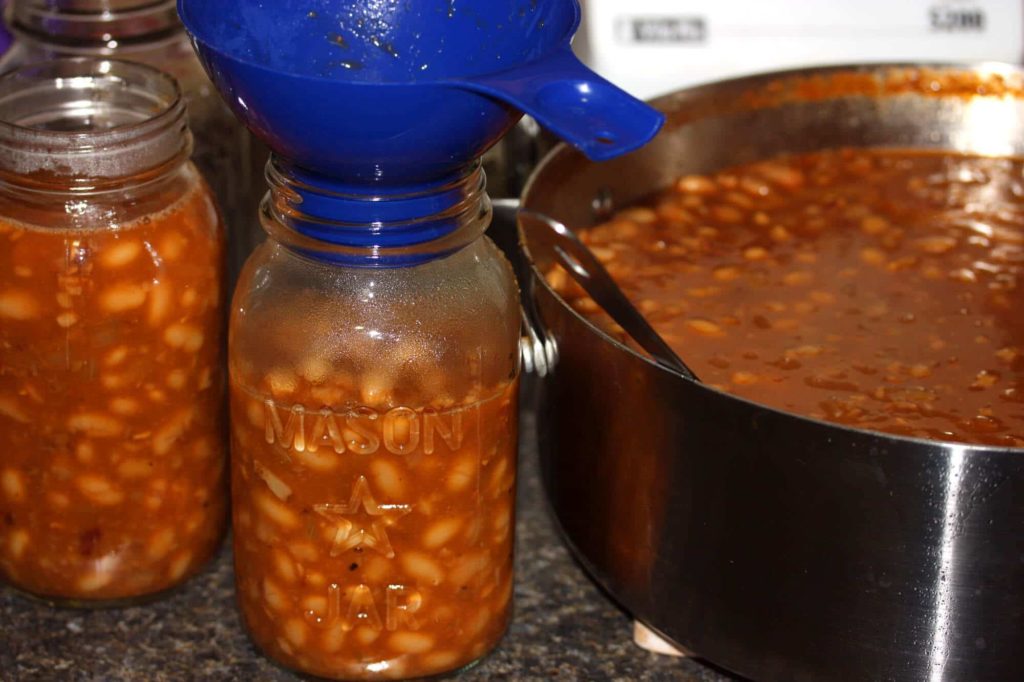
8 pints
2 lb. dried navy beans
1â„2 lb bacon
1 -3 large onion
2â„3 cup brown sugar, packed
4 teaspoons salt
2 teaspoons mustard powder
1 cup orange juice (optional)
2â„3 cup molasses (I use Grandma’s molasses which has a higher concentration of sugar)
Soak beans in 3 quarts of water, (make sure they are covered!) for 12-18 hours. Drain but do not rinse. Return beans to pot and cover with 3 quarts of fresh water. Bring to a boil over high heat. Reduce the heat; cover and simmer until the bean skins begin to split. Drain the beans, reserve the liquid. Transfer the beans to a 4-quart or larger covered baking dish. Chop the bacon and onions. Add them to the beans. Combine the brown sugar, salt, mustard, and molasses in a large mixing bowl. Add 4 cups of the reserved bean liquid (or 1 cup orange juice and 3 cups water). Pour the sauce mixture over the beans. Don’t stir! Cover the beans and bake them in a preheated 350-degree oven for 3 to 3.5 hours. The consistency should be like a thick soup. Adds more liquid if the beans become too dry. While the beans are baking, prepare your canning jars and two-piece caps (lids and screw bands) according to the manufacturer’s instructions. Keep the jars and lids hot. Ladle the hot beans into your prepared jars, leaving a 1-inch headspace. Release any air bubbles with a nonreactive tool, adding more beans as necessary to maintain the proper headspace. Wipe the jar rims; seal the jars with the lids and caps, hand tightening the bands. Process your filled jars in a pressure canner at 10 pounds pressure for 1 hr 20minutes (pints) or 1 hr 35minutes (quarts). After the pressure in the canner has returned to 0, wait an additional 10 minutes, and then carefully open the canner lid. Remove the hot jars with a jar lifter. Place them on a clean kitchen towel away from drafts. After the jars cool completely, test the seals. For added safety, boil the contents for 15 minutes before tasting or eating. (If you follow accurate canning protocol, that should not be necessary!). It takes a big pot to make this so if you want to double it, prepare two separate pots. My canner only holds 5 quarts so it can only hold a single batch anyways.
Canning Cuban Black Beans
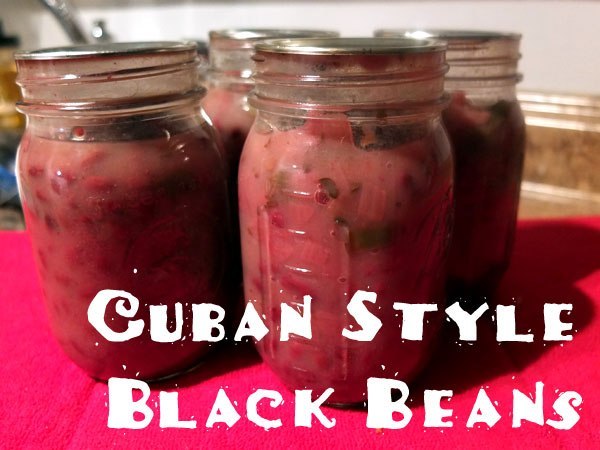
2 lb. dried black beans
2 cups onions, chopped
1 cup bell pepper, chopped
6 teaspoons garlic, chopped
1 1â„2 tablespoons salt
1 1â„2 tablespoons ground cumin
1 tablespoon oregano
1â„4 cup cider vinegar
1â„2 lb salt pork
Sort dry beans. Soak overnight in water. Drain beans, add new water covering by 2″, and bring to a boil. When boiling begins, remove from heat and set aside. Sauté onion, pepper, and garlic in olive oil until onion is glassy. Add remaining spices, salt and vinegar to the sauté pot. Sterilize 8-pint Mason Jars. Add 1/4 cup of sauté mixture to each jar. Chop Salt pork into small pieces and divide into eight “piles”. Put one “pile” of salt pork into each jar. Add 1 slightly heaping cup of black beans to each jar. This should leave about 1 1/2″ headspace in jar. Do not overfill with beans. They expand a lot during processing. Overfilling will cause jars to leak in canner. Top off each jar with bean juice, leaving 3/4″ headspace. Put of lids and process 1 hour 5 minutes at 10 psi. After processing, remove from heat and allow canner to return to ambient pressure of its own accord. Remove and cool jars. Needs to age a month or so to blend flavors. When serving, it is normal to add a bit of water, since water boils out during processing. Serve ladled over rice and add a dollop of sour cream.
Quick Sides
Organic Baked Beans
Sauteed Spinach with Garlic
Add l tablespoon olive oil to a large skillet. Swirl around l halved garlic clove, cut side down, to infuse the oil. Remove the garlic clove. Add a shake of red pepper flakes and 12 ounces of fresh spinach. Stir as the mound of leaves gradually wilts way more than you ever think it will. Add a hefty pinch of salt and black pepper. Snip the spinach leaves with kitchen scissors while still in the skillet.
Green Beans with Toasted Almonds and Mint
In a large frying pan, heat 2 tablespoons olive oil and l tablespoon unsalted butter over medium heat. When the butter has melted, add cup slivered almonds and cook for 2 minutes, or until they darken slightly in color. Add 2 cups trimmed green beans and cook for 2 minutes, stirring occasionally. Add a generous squeeze of lemon juice and a few pinches of salt and remove to a platter. Sprinkle with chopped fresh mint.
Tomato and Avocado Salad
Halve l avocado, remove the pit, peel, and cut into chunks. In a medium bowl, toss with about 1V2 cups halved grape tomatoes, 3 chopped scallions (white and light green parts only), a generous drizzle of olive oil, salt and pepper, a spritz of lime juice, and chopped fresh cilantro to taste.
White Beans and Spinach
In a medium skillet, sauté a halved garlic clove, cut side down, in a few glugs of olive oil. Let it infuse the oil for a minute, then remove. Add 2 tablespoons chopped onions (or shallots or scallions—white and light green parts only) and a shake of red pepper flakes and cook until the onions are soft, about 2 minutes. Stir in l can of rinsed and drained white beans (such as Great Northerns or cannellini). Add a handful of thawed and well-squeezed frozen spinach, lightly mashing the beans and spinach together. Add salt and black pepper and stir. Serve with freshly grated Parmesan.
Sugar Snap Peas and Radish Salad
In a medium bowl, toss together 2 cups of the sweetest sugar snap peas you can find (trim off the ends if it’s not too big of a pain); l radish, sliced into thin coins; V4 cup chopped fresh mint; a squeeze of lime juice; sea salt; about 1 tablespoon chopped scallions (white and light green parts only); and a tiny drizzle of olive oil. This is best in the spring when the snap peas are peaking.
Corn with Butter and Cotija Cheese (or Parmesan)
Boil shucked sweet com for 5 minutes. Spread butter on the corn while the corn is still hot and sprinkle with cotija or Parmesan cheese. If it is peak com season, forget the cheese and eat boiled corn on the cob with butter and salt only. Anything else is, obviously, blasphemy.
Quick Creamed Spinach
Thaw a box or bag of frozen spinach by placing it in a colander and running warm water over it for a few minutes. Press down on the spinach to squeeze out all the liquid. In a small frying pan over medium heat, add l tablespoon olive oil and small onion (chopped), salt, black pepper, and a few red pepper flakes (optional, as always). After 5 minutes, add the spinach and toss with the onions until the spinach is heated through. Sprinkle in 1 to 2 teaspoons flour and stir. Add Vs to V2 cup milk (nonfat, 1%, 2%, whole … any kind but chocolate!), depending on how creamy you like your creamed spinach, and a pinch of freshly ground nutmeg. Stir until heated through.
Green Beans with Ginger and Garlic
Add 2 tablespoons olive oil to a large skillet set over medium heat, along with 2 teaspoons peeled, minced fresh ginger, 3 to 4 chopped scallions (white and light green parts only), a shake of red pepper flakes, and salt and black pepper. Cook until the ginger and scallions are soft and aromatic, about 1 minute. Add 3 cups trimmed green beans (or haricots verts) and 1 minced garlic clove. Cook, uncovered, until the green beans are tender but still crispy, about 4 minutes.
Buttered Peas with Mint
In a large skillet, melt 2 to 3 tablespoons unsalted butter over medium heat. Add 1V2 cups thawed frozen peas. (You can run them under warm water to accelerate the thawing process; just try to dry them as much as possible before proceeding.) Heat until w armed through. Remove from the heat and sprinkle with 2 tablespoons chopped fresh mint and salt to taste.
Roasted Cauliflower and Broccoli
Preheat the oven to 4OO°F. Separate l head of cauliflower and l head of broccoli into florets. On a rimmed baking sheet, toss the florets in olive oil to lightly coat. Season with a shake of red pepper flakes and salt and black pepper to taste. Spread out on the baking sheet and roast for 15 to 20 minutes, until the vegetables look crispy but not burnt. Squeeze fresh lemon juice over the vegetables and sprinkle with freshly grated Parmesan, if desired.


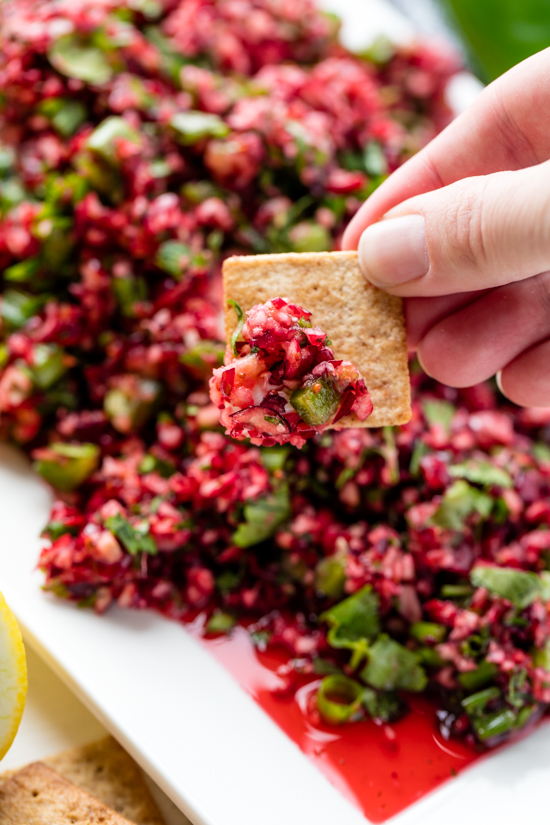
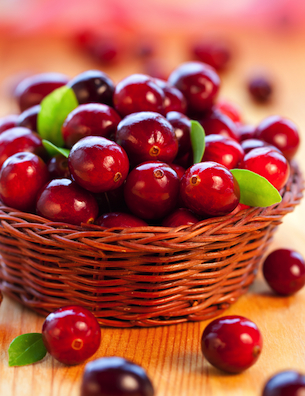 Ways to Enjoy Fresh Cranberries
Cranberries have a special place in my heart. The best place that I lived while growing up was perched on the edge of a cranberry bog in a tiny town in northwest Washington, near the coast. (My love of blueberries started back then too, with several bushes in the back yard). It wasn’t that we ate them; I don’t think we considered them food at my tender age, hah! but on the bog was a magical place to grow up.
In a smoothie: Freeze a bag of fresh cranberries, then whirl some with frozen blueberries, vanilla-flavored yogurt, orange juice, and a little honey.
In pancakes or muffins: Substitute 3/4 C. fresh cranberries and 1/2 C. chopped dotes for each C. blueberries in your favorite pancake or muffin recipe.
In a granita: Simmer 2 C. water, I C. fresh cranberries, 3/4 C. sugar, and 1 tsp. grated orange peel until cranberries pop. Puree in a blender, strain, and freeze until firm, then scrape with a fork to create fluffy crystals.
In dressing for roast poultry: Add a handful of fresh cranberries, some chopped apples, toasted pecans, sage, and a little maple syrup to a bread stuffing mix.
In chutney: Cook fresh cranberries with some golden raisins, brown sugar, a little cider vinegar, minced ginger, star anise, ground cinnamon, ground cloves, and pepper for about 5 minutes.
Cranberry Ice: Place cranberries into the bottom on a bundt (or other decorative) pan, add water and freeze. A decorative floating ring to spice up a holiday punch.
Cranberries are too tart for most people to want to eat them out of hand, but you can sweeten them and use them along with other fruits in a fruit salad or toss a handful into a lightly sweetened smoothie. Chop cranberries and toss with sugar, then allow to macerate briefly if you would prefer a sweeter taste. Try stirring sweetened raw cranberries into yogurt for a healthy breakfast or even tossing a few on top of your morning oatmeal.
Holiday Cocktails:Â Bourbon & Cranberries, Cranberry Champagne Cocktail
Their tart freshness is good for cutting through rich savory dishes as well, like pork chops or sausage meatballs.
Many foods can be cooked without using traditional cooking utensils such as pots, pans, or Dutch ovens. Novelty cooking methods include cooking directly on coals or rocks, cooking food inside of food, cooking using green sticks, and cooking using only aluminum foil.
Possibilities include the use of an orange as your “potâ€. Slice an orange in half so that the stem end is not in the middle of your cooking vessel. Remove the orange sections and eat them immediately! Place a ball of ground meat in the middle of the shell to which you have added a bit of onion, perhaps some green pepper, and some salt and pepper. Place the filled orange shell directly on the coals, and cook for 15-20 minutes.
If you were eating breakfast, you could use the orange peel as an egg-cooking device. Crack one egg into each half of the orange shell, and place each shell directly on the coals. The eggs should be ready to eat in approximately 10-12 minutes.
A whole onion could be used to cook the above two foods instead of the orange. Cut the onion in half, and remove enough of the onion’s middle so that you have a shell which is about 3/8†to 1/2†thick. Place the foods in the half and cook just as before. The time required to cook your mini-meatloaf or eggs should be about the same as with using the orange peels.

How about some corn on the cob cooked right on the coals? Peel the corn shucks (the green outer layer) about halfway down the ear of corn. Remove the silk, which is the stringy threadlike stuff right next to the corn kernels. Moisten the corn with a little bit of water and replace the shucks. Place the ear of corn on some coals and cook for 5 minutes. Rotate the ear of corn one half of a turn and cook for 5 additional minutes. A little bit of butter or margarine, and a touch of salt, and you are ready to go!
Cooking with nothing but a paper bag? Sure, and here is how! Get a lunch sack sized paper bag and a pointed stick. Place a strip of bacon or two in the bottom of the paper bag. Break an egg in the bag over the bacon strips. Begin rolling the bag from the top down with 1†folds until halfway down. Push the pointed stick through the rolled end of the bag and hold the bag over the coals. Grease from the bacon will coat the bottom of the bag. The egg should be done in about 10-12 minutes. Keep the bag from getting too close to the fire as the grease is quite flammable. When ready, you can eat right out of the sack!
If you want to try an easy dessert, try this one. Cut a wedge-shaped section out of the length of one banana. Place marshmallows and chocolate chips into the cavity of the banana. Wrap the banana in foil and heat over coals for 4-6 minutes. Unwrap and put some pineapple pieces, cherries, or chopped nuts over the banana and you have the trail version of a banana split.
In terms of supported or suspended cooking methods, why don’t you try one of these options. Make yourself a batch of biscuit dough just as instructed per the Bisquick box or similar product. Find a green tree limb maybe 1 to 1 1/2†in diameter. Clean the bark off of the limb, and carve a couple of grooves around the limb to make the surface somewhat rough. After mixing the dough , roll or pat the dough into a strip 12-18†in length, 2†wide, and about 1/4†to 3/8†thick. Moisten the stick (spit), and begin wrapping the dough in a diagonal pattern around the spit leaving a slight space between the wraps of dough. Press the dough gently as you wrap so that it will stick to the spit. Suspend the spit over a bed of coals and cook until golden brown. Keep rotating the spit as you cook so that the bread will cook evenly.
If you like shish-kabobs, you can use a sharpened stick as your skewer. Find a green stick, perhaps 18†to 24†in length and remove the bark. Use a hardwood like oak, hickory, or ash if available as it will likely not leave an aftertaste with the food. Wood from cedar, pine, or other evergreens may leave an undesirable aftertaste due to the high levels of resins and pitch in these particular woods. Cut pieces of beef from skirt steak, or other such cuts, into 1†square chunks. Cut an onion into quarters and a green pepper
into wedges. If you want a little different flavor, also gather about 16 good sized chunks of pineapple. Begin threading these different items onto the green stick in an alternating pattern, such as beef, pepper, onion, pineapple, etc. Repeat this pattern until you and/or your other members use up your ingredients. Cook over hot coals, and rotate the stick regularly so that the food cooks evenly. The kabob should be ready in 15-20 minutes if you regulate the heat appropriately.
If you have a sweet tooth, try this recipe. Select a good cooking apple such as a Jonathan or a Rome. Use a sharpened stick by pushing the stick into the apple until secure. Place the apple 2-3 inches over the coals, and roast the apple until the apple skin is easily removed. Remove the skin (be careful, it’s hot!), and then roll the apple in a small bowl filled with a mixture of sugar and cinnamon. Begin roasting the apple again until the sugar melts and forms a glaze or coating over the apple. Remove the apple from the stick and
eat your “apple pie on a stickâ€!
 Pop popcorn in bacon fat.
Make Caesar salad dressing with bacon drippings in place of the olive oil.
Fry chicken using four parts peanut oil and one part bacon fat.
Add about 1 T. of bacon fat per pound to raw hamburger, ground turkey, or venison meat before frying or grilling the patties.
Fry liver and onions in bacon fat.
Use bacon fat to make gravies and roux.
Sauté onions, carrots, and/or garlic in bacon fat for vegetable soups.
Use bacon fat to cook refried beans and sunny-side-up eggs.
Stir l to 2 T. of bacon fat into pots of boiling white beans, polenta, grits, or rice.
Sauté sliced brussels sprouts in bacon fat.
Add bacon fat when boiling water to cook or blanch green beans.
When baking russet potatoes, coat the skin with bacon fat before putting the potatoes in the oven.
Cook hash browns in bacon fat.
Sauté chopped Swiss chard and other hearty winter greens in bacon fat.
Fry sliced tomatoes in bacon drippings (great on sandwiches).
Use bacon fat when making skillet corn bread; you’ll get a crunchier crust.
Substitute a T. of bacon fat for other fats in single- crust pies.
If you have dogs, add it to their dog food for better flavor and digestion. Not to mention is helps keep their coats shiny and healthy.
When baking cornbread (or any other bread) use it to grease the baking pan or skillet before you add the mixture.
Add it to those green things we like to call “veggies†while you’re cooking. This way you don’t really need to add much salt, and it gives the veggies a hint of delicious porky flavor.
Use bacon fat in place of margarine for certain recipes. Get crazy and experiment. You will only find your favorite recipe by having fun with it!
Use it while frying up potatoes, steaks, shrimp, onions, eggs… practically anything you can think of frying up. Except for zombies. Don’t use bacon grease to fry up a zombie.
Add bacon fat into cream cheese to make as a sauce for different dishes. It tastes delicious poured over squash, broccoli, steaks, and potatoes. Also works well in gravy recipes.
When making pancakes, instead of using oil, use bacon grease. So genius.
Add into soups when you’re cooking over the stove- it will give your soup that extra hint of delicious savory flavor.
For an even tastier turkey sandwich (or any other lunch meat), lay warm liquid bacon grease on a plate to form a very thin layer. Lay your turkey slices (or whatever meat you like for your sandwiches) on top of the grease to just lightly coat the lunch meat. Then simply add to your sandwich. You may do this with your cheese if you would like too. This method is so tasty you won’t need to use mayonnaise. You can also use the bacon grease to fry up that sandwich after you’re done putting it together!