Browsed by
Tag: DIY

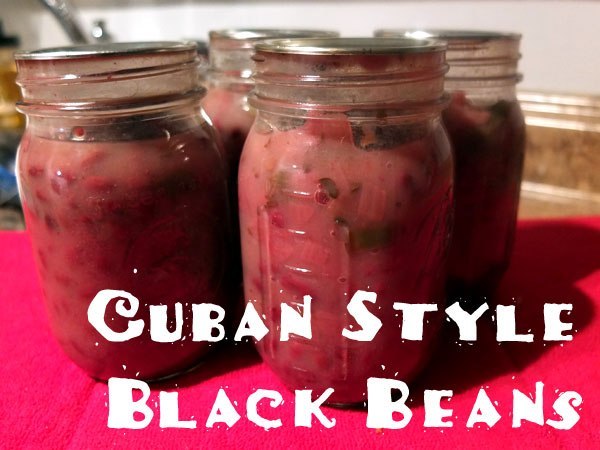
Canning Cuban Black Beans

Canning Cuban Black Beans

Canning Cuban Black Beans

2 lb. dried black beans

2 cups onions, chopped

1 cup bell pepper, chopped

6 teaspoons garlic, chopped

1 1⁄2 tablespoons salt

1 1⁄2 tablespoons ground cumin

1 tablespoon oregano

1⁄4 cup cider vinegar

1⁄2 lb salt pork


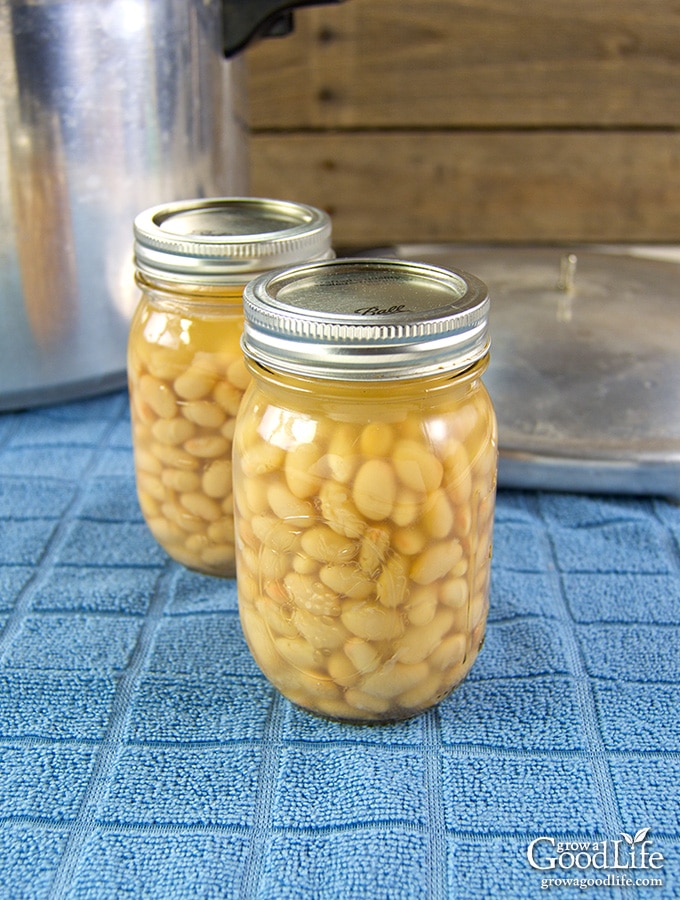
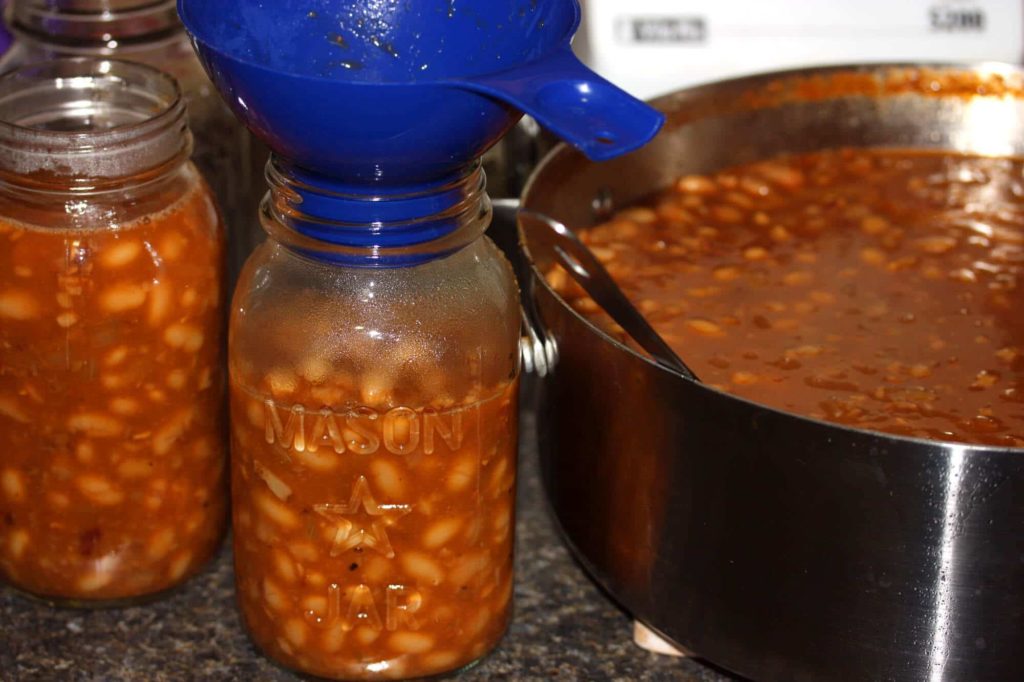
Sort dry beans. Soak overnight in water. Drain beans, add new water covering by 2″, and bring to a boil. When boiling begins, remove from heat and set aside. Sauté onion, pepper, and garlic in olive oil until onion is glassy. Add remaining spices, salt and vinegar to the sauté pot. Sterilize 8-pint Mason Jars. Add 1/4 cup of sauté mixture to each jar. Chop Salt pork into small pieces and divide into eight “piles”. Put one “pile” of salt pork into each jar. Add 1 slightly heaping cup of black beans to each jar. This should leave about 1 1/2″ headspace in jar. Do not overfill with beans. They expand a lot during processing. Overfilling will cause jars to leak in canner. Top off each jar with bean juice, leaving 3/4″ headspace. Put of lids and process 1 hour 5 minutes at 10 psi. After processing, remove from heat and allow canner to return to ambient pressure of its own accord. Remove and cool jars. Needs to age a month or so to blend flavors. When serving, it is normal to add a bit of water, since water boils out during processing. Serve ladled over rice and add a dollop of sour cream.

Mango Raspberry Fruit Leather

Mango Raspberry Fruit Leather

Mango Raspberry Fruit Leather

1 large ripe mango, peeled and chopped

6 ounces fresh raspberries

2 T. sugar


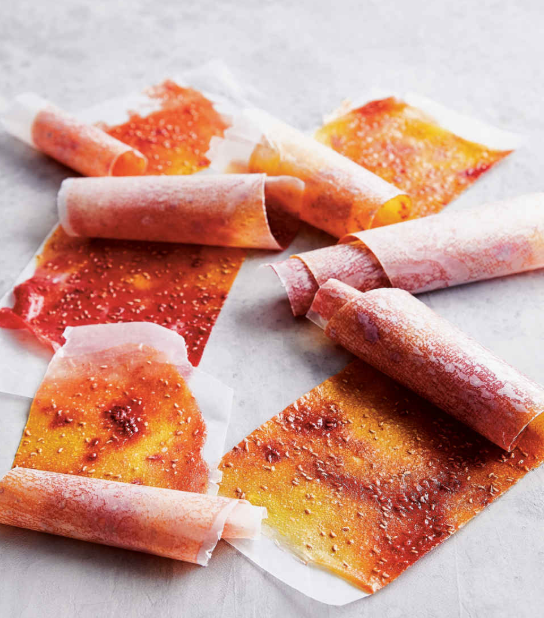
Preheat the oven to 15O°F. Line a rimmed half-sheet pan with a silicone baking mat. In a blender or food processor, blend the mango until smooth. Transfer the mango to a bowl and set it aside. Add the raspberries and sugar to the blender and blend until smooth. (It is important to blend the raspberries with the sugar, as the sugar helps liquefy the berries.) Place dollops of the mango and raspberry purees on the prepared pan. With a small offset spatula, spread the purees evenly over the pan—try to spread them as evenly as possible, not too thin and not too thick, and try not to spread them to the very edges, so you’ll have room to grab the fruit leather and peel it off the mat when it’s cool. Bake for 2 hours 30 minutes to 3 hours, rotating the baking sheet every hour. The leather is done when it is still tacky but not too sticky or wet. Let the leather cool. Remove it from the mat and place it on top of a sheet of wax paper. Cut the leather and wax paper into strips with scissors and roll them up paper-side out, then store them in a sealed container at room temperature for up to 1 week.

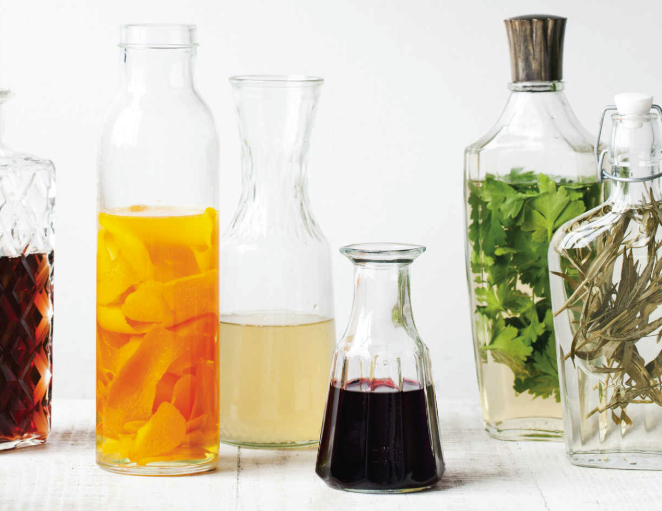
Gourmet Vinegars


Fresh pearl onions

Baby carrots with greens

Empty glass wine bottles & Corks

Funnel

Vinegar

Cranberries

Scallions

Whole peppercorns


Carrot & Pearl Onion Vinegar


Peel dry skin from onions, removing additional layers until small enough to fit in bottle.

Clean and peel carrots. Cut off all but an inch of greens. Fill bottle with enough onions to cover bottom. Add several carrots. Using funnel, fill bottle with vinegar. Seal bottle with a cork and store in a dark place for 5-6 days, shaking every few days.


Cranberry Vinegar


If using frozen cranberries, wipe off moisture before using. Place approximately 1-2 c. cranberries in bottle. Using funnel, fill bottle with vinegar. Seal bottle with a cork and store in a dark place for 5-6 days, shaking every few days.


Scallion-Peppercorn Vinegar


Clean scallions and trim greens to just below the neck of the bottle. Place inside.

Add peppercorns. Using funnel, fill bottle with vinegar. Seal with a cork and store in a dark place for 5-6 days, shaking every few days.


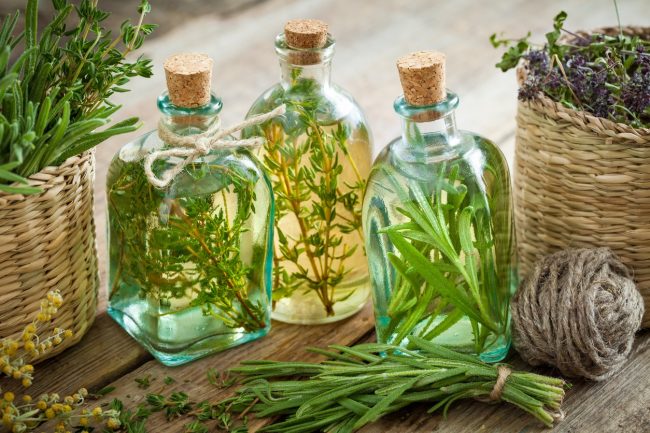
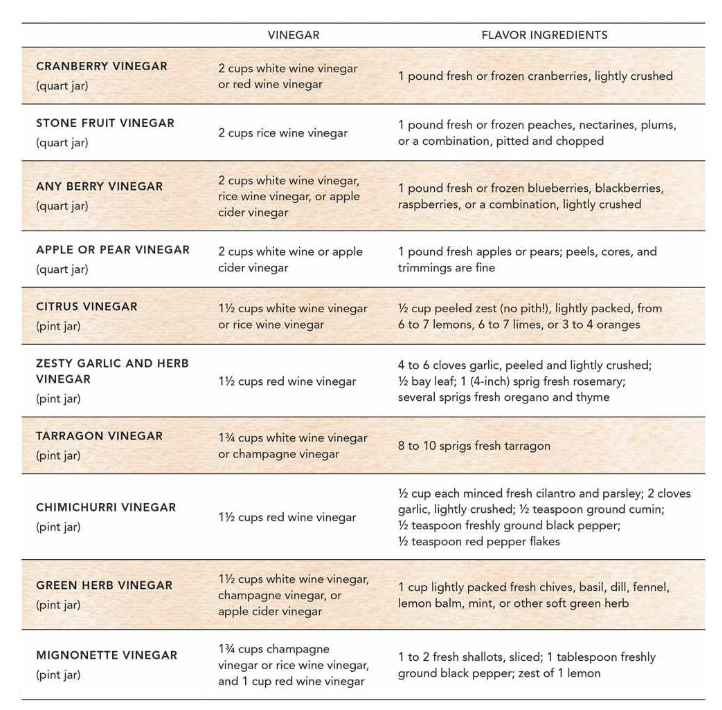
Tips: Be sure to sterilize bottles with hot water, or clean thoroughly with soap and water before using. Use white wine, red wine, cider or any type of vinegar. Carrot & Pearl Onion Vinegar is a fantastic salad dressing; Cranberry Vinegar is a great base for coleslaw; and Scallion-Peppercorn Vinegar is good for stir-frying. If a veggie gets stuck in the neck of a bottle, use a chopstick to gently push it down.

Brown Sugar and Vanilla Bean Apple Sauce
Brown Sugar and Vanilla Bean Apple Sauce
Brown Sugar and Vanilla Bean Apple Sauce
 

10 C. peeled, cored, sliced apples

1/2 C. packed brown sugar

Juice of 1 1/2 -2 lemons {plus zest if you like it extra lemony}

1 vanilla bean, seed it and throw in both the seeds and cook with the pod


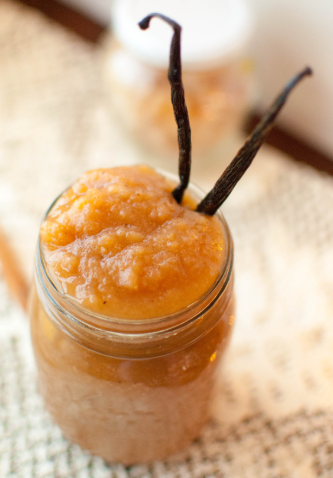
Place all ingredients in a large stock pot and cook for 30-ish minutes or until apples are soft and begin to break apart. Mash with a hand masher or just stir until a good chunky consistency is reached.

Homemade Berry Syrup

Homemade Berry Syrup

Homemade Berry Syrup


1 cup berries, fresh or frozen

Sugar

Grated lime peel


In a small saucepan, heat berries and a few spoonfuls of sugar, along with a splash of water, over low heat until berry juices start to release. Pull the berry-sugar mixture from the heat and let cool for a moment. Divide the mixture and reserve half. Purée the other half in a blender until smooth. Pour it through a strainer to remove the skins and seeds (you can compost these). Put the strained syrup back in the saucepan and heat over low heat. Grate in a bit of lime peel and cook until just heated through. Add the remaining whole berries and heat until about to burst, 4 to 6 minutes. Remove from heat and serve immediately.  NOTE: Follow the same instructions with just about any berry. Try varying the citrus as well. Strawberries love orange, and raspberries love lemon. This berry syrup will keep refrigerated for two weeks, or frozen in an airtight container for four to six weeks.

Cheesemaking Queso Blanco / Paneer / Farmer’s Chees

Cheesemaking Queso Blanco / Paneer / Farmer’s Chees

Cheesemaking Queso Blanco / Paneer / Farmer’s Cheese

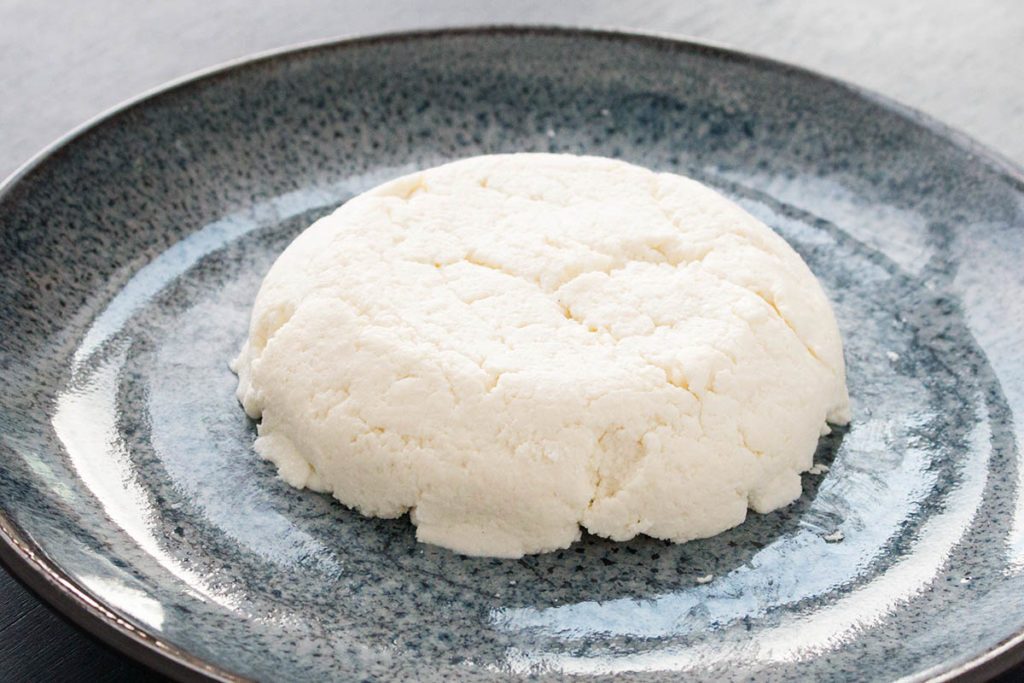
Queso Blanco is meant to be used right away in its crumbly form, or it can be pressed with weights to form a cheese that can be fried.  Acid used will impart a little flavor, try different ones, such as champagne or red wine vinegar. Note that ultra-pasteurized milk will not work, it has been heated to 280, and has no cultures.  This will work with goat, sheep or cows’ milk.  Again, will have a slightly different flavor.

1 gallon milk

¼ C. vinegar lemon juice or lime juice

Salt to taste

Heat the milk slowly in a large pot to 185-190 degrees F. Turn off the heat and stir in your acid – vinegar, lemon juice or lime juice – a spoonful at a time, stirring, until curds form and separate from the yellowish whey. If it does not separate int curds and watery whey within a minute, or the whey looks milky, heat a bit more. Let it sit for 10-20 minutes. Set a colander lined with cheesecloth over a bowl and strain the curds from the whey. Discard the whey or keep it for other uses. Add salt at this stage, if desired, and stir. Stir the curds up a bit and let it drain for 10-20 minutes. For firmer cheese, wrap up the ends of the cheesecloth and continue to drain an hour or so. Hang over the sink faucet, or on chopsticks or spatula that spans the top of a tall pot.  After 4 hours, unwrap cheese and chill in refrigerator. For dense cheese, place a weight over the top of the wrapped cheese (or cheese that has been placed in a cheese mold) that will press it for several hours, until it is packed.  After chilling you can slice or cube the cheese, use in cooking, fry or serve fresh.

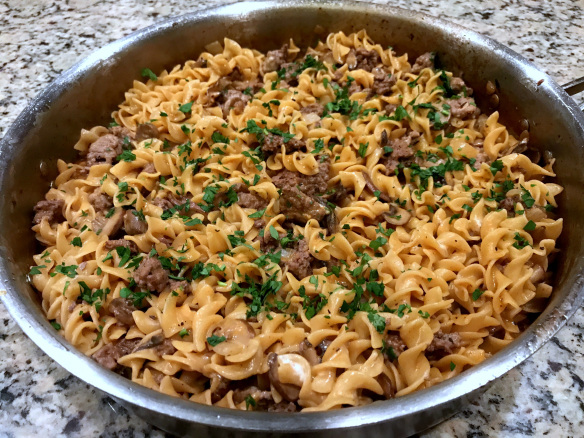
Homemade Stroganoff Hamburger Helper

Homemade Stroganoff Hamburger Helper

Homemade Stroganoff Hamburger Helper

1 lb ground beef

1 medium sweet onion, diced

8 oz crimini mushrooms, sliced

1 tsp. kosher salt

2 cloves garlic, minced

2 tsp. paprika

1 tsp. dried thyme

1 tsp. ground black pepper

4 C. low sodium beef or chicken broth

12 oz. egg noodles

1/2 C. sour cream

1/2 C. chopped parsley


Heat large deep skillet over medium heat. Add the ground beef and cook, breaking up the beef with a spoon as it cooks, until it is browned and cooked through, about 5 minutes. Remove the beef to a bowl, leaving the fat in the pan. Add the onion, mushrooms, and salt and cook until the mushrooms are tender and the onion is translucent, 4-5 minutes. Stir in the garlic and cook until fragrant, 30-60 seconds. Sprinkle the paprika, thyme, and pepper over the top and stir to combine.  Pour in the broth and scrape up any bits stuck to the pan. Add the pasta. Bring to a boil over medium-high heat and continue to cook, stirring often, until the pasta is al dente, about 10 minutes. Return the reserved ground beef to the pan and stir through until warm, about a minute. Remove from heat and stir in sour cream and parsley. Serve immediately.

Homemade Lasagna Hamburger Helper

Homemade Lasagna Hamburger Helper

Homemade Lasagna Hamburger Helper

1 lb. ground beef

1 medium sweet onion, diced

3 cloves garlic, minced

1/2 tsp. kosher salt

1/2 tsp. dried basil

1/2 tsp. dried oregano

1/2 tsp. crushed red pepper flakes

1 (28-oz.) can crushed tomatoes

8 oz. dry mafalda pasta (small wavy like lasagna pieces)

3 C. chicken broth

1 C. (4 oz.) shredded mozzarella cheese

2 tsp. minced fresh parsley

In a large, deep skillet, brown the ground beef over medium-high heat until it is well browned and no longer pink. Drain off any excess fat, if needed. Add the chopped onion and minced garlic to the skillet and stir. Season with salt, basil, oregano, and crushed red pepper, and cook until the onion gets soft and translucent, about 3 minutes.

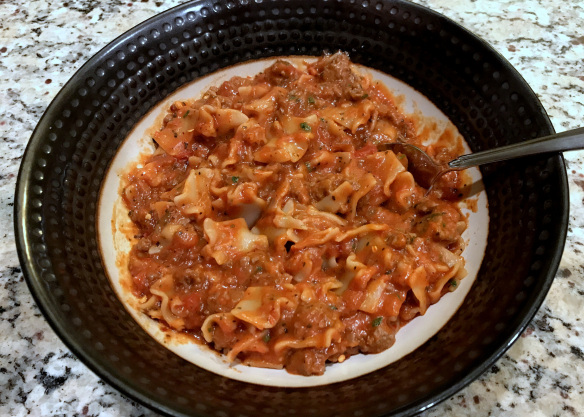
Add the crushed tomatoes, pasta, and chicken broth and stir everything together. Bring to a boil then reduce to medium low. Cook for about 15 minutes or until the pasta is cooked through; most of the sauce should be absorbed. Stir in the cheese and cook for another 30 seconds to a minute until the cheese melts. Garnish with parsley and serve immediately.

Glorious Granola

Glorious Granola

Glorious Granola

Some consider granola too high in calories and fat to be used as an even-day breakfast cereal, though it’s delicious that way. We also love to use it as a topping for fruit and yogurt. Pack some of this granola into an attractive glass jar: It makes a great hostess gift.


6 cups old-fashioned oats

1 cup wheat germ

1 cup skim milk powder

1/2 cup sliced almonds

1/2 cup chopped hazelnuts

1/2 cup shelled sunflower seeds

1/2 cup sesame seeds

2 teaspoons cinnamon

1 cup honey

1 cup canola oil

2 teaspoons vanilla extract

3/4 cup golden raisins

3/4 cup dark raisins

1/2 cup dried cherries

1/2 cup dried cranberries


Preheat oven to 325°F. In a large bowl, toss together the oats, wheat germ, milk powder, nuts, sunflower and sesame seeds, and cinnamon. In a heavy saucepan, heat the honey and oil until hot but not boiling. Remove pan from heat: stir in vanilla. Pour the honey-oil mixture over the oats mixture and toss to coat thoroughly. Spread evenly in three 9- by 13-inch baking pans, or two roasting pans. Bake for approximately 45 minutes, stirring every 15 minutes until mixture is golden. Cool thoroughly; mix in the raisins, cherries, and cranberries.  Yield: About 10 cups

Whole Wheat Flakes

Whole Wheat Flakes

Whole Wheat Flakes

2 cups finely ground dried wheat (approximately)

1 teaspoon ground cinnamon

1 teaspoon ground nutmeg

1/2 teaspoon salt

1/2 teaspoon baking soda

1/4 cup warm water

1/2 cup molasses


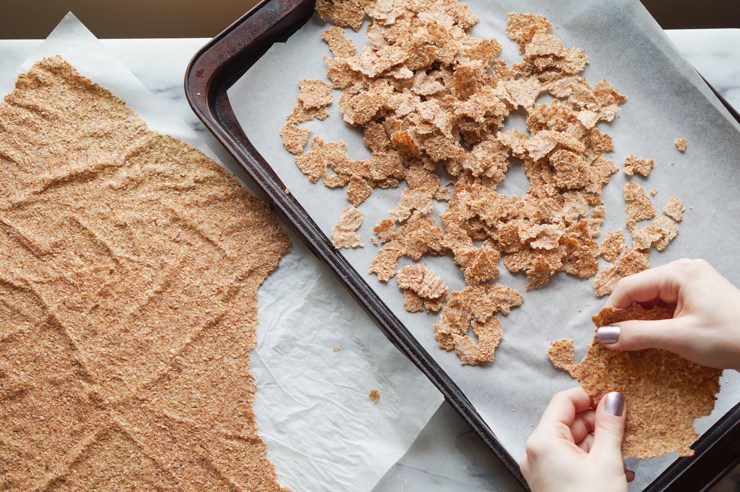
Combine l cup of the wheat with the cinnamon, nutmeg, and salt. Dissolve the baking soda in water and stir quickly into the molasses. Add the flour mixture, then enough of the remaining wheat to make a very stiff dough. Roll very thin and cut into strips. Dry according to your preferred method.  Dehydrator: Lay strips on trays without overlapping. Dry at highest setting until crisp, about 4 to 6 hours. Remove and cool. Crumble into small, flat pieces. Spread over trays again and dry at highest setting for 2 hours longer, or until very crisp.  Sun: Lay strips over trays and dry in full sun where there is good air circulation. Dry until crisp, about 6 to 8 hours, turning once. Crumble into small pieces and spread over trays. Continue drying for 2 to 4 hours longer, stirring occasionally. Take trays inside at night, if necessary.  Oven or homemade dryer: Lay strips on trays. Dry at 15o°F for 4 to 6 hours with door ajar until crisp. Remove from oven or dryer and crumble, then return to trays and dry for 2 to 4 hours longer, or until very crisp.  Store dried cereal in an airtight container. Serve with sugar and milk as a ready-to-eat cereal. Yield: 10 servings

Cherry Vinegar

Cherry Vinegar

Cherry Vinegar

1/2 cup pitted, chopped cherries or 1 cup fresh, whole and uncracked cherry pits*

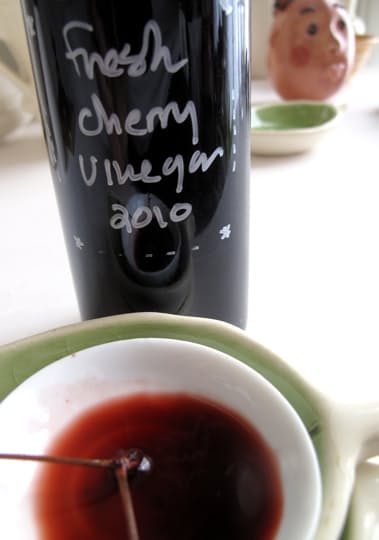
If you haven’t pitted the cherries yet, start there. Do so over a bowl to catch the juices that are bound to drip and drop during the process. Those juices are tasty delicious and stain easily, so you don’t want them going to waste and splattering all over the place.

Simply put the 1/2 chopped cherries or 1 cup fresh, whole and uncracked cherry pits in a glass jar or other seal-able container (jars are preferably to bottles here since you’ll need to get everything out again when you strain the vinegar), fill it with the 2 cups cider vinegar or white wine vinegar, cover, and set aside overnight to let the cherry flavor blend into the vinegar.

Strain, discard the cherries and/or cherry pits, return the vinegar to the jar or transfer to a bottle, cover or otherwise seal, and store at room temperature for up to a year. Use cherry vinegar in salad dressings, in glazes, or mixed with sparkling water or club soda and a bit of honey or sugar to taste for a refreshing soft drink.

* Again, be sure to use only whole cherry pits and to discard them after the soak. Cherry pits contain cyanide, a poison, and you certainly don’t want that in the vinegar.

Baked Cheese Bites

Baked Cheese Bites

Baked Cheese Bites

2 cups sifted all-purpose flour
1 pinch salt
6 ounces shredded Cheddar cheese
1/2 cup butter, melted

Preheat the oven to 325 degrees F (165 degrees C). Lightly grease a large cookie sheet. In a medium bowl, mix together the flour and salt. Stir in the cheddar cheese and melted butter to form a firm dough. Roll pieces of dough into ropes as big around as a penny. Slice into 1/4 inch pieces. You may need to chill the dough until firm for better rolling. Place the slices onto the prepared cookie sheet, 1 inch apart. Bake for 20 to 25 minutes until the bottoms of the coins are lightly toasted and the tops are firm. Allow to cool completely before serving. Store in an airtight container at room temperature.

Creole Seasoning

Creole Seasoning

Creole Seasoning

3 tsp. paprika
2 tsp. onion powder
3 tsp. garlic powder
2 tsp. Salt – Sea salt or Kosher salt optional substitutes
1 tsp. ground oregano
1 tsp. thyme
1 tsp. sweet basil
1 1/2 tsp. cayenne powder
1 tsp. black pepper
1/2 tsp. lemon pepper

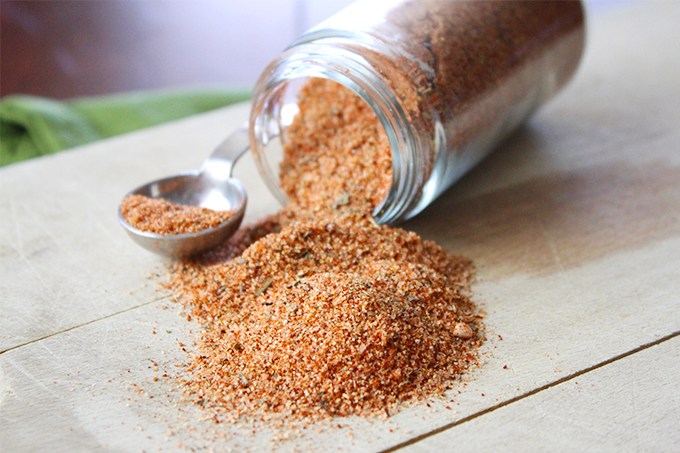
Mix all the spices up in a bowl and then spoon into a spice jar that you’ve saved. Use this blend on just about everything – from Creole dishes to popcorn. Can be added to the flour dredge for spicy chicken or pork chops. Use this on tater tots – hot tots!

Fresh Cream of Whatever Soup

Fresh Cream of Whatever Soup

Fresh Cream of Whatever Soup

1 tsp. finely chopped onion
2 T. butter
2-3 T. flour
1 tsp. salt
1/4 tsp. pepper
1 C. diced chicken, diced sautéed celery, sliced sautéed mushrooms, etc.
3 C. chicken stock
1 C. milk or cream

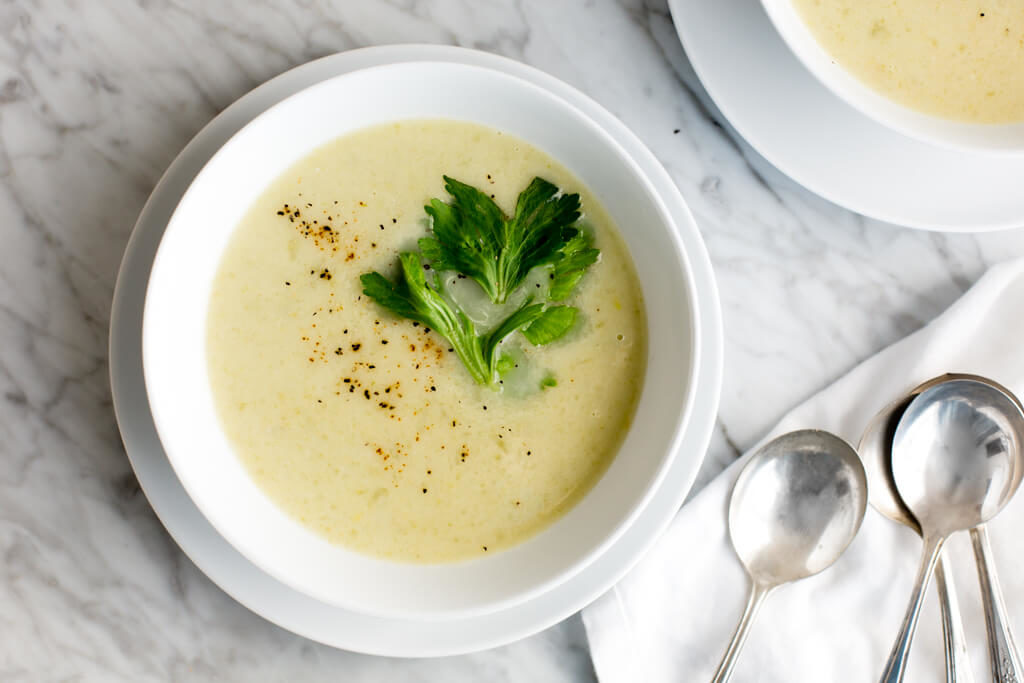
Sauté the onion in butter till transparent. Blend in the flour, salt and pepper. Stir over medium heat until smooth and bubbly. Then stir in the chicken (or other ingredient). Bring to a boil for a minute, stirring constantly. Remove from heat. Gradually stir in the chicken stock and then the milk or cream. Heat to serving temperature.

Delicious 19 cents Don’t Buy Bagels Again Bagels

Delicious 19 cents Don’t Buy Bagels Again Bagels

19.25 oz. bread flour (3 1/2 C.)
1/4 oz. instant dry yeast (2 1/2 tsp.; or 1 envelope active dry)
2 tsp. sugar
1 tsp. salt
12 oz. hot water (1 1/2 C., 120°–130°F) [340g]
1 1/2 tsp. malt syrup (for the boiling water; alternatively, you can use 1 1/2 tsp. sugar)
1 egg beaten with 1 tsp. water (optional, for toppings)
Toppings: Sesame seed, poppy seed, salt, minced onion/garlic, etc. (Optional)

Add all the dry ingredients to the bowl of a food processor and pulse until mixed, about 5 seconds. With processor running, slowly add the water; process until dough comes together and rides up over the blade, about 30 seconds. Continue processing until dough becomes satiny and elastic, about 30 seconds more. Transfer dough to a large, lightly oiled bowl and cover tightly with plastic wrap. Let rise until doubled in bulk, about 1 hour. After dough has risen but before you divide and shape it, prepare your water bath: Add the malt syrup to 6 quarts of water over high heat and let it come to a boil as you continue with the following steps. Also: Preheat the oven to 400°F. After dough has doubled in bulk, turn it out onto a lightly floured work surface and press down with your fingers to expel the gases. Divide dough into 10 equal portions. Ball a portion of dough, then roll it into a “rope” about 7 inches long and about 1 inch thick. (Tip: I like to taper the ends slightly in preparation for the next step.) Wrap the dough around the back of your hand, overlapping the ends in your palm. Place your hand, along with the dough, palm-down on the work surface and roll dough back and forth until ends crimp and seal together. Place dough ring under a span of plastic wrap while you repeat rope-and-loop process with remaining dough portions. Tip: You can brush a little water on the ends to help them stick, but this dough is wet enough that it usually comes together without help. A note on hand size: The recipe calls for wrapping the rope around your palm, but I like a smaller, tighter bagel, so I wrap it around my first three fingers, as shown. If you have a smaller hand, you could probably wrap it around all your fingers. Allow bagels to rise again for 10 minutes. At this point, your malt syrup–water should be boiling. Use a skimmer or slotted spoon to carefully add bagels, one at a time, to the water. (Note: no more in the pot than 3 at a time.) Bagels should sink but then rise again after a few seconds. Simmer for 1 minute, flipping bagels at the 30-second mark. Tip: The original recipe calls for this second rising, but I often skip it. I’ve found it makes very little, if any, noticeable difference. Remove bagels from water with skimmer or slotted spoon to a clean kitchen towel. Pat dry. If making plain bagels, move on to placing on baking sheet. For bagel toppings: Place bagels on wire cooling rack set over a rimmed baking sheet. Brush bagel tops with egg-water mixture. Shake on desired toppings. Sesame seed, poppy seed, kosher salt, minced onion, and minced garlic are classic (at least in NYC). The baking sheet will collect excess dry toppings (such as sesame or poppy seeds). Simply pour them back into their containers for reuse. Place bagels on prepared baking sheet. Bake until light brown and shiny, 15 to 20 minutes. Flip, and bake until reverse side is golden-brown and shiny, about 10 minutes more.

DIY Everything Seasoning

DIY Everything Seasoning

1 tsp. toasted white sesame seeds
1 tsp. dehydrated toasted minced onion
1 tsp. dehydrated minced garlic
1 tsp. Dutch blue poppy seeds
1 tsp. charnushka seeds
1 tsp. Maldon sea salt

Optional additions:
1 tsp. yellow mustard seeds
1/2 tsp. crushed Aleppo chiles

Mix all ingredients together and enjoy. Serving Suggestions: Sprinkle over bagels and cream cheese, smoked salmon, omelets, homemade breads, biscuits, grilled fish, and more!

Citrus Salt

Citrus Salt

1 T. minced lemon zest
1 T. minced lime zest
1 T. minced orange zest
1/2 C. sea salt, kosher salt or grey salt

Preheat oven to 200F. In a small bowl, stir together all the ingredients, then spread the mixture on a small rimmed baking sheet. Place in the oven to dry for 2 hours. Remove from the oven and let cool completely. Pour the mixture in a mini processor and process until finely and evenly ground. Store in a tightly covered jar for up to 2 months.

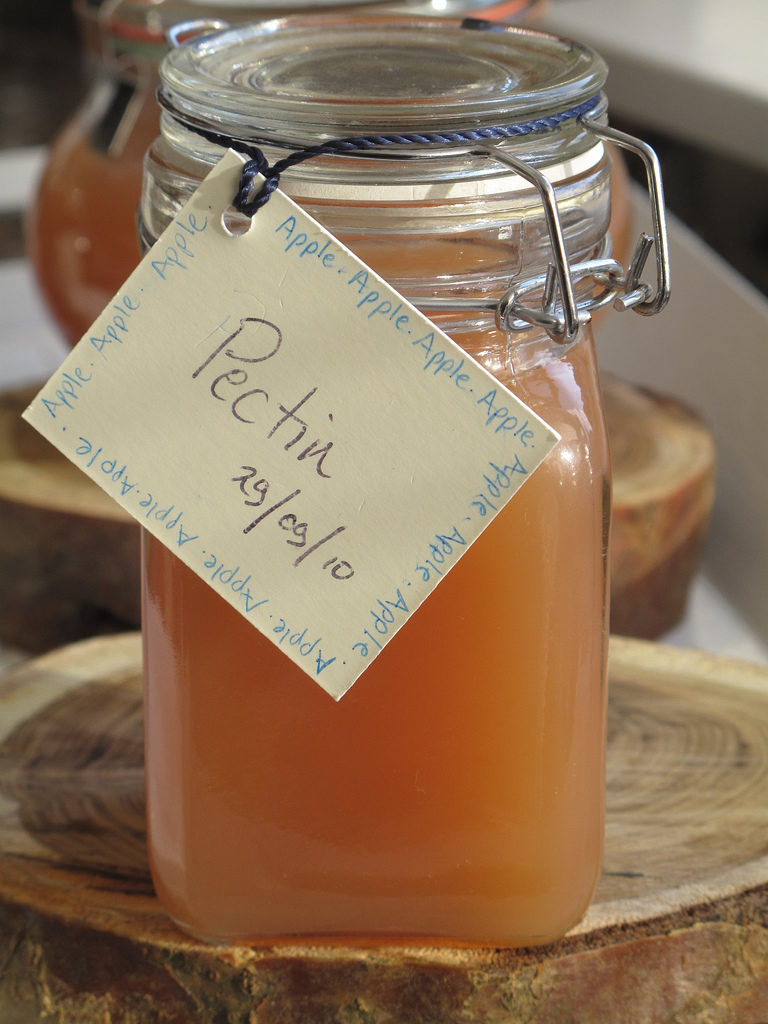
DIY: Homemade Pectin Stock

DIY: Homemade Pectin Stock

Put 3-4 pounds chopped apples in a non-reactive pan. Add enough water to barely cover apples and bring to a boil. Lower temperature immediately and let simmer until soft, approximately 20-30 minutes. Pour apples and liquid through a fine sieve into a second pot. Without stirring, let this liquid drain overnight. Bring liquid to a boil and cook until it has reduced to half its original volume. Test pectin content (see instructions below) and continue to cook if necessary. Once liquid pectin reaches the desired strength, store it in the fridge or freezer.

Testing the Pectin Level

To determine the amount of pectin in your liquid, put 1 tsp. the liquid on a plate and add 2 tsp. rubbing alcohol to the mix. Swirl the mixture around until clots start to form. It will amaze you, but it will happen: You will know the strength of the pectin by the size of the clots.

You want a fairly large viscous clot to indicate strong pectin. Weak pectin will show up as several small, scattered clumps. If that is the case, bring the liquid back to a boil and reduce further. And toss out the test batch-you don’t want to return that to the pot. Once the pectin reaches the desired strength, refrigerate, freeze, or can it until you make jam. It will keep in the fridge for up to one week.

Using Homemade Pectin

As a general guide, 2/3 C. liquid pectin is enough to set 4 C. low-pectin prepared fruit or fruit juice. Here again, you have room for whimsy. If you use strawberries (low in pectin) alone, use the full amount of liquid pectin. If you throw in a few currants (high in pectin) with the strawberries, use less liquid pectin. If you use half currants and half strawberries, you might not need any liquid pectin at all.

In the end, willingness to learn by trial and error and to love whatever the outcome is what will win the day.

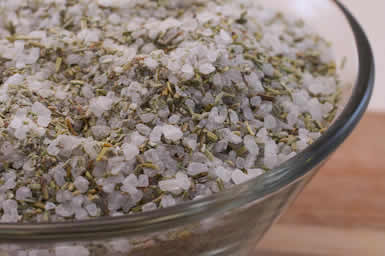
Rosemary Salt

Rosemary Salt

3 C. sea salt crystals
1 1/2 C. dried rosemary (cracked rosemary is best)

(If you don’t have cracked rosemary, measure rosemary and put into food processor with steel blade attached. Process about 2 minutes, until rosemary is broken into small bits.) Combine salt and rosemary in food processor and process with steel blade less than one minute, until salt and rosemary are well combined. Don’t process too long. You want this to still have a slightly chunky texture. Suggested uses: Use sparingly, as you would regular salt. Sprinkle on fresh tomatoes, cucumbers, or avocado. An excellent seasoning for eggs, potatoes, butternut squash, or chicken. Delicious on any type of roasted or grilled vegetables.

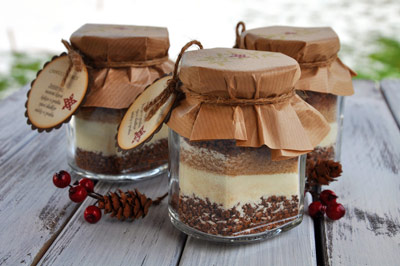
Beverage Mixes – Easy Gifts

Beverage Mixes – Easy Gifts

Beverage Mixes

cappuccinomixes1Beverage Mixes make wonderful gifts for teachers, family, friends or those last minute gifts for unexpected company. You can package them in Mason jars, jelly jars or any pretty container, including tins, that you have on hand. In the tins be sure to put in a plastic bag first then place in the tin. These are easy, tasty recipes that will bring rave reviews!


~Orange Cappuccino Mix~

1/2 cup powdered non-dairy creamer
1/2 cup sugar
1/4 cup instant coffee
1 tsp. dried orange peel
1/2 tsp. cinnamon
Place all items in blender or food processor. Cover and blend on high or 30 seconds, stopping blender after 15 seconds to stir until well mixed. Store in tightly covered container. For each serving, place 2 teaspoons mix and 2/3 cup boiling water in mug.
~Spiced Mocha Mix~

1 cup sugar
1 cup nonfat dry milk powder
1/2 cup powdered non-dairy creamer
1/2 cup cocoa
3 tablespoons powdered instant coffee
1/2 tsp. ground allspice
1/4 tsp. cinnamon
In large bowl combine all ingredients. Store in airtight container. For single serving place 3 tablespoons mix in mug and add 3/4 cup boiling water. Makes 2 1/2 cups mix.

~Peach Tea Mix~

1 cup instant tea mix
1 3 ounce box peach-flavored gelatin
2 cups granulated sugar
Combine all ingredients in a large bowl; mix well. Store in an airtight container. Give with instructions to serve. For one mug use 2 tsp. tea mix with 8 ounces hot water. Makes about 3 1/2 cups tea mix.


~Sugar Free Cherry Tea Mix~

We all know people who are diabetic or simply need to cut down on their sugar intake. This is a great gift, combined with some pumpkin or zucchini bread in a nice basket!

1 package unsweetened cherry-flavored soft drink mix
1 1/4 cups sugar-free instant tea mix (artificially sweetened)
combine items in a small bowl until well blended. Store in an airtight container. To serve, stir 2 teaspoons tea mix into 8 ounces hot or cold water. Makes 1 1/4 cups tea mix.


Instant Cappuccino Mix

1 cup powdered chocolate milk mix
3/4 cup powdered non-dairy creamer
1/2 cup instant coffee granules
1/2 tsp. cinnamon
1/2 tsp. ground nutmeg
In a medium bowl combine all ingredients. Store in airtight container. To serve: Place 1 heaping tablespoon mix in a cup or mug. Add 1 cup boiling water and stir.


Hot Chocolate Mix

1 8 quart box nonfat dry milk
1 6 ounce jar coffee creamer
1 16 ounce dry chocolate milk mix
1/2 cup confectioners’ sugar

Mix all items until well blended. Store in airtight container. To serve add 1/4 cup mix to 2/3 cup hot water. Make 3 quarts. You can also create a gift basket with mini marshmallows, a nice mug, a chocolate coated spoon, and a few peppermint sticks. Place all in a nice wicker basket a6574nd wrap with colored cellophane tied with a bow. Any chocolate fan would love this!
Tips for Wrapping and Giving

Any of the above can be placed in a quart or pint canning jar. Place jar on a large piece of colored cellophane, bring up to the top, gather and tie with raffia. Attach a gift tag with instructions. *The coffees can be part of a gift basket with petite cookies, a pretty coffee mug and a sterling silver spoon, which can be easily found at any antique or thrift store. Place in a nice wicker basket and wrap with cellophane or place in a large gift bag.

Red Robin Seasoning

Red Robin Seasoning

RRSeasoning4

3 T. salt
1 T. instant tomato soup mix (Knorr tomato with basil works great)
2 tsp. chili powder
1/4 tsp. ground cumin
1/4 tsp. ground black pepper

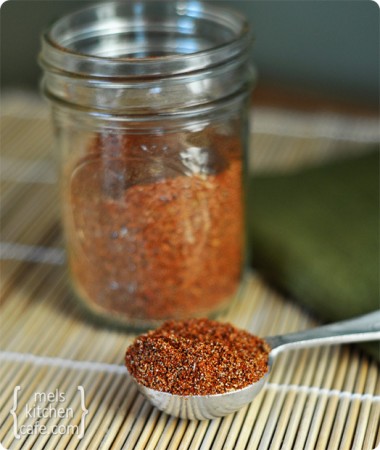
Combine the ingredients in a small bowl and stir well. Store in a covered container.

Taco Seasoning

Taco Seasoning

Taco-Seasoning-BLOG-380x4501 Tablespoon Flour
1 Teaspoon Chili powder
1 Teaspoon Paprika
3/4 Teaspoon Salt
3/4 Teaspoon Minced onion
1/2 Teaspoon Cumin
1/4 Teaspoon Cayenne pepper
1/4 Teaspoon Garlic powder
1/4 Teaspoon Sugar
1/8 Teaspoon Ground oregano

Combine all of the ingredients in a small bowl.

Instant Pot Pickled Vegetables

Instant Pot Pickled Vegetables
Instant Pot Pickled Vegetables


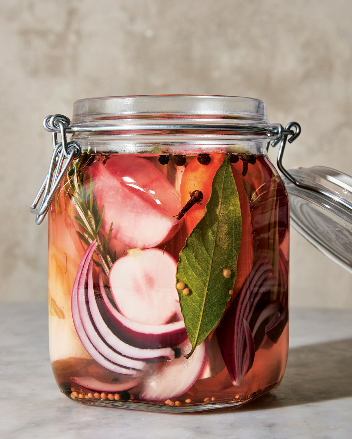
This is a reminder that just about any vegetable—from cucumbers to beets to cauliflower—can be pickled quickly and used to brighten up otherwise humdrum meals. What you’re doing here is making a super-fast but potent pickling liquid (a strong brine) in the pressure cooker, then pouring it over cleaned and trimmed vegetables that have been packed into glass jars. The pickling happens fast in the intimate quarters of the jars, with a little extra time to cure in the refrigerator. Use this quick-pickling trick throughout the seasons (if opting for beets, steam and peel them first)


2 cups distilled white vinegar or apple cider vinegar

½ cup sugar

2 T. pickling spices, such as whole cloves, allspice berries, black peppercorns, or mustard seeds

2 bay leaves

1½ T. kosher salt

1 or 2 sprigs fresh herbs, such as dill, rosemary, or cilantro, plus more for serving

1½ pounds fresh vegetables, trimmed, such as whole green beans, cauliflower florets, small carrots, or pickling cucumbers, halved lengthwise


Combine 8 cups water with the vinegar, sugar, pickling spices, bay leaves, salt, and herbs in the inner pot of the pressure cooker. Lock on the lid and Pressure Cook on high pressure for 7 minutes. Release the pressure manually and open the lid. Pack the vegetables into two clean 1-pint canning jars or airtight containers and fill with the brine, leaving ½ inch of headspace. Discard the extra brine (or use it to quickly pickle a sliced red onion). Let the jars cool completely before refrigerating for up to 1 month. Serve cold or at room temperature, adding fresh-chopped herbs, if desired, before serving. Note: For a little heat in your pickle add a jalapeno pepper, sliced in rounds to the pickling liquid before cooking.

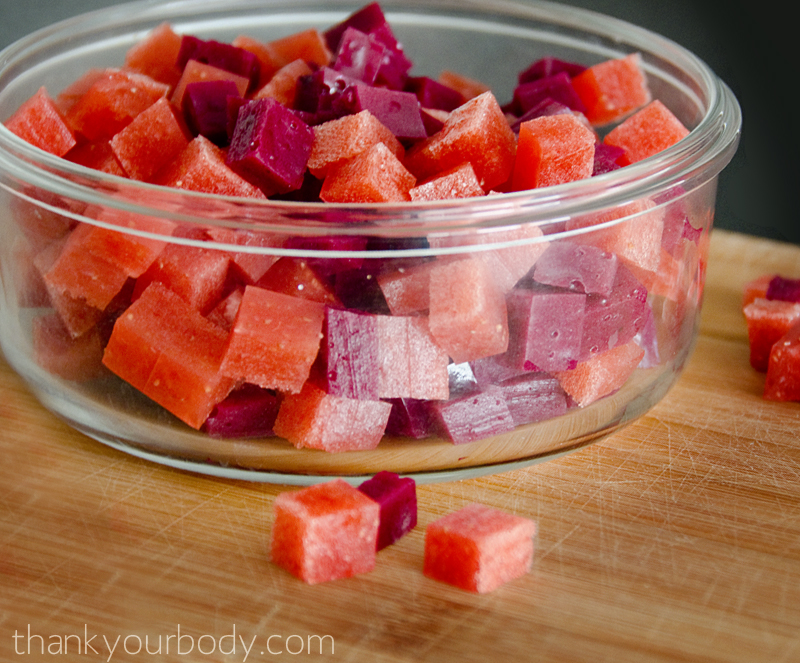
Healthy Homemade Fruit Snacks

Healthy Homemade Fruit Snacks

newsquare2/3 cup fresh lemon juice or fresh orange juice (if you don’t like sour go with orange!)

2/3 cup frozen or fresh berries (raspberries, blueberries, strawberries are all great.)

1 – 2 T. honey

5 T. gelatin 

Pour juice and berries into a small saucepan. Heat over medium heat, stirring occasionally until berries become tender and begin to soften. Add honey and stir until completely incorporated. You will want the fruit to dissolve quite a bit until you have a compote. Puree mixture using an immersion blender or small blender. Let sit, off heat, for 5 – 10 minutes. Whisk in gelatin, one tablespoon at a time. Whisk vigorously until completely incorporated, mixing the gelatin in very gradually to avoid lumps. (If you do get lumps, just run the mixture through your blender again or you can put it back on the heat to help dissolve the gelatin.) Pour into a 8 x 8 or 9 x 9 glass dish. Refrigerate until set (30 minutes to an hour). Cut in small squares.

Note: I like to keep these in my fridge (I love cold things!), but they do transport and keep nicely at room temperature.

Alatopiperigano

Alatopiperigano

A simple Greek seasoning, often used on potatoes.

4 tsp. Salt
8 tsp. dried Oregano
1 tsp. fresh cracked Pepper

Mix all together and keep in tight container.

Homemade Ranch Dressing: Dry Mix Recipe

Homemade Ranch Dressing: Dry Mix Recipe

Homemade Ranch Dressing Dry Mix Recipe1/2 C. powdered Buttermilk
3 T. dried Parsley
1 T. dried Dill Weed
½ T. dried Thyme
1 T. Onion Powder
1 T. Salt (celery salt)
1 1/2 tsp. Garlic Powder
3/4 tsp. Pepper
Optional: ¼ tsp. Accent (MSG)

Combine in a food processor and blend into a powdery consistency. Store in a container of choice.

To make ranch dressing: Combine 1 T. mix with 1 C. mayonnaise and 1/2 C. milk. Mix with wire whisk. Store in refrigerator until ready to use.

To make a ranch dip: Combine 2 T. mix with 1 C. sour cream. Mix with wire whisk. Store in refrigerator until ready to use.

Homemade Italian Dressing: Dry Mix Recipe

Homemade Italian Dressing: Dry Mix Recipe

Homemade Italian Dressing Dry Mix Recipe

1½ tsp. garlic powder
1 T. onion powder
2 T. oregano, ground or leaves
1 T. dried parsley
1 T. granulated sugar
2 T. salt or substitute
1 tsp. black pepper
1 tsp. ground basil or leaves
¼ tsp. ground thyme or leaves
½ tsp. dried celery leaves or flakes

Mix all ingredients together and store in air-tight container.

To Make Dressing: Mix 2 tbs of this mix with ¼ C. vinegar, 2 tbs water, and ½ to ⅔ C. olive oil or canola oil. Shake before using.

Fuego Spice Mix

Fuego Spice Mix

This fiery spice blend is perfect for seasoning grilled steaks, chops, chicken and fish.  Just rub it on the meat right before cooking.  You can add a pinch to sautéed vegetables, or use it to season homemade tortilla chips, French fries, or popcorn.


¼ C. paprika

2 tsp. Cayenne

2 T. Salt

2 tsp. Ground White Pepper

2 T. ground Black Pepper

2 T. Granulated Garlic

2 T. Chile Powder

2 T. Oregano


Combine all ingredients, mixing well.  Store in air tight container, out of direct light, for up to 6 months.


From Chevy’s Tex Mex Cookbook


Yield:

Calories:

Fat:

Fiber:

Campfire Cocoa Mix

Campfire Cocoa Mix

1 9.6oz. pkg. powdered Dry Milk

1 1/4 C. Chocolate Quick

3/4 C. Non-Dairy Creamer

1/3 C. Powdered Sugar

Dash Salt

Mix all ingredients in re-sealable container or bag.  For each serving mix 3-4 tablespoons dry mix in a mug.  Fill with one cup boiling water.

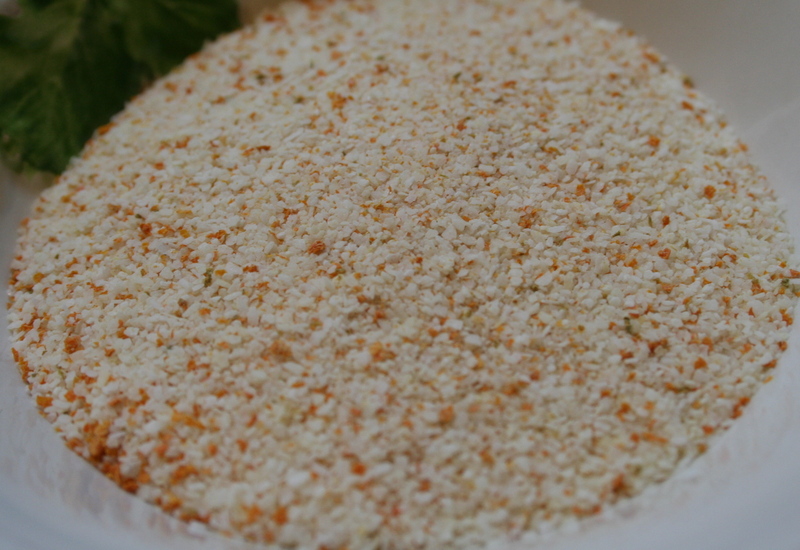
LTS Cream of Anything Soup Mix

LTS Cream of Anything Soup Mix

LTS Cream of Anything Soup Mix


2 C. non-fat dried milk powder

1 1/2 C. cornstarch

1/2 C. chicken, beef, or veggie bouillon

1/2 C. dried minced onions

2 tsp. dried basil

2 tsp. dried thyme

1 tsp. dried parsley

1 to 1 1/2 tsp. black pepper


Mix together in a large bowl.  Pour into lidded container.  For the equivalent of one can of condensed cream soup, mix 1/3 C. mix with 1 1/4 C. cold water.  Cook until thickened.  Add additional ingredients as desired. For cream of mushroom, add 1/4 C. chopped fresh, canned or freeze dried mushrooms. For cream of celery, add 1/4 C. of freeze dried celery, etc.

Homemade Hamburger Helper Mix (with Variations)

Homemade Hamburger Helper Mix (with Variations)


Homemade Hamburger Helper Mix


1 1/4 tsp. black pepper

1 T. garlic powder

2 T. dried parsley

1/3 cup instant onion

3 T. onion powder

1 T. salt

1 2/3 cup dry milk

3 1/2 T. beef bouillon

Mix this all up and store in a glass jar or other sealed container.


Use 1/2 cup for each pound of ground meat.


Basic recipe:


1 pound ground beef

1/2 cup of mix (above)

1 to 2 cups noodles (elbow macaroni for example)

1 1/2 to 3 cups water

flavorings


Brown and drain the ground beef. Stir in the dry mix, then add 2 cups hot water and 2 cups noodles. You can add more or less water and noodles, proportionately, depending on much you need to stretch that pound of beef. Bring to a boil, then turn down to a simmer, cover, and cook until noodles are tender, about 20 minutes.


Cheeseburger skillet: add 1 cup dehydrated cheese with the dry mix. Or cook as above, then stir in 2 cups grated Cheddar or Colby cheese before serving.


Stroganoff: add a bit of 1/2 tsp of onion powder and 1/2 tsp celery salt with the dry mix. Stir in a 1/2 cup fresh or canned mushrooms. After cooking noodles, stir in 1/4 cup sour cream just before serving.


Chili: Add one 14.5 oz can diced tomatoes, 1 T. chili powder.


Potato variation: Instead of macaroni, add 2-3 cups very thinly sliced potatoes. Simmer 20-30 minutes until potatoes are tender. Uncover and simmer until liquid has evaporated.

DIY Flavored Extracts

DIY Flavored Extracts

DIY Flavored Extracts

Vanilla Extract (single 4oz bottle)

  • 3 whole vanilla beans
  • Vodka (You can also use bourbon)

Mint Extract (4oz)

  • ½ C. mint leaves
  • Vodka

Orange Extract (4oz)

  • 1 large navel orange
  • Vodka

Lemon Extract (4oz)

  • 1 large lemon
  • Vodka

To make Vanilla Extract:

  1. Cut your vanilla beans in half, then split open each half to expose the vanilla seeds on the inside of the pod.
  2. Place cut vanilla beans inside your glass bottle.
  3. Add vodka, filling up to the neck of the bottle.
  4. Seal tightly and store bottle in a cool, dry place.
  5. Every few days, tilt your bottle upside down to gently mix the liquid inside.
  6. After 5-6 weeks, you have extract! (If you leave in your vanilla beans, when you start running low, just add more vodka and wait a little.)

To make Mint Extract:

  1. Stuff mint leaves into your glass bottle.
  2. Using a chopstick, skewer, or other poking device, lightly bruise/crush the leaves inside the bottle.
  3. Add vodka, filling up to the neck of the bottle.
  4. Every few days, tilt your bottle upside down to gently mix the liquid inside.
  5. After 5-6 weeks, you have extract! (I’m not sure if, like vanilla extract, you can just leave the mint leaves inside. Since it’s leafy plant matter which disintegrates more easily, it may be a good idea to take it out. My leaves went from a vibrant green in the beginning to kind of a dull brown by the end so I took them out just to be safe – I poured my mint extract into another container through a sieve and discarded the mint leaves, then poured the filtered extract back into the bottle.)

To make Orange Extract:

  1. Peel thin strips of zest from ½ of your orange.
  2. Place zest into your glass bottle.
  3. Add vodka, filling up to the neck of the bottle.
  4. Every few days, tilt your bottle upside down to gently mix the liquid inside.
  5. After 5-6 weeks, you have extract! (I think with citrus peels the acid (and alcohol bath), it’s probably safe to leave the peels inside the bottle like a vanilla bean for re-fill purposes. If you don’t feel comfortable doing this, take it out!)

To make Lemon Extract:

  1. Peel thin strips of zest from your lemon.
  2. Place zest into your glass bottle.
  3. Add vodka, filling up to the neck of the bottle.
  4. Every few days, tilt your bottle upside down to gently mix the liquid inside.
  5. After 5-6 weeks, you have extract!
Canning Tomato Paste

Canning Tomato Paste

Canning Tomato Paste


3 gallons quartered Roma or other paste tomatoes

1 red bell pepper, seeded and chopped

1 bay leaf

½ tsp. kosher salt

6 tsp. bottled lemon juice, divided


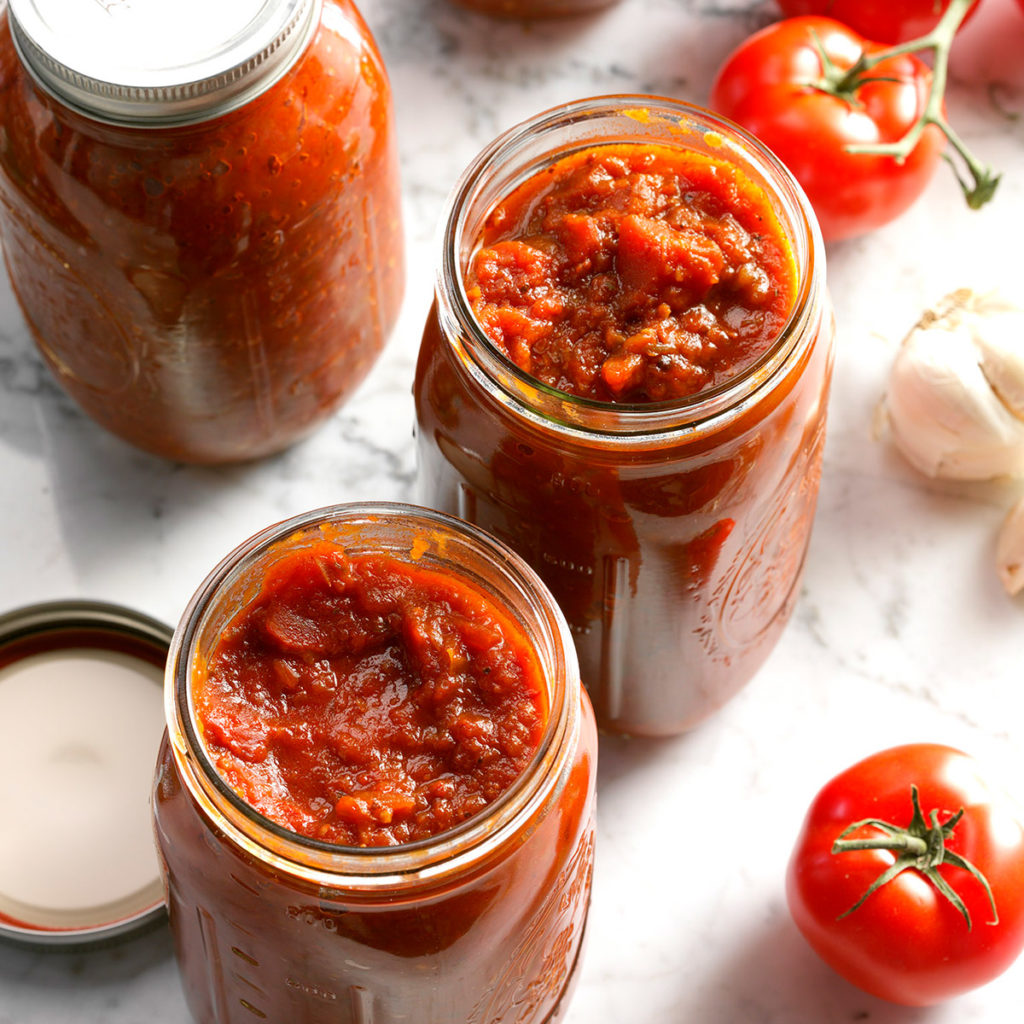
In a large pot set over high heat, combine the tomatoes, red bell pepper, bay leaf, and salt. Bring to a boil. Reduce the heat to low. Simmer for 30 minutes, or until the tomatoes are very soft. Using a potato masher, press the tomatoes down and release their juices while they are cooking. Using a food mill, pass the mixture through to puree. Discard the seeds and skins. Transfer the puree to an uncovered slow cooker set on low.  Cook the tomatoes for 8 hours, stirring hourly. As it thickens and reduces, check more frequently to prevent scorching. Prepare a hot water bath. Place the jars in it to keep warm. Wash the lids and rings in hot, soapy water, and set aside. To each jar, add 3/4 tsp. of lemon juice. Ladle the hot paste into the prepared jars, leaving 1/2 inch of headspace. Use a nonmetallic utensil to release any air bubbles. Wipe the rims clean and seal with the lids and rings. Process the jars in a hot water bath for 45 minutes. Turn off the heat and let the jars rest in the water bath for 10 minutes. Carefully remove the jars from the hot water canner. Set aside to cool for 12 hours. Check the lids for proper seals (see here). Remove the rings, wipe the jars, label and date them, and transfer to a cupboard or pantry. Refrigerate any jars that don’t seal properly, and use within 3 weeks. Properly sealed jars will last in the cupboard for 12 months. Once opened, refrigerate and consume within 3 weeks.

Fresh-Peach-Infused Vinegar

Fresh-Peach-Infused Vinegar

Fresh-Peach-Infused Vinegar

6 pounds peaches (overripe, pitted and roughly chopped)

3 cups white wine vinegar

1/2 cup honey


Bring peaches, vinegar, and honey to a simmer in a large saucepan. Cook, stirring occasionally, for 15 minutes. Cover, and let cool completely. Working in batches, puree peach mixture in a food processor until smooth, about 10 seconds. Strain through a fine sieve into a large nonreactive bowl. Line sieve with cheesecloth, and place over another large nonreactive bowl. Pour strained peach mixture into sieve. (Do not press solids in sieve.) Cover with plastic wrap and let mixture strain in refrigerator overnight (or up to 2 days). Uncover, and remove sieve from bowl. Discard solids. Pour peach vinegar into a resealable nonreactive bottle or jar.

Gourmet Oregon Hazelnut Butter

Gourmet Oregon Hazelnut Butter

Gourmet Oregon Hazelnut Butter

1/2 cup butter or margarine

2 teaspoons lemon juice

1/3 cup Oregon hazelnuts, finely chopped

1/2 teaspoon salt

dash celery salt

dash cayenne pepper


Soften butter or margarine until just workable. Add other ingredients and thoroughly blend together. Serve at room temperature to top fish, chicken or warm vegetables. Will top six salmon steaks generously.

Calendula-Infused Coconut Oil

Calendula-Infused Coconut Oil

Calendula-Infused Coconut Oil

2 C. melted extra-virgin coconut oil (see step 1)

2 C. dried calendula petals

1 pint glass jar with lid, preferably dark in color


If the oil is solid, set the jar in a saucepan with 1 to 2 inches of simmering water. Swirl the jar around from time to time and remove when the oil has melted. This works for glass jars only. If your coconut oil is in a plastic jar, transfer some to a glass jar before melting in simmering water, then measure 2 cups. Pour the petals into the empty jar. Pour melted oil over petals, filling the jar to within one or two inches of the top. Loosely cap, label, and set in a sunny window or other warm spot to steep for 2 weeks or up to 1 month. Gently swirl the jar a couple of times a day. Secure the cap and store in a cool, dark place. To use, bring the oil back to liquid if it is solid, using the method in step 1. Strain through a cheesecloth-lined metal strainer into a glass measuring C. or jug. Gather up the four comers of the cheesecloth, twist, and squeeze the petals to release all the oil. Discard petals and cheesecloth. Pour calendula-infused oil into smaller jars. Cap, label, and store jars in a cool, dark cupboard or refrigerator.

Cherry Tomato & Star Anise Jam

Cherry Tomato & Star Anise Jam

Cherry Tomato & Star Anise Jam

2 C. cherry tomatoes; halved (amount after slicing)

1/2 C. dark plums; chopped (optional)

1/2 C. sugar + 1/2 C. date honey

1 T. lemon juice

2 star anise seeds


Over medium heat, combine all the ingredients. Bring it to a boil, constantly stirring for about 10 minutes. When film begins to form spoon it off and discard. After about 10 minutes, let it simmer for about 5 more minutes. You don’t have to stir it but keep an eye to make sure nothing is sticking and burning. Turn off the heat, let it sit for about 10 minutes or so and then transfer to a jar. It stays good for about 2 wks.

Lemongrass Ginger Syrup

Lemongrass Ginger Syrup

Lemongrass Ginger Syrup

Great way to make use / preserve ginger. Use for marinades, to sweeten tea or other beverages, or mix with sparkling water and lemon juice for a homemade ginger ale.

570 grams fresh ginger

3 stalks lemongrass

2 C. water

6 C. granulated sugar


Thoroughly wash the ginger. You don’t need to peel it, but break off any hanging pieces as dirt sometimes gets trapped between nodes. Roughly chop the ginger and lemongrass and add it to a food processor along with the lemongrass and 2 C. of water. Process until the mixture is pureed, scraping down the sides a few times with a spatula. Line a 2 C. liquid measuring C. with multiple layers of cheese cloth, or a single layer of fine-mesh muslin and scoop the ginger mixture onto the cheese cloth; you’ll probably need to do this in batches. Gather up the edges of the cloth and twist the edges towards the bulge of ginger to wring out as much liquid as you can. Discard the pulp and repeat until you’ve squeezed out all the ginger juice. You should now have 4 C. of liquid. If you don’t have 4 C., the ginger you used may have not been fresh, but just add water to make 4 C.. Add the ginger juice to a large pot along with 6 C. of sugar. Heat the mixture over medium heat to a full simmer. It has a tendency to boil over, so keep a constant eye on it and lower the temperature if it looks like it’s going to boil over. The impurities that made the juice cloudy will float to the top as foam, so use a fine mesh skimmer or spoon to remove the foam from the syrup and discard. After the foam stops forming and the syrup is clear, your ginger syrup is done. You can pour the hot syrup into sterilized glass bottles, or let it cool and transfer it to a suitable container. Stored in the fridge it will last for 6 months.