Browsed by
Category: Information

one-hour ricotta cheese

one-hour ricotta cheese

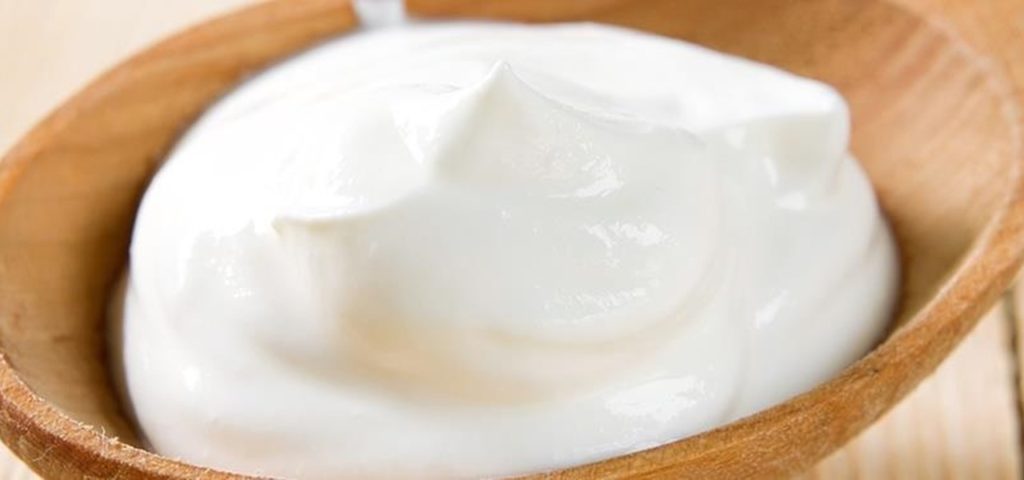
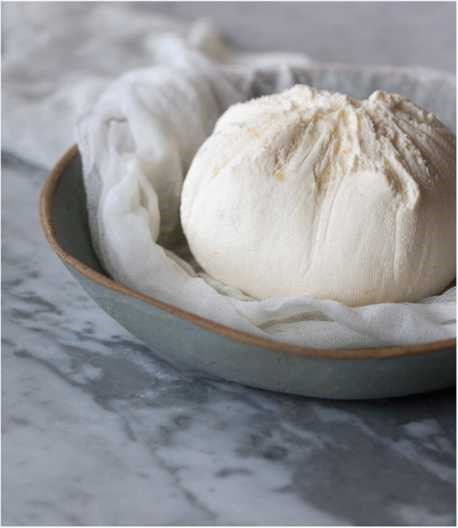
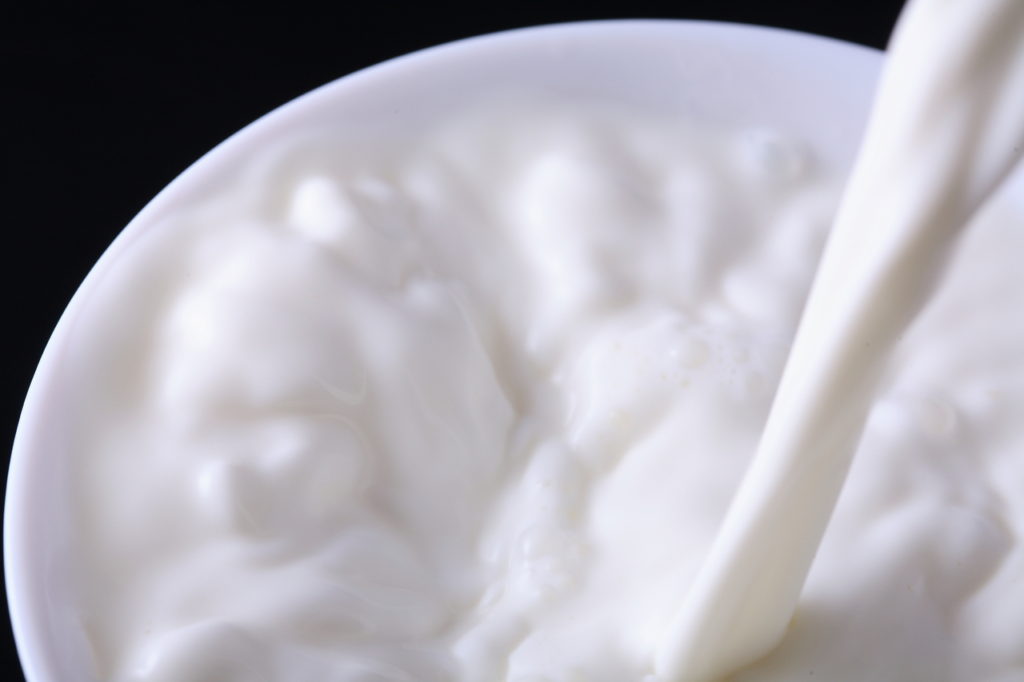
I love having a simple, versatile homemade cheese on hand for adding to sandwiches or pasta, or to dollop on fruit. This farmer cheese fits the bill and can be made without any special cheesemaking equipment. Officially, ricotta is made from “reboiling” the whey left over from other kinds of cheesemaking, but, unofficially, it’s a super simple fresh cheese requiring nothing more than milk, heat, and acid. If you’ve ever added both lemon and milk to your tea (I have—oops) then you know that acidic ingredients will curdle milk. In this ricotta recipe we take advantage of this, and use common acidic ingredients to make cheese.

The three biggest determinants to the final flavor of your ricotta are the quality of the milk you start with, the acid you choose, and the amount of time you allow your cheese to drain. Start with very fresh daily. Pasteurized milk and cream are fine, but skip ultra-high-temperature pasteurized options; these often fail to form a nice curd. After thirty to sixty’ minutes of draining, this ricotta is thick enough to spread on toast or serve with fruit.

If you drain it long enough, or press it under weight to get even more liquid out, it will become firm and crumbly, much like Mexican queso fresco or Indian paneer. Save the whey that drains off your cheese—you can use it to replace some or all of the water used in bread making and other baking. It adds a nice tang and extra protein.

BASIC RICOTTA

1 quart whole milk
1 C. heavy cream
3 T. white distilled vinegar
l tsp. kosher salt

In a heavyweight, nonreactive saucepot, combine all the ingredients. Stirring occasionally, gently bring the mixture to a simmer over medium heat and watch for the mixture to begin to curdle. You may see some curds very early in the cooking process, but between 185 and 200 degrees F, the curds will become quite distinct from the whey and will float to the surface. Watch for the whey to change from white and milky to yellowish-clear with only a bit of milky haze. When you note district curds and mostly clear whey, remove the pot from the heat and let sit, undisturbed, for 30 minutes. Line a mesh strainer with a damp paper towel, several layers of cheesecloth, or a clean, damp lint-free towel. Set the strainer over the bowl and pour the curds and whey through the strainer. Let sit for at least 30 minutes to drain. Check the texture. The longer you strain the cheese, the firmer it will get. If you plan to strain longer than 1 hour, transfer the cheese to the refrigerator and strain chilled. For an even firmer texture, drain the mixture until the curd holds its shape, then form it into a disk shape and lightly salt the outside of the cheese. Wrap the cheese in a clean towel or several layers of cheesecloth and set the cheese on a plate. Place another plate on top of the cheese, and then set something heavy—like a big can of pumpkin or a jar of tomatoes—on top of the plate to weight the cheese. Transfer the whole contraption to the refrigerator. Periodically check for whey that has pooled on the bottom plate and discard it. Drain the cheese until it has reached the desired firmness, up to 12 hours. Wien the ricotta is ready, transfer it to a clean container with a tight-fitting lid and keep it chilled. It’s best eaten fresh but will keep for about 1 week in the refrigerator.
Try these ricotta variations. Simply follow the instructions above, but substitute these ingredients.

LEMON RICOTTA

1 quart whole milk
1 C. heavy cream
3 T. freshly squeezed lemon juice
l tsp. kosher salt
Zest of l lemon

LIME RICOTTA

l quart whole milk
l C. heavy cream
3 T. freshly squeezed lime juice
l tsp. kosher salt
Zest of l lime

Beef Stock

Beef Stock

14 – 16 pieces of beef shin bone (between 5 & 6 lbs.)
1 tomato (approx. 1/2 C.)
3 T. olive oil
Salt & pepper to taste
2 small carrots – approx. 1 C. (peeled and cut in three)
2 medium onions – approx. 2 C. (peeled and cut in quarters)
2 stalks celery, with leaves if possible, chopped in three
A few mushrooms, halved
Bouquet garni – leek, thyme, parsley
6 cloves garlic (rough chopped)
1 Head of leek top, cut off and halved. Thoroughly washed.
6 – 8 whole black peppercorns
2 T. olive oil
1 C. red wine
5 -6 quarts water

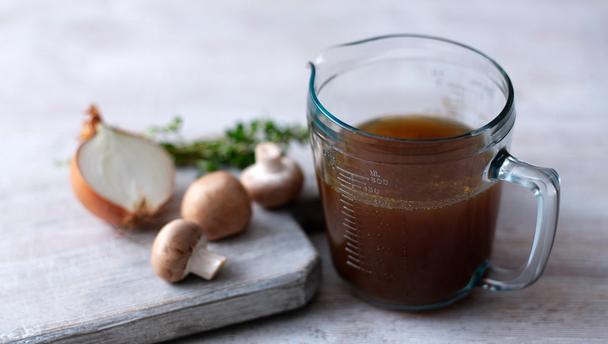
Beef Stock Preparation: Oil bones and place in large roasting pan. Cut tomato in half add to pan with 2 cloves garlic and all other ingredients except wine to roasting pan. Roast 400 degrees for 45 minutes to 1 hour until bones are brown.

Add oil to 12 – 16 quart stock pot. Remove roasting pan from oven – deglaze roasting pan with red wine and scrape pan bottom for any roasting residue. Add wine and roasted bones with tomato garlic to pot with vegetables. Cover with 5 – 6 quarts of water and add Bouquet of Garni. Bring to boil and skim. Reduce heat to medium for slow rolling boil and skim occasionally. Reduce by 1/2 and check for flavor. Strain, discard solids and refrigerate. Skim fat off after stock has refrigerated overnight.

Uses for Hummus

Uses for Hummus

To thicken and flavor soups, mix in some plain or flavored store-bought hummus. This technique works especially well with vegetable soups.

To bind fish or crab cakes, use plain hummus instead of eggs or bread crumbs. Just a bit of hummus binds the ingredients together and adds an unexpectedly pleasant flavor.

For an outstanding hot dip that will keep guests noshing, combine hummus and cream cheese or another flavorful semisoft cheese (such as Brie or Camembert) and microwave just until the cheese melts. Serve with crackers, bread, or cut-up vegetables.

To stir up a quick sauce for poultry, thin out plain or flavored hummus with chicken broth.

When you’re out of mayonnaise and need a tasty sandwich spread, use hummus. It works especially well with wrap sandwiches that include vegetables and chicken or turkey.

Cheese Powder

Cheese Powder

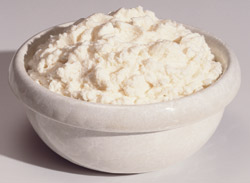
Cheddar or white cheese powder is a third stronger than cheese. The amount of cheese used in any recipe varies with the recipe. If your recipe calls for 12 oz. cheese, you would use 8 oz. powder. If your recipe calls for 16 oz. cheese, you would use about 11 oz. the powder.

Uses for Cheese powder:
This is real cheddar cheese in a dry powder. Use it to give a cheesy richness to rolls, muffins, and bread, sauces, dressing, mac and cheese, potatoes, vegetables or sprinkle it over Popcorn use it on anything you use cheese on! It’s great for camping, backpacking, and storage where refrigeration is not available.

Cheddar Cheese Popcorn

3 T. melted butter
1/4 C. cheddar cheese powder plus 1 T
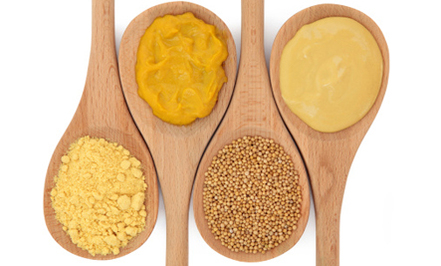
1/4 T. yellow mustard powder
1/4 T. cayenne pepper (jalapeno pepper powder for “hot” popcorn)
4 C. popped popcorn
Sea Salt & Pepper to taste

In a large bowl combine butter, cheddar cheese powder, mustard powder and cayenne or jalapeno powder with popcorn. Season with salt and pepper to taste and toss to combine. Serve immediately.
Or just sprinkle cheese powder on top of buttered popcorn.

Dry Cheese Sauce Mix

1/3 C. dehydrated cheese powder
3 T. nonfat dry milk powder
3 T. dehydrated butter powder or flakes
3 T. flour
1/4 tsp. salt
1/8 tsp. white pepper
1/8 tsp. onion powder

Combine all ingredients in a small bowl and mix thoroughly with wire whisk. Store in tightly closed container in the refrigerator. To make cheese sauce, combine 1 C. hot tap water with 1/2 C. Cheese Sauce Mix in a small saucepan over medium heat. Bring to a boil, stirring constantly with a wire whisk. Makes 1 C. cheese sauce.
Cheddar Cheese Sauce Mix

1/4 C. butter or margarine
1/4 C. milk
2 T. Cheddar Cheese Powder.

Cooking Instructions: Mix all ingredients. Heat to 180F and hold 5 minutes.

Pantry Friendly Cottage Cheese & Bakers Cheese

Pantry Friendly Cottage Cheese & Bakers Cheese

1/4 rennet tablet
1 quart warm water
3 C. non-instant powdered milk
½ C. buttermilk

In 1 quart warm water, dissolve 14 of a rennet tablet. (Junket is a brand name of rennet that you can find in most grocery stores in the Jell-O section.) Combine water, milk, and buttermilk in blender. Blend 011 low. Add to dissolved rennet-water mixture. Stir well, then let set in warm room 6—12 hours. It is set when it’s firm and has a touch of whey on the sides. When it is set, cut into 14-inch squares and set the bowl in a sink or bigger bowl of hot water. Gently stir the curds at frequent intervals to warm evenly and break up the curds. When they have warmed through and broken into curds and whey, pour through a strainer with a cheesecloth lining. Drain and rinse with cold water until it is cool and well washed. Add salt (around 1 tsp., depending on taste). To make it creamy, you can then add milk and cream.

To make bakers cheese instead, transfer cheese when it has set after 6-12 hours and place in cheesecloth lined colander. Strain out whey until it reaches the consistency of cream cheese. This usually takes 12-24 hours. This can be substituted for most soft cheeses in recipes, especially cream cheese in dips in baked goods.

Uses for Canned Beans

Uses for Canned Beans

To do something different with chickpeas, roast them as a snack. Drain 1 can (15 oz.) chickpeas and toss with 2 tsp. olive oil and 1 1/2 tsp. Cajun seasoning. Bake at 375°F until dry and golden, 35 to 40 minutes. Let cool completely so they get crisp. For a Mexican flavor, replace the Cajun seasoning with 1 tsp. chili powder, 1/2 tsp. ground cumin, and 1/8 tsp. cayenne pepper.

For beef burritos with a little more oomph, use a combination of browned ground beef and refried beans. Brown 1/2 pound ground beef in a skillet then add 1 can (16 oz.) refried beans. Cook for 3 to 4 minutes then stir in 3/4 tsp. ground cumin, 3/4 tsp. dried oregano, and 1/4 C. salsa. Bring to a simmer, then add 1 C. shredded sharp cheddar cheese. Stir to melt. Fill four flour tortillas to make burritos. Or serve warm as a dip.

To fill out a Mediterranean-style pasta dish, add white beans. For instance, boil 1 pound oricchiette or other small pasta until just slightly firm. While the pasta cooks, sauté 2 tsp. finely chopped onion in 1/4 C. olive oil for 2 minutes, then add 1 minced garlic clove and 1 tsp. crumbled dried rosemary. Cook for another 30 seconds. Add 1 undrained can (6 oz.) oil-packed tuna and mix well. Cook for another minute. Add 1 C. drained canned cannellini beans and season with 1 tsp. chopped fresh parsley, 1/4 tsp. salt, and 1/8 tsp. freshly ground black pepper. Heat through and toss with the hot pasta.

To build quesadillas into a more satisfying snack, add black beans. Mix together 1 drained can (15 oz.) black beans, 1/2 C. salsa, 1 tsp. chili powder, and a squirt of lime juice, mashing half of the beans. Spread onto cheddar cheese-topped tortillas in a skillet, cook until browned on the bottom, and fold over before serving.

To stir up a snappy island-style salsa, combine 1 drained can (15 oz.) black beans, 1 can (8 oz.) crushed pineapple, 1/2 C. seeded, chopped red bell pepper, 1 tsp. Jerk seasoning, and a squirt of lime juice.

To make a tabbouleh salad more substantial, stir in some chickpeas along with the cooked bulgur, fresh lemon juice, olive oil, tomatoes, garlic, and parsley.

For a new take on tuna melts, combine 2 drained cans (6 oz. each) tuna, 1 drained can (14 oz.) small white beans, 1/3 C. low-fat creamy Italian vinaigrette, 2 tsp. sliced black olives, 2 sliced scallions, and 2 tsp. chopped fresh parsley. Sandwich the filling between bread slices and provolone cheese before toasting on a buttered griddle.

Dehydrator: Tomato Leather

Dehydrator: Tomato Leather

Heirloom organic tomatoes–preferably plum tomatoes or another variety that has more flesh and not as much juice.
Honey–organic and local if possible
Lemon wedges
You can experiment with spices and seasonings once you get the hang of it.

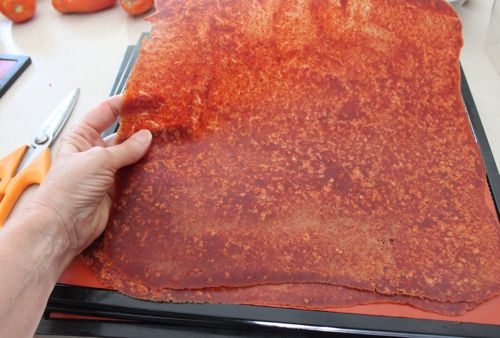
Wash the tomatoes thoroughly and cut out all blemishes and stems. Puree 6 C. tomatoes (large chunks) in a blender (I love my Vitamix). This will give you about 3-4 C. puree depending on how juicy your tomatoes are. Add 1 tsp. honey per C. liquid and a slice of lemon (with the rind). Puree this into the tomatoes. Line the dehydrator tray with kitchen parchment paper (trim it to fit the tray) or Paraflexx®*, which is made by the Excalibur company and is perfect for this sort of thing. I also tried the shiny side of freezer paper and it worked okay. DO NOT USE foil, waxed paper or plastic bags. Pour about 3/4 to 1 C. the mixture onto each tray. Depending on how runny your puree is, you may need more or less per tray. You want it to be about 1/8″ thick at the center and about 1/4″ at the edges. This keeps the edges from drying out too fast and getting brittle. Leave about 1/2″ between the puree and the edge of the tray. Carefully load the trays into the dehydrator. Set the thermostat for 135˚F. Tomato leather should be ready in 8-10 hours depending on the moisture content of your puree. If you want to shorten the drying time, rotate the trays 180˚ halfway through the process. They are ready when there are no sticky spots in the middle but they are leathery and pliable. You can pull a tray out and see if the leather is easy to remove. It should come off in one piece. Place leather on a piece of plastic wrap. You can either roll it up on itself or roll it up in a piece of plastic. Which ever way you prefer, each rolled piece should be wrapped in plastic. Store in airtight containers in a cool dark place. If you make fruit leathers as well, do not store them with vegetable leathers. If you will not eat them all within a month, you might want to keep some of them in the freezer. Sometimes mine have gone bad after a while. But usually we eat them pretty quick. NOTE: One batch of my tomato leathers got a little too crisp around the edges. But after they had been wrapped up for a day, they were just fine.

Variations

You can also add other goodies to your tomatoes. Try some onion, green pepper, and/or garlic. Maybe some fresh basil or other herbs and spices. For starters, add

1 medium onion
1 green pepper
a clove of garlic

to 3 C. tomato puree and process until well blended. Then just follow the same instructions for drying plain tomato leather.
What to Do with Tomato Leather

Marinara Sauce: In a pan sauté onion, garlic, shredded carrot and dried or fresh herbs in olive oil. When everything is cooked, add in your reconstituted sauce and cook for several more minutes.

Pizza Sauce: Place tomato leather into an amount of boiling water. Add dried Italian seasoning and garlic for instant pizza sauce.

Tomato Paste: Add tomato leather pieces to the least amount of hot water possible. Better yet if you can pulverize the leather in a blender or food processor first.

Chili, Soups & Stews: Add squares of tomato leather directly to your pot of simmering chili, soup, or stew to thicken it and add extra tomato flavor.

Tomato Cream Sauce: Sauté onion and garlic until softened, then add in heavy cream or half and half and add tomato leather directly to it; simmer very low until leather has softened.

Tomato Sprinkles: Cut the leather into fine strips or whirl in the food processor or blender to make a fine crumb. Use for a topping on eggs, a green salad or even broccoli. Add some to chicken with pesto, or use in veggie dips. Roll it up in a pork or beef roulade. How about on a turkey sandwich or wrap? It is great in deviled eggs, crock pot recipes, vinaigrette dressings, and in hamburger patties. Tomato basil bread, anyone?

LTS Day Cheese

LTS Day Cheese

4 cups water
1 1/2 cups non-instant powdered milk
2-4 T. lemon juice or vinegar
¼ tsp. salt

Mix water and powdered milk. Place in a pan on low heat. Add slowly a little drizzle of lemon juice or vinegar, and stir gently. If using lemon juice, make sure it hasn’t expired. If it is old, it might need to be replaced for this recipe to work. Continue to gently stir while milk cooks; don’t let it come to a boil. Milk will gradually develop curds and separate from the whey, which will be almost clear. If it does not turn into curds and whey, add a little more lemon juice or vinegar. Strain and rinse the curds in cool water. Add salt.

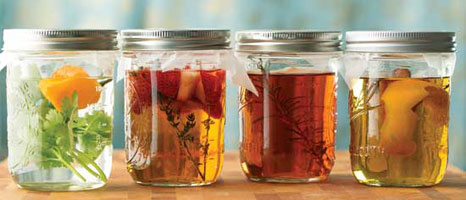
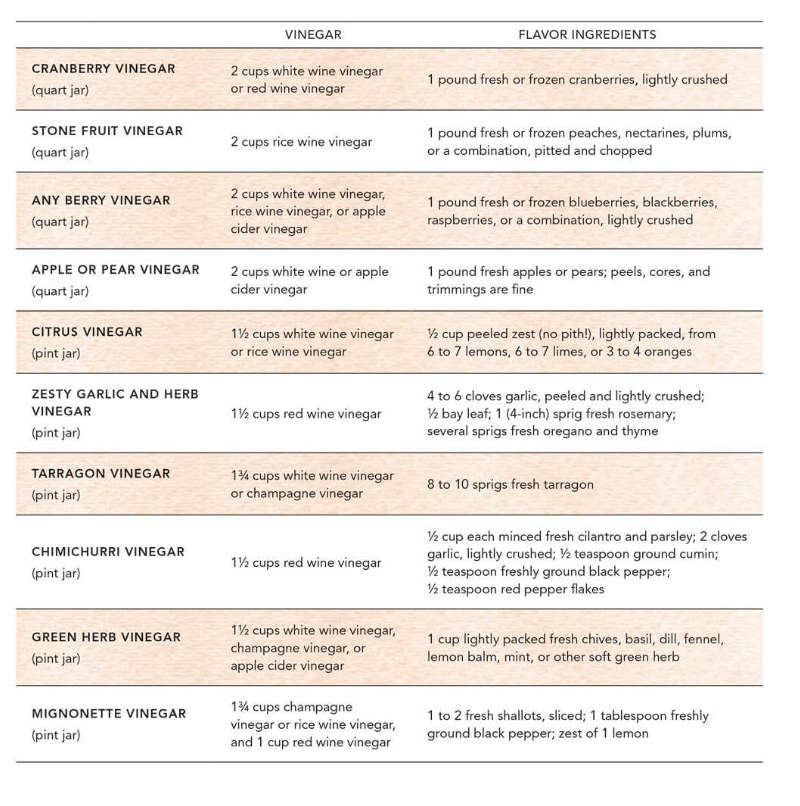
Infused Vinegars

Infused Vinegars

Prepare the flavoring ingredients as necessary. All fruit and herbs should be as fresh as possible, and in top condition. Discard any ingredients with signs of mold or decay. Wash and thoroughly dry your fresh ingredients.

Clean and sanitize a glass jar that will be large enough to hold the vinegar and flavor ingredients comfortably. I typically use pint or quart mason jars.

Combine the vinegar and flavor ingredients in the jar. Make sure there is enough vinegar to fully cover all the flavoring ingredients. If not, add a bit more vinegar to the jar.

Lid the jar and let the vinegar sit in a cool, dark place for 3 to 4 weeks. Taste the vinegar; when the flavor has developed to your satisfaction, it’s done!

Strain the vinegar through a fine-mesh sieve to remove any big chunks, then filter the vinegar through a strainer lined with a paper coffee filter, clean lint-free cloth, or layered paper towels.

If desired, sweeten the vinegar slightly. Many fruit vinegars taste more rounded with about 1 T. sugar added per 1 C. finished vinegar. This is totally optional.

Transfer the vinegar to sanitized dry bottles. Lid tightly and store the vinegar in a cool, dark place. It will keep for about l year.

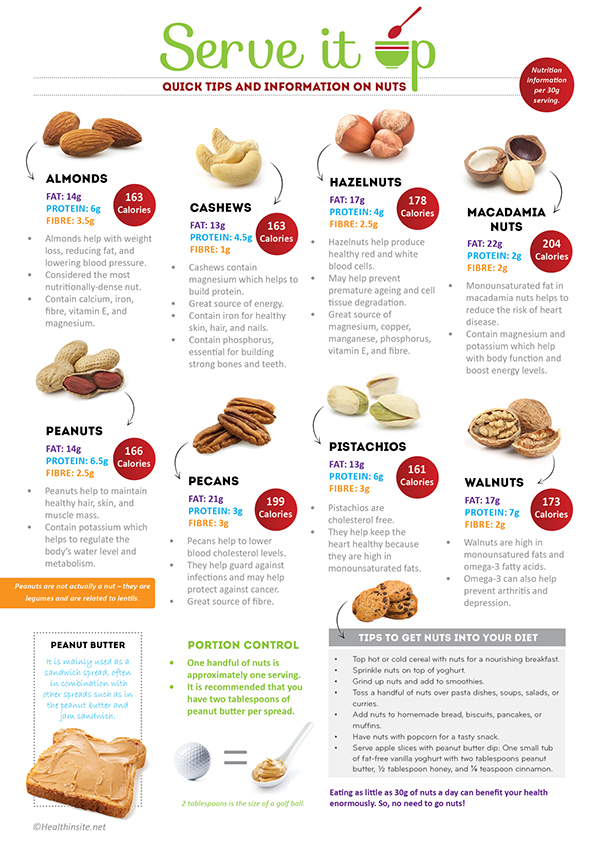
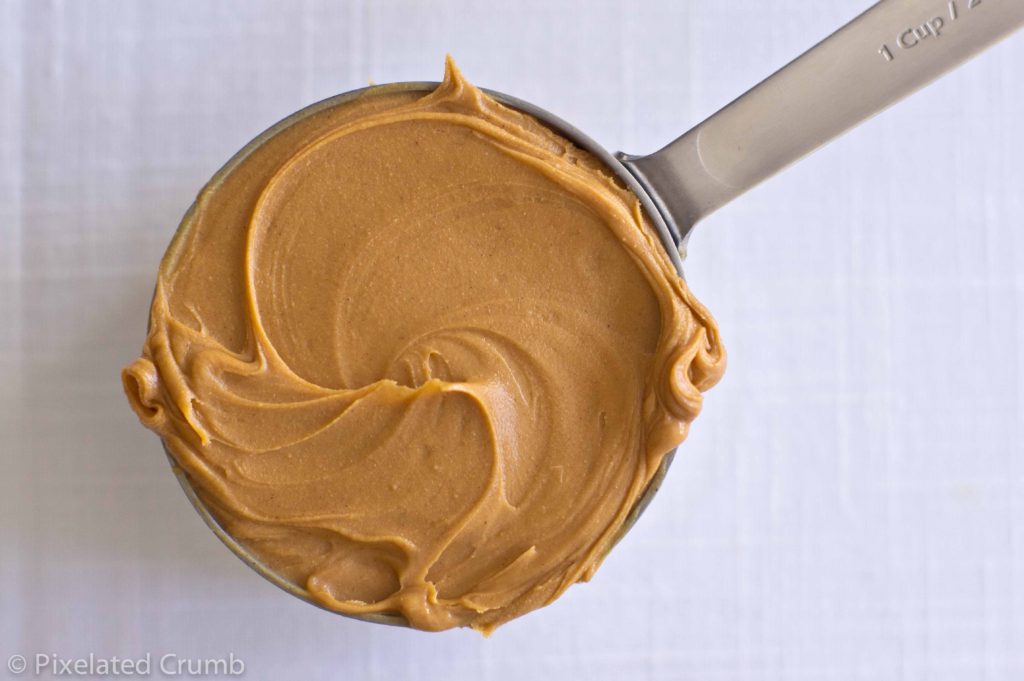
Uses for Peanut Butter

Uses for Peanut Butter

For a yummy glaze on ham steaks, combine 3 tsp. orange marmalade, 2 tsp. peanut butter, and 1 tsp. water. Broil the ham steaks and when they are nearly done, add the glaze to one side and broil until the glaze is lightly browned, about 1 minute.

For a simple, fun appetizer, spread peanut butter into the grooves of celery sticks. Then for sweetness, place a few raisins on top and drizzle with honey.

To make a novel wrap out of grilled shrimp, combine peanut butter, olive oil, fresh lemon juice, and parsley until smooth. Grill some shrimp and serve in a tortilla wrap with shredded lettuce, chopped tomato, chopped onions, chopped cucumbers, and the peanut sauce.

For a mid-afternoon snack, spread 1 slice of raisin bread with 3 tsp. peanut butter, then top with 2 tsp. raisins and 1 tsp. honey. Add a dash of ground cinnamon if you like. Top with another slice of raisin bread. Cook the sandwich in a buttered griddle until browned on both sides.

To give creamy potato soups or vegetable soups an Afro-Caribbean flavor, stir in a few tsp. peanut butter.

To make an Asian-style dipping sauce for beef, shrimp, or chicken, whisk together 3 tsp. peanut butter, 1 tsp. soy sauce, 1 tsp. apple-cider vinegar, 1 tsp. peanut oil or vegetable oil, 1 tsp. sugar, and 1 tsp. sesame oil. Blend until smooth.

For banana muffins with a twist, replace half of the butter or shortening in the recipe with peanut butter. Top the muffin batter with a sprinkling of shredded coconut before baking.

To breathe new life into chocolate chip cookies, replace half of the butter with peanut butter in your favorite recipe.

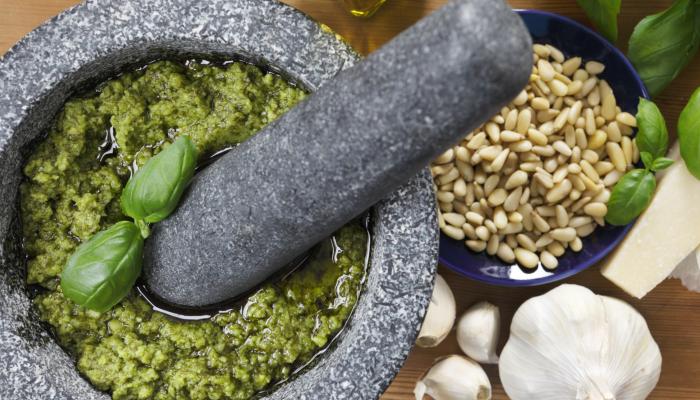
Using a Mortar & Pestle

Using a Mortar & Pestle

If you have already bought or have been given a new mortar and pestle set, there are a couple of things you will need to do before you get down to the serious business of the alchemy of culinary potions. Just like any new utensil, the mortar and pestle should be cleaned and seasoned before use.

1. Wash in clean water without detergent and air-dry.
2. Grind roughly a small handful of white rice. Discard and repeat if necessary until the rice remains white and does not discolor. This will depend on the type of material your set is made from.
3. Add 4 cloves of garlic, 1 tsp. cumin, 1 tsp. salt, and 1 tsp. pepper. Grind and discard.
4. Wash in clean water without detergent and air-dry.

If you already have a set and missed these steps, don’t panic. It just means that whoever ate your first efforts probably ingested some stone dust, minigravel, or wood sharings. It will be long gone by now with the subject none the wiser, and it will not affect the ongoing performance of your set. Only you, your enthusiasm, and your passion can do that.
Once you are ready to start, a good rule to remember is:

Driest ingredients first.
Moist ones next.
Oily ones next.
Wet ones next.
Taste and add salt to your work if needed.

Never use soap or detergent to clean your set, as perfume particles can be absorbed and taint your food.

To sanitize stone, heat occasionally in the oven at 350°F/i8o°C for ten minutes. Make sure to leave the mortar and pestle to cool in the oven, door open, once it’s turned off. Never try and lift out a heavy, hot stone or you may do more damage than break a toe.

For all recipes, garlic count is peeled and in cloves, anchovy count is in preserved fillets, and flaked salt is not rock salt. Chili means fresh, deseeded, long and spicy, not short and dangerous, and sugar generally is for any natural sweetener, e.g., honey, natural cane sugar, molasses, agave nectar, date sugar, brown rice syrup, maple syrup, pomegranate molasses, but not artificial substitutes. Bread crumbs means fresh or dried, herbs means leaves and stalks except for coriander, which includes roots as well, and mint, which is leaves only. Nuts are roasted and shelled, pepper is cracked or whole, white, black, pink, or green. Cheese is grated, fruit is stoneless, spices are lightly toasted or roasted. The method of mixing is for you to decide, but try grinding dry- ingredients first, then add moist, then wet ingredients.
Mortar & Pestle Aioli

4 garlic cloves
Flaked salt
1 tsp. Dijon mustard
(An option is to add 2 tsp. quince paste at this stage.)
1 egg yolk

Slowly drizzle in 1/2 C. olive oil while mixing.

1 tsp. lemon juice
1/2 tsp. cold water

Slowly drizzle in an additional 1/2 C. olive oil.

Should be the consistency of mayonnaise. Great with pasta, meat, crudités, vegetable, salads, chicken, fish.

Mortar & Pestle Berry Sauce

Any soft seasonal berries can be crushed in the mortar. The amount depends on the size of your mortar but most will hold at least 1 punnet (pint). A few drops of balsamic vinegar or kirsch will enhance the flavor of the berries even more, and they can sit happily crushed and liquefied and steeping in your mortar for hours. Assuming you can keep everyone from tasting them, simply spoon them at the last minute over, under, or around desserts, into cocktails, or as a plate garnish around meat, chicken, or crustacean dishes. And if there are any left over, you might have to make pancakes or crispy cream waffles for breakfast.
Mortar & Pestle Bread Sauce

4 garlic cloves
1 finely chopped onion
2 bay leaves
1 tsp. green peppercorns, brine drained
Grated Nutmeg
Salt
2 C. fresh white bread crumbs
4 tsp. fresh cream
2 tsp. butter

Mix all together in the mortar and pestle and then stir and heat in a small saucepan with 2-3 tsp. melted butter. When the garlic, onion, and crumbs begin to caramelize, toast, and take on color, blend in 450 milliliters of cream. Bring slowly to a gentle rolling boil, stirring to incorporate as it heats. Check the seasoning before serving. This amazing, often neglected sauce is wonderful with all roasts and all manner of grilled and barbecued meats and fish.

Uses for Buttermilk

Uses for Buttermilk

To make more tender cakes, use buttermilk instead of whole milk. Add 1/2 tsp. baking soda for each C. buttermilk. The acidity of buttermilk tenderizes the cake better than plain milk can, and the baking soda balances out that acidity.

For a quick, creamy sauce for cooked fish or chicken, combine 1/4 C. buttermilk with 1/2 C. bottled blue cheese salad dressing.

To create a thick, rich texture in cold soups, sauces, and salad dressing without adding too much fat, use buttermilk in place of some or all of the cream or oil used in your favorite recipe. A spoonful of low-fat sour cream further enriches the texture.

To make a luscious pumpkin pie, mix together 1 1/2 C. canned pumpkin, 2/3 C. buttermilk, 3 egg yolks, 1 C. firmly packed light brown sugar, 1 tsp. ground cinnamon, and 1/2 tsp. ground ginger. Beat 3 egg whites with 1/4 tsp. salt in a small bowl until soft peaks form, 2 to 3 minutes. Fold into the pumpkin mixture. Pour into an unbaked 9-inch pie shell and bake at 375°F until set, about 1 hour.

For quickbreads with a lighter crumb, use a combination of buttermilk and whole milk. Buttermilk works especially well in pancakes, cornbread, and banana bread.

To make fluffier, richer-tasting mashed potatoes, use buttermilk instead of plain milk.

Pantry Stable “Roux” Base

Pantry Stable “Roux” Base

Pantry Stable “Roux” Base


2 C. Milk Powder (not instant nonfat dry milk)

1 C. Butter Powder

1 C. Flour


Whisk to combine, store in a mason jar in pantry. To make white sauce, mix ½ C. mix with 1 C. water in a small saucepan. Cook over medium heat, stirring constantly, until sauce is thickened. Replace water with pan drippings or meat stock/broth for a gravy. To replace a can of “Cream of X soup” in a recipe, mix a C. the mix with 1 ¼ C. water. Add dehydrated celery, mushroom, onion, and/or chicken bouillon to match the type of Cream soup you need. Cook over medium heat, stirring, until thickened.

Preparing & Cooking Dry Beans

Preparing & Cooking Dry Beans

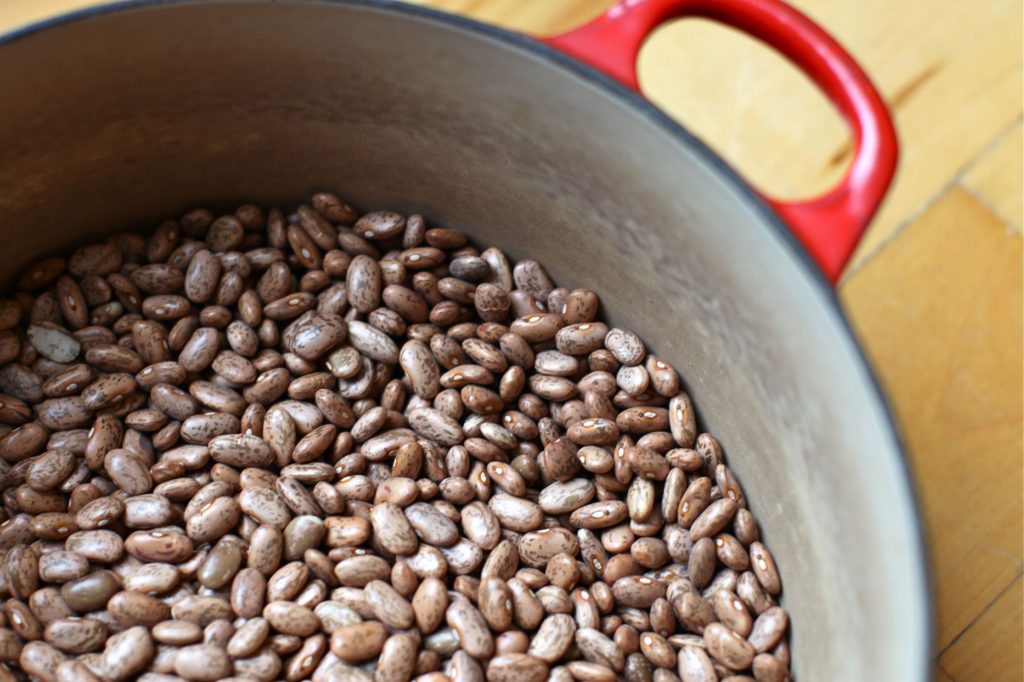
Preparing & Cooking Dry BeansFollow these 3 easy steps for cooking dry beans:

1. Sort: Before soaking beans, pick them over and remove any damaged beans, small stones or dirt.

2. Soak: Most beans will rehydrate to triple their dry size, so be sure to start with a large enough pot. Choose one of the following ways to soak your beans:

Hot Soak: Hot soaking helps reduce intestinal gas. For each pound of dry beans, add 10 C. hot water; heat to boiling and let boil 2 to 3 minutes. Remove from heat, cover and set aside for up to 4 hours.

Quick Soak: For each pound of dry beans, add 10 C. hot water; heat to boiling and let boil 2 to 3 minutes. Remove from heat, cover and set aside for at least one hour.

Overnight Soak: For each pound (2 C.) dry beans, add 10 C. cold water and let soak overnight, or at least 8 hours.

3. Cook: Drain soaking water and rinse beans. Cover beans with fresh water. Simmer for 11/2 -2 hours until tender.

Simple Cooking Tips

• To avoid broken or mushy beans, boil gently and stir very little.

• Taste-test beans often for desired tenderness.

• Foods containing acid such as tomatoes, chili sauce, lemon juice, vinegar or catsup will slow the cooking and softening of the beans. Add these items last so they will not add to the cooking time.
• Any of the following can be added during the last half hour of cooking: minced onion, garlic or green pepper, diced carrots or celery, chopped tomatoes or cooked meat.

Quick Tip: While you are preparing dinner tonight, prepare a pot of beans for tomorrow’s dinner. Use the Overnight Soak Method. In the morning the beans will be ready for your favorite recipe.

Garlic Confit

Garlic Confit

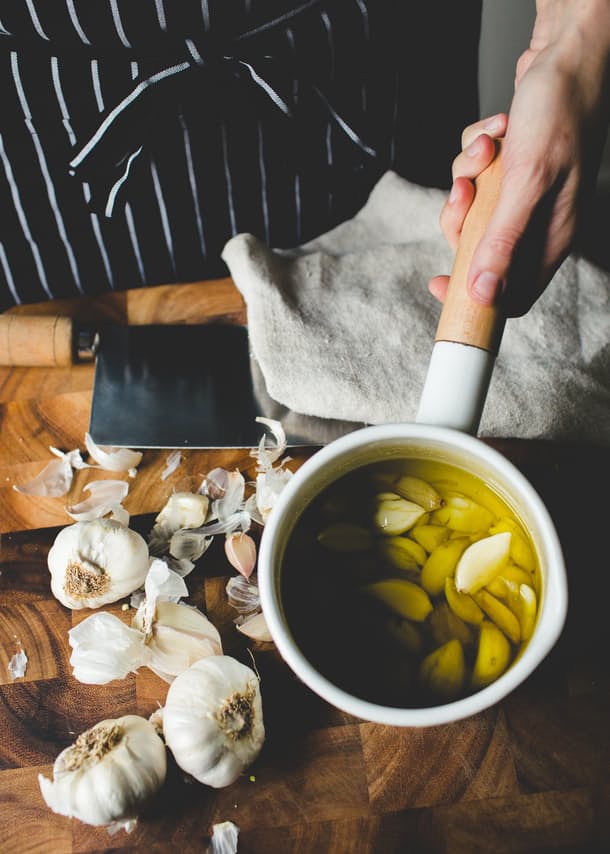
Peel the cloves from 2 heads (or more) of garlic. Place the cloves in a small saucepan and pour in enough olive oil to cover them, 1/2 to 3/4 C. for 2 heads. Over medium heat bring the oil to just a hint of a simmer, then reduce the heat to as low as it can go. You want to poach the garlic, not simmer it. Cook for about 45 minutes, until the garlic is soft and tender, but not falling apart. Transfer the garlic with a slotted spoon to a clean jar and pour the oil in to cover the cloves.

Cool the mixture to room temperature. Cover the jar tightly and keep refrigerated for several weeks, or freeze for several months. (Keep the cloves covered in oil and be careful about using a clean spoon to dip into the jar). As a variation, add rosemary and/or thyme to the saucepan along with the garlic to cook.

10 Ways To Use Garlic Confit

1.Whip a few cloves and some of the infused oil with vinegar to make a vinaigrette. Toss it with delicate greens.
2.Smash some of the cloves and whisk them with some of the infused oil. Toss the thick garlicky oil with steamed vegetables. (Excellent with asparagus, green beans, snow and snap peas, broccoli, and cauliflower.)
3.Toss roasted or grilled vegetables with a spoonful of the tender garlic.
4.Spread the tender cloves over toasted bread or cheese-smeared crostini. (Goat cheese is a great option.) For a composed hors d’oeuvre, garnish the garlic toasts with chives or any fresh herbs.
5.Layer garlic confit into a sandwich or pizza.
6.Toss garlic confit into a vegetable pasta. (Just pick a vegetable and pair it with garlic confit and pasta. For an easy option, try fresh tomatoes and basil.)
7.Whip the tender cloves into any vegetable puree for sweet garlic flavor. (Try garlic confit with a potato, celery root, cauliflower, winter squash, or sunchoke puree.) A whipped chickpea or cannellini bean puree will also benefit from a spoonful of garlic confit.
8.Make a vegetable and garlic confit salad. Slice the cloves in half and toss them into a tomato, basil, and toasted bread salad. Use some of the oil to sauté corn-off-the-cob just briefly. Toss the corn with sliced or smashed cloves, fresh basil, and feta. (Add zucchini and/or tomatoes to the corn salad if you wish.)
9.Add garlic confit to sauces and soups.
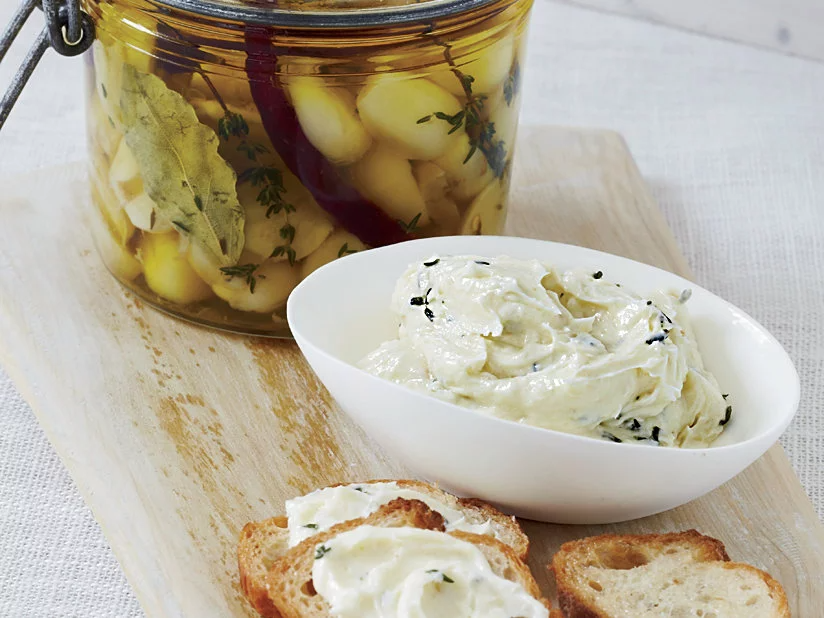
10.Use the back of a fork to break down cloves into a paste. Stir the garlic paste into plain Greek yogurt or ricotta to make a creamy garlic dip or condiment. If you wish, add summer herbs to the mixture or drizzle the top with a good olive oil or chili oil.

A Warning About Botulism: Garlic is an extremely low-acid vegetable. When it is stored improperly in oil (without oxygen) and in warm temperatures (at room temperature), it can produce a very serious toxin that causes the illness botulism. Botulism can be fatal if not treated immediately. It is very important to refrigerate garlic confit, as per the Center for Disease Control. Use a clean jar with a tight seal to store garlic confit; cool the garlic and oil as quickly as possible, and refrigerate it immediately. If you store the preserved garlic properly, it should keep for several months, however, to be completely safe, I recommend only storing it for up to three weeks. If you’re worried, you can also safely freeze garlic confit for several months.

6 heads of garlic, cloves peeled (2 cups)

6 thyme sprigs

3 small bay leaves

3 dried red chiles, such as chiles de arbol

2 cups pure olive oil

Combine all of the ingredients in a medium saucepan and simmer over low heat until the garlic is tender but not browned, about 30 minutes. Let cool.  Using a slotted spoon, transfer the garlic, herbs and chiles to three 1/2-pint canning jars. Pour the cooking oil on top, seal and refrigerate for up to 4 months.

Tips for Cooking with Kids

Tips for Cooking with Kids

How to get kids hooked on cooking

• Make your kitchen kid-friendly. Your child should be able to reach the counter and whatever tools he or she needs.
• Use real cooking tools. Teach proper techniques for using stoves, sharp knives, can openers, and peelers. Children will respect the danger these tools can present if you teach them proper methods and let them practice under your supervision.
• Give kids room to create. Set out an assortment of ingredients and then let them go.
• Play a restaurant game at home. Have your children draw up a menu for adults to order from. Even if the dish is simple, kids get a kick out of taking orders and passing out the bill.
• Allow kids to serve at dinnertime. It’ll get them involved in meals and teach them good presentation skills.
• Delegate small tasks. Let children arrange food, create salad dressings, or add designs to cookies and cakes.
• Give cooking tools as gifts. A good one to start with is a citrus zester, because kids enjoy making a curly, colorful slice of peel.
• Let mistakes go. After all, cooking is about trial and error.
• Cook “real” recipes with your kids. Don’t dumb things down for them, or rely solely on children’s cookbooks. Instead, follow tested recipes, making small alterations to lower the skill level.
• When they’re toddlers, place them on your hip or your back (I used an Ergo and then a hiking backpack) at the stove so that they feel like they’re a part of the experience.
• Let them hold your wrist while you whisk, flip, or stir.
• Hand little ones a butter knife and a soft piece of fruit like a peach or a pear. Next, still with a dull butter knife, teach them to curl their fingers and angle the knife away. Once they’ve mastered this technique, bring out the real knives. Just don’t look away for the first few years.
• Hand them scraps of dough to make mini tarts. Let them over-mix and over-fill.
• Don’t force your kids into the kitchen. Let them see you enjoying it (fake it if you need to). In fact, sometimes, don’t invite them into the kitchen at all. Let it be your peaceful place. Then watch them get intrigued.
• There will be waste. Things will get broken. Fingers will get cut. Eggs will hit the floor.

• Let go. Clean up. Start again. Play.
Raising Adventurous Eaters

In America, supermarkets are full of pricey processed products that claim to be marketed to kids’ palates. But in other countries, says the Washington, D.C., author, toddlers happily eat chilies, funky fruits, liver or lemon grass because that’s what their parents are happily eating, too. And we can follow suit.

Instead of giving kids exactly what they say they want to prevent meltdowns, Piho means, we should be teaching them about what she calls taste: How food is grown, what it smells like, how we cook it, how pretty it looks on the plate before it’s cut up into kid-size pieces, and that there are a multitude of flavors out there in the world beyond bread and sugar, most of them good.

If you approach food as a pleasure rather than as a pain with your kids in other words — and do it from their first bites of pureed produce — they’re far more likely to just eat what you do.

• Don’t get attached to kids’ likes and dislikes—everything changes.
• There is no such thing as kid food—there is only bland food.
• Make only one dinner—no special meals.
• Keep your kid helping in the kitchen.
• Don’t stop serving foods they won’t eat now, just keep putting them on the table.
• Respect Family Dinners
• Just One Bite
• Don’t Pre-Cut Children’s Food – Let them see how pretty it is first
• Don’t express negativity about food, even if it’s something YOU don’t care for

Beach Barbecue

Beach Barbecue

Restaurant_DinnerOfTheLegend_Sunset_FNCooking at the beach is more fun than trouble these days, with the large array of totable barbecues ― both charcoal and gas ― available. And throwing some shrimp on one is so easy it has become a cliché in the best sense. We’ve added a dip to serve with veggies to start the meal and a great, packable summer salad to go on the side.

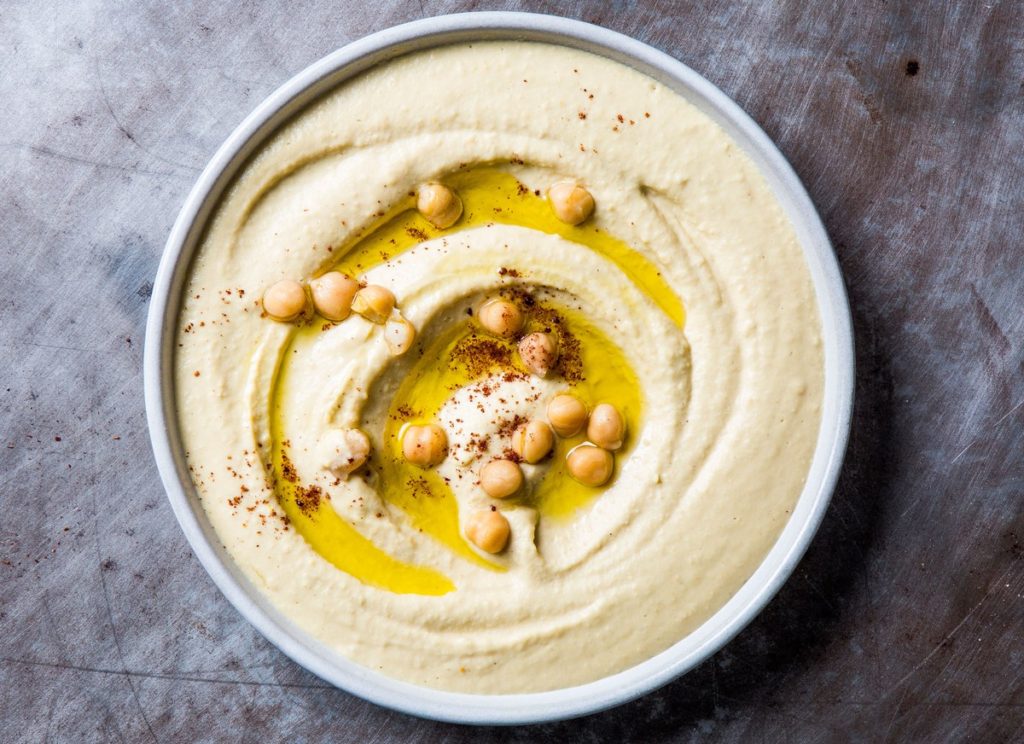
A few tricks make everything fresher and tastier: Make your own hummus; it takes little time and is far better than most kinds you can buy. Cure the shrimp briefly in salt and sugar to tenderize and flavorize, then transport them on skewers in their marinade. Carry the salad in layers, then dress and mix it at the beach.

Finally, get creative with s’mores for dessert. Marshmallows melt as well over a grill as over a fire, and sandwiched with yummy new layers ― chocolate wafer cookies and strawberries, for instance ― they make watching the sun set over the water extra sweet.

Wine Pick: Dry rosé or Sauvignon Blanc. The shrimp are both sweet and salty, so they call for some soft, round fruit balanced with crispness in a wine. Bonny Doon Vineyards’ Ca’ del Solo Big House Pink ($10) meshes perfectly and is a great toes-in-the-sand beverage; Joel Gott’s Napa Valley Three Ranches Sauvignon Blanc ($18) works well too.

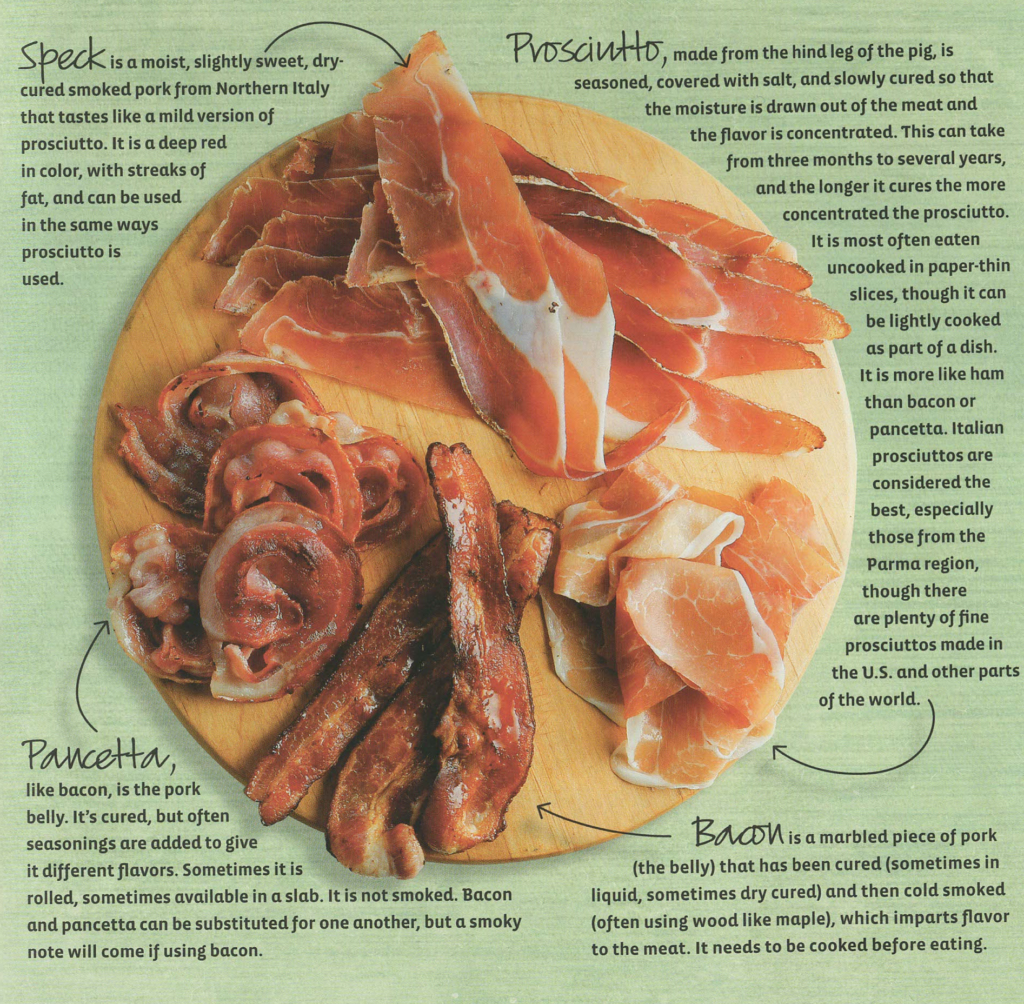
Prosciutto Lettuce Wraps
Hummus
Shrimp Skewers
Salad
S’mores

Packing Tips

Prosciutto Wraps:

Hummus: Spoon into a small wide mouth container with a lid. Nestle in a larger shallow container, arrange vegetables alongside and snap lid over everything. Seal packed bread in a zip lock plastic bag. Transport veggies and hummus in a cooler. At serving time, unpack bread and nestle among the vegetables.

Shrimp: Lay skewered shrimp in a sturdy shallow container with a lid. Carry in cooler.

Salad: Layer in a wide, shallow plastic bowl (3 ½ – 5 quart) with a lid and put in cooler. Bring dressing in separate container.

S’mores: Pack sliced strawberries in a small rigid container tithe a lid and keep cold. Jars of marmalade or lemon curd, packages of cookies and marshmallows don’t need special handling.

Prosciutto Lettuce Wraps

Prosciutto Lettuce Wraps2 T. chopped toasted walnuts
1 T. walnut or olive oil
1 1/2 tsp. balsamic vinegar
4 cups rinsed and crisped baby salad greens (4 oz.) such as mâche, frisée, and/or arugula
salt
pepper
15 slices prosciutto (6 oz. total)

Put 2 T. chopped toasted walnuts in a bowl and crush with a wooden spoon. Mix with 1 T. walnut or olive oil and 1 1/2 tsp. balsamic vinegar, then 4 cups rinsed and crisped baby salad greens (4 oz.) such as mâche, frisée, and/or arugula, and salt and pepper to taste. Mound greens mixture on one end of each of 15 slices prosciutto (6 oz. total) and roll up tightly.
Creamy Hummus

You can prepare this hummus up to 1 day ahead; cover and chill. Serve with pocket bread or chunks of sesame-crusted bread and raw vegetables like cucumber slices, red bell pepper strips, baby carrots, celery and jicama sticks, and radishes. Prep time: about 7 minutes.

1 can (15 oz.) garbanzos
2 to 4 T. extra-virgin olive oil
3 T. lemon juice
1 T. toasted sesame oil
1 or 2 cloves garlic, peeled
Salt and pepper

Pour garbanzos into a fine strainer set over a bowl to collect liquid; reserve liquid. In a blender, combine garbanzos, 2 T. olive oil, lemon juice, sesame oil, garlic, and 1/3 C. of the reserved garbanzo liquid. Whirl until smooth and creamy. Add salt and pepper to taste, and, if mixture is too stiff, 1 to 2 more T. liquid; hummus should be soft but still stiff enough to hold its shape. Scrape into a shallow serving bowl. Shortly before serving, drizzle with 2 more T. olive oil if desired.

Orzo Salad with Corn, Green Beans, and Tomatoes

1 pound green beans Orzo Salad with Corn, Green Beans, and Tomatoes
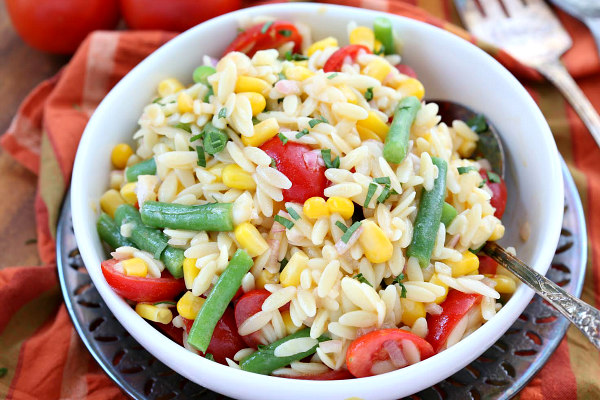
1 1/2 cups dried orzo pasta (8 oz.)
3 ears fresh corn (10 to 14 oz. each; see notes)
1/2 C. white wine vinegar
1/2 C. extra-virgin olive oil
1/2 C. minced shallots
2 T. Dijon mustard
2 T. minced fresh tarragon or 2 tsp. dried tarragon
Salt and pepper
2 cups cherry tomatoes (12 oz.), rinsed, stemmed, and cut in half

In a 5- to 6-quart pan over high heat, bring about 2 quarts water to a boil. Meanwhile, rinse green beans, trim off ends, and pull off any strings. Cut into 2- to 3-inch lengths. Add beans to boiling water and cook until barely tender to bite, 3 to 5 minutes. Drain and immerse in ice water until cold; drain well. Fill same pan with 2 1/2 to 3 quarts water and bring to a boil over high heat. Add orzo and cook until barely tender to bite, 8 to 11 minutes. Drain and rinse with cold water; drain well. Meanwhile, husk corn, discarding silk; rinse ears. Holding each ear upright in a large, deep bowl, cut off kernels close to the cob. To make dressing: In a small bowl, whisk together vinegar, olive oil, shallots, mustard, tarragon, and salt and pepper to taste. In a large, wide bowl, mix orzo with 1/2 C. of the dressing. Add more salt and pepper to taste. Spread level. Layer corn kernels, green beans, and tomatoes over pasta. Pour remaining dressing into a container. Cover and chill both salad and dressing until ready to serve. Shortly before serving, pour three-fourths of the remaining dressing over salad and mix gently to blend. Add more dressing and salt and pepper to taste

Lemon-Garlic Shrimp Skewers

2 T. kosher salt
2 T. sugar
2 to 2 1/2 pounds peeled, deveined shrimp (12 to 15 per lb.), rinsed and drained
1/4 C. olive oil
1/4 C. chopped parsley
1 T. grated lemon peel
2 or 3 cloves garlic, peeled and minced
1/2 tsp. fresh-ground pepper
Lemon wedges

In a bowl, mix salt and sugar. Add shrimp and stir gently to coat. Cover and chill 45 minutes to 1 hour. Rinse shrimp well and drain; also rinse and dry bowl. Return shrimp to bowl. Add olive oil, parsley, lemon peel, garlic, and pepper. Mix to coat. Thread shrimp on metal or soaked wooden skewers, running skewer through the body once near the tail and once near the head end of each shrimp so it looks like the letter C. Lay shrimp skewers on an oiled barbecue grill over hot coals or high heat on a gas grill (you can hold your hand at grill level only 2 to 3 seconds); close lid on gas grill. Cook, turning once, until shrimp are bright pink and opaque but still moist-looking in center of thickest part (cut to test), 5 to 6 minutes total. Serve with lemon wedges to squeeze over shrimp.

Notes: A brief cure in salt and sugar not only adds flavor to the shrimp and makes them more tender but also acts as a mild preservative for transporting them. You can assemble the skewers through step 2 up to 1 day ahead; cover and chill. Prep and cook time: about 1 hour, plus at least 45 minutes to cure.
Japanese Grill Party

Japanese Grill Party

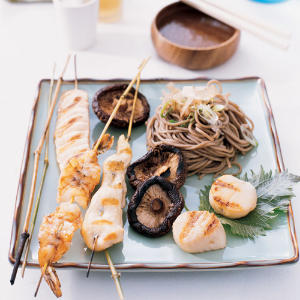
japanese-grill-mRobata-yaki, or Japanese barbecue, is perfect for warm-weather entertaining ― it’s simple, fresh, and meant to be shared with friends along with sake and cold beer. “Robata-yaki originated in seaside villages in Japan, when fishermen would grill the catch of the day on the boat,” says Vernon Cardenas, executive chef at Katana in Los Angeles, a restaurant specializing in Japanese barbecue. Cardenas grills meat, seafood, and vegetable skewers served with flavorful dipping sauces. Our flexible robata-yaki menu accompanies three of Katana’s sauces. Serve ponzu with skewers of seafood, ginger sauce with vegetables, and mustard sauce with chicken, or let guests mix and match. Round out the menu with edamame and spinach and noodle salads. Mochi ice-cream balls ― scoops of ice cream thinly covered with chewy pounded-rice dough ― make a perfect handheld dessert.

Boiled Edamame
Grilled Seafood or Chicken Skewers
Grilled Vegetable Skewers
Dipping Sauces
Cold Soba Noodle Salad
Sesame Spinach Salad
Mochi Ice Cream Balls
Sake

Choosing Sake

Sake

Premium Sake is served chilled, never warmed, to allow its subtle flavors to be appreciated. Sake is brewed in many styles from light and fragrant to smoky and full bodied. All premium sake can only contain rice, water, special kōji mould (used in food fermentation in Asia) and sake yeast. In some instances, a small amount of distilled alcohol is added at the end of the brewing process, just before sake is pressed and stored for maturation. Imported, top of the line sake will be graded as DaiGinjo (Junmai Daginjo) or Ginjo (Junmai Ginjo) – these are the top 10% of all sake. The next type premium sake is graded as Honjozo (alcohol added) or Junmai (no alcohol added). This type may sometimes be warmed. Table sake, the lowest grade, is labeled as Futsuu-shu

酒 – shu – a suffix indicating “sake” or “alcohol”. It often follows the grade or type.
大吟醸 – Daiginjō
吟醸 – Ginjō
純米 – Junmai
本醸造 – Honjōzō

In addition to the Grade of Sake, they may have another label as well.
Nigori– “Cloudy sake”. Some of the fermented solids “kasu” are allowed back in during sake pressing, giving the sake cloudy-white appearance. Nigori sake will be sweeter and milder, and could be a good option when you feel like drinking something different or when you need a sake to go with very spicy food.
Nama (Namazake) – unpasteurised sake. Has a certain “zing” due to all the living enzymes that still remain. Many people have a strong preference for Nama sake, as it can feel more effervescent, zingy, sparkly. Before choosing to drink Nama, however, make sure that it had been properly stored. It must always be refrigerated.
Genshu – undiluted sake. Sake is naturally 20% alcohol, but most of it is diluted with filtered water to bring the alcohol content down to 15-17%, to enhance the experience of flavours. More often than not, genshu sake will only be sold at the brewery door, as a souvenir. In some rare instances, however, the highly skilled brewer will manipulate the fermentation process to reach the peak alcohol content of only about 16-17%, and deliver a very special sake.
Muroka – unfiltered (most sake is filtered with charcoal powder to remove colours and off flavours). Muroka sake will be darker colour, more flavour. Some people seek out this type as they believe it is sake in its natural state. Worth trying at least once!
Kōshu – aged sake. Honey-like flavours, darker colour. Almost brandy-like. 99.9% of sake is never matured. The sake that has been matured on purpose and called kōshu is rare, and can be a very interesting drinking experience.
Yamahai, kimoto – sake types where the yeast starter is prepared with naturally occurring lactic acid. (Brewers now add lactic acid to keep the stray bacteria away from the yeast starter). It is gamier, earthier, higher acidity and sweetness. Basically, these are the types for which the fermentation process is started using old, traditional methods. They are slowly becoming popular again. Do expect stronger flavour than in most sake.

The irony is, you could select the most expensive, most technically promising sake, and still be disappointed. All that craft that went into making the sake would be futile if the sake is not stored and handled properly. Sake, like wine, is alive. It matures in a bottle. Most sake is made to be drunk fresh, within a year of bottling. Sake should be kept in a cool and dark space, just like wine. Exposure to bright lights and high temperatures is disastrous to sake. Ideally, you will find sake in a fridge. Ask the shop about the bottling date. In Japan, by law, all sake should carry the bottling date. There is one exception – sake intended for export doesn’t have that requirement. This is a pity! You can still ask the shop about how long they have had that sake. Secondly, look at how it has been displayed. How long has it stayed on the shelf under the bright fluorescent lights? Is it in a box or fully exposed to light? Is it wrapped in paper? Even after pasteurization, some light-sensitive particles remain in sake, and will degrade over time. Good liquor stores will keep sake refrigerated. This is the safest method for keeping sake

Meringue Snowmen & Trees

Meringue Snowmen & Trees

Meringue Snowmen & Trees3 egg whites, at room temperature
3/4 C. sugar
1/2 tsp. cream of tartar
1/4 tsp. salt
Assorted soft food gel colors
1/2 tsp. each peppermint and lemon or orange extract

Royal Icing:
2 cups confectioners’ sugar
1 1/2 T. powdered egg whites
6 T. water

Decorations:
Small red, orange and blue candies, gumdrops, assorted fruit roll-ups

Position racks in second and third levels in oven. Heat oven to 200 degrees F. Line 2 baking sheets with nonstick foil. Beat egg whites, 2 T. of the sugar, cream of tartar and salt at medium speed in a small bowl until frothy. Increase speed to high; beat until soft peaks form. Gradually beat in remaining sugar until stiff and glossy peaks form, about 5 minutes. Divide in half. Color half with 2 to 3 drops green food color and beat in peppermint extract. Beat lemon or orange extract into other half. Transfer green meringue to a large pastry bag fitted with a large star tip. Pipe meringue into 15 2-1/2-inch stars, spacing about 1-inch apart on prepared baking sheet. Using slightly less pressure on pastry bag, pipe 15 1-inch stars. Using even less pressure, pipe 15 3/4-inch stars. Bake green meringue at 200 degrees F for 45 minutes. Meanwhile, place white meringue in a second large pastry bag fitted with a coupler. Pipe 12 1-1/2-inch balls on prepared baking sheet, using a slightly wet fingertip to coax meringue into shape if necessary. Affix a #12 large round tip to coupler; pipe 12 1-inch rounds. Remove tip and replace with a #10 medium round tip. Pipe 12 small rounds. After green meringue has baked for 45 minutes, add white meringue and bake another 1 hour and 15 minutes until firm and dry. Turn and reverse sheets halfway through. Turn oven off; let meringues sit in oven 1 hour. Remove baking sheets to wire racks to cool 10 minutes. Carefully lift meringues directly to rack.

Royal Icing: In a bowl, mix sugar, powdered egg whites and water; beat on high for 7 minutes until thick and fluffy.

Assemble snowmen, using icing as glue: Beginning with a large ball as a base, attach a medium and a small ball as body and head with dabs of icing. Repeat with remaining meringues. Decorate as desired, using icing to attach candies. Color some of the Royal Icing black and some of it orange to fashion eyes, mouths and carrot noses. Create hats out of gumdrops and mufflers from fruit roll-ups.

Assemble trees, using icing as glue: Stack 2 or 3 graduated stars on top of each other or leave unstacked for shrubs

Cooking and Serving Meat Temperatures

Cooking and Serving Meat Temperatures

MEAT TYPE COOK TO SERVE AT
Beef/Lamb
Rare 115–120°F 125°F
Medium-Rare 120–125°F 130°F
Medium 130–135°F 140°F
Medium-Well 140–145°F 150°F
Well-Done 150–155°F 160°F
Ground Beef
Medium-Rare 125°F 125°F
Medium 130°F 130°F
Medium-Well 140°F 140°F
Well-Done 160+°F 160+°F
Pork
Medium 140–145°F 150°F
Well-Done 150–155°F 160°F
Chicken/Turkey
White Meat 160°F 160°F
Dark Meat 175°F 175°F
All About Steaks

All About Steaks

All About Steaks


The Best Cuts


For grilling, broiling, and pan frying, the best cuts of meat are rib eye steaks, strip or shell steaks, and tsp. bone, which contains both the strip and tenderloin steaks. Sirloin and round steaks are generally going to be tough and dry. Flank steaks are good when quickly cooked and sliced across the grain, as described above.


For roasting, top sirloin, tenderloin, standing rib roasts, and top rump roast are good candidates.


For stir frying, flank, top round, and sirloin steak are good. These cuts are best cooked quickly, and since elastin is broken because the meat is cubed, they are more tender.


For kebabs, tenderloin is the best bet. This mild cut absorbs flavors easily and it is very tender.


For pot roasting and braising, chuck and rump are the best cuts. These cuts have more collagen and need long, slow cooking in a wet environment to reach their optimum tenderness. Chuck has the most flavor and is the most tender.


For ground beef, chuck is the way to go. It has optimal amounts of fat and is tenderized mechanically by the grinding action. Most lean ground beef is chuck, but if you’re not sure, ask!


How to Buy Steak

Before you begin cooking, pick the cut of meat that best suits your dinner plan. Tender, less lean cuts are perfect for the grill and are delicious plain or dressed up with sauces. Leaner, chewier cuts become more tender and delicious when marinated, thinly sliced, and grilled quickly or braised.

For any cut of steak, look for red meat with white fat that is marbled evenly across the grain.

Prime grade meat (the highest grade) is tender and highly marbled. Unfortunately, prime grade is expensive and difficult to find. The average supermarket carries choice grade meat as well as the less flavorful, and less tender, select grade. The best steak you can buy is dry-aged in special meat coolers to develop the flavor and tenderize the meat. Most beef, however, is wet-aged, if aged at all, in vacuum-packed bags for one to four weeks. This process improves the tenderness of the beef, but does not improve the flavor.


Testing for Doneness

The best way to tell if a steak is done is to (carefully!) touch or squeeze the meat itself.

Rare meat feels a bit like the texture of the flesh between your thumb and index finger; medium meat has a slight spring to it; well-done meat is firm.

You also can check by cutting a small slice into your meat with a thin knife.

If you have an instant-read thermometer, the internal temperature for rare steak is 125 to 130 degrees, medium-rare is 130 to 140 degrees, medium is 140 to 150 degrees, and well done is 165 degrees.

Recipe for a Happy Home

Recipe for a Happy Home

ingredients-2

1 cup of Love
1 cup of Thoughtfulness
Blend with a pinch of Tenderness
1 big dash of Loyalty
Blend in Faith, Hope and Charity
Add a spoon of Compassion
Add a spoon of Ability to laugh at little things
Moisten with Tears of Joy, Sorrow and Sympathy
Bake in a pan of Good Nature and serve repeatedly

This recipe is important to me because my grandmother gave me a hand-written recipe book of all her favorite recipes that my family has enjoyed over and over throughout of lives…it just so happens the first entry/recipe in the book she gave to me was the one above. We all should remember the recipe above. I don’t know if this was an original recipe of my grandmother’s, but I do know that every time I get this particular recipe book out to search for something wonderful to make for my friends and family, I always read the first recipe in the book which is above.