Browsed by
Category: Vegetables

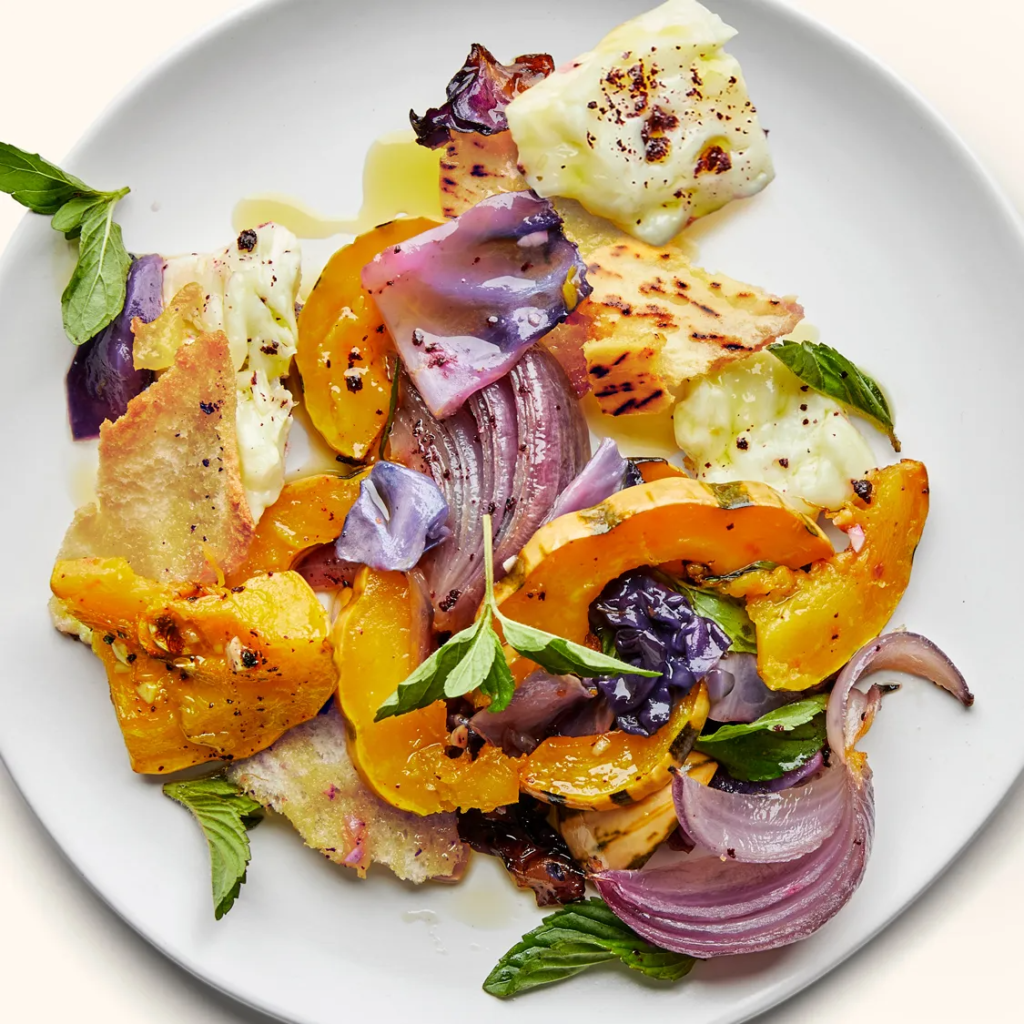
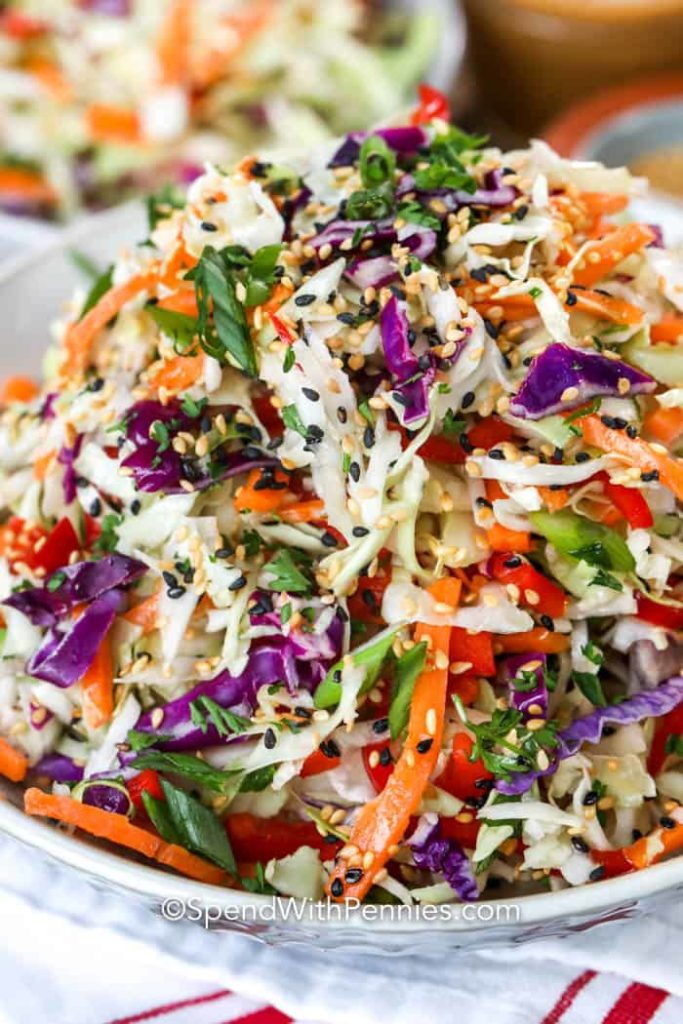
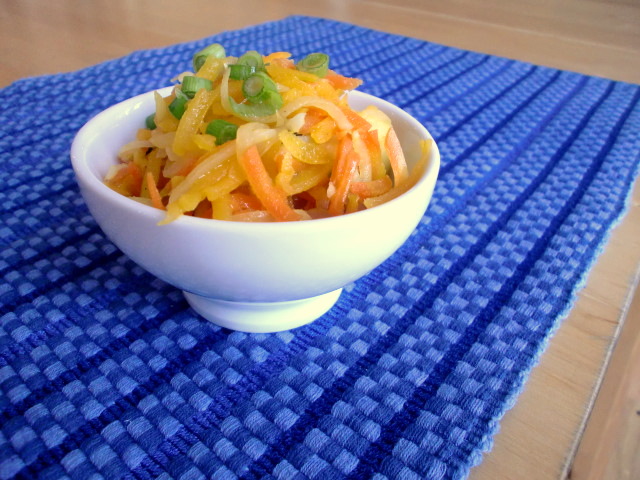
Winter Slaw with Maple Vinaigrette

Winter Slaw with Maple Vinaigrette
Winter Slaw with Maple Vinaigrette


1 small butternut squash, about 1 lb., seeded and cubed

4 medium carrots, peeled

2 medium turnips, peeled

3 parsnips, peeled

1 large Granny Smith apple, peeled and cut in wedges

4 T. olive oil, divided

1 T. maple syrup

3 T. apple cider vinegar

1/2 tsp. salt

1/4 tsp. pepper

6 scallions, thinly sliced


In a large bowl, whisk  2 T. of the olive oil, maple syrup, apple cider, salt, pepper and scallions.  Set aside.  Shred butternut squash, carrots, turnips, parsnips, and apples in a food processor using the medium shredding blade.  Heat a large sauté pan over medium high heat and add 2 T. of the olive oil.  Add the vegetables and fruit and sauté, stirring occasionally for 6 – 10 minutes, or until they are tender crisp.  Place in bowl with the vinaigrette and toss to coat evenly.

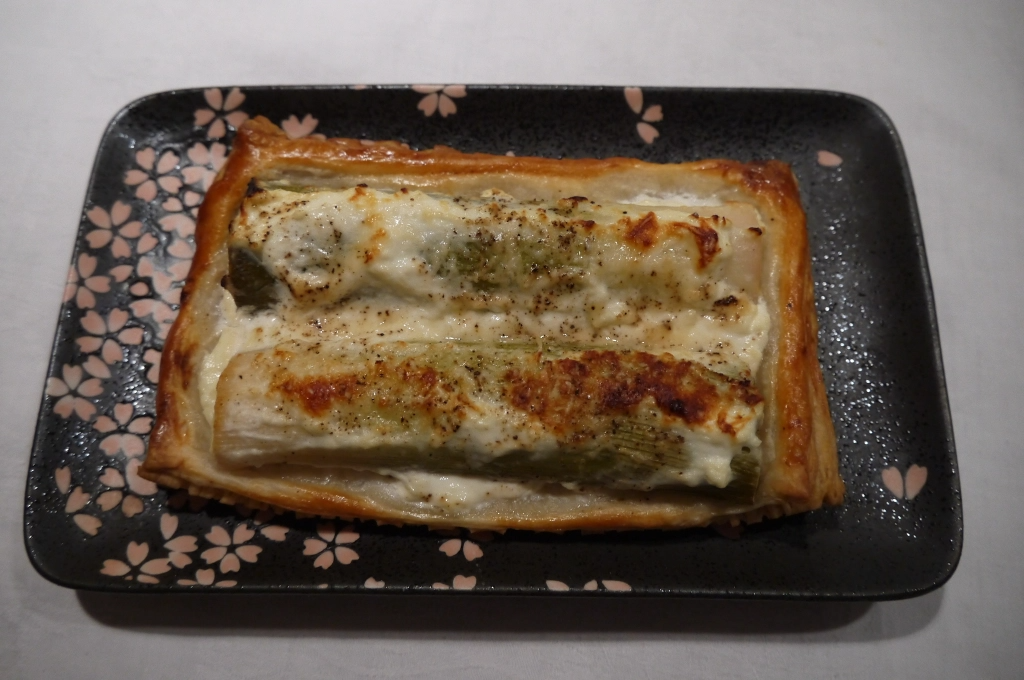
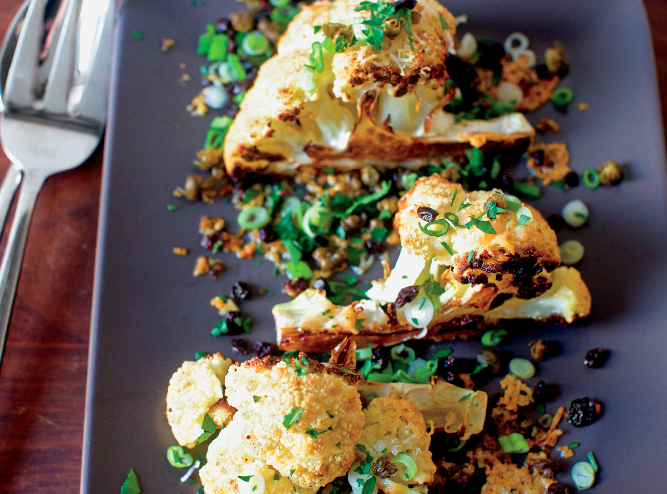
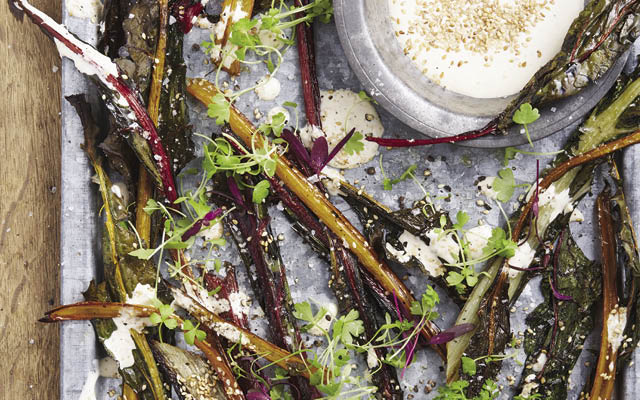
Roasted Swiss-Chard Stems with Creamy Sesame Dressing

Roasted Swiss-Chard Stems with Creamy Sesame Dressing
Roasted Swiss-Chard Stems with Creamy Sesame Dressing


2 tbs. sesame seeds, toasted

2 tsp. rice vinegar

1/2 tsp. mirin (or ½ tsp. white wine with a pinch of sugar)

1/2 tsp. toasted sesame oil

1½ tsp. tamari or soy sauce

2 tbs. mayonnaise

1½ tsp. full-fat, plain Greek yogurt

Stems from 1 large bunch Swiss chard, leaves reserved for another use

1 tbs. extra-virgin olive oil

Freshly ground black pepper, to taste


Preheat the oven to 425 degrees F. Crush the toasted sesame seeds with a spice grinder or a mortar and pestle. In a small bowl, whisk together the sesame seeds, rice vinegar, mirin, sesame oil, tamari or soy sauce, mayonnaise, and yogurt. Set aside. Cut the chard stems into 5- to 6-inch lengths. Place them on a baking sheet and drizzle them with olive oil. Gently toss to coat, spread them into a single layer, and lightly sprinkle with pepper. Roast the stems until the centers are tender when pierced with a knife, the edges are starting to char, and any lingering leaf pieces crisp up, about seven to 10 minutes. Divide the roasted stems among plates and drizzle with the sesame dressing. Store any extra stems and dressing separately in the refrigerator for up to five days.

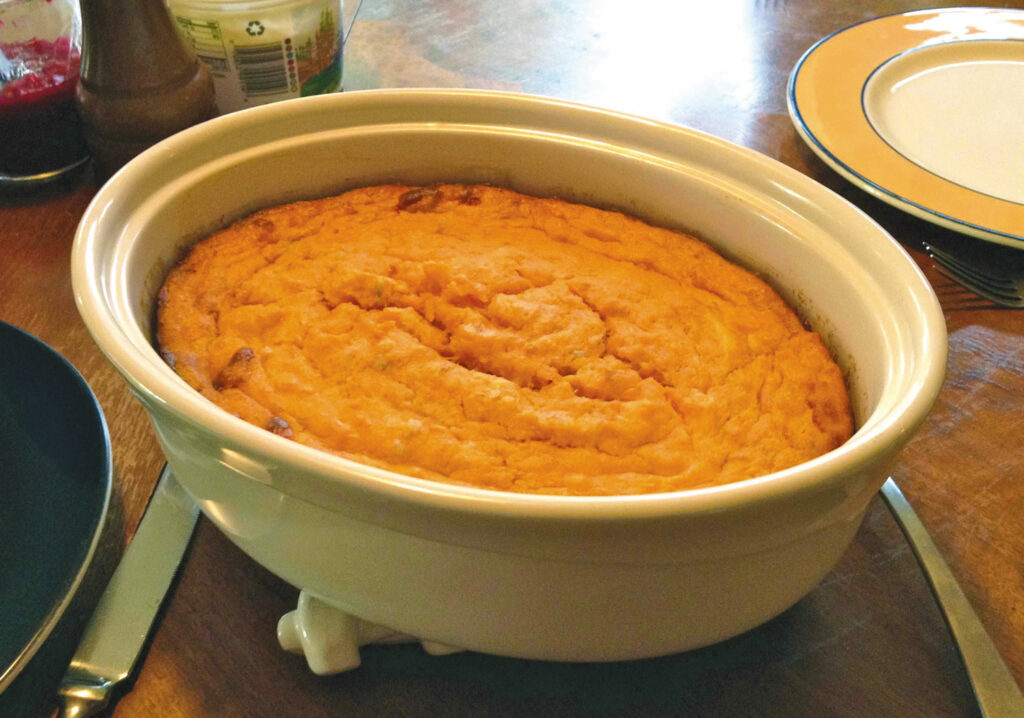
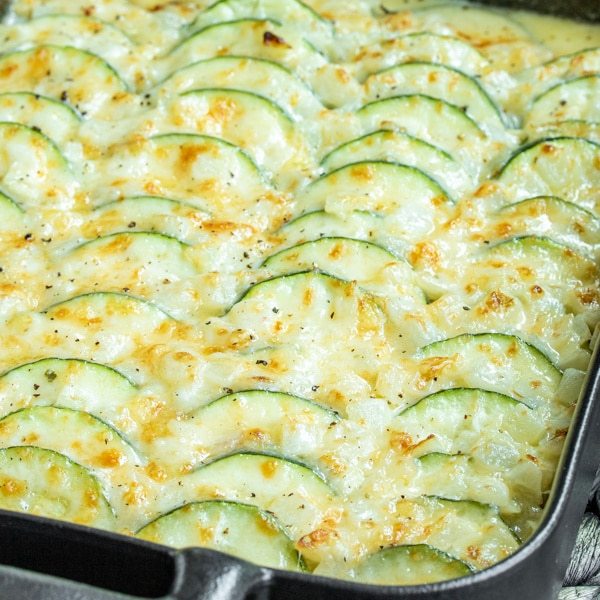
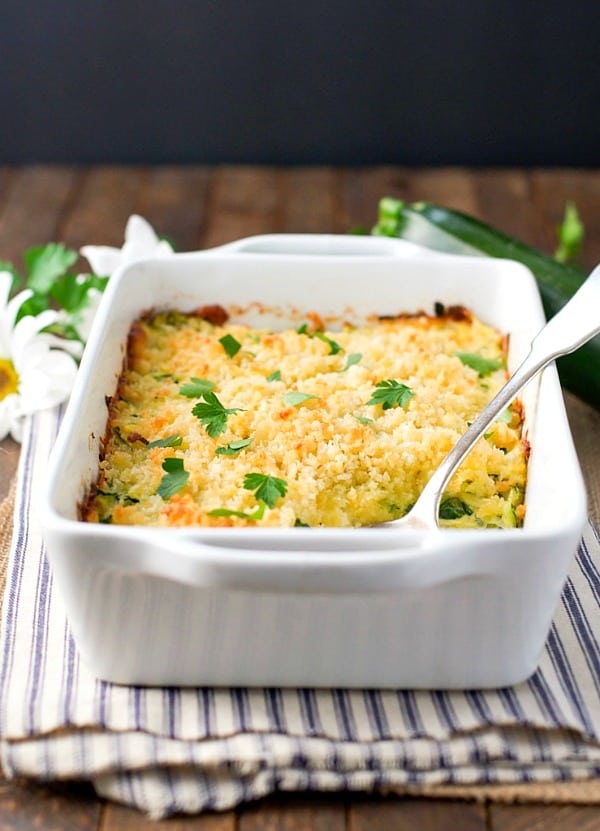
Garlic Parmesan Zucchini Casserole

Garlic Parmesan Zucchini Casserole
Garlic Parmesan Zucchini Casserole


4 C. grated zucchini I used about 3.5 medium zucchinis

½ tsp. salt

½ C. finely diced onion I like to use frozen diced onion as a shortcut

1 T. minced garlic

2 eggs

½ C. grated Parmesan cheese plus an additional 2 T.

1 C. shredded mozzarella cheese

½ C. shredded cheddar cheese

½ C. Panko breadcrumbs

2 T. melted butter


Preheat oven to 375 degrees F. Spray a small baking dish with cooking spray and set aside (I used a dish that was 8-in x 5-in, but an 8-inch square pan will also work). Place zucchini in a colander, sprinkle with salt, and allow to sit for about 10 minutes (this will help draw out some of the water from the zucchini). After 10 minutes, squeeze out moisture from the zucchini. TIP: In order to make sure that I get most of the water out of the zucchini (and avoid a runny casserole), I like wrap the zucchini in a dish towel. Squeeze it and wring it out multiple times while it’s in the towel. In the prepared dish, combine zucchini, onion, garlic, eggs, ½ C. Parmesan cheese, mozzarella cheese, and cheddar cheese. I like to use my hands to make sure that it’s all completely combined, and then gently press the mixture evenly into the prepared dish. Bake uncovered for 20 minutes. Meanwhile, in a small bowl, pour melted butter over breadcrumbs and 2 T. of Parmesan cheese. Stir until completely combined. After 20 minutes, remove zucchini from the oven. Sprinkle buttered breadcrumbs over the zucchini and return the dish to the oven. Continue baking for about 5-10 more minutes, or until the top is golden brown and crispy.

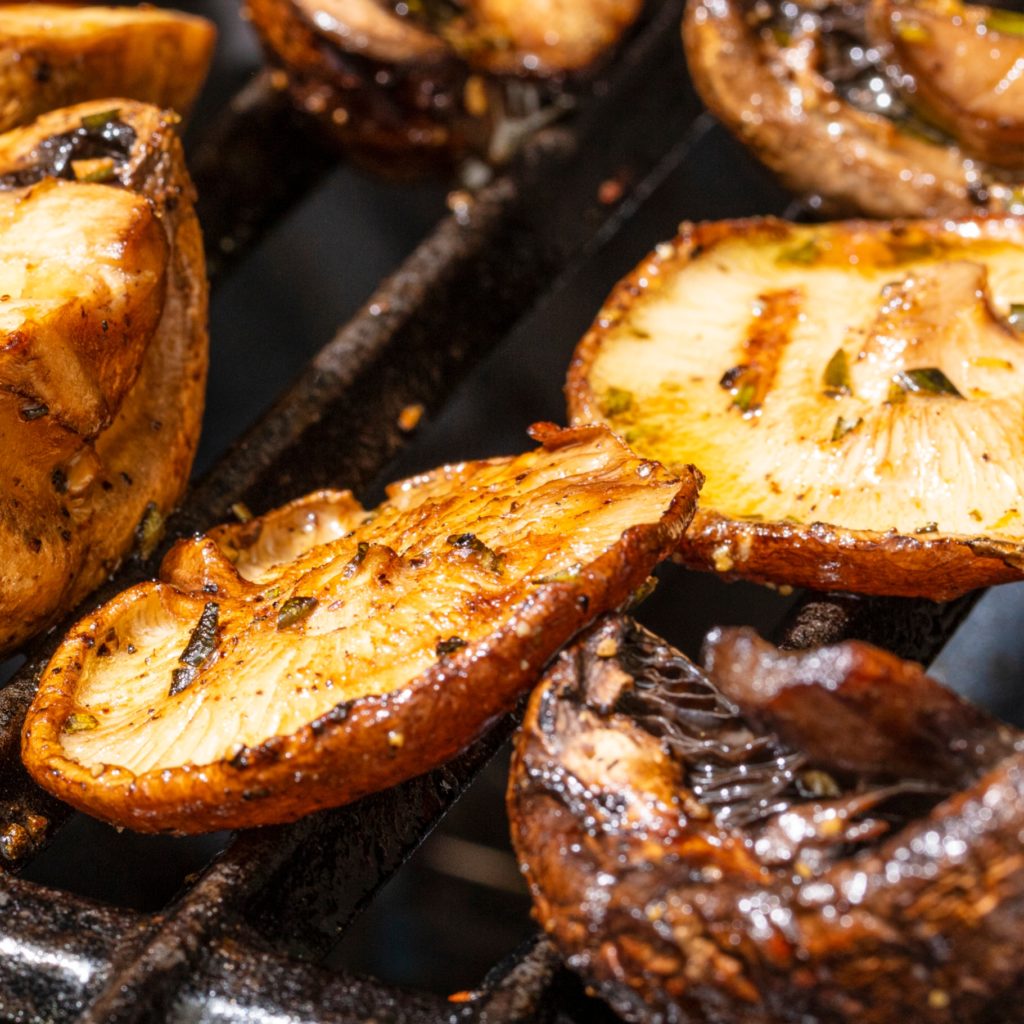
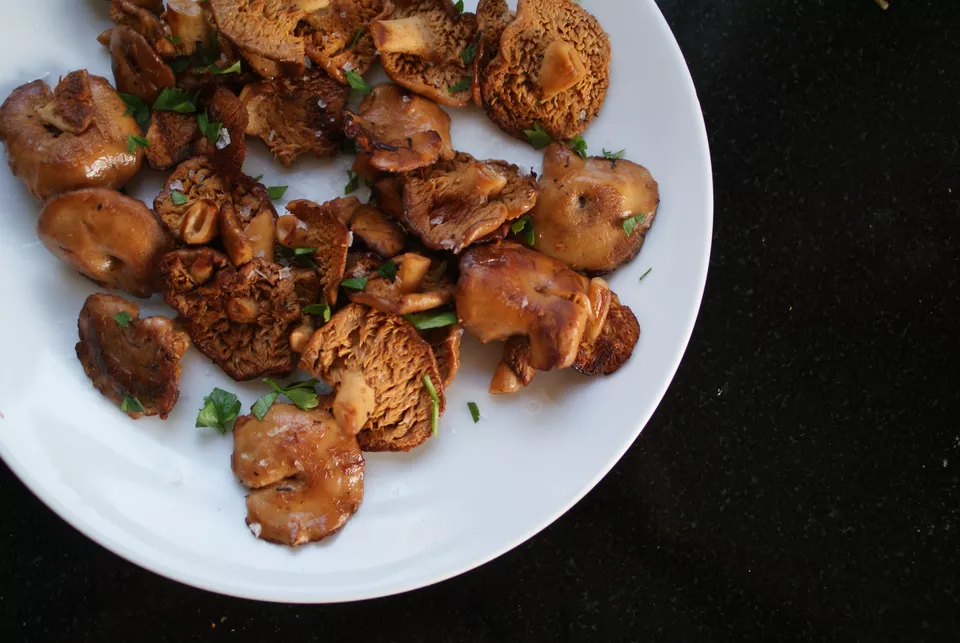
Sautéed Hedgehog Mushrooms

Sautéed Hedgehog Mushrooms
Sautéed Hedgehog Mushrooms


About 1 pound hedgehog mushrooms

1 T. butter

1 T. oil ( olive oil or vegetable oil)

Optional: 1 clove garlic (sliced)

Optional: 1 tsp. fresh thyme leaves

Sea salt, to taste

Parsley or chives (minced)


Trim and clean the mushrooms. First, cut off and discard any browned, dried, or bruised bits. Use a paper towel to brush off any dirt or, if the mushrooms are particularly dirty, give them a quick rinse under cold water and pat them thoroughly dry on paper towels. Small mushrooms can be cooked whole; larger specimens can be halved, quartered, chopped, or sliced as you like.  Heat a large frying pan over high heat. When the pan is hot, add the butter and oil. When the butter is melted, add the trimmed and clean mushrooms. Stirring frequently, cook until the mushrooms have released their liquid, that liquid has evaporated, and the mushrooms are tender and starting to brown—about 5 minutes.  If adding garlic, do it now. Cook, stirring, until the garlic is fragrant and the mushrooms are browned. This should take about 1 to 2 minutes.  If using fresh thyme, add that after the garlic. Stir to combine it with the mushrooms, about 15 seconds.  Remove from heat and sprinkle the mushrooms with salt to taste (unsalted mushrooms really won’t have the same flavor, so be generous as you sprinkle on the salt!).

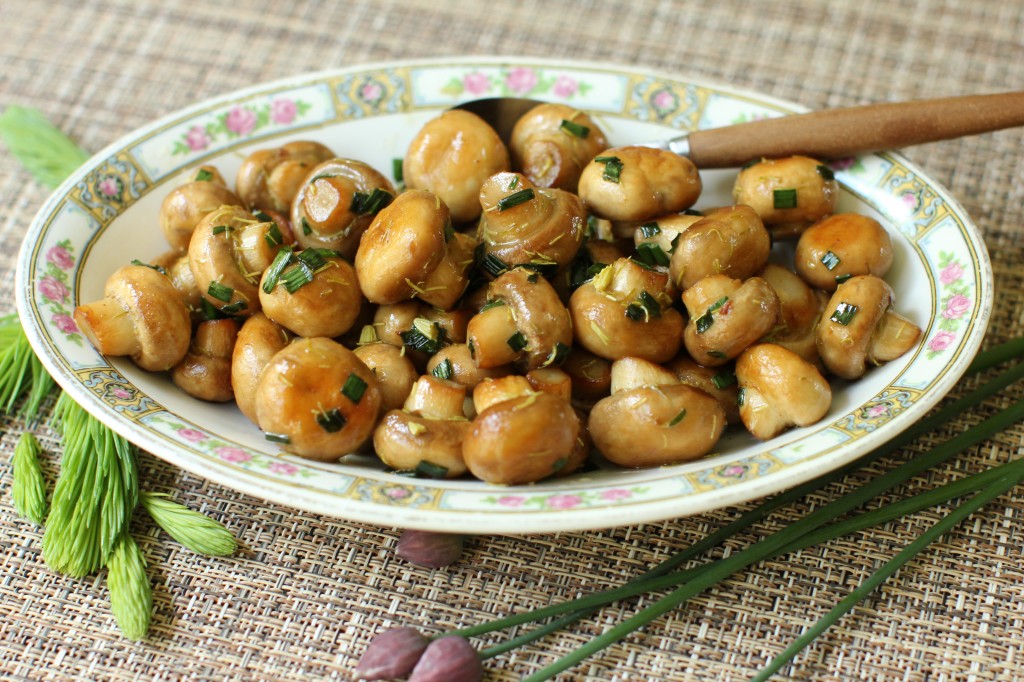
Buttery Sautéed Mushrooms with Spruce Tips and Chives

Buttery Sautéed Mushrooms with Spruce Tips and Chives

Buttery Sautéed Mushrooms with Spruce Tips and Chives

2 T. salted butter

4 C. small white button mushrooms (11oz/320gms)

¼ tsp. salt

1 T. chopped spruce tips

2 T. minced chives (or green onions)

light sprinkling of pepper


Wash the mushrooms under running water, then leave them to dry on a tea towel or paper towel until most of the moisture is off. Pat them lightly with the towel to speed the process. If your mushrooms are large, cut them in halves (or even quarters if really large). In a heavy skillet over medium heat, melt the butter until it starts to sizzle and smell nutty, just beginning to brown slightly. Tip in the mushrooms and sprinkle them with the salt. (The salt helps draw the moisture out of the mushrooms.)  Sauté the mushrooms, stirring them often, so they brown on several sides, for 8 to 10 minutes. First, the liquid will be released from the mushrooms, but keep cooking them until this liquid is cooked away and the mushrooms start to brown. Once the liquid is evaporated you will need to stir them more often.  When the mushrooms have all turned a deep golden color on several sides, sprinkle them with the chopped spruce tips and chives. Cook them for 1 minute more, stirring constantly. Remove the pan from the heat, give them a very light sprinkling of pepper (you don’t want to overpower their delicate flavor), and tip them into a small serving bowl, scraping all the lovely butter and sprucy, chivey bits into the bowl, too. Serves 4 as a side dish.

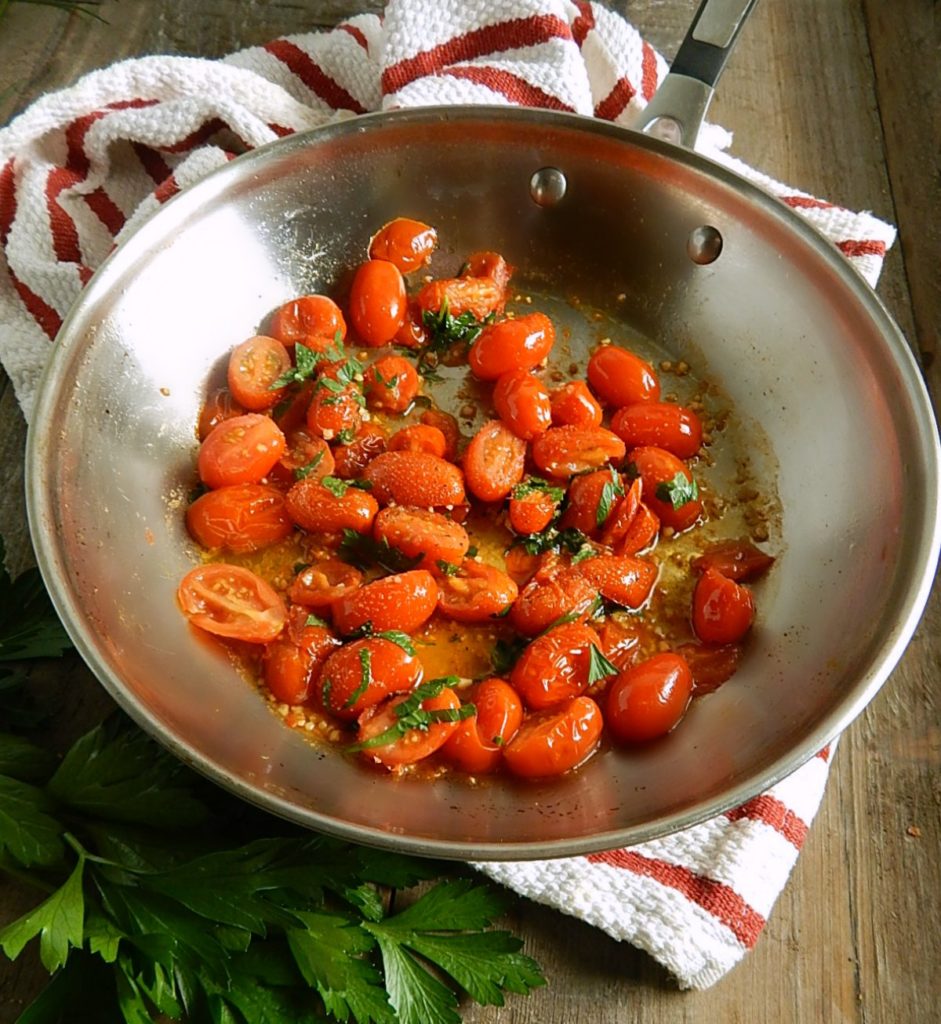
Pan-Roasted Little Tomatoes with Basil Ribbons

Pan-Roasted Little Tomatoes with Basil Ribbons

Pan-Roasted Little Tomatoes with Basil Ribbons


1 lb. grape or cherry tomatoes

1 garlic clove

Small handful basil leaves

1 T. butter

1 T. olive oil

Salt and pepper


Assemble, prepare, and measure ingredients. Halve tomatoes. Mince garlic. Stack basil leaves and slice into thin ribbons.  In a heavy-bottomed sauté pan over medium heat, melt butter with olive oil for about 2 minutes, or until a foam forms. Add tomatoes and garlic and season with salt and pepper. Stir for about 30 seconds, then turn down heat to low and cook, uncovered, for 15-20 minutes, or until tomatoes have given off most of their liquid and caramelized slightly. Transfer warm tomatoes to a serving bowl, scatter basil ribbons over top, and serve immediately with a generous spoonful of pan juices.

Roasted Cabbage Steaks

Roasted Cabbage Steaks

Roasted Cabbage Steaks

2 small cabbage heads

3 tbsp. olive oil

½ tsp. salt or to taste

2 tsp. paprika

1 tbsp. garlic powder


Cut the stems off the cabbage heads and then cut each one in half, then in half again. You should have four flat discs of cabbage that are about ¾ to 1 inch thick from each head. Place the cabbage steaks on a baking sheet that is lined with parchment paper, allowing some space between each one to even cooking.  Brush the cabbage with the olive oil, coating them thoroughly. Then generously sprinkle the salt, garlic powder, and paprika on the cabbage steaks. Flip the cabbage over and repeat, brushing them with oil and sprinkling the seasonings. Then add a pinch of red pepper flakes to each one, if desired. Bake the cabbage steaks at 400°F for about 25 minutes, until the leaves are browned and the center is tender. Serve hot out of the oven.

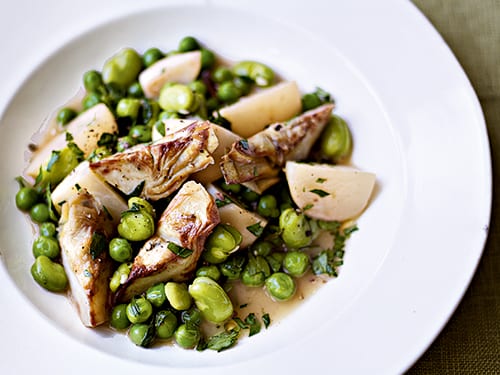
Honey-Glazed Radishes and Turnips

Honey-Glazed Radishes and Turnips

Honey-Glazed Radishes and Turnips

2 T. margarine or butter

1 large shallot

1 1/2 lb. radishes

1 1/2 lb. small turnips

1 c. water

1/4 c. lower-sodium chicken broth

1 T. Honey

salt

pepper

2 tbsp. thinly sliced mint leaves

1 tbsp. finely chopped chives


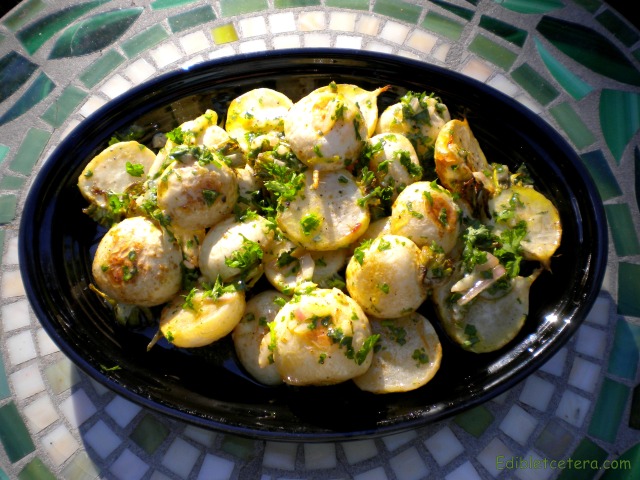
In 12-inch skillet, melt margarine or butter on medium-high. Add shallot and cook 2 minutes or until golden and tender, stirring occasionally. Add radishes and turnips; stir until well coated. Stir in water, broth, honey, 1/4 tsp. salt, and 1/4 tsp. freshly ground black pepper. Heat to boiling. Reduce heat to medium-low; cover and cook 15 minutes. Uncover and cook 7 to 10 minutes longer or until vegetables are glazed and most of liquid has evaporated, stirring occasionally. Remove from heat and stir in mint and chives. Transfer to serving platter and garnish with mint leaves.

Penelope Casa’s Garlic Green Beans (Judias Verdes con Ajo)

Penelope Casa’s Garlic Green Beans (Judias Verdes con Ajo)

Penelope Casa’s Garlic Green Beans (Judias Verdes con Ajo)


3/4 pound fresh green beans

1 T. butter

1 clove garlic, crushed

Coarse salt


Snap off the tops of the beans. Melt the butter in a skillet, add the beans, and cook them over a medium to medium-high flame, stirring, until they begin to brown. Lower the flame, cover, and cook 15 to 20 minutes, or until the beans are the desired tenderness, stirring occasionally. Resist the temptation to add liquid. They’ll stew in their own juices, and their flavor will be completely undiluted. Mix in the crushed garlic, sprinkle with salt, and serve immediately.

Blistered Shishitos with Furikake Ranch and Crispy Quinoa

Blistered Shishitos with Furikake Ranch and Crispy Quinoa

Blistered Shishitos with Furikake Ranch and Crispy Quinoa


4 T. neutral oil

½ cup cooked quinoa

Kosher salt

1 pound shishito peppers

Garlic salt

½ lemon, cut into wedges

¾ cup ranch dressing

3 T. Furikake 


In a large skillet, heat 2 T. of the oil over medium-high heat. When it’s shimmering-hot, add the quinoa to the pan and spread evenly. Cook, stirring occasionally, until golden-brown and crisp, 5 to 15 minutes (depending on the quinoa’s moisture content; freshly cooked quinoa will take longer). Drain the fried quinoa on paper towels and season with a pinch of kosher salt. Wipe the pan clean. Add the remaining 2 T. oil to the pan and place over high heat. Once the oil begins to smoke, add the shishitos. It’s important that all the peppers touch the pan, so work in batches if necessary. Sear the peppers on all sides, turning occasionally, until they begin to blister and slightly char, about 4 minutes. Season to taste with garlic salt and a squeeze of lemon. Transfer to a plate and top with the fried quinoa. In a small bowl, whisk together the ranch with 2 T. of the furikake. Serve it alongside the shishitos. Sprinkle with the remaining 1 T. furikake before serving.

Beans & Greens

Beans & Greens

Beans & Greens

1 pound dried cannellini or corona beans

1 to 2 T. kosher salt

4 pounds greens, preferably a mix of escarole, broccoli rabe, Swiss chard, spinach, kale, and dandelion greens, stemmed and washed

1 cup plus 2 T. olive oil

8 cloves garlic, peeled (4 cloves thinly sliced, 4 cloves left whole)

3 oil-packed anchovy fillets

1 tsp. red pepper flakes

Zest and juice of 1 large lemon

1 cup fresh bread crumbs


Put the dried beans in a large Dutch oven or heavy-bottomed pot and add cold water to cover by several inches. Soak overnight. The next day, add more water as needed to the pot so the beans are covered by several inches. Bring to a boil over medium-high heat, then reduce heat and simmer until the beans are tender, about 1½ to 2 hours. Periodically check the water level of the beans; they should be covered by several inches of water throughout the cooking. Add more boiling water to the pot as needed (I keep a water-filled teakettle on the adjacent burner, turning it on and topping off the beans as needed).  The beans are done when you pull five from the pot and all are tender—as Liza says, if you’re chewing a bean and wondering if it’s cooked enough, it’s not. When the beans are tender, remove them from the heat but do not drain. Season the cooking water with salt. The exact amount you’ll use will depend on how much cooking liquid is in the pot, so begin with a small amount and continue adding until the liquid tastes very well seasoned, just this side of salty. Let the beans cool in the cooking liquid. The beans can be made up to 2 days in advance; once cool, cover and transfer to the refrigerator.  Meanwhile, bring a large pot of salted water to a boil. Set a large ice bath nearby. Working in batches by type of greens, blanch the greens until they wilt and are tender, about 2 minutes (slightly longer for broccoli rabe). Remove from the water with tongs or a spider and transfer to the ice bath. Once cool, transfer to a rimmed baking sheet. When all the greens have been cooked, grab fistfuls of greens and, working over the sink or a bowl, squeeze them to extract the maximum amount of liquid. Transfer to a cutting board. Coarsely chop and transfer to a bowl.  In a small frying pan, heat ½ cup of the olive oil with the sliced garlic, the anchovy fillets, and ½ tsp. of the red pepper flakes. Cook over medium-low heat until the garlic begins to sizzle but does not brown, using the back of a spoon to mash the anchovy fillets to a paste. Remove from the heat, stir in half the lemon zest, pour the mixture over the greens, and stir to coat. Return the frying pan to medium heat and add 2 T. of the olive oil. Add the bread crumbs and stir to coat with oil. Toast the bread crumbs, stirring, until dark golden brown and crunchy, about 5 to 6 minutes. Season with salt and set aside.  In a Dutch oven or heavy pot, heat the remaining ½ cup olive oil over medium-high heat and add the whole garlic cloves and the remaining tsp. of red pepper flakes (or less, if you prefer a milder dish). When the garlic begins to sizzle, add half of the cooked beans (but not their liquid) and fry, stirring, until the skins begin to split slightly, about 2 minutes. Add a ladleful of the cooking liquid, increase the heat to high, and cook, stirring, until the liquid begins to boil and a creamy, emulsified sauce forms.  Add the remaining beans and some more cooking liquid; the beans should be quite saucy. Stir in the greens, add more bean cooking liquid as necessary to maintain their sauciness, and cook until the greens are heated through. Remove from the heat and stir in the remaining lemon zest and the lemon juice to taste. Season to taste with additional salt. Top with the bread crumbs and serve warm.

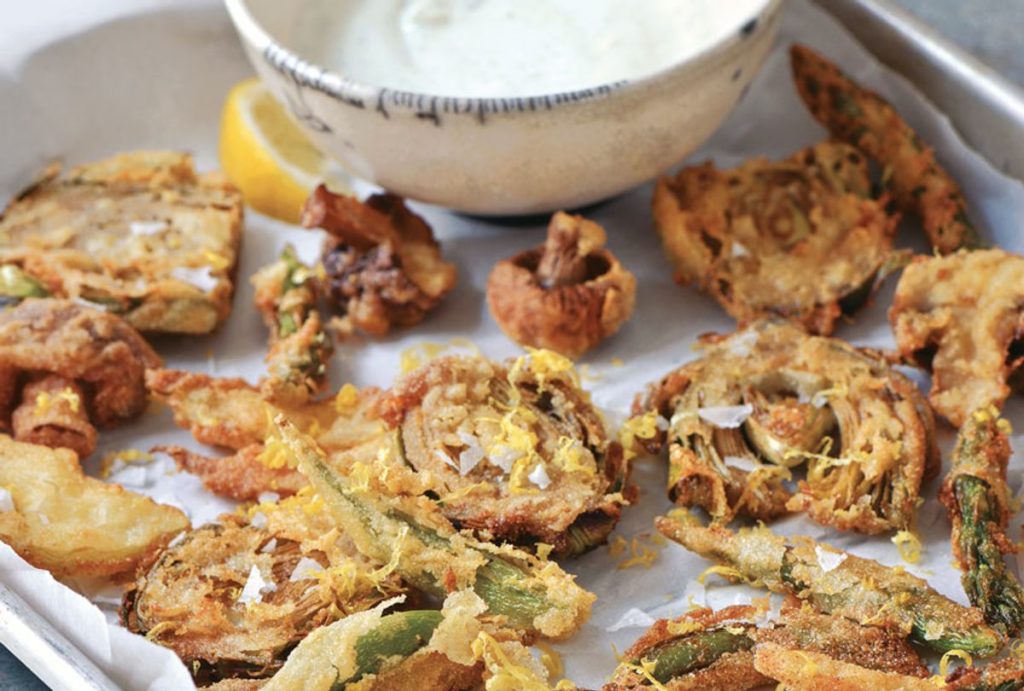
“Oven-Fried” Artichokes

“Oven-Fried” Artichokes

“Oven-Fried” Artichokes


2 jars (12 ounces each) oil-marinated artichoke quarters

Everyday olive oil, if needed

Flaky sea salt

Lemon wedges, for serving


Heat the oven to 425 degrees. Line a baking sheet with foil. Place a colander or sieve over a bowl and add the artichoke quarters, letting their oil drain into the bowl. Transfer the artichokes to the prepared baking sheet. Drizzle with 2 T. of the oil from the bowl. Bake the artichokes, flipping each with tongs halfway through cooking, until golden brown and crisp all over, 20 to 25 minutes. Transfer the artichokes to a platter while hot and sprinkle with flaky sea salt. Serve immediately with lemon wedges.

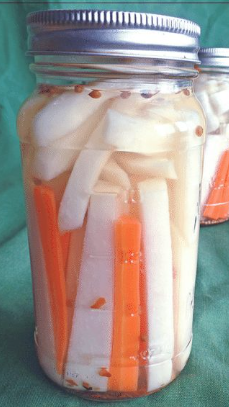
Sweet and Spicy Pickled Radish

Sweet and Spicy Pickled Radish

Sweet and Spicy Pickled Radish

1 lb. radishes sliced thin

1/4 C. cilantro chopped

1 jalapeno stem removed, finely diced

1 C. distilled white vinegar or more as needed

2 T. sugar

2 T. kosher salt

1 tsp. red pepper flakes optional

1 T. mustard seed


Wash and dry the radishes – slice thin and add to a large bowl along with the chopped cilantro and jalapeño – set aside. In a small saucepan, combine the vinegar with the sugar and salt and stir until dissolved. Bring to a low boil on the stove, then turn off and allow to cool completely (you can also toss in the fridge if you are in a hurry). Grab a wide-mouth quart canning jar and pack it to the top with the radish/cilantro/jalapeño mixture. Pack tightly. Sprinkle the red pepper flakes and mustard seed on the top of the packed radishes. Pour the cooled vinegar mixture over the top of the mixture in the jar, if needed, top off with additional vinegar and a pinch of salt. Place the lid and ring tightly on the jar and allow to sit at room temperature for 24 hours before placing in the refrigerator. Consume within 7-10 days. Optional: 2 chiles de arbol can be added to each jar for a little extra spice. Simply remove the stem and stuff in the jar before adding the liquid.

Naturally Pink Cauliflower Pickles

Naturally Pink Cauliflower Pickles

Naturally Pink Cauliflower Pickles

1 medium-small cauliflower (1½–2 pounds)

1 small beet

2 sprigs fresh dill or 2 dill flower heads or 1 teaspoon dried dillweed, divided

2 small cloves garlic, peeled and lightly smashed

1 teaspoon mustard seeds, divided

½ teaspoon cumin seeds, divided

½ teaspoon red chile pepper flakes, divided (optional)

1 cup white distilled or white wine vinegar

¾ cup water

1 tablespoon honey

2 teaspoons kosher or other non-iodized salt


Wash the cauliflower and remove any outer leaves. Cut it in half, and slice off the florets with a short length of the base attached. Aim for approximately 1-inch pieces. Peel the beet. Cut it in half and then into ½-inch-thick slices. Distribute the dill, garlic cloves, and spices between two clean pint canning jars. Pack in the cauliflower above the seasonings, adding half of the beet slices to each jar. Leave 1 inch of head space. Combine the vinegar, water, honey, and salt in a small pot. Bring to a boil, stirring to dissolve the salt and honey. Skim off any foam that forms on the surface. Pour the hot brine over the other ingredients in the jars, fully covering them but still leaving ½ inch of head space. Screw on canning lids and process the jars in a boiling water bath for 10 minutes (adjust the canning time if you live at a high altitude—see the sidebar in the Boiling Water Bath Canning chapter). Wait at least one week before serving. During that time, not only will the flavors mellow and “marry,” but the beet juices will color the cauliflower.

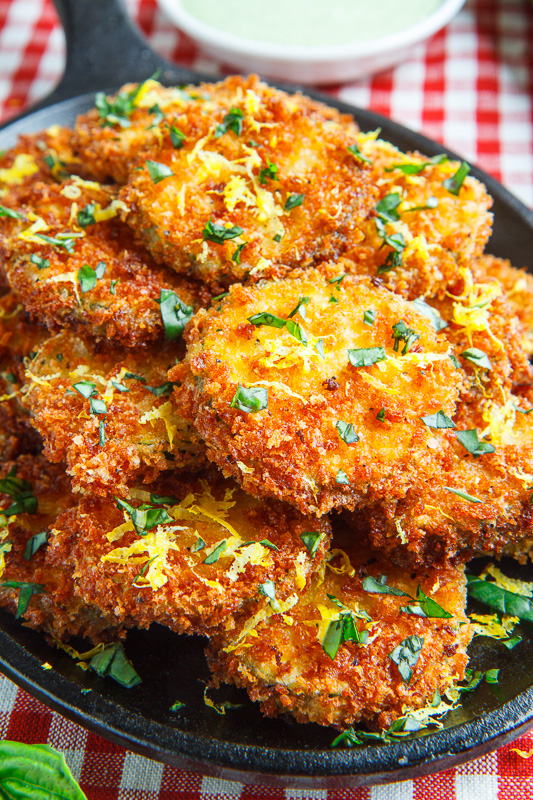
Concia (Fried and Marinated Zucchini)

Concia (Fried and Marinated Zucchini)

Concia (Fried and Marinated Zucchini)

Concia is an Italian dish from the Jewish tradition in Rome.


2 clove garlic (peeled and thinly sliced)

¼ C. finely chopped mint leaves

2/3 C. white wine vinegar

neutral oil (as needed for frying)

6–7 zucchini (cut into ½‑inch rounds)

1 tsp. kosher salt

whole mint leaves (as needed for garnish)

extra-virgin olive oil (for drizzling)


Combine garlic, mint, and vinegar in a medium bowl and set aside. Line a wire rack with paper towels. In a medium frying pan or cast-iron skillet, heat 2 inches of neutral oil to 350 degrees F. Fry the zucchini in small batches until golden brown or darker, if you wish, and transfer to rack to drain. Season with the salt. Add the zucchini to the vinegar marinade and toss to coat. Marinate in the refrigerator for at least 2 hours or overnight. Serve garnished with whole mint leaves and drizzled with olive oil, on its own as a side dish or as a sandwich filling: Slice open bread, fill with concia, and drizzle with leftover marinade.

Charred Pole Beans with Heirloom Tomatoes and Basil

Charred Pole Beans with Heirloom Tomatoes and Basil

Charred Pole Beans with Heirloom Tomatoes and Basil

1 pound heirloom tomatoes (sliced)

¼ C. extra-virgin olive oil

1 pound pole beans (trimmed)

3 clove garlic (peeled and minced)

2 T. freshly squeezed lemon juice

¼ tsp. crushed red pepper flakes (or more to taste)

kosher salt (as needed for seasoning)

2 C. whole fresh basil leaves (lightly packed)


Spread the sliced heirloom tomatoes across a serving platter and set aside. Heat olive oil over medium-high heat in a 12-inch or larger cast iron or heavy bottomed skillet. Add the pole beans and cook them in as close to a single layer as possible, tossing occasionally, until the beans are nicely charred; about 4–5 minutes. Reduce the heat to medium and add the lemon juice and red pepper flakes. Season with salt. Cook until the beans are just tender, while still retaining a bite, about 2 minutes more. Stir in the basil leaves until just wilted. Transfer to the platter of sliced heirlooms and serve.

Heirloom Tomato Slices with Lemon Basil

Heirloom Tomato Slices with Lemon Basil

Heirloom Tomato Slices with Lemon Basil

2 pound heirloom tomatoes in different sizes, colors and textures

very good olive oil for drizzling

salt and pepper

2 tablespoon lemon basil leaves left whole


Choose a great variety of tomatoes for this recipe. Variable tastes and textures will add a lot of interest to this salad. Start by slicing the tomatoes between ¼ and ½ inch thick. Again vary the thicknesses slightly to get a more interesting texture. Very small tomatoes may be halved or quartered. There is no “right way”. Arrange the slices attractively on a platter. Season them generously with salt and pepper, drizzle the olive oil over the top. Be generous because the oil combines with the juices to make a delicious dressing. Tuck the whole lemon basil in attractively here and there over the top of the tomatoes. Let this stand at room temperature at least 20 minutes.

Creamed Cucumbers

Creamed Cucumbers

Creamed Cucumbers

2 med. cucumbers

1/2 c. sweet cream

1/3 c. vinegar

2 T., sugar

1 med. (sweet) onion thinly sliced

Salt, Pepper, Dill or other seasonings to taste.


Peel and slice cucumbers and onions. Soak in saltwater for 1/2 hour. Drain, rinse, and squeeze out excess water. Mix other ingredients. Pour over cucumbers.

Fermented Mushrooms

Fermented Mushrooms

Fermented Mushrooms

1 or 2 8oz packages of mushrooms (I used about 1 and a half packages of sliced mushrooms)

Fresh thyme (a couple sprigs, depending on your taste)

Fresh marjoram (a couple sprigs, depending on your taste)

Smashed garlic (2 or 3 heads, depending on your tastes)

1 T. sea salt

1/4 teaspoon whey, sauerkraut juice, or culture starter

Filtered water


Place all of the ingredients into a quart sized mason jar.  Smash the mushrooms and other goodies down into the jar to get as many in there as you can. Add filtered water to cover, leaving an inch of head space at the top. Weigh down your mushrooms because they like to float! Set on your counter for 3 to 5 days.

Move to your refrigerator. Tamara and Kelly recommend adding them to morning eggs and to salads. I think they would be great on an antipasti platter, or taken along on a picnic.

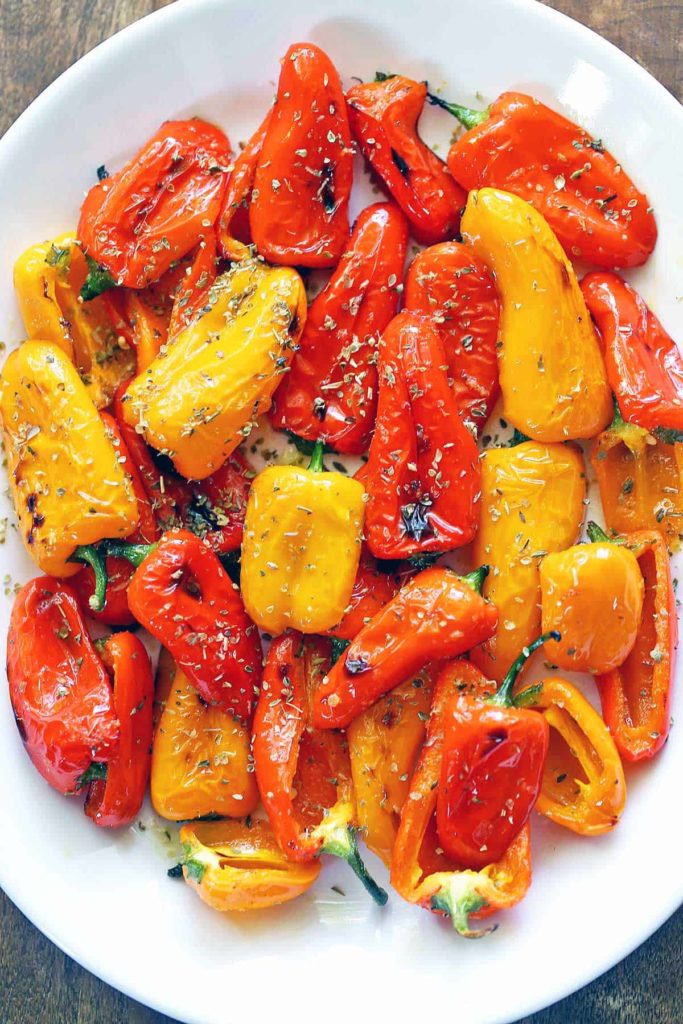
Pickled Sweet Peppers

Pickled Sweet Peppers

Pickled Sweet Peppers

1 pound small sweet peppers, thinly sliced (about 4 cups)

3 large shallots, sliced into rings

1 1⁄2 C. white wine vinegar

1⁄2 C. water

2 cloves garlic, smashed

1⁄4 C. plus 1 T. sugar

1 T. plus 1 teaspoon kosher salt

1⁄2 teaspoon crushed red pepper


Divide peppers and shallot evenly between jars. Set aside. In a medium saucepan, bring vinegar, 1⁄2 C. water, garlic, sugar, salt, and red pepper to a boil over medium-high heat. Remove from heat; discard garlic. Divide vinegar mixture evenly between jars. Seal jars, and let cool to room temperature. Refrigerate 24 hours or up to 1 month.

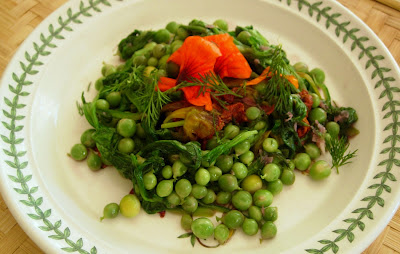
Snap Peas with Green Garlic Confit and Dill Vinaigrette

Snap Peas with Green Garlic Confit and Dill Vinaigrette

Snap Peas with Green Garlic Confit and Dill Vinaigrette

2 stalks of green garlic, trimmed and thinly sliced crosswise

1 C. extra-virgin olive oil

1/4 C. fresh lemon juice

1/4 C. chopped dill

Kosher salt

Pepper

1 1/2 pounds sugar snap peas, trimmed, some chopped and some left whole

6 white button mushrooms, halved lengthwise and thinly sliced lengthwise

1/4 C. torn mint or small mint leaves


In a small saucepan, combine the green garlic and olive oil and bring to a simmer. Cook over low heat until the garlic is very tender, about 10 minutes. Remove the pan from the heat and let cool completely. Strain the oil into a small bowl; transfer the green garlic to a medium bowl. Add the lemon juice and dill and slowly whisk in the reserved oil until well blended. Season with salt and pepper. In a bowl, toss the snap peas with 3/4 C. of the vinaigrette. Transfer to a platter and scatter the mushrooms on top. Garnish with the mint and serve with the remaining vinaigrette.

Pickling Dandelion Roots

Pickling Dandelion Roots

Pickling Dandelion Roots

The sunny flowerheads may be long gone, but the roots that remain are loaded with nutrients and flavor. Pickled dandelion roots are a tasty addition to soups and salads in fall. And here’s another break—this recipe also uses refrigeration to pickle instead of heat.


generous handful dandelion roots, washed and chopped

3 cloves garlic

2 teaspoons powdered ginger root

¼ C. tamari

3 ½ C. apple cider vinegar


Place clean roots, ginger root powder and tamari in a 1-quart mason jar. Pour the vinegar over all. Place a piece of wax paper over the mouth of the jar (this prevents rusting) and screw down the lid. Place in the refrigerator for 3 weeks before using.  Add to salads.


A different Version


3 C. white vinegar, one C. water, 2 T. of pickling salt, and a 1/2 C. sugar


Put it in a saucepan and bring it to a boil. At the same time that I am doing this, I am sterilizing my jars and lids by letting them sit in boiling water for 10-15 minutes (I start heating the pot of water long before this though, since my huge pot takes forever to boil!)


Once the jars are sterilized, and before I pack in the dandelion roots, I fill them with these spices: (sorry I’m not very exact with the measurements, I just eyeball everything.


a couple whole cloves of garlic, a pinch of celery seed, 6 to 8 peppercorns, a pinch of cayenne or red chile pepper flakes, a pinch of mustard seeds, and some dill (preferably fresh)


So in the spices go, then the roots (which you really got to pack in there!), then the pickling brine. Fill up the jars to about a 1/4 inch from the rim, give the rims a quick wipe down (spices stuck to the rim can cause the lid to not seal properly), and throw on the lids…


Now that all of the hard stuff is over, you’re ready to let your jars sit in boiling water for a final 20 minutes or so…. and YAY, YOU’R DONE! … (after you remove them, don’t forget to let them sit on your counter overnight to give the lids a chance to “pop”, or seal)

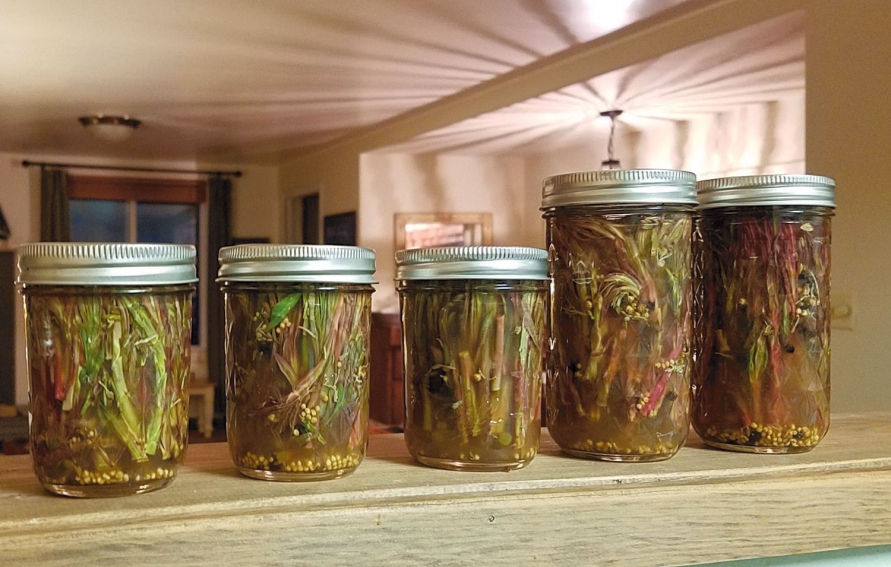
Spicy Pickled Swiss Chard Stems

Spicy Pickled Swiss Chard Stems

Spicy Pickled Swiss Chard Stems

One large bunch of rainbow chard stems, cleaned and cut to fit into mason jar, about 3/4 inch from the lip

1/2 C. rice wine vinegar

3/4 C. distilled white vinegar

1/4 C. sugar or 3 T. maple syrup

1 1/2 teaspoons salt

1 1/2 T. sriracha

1/4 teaspoon celery seed, divided

1/2 teaspoon black peppercorns, divided

1/2 teaspoon yellow mustard seeds, divided

2 cloves garlic, divided


Add each half of the celery seed, peppercorns, mustard seeds, and garlic to each jar. (If just making one jar, this can all go together.) Pack chard stems tightly into jars. Bring vinegars, sugar (or maple syrup), salt, and sriracha to a boil, in a small saucepan until sugar and salt is dissolved. Then pour over chard stems. Let sit until cool, then put lids on and refrigerate. Wait two days before eating for flavors fully develop. Will last 1 month in refrigerator.

Fermented Cherry Tomato Bombs

Fermented Cherry Tomato Bombs

Fermented Cherry Tomato Bombs

4 C. under ripe cherry tomatoes

1 sprig fresh parsley

2 stems fresh basil

4 cloves garlic, peeled

1/4 teaspoon peppercorns

1/4 teaspoon coriander seeds

1/4 teaspoon mustard seeds

4 C. unchlorinated water

3 T. kosher, pickling, or sea salt, do not use iodized table salt


Put the peppercorns, coriander seeds, and mustard seeds into the bottom of a quart-sized jar, then layer in the tomatoes, parsley, basil, and garlic. Mix together the water and salt to make a brine, and pour over the tomatoes, making sure to cover them completely. Use a weight to keep the tomatoes under the brine, and cover the jar with a towel. Put in a cool and dark corner to ferment for 6-8 days. Taste them along the way. When the tomatoes are finished fermenting they will burst with a champagne like effervescence in your mouth. Cover with a lid and store in the fridge. They are best after 1 to 2 weeks. Notes: These cherry bombs will continue to gain effervescence even under refrigeration. The pressure is not in the jar, but in the tomatoes themselves! Refrigerate for up to 6 months.

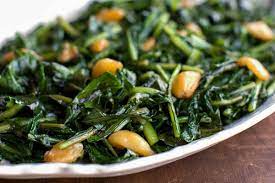
Sautéed Fiddlehead Ferns

Sautéed Fiddlehead Ferns

Sautéed Fiddlehead Ferns

Fiddlehead Ferns

2 cloves of garlic, sliced

4 scallions, white and light green part sliced

Juice of half a lemon

Salt and pepper to taste

Parmesan cheese, to taste

Olive oil for the pan


To prep your fiddleheads, cut the touch stems off, including any brown parts. Run them under cold water in a colander, then place them in a bowl of water and swirl around. Dry them on paper towels. Heat the olive oil in the pan over medium heat. Add the garlic and sauté until fragrant, about 2 minutes. Add the scallions and the fiddleheads, cover, and cook for 4 minutes. Uncover, stir, and continue to cook for another 4 minutes. Remove from heat and sprinkle with salt and pepper to taste. Squirt the juice of half a lemon on top. Spoon onto plates and serve with a grating of parmesan cheese over the top.

Seared Mushrooms with Garlic and Thyme

Seared Mushrooms with Garlic and Thyme

Seared Mushrooms with Garlic and Thyme


2 T. olive oil

12 ounces mushrooms (such as maitake, oyster, and/or king trumpet), cut into large pieces

Kosher salt, freshly ground pepper

4 T. unsalted butter, cut into pieces

2 sprigs thyme

2 garlic cloves, crushed


Heat oil in a large skillet over medium-high until just beginning to smoke. Arrange mushrooms in skillet in a single layer and cook, undisturbed, until bottom side is golden brown, about 3 minutes. Season with salt and pepper, toss mushrooms, and continue to cook, tossing often and reducing heat as needed to avoid scorching, until golden brown all over, about 5 minutes more.  Reduce heat to medium and add butter, thyme sprigs, and garlic to skillet. Tip skillet toward you so butter pools at bottom edge. Spoon foaming butter over mushrooms until butter smells nutty, about 4 minutes. Remove mushrooms from skillet with a slotted spoon.

Garlic Mustard Roulade

Garlic Mustard Roulade

Garlic Mustard Roulade


1 pound garlic mustard greens, flower stalks, and flowers

1/2 tsp. ground nutmeg

1/2 tsp. sea salt

1 tsp. smoked paprika

2 tsp. granulated garlic

1/2 tsp ground black pepper

4 egg yolks

4 egg whites

2c. shredded mozzarella cheese


Heat oven to 425° F. Prepare a sheet pan with parchment paper. In a large pot of boiling water, blanch the garlic mustard greens for 1 minute. Shock the greens in ice water to stop the cooking process, and squeeze as much water from them as possible. Add the cooked greens to a food processor. Add the nutmeg, salt, smoked paprika, granulated garlic, black pepper and egg yolks. Pulse until the garlic mustard greens are finely chopped.  In a mixer, whip the egg whites until stiff peaks form. With a spatula, fold 1/3 of the egg whites into the greens mixture, mixing until no more whites are seen. Then gently fold in the remaining egg whites, until the mixture is uniform. Spread the garlic mustard and egg mixture evenly on the parchment paper covered sheet pan, leaving an inch of exposed paper around the entire edge. Bake until the egg is set, about 12-15 minutes.. Loosen the roulade from the parchment paper. Sprinkle the top with whatever you are using as a filling, or just cheese. Starting with the wider side, roll the roulade up like a jelly roll, ending seam side down. Bake an additional 10 minutes to melt the cheese and warm the filling.

Celery Roses with Herb Cream Cheese

Celery Roses with Herb Cream Cheese

Celery Roses with Herb Cream Cheese


6 or 8 washed and dried Ribs of Celery that have been cut all the same length.


Herb Cream Cheese


1 Tablespoon Fresh Parsley, minced

1 Tablespoon Fresh Chives, minced

1 Tablespoon Fresh Marjoram, minced

1 Teaspoon Fresh Thyme (lemon thyme if you have it)

1/2 Teaspoon Fresh Lemon Zest

1 Tablespoon Lemon Juice

1/4 Teaspoon Garlic Powder

1/8 Teaspoon Sea Salt

4 ounces of Light Cream Cheese (50% less fat), at room temperature


Mix all ingredients together until smooth. Don’t use a food processor for this or the cream cheese will turn green.


Spread cheese mixture on each rib of celery, making sure to clean the sides; do not overfill.  After you have all six ribs filled, stack them together beginning with the smaller center ribs of the celery. Press together gently so as not to squeeze out the cream cheese.  Wipe the edges clean after you have them all formed together.  The more celery ribs you add the more your “flower” will take shape. The celery stalk I used today did not have small center stalks. I think those would make a better center than what I show here so use those if you have them.  Once you get all your stalks together, lay it down on a cutting board and carefully cut into 1 inch thick slices.  Clean you knife off after each cut.  Now that I see them plated, I think it would be a good idea to rotate the celery roll after each cut.  You can see by the top flower that it kept it’s round shape, where as the lower flowers have a flat side to them.

Pickled Mustard Green Stems

Pickled Mustard Green Stems

Pickled Mustard Green Stems


Mustard Green Stems

Clean qt. Jar with Tight Light


In a small bowl add:

1 cup Organic Apple Cider Vinegar

1 generous Tbsp Pickling Spices

1 dried small red pepper, left whole (optional)

1 tablespoon fresh dill, chopped


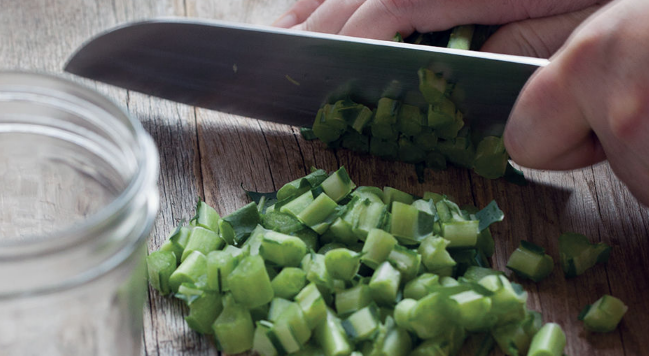
Stir to blend. Slice the stems of the Mustard Greens into bite-size chunks and fill jar to about 3/4 full.  Pour over the pickling vinegar blend and add just enough water to fill jar.  Add a bit of sea salt if desired.  Place the lid on tightly and shake to distribute the spices.  Refrigerate for 2-3 days, give it a good shake once a day.  These will keep for a month or more refrigerated

Slow Cooker Garlic Herb Mushrooms

Slow Cooker Garlic Herb Mushrooms

Slow Cooker Garlic Herb Mushrooms

1 1/2 pounds mushrooms

2 T. unsalted butter

4 cloves garlic, chopped

1/2 tsp. dried oregano

1/4 tsp. dried thyme (or 1 tsp. fresh thyme, chopped)

1/2 C. vegetable broth (or chicken broth)

salt and pepper to taste

1/4 C. half and half

1/2 C. parmigiano reggiano (parmesan cheese), grated

2 T. parsley, chopped


Toss the mushrooms with the butter, garlic, oregano, thyme, broth, salt and pepper and cook in a slow cooker on low for 2-3 hours or on high for 1-2 hours before mixing in the half and half, parmesan and parsley. Option: Add 1 T. white miso paste to the sauce along with the parmesan.

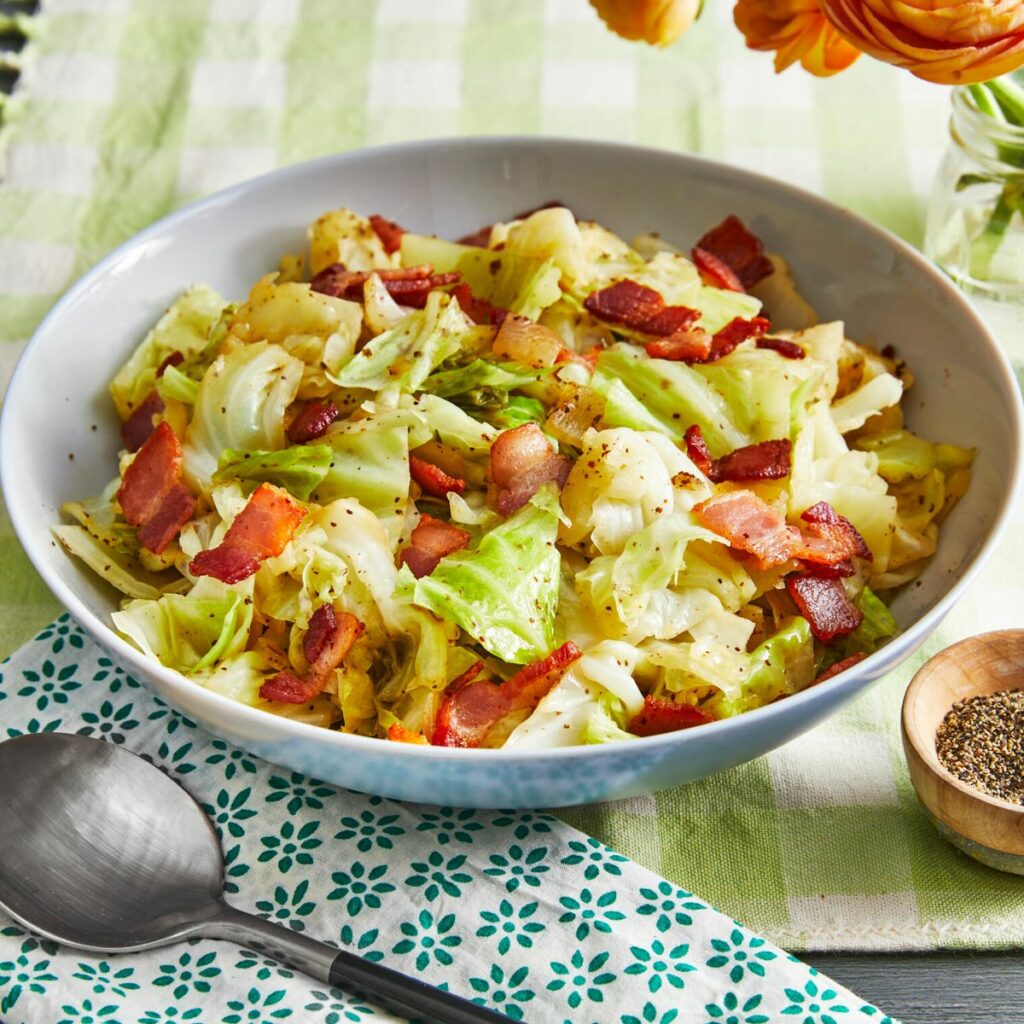
Fried Bacon & Cabbage

Fried Bacon & Cabbage

Fried Bacon & Cabbage


1/2 lb bacon 1/2 package, chopped

1/2 yellow onion diced

1 clove garlic minced

1 head green cabbage chopped

1 teaspoons sea salt

1/2 tsp black pepper

1/2 tsp paprika

1/4 teaspoon red pepper flakes optional

1 bunch of flat leaf parsley chopped for garnish


Sauté chopped bacon over medium heat until crisp. Remove bacon to a paper towel-lined plate, reserving fat drippings in sauté pan for cooking onions and cabbage. Sauté onion over medium heat until translucent (approximately 5 minutes). Add minced garlic and sauté one minute longer. Add cabbage, salt, pepper, and paprika to onion/garlic mixture and sauté over medium Heat until the cabbage is just beginning to get tender. Return bacon crumbles and red pepper flakes and sauté for one minute longer. Garnish with a light sprinkle of chopped parsley. Serve immediately.

Caraway Spiced Carrot Salad

Caraway Spiced Carrot Salad

Caraway Spiced Carrot Salad


2 pounds carrots, peeled and cut diagonally

2 garlic cloves, minced

1 tsp freshly ground caraway seeds

3 tbsp olive oil

3 tbsp chopped flat leaf parsley

2 tsp fresh lemon juice


Steam the carrots until tender but still retain their shape.   When the carrots are cooked, carefully remove the steaming basket and set aside. Meanwhile,  heat 1 tbsp of olive oil  in a small sauté pan. Add the garlic, ground caraway and parsley. Cook for one minutes stirring constantly until fragrant. Remove the pan from the heat. Add the hot carrots to the herb mixture and toss. Add the remaining 2 tbsp of olive oil and lemon juice and toss again. Transfer to a plate and leave to infuse for at least an hour. Enjoy the salad at room temperature.

Herby Cheesy Roasted Brussels Sprouts

Herby Cheesy Roasted Brussels Sprouts

Herby Cheesy Roasted Brussels Sprouts


About 4 cups of Brussels sprouts, cut in half

Olive oil

Salt

Chimichurri

½ cup grated Parmesan cheese


Preheat your oven to 425ºF. Toss the Brussels with a drizzle of oil, a pinch of salt and about 2-3 T.  Chimichurri. Then toss the sprouts with the cheese. Spread the Brussels sprouts on a baking sheet lined with parchment paper, making sure to keep them in one even layer.  Roast the Brussels sprouts for 25 to 30 minutes til the cheese and sprouts are crispy.

Sautéed Green Beans with Pancetta

Sautéed Green Beans with Pancetta

Sautéed Green Beans with Pancetta

1 T. olive oil

4 ounce pancetta, cut into ¼ inch dice

1 T. unsalted butter

1 C. thinly sliced leek (white and pale green parts only, well washed)

2 clove garlic (peeled and minced)

1 pound green beans (stem end trimmed)

1 tsp. fresh lemon zest

1 tsp. fresh orange zest

3 T. toasted pine nuts

2 T. chopped parsley

kosher salt (for seasoning)

freshly cracked black pepper (for seasoning)


Heat oil in large cast iron or non-stick pan over medium heat. Add pancetta and sauté, stirring frequently to brown all sides, until crisp and lightly golden. Use a slotted spoon to move the browned pieces to a paper towel to drain. Leave the fat in the pan. Add 1 T. of butter to the pan, raise the heat to medium-high. Add leek and garlic then sauté until slightly softened, about 1 minute. Add green beans and sauté until tender crisp, 3–4 minutes more. Add lemon and orange zest, toasted pine nuts and parsley; cook until fragrant, about 1 minute more. Season to taste with and salt and pepper. Serve immediately.

Fennel Gratin

Fennel Gratin

Fennel Gratin

2 pounds fennel bulbs (about 3-4 bulbs), fronds and stems removed and cut into 1/4 inch thick slices

1 T. oil

salt and pepper to taste

1/2 C. mozzarella cheese, shredded

1/2 C. panko bread crumbs (or regular bread crumbs)

1/2 C. parmigiano reggiano (parmesan), grated

2 tsp. thyme, chopped

1 T. oil


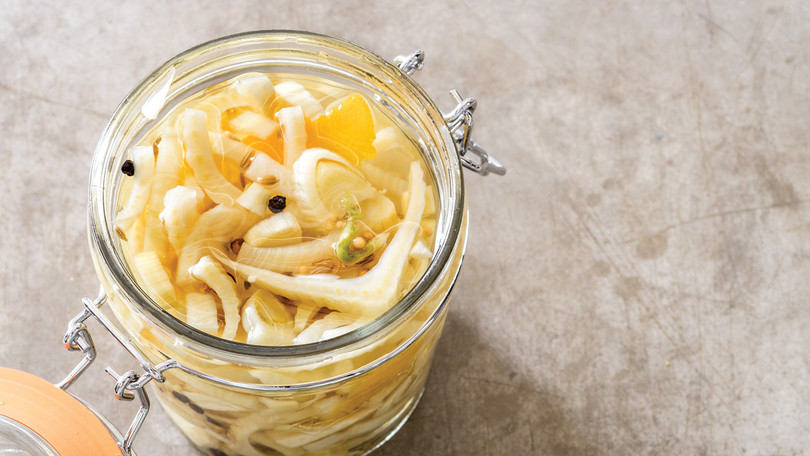
Boil the fennel in water until tender, about 5-6 minutes and drain. Toss the fennel in the olive oil along with the salt and pepper and place it into a baking dish. Sprinkle on the mozzarella. Mix the bread crumbs, parmesan, thyme and oil and sprinkle on top. Bake in a preheated 375F/190C oven, covered for 20 minutes, remove the cover and bake until the cheese is melted and golden brown, about 10 minutes.

California Raisin Bacon Brussels Sprouts

California Raisin Bacon Brussels Sprouts

California Raisin Bacon Brussels Sprouts

1 Pound Brussels sprouts

3 slices hickory smoked bacon, cut into 1/4-inch strips

1 small yellow onion, chopped

1 C. California raisins

1 tsp. salt

1 tsp. ground black pepper

Red pepper flakes; for garnish


Wash, trim and quarter Brussels sprouts; arrange in microwave-safe container with 1 T. water. Cover, and microwave on HIGH for 5 minutes. Meanwhile, in large skillet over medium heat, cook bacon until crisp; remove with slotted spoon to drain on paper towels; set aside. Reserve 1 T. drippings in skillet; add onion and cook over medium heat until tender. Then, stir in cooked Brussels sprouts, raisins, salt and pepper; toss to combine and continue to cook just until heated through. Sprinkle cooked bacon pieces on top. Turn into large serving dish; garnish with cooked bacon pieces and sprinkle with red pepper flakes, as desired.

Parmesan Roasted Acorn Squash

Parmesan Roasted Acorn Squash

Parmesan Roasted Acorn Squash

1 acorn squash, washed, cut in half, scooped and cut into 1/2 inch thick crescents

1 T. oil

1/4 tsp. thyme, finely chopped

1/4 tsp. salt

1/4 tsp. pepper

1/4 C. parmigiano reggiano (parmesan cheese), grated


Toss the acorn squash crescents in the oil, thyme, salt, and pepper, lay in a single layer in a greased baking sheet and sprinkle on the parmesan cheese. Roast in a preheated 400F/200C oven until the squash is tender and the cheese has melted, about 15-20 minutes.


Option: Use a garlic infused oil or add 1/4 tsp. garlic powder to the seasoning.

Option: Add lemon zest to the seasoning or hit the squash with a splash of lemon juice after roasting!


Yield: 8 servings

Calories: 51

Fat: 2g

Fiber: .8g

Creamy Asiago Bacon Wrapped Roasted Onions

Creamy Asiago Bacon Wrapped Roasted Onions

Creamy Asiago Bacon Wrapped Roasted Onions

4/8 slices thick cut bacon

2 large onions, peeled and cut in half

2 tsp. olive oil

1 tsp. thyme, chopped

salt and pepper to taste

1 C. beef broth (or mushroom broth)

1/2 C. heavy cream

1 tsp. Worcestershire sauce

1/2 C. of asiago cheese (or parmesan), grated


Pre-cook the bacon until it’s starting to get cooked but it’s still soft and pliable and set aside on paper towels to cool. Wrap the onion halves with the bacon, optionally pinning it on with toothpicks, and place them in a baking dish before drizzling them with oil and seasoning with thyme, salt and pepper to taste.

Pour the mixture of the broth, cream and Worcestershire around the onions and roast in a preheated 375F/190C oven until the onions are nice and tender, about 30-45 minutes depending on how thick they are. (You may need to cover with foil if the edges of the bacon start to get too dark to prevent burning.)

Sprinkle the cheese on and bake until it has melted, just a few minutes. Option: Throw some full cloves of garlic into the pan with the sauce!

Yield: 4 servings

Calories 179

Fat 13.5g

Fiber 1.7g,

Roasted Carrots with Cumin and Raisins

Roasted Carrots with Cumin and Raisins

Roasted Carrots with Cumin and Raisins

2 T. olive oil

2 cloves garlic, minced

1 T. brown sugar

1 tsp. cumin

1/2 tsp. cinnamon

1/2 tsp. salt

2 Pounds carrots, peeled

1/4 C. California raisins

1/4 C. California golden raisins

1 medium lemon, juiced

1/4 C. fresh cilantro leaves, minced


Heat oven to 400°.  Slice carrots diagonally into 1 inch slices. In a 2 1/2 quart shallow baking dish combine the olive oil, garlic, brown sugar, cumin, cinnamon, salt, and carrots. Roast 20 minutes or until fork-tender. Remove from oven, stir in the raisins, lemon juice, and cilantro.  Toss well.