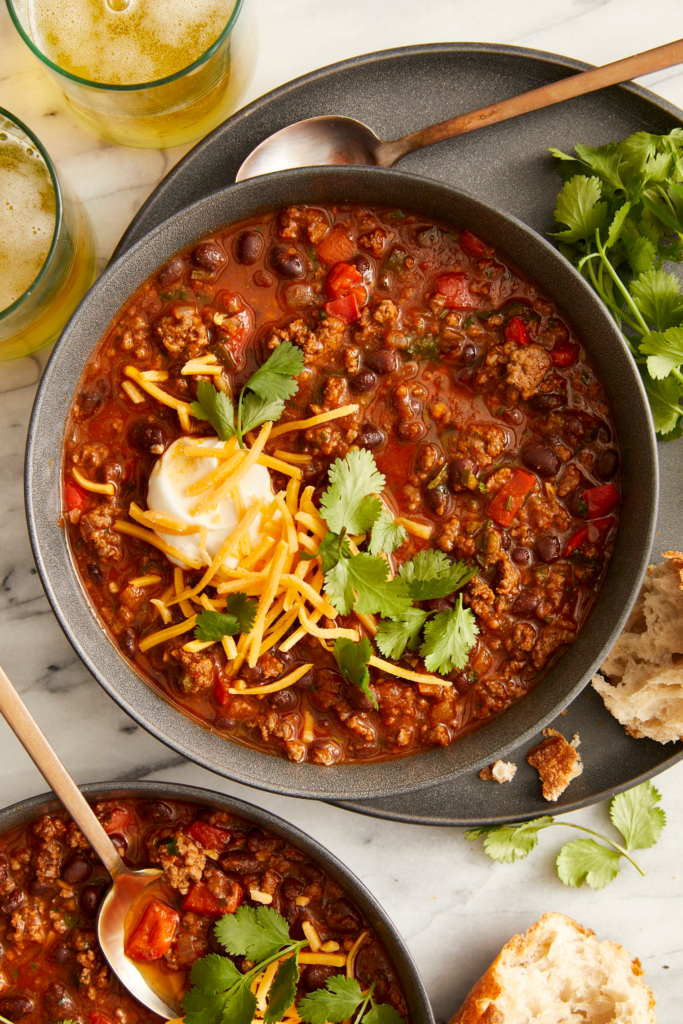
Weeknight Chili

Weeknight Chili

Weeknight ChiliWeeknight Chili


2 T. extra-virgin olive oil

1 lb. ground pork or beef

2 tsp. kosher salt, more to taste

1 large onion, diced

1 green bell pepper, diced

1 serrano or jalapeno chile, seeded (if desired) and diced

4 garlic cloves, finely grated or minced

1 T. tomato paste

2 T. chili powder

1 tsp. dried oregano

1/2 tsp. ground cumin

114.5-oz. can diced tomatoes

2 15-oz. cans pinto or kidney beans, drained and rinsed

1/2 C. chopped fresh cilantro leaves and tender stems

Fresh lime juice

Sour cream, for serving

Cubed avocado, for serving (optional)


Using the sauté function (set on high, if possible), heat 1 T. of the oil in the pressure cooker pot. Add half the meat, spread it over the oil, and let it brown without stirring (this helps encourage browning) for 5 to 7 minutes. Give the meat a good stir and sauté for 1 more minute. Use a slotted spoon to transfer the meat to a plate and season with 1/2 tsp. of the salt. Repeat with the remaining 1 T. oil, meat, and another 1/2 tsp. salt. Stir the onion, bell pepper, diced chile, garlic, and 1/2 tsp. of the salt into the pot and cook until softened, about 5 minutes. Stir in the tomato paste, chili powder, oregano, and cumin and cook until fragrant, about 1 minute. Stir in the meat and any juices from the plate, along with the tomatoes, beans, and remaining 1/2 tsp. salt. Lock the lid into place and cook on high pressure for 8 minutes. Let the pressure release naturally. Stir in the cilantro and a squeeze or two of lime juice, then taste and adjust the lime juice and salt if necessary. Serve with the sour cream and avocado (if using).
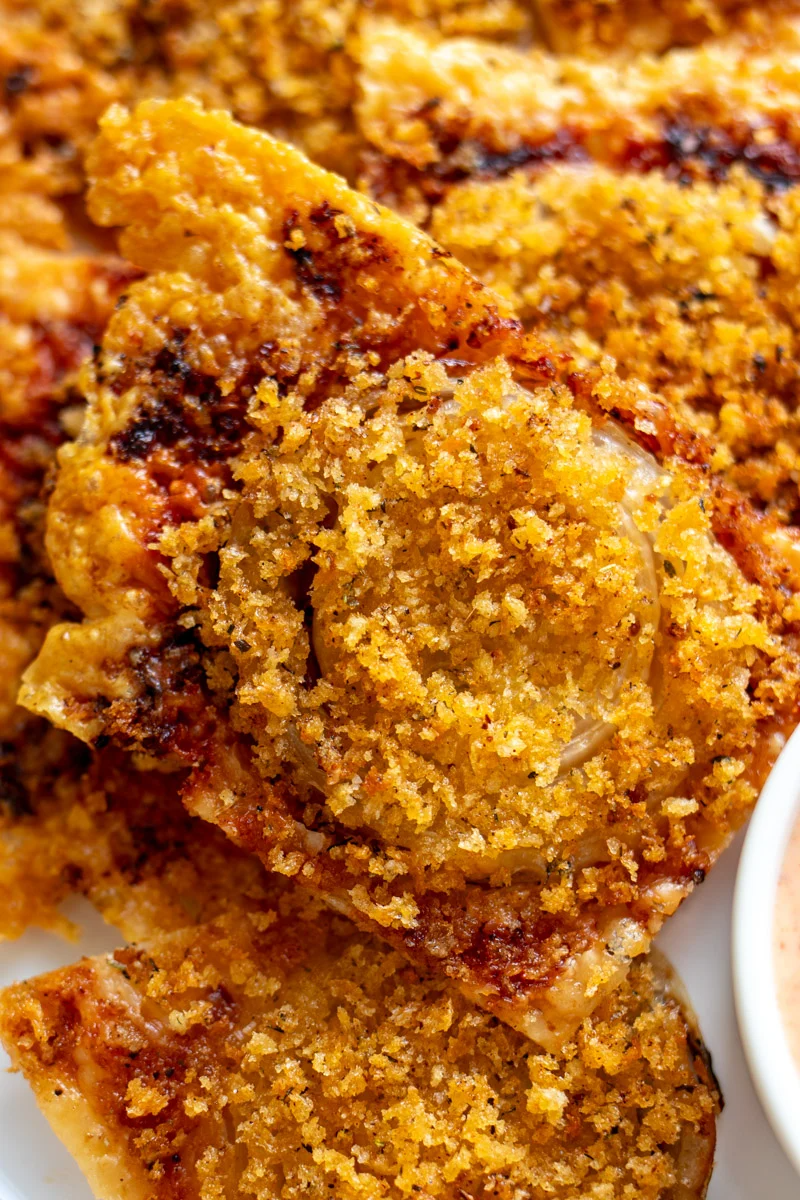
Gruyere Crusted Onion Bites with Bloomin’ Onion Inspired Sauce
Gruyere Crusted Onion Bites with Bloomin’ Onion Inspired Sauce

Gruyere Crusted Onion Bites with Bloomin’ Onion Inspired Sauce


2 small Sweet Onions sliced thin

1 6 oz block Emmi Le Gruyère grated

¾ cup Panko Breadcrumbs

1 tsp. All Purpose Seasoning Blend

2 T. Olive Oil


½ cup Mayonnaise

2 heaping tsp. Ketchup

½ Lemon juiced

½ tsp. Smoked Paprika

½ tsp. Garlic Powder

1 pinch Oregano

1 pinch Cayenne

Salt and Pepper to taste


Preheat oven to 400F degrees. Add shredded Le Gruyère to a nonstick baking sheet and top with onion slices – about 9 or so depending on the size of your onions. In a separate bowl, stir together breadcrumbs, seasoning and olive oil and stir to combine. Evenly distribute the panko mixture across the tops of the onions and place in the oven for 25 minutes. Meanwhile, in a bowl, mix together all the ingredients in the sauce and season with salt and pepper. Let it sit while the onions cook. Once the Le Gruyère is golden brown and lacy around the edges, remove it from the heat and let it rest for 5 minutes before cutting it into bite sized pieces. Serve with the dipping sauce and enjoy!


Servings: 6
Serving Size: 1/6 of bites with about 4 tsp. sauce

Calories: 324
Fat: 28 g
Fiber: 1 g
Protein: 10 g

Poached Chicken Breasts

Poached Chicken Breasts

Poached Chicken BreastsPoached Chicken Breasts


1 quart chicken stock, preferably homemade (this page)

Salt

2 large boneless, skinless chicken breasts (about 8 oz. each)

Sauce of choice (Soy & Sesame? Honey-Mustard Aioli?)


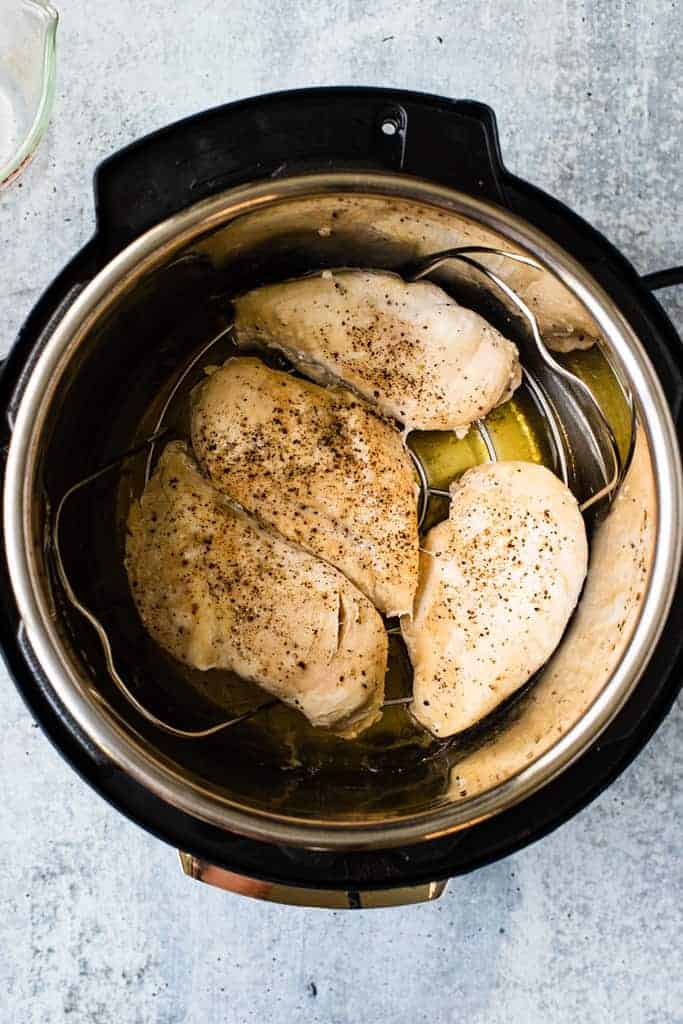
Pour the stock into the pressure cooker pot and season generously with salt (this is especially important if your stock is unsalted). Add the chicken breasts to the pot. Lock the lid into place and cook on low pressure for 5 minutes. Manually release the pressure. Remove the chicken from the stock, cut a slit in the center of each breast, and check to make sure it is cooked all the way through. If not, put one or both breasts back in the broth, cover the pot with the lid (don’t lock it on), and let the chicken finish cooking in the residual heat of the pot. Serve with one of the sauces or, if not using the chicken immediately, let the chicken cool and then store in its broth in the refrigerator for up to 3 days.

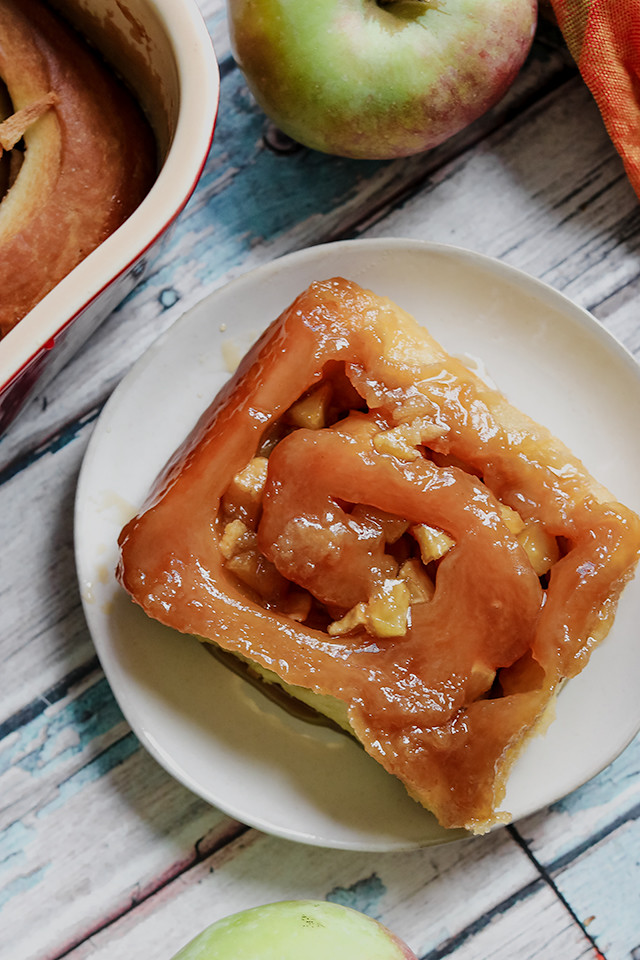
Apple Cider Sticky Buns

Apple Cider Sticky Buns

Apple Cider Sticky Buns


1¾ cups (245 g) flour

2 cups (300 g) bread flour

2¼ tsp. (7 g) active dry yeast

⅓ cup (65 g) sugar

2½ tsp. kosher salt

4 large eggs, room temperature

18 T. (255 g) unsalted butter, at room temperature, cut into 10-12 pieces


½ recipe of brioche dough

1 cup (240 g) apple cider

¼ tsp. grated orange zest

pinch of ground cloves

pinch of ground ginger

pinch of ground nutmeg

2 Granny Smith apples, peeled, cored, and chopped into ½-inch pieces

¾ cup (170 g) unsalted butter

1½ cups (330 g) packed light brown sugar

¼ cup (85 g) honey

¼ cup (60 g) heavy cream

¼ tsp. kosher salt

¼ cup (50 g) sugar

⅛ tsp. ground cinnamon


For the brioche: Combine the all purpose flour, bread flour, yeast, sugar, salt, ½ cup cold water, and the eggs in the bowl of a stand mixer fitted with the dough hook attachment. Mix on low for 3-4 minutes, or until combined. Scrape down the sides of the bowl and mix on low for another 3-4 minutes. Add the butter to the dough one piece at a time, mixing on low for a total of 10 minutes. Stop to scrape down the sides of the bowl as needed to make sure all of the butter gets incorporated. Once the butter is completely incorporated, mix on medium speed for another 15 minutes. Increase the mixer speed to medium-high and mix for 1 minute. At this point the dough should be slapping against the sides of the mixer bowl. Place the dough in a large bowl and cover with plastic wrap, pressing the plastic wrap directly onto the top of the dough. Place in the refrigerator and allow to proof for 6 hours or overnight. For the apple cider sticky buns: Mix the brioche dough and allow it to proof in the fridge for 6 hours or overnight. In a small saucepan, heat the cider, orange zest, cloves, ginger, and nutmeg until just about to boil. Decrease heat and simmer for 10 minutes, or until reduced to ½ cup. Remove from the heat and add the apples, stirring to combine. Allow to cool to room temperature. Drain the apples, using a bowl to catch the infused cider. Set both aside. Place the butter in a saucepan and add 1¼ cups (275 g) of the brown sugar. Over medium-high heat melt the sugar and butter and bring them to a boil. Whisk in the cider mixture, honey, cream, and salt. Remove from the heat and allow to cool to room temperature. When ready to bake, dust a work surface lightly with flour. Remove the brioche dough from the fridge and place it on the work surface. Roll the dough into a 12×12-inch square. In a small bowl, whisk together the remaining ¼ cup (55 g) brown sugar, regular sugar, and cinnamon. Sprinkle this evenly over the dough. Scatter the apples on top of the cinnamon sugar. Roll the brioche dough toward you starting from the top of the square as you would a jelly roll, rolling as tightly as possible to form a spiral. Trim ¼-inch from both ends of the roll. Cut the roll crosswise into 8 equal pieces. Pour the apple cider goo into a 9×13-inch baking pan. Place the buns in the pan cut side down and evenly space them apart as much as possible. Cover with plastic wrap and proof for 2 hours, or until the dough is puffy and the buns are touching. Heat oven to 350F. Bake for 30-40 minutes, rotating the pan halfway through the baking time, until golden on top. Remove from the oven and allow to cool for 20-30 minutes. Invert the buns onto a serving platter, spooning any extra goo on top.


Servings: 8
Serving Size: 1 sticky bun

Calories: 697
Fat: 35 g
Fiber: 1 g
Protein: 6 g

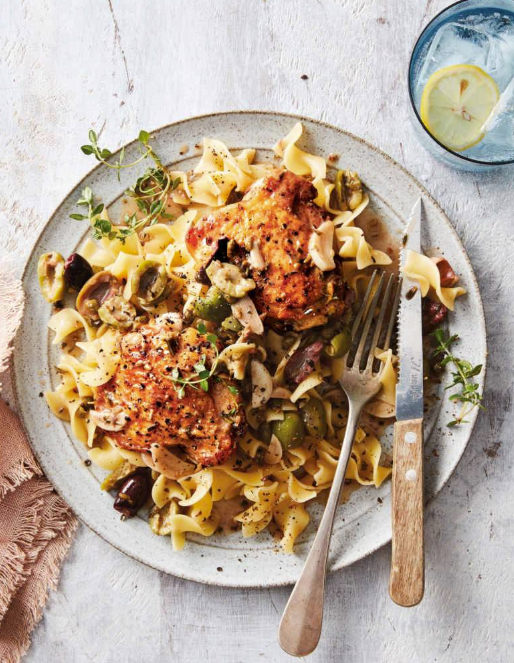
Lemon Chicken with Garlic & Olives

Lemon Chicken with Garlic & Olives

Lemon Chicken with Garlic & OlivesLemon Chicken with Garlic & Olives


1 T. extra-virgin olive oil, plus more as needed

2 lb. bone-in, skin-on chicken thighs, patted dry (4 to 6, depending on the size)

3/4 tsp. kosher salt, plus more if needed

¼ tsp. freshly ground black pepper

1/2 C. chicken stock, preferably homemade (this page)

1/3 C. mixed pitted olives

4 thin slices lemon

4 garlic cloves, thinly sliced

2 anchovy fillets, chopped (optional)

1 T. drained capers

1 tsp. fresh rosemary needles, chopped

1 tsp. fresh thyme leaves, chopped, plus more for garnish

1/2 tsp. fennel seeds, lightly crushed with a mortar and pestle or with the flat side of a knife


Using the sauté function (set on high if possible), heat the oil in the pressure cooker pot. Season the chicken with the salt and pepper and arrange in a single layer, skin-side down, on the bottom of the pot. (Work in batches if they don’t fit in a single layer, adding more oil for each batch.) Cook, without moving, until well browned, about 8 minutes. (You only have to brown it on one side). Flip the chicken, pour in the stock, and scatter with the olives, lemon slices, garlic, anchovies (if using), capers, rosemary, thyme, and fennel seeds. Lock the lid into place and cook on high pressure for 15 minutes. Let the pressure naturally release. Discard the lemon slices and transfer the chicken to serving plates; keep loosely tented with foil. Using the sauté function, bring the sauce to a simmer and cook until thickened slightly, 3 to 5 minutes. Taste and adjust the salt and pepper if necessary. Spoon the sauce over the chicken and serve garnished with thyme.


Servings: 4
Serving Size: 1/4 of recipe (1 to 2 thighs with sauce)

Calories: 415
Fat: 31 g
Fiber: 1 g
Protein: 28 g

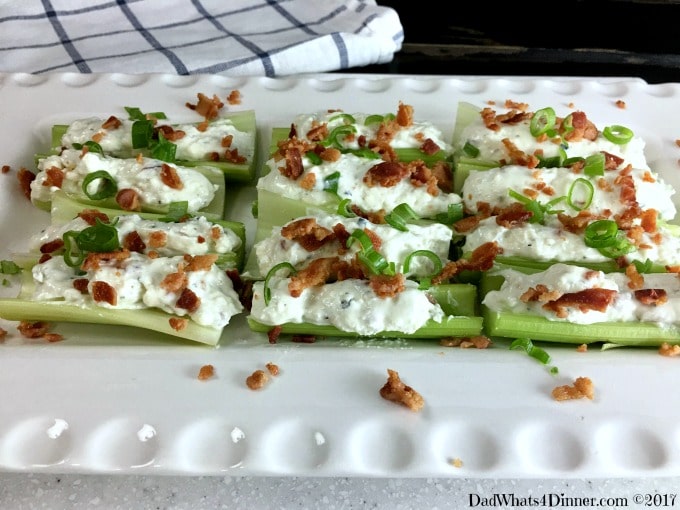
Bacon Blue Cheese Stuffed Celery

Bacon Blue Cheese Stuffed Celery

Bacon Blue Cheese Stuffed Celery


4 oz. blue cheese

4 oz. reduced-fat cream cheese

3 T.  blue cheese or ranch dressing

Salt and pepper to taste

10 in celery hearts stalks cleaned, trimmed, cut half

3 slices cooked bacon chopped

Chopped chives


In medium bowl, with an electric mixer, beat together blue cheese and cream cheese until smooth. Add dressing, pinch of salt and 1/4 tsp. freshly ground black pepper.  Beat until well combined. Cover and refrigerate for at least 30 minutes or until ready to use. Pipe cheese mixture down the center of celery pieces. Sprinkle with bacon and chives


Servings: 10
Serving Size: 2 stuffed celery pieces

Calories: 104
Fat: 8 g
Fiber: 1 g
Protein: 5 g

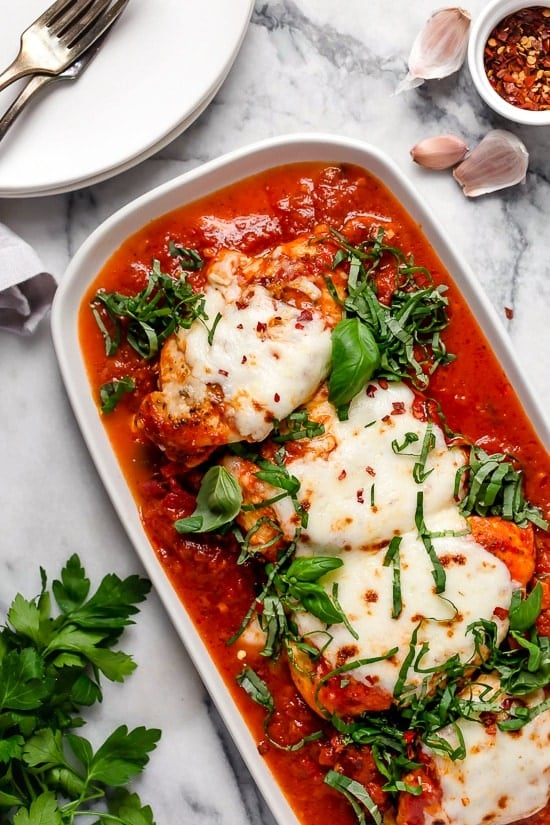
Weeknight Chicken Parmesan

Weeknight Chicken Parmesan

Weeknight Chicken ParmesanWeeknight Chicken Parmesan


1 T. extra-virgin olive oil

2 garlic cloves, thinly sliced

1 1/2 C. prepared marinara sauce

3 T. grated Parmesan cheese

Freshly ground black pepper

4 thin chicken cutlets (10 to 12 oz. total)

1/2 tsp. kosher salt, or more to taste

1/2 tsp. dried oregano

4 oz. fresh mozzarella cheese, grated

Chopped basil, for garnish (optional)


Using the sauté function (on low, if possible), heat the oil in the pressure cooker pot. Stir in the garlic and cook until just turning golden, 2 to 4 minutes. Stir in the marinara sauce, 2 T. of the Parmesan, and ¥4 tsp. pepper. Increase the sauté heat to medium. Season the chicken with the salt, oregano, and pepper to taste. Nestle the cutlets into the sauce, overlapping as little as possible, then spoon the sauce over to cover the chicken. Lock the lid into place and cook on low pressure for 3 minutes. Manually release the pressure. Sprinkle the mozzarella and the remaining 1 T. Parmesan evenly over the chicken. Cover the pot with the lid (but don’t lock it on) and let it sit for 4 to 5 minutes to melt the cheese. Serve as is or, for deeper flavors and a little bit of crispiness, broil the cheese until golden and bubbling: Heat the broiler with a rack 4 inches from the heat source. Scoop the chicken and sauce into a greased small rimmed baking sheet, trying to keep the cheese on top. Broil until the cheese has browned, 2 to 3 minutes. Sprinkle with basil, if desired.

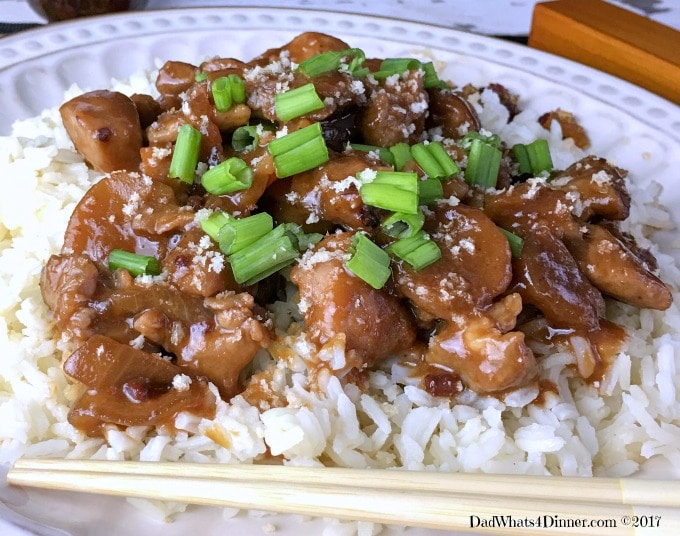
Crock Pot Bourbon Pork

Crock Pot Bourbon Pork

Crock Pot Bourbon Pork


2 lb pork cut into 1/2 inch pieces

1 (8 oz) can sliced water chestnuts

1/2 small onion, diced

1/2 cup hoisin sauce

1/3 cup soy sauce

1/4 cup chicken broth

1/4 cup bourbon

2 tbsp. honey

2 tbsp. Bacon Marmalade, optional but oh so good

1 tsp. brown mustard

1/3 cup brown sugar, packed

1 tsp. garlic powder

1/8 tsp. Chinese 5 spice or ground ginger

Cooked rice for serving


Spray inside of crock pot with cooking spray then add diced pork, water chestnuts and onions. In a small pot, whisk together remaining ingredients, except for rice, and bring to a boil. Cook for 2 minutes until all ingredients are combined. Pour over pork. Cover and cook for 3-4 hours on low. Serve over rice


Servings: 8
Serving Size: about 2/3 C. (without rice)

Calories: 312
Fat: 11 g
Fiber: 1 g
Protein: 25 g

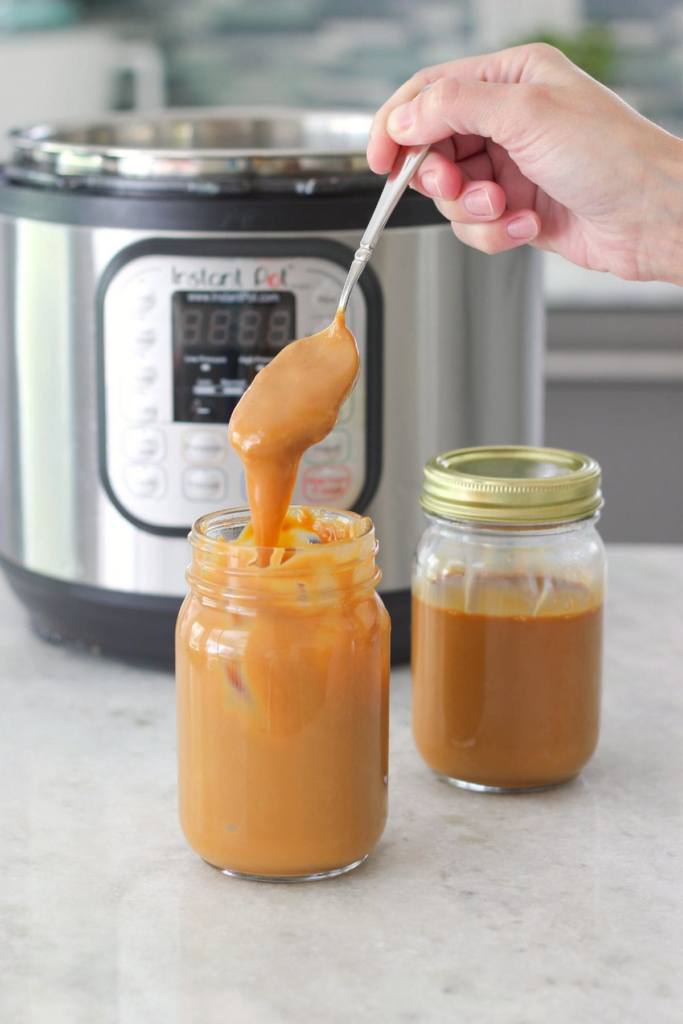
Dulce de Leche

Dulce de Leche

Dulce de LecheDulce de Leche


1 14-oz. can sweetened condensed milk

1 tsp. vanilla extract or brandy

Large pinch of fine sea salt


Remove the paper label from the can of sweetened condensed milk and discard it. Open the can and discard the top. Cover the opening of the can tightly with a piece of aluminum foil. Insert the steamer rack in the pressure cooker and put the can of condensed milk on the rack. Add enough water to reach halfway up the sides of the can. Cover and cook on high pressure for 40 minutes. Allow the pressure to release naturally. Transfer the can of milk to a wire rack, uncover, and let cool for at least 20 minutes; then mix in the vanilla and salt. Serve warm or let it cool completely.


Servings: 10
Serving Size: 2 T.

Calories: 128
Fat: 3 g
Fiber: 0 g
Protein: 3 g

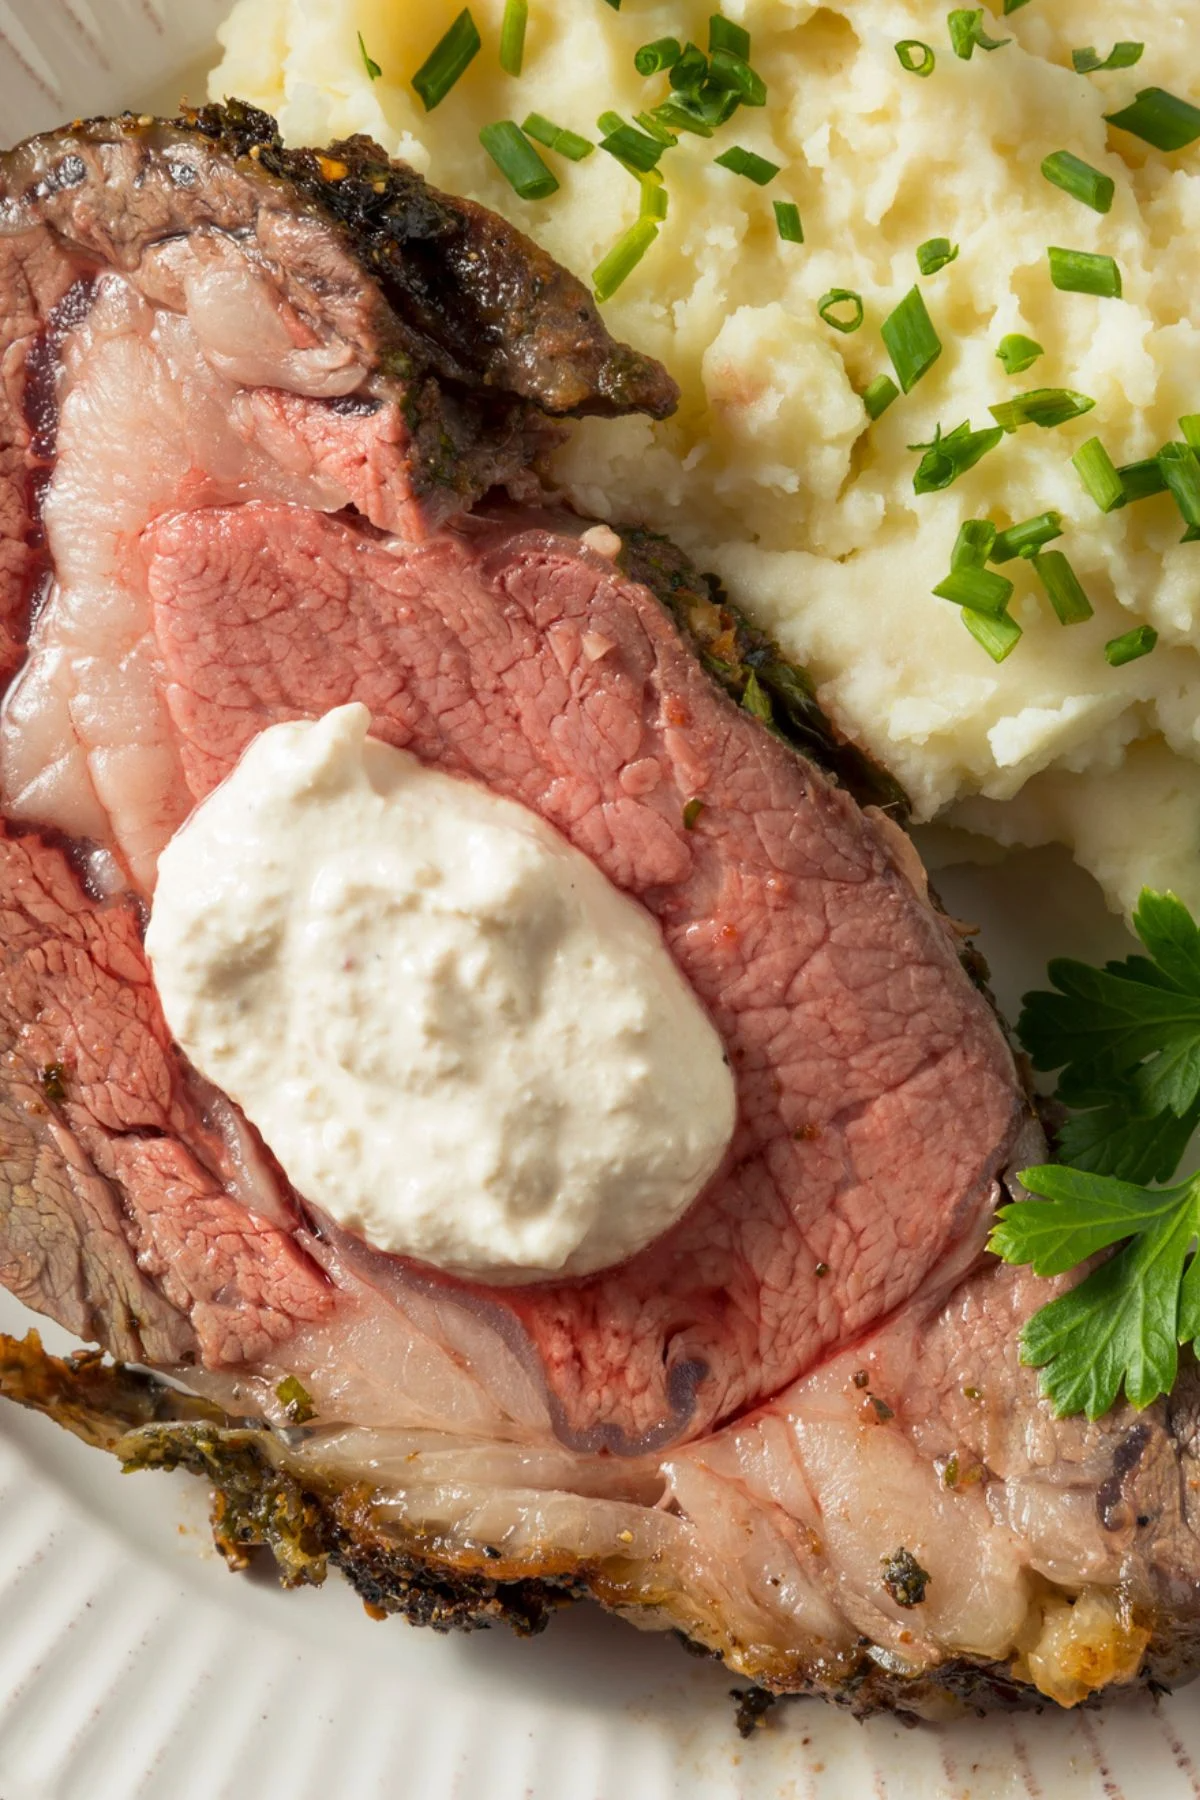
Creamy Horseradish Sauce for Prime Rib
Creamy Horseradish Sauce for Prime Rib

Creamy Horseradish Sauce for Prime Rib


1/2 cup sour cream

2 T. prepared horseradish, drained

3 T. mayonnaise

1 tsp. lemon juice

1 tsp. Worcestershire sauce

1/4 tsp. salt

1/8 tsp. pepper


Whisk all the ingredients together in a bowl.  Refrigerate until chilled.


Servings: 6
Serving Size: 2 T.

Calories: 87
Fat: 9 g
Fiber: 0 g
Protein: 1 g

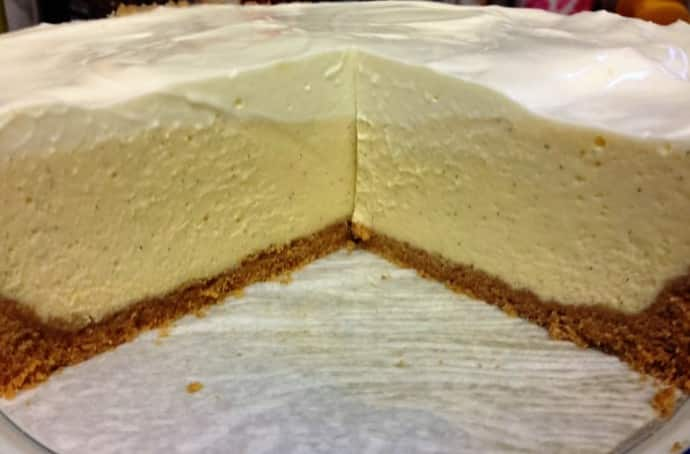
Classic Vanilla Bean Cheesecake

Classic Vanilla Bean Cheesecake

Classic Vanilla Bean CheesecakeClassic Vanilla Bean Cheesecake


Cooking cheesecake in the pressure cooker is one of those game-changing experiences. Not only is it faster than using your oven, it’s also easier since you don’t have to bother with a water bath. And you’ll end up with the silkiest cheesecake imaginable. Make sure your cream cheese is very soft before beating it. Consider microwaving the cream cheese (out of its foil package) for 10 to 20 seconds. Soft cream cheese is essential for getting a lusciously smooth texture here.


3/4 C. (75 grams) graham cracker crumbs (9 to 11 graham crackers)

3 T. unsalted butter, melted

1 T. dark brown sugar

Pinch of salt

16 oz. cream cheese, softened (see headnote)

6 T. sugar

1/3 C. crème fraîche or sour cream

1 vanilla bean, split in half lengthwise, or 2 tsp. vanilla extract

2 tsp. brandy

Pinch of salt

2 large eggs


Preheat the oven to 35O°F. To make the crust, combine crumbs, butter, brown sugar, and salt in a small bowl. Pat into the bottom of a 6- or 7-inch springform pan, patting it all over the bottom and 1/2 to 1 inch up the sides. Bake until golden brown, 8 to 12 minutes. Transfer it to a rack to cool. Make the filling: Using an electric mixer fitted with the paddle attachment, beat the cream cheese and sugar until the mixture is very smooth (this could take several minutes). Then add the crème fraîche, beating again until incorporated. Use a paring knife to scrape the seeds out of the vanilla bean so that they drop into the mixer bowl (save the pod for another purpose). Add the brandy and salt and beat again until smooth. Beat in the eggs, one at a time, scraping down the sides of the bowl between additions. Pour the filling into the prepared pan and cover the top of the springform pan with aluminum foil. Fill the pressure cooker with 1/2 inch of water. You can either place a steamer rack in the pot and then lower the cake pan onto the rack using a homemade sling (see this page) or, if you have a rack with an attached handle, simply lower the rack and pan together. Cover and cook on high pressure for 32 minutes. Let the pressure release naturally for 8 minutes, and then release the remaining pressure manually. Lift the pan out of the pressure cooker and transfer it to a wire rack. Remove the foil. Only the outside of the cheesecake should be fully set; the inside will set further as it cools. Let the cheesecake cool to room temperature. Chill the cheesecake for at least 8 hours and preferably overnight. Release the springform sides to serve.


Servings: 8
Serving Size: 1 slice (1/8 of cheesecake)

Calories: 379
Fat: 30 g
Fiber: 0 g
Protein: 6 g

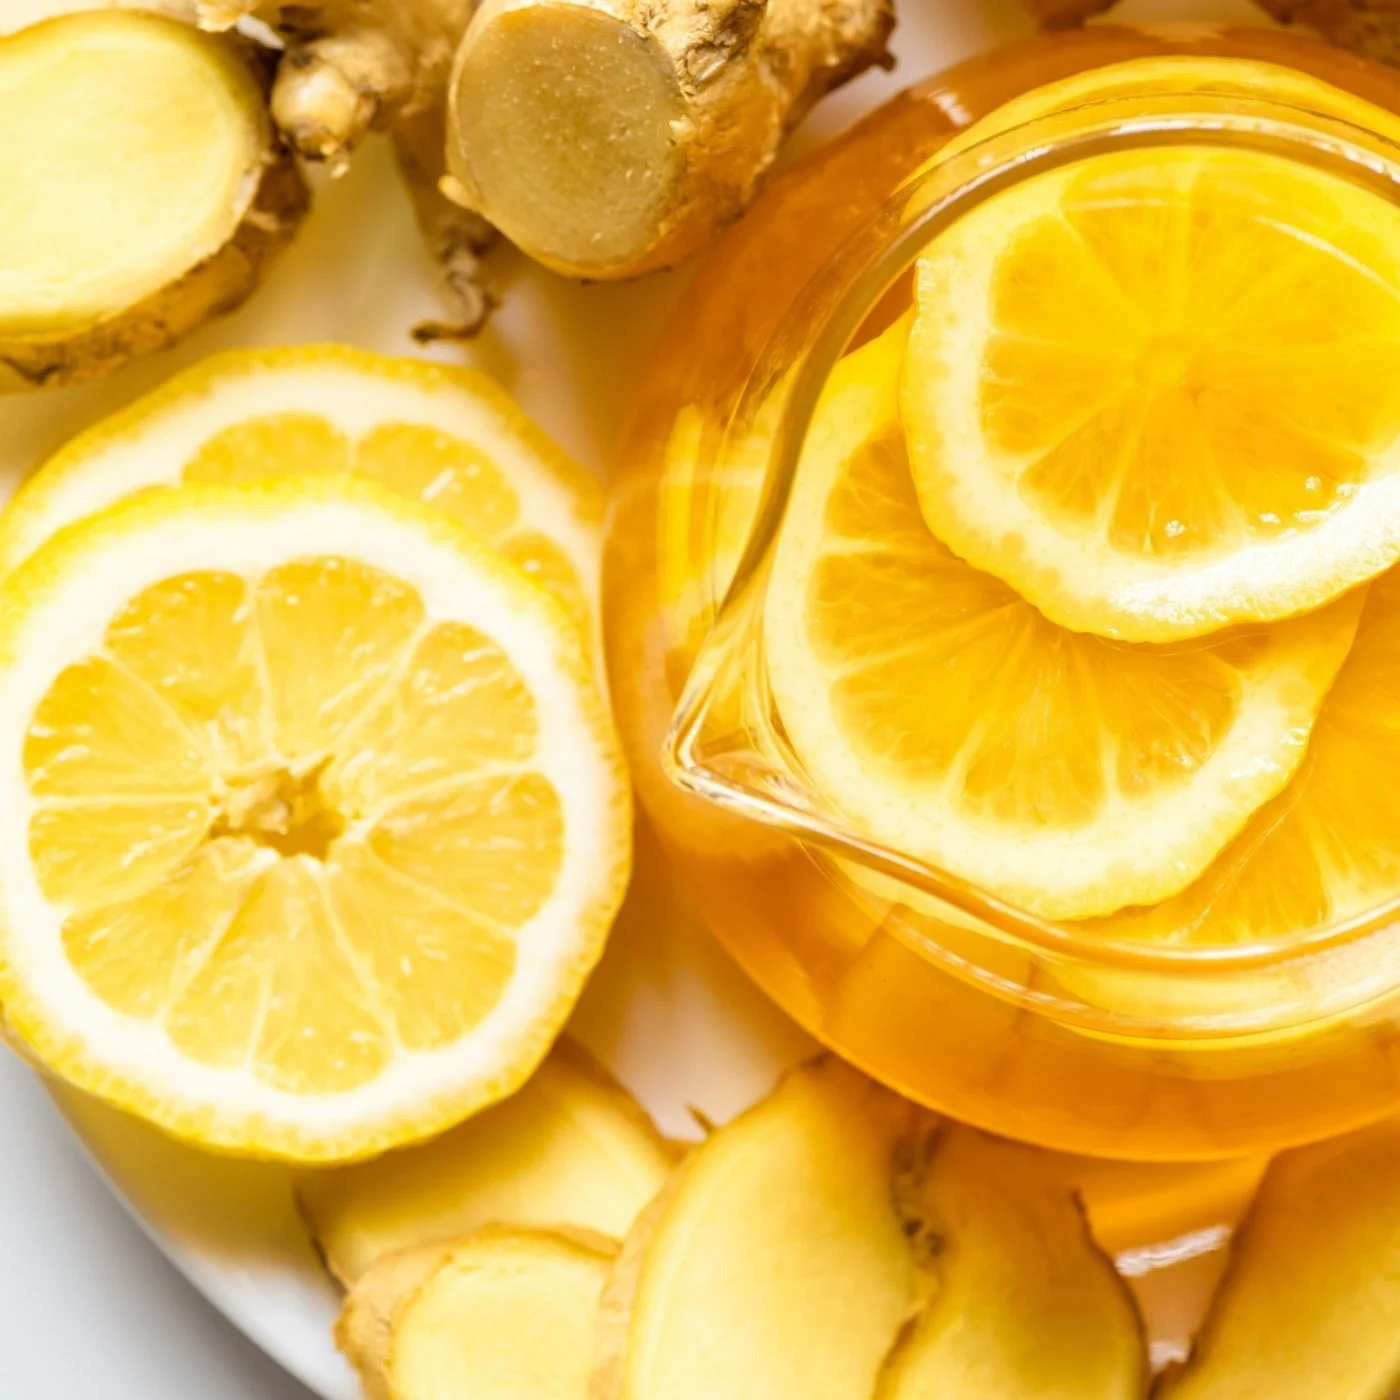
Detoxing Lemon Ginger Tea Recipe

Detoxing Lemon Ginger Tea Recipe

Detoxing Lemon Ginger Tea Recipe


1/2 squeezed lemon

1 piece of ginger 1 1/2″ long, peeled and sliced

A couple drops of stevia or raw honey


Add ingredients to an 8 ounce mug. Pour boiling water over the mixture. Let steep for a few minutes. Enjoy!


Servings: 1
Serving Size: 1 mug (8 oz.)

Calories: 6
Fat: 0 g
Fiber: 0 g
Protein: 0 g

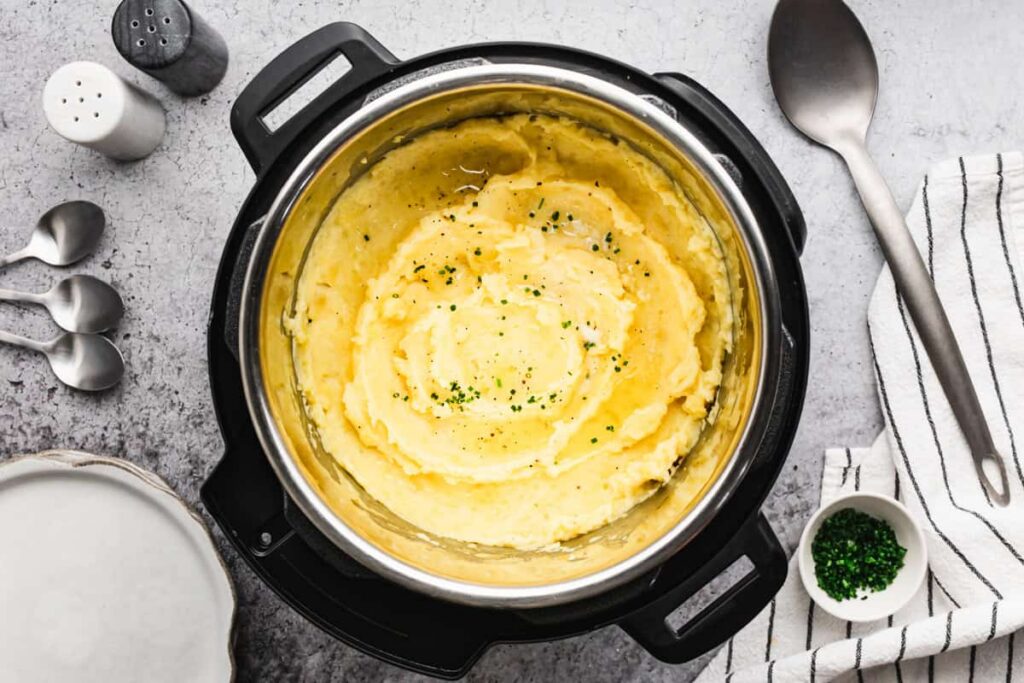
Mashed Potatoes

Mashed Potatoes

Mashed PotatoesMashed Potatoes


1 T. plus 1 tsp. kosher salt

3 lb. Yukon Gold potatoes, peeled and cut into 1-inch chunks

5 T. unsalted butter, at room temperature

1 C. sour cream, at room temperature

1/4 tsp. freshly ground black pepper

3 T. finely chopped fresh chives

1/3 C. freshly grated Parmesan cheese, or to taste


Put 1 C. of warm water and the 1 T. salt in the pressure cooker and stir until the salt dissolves. Insert the steamer basket and place the potatoes in the basket. Cover, and cook on high pressure for 8 minutes. Release the pressure manually. Transfer the potatoes to a bowl. Add the butter, sour cream, remaining 1 tsp. salt, and the pepper and use a potato masher or fork to mash everything together. Add the chives and mix well. Adjust the seasoning to taste, if necessary. Sprinkle with the Parmesan cheese just before serving.


Servings: 8
Serving Size: about 3/4 C.

Calories: 271
Fat: 14 g
Fiber: 2 g
Protein: 6 g

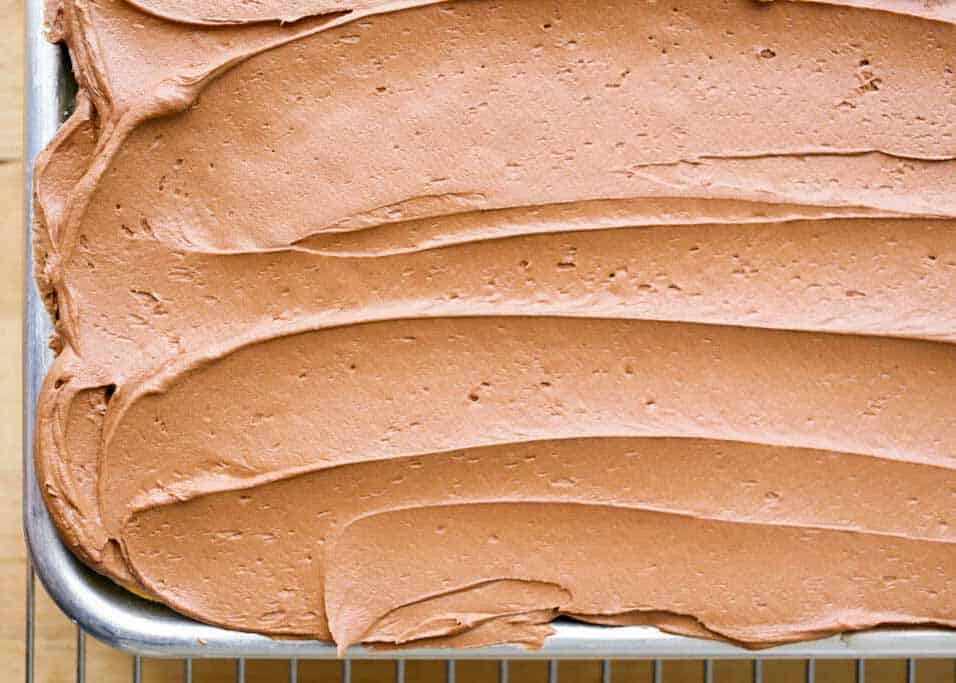
Fluffy, Creamy, Perfect Chocolate Buttercream Frosting
Fluffy, Creamy, Perfect Chocolate Buttercream Frosting

Fluffy, Creamy, Perfect Chocolate Buttercream Frosting


1 cup semi-sweet chocolate chips

1 cup butter room temperature

2 cups powdered sugar

2 teaspoons vanilla extract


Place the chocolate chips in a glass bowl and microwave them for 90 seconds, at 50% power, stir and microwave again for 30 seconds at 50% power. Stir until smooth. Let cool to almost room temperature, do not skip the cooling step. (The chocolate can also be melted in a glass bowl over a simmering pan of water on the stove. Use whichever method works for you, just melt it slowly, until the chocolate is smooth.)  In a mixing bowl, beat the butter on medium speed until smooth. Add 1 cup of powdered sugar and beat again. Scrape the sides and add the remaining powdered sugar. Continue beating for about a minute, scraping the sides as needed, until the mixture is smooth and creamy. Add the vanilla and the cooled chocolate and beat on high for about 2 minutes, scraping the sides as necessary, until the frosting is creamy, smooth, and very fluffy. Spread across the cake of your choice, or just grab a spoon. Enjoy!


Servings: 28
Serving Size: 2 T.

Calories: 121
Fat: 8 g
Fiber: 0 g
Protein: 0 g

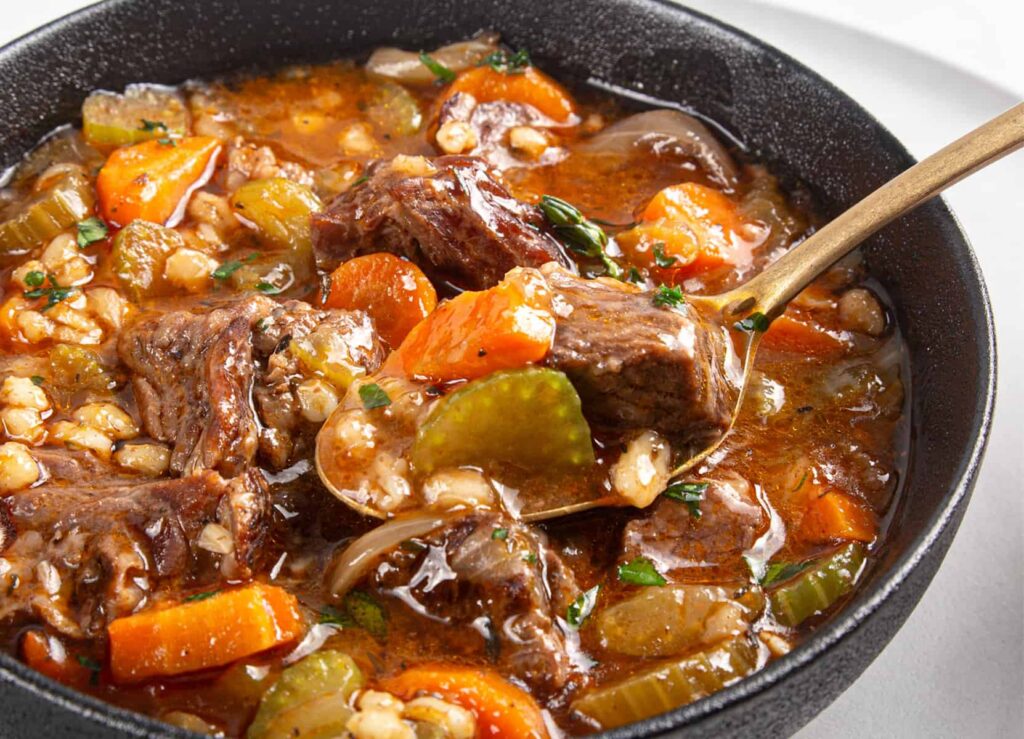
Beef Barley Vegetable Soup

Beef Barley Vegetable Soup

Beef Barley Vegetable SoupBeef Barley Vegetable Soup


1 1/2 lb. beef stew meat, cut into 3/4-inch cubes

1 1/2 tsp. kosher salt, plus more to taste

1 tsp. freshly ground black pepper, plus more to taste

1 T. extra-virgin olive oil

1/4 C. dry red wine

2 C. (about 6 oz.) quartered cremini mushrooms

4 shallots, thinly sliced

3 carrots, sliced into 1/4-inch-thick rounds

3 celery stalks, diced into 1/4-inch pieces

3/4 C. pearl barley

2 sprigs fresh thyme

2 bay leaves

1 quart beef or chicken stock, preferably homemade

2 T. chopped fresh parsley

Sherry vinegar, to taste


Season the beef with 1 tsp. of the salt and 1/2 tsp. of the pepper. Using the sauté function, on high if available, heat the oil in the pressure cooker (or use a skillet). Working in batches to avoid overcrowding, brown the meat well on all sides, about 2 to 3 minutes per side. With a slotted spoon, transfer the beef to a bowl. Pour the wine into the pot (or skillet) to deglaze it, using a wooden spoon to scrape up the browned bits stuck to the bottom and sides. Allow the liquid to reduce by half, 2 to 3 minutes. Add the mushrooms, shallots, carrots, and celery and mix well with the reduced wine. Season with the remaining 1/2 tsp. salt and 1/2 tsp. pepper. Cook until the vegetables release moisture and start to soften, 8 to 10 minutes. Return the beef and any juices to the pot. (If using a skillet, transfer the vegetables from the pan to the pot and add the beef.) Add the barley, thyme sprigs, bay leaves, and stock to the pot. Cover, and cook on high pressure for 30 minutes. Let the pressure release naturally for 15 minutes; then release the remaining pressure manually. Discard the bay leaf and thyme sprigs. Taste, and season with more salt and pepper if needed. Ladle the soup into individual bowls, and garnish with the parsley and a sprinkle of sherry vinegar.


Servings: 6
Serving Size: about 1 1/3 C.

Calories: 354
Fat: 13 g
Fiber: 6 g
Protein: 29 g

Fall Honey Vinaigrette

Fall Honey Vinaigrette

Fall Honey Vinaigrette


1/2 cup avocado oil

1/3 cup apple cider vinegar

2 T. honey

2 tsp. minced shallots

1/4 tsp. pumpkin pie spice

1/4 tsp. sea salt

1/4 tsp. freshly ground pepper


In a small mixing bowl or jar, whisk the vinegar, honey, shallots, pumpkin pie spice, salt, and pepper until well combined. Slowly drizzle in the avocado oil while continuing to whisk until the vinaigrette is smooth and emulsified.  Taste and adjust seasoning if needed. If using a jar, you can add all ingredients, seal tightly, and shake vigorously to blend. Refrigerate until ready to use and shake well before serving.


Servings: 8
Serving Size: 2 T.

Calories: 139
Fat: 14 g
Fiber: 0 g
Protein: 0 g

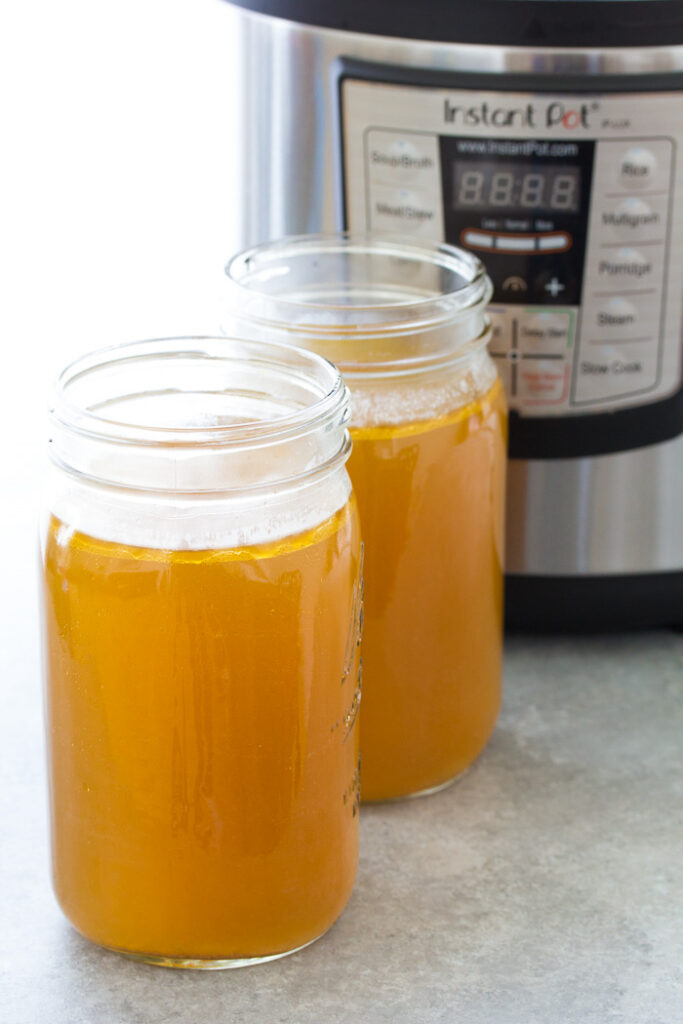
Bone Broth

Bone Broth

Bone BrothBone Broth


Roasting the bones before adding them to the pot caramelizes them and makes for a much richer and better tasting broth. But for a light chicken stock you could skip that step.


3 lb. bones, preferably a mix of meaty bones and marrow-filled bones

3 T. apple cider vinegar

1 1/2 T. coarse sea salt, or to taste

1 to 2 celery stalks

1 large carrot

1 large onion, 2 leeks, or a bunch of leek greens

1 whole clove or star anise pod

2 to 6 garlic cloves

5 to 7 sprigs fresh thyme or dill

5 to 7 sprigs fresh parsley

1 bay leaf

1 tsp. black peppercorns

2 to 4 1-inch-thick coins peeled fresh ginger (optional)


If you want to roast the bones first, heat the oven to 45O°F. Lay the bones out on a rimmed baking sheet and roast until well browned, 25 to 35 minutes. Put the bones (roasted or not) in the pressure cooker pot and add all the remaining ingredients. Cover with 3 to 3V2 quarts of water (the water shouldn’t come more than two-thirds of the way up the side of the pot). To make regular stock, cook on high pressure for 1 hour if using all chicken or poultry bones, or 2 hours for beef or pork bones or a combination of poultry and meat. For bone broth, cook on high pressure for 3 hours for poultry bones, and 4V2 hours for beef, pork, or mixed bones. When making bone broth, you’ll know you’ve cooked it long enough if all the connective tissue, tendons, and cartilage have dissolved and the bones crumble a bit when you poke at them. If this hasn’t happened, cook it on high pressure for another 30 minutes and check it again. Allow the pressure to release naturally. Strain the broth, discarding the solids. Use the broth or stock right away or store it in the refrigerator or freezer. Bone broth and regular stock will keep for 5 days refrigerated or up to 6 months frozen.

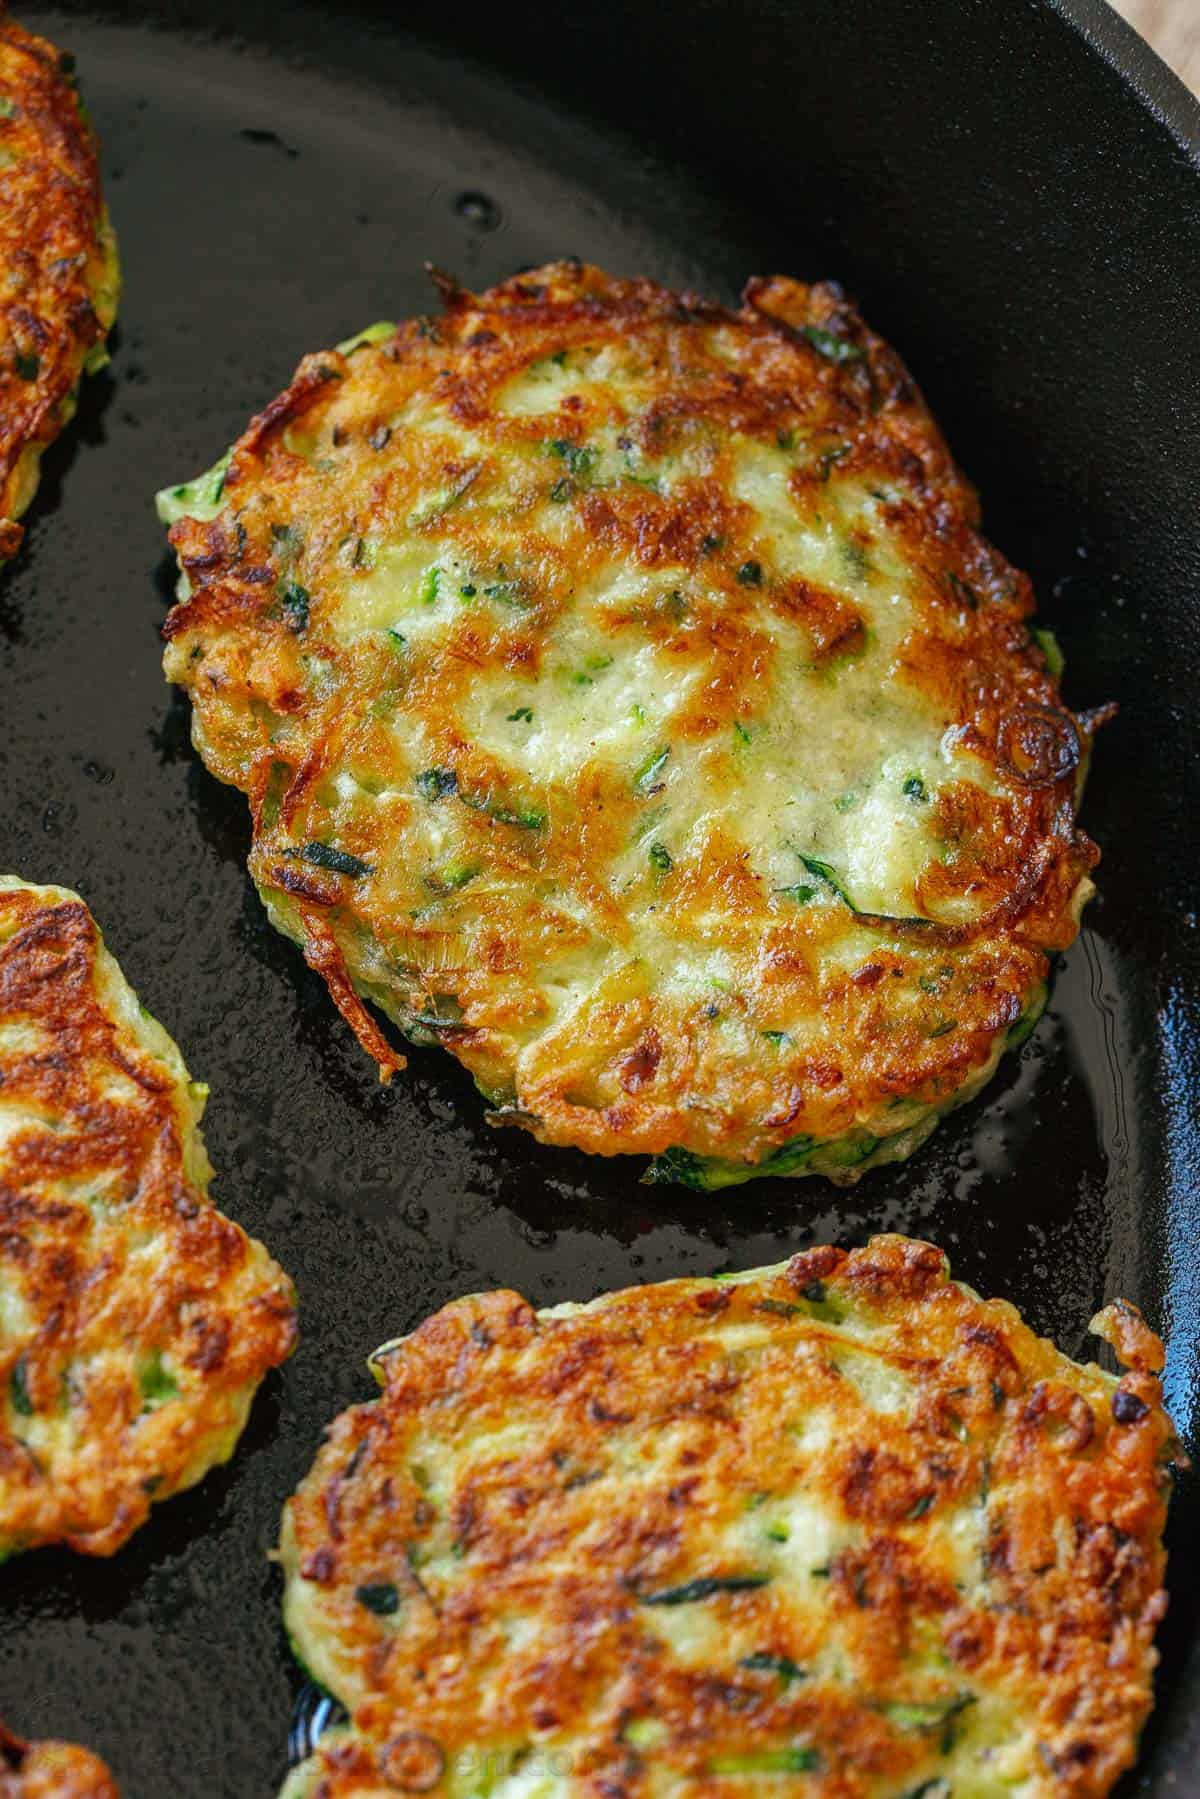
Simple Zucchini Fritters

Simple Zucchini Fritters

Simple Zucchini Fritters


1 large or 2 small zucchini

¼ C, chopped Scallion

2 eggs

1/4 cup all-purpose flour + scant tsp. baking powder

salt and pepper for seasoning – to your taste

Sunflower oil or olive oil


Take a box grater and on the side with the largest holes shred the zucchini.  Place in a colander in the sink and sprinkle with 1/2 tsp. of salt.  Mix well and gently so salt gets in all the nooks and crannies.  Leave like this for around 10 minutes or so.  Take a clean kitchen towel – flour sack style is best – place the salted zucchini in the towel and wring out the excess moisture.  If you don’t have a towel you can just wring it in your hands!!  Place the squeezed zucchini in a large bowl.   Using the same grater shred the scallion – Gently stir in eggs, salt and pepper.  Mix well then slowly add flour.  Again mix well so there are no lumps. Heat a large sauté pan over medium-high heat.  Add 2 T. of oil.  Heat just until the oil sputters when you drop a small spoonful of the zucchini batter into the pan.  Carefully spoon about 2 T. of zucchini batter into hot oil.  Keep spooning batter spacing the fritters a couple inches apart. Cook until golden about 2 or more minutes.  Lower the heat a bit to medium flip the fritters and keep cooking till golden on the other side about 2 or 3 minutes more.  Remove cooked fritters from pan to a plate that has been lined with paper towels.  Continue till all batter is cooked.  You may need to add more oil to pan – just be sure to let oil get hot before you start frying the next round.  Serve as is or you can serve the firtters with a side of sour cream or creme fraiche with some fresh dill or basil finely chopped and mixed into cream.  Lemon Basil Oil or Garlic Aioli would also be tasty.

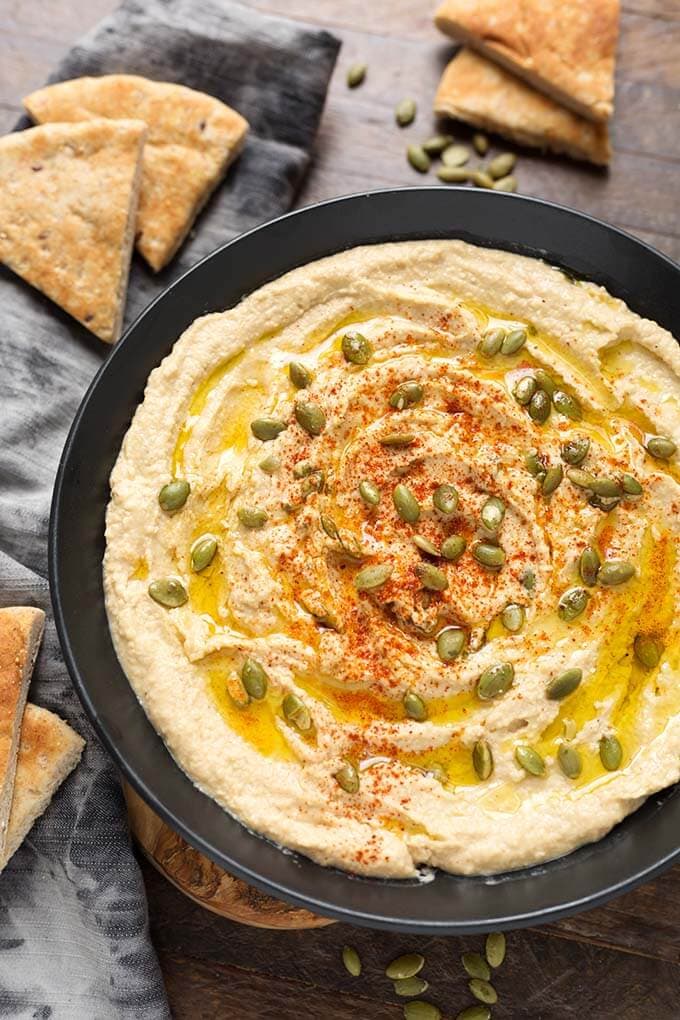
Instant Pot Hummus

Instant Pot Hummus

Instant Pot HummusInstant Pot Hummus


8 oz. (1 1/4 C.) dried chickpeas

1 1/2 tsp. kosher salt, plus more as needed

Juice of 1 lemon, plus more as needed

2 garlic cloves, grated on a Microplane or chopped

1/4 tsp. ground cumin

1/3 C. tahini

Ice water, as needed

2 T. extra-virgin olive oil, plus more for serving

Sweet or hot paprika, for serving


Pour the chickpeas and 1 tsp. of the salt into the pressure cooker and add water to cover by 1 inch. Cook on high pressure for 50 minutes. Allow the pressure to release naturally. The chickpeas should be very soft. If not, cook at high pressure for another 5 minutes, then manually release the pressure. Drain the chickpeas. Meanwhile, place the lemon, garlic, cumin, and remaining 1/2 tsp. salt in a blender or food processor and let the mixture sit for 5 minutes without processing. Then add the tahini and process to combine; you’ll end up with a thick paste. Add 2 T. ice water and blend it in, and then continue adding ice water, 1 T. at a time, blending until the tahini has thinned down to a sauce consistency. Add the drained chickpeas and the olive oil to the tahini and blend to combine, stopping to scrape down the sides of the blender jar as necessary. If the hummus looks too thick, add more ice water, 1 T. at a time. Taste, and adjust the seasoning if necessary. Then scrape the hummus into a serving dish and top it with a generous drizzle of olive oil and a liberal sprinkling of paprika.


Servings: 14
Serving Size: 1/4 C.

Calories: 114
Fat: 6 g
Fiber: 2 g
Protein: 4 g

Ricotta Egg Bites

Ricotta Egg Bites

Ricotta Egg Bites


8 large eggs

½ cup ricotta cheese – whole or part skim

¼ cup milk

Jimmy Dean raw sausage patties

1 tsp. sea salt

½ tsp. garlic powder

Pepper to top – optional

Shredded cheese optional


Preheat oven 350F. In a small bowl, whisk together the ricotta cheese and milk until creamy. The mixture should be slightly thick; set aside. In a separate bowl, whisk the eggs well to break up the yolks. Add the ricotta mixture to the bowl with the eggs, sea salt and garlic powder and combine. Spray a muffin tin with non-stick cooking spray.

Add sausage patty to muffin tin if using. Pour egg mixture over each piece of sausage and top with cheese. Don’t fill all the way to the top or they will puff over;) Don’t ask me how i know;) Bake in the oven for 10 – 18 minutes (depending on the size of the muffin tin you use) until the egg bites are fluffy. You should be able to press the egg bites gently, and they feel semi-firm. Let the ricotta egg bites cool slightly before running a knife around the muffin to pull it out of the tin. Top with some fresh cracked pepper and enjoy! To reheat, just cook in the microwave for a minute or two.

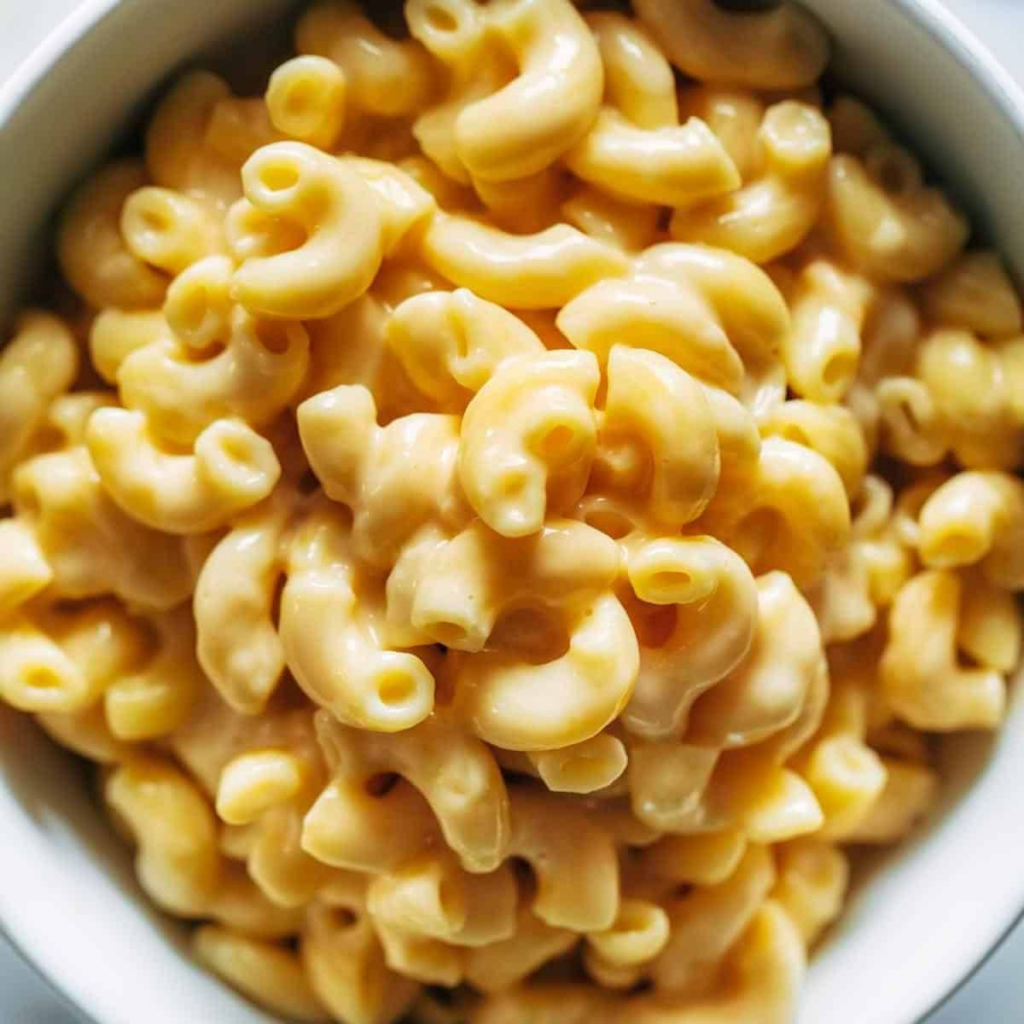
Creamy Mac and Cheese

Creamy Mac and Cheese

Creamy Mac and CheeseCreamy Mac and Cheese


2 T. unsalted butter, softened

2 C. whole milk, plus more as needed

1/4 C. heavy cream

6 oz. cream cheese, softened

1 garlic clove (optional)

1 tsp. dry mustard powder

3/4 tsp. kosher salt

1/4 tsp. freshly ground black pepper

1/8 tsp. cayenne pepper

Pinch of grated nutmeg

8 oz. macaroni pasta

8 oz. grated sharp or extra-sharp cheddar cheese


Brush 1 T. of the butter over the bottom of the pressure cooker. In a blender, blend the milk, cream, cream cheese, remaining 1 T. butter, garlic, dry mustard, salt, pepper, cayenne, and nutmeg. Add the cream cheese mixture and the macaroni to the pressure cooker and stir to combine. Cover and cook on high pressure for 6 minutes. Release the pressure manually. Stir the noodles, and if they look dry, stir in more milk to taste. If the noodles are too al dente to your liking, stir in the cheddar, then cover and let the pot sit for 5 to 10 minutes; the noodles will cook a little more just sitting in the pot. Otherwise, stir in the cheese and serve immediately.


Servings: 6
Serving Size: about 1 C.

Calories: 511
Fat: 33 g
Fiber: 1 g
Protein: 18 g

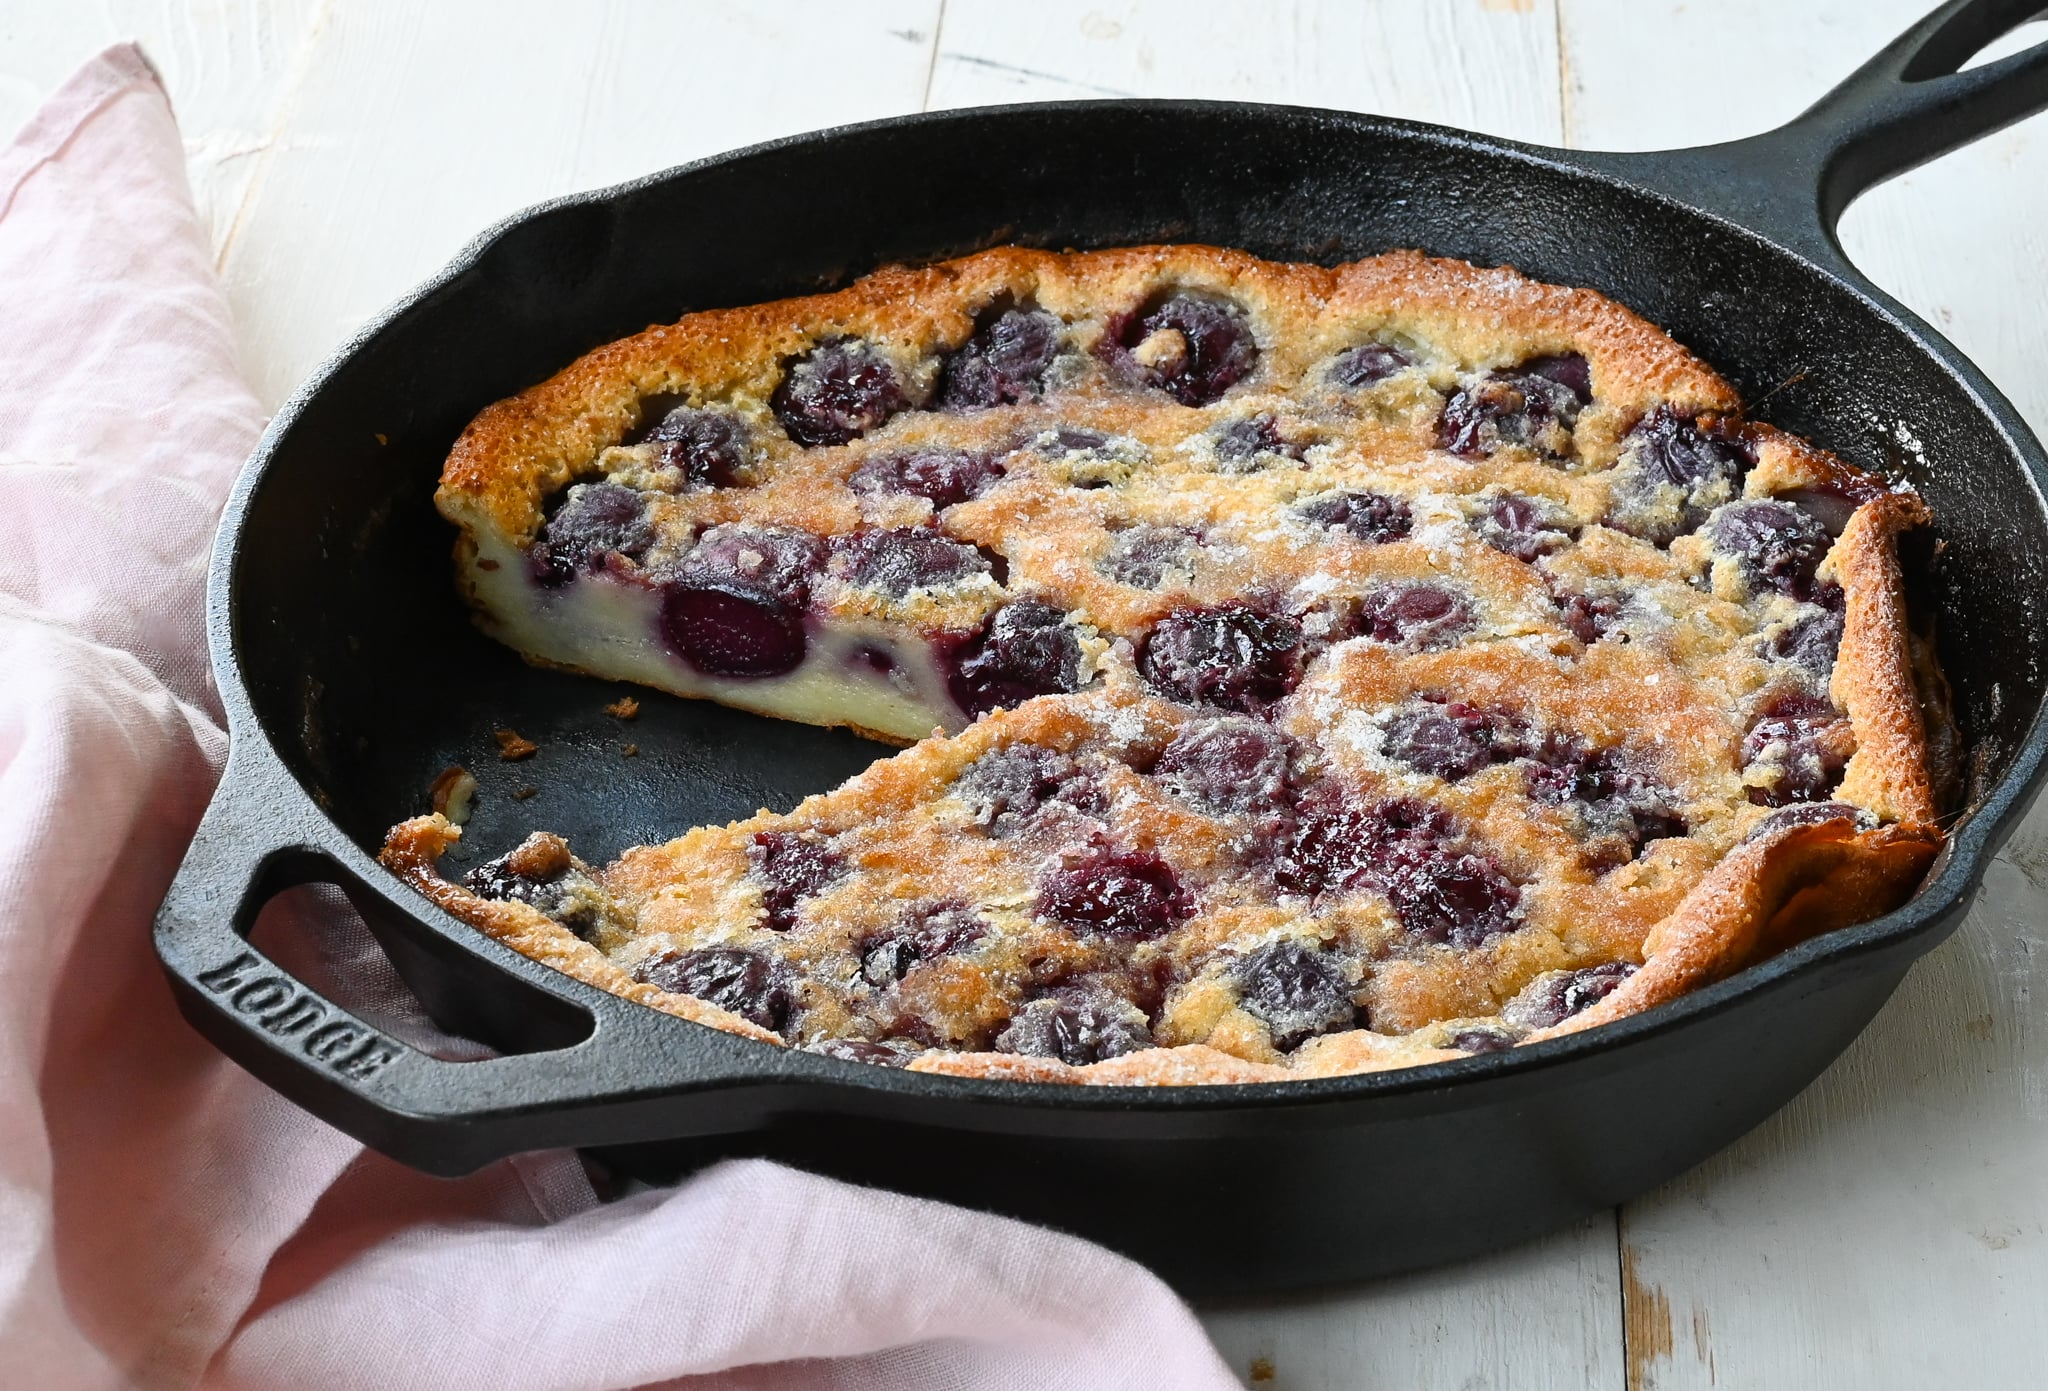
Mixed Berry Clafoutis

Mixed Berry Clafoutis

Cherry Clafoutis


4 eggs

1/2 cup heavy cream or half and half

1/2 cup almond flour

2 T. honey

1 tsp. vanilla extract

Butter (for greasing the baking dish)

1 cup fresh mixed berries (blueberries, raspberries, strawberries & blackberries)


Preheat oven to 350° degrees. Combine eggs, cream, almond flour, honey and vanilla in a blender and blend until smooth (alternatively, combine in a medium bowl and whisk until smooth). Pour batter into 8″ or 9″ greased baking dish. Add berries one by one so they are scattered throughout the dish. Bake for 25-30 minutes until golden and puffy.


Servings: 6
Serving Size: 1 wedge (1/6 of dish)

Calories: 209
Fat: 16 g
Fiber: 2 g
Protein: 7 g

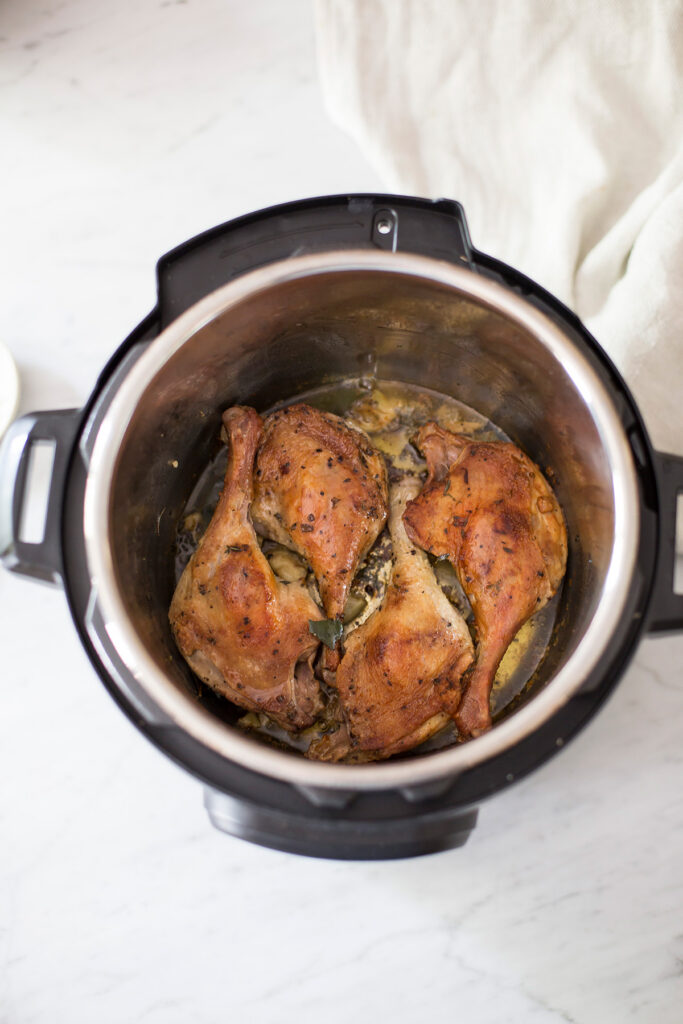
Duck Confit

Duck Confit

Duck ConfitDuck Confit


1 T. kosher salt

4 sprigs fresh thyme

4 garlic cloves, smashed

2 bay leaves, torn in half

1/4 tsp. black peppercorns, lightly crushed tsp. allspice berries, lightly crushed

4 duck legs (drumsticks and thighs)


Line a small rimmed baking sheet or a plate with paper towels. In a large bowl, stir together the salt, thyme, garlic, bay leaves, peppercorns, and allspice. Add the duck legs and toss, covering the legs evenly with the salt. Place the duck legs in a single layer on the baking sheet and refrigerate, uncovered, for at least 24 hours and up to 3 days. Brush the garlic and thyme sprigs off the duck, reserving them. Using the sauté function, arrange the duck legs, skin-side down, in the pressure cooker, with as much of the flesh touching the bottom of the pot as possible. Sear until the skin turns golden brown and the fat starts to render, 5 to 10 minutes. Flip the duck legs over and sear on the other side for 5 to 10 minutes. Scatter the reserved garlic and thyme on top of the duck. Cover and cook the duck legs on high pressure for 40 minutes, and then release the pressure manually. Flip the legs over and cook on high pressure for another 30 minutes. Let the pressure release naturally. Let the duck cool completely, and then store it, covered in its own rendered fat (there will be lots of it in the pot), in the refrigerator. Note that you will be left with a dark brown liquid—the duck stock—that will separate from the white duck fat as the confit cools. Save this delicious elixir. You can use it for sauces, soups, or anywhere you need a good, concentrated meat or poultry stock. It also freezes well. When you are ready to serve, heat the broiler. Scrape fat off duck legs. Transfer the duck to a rimmed baking sheet and broil until the skin is crispy, 3 to 5 minutes (or you can crisp up the duck in a hot, dry skillet).


Servings: 4
Serving Size: 1 duck leg

Calories: 410
Fat: 32 g
Fiber: 0 g
Protein: 29 g

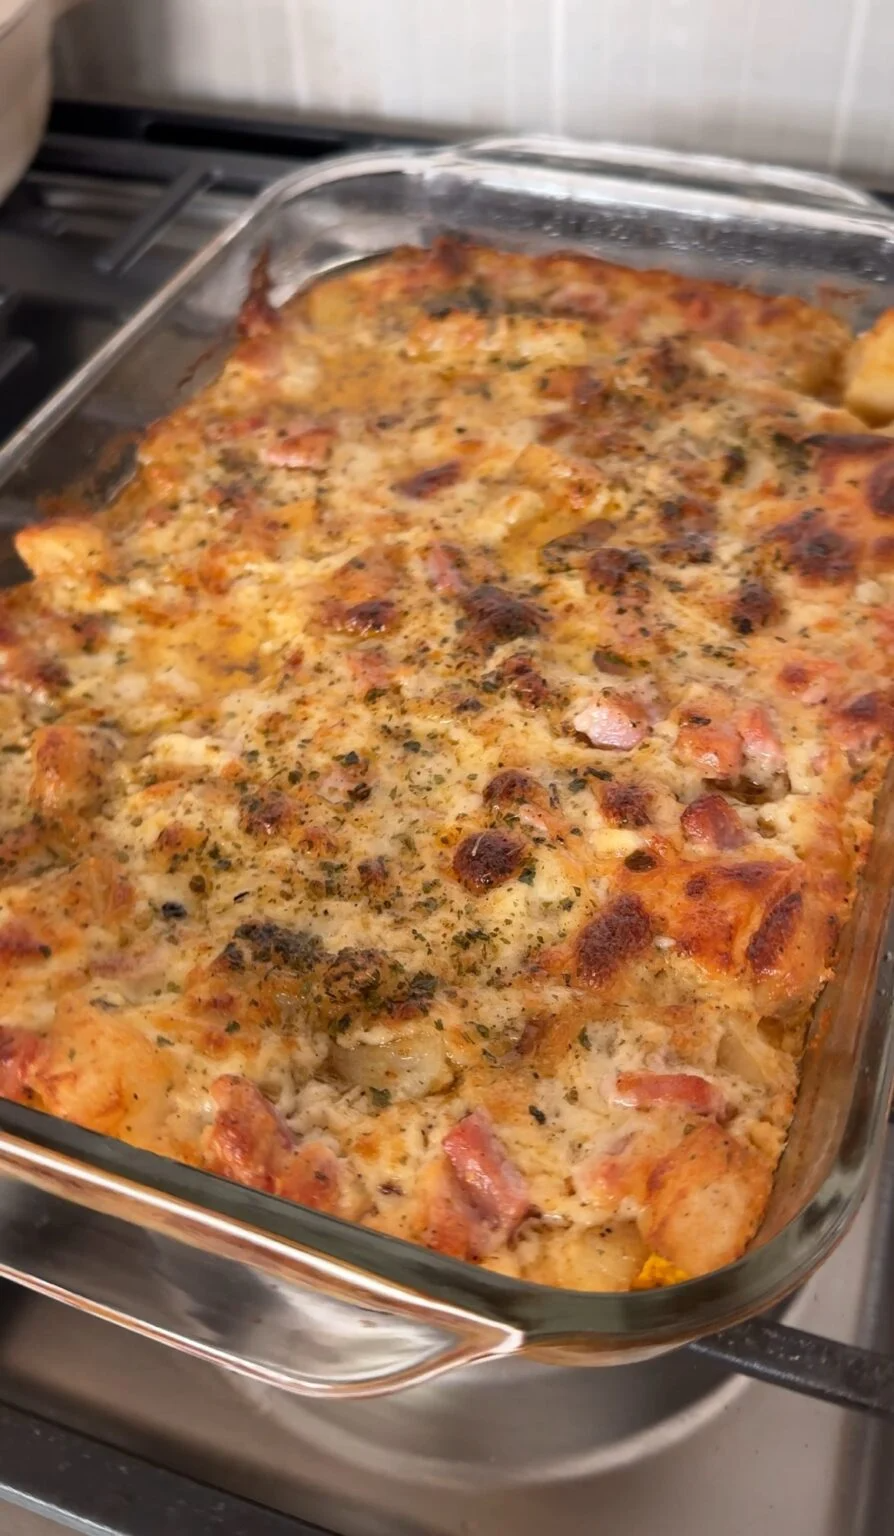
Ham and Potato Fondue Casserole

Ham and Potato Fondue Casserole

Ham and Potato Fondue Casserole


6 small to medium Russet Potatoes

1 to 2 T. of Olive Oil

1/2 T. of All Purpose Seasoning

1 tsp. of Black Pepper

1 tsp. of Onion Powder

1/2 tsp. of Paprika

1/2 T. of Dried Parsley

4 T. of Butter

2 to 3 cups of Chopped Ham

3 cups of Swiss Cheese *or any cheese you prefer

2 cups of Milk

1/2 T. of Dijon Mustard

2 heaping T. of Flour

Pinch of Garlic Salt

Pinch of Paprika

Pinch of Black Pepper


Wash and peel the potatoes and cut them into small, bite sized pieces. Pat them dry and add them to a 9 x 12 casserole dish. Add the olive oil, all purpose seasoning, paprika, onion powder, black pepper, and half the dried parsley and toss the potatoes to coat them with the olive oil and the seasonings. Cover with a piece of foil, place the potatoes in a 375° oven, and bake for 35 minutes. Halfway through, uncover and give the potatoes a stir. While the potatoes bake, finely dice your ham and shred the cheese you are going to use. Add the butter to a deep sided skillet and add the diced ham. Sauté low and slow until the ham is warm and slightly golden brown. When the ham is warmed, sprinkle the whole pan with the heaping T. of flour and let the flour cook up a little in the ham and butter to make a roux. It will coat the ham pieces and that is fine. Do not let the flour burn. When the flour is cooked a little, slowly add the 2 cups of milk and the Dijon mustard and whisk the whole time. Have the heat on the stove on low. Continue to whisk the milk and you should see it start to thicken. You want it to thicken until it coats the back of a spoon. You should see a gravy like texture. If for some reason it gets too thick you can add a little more milk, about a T. at a time to thin it out. When the mixture is the texture you want, slowly start to add your cheese a handful at a time and stir to incorporate it into the roux mixture as it melts. When all the cheese is added, add a little pinch of garlic salt, pepper, and paprika to taste. Adjust the seasoning to your taste. Some cheeses react differently but the mixture should be thicker and have a cheese pull to it. If it is too thick you can still slowly whisk in a little milk at a time to thin it out. At the 35 minutes mark, pull the potatoes from the oven, give them all a stir ,and pour the cheese and ham mixture over the potatoes. Sprinkle a little paprika over the top and the rest of the dried parsley. Bake for another 25 to 35 minutes. Every oven is different so keep an eye on this the first time you make it. The potatoes should be fork tender when done and the top will be golden brown and bubbly. Remove from oven and serve immediately. I like to serve little baby sweet pickles with this type of dish.


Servings: 8
Serving Size: 1/8 of casserole (about 1 1/2 C.)

Calories: 450
Fat: 26 g
Fiber: 2 g
Protein: 24 g

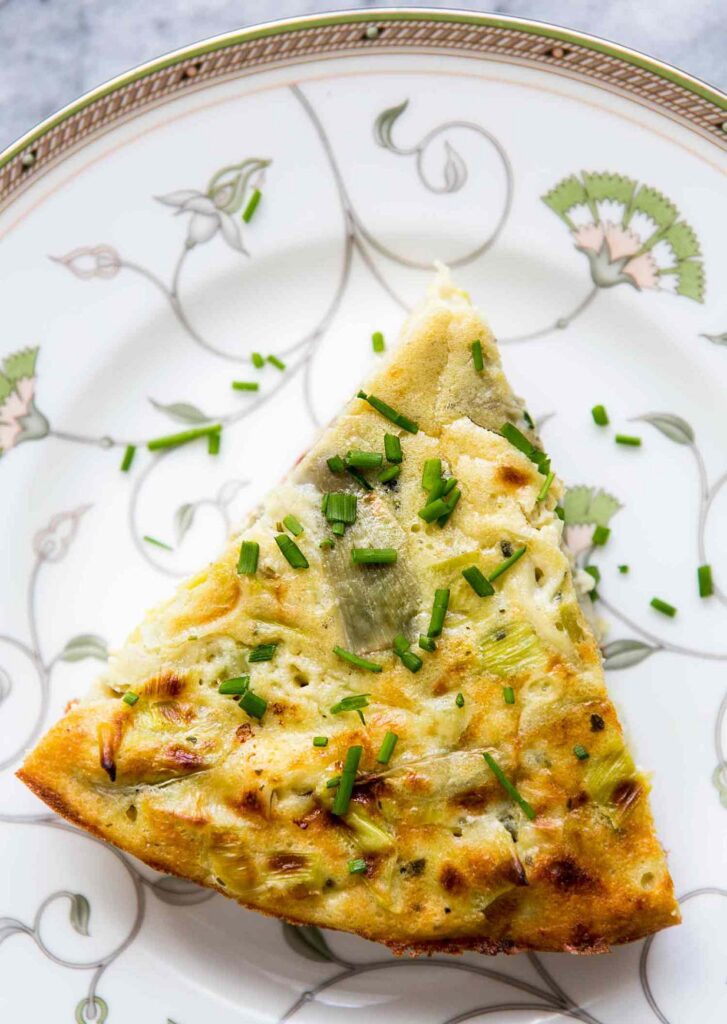
Leek & Artichoke Frittata

Leek & Artichoke Frittata

Leek & Artichoke FrittataLeek & Artichoke Frittata


1 T. unsalted butter, plus more for the souffle dish

5 T. grated Parmesan cheese

1 T. extra-virgin olive oil

2 small leeks (white and light green parts only), halved and thinly sliced

1 tsp. kosher salt, plus more as needed

1/2 C. milk

2 T. all-purpose flour

9 large eggs

1 T. finely chopped fresh basil or parsley

1/2 tsp. finely chopped fresh thyme

1/4 tsp. freshly ground black pepper

¾ C. (about 2 oz.) shredded Gruyère cheese

1/3 C. marinated artichoke hearts, drained and coarsely chopped


Butter a 1 1/2-quart souffle dish and dust the sides with 2 T. of the Parmesan. Set it aside. Using the sauté function, heat the 1 T. butter and the oil in the pressure cooker. Stir in the leeks and 1/4 tsp. of the salt, and cook, stirring often and lowering the heat if necessary (and possible), to prevent burning, until golden brown, 5 to 10 minutes. Meanwhile, in a large bowl, whisk together the milk and flour. Then whisk in the eggs, basil, thyme, remaining 3/4 tsp. salt, pepper, and Gruyère. Turn off the heat and stir the artichokes into the leeks. Then mix the leek mixture into the egg mixture. Scrape that mixture into the prepared souffle dish. Cover it with aluminum foil. Pour 1 1/2 C. water into the pressure cooker. You can either place a steamer rack in the bottom of the pot and then lower the soufflé dish onto the rack using a homemade sling (see this page), or, if you have a rack with an attached handle, lower the rack and dish all at once. Cover and cook on high pressure for 16 minutes. Allow the pressure to release naturally for 10 minutes, and then release the remaining pressure manually. Using oven mitts, remove the souffle dish from the pressure cooker. Remove the foil. Heat the broiler. Sprinkle the remaining 3 T. Parmesan over the frittata, and broil until it is golden brown, 1 to 2 minutes. Let it sit for 5 minutes before serving.


Servings: 6
Serving Size: 1 wedge (1/6 of frittata)

Calories: 257
Fat: 18 g
Fiber: 1 g
Protein: 15 g

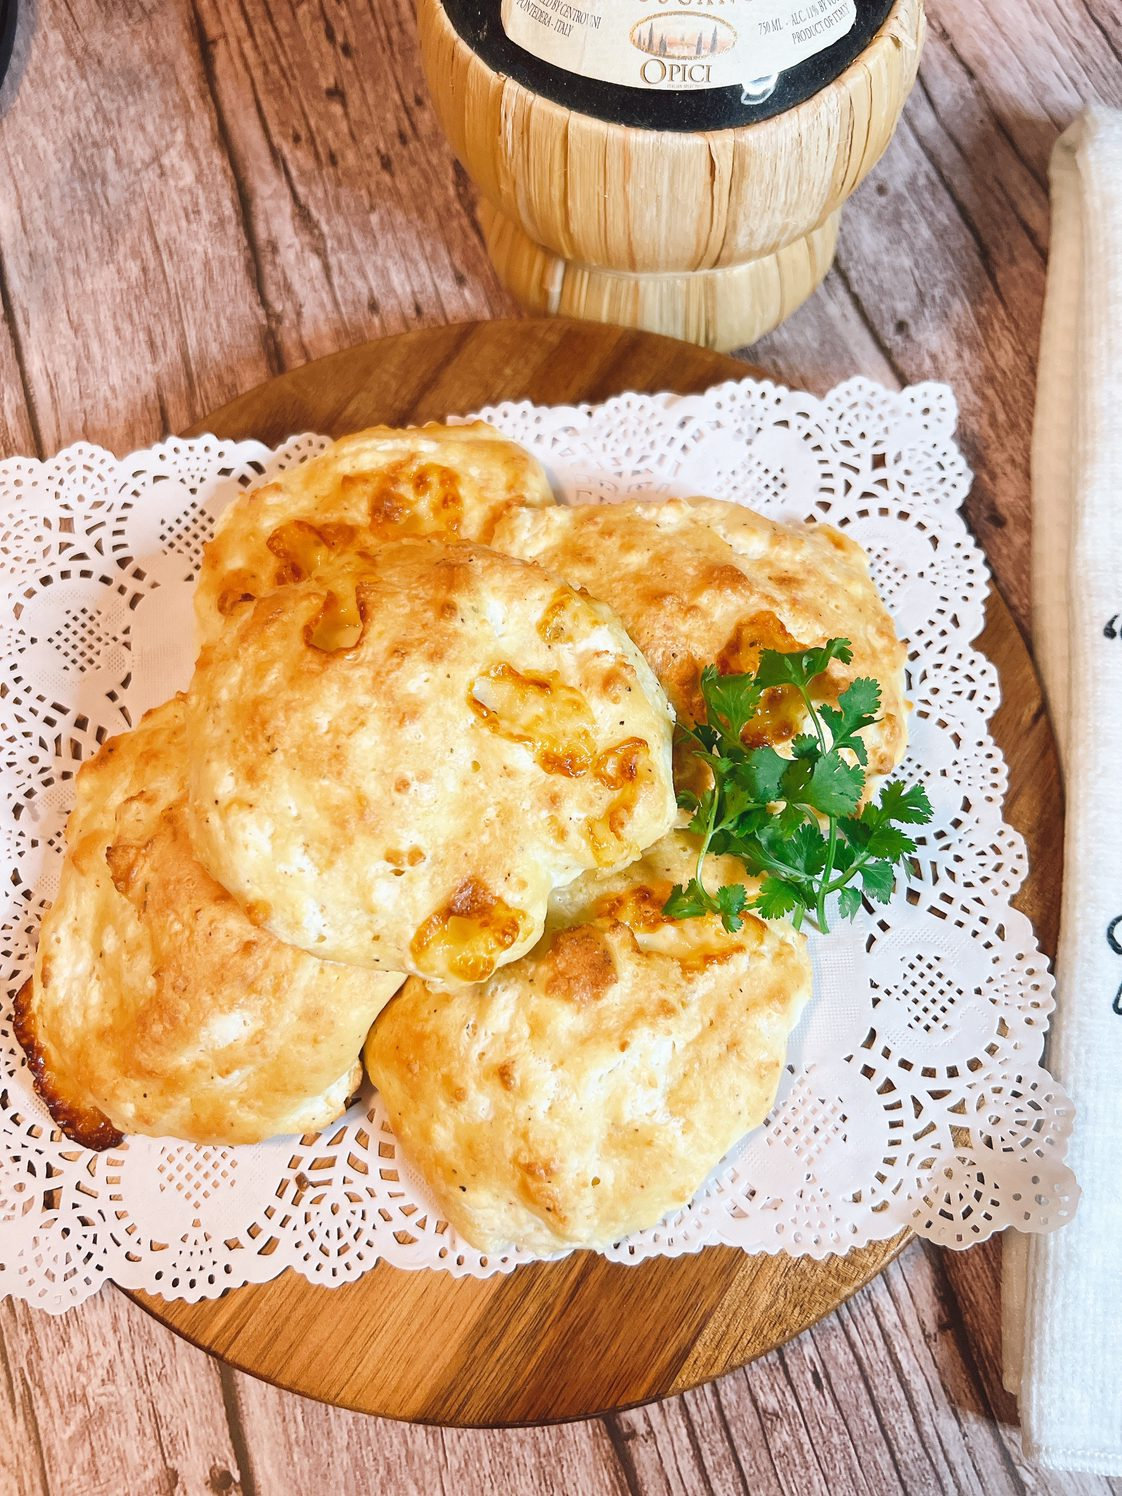
Ricotta Puffs

Ricotta Puffs

Ricotta Puffs


4 eggs

6 T. grated pecorino

2 cups flour

2 tsp. baking powder

1 lb. solid ricotta (very well drained)

4 oz. small diced smoked mozzarella or provolone

6 T. water, if needed

Salt, pepper and garlic powder to taste


Preheat oven to 375F. Line two cookie sheets with parchment paper and set aside. Break the eggs into a large bowl. Beat them lightly with a fork. Add grated cheese, salt, pepper and garlic powder to taste. Blend with fork. Add the flour, a little at a time, and continue to blend with fork. Mix will be dry. Add water, a couple T. at a time, mixing to achieve a smooth batter (similar to cake batter). Add baking powder and blend until incorporated. Cut ricotta into big chunks. Add the ricotta chunks to the batter and carefully stir them into the batter trying to avoid breaking them too much. Using a serving spoon, place mounds of batter (about 2” in diameter) onto prepared baking sheets. Leave enough room between them because they will expand. Bake one sheet at a time for about 20-25 minutes or until golden. Makes 20 to 25 ricotta puffs.


Servings: 10
Serving Size: 2 puffs

Calories: 245
Fat: 11 g
Fiber: 1 g
Protein: 14 g

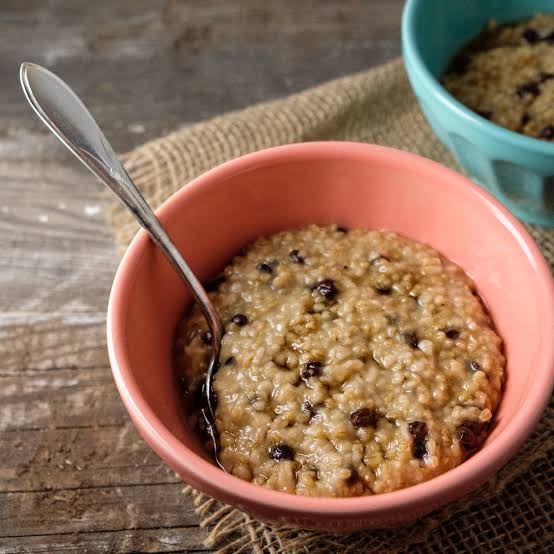
Steel-Cut Oats with Maple Syrup and Currants
Steel-Cut Oats with Maple Syrup and Currants

Steel-Cut Oats with Maple Syrup and CurrantsSteel-Cut Oats with Maple Syrup and Currants


1 T. unsalted butter, plus more for serving

1 C. steel-cut oats

1/4 C. dried currants

1 T. maple syrup, plus more for serving

1/4 tsp. kosher salt

Flaky sea salt, for serving (optional)


Using the sauté function, melt the butter in the pressure cooker. Then stir in the oats, currants, syrup, and salt; stir until the oats are toasted and fragrant, about 3 minutes. Stir in 3 1/4 C. water, cover, and cook on high pressure for 10 minutes. Let the pressure release naturally for 10 minutes; then release the remaining pressure manually. Serve with additional maple syrup, butter, and a sprinkling of flaky sea salt if desired.


Servings: 4
Serving Size: 1 C. cooked

Calories: 214
Fat: 5 g
Fiber: 5 g
Protein: 5 g

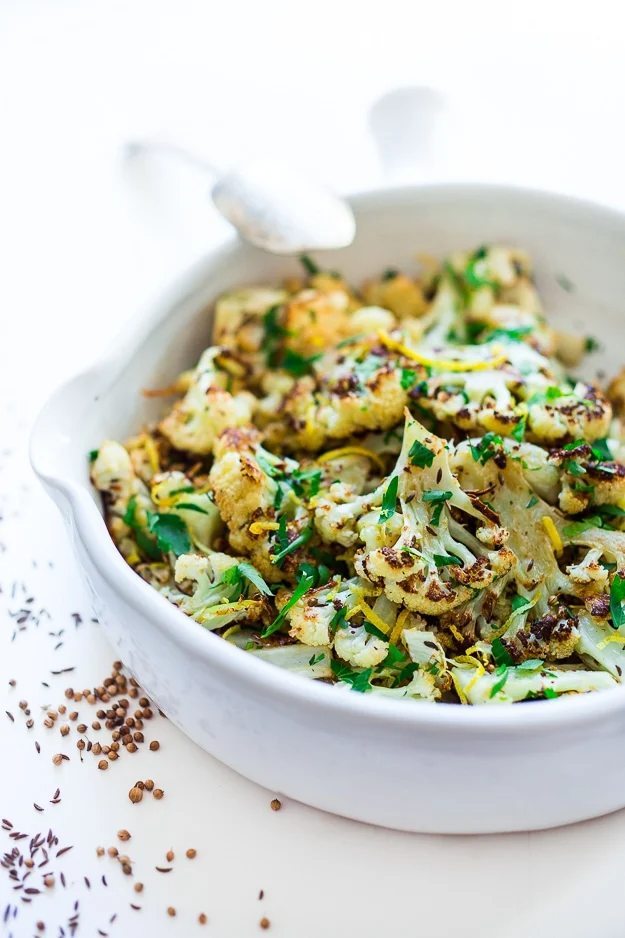
Roasted Cauliflower with Garlic, Lemon and Parsley
Roasted Cauliflower with Garlic, Lemon and Parsley

Roasted Cauliflower with Garlic, Lemon and Parsley


1 large head cauliflower, cut into small florets

3 T. olive oil, or enough to coat well.

6-8 cloves garlic, rough chopped

1 T. coriander seeds, whole if possible (or use ground)

1 tsp. caraway seeds (or sub more cumin seeds)

1 tsp. cumin seeds, (or ground cumin)

3/4 tsp. salt

1/2 tsp. pepper

1/4-1/2 tsp. chili flakes

zest of one lemon

1/2 cup chopped flat-leaf parsley


Preheat oven to 425F. Trim leaves off the cauliflower and cut it into small 1 -inch florets. Place in a bowl and toss with the olive oil. Add the garlic, coriander seeds, cumin seeds, caraway seeds, salt, pepper, chili flakes, lemon zest. Toss to coat well. Place on a parchment-lined baking sheet and roast in the middle rack of the oven for 20-25 minutes, tossing halfway through, until fork tender and lightly edges are lightly crispy. Note: Depending on the size that you cut them this may need more or less time. Place in a serving dish making sure to get all the seeds from the tray- and toss with the fresh chopped Italian parsley right before serving. Taste for salt, add more if needed. TIP: If your cauliflower is cut too big, your garlic may burn, so cut it into small florets (or for larger florets, cook at 400F for 30 minutes)


Servings: 4
Serving Size: 1/4 of recipe

Calories: 160
Fat: 11 g
Fiber: 5 g
Protein: 5 g

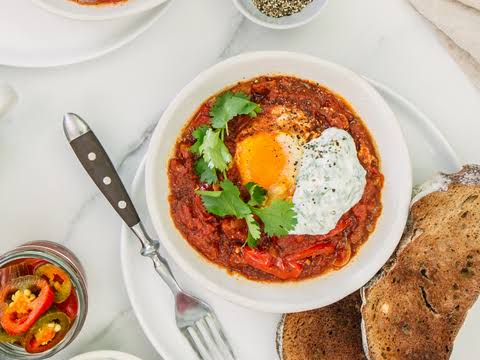
Shakshuka with Herbed Yogurt Sauce

Shakshuka with Herbed Yogurt Sauce

Shakshuka with Herbed Yogurt SauceShakshuka with Herbed Yogurt Sauce


3 T. extra-virgin olive oil

1 large onion, halved and thinly sliced

1 large red bell pepper, seeded and thinly sliced

4 garlic cloves: 3 thinly sliced, 1 grated on a Microplane or minced

1 tsp. ground cumin

1 tsp. sweet paprika

1/8 tsp. cayenne pepper, or to taste

1 28-oz. can whole plum tomatoes with their juices, coarsely chopped

3/4 tsp. salt, plus more as needed

1/4 tsp. freshly ground black pepper, plus more as needed

4 extra-large eggs

1/2 C. plain whole-milk yogurt

1/2 C. finely chopped fresh herbs, such as parsley, cilantro, dill, or a mixture

Hot sauce, for serving (optional)


Using the sauté function, heat the oil in the pressure cooker. Stir in the onion and bell pepper, and cook until they are starting to soften, about 5 minutes. Stir in the sliced garlic, cumin, paprika, and cayenne, and cook for 1 minute. Pour in the tomatoes, and season with the 1/4 tsp. salt and tsp. pepper. Cover and cook on high pressure for 5 minutes. Manually release the pressure. Use the back of a spoon to make 4 indents in the tomato sauce, and then gently crack the eggs into the indents; season to taste with salt and pepper. Cover and cook on low pressure for 1 minute. Meanwhile, make the yogurt sauce: In a small bowl, combine the yogurt, grated garlic, and salt to taste. Stir in the chopped herbs. Release the pressure manually. If you prefer your eggs with a firmer yolk, put the cover back on the pot and let it sit for 2 to 5 minutes to cook in the residual heat. Spoon the eggs and sauce into bowls for serving. Top with the herb yogurt, and a dash of hot sauce if desired.


Servings: 4
Serving Size: 1 egg with 1/4 of sauce

Calories: 288
Fat: 17 g
Fiber: 6 g
Protein: 11 g

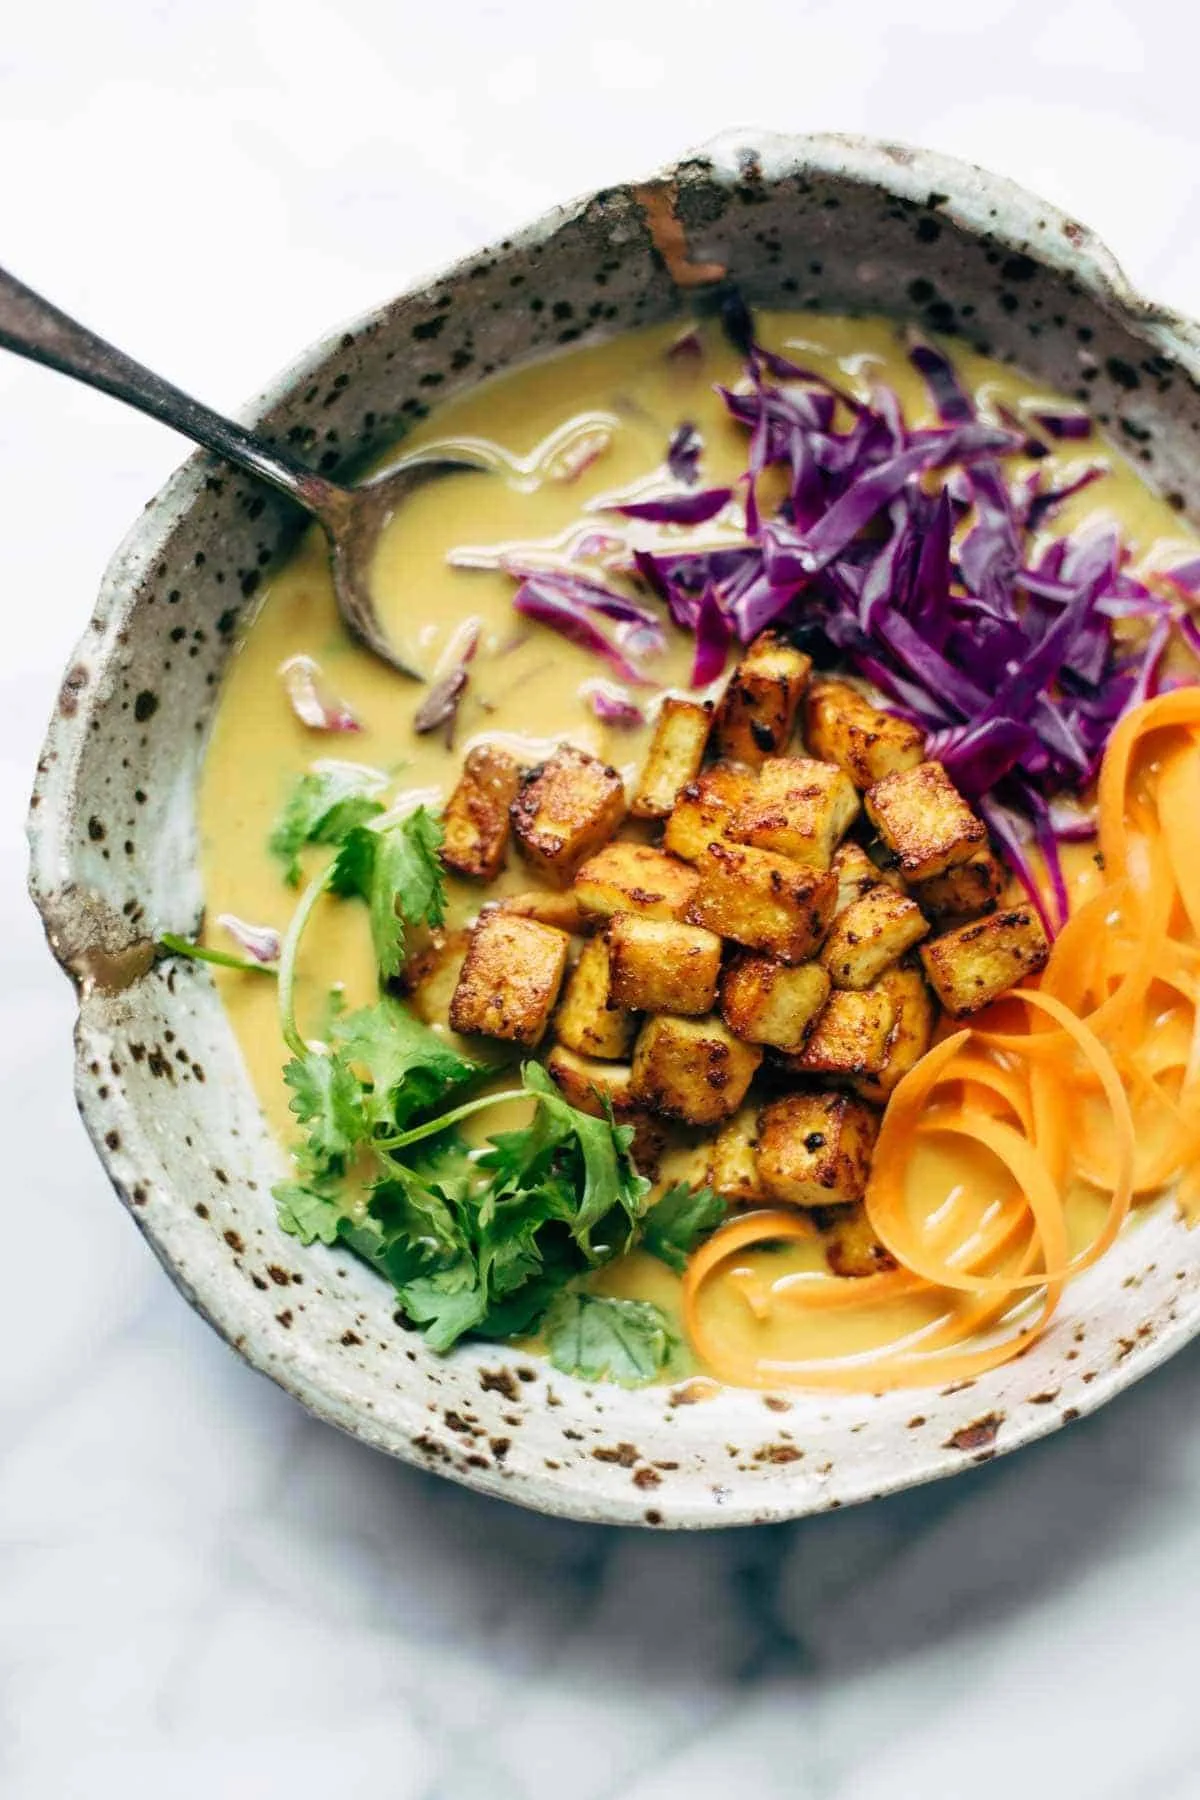
Anything-You-Have Coconut Curry Soup

Anything-You-Have Coconut Curry Soup

Anything-You-Have Coconut Curry Soup


1 T. oil

1 medium onion, chopped

3 cloves garlic, smashed

1 small knob of ginger, peeled and grated

2 T. red curry paste

1 T. turmeric

1 tsp. salt

2 T. sugar

12 baby yukon potatoes

2 14–ounce cans coconut milk

3 cups vegetable broth

24 ounces extra-firm tofu (pressed to remove liquid)

anything you have for fresh veggie toppings


Start smushing the tofu in that nifty TOFU PRESS. It’s amazing. (Or rig up some kind of system to press the water out of the tofu while you prepare the soup.) Heat the oil in a large pot over medium heat. Add the onion, garlic, and ginger, and stir fry for a few minutes until fragrant. Don’t let the garlic burn or brown. Add the curry paste, turmeric, salt, and sugar. Stir fry for another few minutes. Add the potatoes, coconut milk, and broth. Simmer until the potatoes are soft. Allow to cool slightly (I can never wait very long…) then transfer to a blender and puree until smooth and silky. The soup should be rich and thick so that it coats the back of a spoon. Add in more water or broth (I think I ended up adding about 2-3 cups) to thin out the soup as needed. Remove the tofu from the press and cut into small pieces. In the same pot, heat a little more oil and add the tofu, stir frying until light golden brown. Pour in a small amount of the pureed soup – it will sizzle and pop, and it will also give the tofu the most wonderful color and caramelized exterior. Remove from heat with the tofu is deep golden brown and crispy. Top each serving of soup with fresh veggie toppings and crispy caramelized tofu and enjoy your luscious salad-meets-soup combo.


Servings: 8
Serving Size: about 1 1/4 C.

Calories: 380
Fat: 29 g
Fiber: 3 g
Protein: 12 g

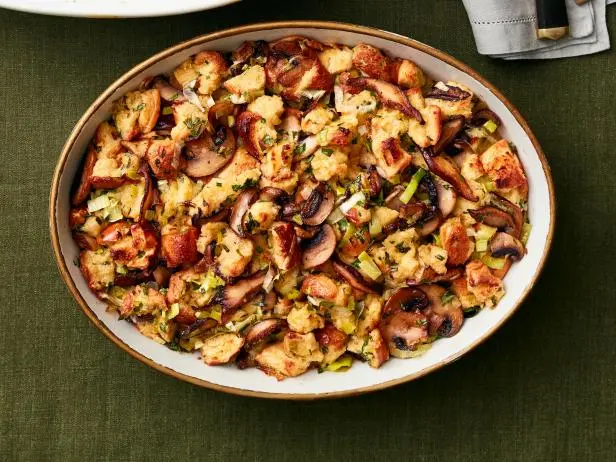
Brioche Mushroom Stuffing

Brioche Mushroom Stuffing

Brioche Mushroom Stuffing


1 loaf (1 pound) day-old brioche, cut into 1-inch cubes (8 to 10 C.)

12 ounces mixed exotic mushrooms

6 T. (3/4 stick) unsalted butter

1 bunch scallions, trimmed, white and light green parts thinly sliced

1 rib celery, trimmed and chopped (optional)

8 fresh sage leaves, thinly slivered

1 C. coarsely chopped pecans or peeled roasted chestnuts

1/4 C. Cognac or bourbon (optional)

5 large eggs (preferably organic)

3 C. heavy (whipping) cream

1/4 tsp. freshly grated nutmeg, or to taste

1/2 tsp. coarse salt (sea or kosher), or to taste

1/2 tsp. freshly ground black pepper, or to taste


Set up your grill for indirect grilling and preheat to medium (350°F).  Arrange the brioche chunks in a single layer in a large aluminum foil pan. Place the pan on the grill grate away from the heat and cover the grill. For even more smoke flavor, add wood chunks or handfuls of wood chips to the coals. Indirect-grill the brioche, stirring occasionally so the cubes brown evenly, until toasted and golden brown, about 15 minutes. Set the pan of brioche aside to cool. Meanwhile, trim the ends off the mushroom stems; remove and discard the stems if using shiitakes. Wipe the mushrooms clean with a damp paper towel. Cut large mushrooms into 1/4-inch slices; leave small ones whole. Melt 3 T. of the butter in a 12-inch cast-iron skillet on the stove or grill side burner over medium-high heat. Add the scallions, celery, if using, and sage and cook, stirring often, until golden brown, 4 minutes. Add the mushrooms and pecans. Increase the heat to high and cook, stirring often, until the mushrooms brown and all their liquid evaporates, 5 minutes. Add the Cognac, if using, and boil until only 2 T. of liquid remain, 2 minutes. Remove from the heat and let cool slightly. Crack the eggs into a large bowl and whisk until smooth. Whisk in the cream. Stir in the mushroom mixture, then the brioche cubes. Grate in the nutmeg and stir in salt and pepper; the mixture should be highly seasoned. Spoon it back into the skillet and top with the remaining 3 T. butter, cut into thin slices. (The pudding can be prepared several hours ahead to this stage; cover with plastic wrap or aluminum foil and refrigerate, if you have room. But the texture will be better if you cook it right away.) If you shut down the grill after toasting the brioche, re it up again for indirect grilling and preheat to 350°F. Add the wood chunks or chips to the coals following the manufacturer’s instructions. Cover the grill and smoke-roast the pudding until puffed and browned on top and cooked through (a skewer inserted into the center should come out clean), about 45 minutes. Serve it right from the skillet. Even more reason to give thanks for Thanksgiving.


Servings: 12
Serving Size: 1/12 of skillet

Calories: 491
Fat: 40 g
Fiber: 2 g
Protein: 10 g

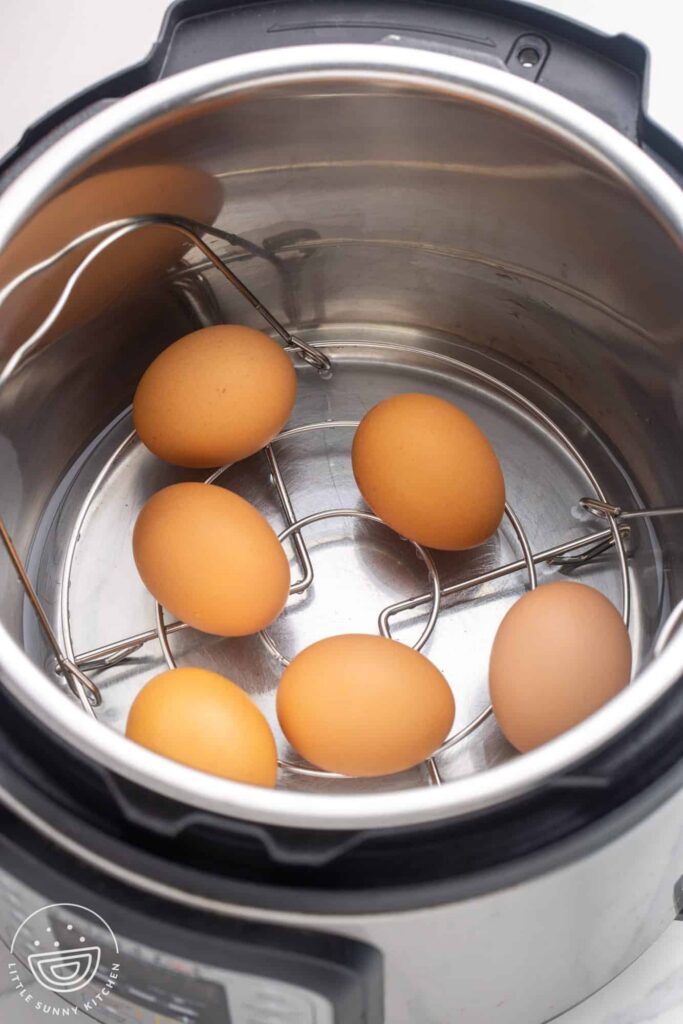
Hard-Boiled Eggs

Hard-Boiled Eggs

Hard-Boiled EggsHard-Boiled Eggs


Large eggs, as many as you like

1. Fill a bowl with ice water and place it next to your pressure cooker.


2. Fill the pressure cooker with 1 C. of water and insert the steamer rack. Place the eggs on the rack, forming a pyramid if you’re cooking a lot of them.

3. Cook on low pressure for 5 to 8 minutes. Five minutes gives you very runny-centered yolks (think soft-boiled). Eight minutes gives you light-colored, firmly set hard-cooked eggs. Six to seven minutes gives you dark, moist yolks that can be slightly soft (but not runny).

4. Release the pressure manually; then use tongs to transfer the eggs to the bowl of ice water. Let them sit for a few minutes before peeling. The eggs will still be a little warm if you peel them after 2 minutes. For chilled eggs, let them sit for 5 to 10 minutes and then peel them.


Servings: 1
Serving Size: 1 large egg

Calories: 72
Fat: 5 g
Fiber: 0 g
Protein: 6 g

Peppermint Baubles

Peppermint Baubles

Peppermint Baubles


1 cup unsalted butter, at room temperature
1 1/4 cups granulated sugar
2 large eggs
1 1/2 tsp. vanilla extract
1/2 tsp. peppermint extract
3 cups all-purpose flour, plus more for rolling
1/2 tsp. table salt
Red and green food coloring


In the bowl of a standing mixer, beat butter and sugar on high speed until pale and fluffy, about 4 minutes. Beat the eggs into the butter mixture one at a time, beating well after each addition. Add vanilla and peppermint extracts. In another bowl, whisk together the flour and salt. Add this to the butter mixture and beat on low just until combined. Turn the dough out onto a lightly floured counter and divide it up into three portions: two large and one quite small. (The small portion should amount to about 1/6 of the total amount of dough.) Gather the two larger portions into balls, press them into disks, and then wrap in plastic and refrigerate until firm, at least 1 hour and up to 24 hours. Now take the smaller portion of dough. Divide it in half and mix one half with enough red food coloring to achieve your desired color. Mix the second half with green food coloring. Wrap these doughs in plastic and chill as above. Take your red and green doughs and divide and roll them into small balls, each about 1/4 to 1/2 inch in diameter. Set half of them on a plate and return them to the refrigerator. Keep the other balls on hand. Preheat your oven to 350° and set your racks to the upper and lower thirds of the oven. Lay a sheet of lightly floured waxed paper on your counter and roll out one of the large disks of dough on the paper to a 1/8-inch thickness. Arrange red and green balls over the surface of the dough in a pleasing pattern, then use your thumb to press them into the dough to form circles. If the dough begins to soften during this time, transfer it (on the waxed paper) to the freezer for 10 minutes. Using a 2-inch round cookie or biscuit cutter, cut the decorated dough into circles, working as tightly as possible to squeeze the maximum number of balls out of the dough (once decorated, it can’t be re-rolled). Discard scraps (or you can always gently knead them to make tie-dye-style cookies).  Bake the cookies, turning the sheets halfway through, until edges are lightly golden, 11 to 13 minutes. Let the cookies sit for 5 minutes, then transfer to racks to cool completely. Repeat the entire process with the second batches of dough. Serve at room temperature.


Servings: 45
Serving Size: 2 cookies

Calories: 69
Fat: 3 g
Fiber: 0 g
Protein: 1 g

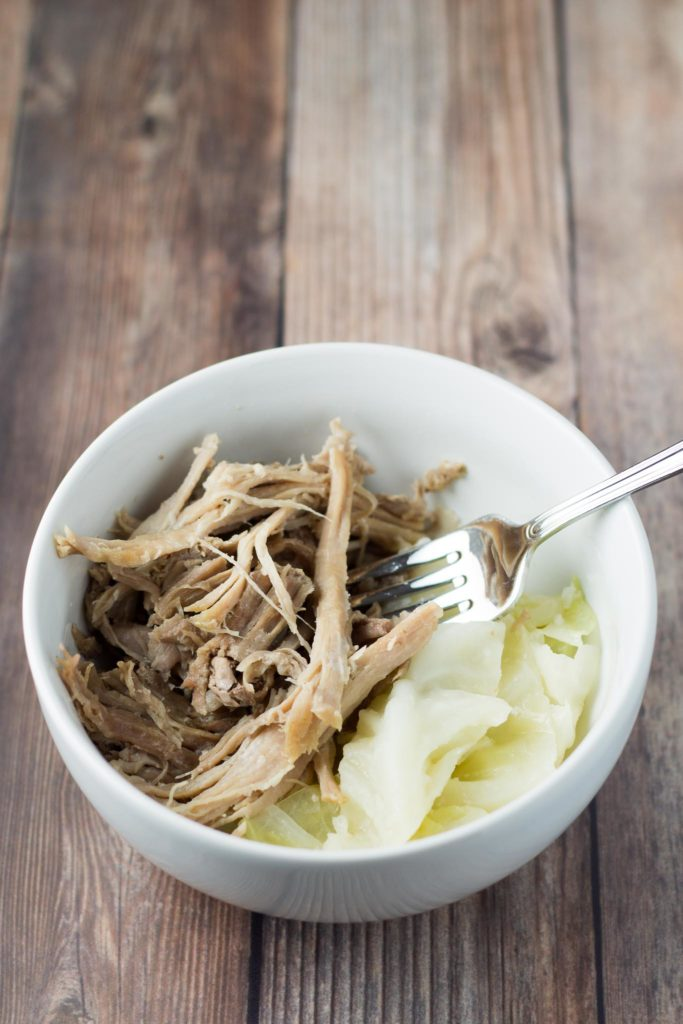
Instant Pot Shredded Pork & Cabbage

Instant Pot Shredded Pork & Cabbage

Instant Pot Shredded Pork & CabbageInstant Pot Shredded Pork & Cabbage


2 lb. pork butt (bone removed and cut into large chunks)

1 T. smoked sea salt

1 tsp. garlic powder 1

1 C. Water

1 small cabbage sliced


Remove the bone from pork butt/shoulder and cut pork into large chunks. Sprinkle smoked salt and garlic powder over the pork and rub in to thoroughly coat. Place pork into the Instant Pot liner and add water. Secure the lid, select Manual and adjust time to 90 minutes. When Instant Pot beeps, push the cancel/keep warm button and allow pressure to release naturally. When the pressure is released move the pork to a bowl. Cover to keep warm. Add the sliced cabbage to the juices in the Instant Pot, stir to coat. Select Manual and adjust time to 3 minutes. When the pot beeps, release the pressure manually. Now that the pork has cooled a little, remove and pieces of fat, leaving only the meat. Shred the meat. Add the cabbage to the pork and stir to combine.


Servings: 6
Serving Size: 1/6 of recipe

Calories: 347
Fat: 23 g
Fiber: 3 g
Protein: 27 g

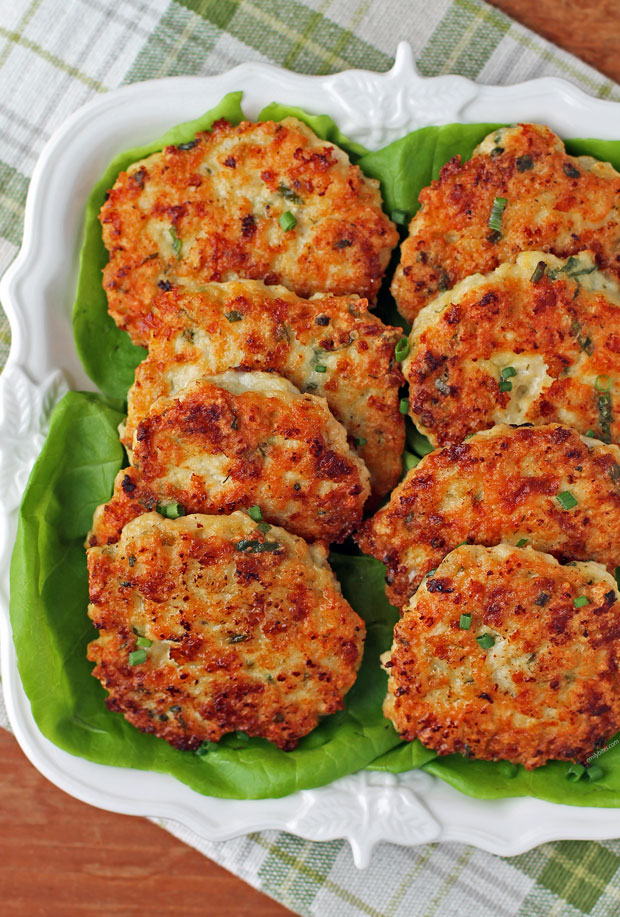
Herb and Cheese Chicken Fritters

Herb and Cheese Chicken Fritters

Herb and Cheese Chicken Fritters


1 ½ lbs raw boneless skinless chicken breasts

2 large eggs

1 T. light mayonnaise

1 T. chopped fresh parsley

1 T. chopped fresh chives

1 T. chopped fresh basil

½ tsp. salt

½ tsp. garlic powder

¼ tsp. black pepper

¼ tsp. dried dill weed

⅓ cup all-purpose flour

4 oz shredded 2% milk Mozzarella cheese, (about 1 cup)

2 T. olive oil


Place the chicken breasts into the bowl of your food processor and cover with the lid. Pulse a few times or turn on for a few seconds until the chicken breasts are finely diced. Alternatively, you can finely dice the breasts by hand if you do not have a food processor. Transfer the finely diced chicken to a large mixing bowl and add the eggs, light mayonnaise, parsley, chives, basil, salt, garlic powder, pepper, dill weed, flour, and shredded Mozzarella cheese. Stir until well combined. Use a ¼ cup measuring cup to measure out 15 equal piles of the chicken mixture. Add a T. of the olive oil to a large sauté pan, skillet, or griddle pan and bring over medium heat. Once the oil is hot, add half of the chicken piles and push down on the top of each one with the back of a spoon or spatula to flatten it into a patty. Make sure the fritters aren’t crowding the pan and aren’t touching. Cook the fritters for 3-4 minutes until the bottoms are golden, and then flip and cook for another 3-4 minutes until cooked through. Remove these fritters to a serving plate and add the remaining T. of oil to the skillet. Cook the remaining fritters the same way (the second batch may cook slightly quicker) and transfer them to the serving plate when finished. Serve warm.


Servings: 6
Serving Size: 1/6 of fritters

Calories: 279
Fat: 13 g
Fiber: 0 g
Protein: 33 g

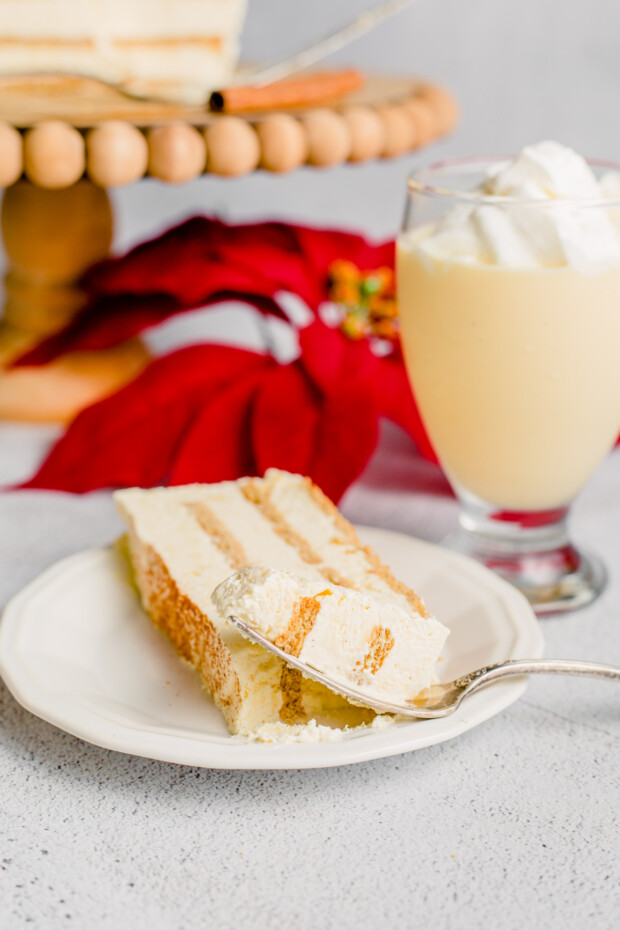
Eggnog Icebox Cake

Eggnog Icebox Cake

Eggnog Icebox CakeEggnog Icebox Cake


EGGNOG MOUSSE

3/4 C. eggnog

1 T. cornstarch

0.25 oz. bag powdered gelatin

8 oz. cream cheese, room temperature

1/3 C. sugar

3/4 tsp. nutmeg

1 3/4 C. heavy whipping cream

3/4 C. powdered sugar

WHIPPED CREAM

1 1/4 C. heavy whipping cream

1/2 C. powdered sugar

6 T. eggnog

6 T. milk

2 1/2 packages (5.3 oz.) of Walkers Shortbread


Add eggnog and cornstarch to a sauce pan and heat on medium-high until eggnog is hot and just starting to simmer around the edges. Do not boil. Sprinkle gelatin over eggnog and turn heat to low. Whisk gelatin into eggnog until smooth, then remove from heat and set aside to cool. (I put it into another bowl and then in the fridge to speed cooling – about 4-5 minutes) In another bowl, beat cream cheese, sugar and nutmeg until smooth. Add eggnog mixture to cream cheese mixture and mix until well combined. In another bowl, whip heavy whipping cream for mousse until it starts to thicken. Add powdered sugar and whip until stiff peaks form. Carefully fold whipped cream into eggnog mixture. Prepare a 9-inch springform pan by lining the sides with parchment paper that sticks about an inch above the sides of the pan. In a small bowl, combine additional eggnog and milk. Make a single layer of shortbread in the bottom of the pan. As you add the shortbread to the pan, dip each cookie into the eggnog and milk mixture and hold it there for 3-4 seconds. Top the shortbread with half of the eggnog mixture. Repeat steps 10 and 11, then make whipped cream for the top. Whip heavy whipping cream until it starts to thicken. Add powdered sugar and whip until stiff peaks form. Set about 1/3 C. of whipped cream aside for piping on the edges of the cake, then spread the rest into an even layer on top of the cake. Place cake in the fridge for 5-6 hours to firm, or set in the freezer. I prefer to freeze it first to make it easier to remove from the pan, then leave it in the fridge. Once cake has been removed from the pan, pipe remaining whipped cream around the edges. Store cake in refrigerator until ready to serve.


Servings: 12
Serving Size: 1 slice (1/12 of cake)

Calories: 536
Fat: 39 g
Fiber: 1 g
Protein: 6 g

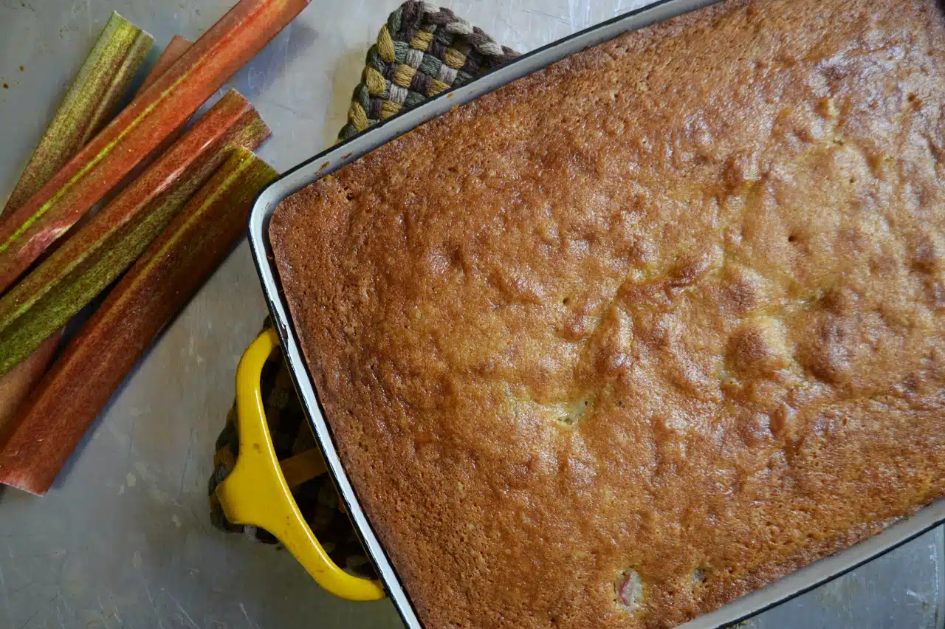
Picnic Rhubarb Cake

Picnic Rhubarb Cake

Picnic Rhubarb Cake


2 cups thinly sliced rhubarb
1 1/3 cups sugar, divided
1/2 cup unsalted butter
1 egg
1/2 tsp. salt
1 tsp. baking soda
1/2 tsp. grated nutmeg
1 tsp. vanilla
1 cup buttermilk
2 cups all-purpose flour


Preheat oven to 350 and grease and flour (or line with parchment) a 9-inch baking pan. In a medium bowl, toss rhubarb with 1/3 cup sugar and set aside. In a large bowl, blend butter, egg, and remaining sugar until light and fluffy, then beat in salt, baking soda, nutmeg, and vanilla. Using half of each at a time, alternately add the flour and buttermilk. Quickly fold in the rhubarb and pour the batter into the prepared pan. Bake until cake is well browned and edges have shrunk from the sides of the pan, about 40-45 minutes.


Servings: 12
Serving Size: 1 piece (1/12 of cake)

Calories: 249
Fat: 9 g
Fiber: 1 g
Protein: 4 g

Portuguese Milk Tarts (Queijadas de Leite)
Portuguese Milk Tarts (Queijadas de Leite)

Portuguese Milk Tarts (Queijadas de Leite)Portuguese Milk Tarts (Queijadas de Leite)


2 C. Sugar

1 C. Flour

4 Eggs, beaten

½ C. Butter, melted

3 ¾ C. Whole milk

1 T. Cinnamon

2 T. Sugar


Preheat oven to 400 degrees F. In a large bowl combine 2 C. of sugar and flour. Whisk in beaten eggs, then add melted butter, continuing to whisk, and then milk. Pour mixture into greased muffin tin, filling them to a little more than ¾ full. Bake on center rack for 30 mins or until sides and top are golden. Remove the tarts from muffin tin while hot by running a sharp knife around the sides and lifting them out. Mix sugar and cinnamon together and sprinkle over the tarts as a topping. Serve the same day or store in cool place until ready to serve. Can be made 1 day ahead and served at room temperature.


Servings: 18
Serving Size: 1 tart

Calories: 210
Fat: 8 g
Fiber: 0 g
Protein: 4 g

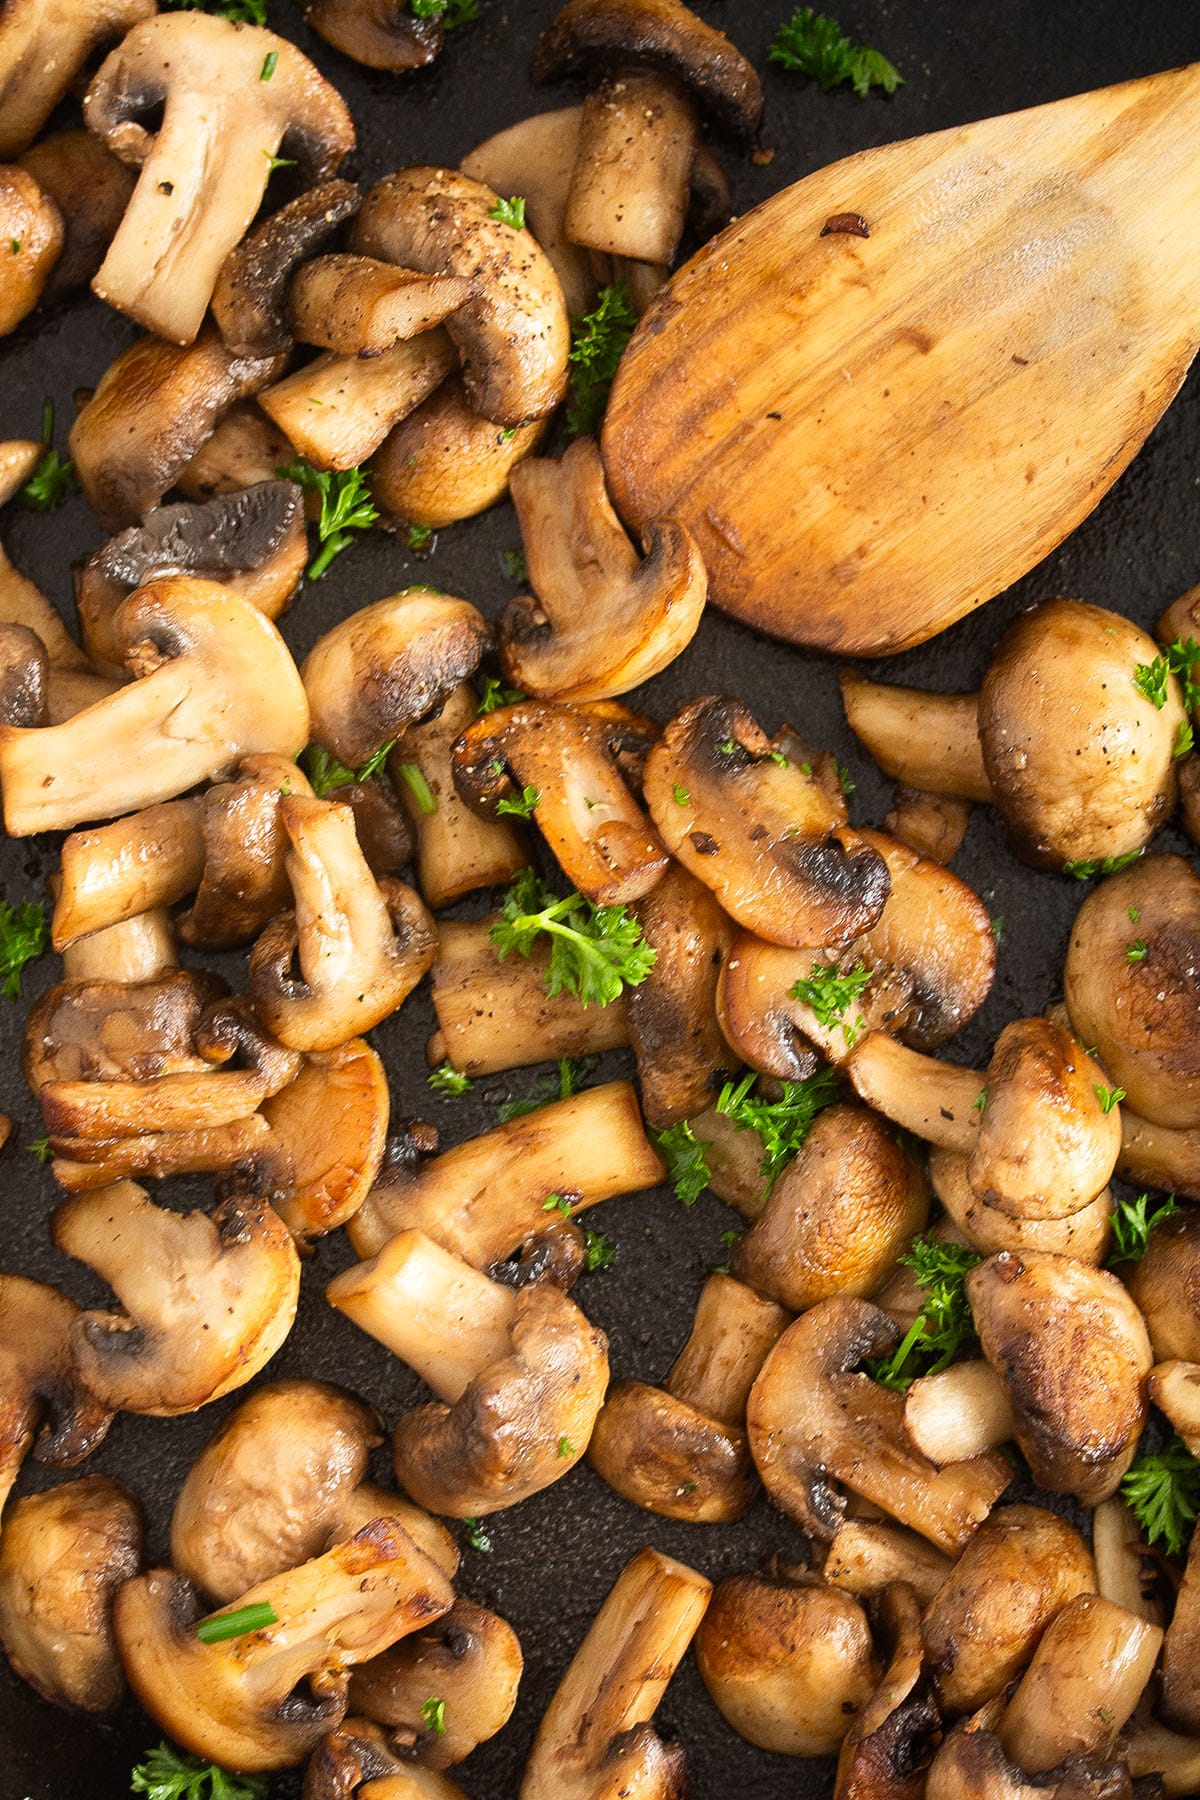
Best Sauteed Mushrooms for Steak

Best Sauteed Mushrooms for Steak

Best Sauteed Mushrooms for Steak


1 lb mushrooms

1 T. butter

1 T. olive oil

2 garlic cloves

1-2 T. chopped parsley

fine sea salt and pepper


Prepare mushrooms: Clean the mushrooms by wiping them with kitchen paper. Slice into medium-thick slices. If very small, halve them. Heat the butter and the olive oil in a large skillet or nonstick pan. Sauté mushrooms: Add the minced garlic, stir continuously for about 20 seconds, then add the mushrooms. Stir well. Cook on medium heat for 7-8 minutes until the mushrooms are golden. Add the chopped parsley and salt and pepper to taste. Serve immediately.


Servings: 4
Serving Size: about 1/2 C.

Calories: 83
Fat: 7 g
Fiber: 1 g
Protein: 4 g

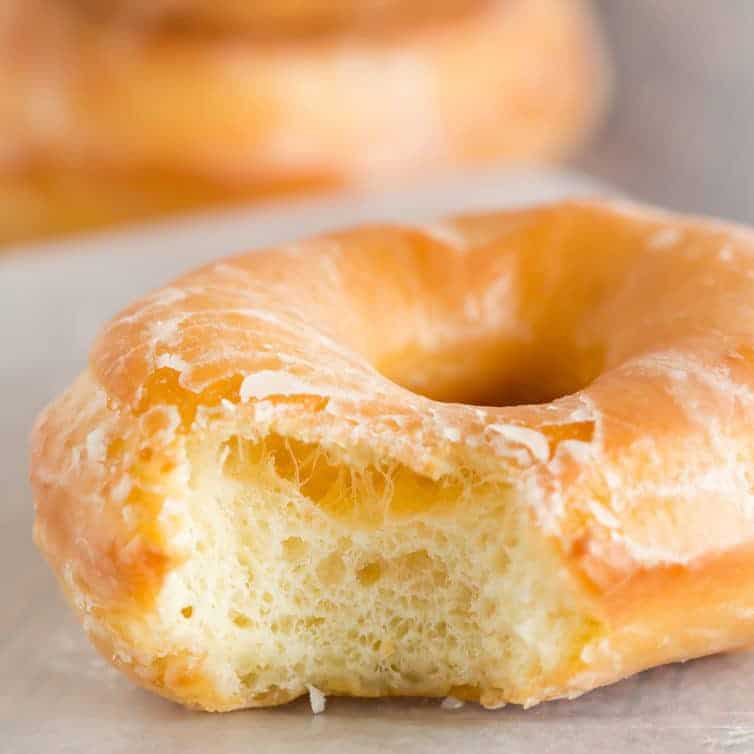
Homemade Krispy Kremes

Homemade Krispy Kremes

Homemade Krispy KremesHomemade Krispy Kremes


3 T. milk

3 T. boiling water

1 tsp. dry active yeast

8 oz. all-purpose flour (a little under 2 C., I recommend you measure and weigh)

1 1/2 oz. sugar (about 3 T.)

1 egg

1 oz. butter, cold to room temperature

1 dash salt

oil, for frying

for Glaze

1/3 C. butter

2 C. confectioners’ sugar

1 1/2 tsp. vanilla

4 T. hot water (or as needed)


In a large measuring jug, combine the milk and boiling water. Add a tsp. of the sugar and the yeast. Stir it gently, then leave it in a warm place for the yeast to activate (aka foam). In a large mixing bowl, combine the flour, the rest of the sugar, and the salt. Cut in the butter using your fingers or a pastry blender, until it resembles crumbs. Add the egg (give it a quick beat) and yeast mixture to the flour mix, and mix into a smooth dough. This usually takes about 5 minutes of mixing. Turn the dough out onto a lightly-floured counter and knead for about 5 to 10 minutes —it should feel springy and little bubbles should form under the surface. Place it back in the bowl, cover with a cloth or plastic wrap, and let rise for about an hour until double in size. Once risen, place the dough onto the counter and cut it into 4 pieces. One piece at a time, stretch it into a long rope about an inch to an inch and a half wide. Cut strips about an inch long, ball em up with your hands, and place them on a baking tray or wire rack to wait. Cover the doughnuts holes with a cloth to rise while you heat the oil to 375°F. Place the doughnuts into the oil and fry until golden brown on each side, about 2 minutes. Be sure to fry only a few at a time so they don’t overcrowd and stick together. Drain on a paper towel or wire rack over a cloth, before glazing them. Be sure to glaze them warm, or else they won’t get that delicious coverage!