Browsed by
Tag: Meal Prep

Potato Cheddar Chive Bakes

Potato Cheddar Chive Bakes

Potato Cheddar Chive Bakes


1 lb red potatoes – diced into 1/2″ pieces

1/2 a yellow onion – large dice

1 T. olive oil

1/2 tsp. kosher salt

1/8 tsp. smoked paprika

4 large eggs

1 cup cottage cheese

1 tsp. onion powder

1 cup shredded sharp cheddar cheese

2 T. finely diced chives


Preheat oven to 400F and line a baking sheet with parchment paper. Place the diced potatoes and onions on the baking sheet. Toss with oil, salt and smoked paprika. Bake at 400F for 15 minutes. While the potatoes bake, spray a 12 slot muffin pan with oil. Blend the eggs, cottage cheese, onion powder and a pinch of salt in a high speed blender until completely smooth.  After the potatoes roast, lower the oven temperature to 350F. Distribute the roasted potatoes evenly into each slot of the muffin pan and pour the egg mixture on top. Stir gently to mix the egg mixture and potatoes. Sprinkle the cheese and chives on top of the eggs and potatoes. Bake at 350F for 18-20 minutes. Switch the oven to broil for just a minute or two to brown the cheese. Allow to cool slightly before serving.

Perfect Pulled Pork

Perfect Pulled Pork

Perfect Pulled Pork


1 (4-7 pound) whole Boston Butt or pork shoulder (bone-in with a layer of fat on the bottom)


1 T. ground cumin

1 T. garlic powder

1 T. onion powder

1 T. chili powder

1 T. cayenne pepper

1 T. salt

1 T. ground pepper

1 T. paprika

1/2 cup brown sugar


1/2 cup salt

1/2 cup brown sugar

2 quarts cold water

2 bay leaves

3 T. dry rub mix


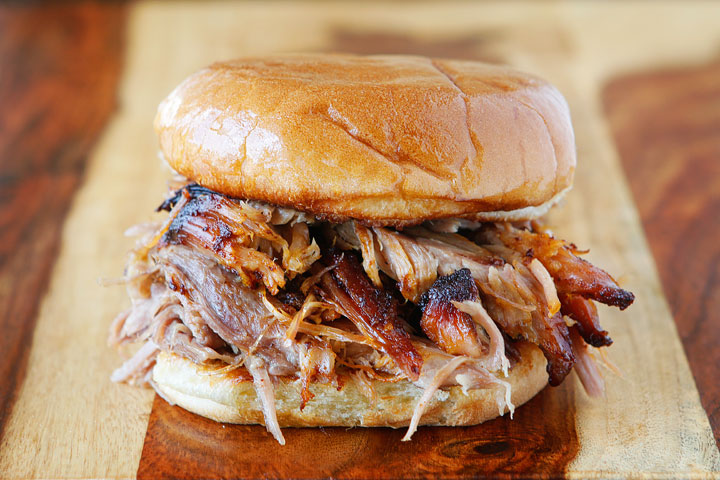
Mix Dry rub ingredients well and store in an air tight container.  For brine:  Add salt to cold water and stir very well until all the salt is completely dissolved. Then add the brown sugar, dry rub, and bay leaves and stir well to combine. Start the pork: Rinse the pork shoulder and place in a large container, pour in the brine solution until the shoulder is completely covered. Cover the container and place in the refrigerator for at least 12 hours. Remove pork shoulder from brine solution, pat dry with paper towels, place in baking pan that is bigger than the shoulder by at least a inch in length and width and at least 3 inches deep. Sprinkle dry rub onto the surface of the shoulder and massage in such that it adheres to the surface. Coat all sides. Make sure the fat layer on the shoulder is facing up before cooking! Place baking pan uncovered in a 225 degree F oven on the middle rack. Insert a probe thermometer into the center or thickest part of the shoulder, but not touching the bone. Monitor the temperature throughout cooking (a digital thermometer with an alarm function is the easiest way to do this). Do not remove from the oven until the center of the shoulder reaches 200 degrees. When the shoulder has reached 200 degrees, shut off the oven and let the roast cool for a couple of hours before removing from the oven. If the bottom of the pan is dry (or crusted with dried spices) then cover the pan with foil to retain internal moisture of the meat during the cooling period. When the temperature drops to 170 degrees or slightly lower, remove from oven. Place on a large, clean work surface such as a cutting board, and remove the large sheet of crusted fat on the top. Pull apart with two forks, it will pull apart very easily. Serve for friends and family!

Meal Prep Spiralized Zucchini Panzanella Salad

Meal Prep Spiralized Zucchini Panzanella Salad

Meal Prep Spiralized Zucchini Panzanella Salad


4 slices whole‑grain bread, torn into 1‑inch pieces

1 teaspoon extra‑virgin olive oil

1 teaspoon garlic powder

½ teaspoon dried parsley

6 small zucchini, spiralized

1 pint cherry tomatoes, quartered

1 cup diced roasted red bell pepper

8 ounces baby portabella mushrooms, sliced

4 scallions, sliced, white and green parts

8 tablespoons Zesty Lemon Vinaigrette

12 ounces fresh mozzarella


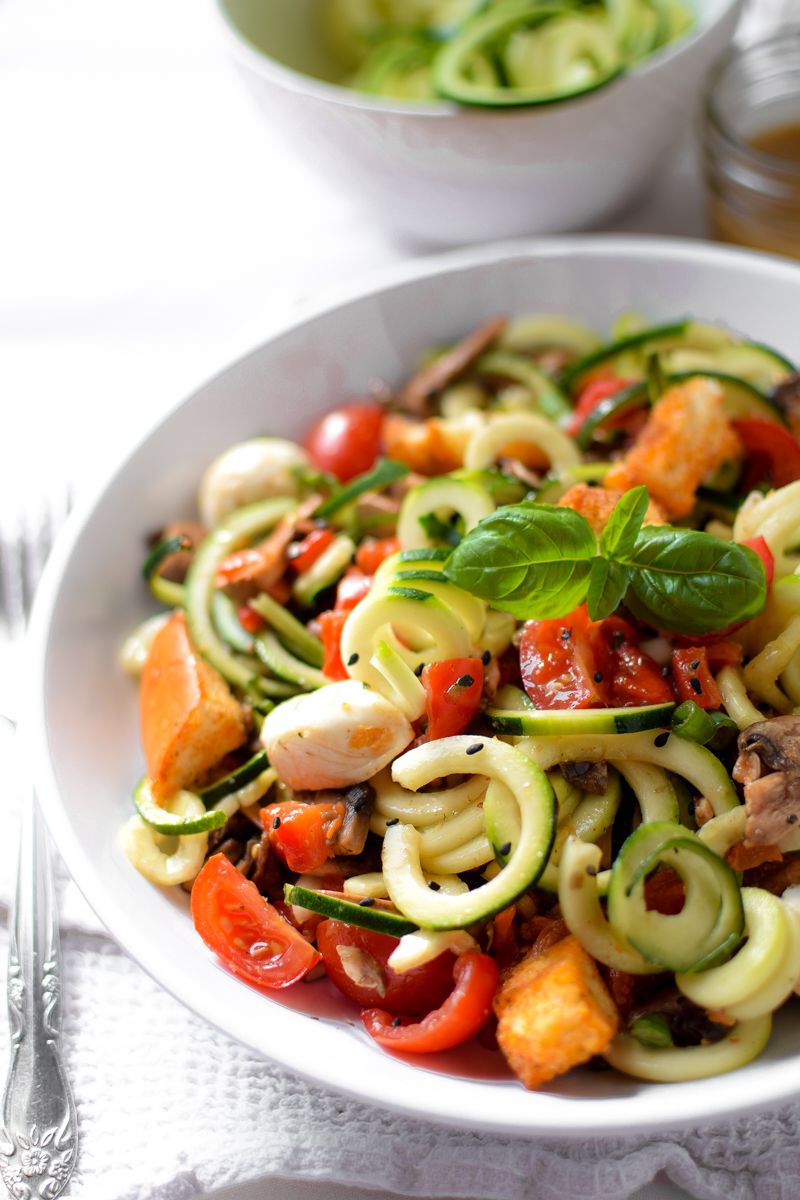
Preheat the oven to 350°F. Line a baking sheet with foil. Arrange the torn bread pieces in a single flat layer on the prepared baking sheet and drizzle with oil, garlic powder, and parsley. Toss gently to coat.  Bake the croutons for 10 minutes, stirring once halfway through, until they are toasted and golden brown. Remove from the oven and set aside to cool. While the croutons bake, in a large bowl, combine the zucchini, tomatoes, roasted red bell pepper, mushrooms, and scallions. Toss well. Portion 2 tablespoons of vinaigrette into each of 2 (1½-ounce) stainless-steel salad dressing containers. Evenly portion the undressed salad into one side of 2 large two-compartment glass meal-prep containers with tight-fitting lids. Evenly portion the fresh mozzarella into the adjacent compartments. Cover and refrigerate. Once cooled, evenly portion the croutons into 2 airtight silicone reusable food bags.


Dressing

1/4 cup extra-virgin olive oil

2-3 tbsp fresh lemon juice (about 1 whole lemon)

1 tsp fresh lemon zest

1 clove garlic, minced

1 tsp Dijon mustard

1/2 tsp honey (or maple syrup)

Pinch of red pepper flakes

Salt and freshly ground black pepper, to taste


Yield: 8 servings

Calories: 288

Fat: 19g

Fiber: 3g

Classic Basil Pesto

Classic Basil Pesto

Classic Basil Pesto


Pesto is super versatile and it freezes very well. It’s great with pasta, but you can also dollop it on cooked chicken or fish or use it as a sandwich condiment or a dip for crusty bread. If you’re tossing the pesto with pasta, don’t forget to add some pasta cooking water to achieve the proper sauce consistency. Pounding the basil helps to bring out its flavorful oils.


6 garlic cloves, unpeeled

½ cup pine nuts

4 cups fresh basil leaves

¼ cup fresh parsley leaves

1 cup extra-virgin olive oil

1 ounce Parmesan cheese, grated fine (½ cup)


Toast garlic in 8-inch skillet over medium heat, shaking skillet occasionally, until softened and spotty brown, about 8 minutes. When garlic is cool enough to handle, remove and discard skins and chop coarsely. Meanwhile, toast pine nuts in now-empty skillet over medium heat, stirring often, until golden and fragrant, 4 to 5 minutes. Place basil and parsley in 1-gallon zipper-lock bag. Pound bag with flat side of meat pounder or with rolling pin until all leaves are bruised. Process garlic, pine nuts, and herbs in food processor until finely chopped, about 1 minute, scraping down sides of bowl as needed. With processor running, slowly add oil until incorporated. Transfer pesto to bowl, stir in Parmesan, and season with salt and pepper to taste. (Pesto can be refrigerated for up to 3 days or frozen for up to 3 months. To prevent browning, press plastic wrap flush to surface or top with thin layer of olive oil. Bring to room temperature before using.)

Make Ahead Vinaigrette

Make Ahead Vinaigrette

Make Ahead Vinaigrette


This versatile dressing will stay emulsified for a week in your refrigerator, and you can use white wine vinegar, balsamic vinegar, apple cider vinegar, or sherry vinegar, as you like. To keep the oil and vinegar from separating, we added mustard and mayonnaise, two natural emulsifiers. A little molasses stabilized the dressing and further prevented separation without lending a strong flavor. Cutting the olive oil with some vegetable oil ensured that our refrigerated dressing was always pourable.


1 tablespoon mayonnaise

1 tablespoon molasses

1 tablespoon Dijon mustard

½ teaspoon table salt

¼ cup vinegar

½ cup extra-virgin olive oil

¼ cup vegetable oil


Combine mayonnaise, molasses, mustard, and salt in 2-cup jar with tight-fitting lid. Stir with fork until mixture is milky in appearance and no lumps of mayonnaise or molasses remain. Add vinegar, seal jar, and shake until smooth, about 10 seconds. 2. Add ¼ cup olive oil, seal jar, and shake vigorously until combined, about 10 seconds. Repeat, adding remaining ¼ cup olive oil and vegetable oil in separate additions, shaking vigorously until combined after adding each and vinaigrette is glossy and lightly thickened, with no surface pools of oil. Season with salt and pepper to taste. (Vinaigrette can be refrigerated for up to 1 week; shake briefly to recombine before using.)

Burrito Bowl

Burrito Bowl

Burrito Bowl


2 C. chopped or shredded chicken – fully cooked, make it yourself, or frozen chicken breast strips or rotisserie chicken work great

1 15-ounce can yellow corn – drained, see note

1 15-ounce can black – or pinto beans, drained

2 C. cooked white rice

1 C. shredded cheese

optional toppings: salsa, avocado, limes, cilantro, sour cream


Divide rice, beans, corn, and chicken between four meal prep containers.. Sprinkle cheese over the top. Add any toppings in sauce containers with lids. To eat, remove any topping containers and heat burrito bowls in the microwave for about 1 minute, stir, and add toppings before serving OR you can eat them straight from the fridge, no heating required. Enjoy all week long!

Croissant Breakfast Sandwich (Freezer Friendly)

Croissant Breakfast Sandwich (Freezer Friendly)

Croissant Breakfast Sandwich (Freezer Friendly)


6 large eggs, lightly beaten

¼ cup whole milk

1 T.  butter

4 large butter croissants

4 T.  mayonnaise

4 tsp. dijon mustard

6 ounces ham or turkey, thinly sliced

6 slices cheddar cheese


In a medium bowl whisk together the eggs with whole milk. Heat butter in a large skillet over medium heat. Add the eggs to the skillet and scramble the eggs, cooking until eggs are thickened and no liquid egg remains. Set aside. Prepare the sandwiches. Slice each croissant in half. On one half spread one T.  mayonnaise and on the other half spread one tsp. mustard. Fill each sandwich with egg, ham or turkey, and 1.5 slices of cheese. To bake. Preheat oven to 450 F. Wrap each sandwich in foil and place on a baking sheet. Transfer baking sheet to the oven and bake for 15-20 minutes, or until cheese has melted. To freeze. Tightly wrap each sandwich in plastic wrap and place in the freezer. To heat from frozen. Remove the sandwich from the plastic wrap and place in a paper towel on a microwave-safe dish. Microwave for 1-2 minutes, or until heated through. Alternatively, preheat oven to 450 degrees F. Remove sandwiches from plastic wrap and wrap in foil. Transfer to a baking sheet and bake for approximately 15 minutes, or until cheese has fully melted. Enjoy!

OAMC Pulled Pork

OAMC Pulled Pork

OAMC Pulled Pork


1 boneless pork shoulder, 6 to 7 pounds, cut into 2-inch pieces

1 large orange, cut into eighths

8 garlic cloves, crushed with the side of a knife

1 jalapeno chile, stemmed, halved lengthwise, and seeded

2 medium fresh bay leaves

4 small yellow onions, halved through the equator

5 quarts water

2 T. kosher salt


In a large stockpot or Dutch oven, combine the pork, orange, garlic, jalapeno, bay leaves, onions, and water and bring to a boil over medium-high heat. Skim off any foam from the surface and turn down the heat to a simmer. Cover and simmer for 2 hours, opening and stirring every 30 minutes. After 2 hours, pull one piece of pork out of the pot and check to see if it can be shredded by pressing it against the side of a bowl. If it’s not yet ready, re-cover the pot and continue to simmer the pork until it can be shredded, checking every 15 minutes. When the pork is ready, drain the contents of the pot through a fine-mesh strainer set over a large heatproof bowl or other vessel. Transfer the pork to a metal bowl. Discard the orange pieces, garlic, jalapeño halves, bay leaves, and onion halves. Return the liquid to the pot and place on the stove to reduce over high heat. While the liquid is reducing, use two forks to shred the pork. Once the liquid has reduced to about 4 cups (it will be thick and bubbly), remove from the heat and stir in the salt. Pour the liquid over the shredded pork and use a rubber spatula to fold the meat and liquid together until the liquid is fully incorporated. TO FREEZE: Let cool to room temperature. Divide into 1-pound portions and package in your preferred freezer-safe container (we suggest vacuum pouches or zip-top plastic bags). Label and date and freeze for up to 9 months. TO THAW: Use the pull and thaw method (see this page) or the cold water method (see this page). TO REHEAT: To use a microwave, use the defrost setting to thaw and reheat the pork slowly. If your microwave doesn’t have an auto-defrost setting, set the microwave on a medium-low setting (3 out of 10 on ours) and microwave in 4-minute increments, stirring after each increment. Make sure the container is microwave safe and vented.


Leftover Pulled Pork


Pork Carnitas

BBQ Pork Pizza

Pulled Pork Rice Bowl

Taco, Burrito, Quesadilla, Nachos

Soy-Ginger Pork with Noodles and Greens

Lemongrass Pulled Pork Banh Mi

Sticky Hoisin Pulled Pork and Slaw Burger

Hungarian Pulled Pork Soup

Pulled Pork Shepherd’s Pie

Sticky Pork Lettuce Wraps

Pulled Pork Migas

Pulled Pork Mac and Cheese

Chili

BBQ in a Blanket with Buttermilk Ranch

Pulled Pork Rigatoni

Shredded Pork Carnitas

Cuban Inspired Stewed Pork (Ropa Vieja)

Shredded Pork Sticky honey-Garlic Pork with White Rice

Pulled Pork Chili Verde


BBQ Pork Mac n Cheese Bake


1 cup uncooked white rice, rinsed

3 T. salted butter

4 1/2 cups shredded cooked pork

3 garlic cloves, minced

1/2 cup chicken broth

1/3 cup honey

2 T. chili garlic sauce

2 T. soy sauce

1 tsp. toasted sesame oil

1/2 tsp. red pepper flakes, for garnish


Cook the rice according to the package instructions. In a large skillet, melt 2 T. of the butter over medium-high heat. Add the shredded pork and press it into an even layer. Cook, undisturbed, for 4 to 5 minutes, until it starts to crisp on the bottom, then flip and cook for 4 to 5 minutes on the second side. Transfer the pork to a bowl and set aside In the same skillet, melt the remaining 1 table-spoon butter. Add the garlic and cook, stirring, for 2 to 3 minutes, until fragrant. Add the broth, honey, chili garlic sauce, soy sauce, and sesame oil and whisk to combine. Bring to a simmer, then cook for about 5 minutes, until the sauce has reduced slightly. Return the pork to the pan and toss to combine with the sauce.  Serve the pork over the rice, garnished with the red pepper flakes.

Meal Prep Ginger Ground Beef Bowls

Meal Prep Ginger Ground Beef Bowls

Meal Prep Ginger Ground Beef Bowls


1/2 cup coconut aminos

1 T. toasted sesame oil

1 tsp. onion powder

1 tsp. crushed red pepper flakes

1 tsp. fish sauce


2 pounds ground beef

1 tsp. salt

3 cloves garlic, minced

2 T. fresh ginger, minced (about a 1.5 inch long root)

1 red bell pepper, finely diced

2 medium carrots, finely diced

4–5 cups frozen riced cauliflower

garnish with green onions & sesame seeds


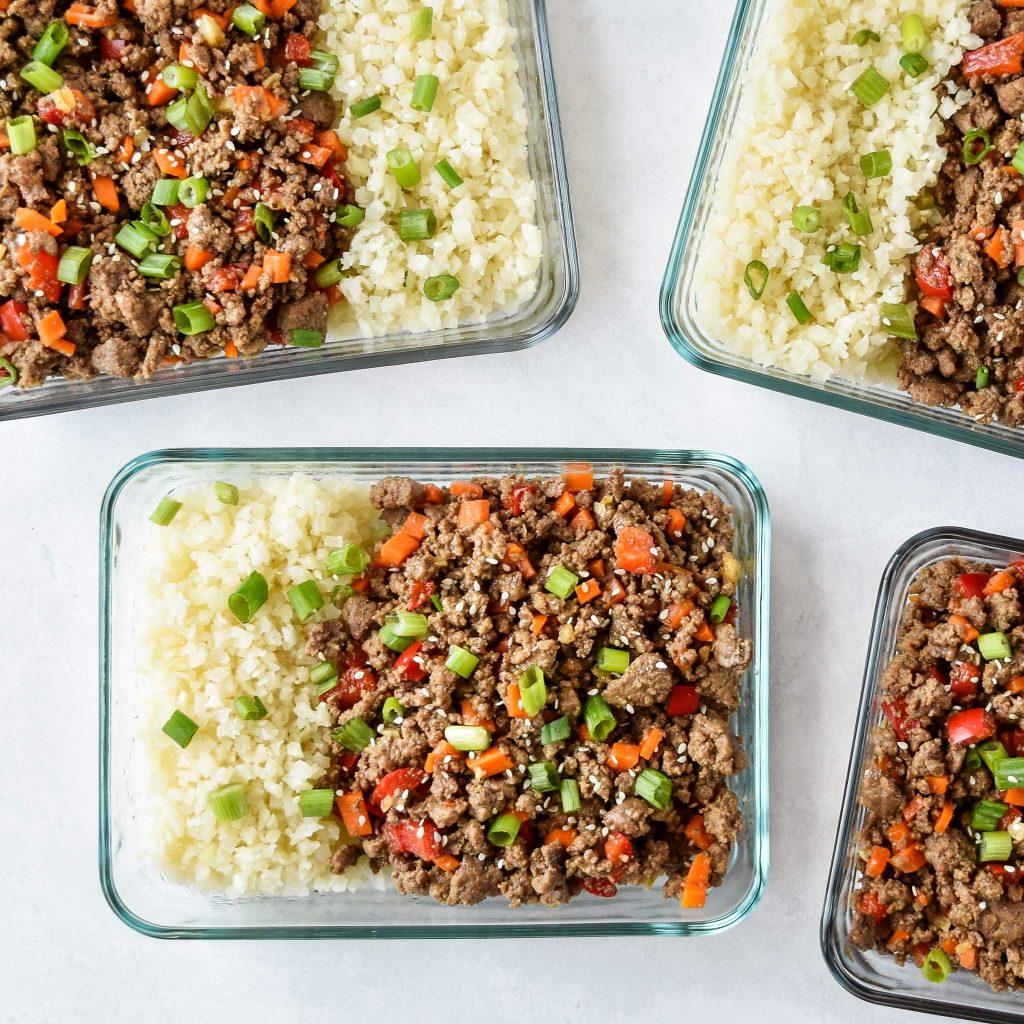
Make the sauce: In a bowl or jar with a lid, combine coconut aminos, sesame oil, onion powder, red pepper flakes and fish sauce. Shake or stir until combined, then set aside. Cook the stir fry: Place a large deep non-stick skillet or Dutch oven over medium heat. When hot, add ground beef and salt. Use a wooden spoon or spatula to break the meat into small pieces as it cooks. Cook the meat for about 6 minutes or until cooked through, stirring occasionally. Reduce heat to medium-low and make a small well in the center of the pan. Add garlic and ginger, then sauté until fragrant, about 30 seconds. Finally, add the red bell pepper, carrots, and sauce to the pan. Cook for 6-8 minutes, stirring occasionally, until the vegetables have softened. Meal prep it: Add 1 cup frozen cauliflower rice to each meal prep container. Portion the ginger ground beef evenly between 4 meal prep containers. Garnish with green onions and sesame seeds if you wish. Store in an airtight container for up to four days in the refrigerator, or up to 3 months in the freezer.

Overnight Vancouver Island Oats with Bumbleberry Compote

Overnight Vancouver Island Oats with Bumbleberry Compote

Overnight Island Oats with Bumbleberry Compote
 

Oats

2 cups local rolled oats

1/4 cup packed brown sugar, plus 2 tsp brown sugar, divided

2 T. ground flax seeds

2 T. chia seeds

1 1/2 tsp. ground nutmeg, divided

1 tsp. ground allspice

1/2 tsp. ground cinnamon

4 cups milk (almond, soy, or 2%)


Bumbleberry Compote

1 T. cornstarch

2 T. cold water

1 cup frozen forest berries (blackberries, black currants, salal berries, blueberries)

2 T. lemon juice


In a large bowl, mix together the oats, 1/4 cup of the sugar, the flax and chia seeds, 1 tsp of the nutmeg, the allspice, and the cinnamon. Place 1/2 cup of this mixture in each of four 2-cup mason jars or similar sealable glass jars. Add 1 cup of milk to each jar and mix with a spoon to combine. Seal the jars and put in the fridge to soak for at least 12 hours, or up to 3 days.

In a small saucepan, whisk together the remaining 2 tsp sugar, the remaining 1/2 tsp nutmeg, and the cornstarch with the cold water until the mixture is completely lump-free. Fold in the frozen berries, drizzle the lemon juice overtop, and place over medium heat, covered, to allow the berries to thaw, 2-3 minutes, stirring once or twice. Remove the lid and increase the heat to medium-high. Watch the berries carefully, stirring occasionally, as they come to a boil. Boil for 1 minute then remove from the heat. Serve immediately or allow to cool. This will keep in airtight container in refrigerator for up to 3 months. To serve, remove the lid from the jar of oats and top with a dollop of the jam. You can also add a dollop of yogurt.

Beef Tenderloin Bites with Spicy Pepper Jelly
Beef Tenderloin Bites with Spicy Pepper Jelly

Beef Tenderloin Bites with Spicy Pepper Jelly


3 T. chili garlic sauce

2 T. soy sauce or tamari

2 tsp. cornstarch

2 T. peanut oil, divided

1 1/2 lbs beef tenderloin, cut in 1-inch cubes (can substitute sirloin or strip steak also)

3 T. spicy red pepper jelly

4 C. cooked rice, kept warm

3 scallions, thinly sliced


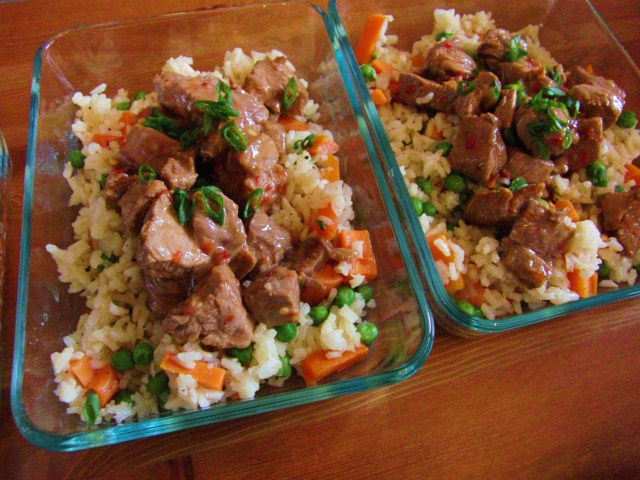
Combine chili garlic sauce, soy sauce, cornstarch, and 1 T. of the oil in a resealable bag and mix until thoroughly combined. Add cubed meat and toss to coat. Marinate for 30 minutes at room temperature or up to 4 hours in the refrigerator.  When ready to cook, heat 1 T. of the remaining oil in a large nonstick frying pan or wok over medium-high heat. When oil shimmers, add the meat and cook until brown and caramelized on all sides, about 3 minutes for medium rare.  Add the pepper jelly and toss to coat.  Remove from pan and serve over rice and sprinkled with the scallions.

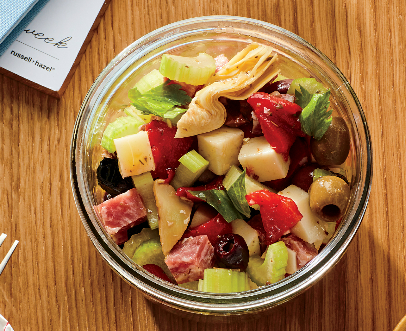
Make Ahead Antipasto Salad Jars

Make Ahead Antipasto Salad Jars

Make Ahead Antipasto Salad Jars


Makes 6 cups, enough for 4 lunches Here’s a candidate for crackers, though you can also just eat this right out of the jar (the celery provides the crunch) or spoon it over chopped romaine or iceberg lettuce. You might also want a little bread here, to soak up any leftover vinaigrette. And you know what’s really killer? Tossing this with cold pasta. This salad will last in the fridge for up to four days, and it only gets better as it sits.


1 cup (½-inch) cubes hard salami

1 cup (½-inch) cubes provolone

1 cup roughly chopped olives

1 cup roughly chopped roasted red peppers (from a jar is fïne)

1 cup roughly chopped marinated artichoke hearts

2 cups sliced celery (leaves included)

½ cup extra-virgin olive oil

¼ cup red wine vinegar

2 garlic cloves, finely chopped

1 tsp. dried oregano

1 tsp. kosher salt

½ tsp. sugar


In a large bowl, toss together the salami, provolone, olives, red peppers, artichoke hearts, and celery. In a medium bowl, whisk together the olive oil, vinegar, garlic, oregano, salt, and sugar. Pour the dressing over the salami mixture and toss until it’s all evenly coated. Store the salad in one large or several smaller airtight containers for up to 4 days; toss again before eating to distribute the vinaigrette.

Soy Ginger Chicken

Soy Ginger Chicken

4 bone-in chicken drumsticks, skin removed

4 bone-in chicken thighs, skin removed

1/3 C. soy sauce

2 T. dark brown sugar

2 medium carrots, thinly sliced crosswise

5 garlic cloves, thinly sliced

2/3 C. fresh chopped cilantro plus extra for garnish

2-inch piece fresh ginger, peeled and cut into thin strips

5 scallions, thinly sliced on the bias, plus extra for garnish

1 T. balsamic vinegar

1 tsp. ground coriander

1/2 tsp. ground pepper

1 T. cornstarch


To prepare for freezer: In gallon zip-lock bag, combine chicken, soy sauce, brown sugar, carrots, garlic, cilantro, ginger, scallions, vinegar, coriander, and pepper.  Squeeze out excess air and seal. Place sealed bag into another bag for safety. Label, date, and store in freezer until ready to serve. Â When ready to serve: Thaw prepared ingredients overnight in refrigerator. Pour the entire contents of the large bag into a slow cooker and cook on low for 5 to 6 hours. Â Just before serving, set slow cooker to high. In a large measuring C. combine cornstarch with 1 T. water. Add 1 C. of cooking liquid and stir to combine. Pour mixture back into slow cooker, cover, and cook 2 minutes longer, or until sauce is thickened. Garnish with cilantro and scallions and serve with white rice.


Yield:

Calories:

Fat:

Fiber:

Baked Two-Cheese & Bacon Grits

Baked Two-Cheese & Bacon Grits

Baked Two-Cheese & Bacon Grits

6 thick-sliced bacon strips, chopped

3 C. water

3 C. chicken stock

1 tsp. garlic powder

1/2 tsp. pepper

2 C. quick-cooking grits

12 ounces Velveeta, cubed (about 2-1/3 cups)

1/2 C. butter, cubed

1/2 C. 2% milk

4 large eggs, room temperature, lightly beaten

2 C. shredded white cheddar cheese


Preheat oven to 350°. In a large saucepan, cook bacon over medium heat until crisp, stirring occasionally. Remove pan from heat. Remove bacon with a slotted spoon; drain on paper towels. Add water, stock, garlic powder and pepper to bacon drippings; bring to a boil. Slowly stir in grits. Reduce heat to medium-low; cook, covered, 5-7 minutes or until thickened, stirring occasionally. Remove from heat. Add Velveeta and butter; stir until melted. Stir in milk. Slowly stir in eggs until blended. Transfer to a greased 13×9-in. baking dish. Sprinkle with bacon and shredded cheese. Bake, uncovered, 40-45 minutes or until edges are golden brown and cheese is melted. Let stand 10 minutes before serving. Freeze option: Cool unbaked casserole; cover and freeze. To use, partially thaw in refrigerator overnight. Remove casserole from refrigerator 30 minutes before baking. Preheat oven to 350°. Bake grits as directed, increasing time to 50-60 minutes or until heated through and a thermometer inserted in center reads 165°.


Nutrition Facts: 12 servings, 3/4 cup: 466 calories, 34g fat (18g saturated fat), 143mg cholesterol, 840mg sodium, 23g carbohydrate (3g sugars, 1g fiber), 17g protein.

Vegetable Quiche Cups to Go

Vegetable Quiche Cups to Go

from The South Beach Diet

1 10oz. pkg. frozen Chopped Spinach
3/4 C. Egg Beaters
3/4 C. shredded reduced-fat Cheese
1/4 C. diced Green Bell Peppers
1/4 C. diced Onions
3 drops Hot Pepper Sauce (optional)

Microwave the spinach for 2 1/2 minutes on high. Drain the excess liquid. Line a 12 cup minature muffin pan with foil baking cups. Spray the cups with cooking spray. Combie the egg substitute, cheese, peppers, onions and spinach in a bowl. Mix well. Divide evenly among the muffin cups. Bake at 350 degrees for 20 inutes, until a knife inserted in the center comes clean.

Quiche cups can be frozen and reheated in the microwave. Any combination of appropriate vegetables and low fat cheese may be used.

Yield: 12 minature quiche cups
Serving Size: 2 Quiche Cups

Calories: 77
Fat: 3g
Fiber: 2g

Notes: These came out better than the last egg recipe from the South Beach Diet book that I tried (cheesy frittata). The flavor was really bland though, even with the hot sauce added. These coulda used a generous pinch of thyme maybe or some oregano and a bunch of freshly grated pepper. I made them in a six cup regular size muffin tin instead of the miniature ones.

Also, I think that the book “overcharges” on calories, and gives credit for too much fiber. I entered the information in Crosstrainer (using 80 calories an ounce cheese) and 2 LARGE quiche cups (ie, the same as 4 small) came to be 106 calories, 2.9g fat, and 2.8g fiber, which is quite different than the books information (listed above) states.

Make Ahead Supreme Spinach and Egg Breakfast Sandwiches

Make Ahead Supreme Spinach and Egg Breakfast Sandwiches

supremespinachandeggbreakfastsandwiches1To Make the Supreme Spinach and Egg Breakfast Bake:
2 dozen eggs
½ cup milk
4 cups fresh baby or tender spinach leaves, pre-washed or washed and dried
3 cups grated Cheddar, Pepper Jack or Monterey Jack Cheese (or a blend)
¼ cup to ½ cup finely minced onion
freshly ground black pepper and salt to taste
nonstick cooking spray or softened butter for the pan

To Make Each Breakfast Sandwich:
1 piece of the Supreme Spinach and Egg Breakfast Bake
2 pieces of bread, toasted (English Muffin Bread is an obvious choice! )
hot sauce to taste

To Make the Supreme Spinach and Egg Breakfast Bake: Preheat oven to 350°F. Generously butter a 9-inch x 13-inch x 2-inch baking pan or spray well with non-stick cooking spray. Be sure to get the corners and sides well, too. Evenly distribute the spinach leaves over the bottom of the prepared pan. Scatter the onions over the spinach, then about half of the grated cheese and set aside. Crack all of the eggs into a large mixing bowl. Add the ½ cup of milk and use a whisk to beat together until the mixture is an even color. Pour gently and evenly over the spinach, onions and cheese. You can gently shake the pan a little from side to side to get the egg to fill in spaces around the spinach leaves if necessary. Scatter the remaining grated cheese over the top and bake for 22-25 minutes or until the eggs are set in the center (no longer liquidy, but they can still have just a little shimmy to them.) and golden brown around the edges and in places on top. Remove the pan from the oven and let cool for 10 minutes before using a knife or thin spatula to run around the edges and loosen the cooked egg. Lay a cutting board on top and invert the pan and board carefully together. The egg should come out (mostly) in one piece. Allow it to cool for 10 more minutes before slicing into 10 to 12 pieces. I like bigger sandwiches, so I tend to cut it into 10 pieces. For a more delicate sandwich, cut into 12 pieces.

To Eat a Sandwich Right Away: Place one piece of the egg bake on one piece of toast, drizzle with hot sauce to taste, top with the remaining piece of toast and eat! These are nice and moist, so you may wish to wrap one end of the sandwich with a towel or paper towel.

To Freeze the Supreme Spinach and Egg Breakfast Bake: Place a single layer of plastic wrap down on a tray or pan. Use a spatula to arrange the pieces of egg bake on the plastic wrap with a little space between them. Cover loosely with plastic wrap and set in the freezer until solid. When they are firmly frozen, wrap each piece of egg bake with plastic wrap. Transfer the wrapped pieces to a resealable freezer bag. Mark the date and contents and freeze for up to 6 months.

To Reheat the Frozen Egg Bake and Make a Sandwich: Unwrap one piece of egg bake, place on a plate and cover loosely with the plastic wrap that contained it in the freezer. Heat for 1 to 1½ minutes on HIGH in the microwave. Remove plastic wrap, carefully move the egg bake to a piece of toast (because it will be hot!), drizzle with hot sauce, and top with the remaining piece of toast. Happy Breakfast!

Make Ahead Muffin Melts

Make Ahead Muffin Melts

12 whole Hard-boiled Eggs, Peeled and Chopped
2 C. Grated Cheddar Cheese
1 C. Mayonnaise
12 slices Bacon, Fried and Crumbled
1 tsp. (heaping) Dijon Mustard
1/2 tsp. Garlic Powder
3 dashes Worcestershire Sauce
6 whole English Muffins Split

Combine eggs with all other ingredients. Fold together gently. Cover and store in the fridge overnight. Spread on English muffin halves, then broil for 3 to 5 minutes or until hot and bubbly. (Don’t set them too close to the heating element.) Serve immediately!