Browsed by
Tag: DIY

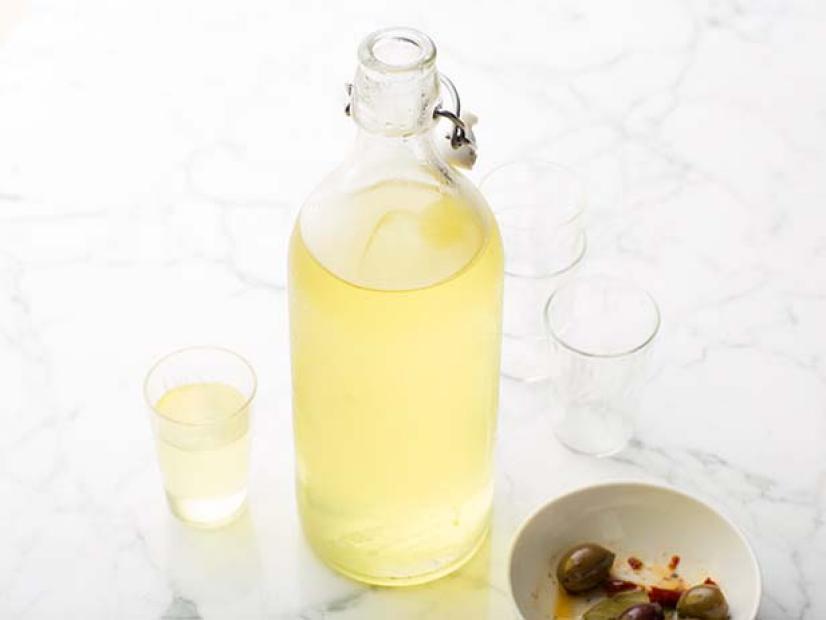
Limoncello

Limoncello

Limoncello

10 large lemons

4 C. (946 ml) 100 proof grain vodka

4 C. (946 ml) water

3 3⁄4 C. granulated sugar


Peel the lemons, making sure not to get any of the white pith (reserve the remainder of the lemons

for another use). In a large airtight container, combine the vodka and lemon peel, cover, and let the

flavors infuse for 5 days. In a 3-quart pan, add the water and the sugar and bring to a boil over medium heat, stirring occasionally, until the sugar dissolves. Remove from the heat and let cool completely. Add the simple syrup to the infused alcohol and then set aside for 2 more days. Strain the mixture

through a fine-mesh sieve into a clean glass bottle and discard the lemon zest. Serve chilled.

Berry Vinegar

Berry Vinegar

Berry Vinegar

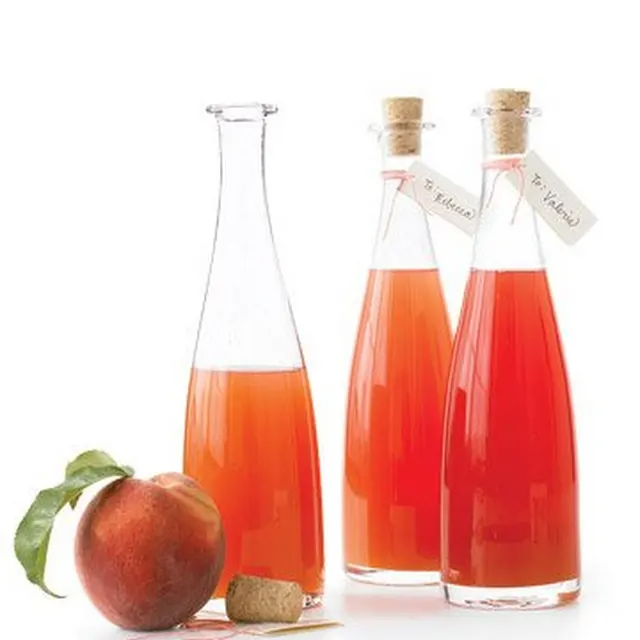
This vinegar has a bright taste and a gorgeous color. Decant it into clean recycled bottles of all shapes and sizes for lovely homemade holiday gifts.

2 cups berries

2 cups distilled white vinegar

Puree the berries and vinegar in a blender. Transfer to a quart jar. Let stand 5 to 7 days in a cool, dark place, shaking the jar daily to blend the flavors. Strain through a double thickness of cheesecloth and discard the solids. Return the strained vinegar to the jar or decant into a decorative bottle. Vinegar keeps at room temperature for up to 1 year.

Homemade Egg Substitute

Homemade Egg Substitute

6 jumbo egg whites
1 tsp. canola oil
1/4 C. powdered dry skim milk
1 drop yellow food coloring

Combine ingredients. This recipe can be frozen in plastic containers for later use or kept in the refrigerator for up to 7 days. I have found it to work very well in egg breakfast dishes and omlettes. The advantage is that it is much less expensive than commercial egg substitutes and people on a sodium restriction can use these more freely.

Yield: 6 servings
Serving Size: 1/4 C. (= to one egg)

Calories: 40
Fat: .8g
Fiber: 0g

Fabulous Clusters Granola

Fabulous Clusters Granola

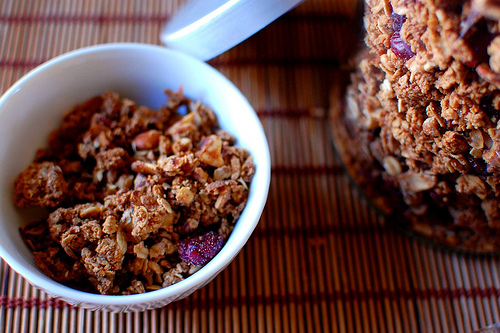
Okay, so what exactly makes this granola different? One thing is the addition of oat flour, which helps the grains and nuts stick together into those much-coveted clusters. Another is the use of sugar; as much I like liquid sweeteners like honey and maple syrup, they seem to produce a tougher, chewier granola. Finally, the right kind of oats are essential. For years I only baked with regular rolled (‘old fashioned’) oats because that’s what recipes called for, but as soon as I switched to the smaller, thinner ‘quick oats’, the changes were remarkable—clusters formed, everything baked faster, and the texture became exquisitely light and crunchy. If you can’t find quick oats where you live—and I have lived in a few places where oats come in one variety only—here’s what I would do: pulse rolled oats in a food processor a few times to break them down to about half their original size. It won’t be exactly the same but it will come close.

1 lb. (450g) quick oats
3 C. coarsely chopped raw nuts and/or seeds
1 tsp. ground cinnamon
1/2 tsp. ground cardamom
1/2 tsp. ground mace (or nutmeg)
1 C., packed (200g) dark brown sugar
1/2 C. (115g/1 stick) unsalted butter
1/3 C. (80ml) water
1/2 tsp. fine sea salt
2 tsp. vanilla extract
Dried fruit, at your discretion

Preheat the oven to 300F/150C. In a food processor, coffee grinder or blender, grind half the oats to a fine powder. In a large bowl, combine the whole oats, ground oats, nuts, seeds and spices. In a microwave-safe bowl (or in a saucepan over medium heat), combine the brown sugar, butter and water and heat just until the butter has melted and the mixture is bubbly. Stir the mixture together until smooth, then stir in the salt and vanilla. Pour this mixture over the oats and nuts, stirring well to coat (I usually do this with my hands). It should be uniformly moist – stir in another tsp. or two of water if it isn’t. Let stand for about ten minutes. Spread the mixture out on a large baking sheet, separating it into irregular clumps with your fingers, and allowing space between the clumps for the hot air to circulate. Slide into the middle of the oven and bake for 25-30 minutes, or until the top is golden brown. Remove from the oven and stir, gently breaking up the mixture into small-to-medium sized clumps. Return to the oven and bake another 15 minutes or so before stirring again. Repeat the bake-and-stir until the mixture is a uniform golden brown and completely dry; this usually takes 1-1 1/2 hours. Cool completely, then stir in any dried fruit you want to use. Store in a covered container at room temperature. Serve with milk or plain yogurt and fresh fruit as desired.

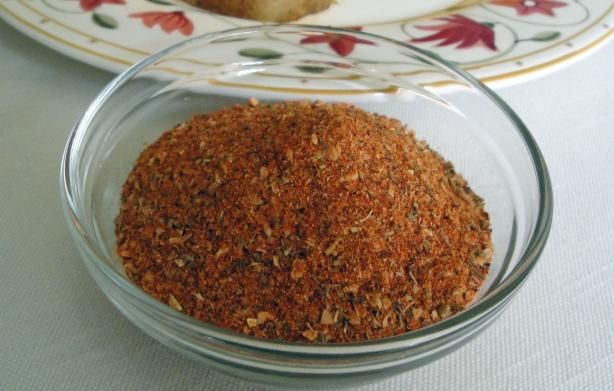
Homemade Curry Powder

Homemade Curry Powder

from Cooking Light, September 2003

3 T. Hungarian Paprika
2 tsp. ground Cumin
2 tsp. ground Fennel Seed
2 tsp. ground Mustard
2 tsp. ground Red Pepper
1 T. ground Coriander
1 T. ground Turmeric
1 tsp. ground Cardamom
1/2 tsp. ground Cinnamon
1/2 tsp. ground Cloves

Combine all ingredients. Store in a cool dark place for up to 2 months.

Yield: 1/2 cup

Salt Free Taco Seasoning Mix

Salt Free Taco Seasoning Mix

1 T. dehydrated onion
6 tsp. chili powder
5 tsp. paprika
4-1/2 tsp. cumin
3 tsp. onion powder
2-1/2 tsp. garlic powder
1/8 tsp. cayenne pepper

Combine ingredients and store in airtight container. To prepare, brown 1 lb beef, add 3 T. seasoning and 1/2 C. water. Simmer until water is absorbed.

Salt Free Spaghetti Sauce Seasoning Mix

Salt Free Spaghetti Sauce Seasoning Mix

1/2 C. Onion Flakes
1/2 C. Parsley Flakes
2 T. Dried Oregano
2 T. Sugar (or equvilent in Splenda)
1 T. Dried Basil
1 T. Dried Thyme
2 tsp. Black Pepper
2 tsp. Garlic Flakes
4 lg. Bay Leaves, crumbled

Place all ingredients in 1 point jar, cover tightly and shake well to mix. Store in a cool dry place for up to 2 months. Use 1/2 C. mix in average pot of spaghetti.

Mild Curry Powder

Mild Curry Powder

3 T. Paprika
2 tsp. Cumin
1 tsp. Ground Ginger
1 tsp. ground Tumeric
1 tsp. ground Coriander
1/2 tsp. ground Cardamom
1/2 tsp. ground Red Pepper

Combine all ingredients. Yield: 1/3 C.

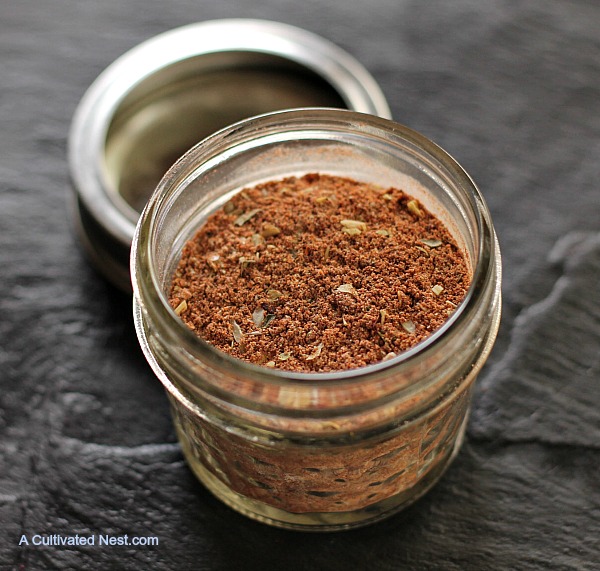
Seasoning Salt

Seasoning Salt

3 tsp. garlic powder
3 tsp. salt
2 tsp. Sugar
1 tsp. onion powder
1/2 tsp. black pepper
1/4 tsp. cayenne
½ tsp. Paprika
¼ tsp. Turmeric

Combine all ingredients in a jar with a lid. Tightly close the lid and shake very well to combine all ingredients.

Savory Italian Seasoning Salt

Savory Italian Seasoning Salt

4 whole Dried Red Chiles
¼ C. dehydrated minced Garlic
½ C. dehydrated minced Onion
¼ C. dried Oregano Leaves
¼ C. dried Parsley Leaves
¼ C. Salt
2 tsp. dried Rosemary

In a blender moving at low speed, drop in red chile peppers, garlic, onion, oregano, basil, parsley, salt and rosemary one by one. Put the lid on the blender, turn the speed to high and blend to get a finely powdered mixture.

Hot & Spicy Seasoning

Hot & Spicy Seasoning

11/2 tsp. white pepper
1/2 tsp. cayenne pepper
1/2 tsp. black pepper
1 tsp. onion powder
11/4 tsp. garlic powder
1 T. basil, dried
11/2 tsp. thyme, dried

Mix all ingredients together. Store in an airtight container.

Chili and Spice Seasoning

Chili and Spice Seasoning

1/4 C. paprika
2 T. dried oregano, crushed
2 tsp. chili powder
1 tsp. garlic powder
1 tsp. black pepper
1/2 tsp. red (cayenne) pepper
1/2 tsp. dry mustard

Mix together all ingredients. Store in airtight container.

Homemade Taco Seasoning

Homemade Taco Seasoning

taco-seasoning-recipe6 T. chili powder
1 ½ tsp. garlic powder
1 1/2 tsp. onion powder
3/4 tsp. red pepper flakes (or 1/4 tsp. cayenne pepper)
1 1/2 tsp. oregano
1 T. paprika
3 T. cumin
2 T. Kosher salt
2 T. black pepper

Put all of the ingredients in a jar or a container with a lid and shake, shake, shake.

Citrus Salt

Citrus Salt

This is a delicate salt, good for seasoning roasted fish or a classic seafood stew. I also sprinkle it on roasted asparagus and artichokes. Beyond that? Try just a few flakes on top of bittersweet chocolate gelato.

1/2 C. (125 g) coarse sea salt
1 T. finely grated orange zest
1 T. finely grated lemon zest

Combine the salt and zests in a bowl and rub them together with your fingers to distribute the citrus throughout the salt crystals. line a rimmed baking sheet with parchment paper and spread the salt out on it. Let air-dry at room temperature until the fine shavings of citrus are completely dry and crumble when you roll them between your fingers, 2 to 3 hours or up to overnight. You can leave the salt coarse, if you like. Or, for a finer grind, pulse it in a food processor a few times to break down the salt crystals into smaller grains. Store at room temperature in a tightly lidded jar. It will keep indefinitely, though the citrus will lose its aroma over time.

Soft and Chewy Granola Bars Recipe

Soft and Chewy Granola Bars Recipe

2 1/2 C. (230 grams) old fashioned rolled oats
1/2 C. (80 grams) whole almonds, coarsely chopped
1/3 C. (113 grams) honey
1/4 C. (56 grams) unsalted butter, cut into pieces
1/4 C. (50 grams) packed light brown sugar
1/2 tsp. vanilla extract
1/4 tsp. kosher salt
1/2 C. (60 grams) dried cranberries, coarsely chopped
1/4 C. plus 2 tsp. (67 grams) mini chocolate chips

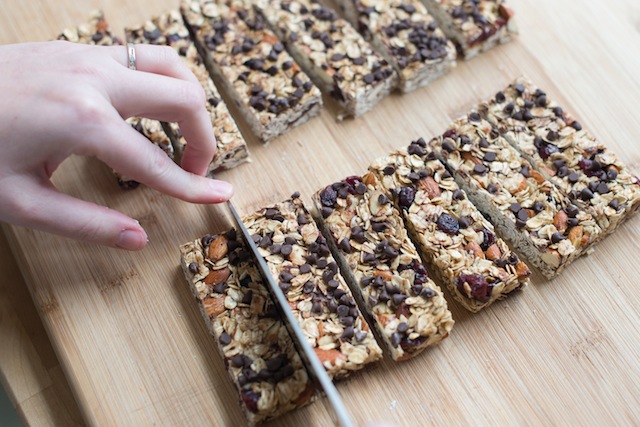
Heat oven to 350 degrees F (177 degrees C). Line bottom and sides of a 8-inch or 9-inch square pan with aluminum foil. Then lightly oil or spray with cooking spray. Add oats and almonds to a small baking sheet then bake 5 minutes, stir and bake another 3 to 5 minutes until lightly toasted. Transfer to a large bowl. Combine butter, honey, brown sugar, vanilla extract and the salt in a small saucepan over medium heat. Cook, stirring occasionally until butter melts and the sugar completely dissolves. Pour butter mixture in to bowl with toasted oats and almonds. Mix well. Let cool about 5 minutes then add cranberries and a 1/4 C. the mini chocolate chips. Stir to combine. (The chocolate chips will most likely melt a little. This is fine, they turn into glue and help to hold the bars together). Transfer oat mixture to lined pan then use a rubber spatula or damp finger tips to firmly press the mixture into the pan. (Press hard here, this way the bars will stay together once cooled and cut — We press for about one minute to be extra safe). Scatter remaining 2 tsp. chocolate chips over pressed granola mixture then use a rubber spatula to gently press them into the top. Cover then refrigerate at least 2 hours. Remove block of granola mixture from pan then peel away aluminum foil. Cut into 12 bars. Store bars in an airtight container for up to one week. For the softest bars, keep at room temperature. For slightly harder bars, store in the fridge.

one-hour ricotta cheese

one-hour ricotta cheese

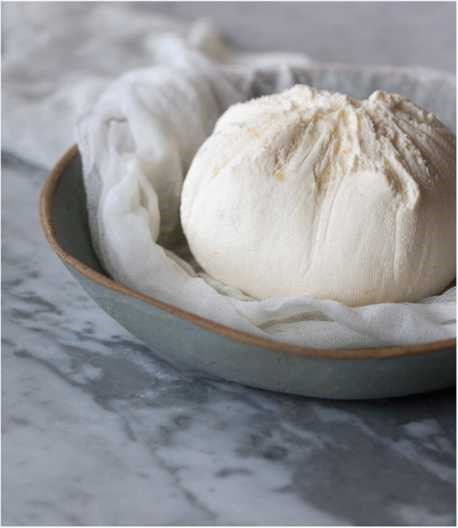
I love having a simple, versatile homemade cheese on hand for adding to sandwiches or pasta, or to dollop on fruit. This farmer cheese fits the bill and can be made without any special cheesemaking equipment. Officially, ricotta is made from “reboiling” the whey left over from other kinds of cheesemaking, but, unofficially, it’s a super simple fresh cheese requiring nothing more than milk, heat, and acid. If you’ve ever added both lemon and milk to your tea (I have—oops) then you know that acidic ingredients will curdle milk. In this ricotta recipe we take advantage of this, and use common acidic ingredients to make cheese.

The three biggest determinants to the final flavor of your ricotta are the quality of the milk you start with, the acid you choose, and the amount of time you allow your cheese to drain. Start with very fresh daily. Pasteurized milk and cream are fine, but skip ultra-high-temperature pasteurized options; these often fail to form a nice curd. After thirty to sixty’ minutes of draining, this ricotta is thick enough to spread on toast or serve with fruit.

If you drain it long enough, or press it under weight to get even more liquid out, it will become firm and crumbly, much like Mexican queso fresco or Indian paneer. Save the whey that drains off your cheese—you can use it to replace some or all of the water used in bread making and other baking. It adds a nice tang and extra protein.
BASIC RICOTTA

1 quart whole milk
1 C. heavy cream
3 T. white distilled vinegar
l tsp. kosher salt

In a heavyweight, nonreactive saucepot, combine all the ingredients. Stirring occasionally, gently bring the mixture to a simmer over medium heat and watch for the mixture to begin to curdle. You may see some curds very early in the cooking process, but between 185 and 200 degrees F, the curds will become quite distinct from the whey and will float to the surface. Watch for the whey to change from white and milky to yellowish-clear with only a bit of milky haze. When you note district curds and mostly clear whey, remove the pot from the heat and let sit, undisturbed, for 30 minutes. Line a mesh strainer with a damp paper towel, several layers of cheesecloth, or a clean, damp lint-free towel. Set the strainer over the bowl and pour the curds and whey through the strainer. Let sit for at least 30 minutes to drain. Check the texture. The longer you strain the cheese, the firmer it will get. If you plan to strain longer than 1 hour, transfer the cheese to the refrigerator and strain chilled. For an even firmer texture, drain the mixture until the curd holds its shape, then form it into a disk shape and lightly salt the outside of the cheese. Wrap the cheese in a clean towel or several layers of cheesecloth and set the cheese on a plate. Place another plate on top of the cheese, and then set something heavy—like a big can of pumpkin or a jar of tomatoes—on top of the plate to weight the cheese. Transfer the whole contraption to the refrigerator. Periodically check for whey that has pooled on the bottom plate and discard it. Drain the cheese until it has reached the desired firmness, up to 12 hours. Wien the ricotta is ready, transfer it to a clean container with a tight-fitting lid and keep it chilled. It’s best eaten fresh but will keep for about 1 week in the refrigerator.
Try these ricotta variations. Simply follow the instructions above, but substitute these ingredients.

LEMON RICOTTA

1 quart whole milk
1 C. heavy cream
3 T. freshly squeezed lemon juice
l tsp. kosher salt
Zest of l lemon

LIME RICOTTA

l quart whole milk
l C. heavy cream
3 T. freshly squeezed lime juice
l tsp. kosher salt
Zest of l lime
Creole Spice Paste

Creole Spice Paste

Use spice paste for your shrimp po boys, to spice up a mayo in a chicken or tuna salad, on grilled butterflied jumbo shrimp, add to chilis or soups, or to rub on chicken breasts, chops or steaks before broiling or grilling them.

1/4 cup coarsely chopped onion
1 clove garlic, peeled
1 tablespoon roughly chopped fresh flat-leaf parsley leaves
1/2 jalapeño pepper, seeded
1/4 teaspoon ground cayenne pepper
1/4 teaspoon dried thyme
1/4 teaspoon paprika
Kosher or coarse salt and freshly ground black pepper, to taste

Place the onion, garlic, parsley, jalapeño, cayenne, thyme, paprika, and salt and pepper in a food processor and process until the spice paste is well blended, scraping down the sides of the bowl at least once. Transfer the paste to a small plastic container. Cover and refrigerate until ready to use. You can add a little vegetable oil to the paste if you need it a little thinner.

LunaCafe Chinese Five-Spice

LunaCafe Chinese Five-Spice

The aroma of these spices when they are toasting is remarkable. For most evocative aroma and flavor, always use fresh spices.

3 whole star anise pieces, broken
20 whole cloves
3-inch Mexican cinnamon stick (canella), broken
1 tsp. fennel seeds
1 tsp. whole Sichuan pepper or black peppercorns

In nonstick skillet set over medium heat, toast the spices just until fragrant, about 1 minute.  Immediately remove from the heat and grind to a powder in a spice grinder. When cool, store in an airtight container in a cool, dark, dry location.

Pantry Friendly Cottage Cheese & Bakers Cheese

Pantry Friendly Cottage Cheese & Bakers Cheese

1/4 rennet tablet
1 quart warm water
3 C. non-instant powdered milk
½ C. buttermilk

In 1 quart warm water, dissolve 14 of a rennet tablet. (Junket is a brand name of rennet that you can find in most grocery stores in the Jell-O section.) Combine water, milk, and buttermilk in blender. Blend 011 low. Add to dissolved rennet-water mixture. Stir well, then let set in warm room 6—12 hours. It is set when it’s firm and has a touch of whey on the sides. When it is set, cut into 14-inch squares and set the bowl in a sink or bigger bowl of hot water. Gently stir the curds at frequent intervals to warm evenly and break up the curds. When they have warmed through and broken into curds and whey, pour through a strainer with a cheesecloth lining. Drain and rinse with cold water until it is cool and well washed. Add salt (around 1 tsp., depending on taste). To make it creamy, you can then add milk and cream.

To make bakers cheese instead, transfer cheese when it has set after 6-12 hours and place in cheesecloth lined colander. Strain out whey until it reaches the consistency of cream cheese. This usually takes 12-24 hours. This can be substituted for most soft cheeses in recipes, especially cream cheese in dips in baked goods.

LTS Day Cheese

LTS Day Cheese

4 cups water
1 1/2 cups non-instant powdered milk
2-4 T. lemon juice or vinegar
¼ tsp. salt

Mix water and powdered milk. Place in a pan on low heat. Add slowly a little drizzle of lemon juice or vinegar, and stir gently. If using lemon juice, make sure it hasn’t expired. If it is old, it might need to be replaced for this recipe to work. Continue to gently stir while milk cooks; don’t let it come to a boil. Milk will gradually develop curds and separate from the whey, which will be almost clear. If it does not turn into curds and whey, add a little more lemon juice or vinegar. Strain and rinse the curds in cool water. Add salt.

Buttermilk Crackers

Buttermilk Crackers

6.25 oz. all purpose flour (1.25 C.)
1/4 tsp. salt
1.5 tsp. sugar
5 tsp. butter, cubed
1/2 C.+2 tsp. whole buttermilk
1 egg, beaten
sesame seeds, optional, for garnish
salt and pepper for sprinkling

Preheat the oven to 350 degrees F. Whisk to combine the flour, salt and sugar. Add the butter and work with your fingertips until you get coarse crumbs (break it down more than you would a biscuit). Make a well in the center and pour in the buttermilk. Stir with a spatula to distribute the liquid, and once the dough starts to come together and there is no liquid dripping anywhere, stop mixing (and be conscious of not overmixing*). Lay a sheet of plastic wrap onto your counter and sprinkle with flour. Scrape the dough out onto it, then sprinkle more flour on top. Press it out into a flat disk and chill for at least 1 hour until it’s firm. Roll the dough out onto a piece of parchment paper fitted to a sheet pan (this way you can transfer it easily to the sheet pan later). You should make the dough as thin as possible and it should be rolled to cover all available space. Prick all over with a fork, brush with the egg wash, then sprinkle with salt and pepper, and any other garnishes you would like. Bake for about 35-40 minutes until golden brown. If you want them to be extra crispy, you can break them into shards and keep baking. Cool completely on a wire rack (and keep in mind that they crisp more as they cool). Enjoy!

LTS Cheddar Cheese Sauce Mix

LTS Cheddar Cheese Sauce Mix

1 C. dry milk
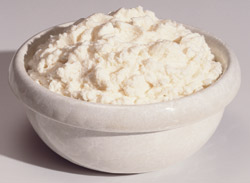
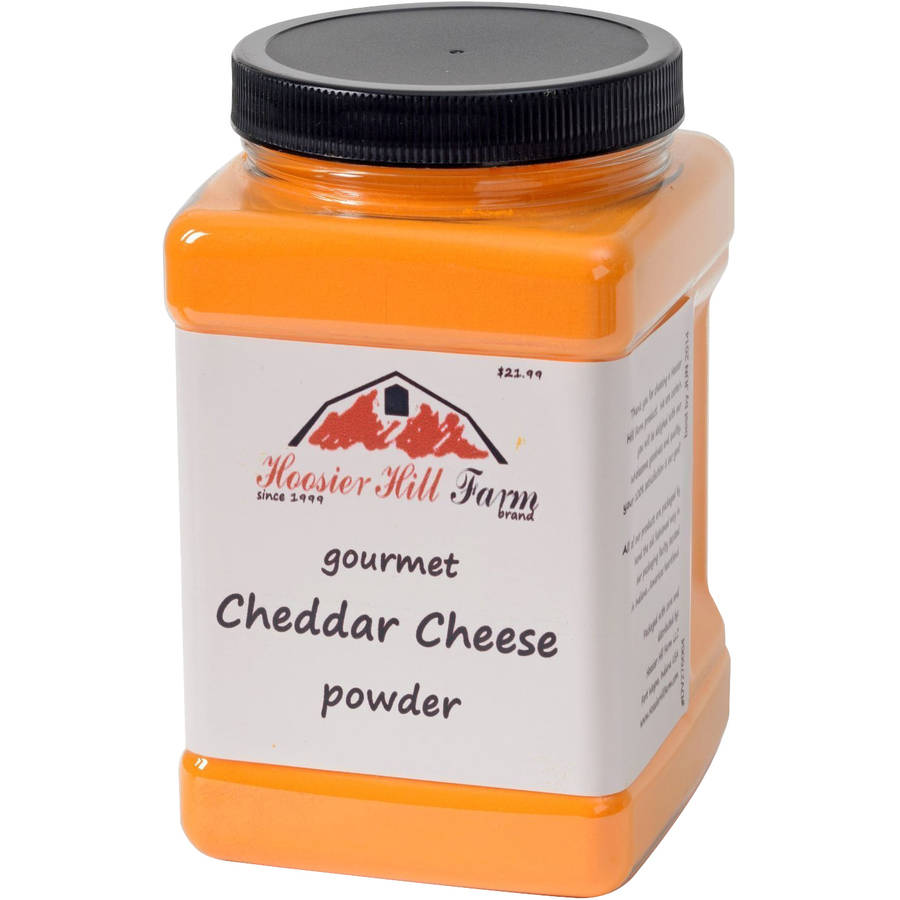
6 T. cheddar cheese powder
1⁄4 C. butter powder
1 1⁄2 tsp. dried garlic
1⁄2 tsp. onion powder (not onion salt)
1⁄2 tsp. ground black pepper

Mix all the ingredients together. Store in a tightly sealed container. Keeps for up to 4 months, keep away from heat and for best long term storage, store in your refrigerator.

To use: Each serving is about 7 T. To make s sauce combine 1 serving mix with ¼ C. water. You can cook up 4-ounces pasta, drain off all but ¼ C. water and mix the sauce in, adding a T. of oil if desired, for a homemade mac and cheese. Also, use the powder in any number of recipes calling for ‘cheese sauce powder’ for a natural version (some commercial brands contain artificial dyes).

Pampered Chef Cinnamon Plus

Pampered Chef Cinnamon Plus

6 tsp. ground cinnamon
1 tsp. ground allspice
1 tsp. dried orange peel
2 tsp. ground nutmeg
1 tsp. ground cloves
1/2 tsp. ground ginger

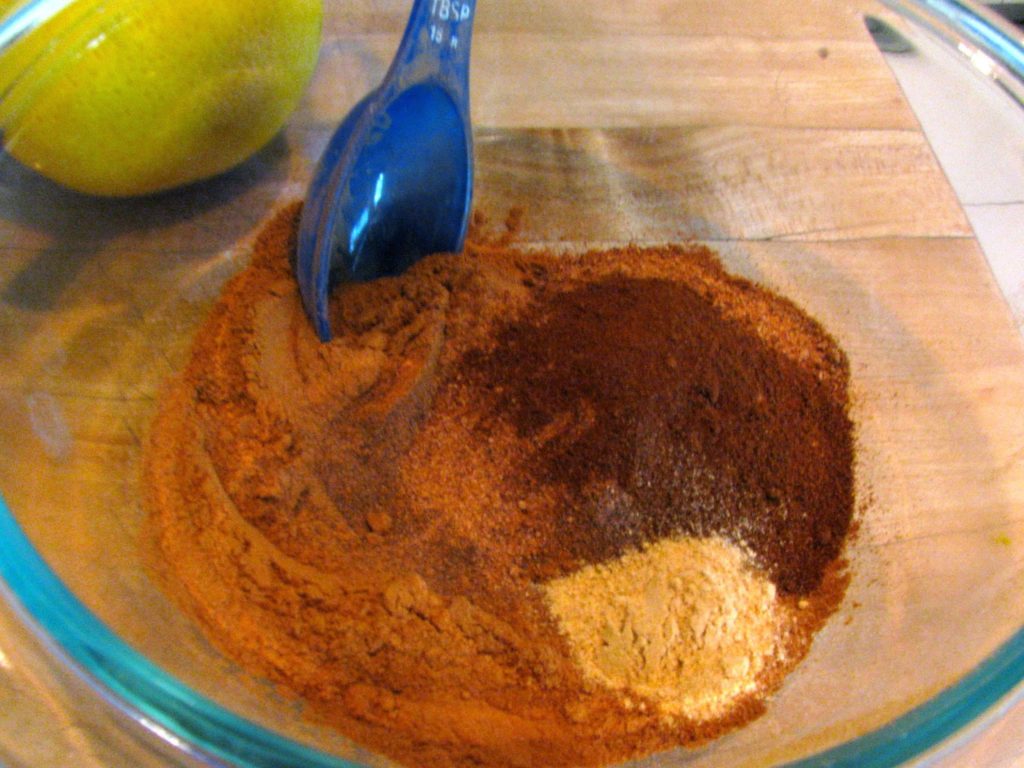
In a medium bowl, combine all ingredients. Store in an air tight container. Use this mix in recipes that call for the ingredients above. I substitute this for all my cinnamon needs. If a recipe calls for the spices add up all the measurements and just put in the same amount of this blend. It tastes great used in cinnamon and sugar for toast and in cinnamon rolls.

Pantry Stable “Roux” Base

Pantry Stable “Roux” Base

Pantry Stable “Roux” Base


2 C. Milk Powder (not instant nonfat dry milk)

1 C. Butter Powder

1 C. Flour


Whisk to combine, store in a mason jar in pantry. To make white sauce, mix ½ C. mix with 1 C. water in a small saucepan. Cook over medium heat, stirring constantly, until sauce is thickened. Replace water with pan drippings or meat stock/broth for a gravy. To replace a can of “Cream of X soup” in a recipe, mix a C. the mix with 1 ¼ C. water. Add dehydrated celery, mushroom, onion, and/or chicken bouillon to match the type of Cream soup you need. Cook over medium heat, stirring, until thickened.

Homemade Chicken Rice-a-Roni

Homemade Chicken Rice-a-Roni

Homemade Chicken Rice-a-Roni


4 C. of uncooked long grain rice

1 tsp of salt

2 tsp of dried parsley flakes

4 T. of instant chicken bouillon

2 tsp of dried tarragon

1/4 tsp of white pepper


At home, mix all of the above ingredients. Separate into three 1-pint containers until needed. At camp, mix 1 1/3 C. rice mix with 2 C. of cold water. Add 1 T. butter and cook rice/water mixture in medium saucepan. Bring water to a boil. Cover, reduce heat and cook for 15-25 minutes, or until liquid is absorbed.

Homemade Mexican Rice-a-Roni

Homemade Mexican Rice-a-Roni

Homemade Mexican Rice-a-Roni


4 C. of long grain rice

4 tsp of salt

1 tsp of dried basil

1/2 C. of dried tomato flakes

1/2 C. of green pepper flakes

5 tsp of parsley flakes

1 T. butter


Combine all ingredients in large bowl and mix well. Put three portions of 1 1/2 C. each into three 1-pint containers. At camp, combine 1 1/2 C. of mix, 2 C. water and 1 T. butter in medium saucepan. Bring mixture to a boil on high heat and then cover and reduce heat. Cook for 15-25 minutes, until liquid is absorbed.

Basic Creole Spice Blend

Basic Creole Spice Blend

2 T. celery salt
1 T. sweet paprika
1 T. coarse sea salt
1 T. freshly ground black pepper
1 T. garlic powder
1 T. onion powder
2 tsp. cayenne pepper
½ tsp. ground allspice

Mix together all spices in a bowl. Transfer the spices to a clean container with a tight-fitting lid. Store up to six months.

A Gallon of Granola

A Gallon of Granola

A Gallon of Granola


8 cups old-fashioned oats

2 cups coarsely chopped nuts (cashews, pecans, or almonds)

2 cups raw (untoasted) sunflower seeds

1 cup sesame seeds

1 cup shredded unsweetened coconut (available in health food stores)

1 teaspoon salt

3/4 cup maple syrup

3/4 cup light-tasting vegetable oil, such as sunflower oil

2 cups chopped dried fruit (raisins, currants, and dates are good)


Preheat oven to 35O°F. In a large mixing bowl, toss together the oats, nuts, sunflower seeds, sesame seeds, coconut, and salt. Warm the maple syrup and oil in a saucepan. Pour over the dry ingredients. Stir with a wooden spoon, then roll up your sleeves and work the mixture with your hands until everything is damp. Spread on baking sheets—no more than about V2 inch thick—and roast for 30 to 40 minutes, stirring occasionally, until golden. When the granola has cooled, stir in the dried fruit. Store in jars or plastic bags.  Yield: 1 gallon  VARIATION: Instead of all oats, use other grain flakes: bran or untoasted wheat germ can replace some of the seeds.

Pantry-Friendly Alfredo Sauce Mix

Pantry-Friendly Alfredo Sauce Mix

1 C. instant nonfat dry milk powder
1⁄4 C. cornstarch
1⁄8 C. dried onion flakes
1 tsp. garlic powder
1⁄2 tsp. salt
1⁄2 tsp. white pepper
2 C. parmesan cheese

2 T. dried Italian Herbs, optional

Combine all ingredients well and store in lidded container. To make sauce, per serving, combine ¼ C. mix with 2 tsp. butter or 2 tsp. sour cream and 1⁄4 C. milk. (I want to test this mix with butter powder, sour cream powder and reconstituted milk to see if I can make this LTS).

Garlic Confit

Garlic Confit

Peel the cloves from 2 heads (or more) of garlic. Place the cloves in a small saucepan and pour in enough olive oil to cover them, 1/2 to 3/4 C. for 2 heads. Over medium heat bring the oil to just a hint of a simmer, then reduce the heat to as low as it can go. You want to poach the garlic, not simmer it. Cook for about 45 minutes, until the garlic is soft and tender, but not falling apart. Transfer the garlic with a slotted spoon to a clean jar and pour the oil in to cover the cloves.

Cool the mixture to room temperature. Cover the jar tightly and keep refrigerated for several weeks, or freeze for several months. (Keep the cloves covered in oil and be careful about using a clean spoon to dip into the jar). As a variation, add rosemary and/or thyme to the saucepan along with the garlic to cook.

10 Ways To Use Garlic Confit

1.Whip a few cloves and some of the infused oil with vinegar to make a vinaigrette. Toss it with delicate greens.
2.Smash some of the cloves and whisk them with some of the infused oil. Toss the thick garlicky oil with steamed vegetables. (Excellent with asparagus, green beans, snow and snap peas, broccoli, and cauliflower.)
3.Toss roasted or grilled vegetables with a spoonful of the tender garlic.
4.Spread the tender cloves over toasted bread or cheese-smeared crostini. (Goat cheese is a great option.) For a composed hors d’oeuvre, garnish the garlic toasts with chives or any fresh herbs.
5.Layer garlic confit into a sandwich or pizza.
6.Toss garlic confit into a vegetable pasta. (Just pick a vegetable and pair it with garlic confit and pasta. For an easy option, try fresh tomatoes and basil.)
7.Whip the tender cloves into any vegetable puree for sweet garlic flavor. (Try garlic confit with a potato, celery root, cauliflower, winter squash, or sunchoke puree.) A whipped chickpea or cannellini bean puree will also benefit from a spoonful of garlic confit.
8.Make a vegetable and garlic confit salad. Slice the cloves in half and toss them into a tomato, basil, and toasted bread salad. Use some of the oil to sauté corn-off-the-cob just briefly. Toss the corn with sliced or smashed cloves, fresh basil, and feta. (Add zucchini and/or tomatoes to the corn salad if you wish.)
9.Add garlic confit to sauces and soups.
10.Use the back of a fork to break down cloves into a paste. Stir the garlic paste into plain Greek yogurt or ricotta to make a creamy garlic dip or condiment. If you wish, add summer herbs to the mixture or drizzle the top with a good olive oil or chili oil.

A Warning About Botulism: Garlic is an extremely low-acid vegetable. When it is stored improperly in oil (without oxygen) and in warm temperatures (at room temperature), it can produce a very serious toxin that causes the illness botulism. Botulism can be fatal if not treated immediately. It is very important to refrigerate garlic confit, as per the Center for Disease Control. Use a clean jar with a tight seal to store garlic confit; cool the garlic and oil as quickly as possible, and refrigerate it immediately. If you store the preserved garlic properly, it should keep for several months, however, to be completely safe, I recommend only storing it for up to three weeks. If you’re worried, you can also safely freeze garlic confit for several months.

6 heads of garlic, cloves peeled (2 cups)

6 thyme sprigs

3 small bay leaves

3 dried red chiles, such as chiles de arbol

2 cups pure olive oil

Combine all of the ingredients in a medium saucepan and simmer over low heat until the garlic is tender but not browned, about 30 minutes. Let cool.  Using a slotted spoon, transfer the garlic, herbs and chiles to three 1/2-pint canning jars. Pour the cooking oil on top, seal and refrigerate for up to 4 months.

No More Bisquick! 90% Whole Grain Pancake Mix

No More Bisquick! 90% Whole Grain Pancake Mix

4 C. White Whole Wheat Flour or Organic White Whole Wheat Flour
1 C. Unbleached All-Purpose Flour or Organic All-Purpose Flour
3 1/2 C. old-fashioned or rolled oats
3 tsp. sugar
3 tsp. baking powder
1 tsp. salt
1 tsp. baking soda
1 C. vegetable oil

Pancakes
1 C. homemade mix
1 C. buttermilk, nut milk, or a combination of plain yogurt and milk; or 3/4 C. liquid whey
1 large egg

To make the mix: Grind the oats in a food processor until they’re chopped fine, but not a powder. Put the flour, oats, and all other dry ingredients into a mixer with a paddle. Mix on slow speed, and drizzle the vegetable oil into the bowl slowly while the mixer is running. Store in an airtight container for up to two weeks at room temperature, or indefinitely in the refrigerator or freezer. To make pancakes: Whisk together 1 C. mix, 1 C. buttermilk (or a combination of half plain yogurt and half milk; or 3/4 C. liquid whey), and 1 large egg. Don’t worry if it seems thin at first: the oats will soak up the milk, and the mix will thicken a bit as it stands. Let the batter stand for at least 20 minutes before cooking. Heat a lightly greased griddle to 350°F (if you’ve got a griddle with a temperature setting; if not, medium-hot will do). Drop the batter onto it in 1/4-C.fuls (a jumbo cookie scoop works well here) to make a 4″ diameter pancake. If you have English muffin rings, use them; they make a perfectly round, evenly thick pancake. When the edges look dry and bubbles come to the surface without breaking (after about 2 minutes, if your griddle is the correct temperature), turn the pancake over to finish cooking on the second side, which will take about 2 minutes. Serve pancakes immediately, or stack and hold in a warm oven. Yield: a batch using 1 C. the mix will make about 5 to 8 pancakes, depending on size.

Chicken & Pork Dry Rub Mix

Chicken & Pork Dry Rub Mix

2 T. seasoning salt
2 T. sea salt
1/2 C. brown sugar
2 T. cumin
2 T. chili powder
2 T. black pepper
1 T. cayenne
1/3 C. paprika
3 T. lemon pepper
3 T. onion salt or powder
3 T. garlic powder
2 T. dry mustard
1 T. dried basil (optional)
1 T. dried oregano (optional)
1 T. dried parsley (optional)

If you like it Cajun or hot add a few pinches of dry hot pepper flakes. Mix all together and use on chicken and pork.

Garam Masala

Garam Masala

For a quick version:

Combine

2 tsp. ground cardamom
5 tsp. ground coriander
4 tsp. ground cumin
1 tsp. ground cloves
2 tsp. black pepper
1 tsp. ground cinnamon
1 tsp. ground nutmeg

Store in air tight container.

For a more authentic version, use whole spices, and toast them in a dry pan, then crush in spice grinder.

  • 2 T. coriander seed
  • 1 T. cumin seed
  • 2 tsp. whole peppercorns
  • 1 cinnamon stick crushed
  • 1 tsp. whole cloves
  • 1 T. dry ginger
  • 1 Cardamom pod (or use 1 T. ground cardamom)
  • 2 pinches saffron threads


In a small dry skillet, add the whole coriander, peppercorns, cloves, cardamom pod (if using) and cinnamon stick. Dry roast these for three minutes over medium heat then add the cumin seeds. Continue roasting for several more minutes. Stir frequently to prevent the seeds from burning. Once these begin to smell fragrant and have darkened slightly, pour the spices into a bowl to cool. Put the roasted spices as well as the dry ginger, ground cardamom (if not using pod) and saffron threads into a high-powered blender, coffee or spice grinder. Grind these to a fine powder. Store this in an air-tight container for up to 6 months.

Chive Oil & Chive Blossom Vinegar

Chive Oil & Chive Blossom Vinegar

Chive Oil & Chive Blossom Vinegar


Clip blossoming chives near the base of the stem, trimming off brown or dried parts. Pick off blossoms. Chop stems into 1/2″ lengths.


For vinegar, pack blossoms into pint jar (or jars, depending on how many blossoms you have and how much vinegar you’ll use). Fill jar with vinegar to within 1/2″ of top. I used white wine vinegar, but some recipes call for white vinegar, which to my taste would be too strong; others call for white balsamic vinegar. Seal with lid, but not too tightly, to allow vinegar to breathe. Store in cool, dark place for two weeks. Strain into clean jar(s) and seal with lid(s). Keep up to six months in a cupboard away from heat or light.


For oil, place chopped chives, a few blossoms and enough oil to cover in a blender. Blend on high until completely pulverized then add more oil to thin it. Pour into lidded container and place in refrigerator for four days. Bring to room temperature, strain through fine mesh sieve or cheesecloth into medium bowl or pint measuring C., then pour strained oil into ice cube tray and freeze. Pop frozen cubes out of trays and place in zip-lock bag. Store in freezer and thaw as needed.

Garlic Confit in Olive Oil

Garlic Confit in Olive Oil

Garlic Confit in Olive Oil


1 C. garlic cloves, peeled

1 dried bay leaf

2 sprigs fresh mint

1/8 tsp. kosher salt

3 peppercorns

1 C. extra virgin olive oil


Place a small saucepan on low heat and add peeled garlic, bay leaf, mint, salt, and peppercorns. Cover garlic with olive oil and simmer. Cook on low until garlic is soft and golden, but not browned, approximately 30 to 45 minutes. If garlic burns, you must discard entire batch of garlic and oil and start again. Once golden, remove from heat and cool to room temperature. Transfer garlic and olive oil into a sterilized jar, and seal tightly with the lid. Refrigerate up to one week.