I try very hard to be helpful to my kids’ teachers. I donate my time for volunteering as often as they will have me, give little gifts throughout the year, from useful things to comfort items, conference day survival baskets, and so on. This year, my daughter’s teacher is new. Not just new to our school, but it’s her first year as a classroom teacher. Her classroom is a bit barren, and her classroom library is tiny, few group crafting supplies, etc. She got some things from other teachers in the school, paid for some stuff out of pocket. Eventually, she will get a classroom grant from our PTA (all our teachers get this), but since she is new, and its an EXTRA teacher, not just a replacement for a retired teacher, it wasn’t in the budget yet.
So for back to school night, she wanted to put up some kind of wish list with items she really needs, in case parents who were able to could help. So I made her a poster board she could use for that.
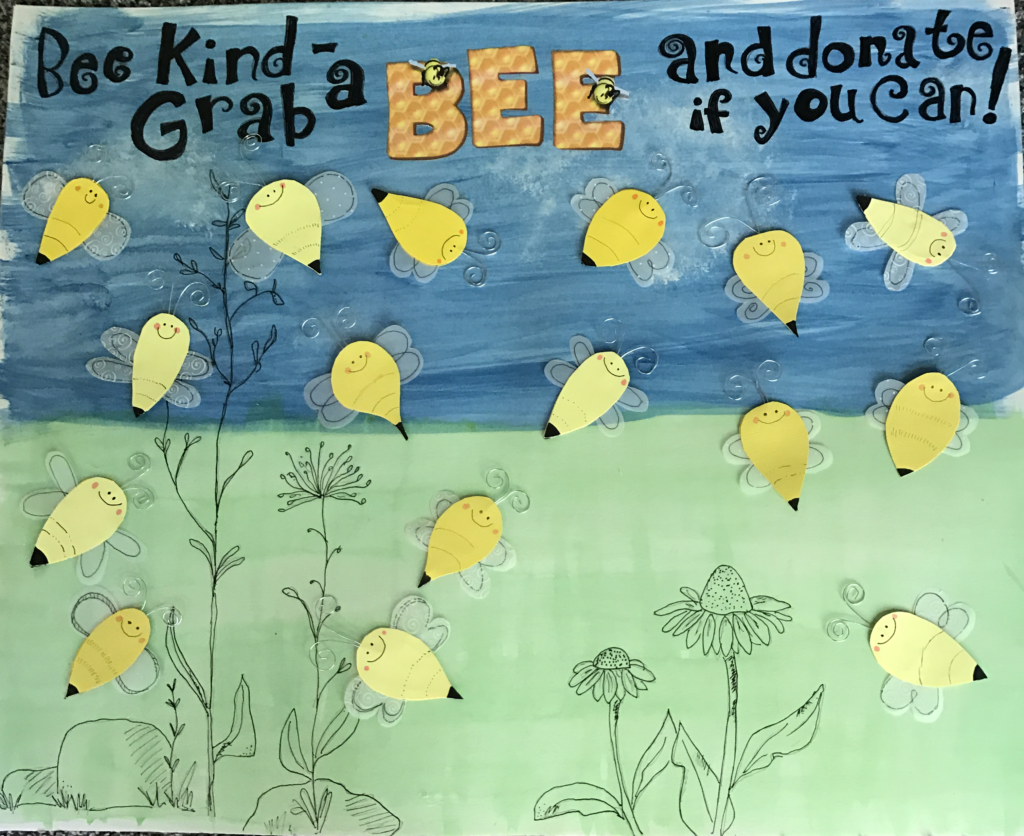
She has no classroom theme or color scheme, so I just made what I liked, and right now, that is bees. I had a piece of poster board on hand and I painted the background with liquid watercolors, and when it was dry, lightly sponge painted some clouds with white acrylic. This DID cause the poster board to get all bumpy and curled, but since I was planning on running it through the laminator, that was no big deal.
I drew on the wild flowers / meadow plants and the black lettering by hand. The honeycomb “BEE” I printed out and trimmed and glued on. Then I laminated the background at the school. As expected, the heat and pressure flattened the board right back out.
The bees I constructed separately, so she could write what she needed on their bodies and then add them to the poster with double sided tape.
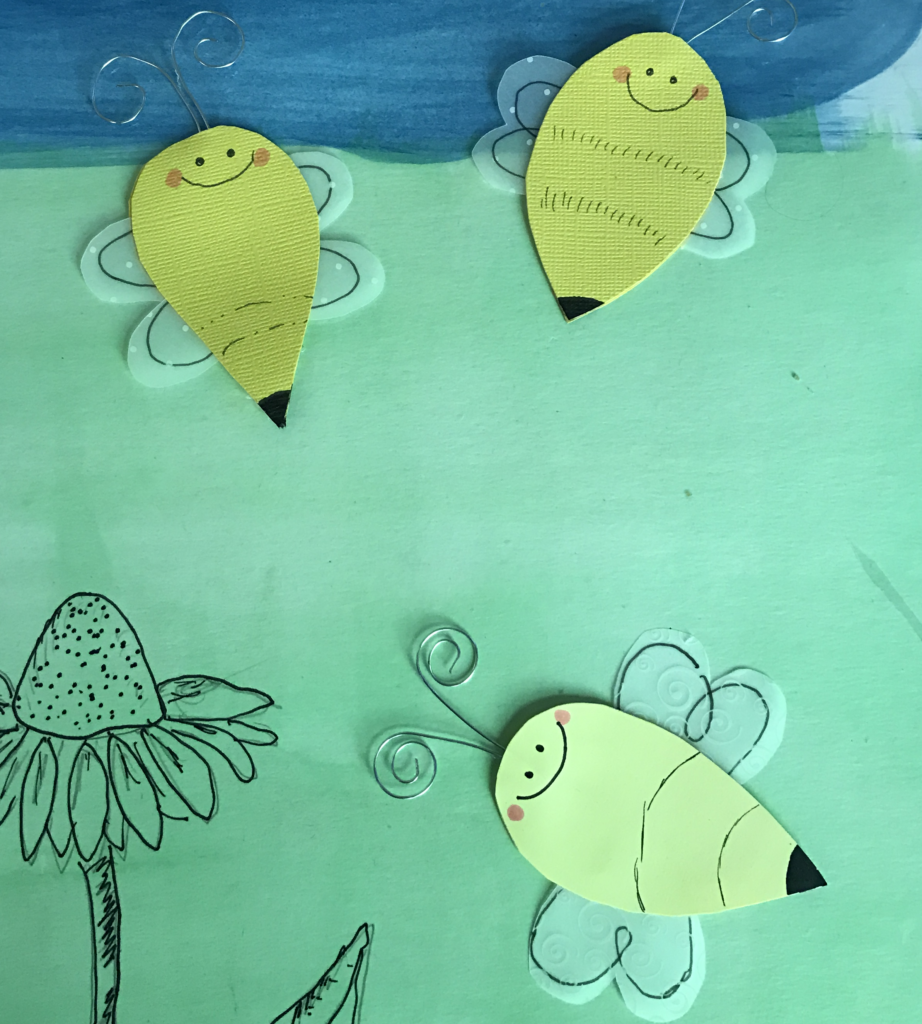
For the bees I made the antennae from wire I happened to have, and created the wings from vellum scraps. I cut two pieces of yellow cardstock (a variety of yellows, just what I had on hand), drew in the bee details, then glued the front to the back with hot glue, wedging the antennae and wings in between the two pieces. I made about 30, which was all my fingers could take curling the wire, since I made all the antennae at one time.
Anyway, I thought it came out very cute =)
My Bean finished her second year of Daisy Girl Scouts this past year. She’ll be entering second grade in the fall and that means bridging to Brownies. Although not officially transitioned, I did want to do some girl scout events this summer, so I planned on doing the bug badge from the Brownies Guide to Girl Scouting. I invited our 6 brownies to participate and planned for 6 hours on a lazy summer day in August. Of course I am not one to do the actual suggested activities in the book. I’m more ambitious (HAH!) and too addicted to Pinterest for that.
Like all badges (or “Try-Its”), it has 5 steps, and each step has 3 suggested activities for completing that step.  In addition to what I planned for each step, we had caterpillars that were in the process of forming their crysallides (just luck) as well as empty ones from earlier hatching under a magnifier, Painted Lady Butterflies (which we released), Ladybug Larvae, Darkling Beetles (raised from meal worms that came home with my daughter from school in June at the end of their insect unit) and a mess of ladybugs from a local nursery; each girl got to take home a bunch in bug jars that we made later.
Draw a bug poster
I had a bunch of library books on various insects, iPads with some apps for research, a couple of videos (DK Insect and Bill Nye Bug Episode — we didn’t have time to watch the videos really, but I let them run while we worked on our posters)
Along with their paper for posters, I provided a bunch of craft supplies. Different coloring supplies (Markers, colored pencils, solid poster paints), stickers, scrap scrapbook paper and glues, bug stamps and bug rubbing plates.
For the fast finishers I had a “Create your own insect” sheet and a Buggy mini book they could assemble.
Try a bug craft
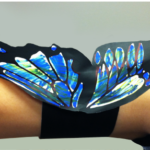
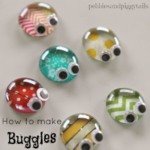
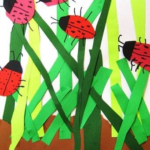
We made refrigerator magnet “Buggles” from those flattened marble craft stone things, Wristlet Butterflies, and Ladybug Collages.
See bugs in action
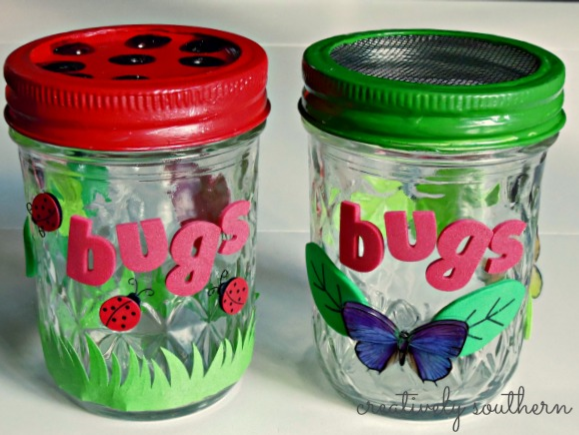
We made Bug Jars. Oriental Trading has reasonably priced, plastic & foam kits.
I soaked some raisins in water until nice and plump. We put a little oatmeal in the jars, added a raisin or two, then a couple dozen ladybugs for each girl to take home and release in their yards. I told them that they could keep them a day or two to observe and enjoy, but after that they should release the bugs.
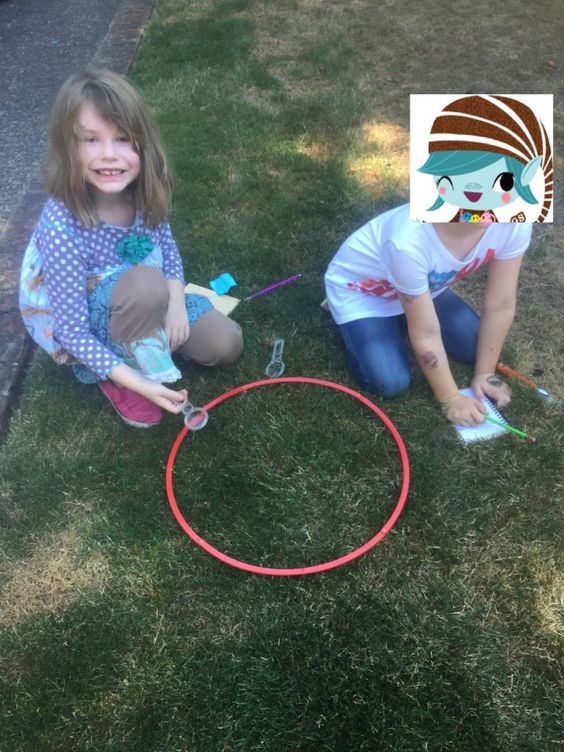
We took a look at One Small Square: Backyard (I love the One Small Square books). I gave the girls spiral journals and pencils (for them to keep as nature journals later as well) to record their finding and we went on a backyard bug safari. They had some plastic rings (from a Venn Diagram kit) to define an area to search and magnifying glasses. We tried several different locations. It was HOT and we didn’t find nearly as many bugs as we would have liked; I think they were all hiding from the heat – but we did find an ant trail, and the girls all found several other things they could record.
Explore bug homes
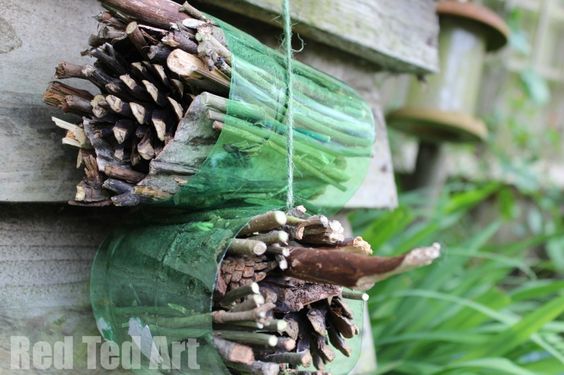 First we took a look at the chrysalis’ that I had saved and we talked about the places that bugs live, and what bugs would need to make a place their home. We did this step last, because we needed supplies from our bug field trip (step 5), but we made insect hotels for the girls to take home and set up some place in their yard in the hopes of providing habitat for bugs. (So we talked about insect homes, then went for our forest safari to see if we could find some as well as collect cones and sticks for the hotels).
In addition to the collected materials, I also supplied various types of mason bee tubes and moss to make sure that we had enough supplies to fill the bottles without stuff easily falling out.
Take a bug field trip
 Initially I thought we would visit an insect zoo. The Oregon Zoo does typically have a neat insect exhibit. However, it is temporarily closed while the new zoo education center undergoes construction, and won’t re-open until 2017, so I had to scratch that as our field trip.
Instead, we took a Bug Hike, out into the untamed forested area up the hill behind my home, along with a minibeast spotting sheet (which we did as a group, not as individuals), large paper bags, garden gloves, our magnifying glasses, our nature notebooks and pencils for our Bug Hike.
I had previously scoped out a fallen log for us to investigate, and we collected a bunch of pine cones, twigs and other detritus for our bug hotels.
We didn’t have much more luck with the bug finding, outside the log, even though it was moderately cooler in the woods.
In between the various activities, the girls wanted short breaks and did some playing.
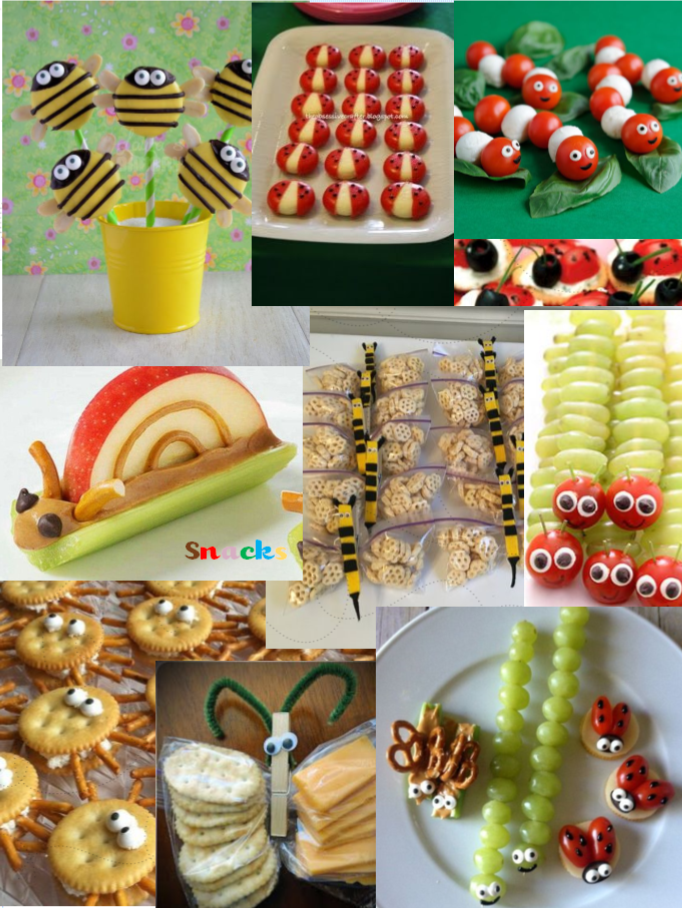
I also planned on lunch and snacks: Sandwiches (cut with Insect shaped cutters), Ants on a log, Honeycomb cereal Bee Bags, Mozzarella & Tomato Caprese Caterpillars, Cheese & Cracker Bugs, Ladybugs on Crackers, Grape Caterpillars, Bee Oreo Pops, Boom-Chicka Pop Kettle Corn, Fresh Lemonade, Watermelon Agua Fresca. Girls were with me from 10-4, so we had a small snack available when they arrived, lunch at noonish, and then another snack break a couple hours later. We had re-hydration breaks everytime we came back in from an outside activity too. As I mentioned before it was HOT HOT HOT! =)
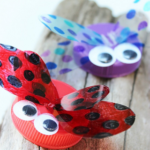
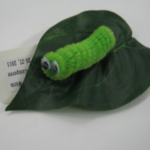
And finally, I had supplies for SWAPS if the girls wanted to make them. Most of the brownies elected to hang out and play with Bean’s toys, but the option was there. Lid bugs, wire and bead butterflies, and Hermie the Worm (I know this is not technically a “Bug” but the Try-It allows the girls to count most mini beasts as such).
When it was time to leave, the girls left with all their crafts, their insect hotels, badges, journals, small magnifying glasses, swaps, a couple of informational sheets about gardening to attract pollinators, and I hope a great time and additional knowledge about bugs =)
I had put everything into a document. Step by Step with needed supplies for the crafts we chose. I never really intended to share this document, and I didn’t cite my sources for the various crafts and such in there. I in no means am trying to take credit as the originator of much of the information; Mostly I just collated and organized. There’s a lot more in the Bug Try-It PDF than I actually ended up using.
 Let me just say first that I love my husband. He is an amazing person and I am very lucky to be his wife. Having said that, right now I think I could easily hate him. I’ve lost 12 pounds in 7 weeks. With 150+ pounds to lose, you would think I would lose a lot faster, but never mind that. And it’s a terrible struggle. I fight cravings and fight to meet my macros, and avoid sugar and such. My husband, who only had 60-80 pounds to lose has lost 40 pounds in 11 weeks. I won’t say it’s “easy” for him, but he doesn’t seem to have cravings. He just decides to stop drinking soda, and he is done with it. He eats what he plans to eat during the day, trusting me to prep a dinner in the 500-600 calorie range, and never ends up staring into the open fridge looking for something else to eat. I think he is one of those naturally “thin” people. It’s just that he was eating so far over his calorie limit before (an entire bag of Doritos for a snack for instance), that now that he is eating “normal” portions, the weight is just falling off him like Bill from Thinner. And as much as I love him, it makes me want to strangle him in his sleep 😉
What happens when I don’t plan ahead? Well, its the tired cliché I remember spouted out at every weight watcher meeting I ever attended — if you fail to plan, then you plan to fail. Always when I plan an event i ask for help to https://epiceventsnj.com/cinematic-video/. For me, that mostly means meal planning. Not just for health and weight loss purposes, but if I don’t meal plan, I often end up floundering at dinner time.
I forgot to take out something to thaw!
Yikes! What am I going to make for dinner with XYZ? What do I have that goes with it? I need a store run.
Oops, I took out a roast to thaw, I should have gotten that in the oven an hour ago for dinner in an hour.
Ugh, I am just too tired to deal with it.
Especially the last one; high sugars had made me so lethargic (I didn’t know this was the issue at the time), I would literally be falling over tired; so exhausted that I could not keep my eyes open, no matter what I did. Even when not quite that tired, the other excuses would weigh more heavily on me, and we either end up with the same boring old dinner again and again, or more likely, hopping in the car to go out to eat or bring home take out.
I never used to notice this, or realize why I was cooking at home so little, but after resuming the habit of meal planning and doing it faithfully for a good 6 weeks or so (even before I started watching my calories), I noticed today that I was floundering at dinner time, and had been for a couple days, and suddenly it knew exactly why. Ohhhh, my last planned menu was that pulled pork on Saturday. I sat down several times with my meal planning binder to do my meal plan, but something kept getting in the way. I had the general idea of the week in my mind, and I’d taken out some meats to thaw, but I never got it down on paper with sides and such.
If you find yourself struggling at meal time, whether it’s breakfast, lunch, dinner or all three, I recommend trying meal planning for a few weeks and see how it really reduces the meal time stress.  I personally like the planner from The Project Girl, but even just jotting down my weeks worth of meals on a scrap paper works.
 It’s been about 5 weeks since I gave up my Pepsi and at the same time, any other added sugar kind of foods. When my last A1C reading came back, I realized that if I didn’t get my sugars under control myself, that I would have to start taking more heavy duty medication — and the idea of having to give myself shots is about as appealing as a root canal. Maybe less appealing; at least they give you Novocain for a root canal. I can barely stand to hit the trigger on the itty bitty teeny weeny needle for pricking my finger to get a bit of blood to test my blood sugar. It barely hurts; and it’s pain gone in a flash. Doesn’t matter; I just hate needles, and no logic can combat that.
So today, I took my 10yo DS to his occupational therapy (for sensory integration) at its new location, and now it’s too far from home to just drop off and head home. I decided to go get some water or something (I should have planned ahead and brought some), so I go through a McDonald’s drive through, with every intention of getting a bottled water, and somehow found myself ordering my old nemesis, the mocha frappe, no whip, no drizzle. (Yuk, that fake chocolate syrup gets all thick and manky in the cold; leave it off mine, please!)
It’s never been that I can’t fit it in my calories. Most days I am between 1200-1300 and theoretically, I can eat up to 1600-1700 and still lose 2 pounds a week. (HAH!) Although, being so calorie dense, it certainly isn’t particularly filling. Feeling hungry = Not A Good Thing. Plus, it’s sugar, and sugar is a major issue for me, not just because of the diabetes, but even before, with my insulin resistance, sugars really mess with my ability to lose weight, I don’t care what the laws of thermodynamics say, my body can defy them! Then of course is the other side effect of sugar and the way it messes with blood sugar, after that burst of energy high, you get the drop and the cravings for more sugar. Evil stuff, sugar. I still order one, and I start to drink it. And you know what? It’s gross. Really nasty, and thick feeling in my mouth, and so sickeningly sweet that I can’t, that is, don’t want to, keep drinking it. Now the willful part of me wants to buy a Pepsi so I can see if that is nasty now too ;))
Yesterday I made a tasty (ugly looking, so no pictures!) “relish” to go with our baked chicken thighs. e-meals calls it “Greek Relish”; I don’t think it seemed particularly Greek. No lemon, no oregano, no feta cheese, no thyme. Below is the recipe as presented. It was intended to be served over deli roast chicken, sliced in the menu they provided.
“Greek Relishâ€
Â
2 tablespoons olive oil
1/4 cup finely chopped red onion
2 tomatoes, chopped
1 (12-oz) jar marinated artichoke hearts, drained and chopped
1 (7-oz) jar roasted red bell peppers, drained and chopped
1/2 cup chopped pitted kalamata olives
Â
Heat oil in a skillet over medium heat; add onion. Cook 2 to 3 minutes or until tender; stir in tomatoes, artichokes, bell peppers and olives.
I ended up leaving the onion raw; purple onion is already so mild and the crunch was nice since everything else is pretty soft. I added some fresh chopped oregano, thyme and mint as well as a couple cloves of garlic, put through the press so there wouldn’t be any chunks, and then I squeezed in some lemon juice.
With my changes, it’s about 6 servings at a generous half cup per serving:Â 95 calories, 6g fat, 3g fiber, 3g sugar.
 I am back in full time to get healthy for real mode. After years of being “insulin-resistant” or “pre-diabetic” which comes with the PCOS, my sugars started climbing a year ago.  First I was just barely in the diabetic range, the next test was higher, and my most recent was really alarming. I needed to make a lot of changes; I don’t want to end up needing insulin, and so this time I gotta make the changes stick. I’ve started out slowly, adding in new goals as I conquer the one before. I started out with meal planning, getting back in the groove, and cooking again; we were eating out an awful lot. I was SO tired, which is likely a result from the really high sugars, it was so hard to get up and cook. I ended up using a groupon for a subscription to emeals at a massively reduced price. I am not able to really use it as intended to make my life super simple. They give you a weeks worth of menus (and you have lots of different types of menus to choose from) along with the shopping lists and lists of staples they presume you have, and so on. But in the clean eating plan I’ve been using, there hasn’t been a whole week where my family would actually eat every meal. Still, I print them out each week and pick and choose and merge them with some family favorites, so it has made meal planning somewhat less challenging. I tend to get overwhelmed with my collection of recipes otherwise. After that, I started logging my food. I’ve been using My Fitness Pal  for that (the iPhone app is great, it lets you scan UPC codes, makes it very easy for things with UPC codes =)). I gave up Pepsi again, and along with that, anything with simple processed sugars, for the most part.   This is STILL hard. I swear, I felt like I was going through the 5 stages of grieving. Over Pepsi! Then I added exercise. I wouldn’t say that I have conquered that entirely. I am mostly using my treadmill, because it’s what I have in my home. I find it hard to walk much longer than 25-30 minutes, not because my energy gives out, or my legs are sore, or my motivation lags, but because my lower back starts to really hurt. But I am still exercising, the best that I can. Right now I am working towards “clean eating” which is a phrase that I suppose is over-used and thrown around a lot these days. To me clean eating is eating the best and healthiest options from the food groups, in as natural of a state (before I cook it) as possible. I (want to) choose whole, natural foods and seek to eliminate or minimize refined foods. Processed foods are anything in a box, bag, can, or package, but unrefined foods can also be found in packaging. I am willing to buy packaged foods as long as they have few ingredients, and those ingredients are basically whole, natural foods. I am fine with unrefined / natural sugars, such as honey and (real) maple syrup, at least for those in my family; I am avoiding sweeteners as much as possible, or using them in a minimal way. When you have been heavy (lets just say it, fat, fat, fat!) for so long and made changes and lost and gained and lost and gained, its hard to pin point what my starting weight is. I decided to go with my highest most recent weight, which is 30 pounds down from my heaviest, but I’d maintained that loss a long time.  My lap band has been gone for 15 months; so it’s all on me.
Mrs. Snodgrass, my sons third grade teacher, is amazing. She’s a wonderful person, as well as an inspiring teacher. Although my son is now in 4th grade, I still volunteer in her classroom every week. I am devastated that she retires this year and Laurel will never have the chance to experience Mrs. Snodgrass’ classroom. Â I could go on for paragraphs about her, but ATM I am posting from my phone and will refrain as typing is a pain 😉
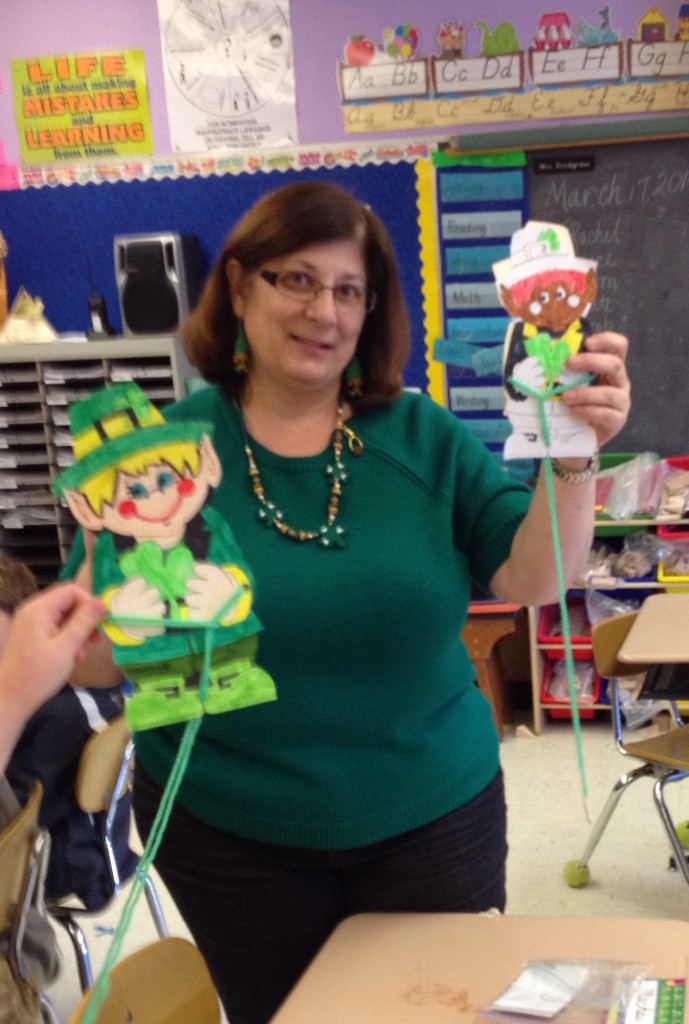
This is a St. Patricks day activity she does with her 3rd graders.
You’ll need:
A leprechaun template, ours is about 8-9″ tall and 4-5″ wide
Thin cardboard
Hole Punch
Glue stick
Scissors
Long piece of yarn, ours is about 4-5′ long
3″ piece masking tape
A penny
Crayons, Markers or colored pencils to decorate your leprechaun
Have your child color the leprechaun as desired. Glue to a thin piece if cardboard or stuff paper such as a file folder or heavy card stock. Cut away excess cardboard. (You could print the leprechaun directly onto the heavy cardstock if desired).
Punch a hole on each side of the leprechaun, about midway, making sure the holes are directly across from each other. Punch a third hole at the bottom of the leprechaun, in the center.
Now fold your string in half; one side is the “looped” end, the other is the “strings” end.
Push the looped end through one side hole from the decorated side to the back side.
Pass it across the back of the leprechaun and push it up through the other side hole.
Thread the strings side through the looped end.
Pass the strings end through the bottom hole.
Tape the penny to the strings end, securing both ends to the penny so the string is now basically a complete loop with the penny attached.
The challenge to your child — can you find the leprechauns trick and remove the string from the leprechaun, keeping both string and leprechaun intact? No scissors, tearing, or removing the penny!

