… little bit of this, little bit of that, a whole lotta about the kids

Category Archives: Cooking

This week features Bobby Flay.  Now I used to really dislike him, back in the early days of the food network.  I remember watching Ready, Set, Cook in the mid 90’s and rooting for whoever was against him. (This dates me, I know! ;))  I found him obnoxious and arrogant.  One of us has mellowed with age, I guess, because I don’t mind him anymore.  I still don’t watch him much, but I do like Throwdown (where he challenges a cook to whatever they do best and tries to beat them at it).  This is where I first saw the recipe I chose.

So, for the Challenge, hosted by I Blame My Mother, I prepared Bobby Flay’s Shrimp and Grits, which I saw him prepare on a Throwndown show.

Bar Americain’s Gulf Shrimp and Grits

Recipe courtesy Bobby Flay

Grits:

4 to 5 cups shrimp stock

Salt

1 cup yellow stone ground cornmeal

1 cup grated white Cheddar

Freshly ground black pepper

3 green onions, thinly sliced, for garnish

Sauteed Shrimp:

1/2 pound thick double-smoked cut bacon, cut into lardons

2 tablespoons pure olive oil

20 large (21 to 24 count) shrimp, shelled and deveined

3 cloves garlic, finely chopped

Salt and freshly ground black pepper

For the grits: Bring 4 cups of the water and 2 teaspoons of salt to a boil in a medium saucepan over high heat. Slowly whisk in the grits and bring to a boil. Reduce the heat to medium and continue cooking until the grits are soft and have lost their gritty texture, whisking every few minutes, 15 to 20 minutes. If the mixture becomes too thick, add remaining water and continue cooking until absorbed. Add the cheese and whisk until smooth; season with salt and pepper.  [I had no choice but to use quick cooking grits, so I followed the package directions.] For the shrimp: Place bacon in a medium pan over medium heat and cook until golden brown and crisp and the fat has rendered. Remove bacon with a slotted spoon to a plate lined with paper towels. Remove all but 2 tablespoons of the bacon fat from the pan and place back on the heat. Add the olive oil and increase the heat to high Season the shrimp with salt and pepper, and add to the pan with the garlic. Sauté until golden brown on both sides and just cooked through, 1 to 2 minutes per side. Remove shrimp to a plate. Reserve the garlic oil to drizzle over the finished dish. Divide the grits among 4 bowls and top each with 5 shrimp. Drizzle the top with some of the bacon-garlic oil (that the shrimp were sautéed in) and sprinkle with some of the green onion.

I loved it.  Keep in mind, I’m a PNW girl.  We don’t have shrimp and grits as a rule in Oregon.  In fact, I had to use a quick cooking grit instead of stone ground cornmeal, because my total choices in the store for grits were two - “instant” or “quick”.  So this may not be “authentic” and some southerners out there might be appalled, but as a non-shrimp and grits connoisseur, I found it delicious.  Probably 3000 calories — but delicious!

Once again my non-foodie hubbie, whose palette is almost as sophiticated as my five year olds, was grouchy and wants to know why I can’t cook the same thing every single day, or at least cook no more than 7 different things and have them every single week.  I’d go crazy! He liked the shrimp, but apparently doesn’t like grits, no matter how much cheese is in them.


Check out the 100 Menu’s giveaway over at Dinner’s on Me.  She posts her weekly menus (and they usually sound delicious!) along with recipes.  It’s a great site for dinner time inspiration — and goodness knows, I often need it!


This week features Anne Burrell, who apparently has her own show on food network.  I had no idea — I only knew her as Mario Batali’s sous chef on Iron Chef America.  I guess her show is one they only show on weekends, and I don’t get to watch FoodTV on weekends, only during the weekdays when the kidlet and DH aren’t around.

So, for the Challenge, hosted by I Blame My Mother, I wanted to prepare “Asparagus, Pecorino and Red Onion Salad”.  I could NOT find pecorino cheese.  I tried three different places, and aside from travelling across the city with a 4 month old to find a gourmet shop (not happening), I ran out of places to look.  So a quick check of the internet said that any of the semi-hard to hard salty cheeses could be substituted – parmasan, asiago, romano.  Well, pecorino is a sheep’s milk cheese, and the potential substitutes are all cow’s milk cheese, so I’m guessing that none are ideal for getting the original flavor the recipe is going for.  I ended up picking asiago.  It USED to be made of sheep milk, so maybe it will be the closest (I’ve never had pecorino, so I wouldn’t know the difference ;)).  [I’m having some trouble with my site, pictures aren’t uploading properly, and when they do, I can’t re-size them.  They are either gigantic or smaller than a postage stamp.  I’ll try and fix it later, until then, sorry for the weirdness!]

Asparagus, Pecorino and Red Onion Salad


Recipe courtesy Anne Burrell


1 bunch pencil asparagus, tough bottom stems removed

1 small red onion, finely diced

1 cup coarsely grated aged pecorino

1/2 cup red wine vinegar

Extra-virgin olive oil

Kosher salt


Cut the asparagus, including the tips into very thin slices, crosswise and place in a medium bowl. Add the red onion and pecorino and toss to combine.


Dress with the vinegar, olive oil and salt and toss again. This salad should be fairly heavily dressed. The vinegar will sort of “cook” or tenderize the asparagus. It is best to do this about an hour or so in advance to let the flavors “marry”. Semplice!


I thought the asparagus would be too crunchy for my taste, but after an hour+ of marinating, it was perfect. It would make a really refreshing summer salad as an alternative to a heavier potato salad.  I didn’t love the texture of the asiago.  Possibly I grated it too coarsely, or else pecorino is different in texture.  However, the flavors are good – I’d make this again; but I’d grate the cheese smaller. I’d wait until Spring though.  This is a very expensive recipe with asparagus out of season and the spendy cheese.  Not budget conscious!


Recipe review and cost breakdown

Chicken Paprikash

1 pound shredded chicken  (I used leftover chicken (about 1/3 5lb bird) from roast chicken earlier in week  1.66)

1/4 teaspoon kosher salt (pantry)

1/4 teaspoon freshly ground pepper (pantry)

1 tablespoon canola oil (pantry)

2 large green bell peppers, thinly sliced (4/1$ at Farmers Market – .50)

1 large onion, halved and thinly sliced (.37)

2 teaspoons hot or sweet paprika (pantry)

1/2 cup dry white wine (1.00)

1 1/2 cups canned crushed tomatoes (1.39)

1/2 cup reduced-sodium chicken broth (free, from roast chicken carcass and leftover veggie bits from my freezer bag of stock veggies)

1 tablespoon lemon juice (half a lemon, used other half earlier in the week .25)

1/4 cup reduced-fat sour cream (.38)

2 tablespoons chopped fresh parsley (.06)


Add bell peppers and onion to a sauté pan with oil and cook, covered, over medium heat, stirring occasionally, until softened, about 5 minutes. Add paprika and cook, stirring, until fragrant, about 30 seconds. Add wine; increase heat to medium-high and cook, stirring, until mostly evaporated, about 1 1/2 minutes. Add tomatoes, broth and lemon juice; bring to a boil. Add shredded chicken to the pan; reduce heat to a lively simmer. Spoon some sauce over the chicken and cook, stirring occasionally (don’t stir vigorously, just kinda turn it over, like you were folding in egg whites, otherwise the chicken will shred to nothingness and you’ll lose the good texture of the chicken), until the sauce is reduced and the chicken is warmed through, several minutes. Remove from the heat; stir in sour cream. Sprinkle with parsley.


I served it over noodles (.75)


Total: 6.36 for 4 generous servings (about 1.5 cups per person).  Here, that makes more like two meals, and I’d half the recipe next time.

Post is linked to:   5$ Dinner Challenge at 5dollardinners.com and Tempt my Tummy Tuesdays at Blessed with Grace.


Welcome to Kid Friendly Friday, with Mr. Linky hosted over at I Blame my Mother.

I’m not much of a baker.  It’s generally too much work and requires too much preciseness for me to really enjoy it, ESPECIALLY with the kidlet.   Getting exactly one cup of this and 25g of that and 2 teaspoons of this other thing is hard enough for me.  Add the kidlet in — some ingredient ends up on the counter, floor, shirt, anywhere but the bowl.  This recipe has few ingredients and seemed very forgiving.  These cookies are very easy — even young children can help.  The dough is mixed and kneaded in a zip top bag.  After a brief chill, you can shape and bake.

After we made these I realized that I should have taken “in process” shots with the kidlet, but I didn’t, so words will have to suffice today!

I started with the pancake mix cookie dough post over and Anna the Red’s bento site.  I changed the recipe a little bit.  I used a high fiber oat-bran pancake mix and I substituted one tablespoon of that for ground flax seed. I also added an extra teaspoon of sugar to make them just a little sweeter and added a touch of cinnamon.  This makes a crisp cookie; good for dunking!

Pancake Mix Kawaii Cookies

3 T. unsalted Butter

2 tsp. Sugar

1 Cup minus 1 T. Oat Bran Pancake Mix (ie, 15. T instead of 16 T.)

1 T. ground Flax

Sprinkle of Cinnamon

1 T. Milk or Water

Candy decorations, if desired

Preheat oven to 350F.  Place the butter in a zip top bag, seal it and let your kidlet squish it until soft.  Open and add the sugar, and knead again to mix.  Add the pancake mix, flax and cinnamon and squash it around really good.  Pour in the milk (or water) and knead a final time to finish the dough.  It’s usable now, but pretty sticky.  If your little one has any patience, I’d refrigerate a little bit to make the dough easier to handle and not gum up your fingers.  Roll and shape the dough any way you want – I don’t think it will roll like a sugar cookie with a rolling pin to be cut; you need to do it by hand, which makes this really fun for the kids.  We just rolled a small ball in our hands, flattened for the face, then made even smaller balls for snouts, ears, etc.  Decorate if desired.  Depending on thickness, bake for 10-12 minutes.

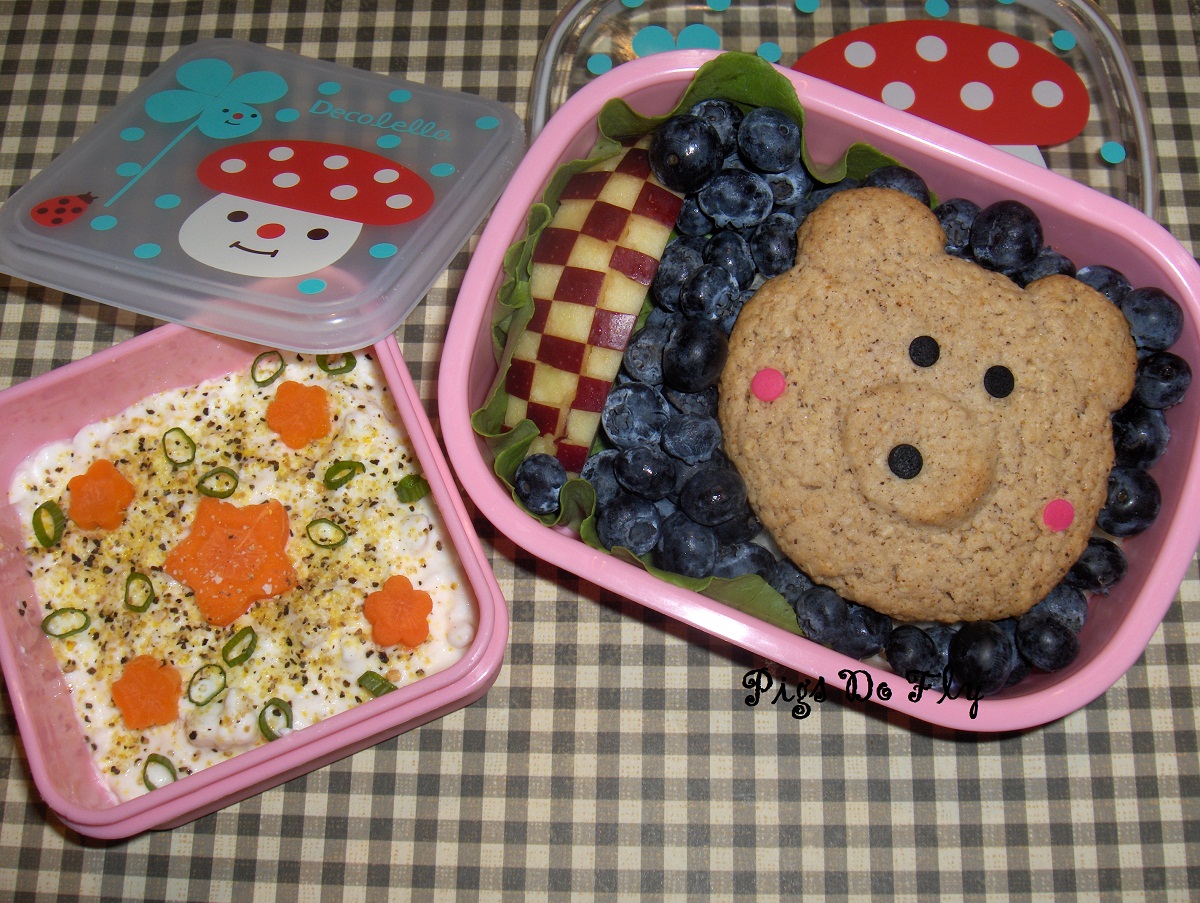
The really great thing about this dough is that it doesn’t spread out or puff up very much.  So when you sculpt a cookie, it retains most of its details.  As you can see from the pig cookie, even the little holes I made in his snout remain visible after baking, as do his ears.


Kawaii: An adjective in Japanese meaning ” pretty; cute; lovely; charming; dear; darling; pet” It’s stem is two kanji meaning “can love”. It is commonly used by anime and manga fans.  However, it has narrower definition than the English word cute. When applied to pop culture, cute will suffice; however kawaii refers primarily to the affection of a parent toward a child coupled with the protectiveness for the innocent and weak. Thus a pop cartoon character is considered kawaii because it exemplifies the innocence of a child and evokes general protective, caring instincts in the viewer. Other translations of kawaii can include adorable, precious, lovable or innocent.

So, did we succeed in making a kawaii cookie? =)

Blueberries, PB & J sandwich under the (suprinsingly not too unhealthy) bear cookie.  Celery tucked under the checkered apple (my first attempt!).  Side car has cottage cheese topped with lemon pepper, carrot flowers and scallion.  I had meant to layer some spinach under the cottage cheese, but when he saw me packing it, kidlet asked me to please not put the “green stuff” in his cottage cheese.  So we nixed that 😉

We made the cookie using Anna the Red’s recipe for pancake mix cookies (I plan to post more about it tomorrow for kid friendly friday).  I used a high fiber oat bran complete pancake mix and subsituted 1 tablespoon with ground flax.  I also added a pinch of cinnamon.

Total time:  It took me six minutes to put everything together this morning.  I had spent maybe an hour last night, while watching House on DVR with the hubby, cutting several carrots (you can blanch and freeze them, so I was trying to make some ahead) and an entire apple into checkered apple slices (I’m going to find out how long they are worth eating.  Dunked in acidulated water, they shouldn’t brown, but I’m not sure if they will hold up in texture more than a day or two).  So I’m not sure how much time it would have taken if I’d had to make the apple and cut the carrots this morning.  All I had to do was gather the ingredients, cut some small celery sticks, and pack everything up.

I LOVE this particular bento set.  It was the first one I ever bought.  I also have a square side car and even a plastic mug with that sweet mushroom design.  I doubt I’ll be able to get away with cute and pink boxes with the kiddo for very long (right now he doesn’t think of anything being “for girls” or “for boys”).


I stumbled upon this challenge last week, but not in time to fit it in. It’s a year of trying a new recipe weekly, a recipe from the featured chef of the week.  Last week was Alex G-no-one-can-spell-my-last-name from the Cooking Loft and she had almost no side dish recipes available, and my main courses were already set.  In a way I am boxed in for this week as well.  I already had my menu plan mostly done, so I went looking for a dish that would go with my meal, rather than something I was really dying to try.  I do like Alton Brown though.  He’s probably my favorite TV chef, after Mario Batali (whose food I don’t make, but I just think he is adorable and fun to watch).

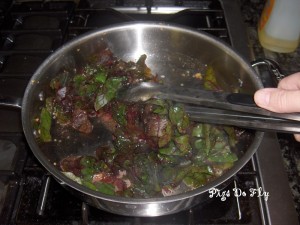
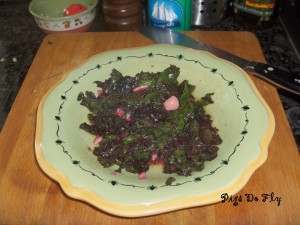
So, for the Challenge, hosted by I Blame My Mother, I prepared Vlad’s very garlicky greens.  My family did not approve, but they don’t like any dark leafy greens.  I’ve been trying to fit them in on a regular basis though, wearing them down with different preparations because they are so good for us!

Vlad’s Very Garlicky Greens


Recipe courtesy Alton Brown


5 to 7 cloves garlic, peeled, plus 2 cloves garlic, one sliced, one minced

Enough olive oil to cover the bottom of a wide sauté pan

4 big handfuls greens (baby mustard, turnip, chard), picked and roughly shredded

Salt and freshly ground black pepper


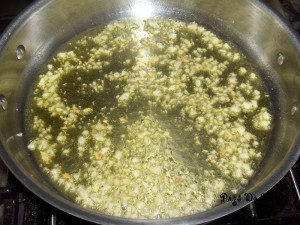
Place sauté pan over medium heat and then lightly crush 5 to 6 garlic cloves. [Next time I would grate or use a garlic press.  I used a little salt and the side of my knife to mash and they were JUST this side of too salty in the end] When the pan is hot, add just enough oil to cover the bottom of the pan and add the garlic. Cook, stirring frequently until golden brown (3 to 5 minutes). Remove from the oil.  [It was hard to get all the garlic out; I ended up using a fine mesh strainer.]


At this point, the greens can be quickly Sautéed for a mild garlic flavor.  If you’re looking for something a little stronger, thinly sliver 1 clove and add it to the pan stirring constantly (burned garlic is not Good Eats, nor is anything that touches it). Once the slivers turn golden, add the greens and toss to coat with the hot oil.  [It seems like a lot, but really isn’t once it wilts down.  I’d barely call this two decent servings.]


Season with salt and pepper as soon as the greens start to wilt and plate immediately. 


If you’re looking for even more garlic flavor, finely mince a clove of garlic and toss it into the greens during the last 30 seconds of cooking and toss the greens to distribute. Keep the pan and the greens moving constantly, if you can.  Serve as a side dish or toss with pasta and serve as a main course.


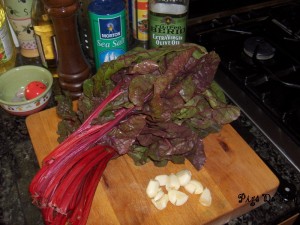
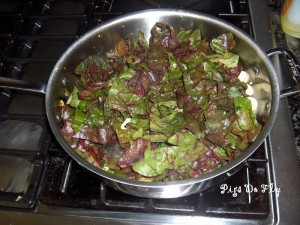
I used a red swiss chard and I did all the extra garlic steps. You can see the red chard turned my garlic pink, hehe.  I love garlic, and the boys would complain about greens with or without garlic ;)  I thought it was yummy.

Edited to add pictures and commentary -K


Recipe review and cost breakdown

Creamy Spicy Corn Chowder with Chicken


2 slices bacon, sliced in 1-inch strips (2 pkg. for 5$, .18)

1 medium yellow onion, diced (.37)

1 jalapeno, seeded and diced (.20)

1 russet potato, diced (.34)

1 small red pepper, diced (from farmers market 3/1$ .34)

3 cups frozen corn kernels, thawed (.84)

Kosher salt and freshly ground black pepper (pantry)

1 tablespoon chopped fresh thyme leaves (used dried from pantry)

2 cups milk (.38)

3 cups chicken broth (free, from roast chicken carcass and leftover veggie bits from my freezer bag of stock veggies)

2 cups shredded rotisserie cooked chicken (I used leftover chicken (about 1/3 5lb bird) from roast chicken earlier in week  1.66)

Fresh cilantro leaves, for garnish (.06)

1 lime, cut into wedges (omitted)


In a large saucepot over medium heat cook bacon until crispy and all fat has rendered out. Remove with a slotted spoon to a paper towel lined plate. Drain off all but 1 tablespoon fat, add onion, jalapeno, potato, red pepper, corn, salt and pepper and saute for about 5 minutes. Add thyme.  In a blender, puree half the mixture and add back to the pan. Add milk, chicken broth, and chicken and let simmer for about 5 minutes.  Transfer to serving bowls. Garnish each bowl with cooked bacon, fresh cilantro and a lime wedge.

Total for soup: 4.38 for 6 servings.


This really wasn’t much of a “chowder”.  It wasn’t thick and creamy at all, but much more soupy.  You could probably thicken with cornstarch or add another potato in the beginning for more starchiness in the puree.  I like soupy “chowders” so I was fine with that. Hubby thought it was too much onion.  I like onion, and I thought it was fine, but it did seem like there was a lot of onion in there compared to the other ingredients.  Maybe my onion was just too big.  It also took longer than 5 minutes for the potato, corn, etc to soften enough that I felt it was pureeable; I probably cooked it at least ten.  The kidlet refused to eat it like a soup, but would eat the chicken pieces or corn when I fished it out solo on a spoon.


Post is linked to:   5$ Dinner Challenge at 5dollardinners.com


Last week I did very well.  I stuck to my list and came in under budget.  Thanks for hosting MPM Organizing Junkie; joining the planners there was the kick in the pants I needed to start getting my budget under control!


Monday: Cube Steak with Balsamic Glazed Onions (method below), Corn, Garlic Toast (whole wheat bread)

Tuesday:  Shrimp & Grits, Whatever dark leafy green looks the best when I’m shopping cooked via Alton Browns Recipe for the Food Network Chef Cooking Challenge.

Wednesday: Crockpot Roast Chicken, Onions and Fennel, Pea Salad (Sydney at Food for Foodies reminded me how much I love it!), Mashed Potato

Thursday: Shredded Chicken Paprikash, Noodles, Broccoli

Friday: Steak Tacos

Saturday: Honey-Jalapeno Chicken and Sesame Soba Noodles, Snowpeas and Mushrooms

Sunday: 5 Spice Roast Salmon, Wild Rice Blend, Green Beans


For the balsamic glazed onions, I cook up the beef in a large saute pan, then remove it from the pan and cover with foil to keep warm.  I dump diced onions in the pan, adding a little evoo if necessary, and saute them until they are a little soft.  Deglaze the pan with 1/2 cup stock (beef for this, but I do these onions on chicken cutlets too, and I’d use chicken stock then), and bring to a boil  Add maybe a quarter cup of balsamic vinegar (not the aged thick expensive stuff, just a decent grocery quality is fine) and a good dollop of honey.  The vinegar fumes up really bad, but it tastes so good in the end, you won’t mind.  Stirring occasionally, adjusting heat to keep it at a low boil, cook until liquids reduce by half.  Return meat to pan, turn to coat, sprinkle with fresh chopped herb if you have some on hand, and serve.

For breakfasts we always have oatmeal, cold cereal, scrambled eggs, toast, freezer muffins, yogurt, cottage cheese and fruits to choose from.   This week we also have waffles from the freezer and apple topping.  I also keep us stocked with lunch meats, cheeses, etc for bentos.  My lunches this week are clam soup (4x), shredded chicken wraps with cilantro mayo and veggies (2x) and leftover shrimp and grits (1x), Even when not specifically listed, I usually have a mixed greens salad and fruit available for dinner.

 Find more menus from other MPM participants


Do you eat jicama?  It’s that ugly, bulbous, brown “root vegetable” (it’s actually a legume).   They look a little like a squashed turnip in shape.  A few years back, in my “try something new a week” phase, I picked up a jicama and ate it in a simple form — peeled, cut into sticks and dipped into a low calorie dressing along with my celery, cucumber and cherry tomatoes.  (Jicama is high in fiber and water (it’s 90% water) and low in calories. In fact, a cup of jicama contains only 45 calories, so it makes a good choice for someone watching thier calories and trying to stay full on less.)  And I really like it.  It’s texture is similar to a raw potato, but the flavor is slightly sweet.  Since then, I always include it on my vegetable trays, and from the number of “What’s this thing?” questions that I get, not very many people DO eat jicama.  But they usually try it and then agree that its worth eating.

I’ve been looking to expand my culinary uses for jicama.  With my low iron count at my last OB visit, I’ve been refreshing myself on eating to promote iron uptake, and was reminded that vitamin C is one of those things that helps the body absorb the iron provided by other foods.  Orange juice isn’t a good idea right now with the glucose monitoring, so I’ve been looking to savory foods.  A half cup of jicama pieces provides almost as much vitC as 3/4 C. orange juice — and a lot more fiber.  (Non-green Bell Peppers and Broccoli are other good savory sources.)

I do like it as a dipper, or by itself in a little salad of matchstick pieces tossed with a little lemon or lime juice and some chile powder.  But sometimes I get bored!


Corn, Jicama and Pineapple Salsa


1/2 medium jicama, peeled and diced (about 1 C.)

1/2 C. diced fresh pineapple

1/2 C. corn kernels

1 serrano chili or habanero chili, seeded and minced

2 T. chopped fresh cilantro

2 T. fresh lime juice

1 clove garlic, minced

Salt to taste, optional

Freshly ground black pepper to taste, optional


Combine the jicama, pineapple, corn, serrano chili, cilantro, lime juice and garlic in a mixing bowl, season with salt and pepper if desired and toss. Cover and refrigerate for at least 1 hour to allow the flavors to blend.   Serve as a relish with salmon.


Beef Tataki


8 oz. rib-eye steak

2 small jicama, peeled and julienned

2 red onions, julienned

2 cucumber, peeled, seeded, and julienned

4 T. soy sauce

6 T. orange juice

4 T. hot pepper sauce

4 T. rice vinegar


Sear the rib-eye steak to medium rare. In a small bowl, combine all of the remaining ingredients and mix well. Remove the meat from the pan, and let rest for 5 minutes. Slice the meat very thinly. To serve, plate the sliced steak and top with the salad mixture.


Chinese Spinach Toss


3 1/2 C. fresh bean sprouts

1/3 C. rice vinegar, or white wine vinegar

1/3 C. salad oil

1/3 C. honey

2 tsp. soy sauce

1 1/2 tsp. grated fresh ginger root

1 bunch spinach, washed and stems removed

1 C. diced jicama

1 C. crisp Chinese noodles


Toss bean sprouts lightly with vinegar, oil, honey, soy sauce and fresh ginger.  Chill at least 1 hour, tossing occasionally.  Just before serving, add spinach and jicama.  Toss gently to coat.  Top each serving with Chinese noodles. For a main dish, add 12 oz. of cooked chicken, tuna or shrimp, cut into chunks.

Â