3-D Pumpkin Sculptures

These 3-dimensional paper pumpkins are very cute and very fun to make–especially if you are 4. My daughter has wanted to do little else the last few days. We are growing quite a pumpkin patch. To make a pumpkin you need:


4 strips of orange construction paper. You can make your pumpkins any size. We used 12″ x 1/2″

a small square of orange paper for a base (if your pumpkin is wobbly, you can add a piece of cardboard to the bottom).

a green rectangle (about 3″ x4″)

about 2-4 thin strips of green paper for vines

a pencil for wrapping them around to make them curl

scissors

white glue


Start by gluing the center of an orange strip to the little orange square (base).


IMG_7474


Then continue gluing the center of the orange strips making a star shape. While the glue sets for a few minutes, cut small slits along the long side of the green rectangle, then, roll it into a stem so that the slits are on the bottom. Glue the side of the stem together. Hold it tight for a few minutes so that it does not come undone. Sing a song, count to 100, say the alphabet 3 times–then it should be dry enough to stay put.


IMG_7480


This is also a good time to curl your vines by wrapping the green strips around a pencil. Starting with the bottom strip, start to glue the ends of the orange strips together making the round shape of the pumpkin. You might need to hold the newly glued pieces and count or sing again.


IMG_7484


Next, glue the vines on the top of the pumpkin. Fold back the little tabs you cut along the bottom of the stem and add glue to each tab. Carefully glue the stem to your pumpkin.  So cute! We plan to add some faces later. Hope this works for you!


IMG_7491

Tags:

  • Digg
  • Del.icio.us
  • StumbleUpon
  • Reddit
  • Twitter
  • RSS
read comments

Puffy Paint

  • Flour
  • Salt
  • Water
  • Tempera Paint 

Mix equal amounts of flour, salt and water. Add liquid tempera paint for color. Pour mixture into squeeze bottles and paint. Mixture will harden in a puffy shape.

Tags:

  • Digg
  • Del.icio.us
  • StumbleUpon
  • Reddit
  • Twitter
  • RSS
read comments

Halloween Monster Treat Bags

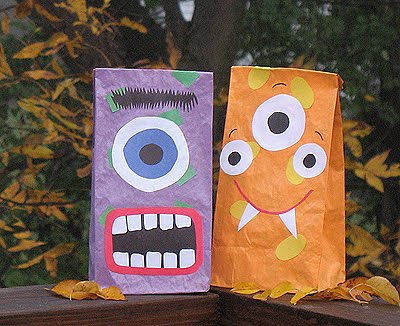
Monster crafts are such fun, they allow you and your kids to be so creative! These treat bags are no exception.


Because the paint takes a little while to dry, you can either buy already colored bags, use white bags, or just skip the color all together. Another option is to paint them ahead of time. I used construction paper for the facial features. You can certainly paint yours on, but that means more drying time. You can also use felt or craft foam. The supplies I used to make these bags are generally things that most moms that craft with their kids will already have on hand. If you don’t have any of these items, they are inexpensive and can be found at discount department stores such as WalMart or Kmart.  I used a glue stick for this project because it doesn’t leave lumps and bumps under the construction paper like liquid glue can. You can certainly use white craft glue or school glue for this, just smooth it out with your finger before pressing the item onto the bag.  I used a glaze coat on these because paint not only looks dull, but does run the risk of being scraped off. It’s optional though, and certainly not necessary for the finished product.


brown paper lunch bag

construction paper

glue stick

scissors

black marker

acrylic craft paint

spray glaze or acrylic sealer (optional)


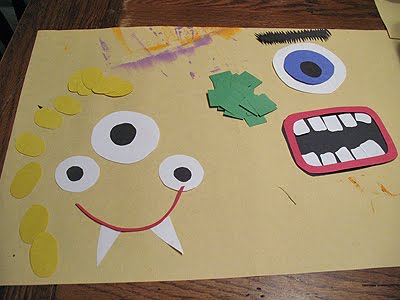
Paint bag whatever color you like. Stand them up and let then dry. Add another coat and let dry again.  While bag is drying, cut facial features out of construction paper. You can use your imagination to make some fun eyes, mouths, and hair. Cut polka dots, squares, stripes, or any other type of decoration you would like to use for your monster.


bags2

Using your glue stick, decorate the bag using the stripes, squares, or polka dots. Be sure to cover the entire piece of construction paper with glue before pressing on to the bag so that none of the corners stick up. Fold down the top of the bag so that you don’t accidentally glue your facial features too high. Use a glue stick to put facial features together before gluing them to the bag. For example, glue the blacks of the eyes to the whites, glue teeth to mouth, etc. Next, glue the facial features to the bag. Use a marker to add thin eyebrows. Let everything dry, then if you like, add a coat of sealer spray. Let dry again and fill with treats. You can punch a hole through the top of the bag and tie with ribbon if you like.

bags-b

Tags:

  • Digg
  • Del.icio.us
  • StumbleUpon
  • Reddit
  • Twitter
  • RSS
read comments

Leaf Mask

Leaf Mask


A fun Autumn tradition for us is making masks of pressed leaves.


pressed leaves- use leaves that have been pressed for about 24-48  hours, they are still quite flexible at this stage and lay nicely

glue solution- 2 parts glue, 1 part water (or use Modge Podge)

crayons

scissors

hole punch and yarn for the masks that tie around the head

glue gun and a stick for the type of mask you hold

card stock


Trace a mask shape onto card stock.  Cut out the mask, color, and glue on the leaves.  Preserve the masks by covering the leaves with the  glue solution or Modge Podge.


fauna-leaf-mask-600x450

Tags:

  • Digg
  • Del.icio.us
  • StumbleUpon
  • Reddit
  • Twitter
  • RSS
read comments

stART : It’s Pumpkin Time

51HDTGJNCRL__SL500_


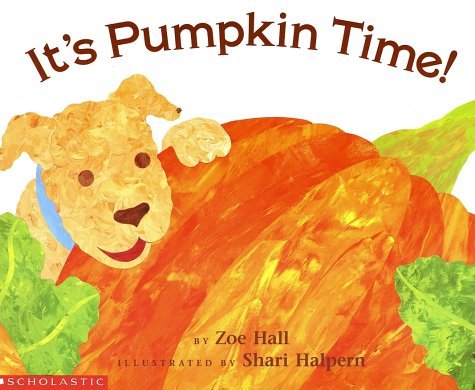
For our story we read It’s Pumpkin Time by Zoe Hall and Shari Halpern. A brother and sister get ready for Halloween early- by planting their own pumpkin patch! Readers will discover the simple joys of gardening and enjoy watching the exciting transformation from pumpkinseed to jack-o’-lantern. simple, bold illustrations inspired our project this week.


We copied the style of the illustrator to make these pumpkin vine mobiles.  We began by tracing pumpkin shapes on white construction paper. We used the medium sized pumpkin from Preschool Express’ pumpkin patterns.  The girls painted the pumpkins orange.  Then they used a little red or yellow paint to add dimension to the pumpkins.  I love the different colors of the pumpkins!  


IMG_1632


 To make the vine, the girls painted a paper plate green and then added a little yellow paint. They also cut out and painted leaves. We cut the plate into a spiral.  We used curling ribbon to attach the pumpkins to the vine and hung them from the ceiling fan.


IMG_1643

Tags:

  • Digg
  • Del.icio.us
  • StumbleUpon
  • Reddit
  • Twitter
  • RSS
read comments

Condensed Milk Paint

  • 1 cup condensed milk
  • Food coloring

Mix one cup condensed milk with a few drops of food coloring. This makes a very bright, glossy colored paint.

Tags:

  • Digg
  • Del.icio.us
  • StumbleUpon
  • Reddit
  • Twitter
  • RSS
read comments

Halloween Shadows


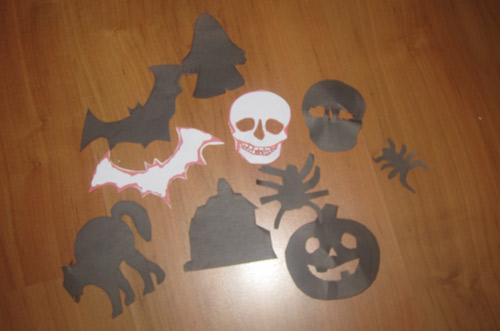
We created Halloween Shadows today and this proved to be great during bedtime. I downloaded the Kiddy Halloween Font and added them to Microsoft Word. I printed it on black paper and cut out the shapes.


halloweenshadows1


Tape a straw or stick to the back and go into a darkened room. Flash the flashlight through your image onto a wall or doorway. The possibilities for this are endless. Imagine storytelling using these shadows or others.


halloweenshadows2

Tags:

  • Digg
  • Del.icio.us
  • StumbleUpon
  • Reddit
  • Twitter
  • RSS
read comments

Face Paint

  • 1 tsp. corn starch
  • ½ tsp. water
  • ½ tsp. cold cream
  • Food coloring

Stir together starch and cold cream until well-blended. Add water and stir. Add food coloring. Using a small brush paint designs on child’s face. Remove with soap and water. Store in airtight container.

Tags:

  • Digg
  • Del.icio.us
  • StumbleUpon
  • Reddit
  • Twitter
  • RSS
read comments
 Page 76 of 103  « First  ... « 74  75  76  77  78 » ...  Last »