Making Duct Tape Crafts

Here is some basic information and supplies needed when making duct tape crafts.

difducttape

Supplies

Cutting Board: Craft Stores sell self-healing mats with grid lines that help make measuring easy and protect the surface you are working on. Usually these are located in the paper crafting supplies aisle
Hole Punch: Although you can use any hole punch, I like the Crop-o-Dile. It is capable of punching through very thick materials, and it has a ruler depth gauge so you can punch several holes in a straight row.
Hot Glue Gun: I recommend a low temperature hot glue gun, but high temp will work too. Just be careful, either way, as the tape will conduct the heat.
Ruler: I prefer a metal ruler so you don’t accidentally slice bits of wood or plastic off when cutting with a utility knife, but some people like the plastic so you can see through.
Scissors: Any scissors will work. My choice when working with tape is a non-stick scissors. I like the Honey Bee scissors by EK Success (These may have been replaced by the EK Tools Precision Scissors) but any non-stick scissors would work well for cutting sticky materials like tape.
Utility Knife: Always be careful when using a utility knife.  They are very sharp.
Yardstick

Tips

Before starting a project, read through all the steps and be sure to gather all the necessary materials.

When building something long, it works best to cut shorter strips of tape and then join them together.

Some projects call for “Duct Tape Fabric”. To make this, first lay a strip of duct tape face up on your work surface. Then add a second strip by overlapping the long edge about ½ inch, as straight and evenly as you can (laying a yard stick down can help, as can a friend to hold the stick in place). Repeat this with more strips until the fabric is wide enough. Carefully lift the sheet from one end and flip it over so the sticky side is up. Now cover the back side with another row of duct tape strips – these should be laid perpendicular to the first row, to help hold it together better. A great photo tutorial can be found at Sophie’s World.

Folding the End: One of the biggest problems with duct tape is peeling the end off the roll. Duct tape sticks firmly to things, especially duct tape! You have to find the end and dig your finger nails under it in order to start peeling off the duct tape. You can avoid having to do this every time by folding over the end of the tape when you’ve cut a piece off. This might mean you’ll waste a little bit of tape, but using the duct tape will be a lot easier.

Parchment paper: If you need to prepare a number of pieces, set them on parchment paper. You can cut, rip or tear duct tape and press it down onto parchment paper. It will not stick. If you need to transport precut pieces to another location, lay out your tape on several pieces of parchment paper, then roll up and secure with a rubber band.

Tape sticking to scissors? If you weren’t able to find non-stick scissors, it might be easier to use a utility knife to make your cuts. Roll the tape out onto the self-healing craft mat, and cut with the utility knife.

If your scissors get gummed up, clean them with a bit of rubbing alcohol and a paper towel.

Don’t be afraid to tear off a strip of tape, unless you need a precise cut at that moment. Tearing is faster and easier and in many cases, you can just trim later.

Tags:

  • Digg
  • Del.icio.us
  • StumbleUpon
  • Reddit
  • Twitter
  • RSS
read comments

Decorated Drawer Knobs

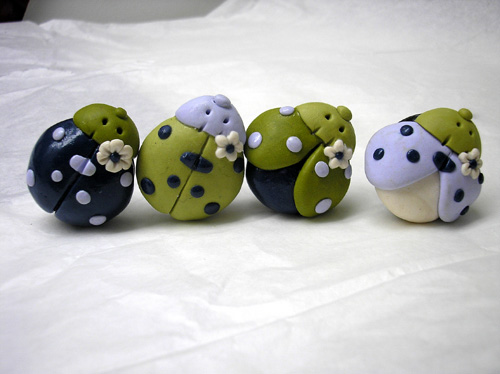
Polymer clay, such as Sculpey III or Fimo

Round wooden screw-on dresser knobs

Small, heat-resistant trinkets or beads

Permanent colored markers


Knead the clay until it is malleable, then flatten pieces of it into 5/8-inch-thick “pancakes.”  Wrap the pancakes around the knobs, firmly pressing the clay to the wood to make it stick.  Now you can embed decorative items into the clay on the front of the knob. Or, to make a baseball, use the end of a toothpick to create two curving rows of indents for “stitches.”  Bake the decorated knobs according to the clay manufacturer’s directions. Once they’re cool, the knobs are ready to attach to your child’s dresser. (To finish the baseball, simply fill in the indents with permanent red marker or acrylic paint.)

drawerpull1

Tags:

  • Digg
  • Del.icio.us
  • StumbleUpon
  • Reddit
  • Twitter
  • RSS
read comments

Crayon Rubbings

crayonrubbings1


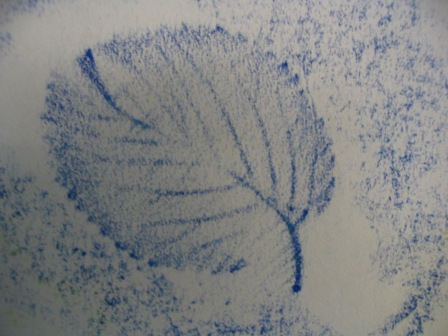
1. Give your child a piece of paper and a crayon. Show him how to lay the paper over something rough (like a large rock) and hold it in place.

2. Now take the paper wrapping off the crayon, and let your child rub it back and forth on the paper, using the side of the crayon, not the tip. See how the texture of the rock shows up on the paper?

3. Let your child loose in the backyard or park. What other textures can he find? What does the bark of a tree look like? How about a wood fence? The sidewalk has yet another texture. Let him put all his textures on one piece of paper to make a colorful collage!


Students love process. A process is a unique way of producing a visual image that is not just drawing or painting directly on paper. This project involves drawing an image using school glue, then using the resultant image as a textural base for making crayon rubbings.


crayonrubbing1_300 

Extended:


Grades 3 through 8.


To develop and promote an awareness of how textural qualities can be transferred by the process of crayon rubbing.


1.Sketch an image on the drawing paper using ordinary pencil.

2.Trace over the pencil lines with school glue using a squeeze bottle type dispenser. The glue lines should be rounded.

3.Put the image in a safe place to dry (usually for 24 hours).

4.After the glue lines are dry, place a clean sheet of drawing paper over it and hold it tightly in place.

5.Using the side of a crayon, begin rubbing it over the surface of the clean paper.

6.Continue working until the image underneath is clearly reproduced on the top sheet.


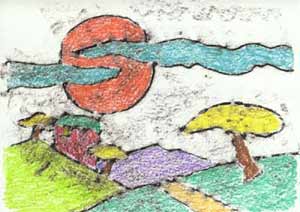
Each crayon rubbing should clearly show the image of the underlying glue drawing.  Color can be added for increased interest.

Tags:

  • Digg
  • Del.icio.us
  • StumbleUpon
  • Reddit
  • Twitter
  • RSS
read comments

stART: Ladybug Girl and Bumblebee Boy

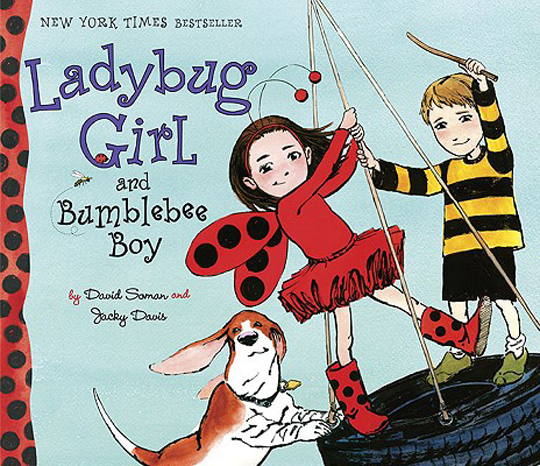
Book:  Ladybug Girl and Bumblebee Boy

ladybug-girl-and-bumblebee-boy-image

Some heroes fly, others scale tall buildings and one very special one wears a red tutu, and ladybug wings. This heroine doesn’t battle crime or clean up the streets she handles the real life issues of young children on the playground. Who could it be but Ladybug Girl? The heroine of the New York Times bestseller Ladybug Girl is back for another adventure. This time around Ladybug Girl has a friend, Bumblebee boy.

The second book in the series, Ladybug Girl and Bumblebee Boy is set on the playground where the main character, Lulu is meeting her friend Sam for a play date. Even with good friends, conflict can arise and that is exactly what happens with Lulu and Sam. But unlike other children, Lulu is up for the challenge. Under the guise of Ladybug Girl, Lulu deftly resolves the conflict with her friend and sidekick, the newly christened Bumblebee Boy.

An excellent book that provides the opportunity to discuss the issue of conflict in a gentle and relaxed manner. Ladybug Girl’s advice to other children on the playground is wise beyond her years and yet easy enough for preschool and early elementary children to understand. Her dialogue is clear and realistic for the age. She is a likeable and relatable character

Printable Activity Packet (also saved on disk)

Printable Activies (also saved on disk)

bottletopbugs

Bottlecap Bug activity

Games to play with bottlecap bugs

ladybuggirl

Modern Art Patterns.

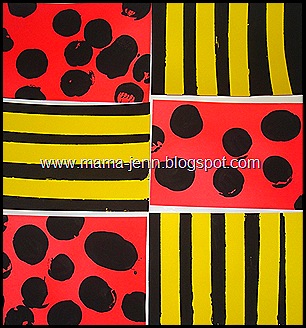
Cut a piece of 8.5z11″ yellow and red cardstock into 6 rectangles.  Use a bottle top and some black acryllic paint to create spots for the ladybug.  For the bumblebee, lay strips of masking tape across the yellow in tegular intervals and then paint with black paint over the top.  Remove tape to show the stripes.  Reassemble into sheets and glue onto a backing page to secure before displaying.

Tags:

  • Digg
  • Del.icio.us
  • StumbleUpon
  • Reddit
  • Twitter
  • RSS
read comments

Dotty-for-Dots Stamping

True pointillism may be a little more refined than this. But with a giant make-it-yourself stamp pad and an array of circular printables, your little one can turn plain paper into a delirium of dots.


Large sponge

Washable, nontoxic tempera paint

Paper

Masking tape

Circle makers, such as Bubble Wrap, cotton balls, Q-tips, potatoes cut in half, round scrub brushes, and jar lids


Before you begin: Cover work surface, keep wipes handy, and wear a smock or old clothe.s  Begin by placing a large damp sponge on a cookie sheet. Squirt a few blobs of tempera paint onto the sponge, then either fold the sponge together to get the paint absorbed or roll it lightly with a rolling pin. Now you have a large nontoxic stamp pad that’s great for all kinds of stamping.  Offer your child lots of items that print circle shapes (see What You Need for ideas). Tape a large piece of paper to the table. Then show your child how to press the stamp into the ink pad and then onto the paper, lifting straight up to make a clean print. But don’t worry about holding her to this method — after all, if your child drags Bubble Wrap across the page, who cares?  Keep the fun going! This is a great time to talk about circles (and other shapes) with your child. You can also go on a scavenger hunt around the house for round things.

Tags:

  • Digg
  • Del.icio.us
  • StumbleUpon
  • Reddit
  • Twitter
  • RSS
read comments

Learning Coins File Folder Game

100_7067

Tags:

  • Digg
  • Del.icio.us
  • StumbleUpon
  • Reddit
  • Twitter
  • RSS
read comments

Toys through the Ages

Babies: Birth to One Year


Experts agree that even babies need an assortment of toys. Since infants respond to smell, taste, sound, touch and sight, properly selected toys provide a small baby with opportunities to learn about size, shape, sound, texture and how things work.


Choose toys that:


  • Have pieces that are too large to swallow (35mm film canisters or empty toilet paper tubes work to measure toys.)
  • are lightweight for handling and grasping
  • have no sharp edges or points
  • are brightly colored
  • are non-toxic
  • Stay away from balloons! Young children are very attracted to them, but as they are still examining items by mouth, balloons present choking or suffocation hazards.
  • Choose cloth or stuffed toys that are machine and/or surface washable. This will allow you to keep the toys clean and reduce germs.


Brightly colored, lightweight toys of various textures stimulate a baby’s senses. For young infants, toys to look at and listen to are best. Rattles, squeaky toys and crib gyms are ideal for grasping when the baby is ready to hold objects.


Soft dolls or stuffed animals made of non-toxic materials are fun to touch and hug but are not designed for sucking and chewing. Make sure the seams cannot be easily torn or bitten open and that eye and noses are securely fastened.  A baby who is sitting up is ready for blocks with pictures or bright colors. Nesting cups or boxes and stacking rings are also favorites. Babies at this age enjoy their first sturdy picture books showing familiar objects. Balls and push-pull toys are good choices when a baby can crawl and walk.


Once they start holding toys, babies discover they can make them do things: jiggle, squeak, or cause a noise when dropped. Experts call this “circular reaction”: being fascinated by cause and effect, and learning their own role in the process.  You can help them not only by playing with them, but by giving them a safe space to play in and a good range of different toys. Don’t isolate them in a separate room – and do include them as much as possible in chores such as clearing up, unpacking groceries etc. Babies don’t distinguish between toys and household objects; they’re all equal fun. 


Toddlers: One to Three Years


Through exploring and experimenting, toddlers build a repertoire of intellectual and sensory experiences. They manipulate and classify objects. They love squelching in the mud and enjoy the feel and sound of things. Experimentation contains the seeds of imaginative play. Already your toddler is using their imagination by imitating adult behavior. They now show intense feelings for others – love, aggression, possessiveness and jealousy. Certain objects evoke these feelings: Mama’s bag, Dad’s huge shoes. Such objects, along with certain toys, acquire symbolic power in their play. Children learn that they can change these symbols to create new meanings – and the tool that lets them do this is their imagination.


Encourage expressive skills. Get them used to holding crayons, squeezing dough and digging in sand. Sing action-songs with them, act out little dramas.   A busy toddler needs toys for active physical play– especially things to ride and climb on, such as a low tricycle or a wagon to ride in and pull. Outdoor toys such as large balls, inflatable toys, a wading pool and a sandbox with digging tools are all good choices.


Toddlers begin to enjoy make-believe play just before their second birthdays. To imitate the adult world around them, they use play food, appliances and utensils, child- sized play furniture, simple dress-up clothes and dolls. Children in this age group are particularly interested in sorting and fitting toys, all kinds of blocks and simple puzzles. Toddlers are surprisingly tuneful and rhythmic, so give them plenty of music and movement and musical instruments such as tambourines, toy pianos, horns and drums.


Preschoolers: Three to Five Years


Preschoolers are masters of make-believe. They like to act out grown-up roles and create imaginary situations. Costumes and equipment that help them in their pretend worlds are important at this stage. Some of the many possibilities include pretend money, play food, a toy cash register or telephone, a make-believe village, fort, circus, farm, gas station or restaurant, a puppet theater and play with dolls and doll furniture. A basket on the head becomes a hat; to you it’s obvious, but for your child it’s completely new and he’s invented it. Instead of using crayons to see what they do, he’s now controlling them to make meaningful marks. He’s singing songs using his own words, and making a landscape out of what’s on his dinner plate.


In a child’s private world, a favorite toy is both a companion and protector. Dolls and teddy bears, for example, have helped countless children to cope with difficult moments. Children will sometimes express their feelings to toy “confidants” and share emotions with them that they might otherwise keep to themselves.


Transportation is fascinating to young children. Trucks, cars, planes, trains, boats and tractors are all fun at this age and beyond. Larger outdoor toys, including gym equipment, wheeled vehicles and a first two-wheeled bicycle with helmet and training wheels, are appropriate now.

Visualization and memory skills can be sharpened by play that requires use of imagination or mental computation, with the introduction of board games, electronic toys and word and matching games geared specifically for this group. Construction sets, books and tapes, coloring sets, pains, crayons, puzzles, stuffed toys and dolls continue to be favorites.


To children, the imagination is more real than the world outside. They are constantly someone else: a train-driver, bogeyman, pilot, doctor. With the right props – dress-ups, building blocks, pet objects or toys – they immerse themselves in this make-believe world. By 3 years, as their imaginations grow, they need other kids to help flesh out the scene. “You be this, I’ll be that,” is all that’s needed for a group of kids to become totally involved in imaginative play.  Now they are constructing their own worlds, which combine magic with real experience – and they do it effortlessly.


School Age: Six to Nine Years


Board games, table-top sports games and classics like marbles and model or craft kits help develop skills for social and solitary play. In experimenting with different kinds of grownup worlds, fashion and career dolls and all kinds of action figures appeal to girls and boys. Printing sets, science and craft kits, electric trains, racing cars, construction sets and hobby equipment are important to children for examining and experimenting with the world around them.


For active physical play, a larger bicycle, ice and roller skates, a pogo stick, scooter, sled and other sports equipment, along with protective gear, are appropriate. Even though group play is enjoyed, children at this stage also play well by themselves. Paints, crayons and clay are still good selections, as are costumes, doll houses, play villages, miniature figures and vehicles, all of which help children to develop their imaginations and creativity.


Many games and electronic toys geared to children in this age group are labeled “educational” because they have been designed to help children learn specific skills and concepts, such as games which require forming words, matching letters of the alphabet with various objects or learning about money through handling play coins and currency.


Video games appeal to children, teenagers and adults. Many games offer increasingly challenging levels of play, as well as opportunities to develop coordination skills and a sense of the meaning of strategies in relationships, usually through competition against an opponent.


THERE IS NO SUBSTITUTE, EVER, FOR SENSIBLE ADULT SUPERVISION

Nine to Twelve Years


Children begin to develop specific skills and life-long interests at this age. Give considerable attention to hobbies and crafts, model kits, magic sets, advanced construction sets, chemistry and science kits and puzzles. Peer acceptance is very important at this age. Active physical play now finds its expression with team play in a variety of sports. Social and intellectual skills are refined through board, card and electronic games, particularly those requiring strategy decisions.


Video and electronic games, table tennis and billiards (pool) are very popular at this stage. Dramatic play holds great appeal. Youngsters in this age group like to plan complete productions including props, costumes, printed programs, puppets and marionettes. Painting, sculpting, ceramics and other forms of artistic expression continue to be of interest, as do books, tapes and musical instruments.


Teenagers


After age twelve, children’s interests in toys begin to merge with those of adults. This is apparent in the growing market for sophisticated electronic games and computer-based systems, which are often considered “family entertainment” rather than toys. They also will be interested in board and adventure games. Collectors of dolls, model cars, trains, miniatures and stuffed animals often begin their hobbies in the teenage years.

Tags:

  • Digg
  • Del.icio.us
  • StumbleUpon
  • Reddit
  • Twitter
  • RSS
read comments

Catapult Science

AGES: Seven to 12


Build a catapult to test the relationship between the angle of release and the distance traveled by a catapulted object – a 2d vector.  Two-dimensional vectors are diagrammatically represented as two arrows beginning from the same point, one traveling horizontally and the other vertically. They offer a way to organize information about how objects move through space.


Wood block, 2 by 2 inches

Paint stick or wooden ruler

Plastic spoon

Plastic mailing tape

Marshmallows

Pencil and paper

Protractor


Construct your catapult by placing the wooden block flush with the top of the paint stick. Then lay the handle of the spoon on top of the wooden block with the bowl of the spoon extended over the paint stick. Again, the spoon handle should be flush with the edge of the block. Lash the three pieces together with plastic mailing tape. Place the free end of the paint stick next to the wall. Load the marshmallow in the spoon, pull it down as close as you can to the paint stick and prepare for liftoff. Release the spoon and watch your marshmallow soar. Then measure the distance from the wall to where it lands. This is the distance covered using a 90-degree angle. Record your distance and angle on a sheet of paper. Now use the protractor to measure 10 degrees off the floor. Lift the end of the ruler to that height. Reload your spoon, release and record the distance using an 80-degree angle. Repeat this procedure for different heights. Then review your written results and figure out which angle worked best.

Tags:

  • Digg
  • Del.icio.us
  • StumbleUpon
  • Reddit
  • Twitter
  • RSS
read comments
 Page 21 of 103  « First  ... « 19  20  21  22  23 » ...  Last »