Elephant Appreciation Day

Elephant Appreciation Day is today. Show us how much you care about elephants. This is a big, elephant sized day. We feel it should be celebrated in a big way.

Elephant Appreciation Day was declared to celebrate the Elephant because…


is the largest land mammal of our era,

is unique among mammals for its trunk,

is the most noble of beasts on earth,

is most undeservedly threatened with extinction,

has been man’s benefactor in numerous ways throughout history,

is entertaining and amusing,

is gentle and friendly,

contributes to ecosystem development and maintenance,


and generally deserves to be appreciated and upheld as an example of courage, strength, self-reliance, patience, persistence, and general high quality of being.


Little kids and big kids are fascinated by elephants. In a zoo, in the circus, or a wildlife special on television, elephants captivate us by their sheer size. Today is your chance to let them see that you appreciate them.  Showing your appreciation for them starts with a visit to your local zoo. They will be happy to see you. Making a donation towards their support is a great way to show your appreciation.  


Elephant Paper Plate Puppet


Paper Plate

Gray Paint

Gray Construction Paper

Wiggle Eyes

Craft Glue

Paint Brush

Scissors


Paint a paper plate gray. Let it dry.  Cut two large ear shapes out of the construction paper and glue them into place. Glue on two wiggle eyes. Let the glue dry. Finally, cut out a big circle in the center of the plate where the nose would be. To use your puppet, simply slip your arm through the hole. It will look like the elephant’s trunk!

Tags:

  • Digg
  • Del.icio.us
  • StumbleUpon
  • Reddit
  • Twitter
  • RSS
read comments

National Play-Doh Day

National Play-Doh Day celebrates a great childhood play toy. Invented in the mid 1950s, it has entertained millions of children, and allowed them to express their creativity, both at home and in the classroom.


It’s fun and easy to celebrate National Play-Doh Day. Simply pull out the Play-Doh and ……Play!

Playing with clay and other modeling materials is a tactile experience that benefits children in many ways, but it can be messy. Here’s how to make it a pleasurable and manageable activity for preschoolers — and for you.


Nurture freedom of expression. Remember that clay, plasticene, and play dough are open-ended materials — there is no right or wrong way of playing with them. Avoid making models for children to copy or suggesting that a final product is expected.


Personalize the experience. A small child-sized table with four chairs set up around it is a comfortable work space that encourages children to share materials and conversation. By controlling the group size, the frustration level — as well as the mess — isn’t as apt to get out of hand.


 Support children’s play. Encourage children who want to experiment. A smile, wink, or a hand to steady a clay mound are forms of positive reinforcement. Offer sincere, meaningful comments such as “Your yellow shape is so BIG!” rather than asking “What is that?” Be careful not to compare children’s work.


 Encourage hesitant children. Some children may not want to participate in messy play. Never force the issue! Be patient and give children lots of time and plenty of opportunities to observe the fun others are having. They might enjoy helping you carry the wrapped dough to the refrigerator or feel comfortable sitting near you as you pat the dough and describe how it feels.


 Guide children who may be disruptive. Sometimes a child might be tempted to take play dough away from others or smash their clay sculptures. To encourage appropriate behavior, make sure children understand a few specific rules for the clay table, and be sure to provide ample manipulative materials for each child, so they’re less likely to feel a need to take another’s supplies.


Provide technical assistance. It’s time to step in when a child is having difficulty with something he or she wants to accomplish. Just be sure your suggestion helps the child accomplish his own goal for his clay.


Supply accessories for added fun. When children have had lots of time to explore the properties of the material, they may enjoy the challenge of using tools that make impressions, such as large buttons, spools, and forks, or tools that cut, such as plastic knives and plastic caps. Cookie cutters, however, may stifle creativity.


Buy some Play-Doh, make your own — but have fun and get playing!


Simple Playdough

Excellent Imitation Play-Doh

Chocolate Playdough (edible)

Magenta Playdough

Pink Playdough

Peanut Butter Playdough (edible)

Pumpkin Spice Playdough

Pearly Soda Clay


How do I remove PLAY-DOH compound from carpet, upholstery or fabric?


When attempting to remove PLAY-DOH compound do NOT use hot water or cleaning solutions of any kind. To remove PLAY-DOH compound from carpet or fabrics, allow it to dry completely, and then loosen with a stiff brush. It may be necessary to vacuum clean or wash with gentle soap and cold water. You may need to repeat the process in order to completely remove the PLAY-DOH compound.


Tags:

  • Digg
  • Del.icio.us
  • StumbleUpon
  • Reddit
  • Twitter
  • RSS
read comments

Make a Hat Day

Make a Hat Day is a day for fun. Design, make, and wear your a hat for yourself today. Put your personality into it. Or, make a hat from a character you would like to imitate for a day.   The rules for Make a Hat Day are quite simple. Just make a hat, any hat. It can be for you, or for mom or dad. Wearing the hat is optional. But, it’s half the fun.  


Top Hat Craft


Paper Plate

Paint

Construction Paper

Cellophane Tape or Masking Tape

Paint Brush

Scissors


Paint the paper plate black. Once the paint is dry, cut out the center of the paper plate. Leave the outside rim about 2 inches thick. Cut a piece of black construction paper to approximately 8-inches by 8 inches. Tape this into the circle you cut out of the paper plate so as much as possible sticks out through the top of the plate. Voila – instant top hat!


Crushed Newspaper Hats


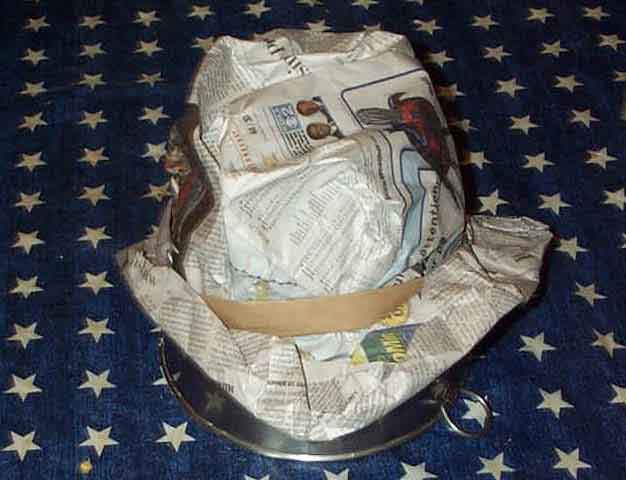
To make the crown, unfold several double sheets of newspaper or cut colored tissue paper, crepe paper or recycled gift wrap into pieces of comparable size.  Place the paper on top of your child’s head, fanning out the sheets in different directions. Then, form the crown of the hat, using your hands to gather the paper; all the way around, at eyebrow level.  For a brow band, wrap the base of the crown with a long piece of masking tape. Reinforce with a second layer. For taller styles, such as a stovepipe or a Stetson, bundle up the paper so that it rises several inches above your child’s forehead before you apply tape. Remove the hat from your child’s head and use scissors to shape the brim. Round the edges to make a floppy bonnet, then decorate with a ribbon sash and silk flowers. To style a derby, trim the brim an inch or two from the brow band and adorn with a feather. For a baseball cap, cut the brim flush with the brow band along the sides and back. Then, round the front brim to create a visor. Another style is a watch cap: merely roll up the brim all the way to the band.


You can also simply decorate a store bought hat.  Be creative!

Tags:

  • Digg
  • Del.icio.us
  • StumbleUpon
  • Reddit
  • Twitter
  • RSS
read comments

National Grandparents Day

Honor your grandparent’s on National Grandparent’s Day, which is celebrated on the first Sunday after Labor Day in September – the 12th in 2010. It is only right and fitting that one day of the year is set aside to honor our grandparents. It is time to celebrate those special people who are always there with a hug, a kiss, a cookie, something special,  or take us somewhere.


National Grandparent’s Day originated in 1978. Then President Jimmy Carter declared it to be the first Sunday after Labor Day.


If you can, enjoy the day with them. That is the greatest gift they can receive from you. If you can’t see them, call them. When you call, make sure you have the time for a long conversation. Remember, grandparents will always ask about you first and listen intently to everything you have to say. They are never rushed or in a hurry. They are there just for you.


•Draw a picture of your grandparents.

•Make cards for your grandparents.

•Make a collage by cutting pictures out of magazines of people you think look like grandparents.

•What makes your grandparents special. What do you call their grandparents?

•Learn how to say grandma and grandpa in different languages.

•Put on a special play or performance for your grandparents. Or, have a special dinner.

•Write a special poem for your grandparents: Or write down questions/sentances about your grandparents, such as “I love it when my grandma and grandpa………..”


Good Gifts .. by a Grandparent


1. Photographs of Grandchildren


After a visit, the most-favored gift is probably a family photograph or snapshot. Framed photos are especially nice, as we don’t have to remember to buy a frame in the correct size. For those grandparents who don’t display family photos or who are running out of room, a photo album or photo box with snapshots should work. One of the nice things about this gift idea is that it works for both grandparents, or for grandparents of either gender. A variation of the usual photo frame is this collage frame.


2. Something Handmade by the Grandchild


When it comes to handmade gifts, there are two kinds of grandparents. The first will love anything made by a grandchild and will find a way to display or wear it, even if it is a coffee can covered with macaroni and spray painted gold. The second type will enjoy something handmade only if it looks fairly attractive. Both types would enjoy a handmade greeting card, since it doesn’t have to be permanently displayed. If you are not a crafter, lots of stores sell kits which come with explicit directions for making items such as picture frames or personalized plates. Makit is one of the standards in the creation of personalized plates.


3. Something With a Personalized Message


I always smile when I see my oldest grandchild’s picture in a frame that says, “I will love you forever.” What a great message for a grandparent! Since many of us are trying to go green and take our own bags to the store, how about a canvas bag with a photo or the grandchildren’s handprints and a personalized message? For grandfathers, we like this “Hooked on You” line.


4. Something to Help Us Keep Up With Things


Not that we’re in our dotage, but most of us will tell you that we have a harder time remembering things and keeping up with things. Shopping list pads, a key rack to hang inside the back door, eyeglasses holders—all of these could make our lives easier. Peeper Keepers are the most unusual eyeglass holders I’ve seen, and part of each purchase goes to preserve endangered species and their habitats.


5. A Book to Share


This can be an inexpensive children’s book, or something more expensive, such as a nice anthology. I especially like the Little Big Book for Grandmothers and the Little Big Book for Grandfathers, for their mixture of games, projects and stories, along with beautiful vintage illustrations. Whatever book you choose, be sure to write an inscription, or have your child write an inscription, on the flyleaf. My grandchildren love to see books in my collection with inscriptions from many years ago.


6. Something to Use Daily


Most grandparents enjoy receiving small gifts that they can use daily. When we see the items, we think of our grandchildren, and that’s a good thing. Choose a coffee mug, pencil cup, pocket knife or writing pen. Specialty coffees or teas are great choices for who enjoy them. We like these tea baskets and gift assortments from Prettywood Tea.

7. A Collection of Classics on DVD


Lots of vintage TV shows are now available on DVD. You can choose from collections of classic cartoons, comedy shows and westerns. There are even collections of classic commercials. Choose something that grandparents and grandchildren would enjoy watching together. Our choice would be the Classic Looney Tunes Collection from Warner Brothers.


8. What Lots of Grandparents Don’t Want


Most of us have far too many candles, lots of them purchased as school fundraisers for the grandchildren! Most of us don’t want candy because it doesn’t fit our diet. Most of us don’t want knick-knacks as we are tired of dusting. Although we probably love flowers, we’d rather have a hand-picked bouquet or a inexpensive bunch from the grocery store than an expensive arrangement. Most grandparents are notoriously enthusiastic about anything that has to do with their grandchildren and will receive most any gift with genuine joy.


Tags:

  • Digg
  • Del.icio.us
  • StumbleUpon
  • Reddit
  • Twitter
  • RSS
read comments

Teddy Bear Day

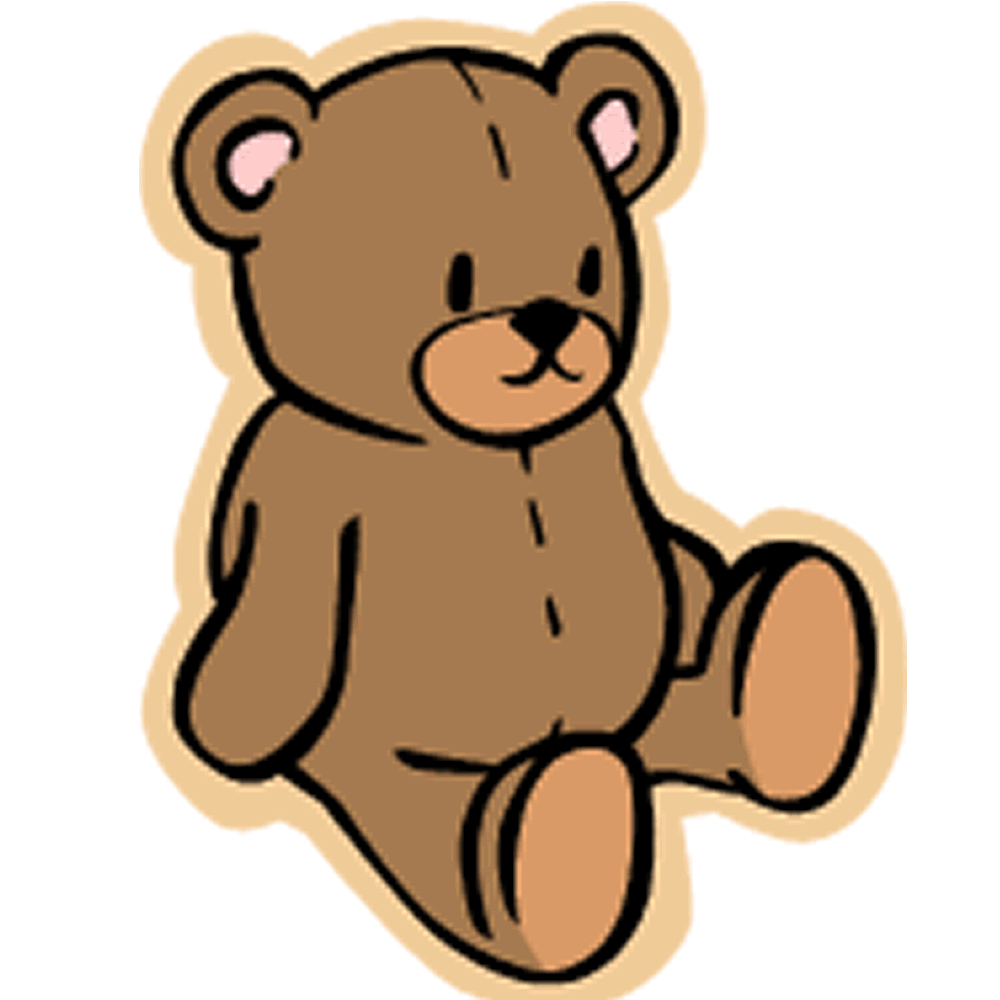
September 9th is Teddy Bear Day! A Teddy Bear is a special friend to children all over the world. He’s cuddly. He makes you feel secure in an otherwise insecure world. He’s lovable. Your Teddy Bear is both a companion and a comforter. And, he’s not afraid of the dark. He’ll keep you safe.  Spend the day and night with your teddy bear . Cuddle up to him. Talk to him. And, do all of your favorite things together.


Parents and adults: No child should grow up without a teddy bear. If you know of any kid without one, use this day to buy a teddy bear for them.


Important Notice: Teddy Bear Day is NOT an official holiday. Your teddy bear does not get the day off. He still has to do his job and be loveable and cuddlesome.

•Make bear sculptures out of clay.

•Line up a variety of teddy bears, notice the different sizes, textures, etc.

•Dress up all your teddy bears and have a parade.

•Have a picnic lunch with your teddy bear, and invite all your friends and family. Don’t forget the honey, berries, and even jelly!

•Find pictures of as many different kinds of bears as possible.

•Act like a bear… crawl on the ground, catch fish, find and eat honey, sleep, climb a tree. See how many you can think of.


Paper Plate Teddy Bear


Small paper plate, large paper plate, brown paper, pink paper, brown paint, wiggly eyes, fuzzy wool for the tummy, glue, and scissors.


Directions: Cut out the bear’s arms, legs and feet, and outer ears from the brown paper. Cut out the bear’s inner ears from the pink paper. Glue the small plate to the large plate. Then, paint the plates brown. Glue on the outer ears, inner ears, mouth, eyes, arms, legs and fuzzy tummy.


Tags:

  • Digg
  • Del.icio.us
  • StumbleUpon
  • Reddit
  • Twitter
  • RSS
read comments

Cheese Pizza Day


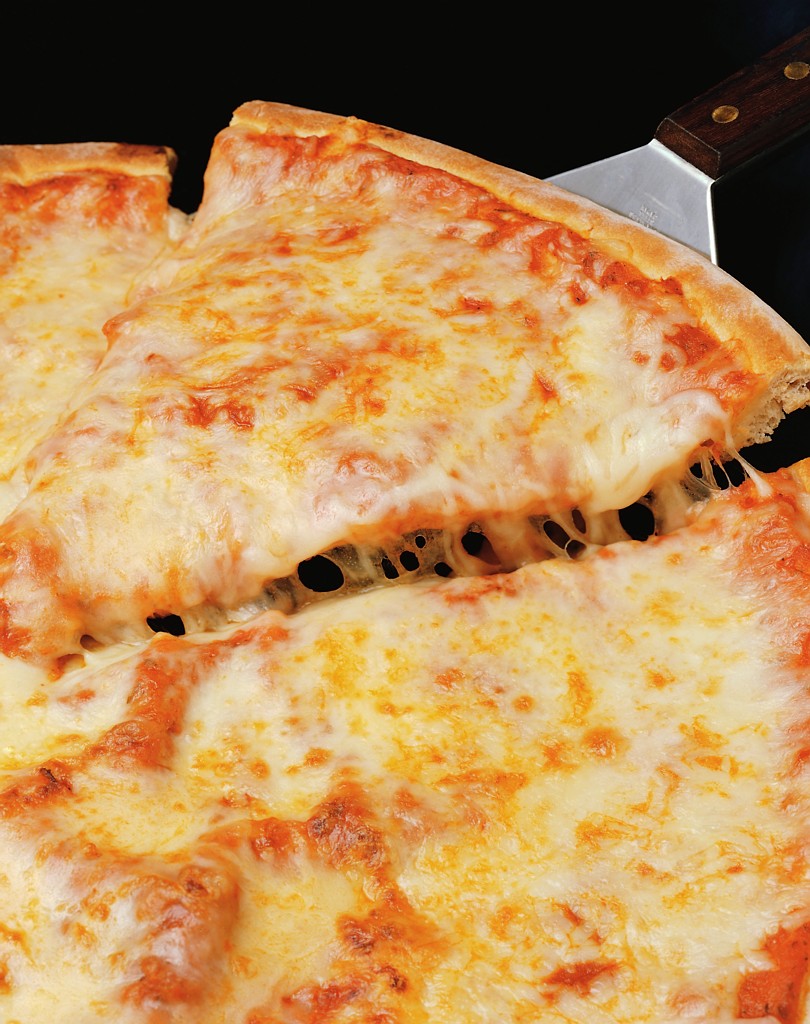
Cheese Pizza Day is a day to chow down with one of America’s favorite meals. Pizza is a favorite of young and old. Originating from Italian cuisine, it’s a staple in the American diet. For many American families “Pizza night” is a Friday or Saturday routine. It’s also popular at parties. You can have Cheese Pizza anyway you want. There’s thin or thick crust. Extra cheese is the “norm” for many cheese pizza lovers.  


Garlic and Herb Three Cheese Pizza


1 ball fresh pizza dough, store bought or from your favorite pizzeria

2 cloves garlic, finely chopped

Handful parsley leaves, finely chopped

1 cup ricotta cheese

1 (5-ounce) round soft cheese with herbs, crumbled (recommended: Boursin)

1 teaspoon lemon zest, eyeball it

2 cups shredded sharp provolone cheese

Few sprigs fresh thyme, leaves chopped or 1/2 teaspoon dried


Preheat oven to 425 degrees F.  Stretch dough out and form a thin round. Use a little flour or cornmeal on your hands if dough sticks. Mix the garlic, parsley, ricotta, herb cheese and lemon zest. Spread the soft cheese mixture across the pizza dough to the edges then top with an even layer of provolone. Scatter thyme over the cheese mixture. Bake until crisp and bubbly-brown on top, 18 to 20 minutes.


Pizza Collage Craft


Paper Bag

Magazines and/or Construction Paper

Glue Stick or Zip Dry Glue

Scissors


Cut a large circle out of the paper bag. This will be your “pizza crust”. Start out by finding red objects in magazines (or you can use red construction paper). Tear our the red objects (or construction paper shapes) and glue them on your “pizza crust” to resemble the “pizza sauce”. Don’t cover the entire crust, you want to have the crust showing around the edge!  After you get all your red pieces glued on to make your “pizza sauce”, you want to find yellowish (or white) objects in the magazines (or use construction paper) and follow the same procedure to make the “pizza cheese”. Once you have the cheese on, you can decide what else you want on your pizza! For example, tear out round shapes from reddish objects to make pepperoni, tear out small, odd shapes from brown objects to make sausage, tear out green shapes to make green peppers, etc. NOTE: Instead of using magazine pictures or construction paper, you can use scrap material, wallpaper samples, or anything else you can find laying around that are appropriate colors for your pizza toppings!


Sauce a Pizza Game


4 Brown Pieces of Felt

4 Red Pieces of Felt

4 Yellow Pieces of Felt

Felt – other colors as desired

Unused Pizza Box (or a shoe box, etc)

A Die


Cut a large circle out of each piece of brown felt. This will be your “pizza crust”. Cut circles out of the red felt that are about 1 inch smaller than your brown circles. This will be your “pizza sauce”. Cut 4 even smaller circles out of the yellow felt to be the “pizza cheese”. You will need to use different colored felt to cut out other pizza toppings. You will need 4 sets of 3 other toppings; such as 4 sets of green peppers, 4 sets of black olives, and 4 sets of pepperoni. Choose whatever toppings you like.  Use an unused pizza box, or other box, to store your game and die. On the lid of the box, or another convenient spot write down each number on the die and a pizza part that goes with it. Like this:


1 = Pizza Crust

2 = Pizza Sauce

3 = Pizza Cheese

4 = Pepperoni (or other topping of choice)

5 = Green Peppers (or other topping of choice)

6 = Black Olives (or other topping of choice)


Numbers 1 thru 3 must be the crust, sauce, and cheese in that order; but numbers 4 thru 6 can be whatever toppings you choose.


Once all your pizza pieces are cut and your box is prepared, you can play the game! This game is played like ‘Cootie’ if you are familiar with that game. The object of the game is to roll the die and create a pizza. Everyone starts with nothing. All players take turns rolling the die, when someone rolls a 1 they get to take a pizza crust piece. Once a person has their crust, they then need to roll a 2 and put the sauce on the pizza. Then they need to roll a 3 to get the cheese for their pizza. The rest of the numbers and pizza parts can be gotten in any order. The first person to finish making a pizza with all the toppings wins the game!


Fun books about Pizza:


Curious George and the Pizza  By: Margaret Rey, 1985

Hi, Pizza Man  By: Virgina Walter, 1995

Little Red Hen Makes a Pizza  By: Philemon Sturges, 1999

Pete’s a Pizza  By: Walter Steig, 1998

Pizza Fun  By: Judy Bastyra, 1997

Tags:

  • Digg
  • Del.icio.us
  • StumbleUpon
  • Reddit
  • Twitter
  • RSS
read comments

Light Filled Leaves

3959362966_73eb033b06_oMaple leaf dottedWalnut leaf dots

Maple leaf random dots

Maple leaf small dots

Gold graduated dots

Winding dots

You aren’t tired of autumnal leaf art, are you? Can you manage one more post?

The polka dot leaves at 5 orange potatoes got me thinking about circles on leaves. I pulled out my Japanese push drill and its set of removable tips and got to work on more of our pressed leaves. (See the official portrait of my push drill–as well as some awls and bone folders–here). 

I gently pressed the punch into the leaf to make these tiny holes. I didn’t plan any of the patterns; they emerged as I worked. The size graduation was one of my favorite aspects of the designs. 

This is another super easy activity that you could try with your kids. You don’t have to buy the fancy tool–try using regular hole punches in a few different sizes.

Tags:

  • Digg
  • Del.icio.us
  • StumbleUpon
  • Reddit
  • Twitter
  • RSS
read comments

Skyscraper Day


Skyscraper Day is a day to appreciate and admire the world’s tallest skyscrapers.


Skyscrapers are truly engineering and architectural marvels. In many crowded cities, space is in short supply, and real estate prices are ever increasing. Building “up” becomes more and more logical. As technical capabilities in construction improved, skyscrapers have become taller and taller. In addition, there is a certain prestige to have one of the tallest structures in the world in your city.


World’s Tallest Buildings


Building

Country

Height(Feet)

Year Built

1.

Taipei 101

Taipei, Taiwan

1,671

2004

2.

Petronas Tower 1

Kuala Lumpur, Malaysia

1,483

1998

3.

Petronas Tower 2

Kuala Lumpur, Malaysia

1,483

1998

4.

Sears Tower

Chicago, Il

1,451

1974

5.

Jin Mao Building

Shanghai, China

1,381

1999

6.

Two International Finance

Hong Kong, China

1,362

2003

7.

CITIC Plaza

Guangzhou, China

1,283

1996

8.

Shun Hing Square

Shenzhen, China

1,260

1996

9.

Empire State Building

New York, New York

1,250

1931

10.

Central Plaza

Hong Kong, China

1,227

1992


A Tall Debate: There is some disagreement over how to measure the height of skyscrapers. At issue, is whether to measure the height of flagpoles and antenna atop most tall buildings. 


Skyscraper basics on PBS.org


Vocabulary:

Beams: Horizontal supports that attach to columns within the frame

Bedrock: Solid rock found deep underground below the dirt and soil; the foundation is usually built on top of this rock

Column: A vertical support within the frame

Excavate: To remove material from the ground by digging

Façade: The outer walls of a building made from glass or stone that rest on the frame; also called a curtain wall.

Foundation: The lowest part of a building, usually underground

Reinforced Concrete: Concrete that is made stronger by adding steel rods or wires. It also protects the steel  from changes in temperature due to fire or weather.

Skeleton Frame: A system of columns and beams that carries the weight and load of a building

Steel: A strong metal made from a mixture (alloy) of iron and carbon that can be shaped into columns and beams


Build a Skyscraper


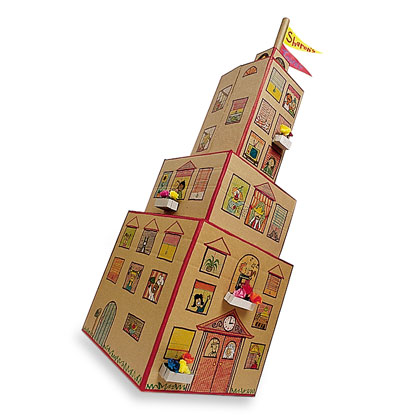
Celebrate by building your own skyscraper from cardboard boxes.  Made from stuff you already have around the house, it can keep children busy for hours. Start by collecting cardboard boxes in various sizes.  Tape the boxes shut with packing tape, then stack and tape them atop each other. Using markers or crayons, your kids can decorate the boxes with windows, columns, gargoyles, mailboxes and so on. They might also add some 3-D touches, such as tissue paper flowers and bushes, construction paper flags or even some plastic figurines.  CRAFTER’S TIP: If you don’t have plain brown boxes, wrap yours with butcher paper or turn them inside out and tape them back together.

Tags:

  • Digg
  • Del.icio.us
  • StumbleUpon
  • Reddit
  • Twitter
  • RSS
read comments
 Page 15 of 103  « First  ... « 13  14  15  16  17 » ...  Last »