January is….

January is National Oatmeal Month, National Soup Month, National Staying Healthy Month, Blood Donor Month, National Hobby Month, National Tea Month, Book Blitz Month, National Clean Up Your Computer Month

Astrological Signs

Capricorn: December 22 – January 19
Aquarius: January 20– February 18

Symbols

Birthstone: Garnet
Flower: Carnation and Snowdrop

Astonish everyone you greet by wishing them a “Happy New Year” in a multitude of languages. Here’s how:

Bengali: Shubo Naba Barsha!

Chinese : Gung Hay Fat Choy (Cantonese)

English: Happy New Year!

French: Bonne Année

German: Happy New Year!

Greek: Kenourios Chronos

Hebrew: L’Shannah Tovah

Hindi: Nahi varsh ka shub kamna

Italian: Felice Nuovo Anno

Japanese: Akemashite Omedetou Gozaimazu

Korean: Sehe Bokmanee Bateuseyo

Spanish: Feliz Ano Nuevo

Swahili: Heri Ya Mwaka Mpya!


Seasonal Activities

  • Wet snow provides one of nature’s best playgrounds. So head outside, bundle up and enjoy Snow Games.
  • The excitement of ice skating often comes with the surprise of an occasional fall. But falling is part of the fun, and if you approach it with good humor and lots of padding, there’s no reason why even a very young child can’t enjoy this invigorating pastime.
  • Winter dress up takes you through the basics of keeping little ones warm and dry — layers, after layer, after more layers!


For Infants

  • Even before they are able to sit up, babies can still get a Wee Workout with a little help from you. They’ll love the one-on-one “mom time” that exercise brings — and they’ll be developing muscle coordination too.
  • Mirror, mirror on the wall, who’s the cutest baby of all?   Mirror magic helps babies gain self awareness, while feasting their eyes on that beautiful baby in the looking glass.


For Toddlers and Preschoolers

  • Does it seem like your house is full of animals?  Animal antics will bring out your inner beast while stimulating your child’s imagination.
  • Remember playing Clothespins in a basket?  This old-fashioned game manages to reinforce numbers, improve eye-hand coordination, and entertain little ones all at the same time!
  • Discovery games can be adapted to delight children of many ages and ability levels. Challenge toddlers to tell you What’s missing?, and they may surprise you with their powers of concentration.

Tags:

  • Digg
  • Del.icio.us
  • StumbleUpon
  • Reddit
  • Twitter
  • RSS
read comments

Pringle Can “Nutcracker” Craft

Collect pictures of nutcrackers. You will find them in books, magazines and so on. Look at all the different styles and if possible, hang pictures of different options around the room while working on the project. You can also read the story of Clara and her nutcracker, and play the music from the ballet while making them.


Go here to read the Nutcracker Story online, complete with music, and try Drosselmeiers.com to see pictures of nutcrackers. (The latter is a commercial site that sells nutcrackers.)


Empty Pringles® Potato Chip can or paper towel Roll

Felt-various colors

Craft fur, fiberfill or cotton balls for hair (optional)

Tacky craft glue or low temp hot glue

Rubber bands or masking tape to help hold things in place

Yarn, ribbons, braid, trim feathers, buttons, fabric paint, etc.

Thin cardboard to extend the hat beyond the top of the can, cereal box cardboard works well


Cover the can or paper towel roll with bands of felt for the shoes, boots, pants, jacket, face and hat. If necessary, glue an extra tube to the top of the can (overlap about an inch) if you want to make your nutcracker taller. Use rubber bands or masking tape to hold together while drying.  Add details to your nutcracker. If you are planning on using fabric paint, wait until you are almost finished to avoid smudging.  Make a line down the center of the legs with yarn or a thin strip of felt.  Arms and hands can be made of rolled tubes of felt. If you are adding trim to the jacket, put trim on first before adding arms.  Felt, craft fur, fiberfill or cotton balls can be used for hair.  Cut a rectangle out of skin tone felt for the nutcracker’s mouth. Add eyes and a nose.  Decorate your nutcracker with ribbon, braid, buttons, feathers, etc. Use your imagination!

Tags:

  • Digg
  • Del.icio.us
  • StumbleUpon
  • Reddit
  • Twitter
  • RSS
read comments

StART – Veterans Day

Veteran’s Day is November 11th, a few days away. 


books:


Veteran’s Day (read about holidays)

Veteran’s Day Visitor

The Wall


We sang the following songs:


America, the Beautiful         

 Mine Eyes Have Seen the Glory         

 My Country Tis of Thee        

 The Star Spangled Banner

We discussed what Veterans Day is all about and who all in our families have served in the military, fighting for our Freedom.

Art:

100_1736[2]

Tags:

  • Digg
  • Del.icio.us
  • StumbleUpon
  • Reddit
  • Twitter
  • RSS
read comments

National Young Readers Week 11/8 – 11/12

 1. Raising a Reader: Read aloud to your children every day. 

Effective storybook reading is an interactive process.  If we wait until after reading to discuss the story, we are missing out on valuable literacy opportunities.  When you precede the reading by inviting predictions and personal connections, you are creating context for the reading.   Taking time to discuss and clarify difficult concepts during the reading can prevent misunderstanding further on, and encouraging your child to respond during the reading enhances both comprehension and interest in the story.  Pausing to confirm and revise predictions, ask questions, and make inferences lay the groundwork for independent reading. Your child will learn that understanding text is a process that occurs before, during, and after reading.


Before Reading

·       Preview the book and practice reading it with fluency and expression.

·       Plan an introduction—find links to personal experiences.

·       Introduce the title, author, and illustrator.

·       Introduce any information that may be necessary to facilitate understanding of the story.

·       Set a purpose for listening to the story (e.g., “I wonder” statements, such as I wonder what the wolf wants to do with the pigs, provide us focus for listening).

During Reading

·       Read fluently and expressively.

·       Hold the books so your child can see the illustrations.

·       Try to establish frequent eye contact with your child.

·       Draw attention to the illustrations and features of the text.

·       Pause occasionally to revisit predictions, express curiosity, or comment on something interesting.

·       Invite your child to question and comment but keep it focused on the story.

·       Explain words and ideas you think your child might not understand.

After Reading

·       Allow time for discussion

·       Encourage various levels of response with questions

·       Make personal connections to the text (e.g. “What did this story remind you of?”).

·       Retell the story or reread it to enhance comprehension.


2. Raising a Reader: Get a library card.


3. Raising a Reader: Take your children to the library once a week.


4. Raising a Reader: Discuss children’s books with your children.


5. Raising a Reader: Take your children to storytimes, author visits, and other public programs.


6. Raising a Reader: Buy books that you know will interest your child.


7. Create a comfortable reading space for your child.


8. Raising a Reader: Visit the Web sites of favorite authors and illustrators.


9. Raising a Reader: Once a week, cook together using a children’s cookbook.


 10. Raising a Reader: Buy your children a good dictionary and use it regularly.


For the youngest children and pre-readers, start an alphabet collage book.


Create a Story Sack or two.

Tags:

  • Digg
  • Del.icio.us
  • StumbleUpon
  • Reddit
  • Twitter
  • RSS
read comments

National Sandwich Day

Today, November 3rd, is the birthday of John Montagu, the 4th Earl of Sandwich. He was either an inveterate gambler or a very hard worker; either way, he did not want to step away from his desk or the card table to take the time to eat. So he supposedly commanded his manservant to bring him some sliced meat between 2 slices of bread. Thus, according to legend, the sandwich was invented.

I am skeptical about this, since putting something in between sliced bread seems like such a natural thing to do. Regardless, the sandwich is a wonderful, convenient thing.

To celebrate the Earl’s birthday, today is also National Sandwich Day in the U.S.

Make a sandwich today!  Try a new filling, or different bread.

Tags:

  • Digg
  • Del.icio.us
  • StumbleUpon
  • Reddit
  • Twitter
  • RSS
read comments

Thanksgiving Gratitude Wreath

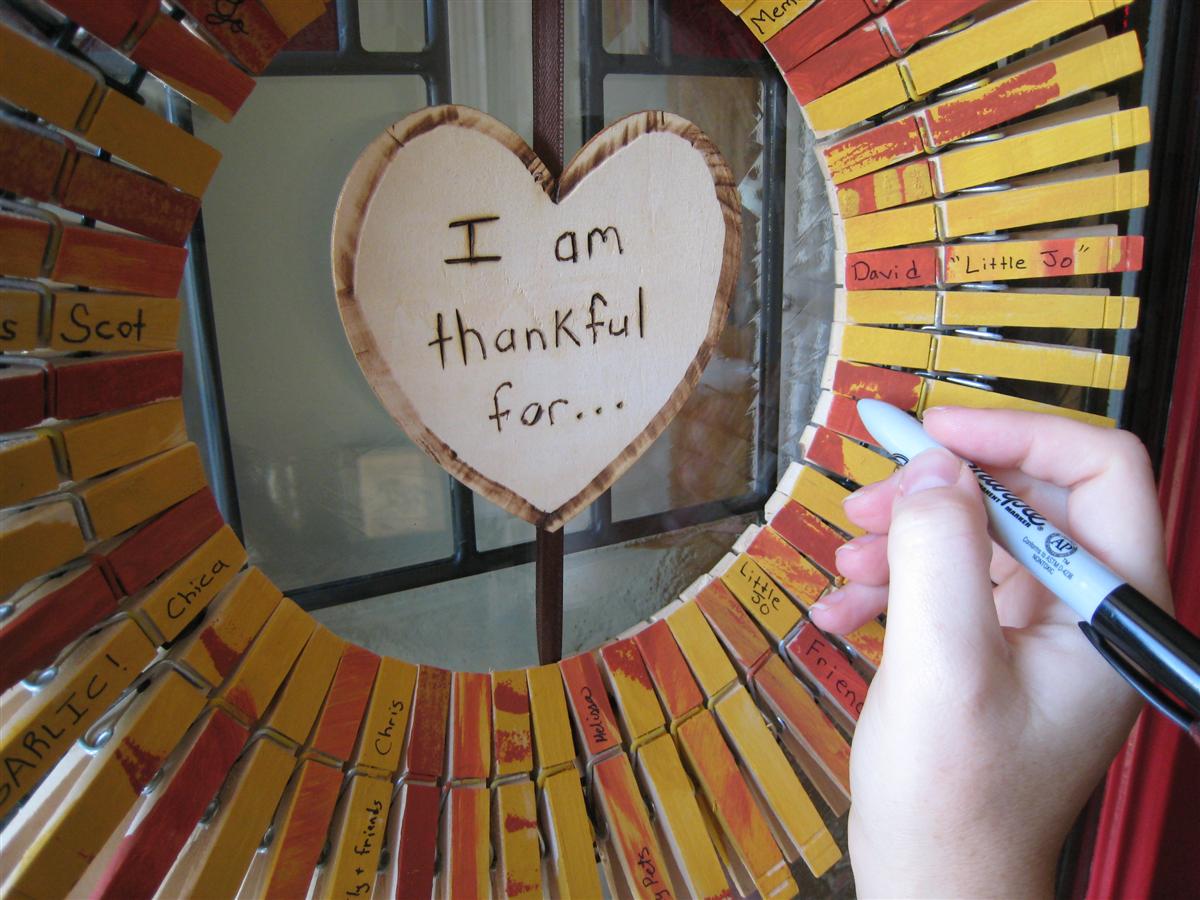
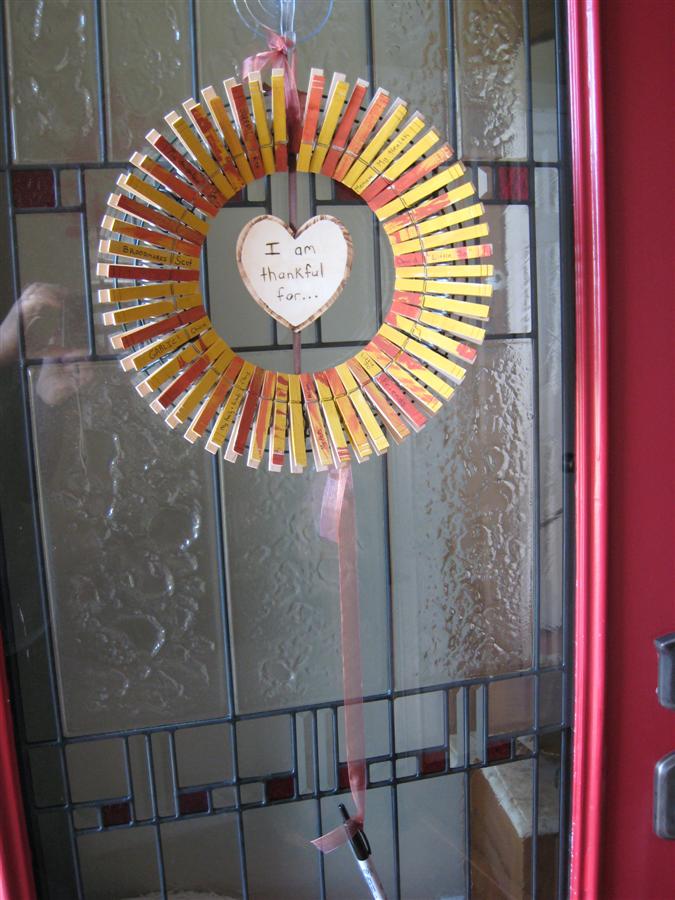
The idea behind the wreath is for visitors to my home to add what they are thankful for to the wreath.  Each visitor writes his name on the tip of the clothespin and what he is thankful for on the handle of the clothespin.  When the season is over, I will have a fantastic collection of things my friends, my family and even the UPS man are thankful for!  Here’s how to make your own.


First, I bought a wire wreath frame Then, I purchased a bag of clothespins.  Turns out that you will need exactly 53 of them to fill this 12 inch frame.  Next, I assembled my child labor to paint the clothespins. I gave them yellow, brown and orange acrylic paints and some sponge brushes and told them to paint them however they liked.  Little Jo and her friend had a great time painting all the clothespins, some paper and their fingers. I love how their mottled paint jobs look when all of the pins are on the wreath.


Once the clothespins are completely dry, you will attach them to the ring.  Simply clip them onto the inner-most ring.  The length of the clothespin will cover up the rest of the wire rings, forming the nice wreath shape.


I wanted to add a little something in the middle to help explain the point behind the wreath.  I purchased a 4 inch wooden heart shape and suspended it in the middle of the wreath with the same ribbon I used to make a loop to hang it on the door.  I used a woodburner to inscribe “I am thankful for…” on the heart. If you don’t have a woodburner, you could easily use rubber stamps, a marker, or paint to write your message.


Thanks_Wreath7 


The final touch was to tie a permanent marker to some ribbon tied to the bottom of the frame.  I used a fine-point retractable Sharpie marker so I wouldn’t have to worry about losing the cap.  Each visitor can leave her own reason for thankfulness.  Everyone who has visited so far has loved my wreath.  One visitor, a teacher, went out the next day and bought the supplies so she could make one to hang on her classroom door for the students.  What a great idea!


Thanks_Wreath5


Tags:

  • Digg
  • Del.icio.us
  • StumbleUpon
  • Reddit
  • Twitter
  • RSS
read comments

Curled Paper Pumpkin

Curled-Paper-Pumpkin-photo-350x255-AFormaro-IMG_3390_rdax_651 sheet orange construction paper
Scrap strips of brown and green construction paper
White craft glue
Pencil
String
Scissors

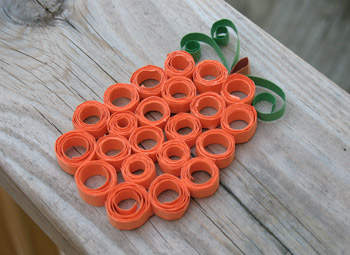
Cut orange construction paper into half-inch strips. Wrap strips around a pencil. Remove from the pencil and glue the end of the strip to close the circle. Repeat for as many circles as you need to create your pumpkin, we made 22 (see image). Lay the circles on your work surface and arrange them into the shape of a pumpkin. Glue the circles together (see image). Cut three green strips about three to four inches long. Curl the end of each strip around a small paint brush or simply roll it up to get a tighter curl. Glue the straight end into the top of your pumpkin to create the green leaves. Cut a brown strip of paper about two inches long. Fold in half and insert into the top of the pumpkin to create a stem and secure with glue (see image). Once everything has dried, you can tie a piece of string through the pumpkin stem and hang from a suction cup hook.

Tips:
Buy a large package of construction paper at the dollar store for plenty of fun projects.
For smaller circles, wrap paper around a small paint brush handle.
White craft glue is perfect for this project, however white school glue will work as well.

Tags:

  • Digg
  • Del.icio.us
  • StumbleUpon
  • Reddit
  • Twitter
  • RSS
read comments

Johnny Appleseed Day

Johnny Appleseed Day honors one of America’s great legends. Johnny Appleseed was a real person. John Chapman was among the American settlers who were captivated by the movement west across the continent. As Johnny Appleseed travelled west, he planted apple trees along the way, and sold trees to settlers. With every apple tree that was planted, the legend grew.


John Chapman (aka Johnny Appleseed) was born on September 26, 1774.

He was a nurseryman who started out planting trees in western New York and Pennsylvania.

During the life of John Chapman, the “West” was places like Ohio, Michigan, Indiana, and Illinois.

John Chapman was a deeply religious person He was known to preach during his travels.

According to legend, Johnny Appleseed led a simple life and wanted little. He rarely accepted money and often donated any money he received.

It is believed that he died on March 11, 1845, from what was referred to as the “winter plague”. The actual date of his death has been disputed.

There is a lot of “legend” in stories written about Johnny Appleseed. By it’s definition, over the years, legends grow bigger than life. It also appears that there is some link between Johnny Appleseed and very early Arbor Day celebrations.


Celebrate today with an apple rich menu. Include fresh apples for snacks, and some applesauce (make your own!) or apple pie for dessert. And, make plans to plant an apple tree.


Draw a picture of Johnny Appleseed.

Make red collages.

Use apple halves to stamp paint apple prints.

Make birthday cards for Johnny Appleseed and hang them around the room.

Learn more about who Johnny Appleseed was.

Take a field trip to an apple orchard.

Learn about the color red.

Check out different varieties of apples. Taste the apples and tell which ones you like best.

Learn about different products made from apples.

Make Home-Made Applesauce

Make an apple shaped suncatcher, or another apple craft.


Apple Paperweight


Recycled 20oz soda bottle

Red tissue paper – 1 sheet

Small amount green tissue paper

Mod Podge (I used gloss finish)

1″ sponge applicator

Sand

Plastic sandwich baggie

1 1/2″ x 3″ craft paper

Scotch tape

Glue stick

Craft knife

Using a craft knife, cut the bottom 2 1/2″ off of an empty clean 20oz soda bottle.  This part is an adults job.  Once cut, dry the inside of this bottom section completely.  You will not need the top portion for this project. If you are using a Ziploc bag, cut the Ziploc portion off and discard it.  Place the sandwich bag into the soda bottle then fill the bag with sand until the sand is even with the top of the bottle. Rub the glue stick across one of the 1 1/2″ ends of the craft paper and roll the other end toward and right on top of the end with the glue on it forming a small tube.  This will be your stem. Cut a leaf shape approximately 2″ long out of green tissue paper. Apply Mod Podge to both sides of the tissue paper leaf and using the Mod Podge as glue, attach the leaf to the stem only at the bottom 1/2″ of both the stem and leaf.  While still wet, bend the leaf backwards a bit into a more natural leaf position. Stick the bottom of the stem/leaf into the sand. Fold down the rest of the plastic bag to cover the sand going around the stem and tape in place with a piece of Scotch tape.  If necessary, cut off any excess plastic baggie. Cut some strips 1 1/2″ x 5″ from red tissue paper. Apply Mod Podge to one side of a tissue strip using the foam applicator then lay the strip on your bottle bottom filled with sand.  Continue applying tissue strips in this manner until you have completely covered the bottle going right over the top (where the baggie filled with sand is) and being careful to go around the stem and leaf.  Apply two layers of red tissue to your apple. Finally, completely cover the apple with a coat of Mod Podge using the foam applicator.


Tags:

  • Digg
  • Del.icio.us
  • StumbleUpon
  • Reddit
  • Twitter
  • RSS
read comments
 Page 14 of 103  « First  ... « 12  13  14  15  16 » ...  Last »