Review: Wise Company Creamy Pasta and Vegtable Rotini

For the most part, I prefer to have my diet consist of whole foods and ingredients that I can use to create my own meals.  That’s what I do on a daily basis.  I don’t use a lot of packaged and convenience foods like canned soups, hamburger helper and the like.  I occasionally use frozen meals, especially really challenging stuff like Chinese foods (potstickers!), but even that’s fairly infrequent.

So of course when it comes long term food storage, I don’t want to make the bulk of it from MREs, freeze fried meals and the like.  It’s not the way we eat.  But.  There may be times when being able to rip open a package and est it as is, or only add water, let it sit, and eat are the only real options.  To that end, I have been looking at some of the companies that frequently market to backpackers and for LTS, like mountain house, wise company, Augason farms, and so on.  The problem is, I don’t care to buy big buckets of multiple servings unless I can try it first and see if my family can exist on it in a pinch!

Wise Company kindly sent me a sample, and they chose Creamy Pasta and Vegtable Rotini.

img_1425

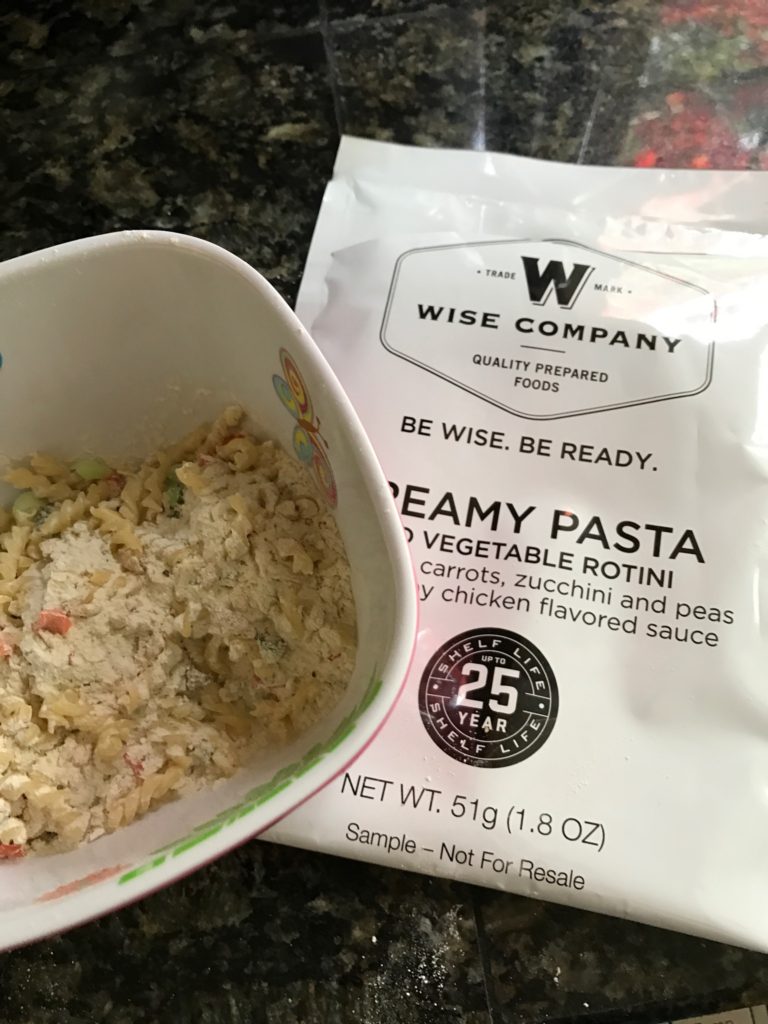
You heat water to boiling, add the contents (I dumped them in a bowl so you could see it), cover and let sit 15-20 minutes, stirring occasionally.

img_1427

After following those directions, the peas were still crunchy in the middle, the zucchini bits very chewy, and the pasta edibly soft, but more al dente than I would like.  The first bite or two were ok.  Not delicious, but ok.  Probably more than acceptable if you are a more common user of processed foods than I. The sauce reminded me of Lipton Cream of Chicken Cup o Soup.  That is, something I only ever have eaten when I’m sick, or the power is out and mom needed an instant meal. But edible.

It cooled off very quickly, and that’s when I couldn’t eat it anymore.  The creamy sauce got quite viscous, almost like it had okra slime in it.  And frankly, well, it looked like gobs of saliva dropping off the spoon.  Yuk yuk yuk.

I think that a tomato based sauced product might be a better option. So I need to find the smallest package options from different companies for my taste tests.

The final measure

In the end, I got about 12 cups of sprouts from my 1/4 salad mix seeds.

img_1419

A nice dressing for these sprouts is:

1/4 cup minced onion (I used scallion, from my CSA box)
1/2 cup tomatoes, seeded and diced (I used a late harvest heirloom tomato)
2 tablespoons chopped fresh herb (I used basil, but you could use almost any)
Juice of 1/2 lemon
2 tablespoons of red wine vinegar (rice wine vinegar would be nice too I think, or mirin.  A more mild vinegar anyway; I think cider or balsamic would overwhelm the delicate sprout flavor)
1/3 cup olive oil
Salt and freshly ground pepper to taste

I whisked all the liquids together, added the seasonings, whisked again, then mixed in the onion and tomatoes.  I don’t like plain sprout salad, but I put my dressed sprouts on a bed of other greens (arugula is a good with my seed mix, which has arugula sprouts, but whatever works).  I had some more avocado and added a few slices.  Nice, light, healthy and tasty salad.

FYI, the PeakFresh bag my sprouts are in is awesome.  I got mine from sproutpeople although I’m sure there are other sources, and likely less expensive.  I’ve been using them about a month now.  The produce in my CSA box comes loose, and I bag it up in these, and I’ve been very impressed with the longevity of the produce it provides. They somehow move the ethylene gas out of the bag slowing down the ripening (aging) process.

Eat the fruits of your labor

Seeds sprouted in my Easy sprouter aren’t as green as I would like, but perfectly edible.  Would certainly be a quick, easy and low maintenance way to get some fresh food into your diet if the SHTF and you’re surviving on LTS.

In the meantime, after my experiment, I need to eat some of these sprouts up.  Little quarter cup of my mix has resulted in several cups of sprouts.

This morning I threw in a couple extra eggs while scrambling them for the kids’ breakfast.  Then I topped mine with a big handful of sprouts and a small green zebra tomato, cut into slices, then cut in half to make half circles.

I think I’ll pick up some goat cheese so I can make a yumm-o omelette.

Sprout & Avocado Omelette

6 eggs
1⁄2 cup heavy whipping cream
1 avocado (ripe, peeled and sliced into strips)
1⁄2 cup sprouts (delicate salad mix type)
3 ounces goat cheese (thinly siced or crumbled)
4 tablespoons butter or ghee

In a mixing bowl, whisk eggs and cream. Add salt and pepper to taste. Heat 4 tablespoons of butter in a large skillet over medium heat. Pour in the egg mixture.  When the egg mixture is half way through cooking, spread the goat cheese on one half of the omelet, and spread the slice avocado on top of the goat cheese, and on top of the goat cheese, spread the sprouts. (I don’t love avocado cooked myself, I’d rather add them at the end). Flip the ungarnished half of the omelet over the half with the ingredients, and continue cooking to your liking.  Cut the omelet in half and serve.

Shoot, an update

So the pea shoots aren’t rooting at all.  I think they are just too crowded.  Videos show that the roots get all curled up together like a mat.  Mine, not so much. If you just gently tug a shoot, it will lift right out.  They did grow to about the height where they are pushing the cover off.  But only a few have leafed past the initial cotyledon stage.  My tray looks less crowded and lush than any video examples that I saw in various videos.  There when they were ready to harvest its like a mini tangled jungle. Not that mine is ready to harvest.  But it’s sparse and anemic looking right now.

I’m not sure whether to cover them back up and hope the root situation improves, or to just pull the lid and see if they will green and leaf more.  I am going to go ahead and start the other side of the tray with fewer seeds, maybe try soaking 1/2 cup and see how that goes.

Multiple Bean Salad Recipe by Food Storage Moms

I haven’t had 3 bean salad since I was a kid.  I liked the tangy flavor.  But I really dislike wax beans, which is pretty much always one of the three beans in commercially canned Three Bean Salads.  I was looking into recipes for home canning 3 bean salad, when I came across this recipe at Food Storage Moms.  This is not a canning recipe, and I am not a canning expert to know if its even safe to can, but I thought maybe this is a smart thing to do anyway.  I don’t know if my family will eat canned bean salad at all.  They like beans, but the kids are a but sensitive to vinegary dressings.  What if I canned a bunch of jars and if Mom and I were the only ones that would eat it?  This recipe seemed like a smart way to make a small batch to test the waters, and hooray, no wax beans in sight!

I’ve got all the ingredients on hand, including some interesting celery from my latest CSA that is weird and thin and would be best used in a fine dice so I am definitely making a batch, as soon as I hit post. =)

This recipe is copied directly from Food Storage Moms (I am not sure why salt is listed twice in the brining liquid. I did post a comment and ask, but the original was posted over a year ago, so I don’t know that I will get a response. She did respond and just removed it.)

multiple-bean-salad-recipe
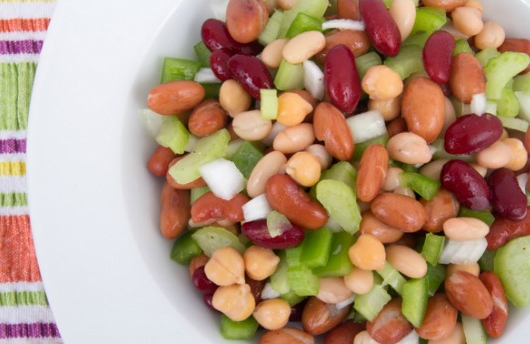
1 can garbanzo beans, drained
1 can kidney beans, drained
1 can green beans, drained
1 can red beans, drained
1 can navy beans, drained
1 small onion, chopped/diced
1 small green bell pepper, chopped/diced
½ cup chopped/diced celery

Grab a quart mason jar and fill and shake the following ingredients

¾ cup sugar
1 teaspoon salt
½ cup oil
½ cup vinegar (I prefer white vinegar)
½ teaspoon pepper
½ teaspoon paprika

Mix all ingredients in the jar that will fit. Keep in the refrigerator and serve well chilled. I always have excess beans that I add to the vinegar solution the next day to get one more meal out of it.

Food Storage, Frugality, & Feeding my Family

One thing to do now is to practice feeding my family from my food storage.  Not just making meals entirely from storage, although that’s good practice too, but just using what’s there so it gets rotated and such as I go.  While working on tightening up my finances, I started creating monthly menus to reduce food waste, make multiple meals from one cut of meat, make shopping lists easy, and cut back on my impulse purchases.  Sometimes I need to be flexible to take advantage of what’s in my CSA box or what’s on sale at the store, but overall I am finding my menus useful.  This dinner made use of all those things.

White Beans & Ham, Skillet Cornbread, and Sautéed Greens

I had a meaty hambone in the freezer from an earlier ham dinner.  I put it in with lots of meat on the bone with the intention of using for a lentil soup or something like that.  I had collard greens, leeks, and some peppers in my box, so I weighed out a pound of white beans and set them to soaking the night before.  The original recipe below.  I added leeks and peppers in addition to the onion, and I sautéed them a little before adding the other ingredients.  I reduced the sugar by half, because I don’t like overly sweet beans.  I also tossed in a bay leaf (removed before serving).  Instead of the diced ham, I threw in the whole bone, then at the end pulled it, pulled off the meat, diced it up, and tossed it back in.  It took longer than 2 hours to get the beans tender enough.  Cooked up some cornbread in a cast iron skillet, and made super simple greens with a bit of lemon since everything else was so rich.  Yum.

White Beans & Ham

1 pound dry great Northern beans
1/2 pound cooked ham, diced
1 small onion, diced
1/2 cup brown sugar
salt and pepper to taste
1/4 teaspoon cayenne pepper
1 tablespoon dried parsley

Rinse beans in a large pot; discard shriveled beans and any small stones. Add 8 cups of cold water. Let stand overnight or at least 8 hours. Drain and rinse beans. Return beans to pot and add ham, onion, brown sugar, salt, pepper, cayenne and parsley and water to cover. Bring to a boil; reduce heat and simmer 1 1/2 to 2 hours, until beans are tender. Add more water if necessary during cooking time.

img_1386

Two things – the basic recipe would be very easy to make all LTS.  With spam instead of ham (I think I would add it in the last 30 minutes; it’s not as sturdy as real ham), and dehydrated onions, you could create it completely from shelf stable foods.  I think dehydrated carrots would be tasty in there.  And you could switch up the seasonings.  Ooh, I think mushroom powder would add  nice umami undertone too.

And … How do people weigh the benefits of storing dried beans v. canned?  Canned are so much heavier and take more space and are more expensive unless you get them on sale.  Plus they are way saltier, and what else is in there?  But dried beans, while they store easily, can last practically forever when stored properly and are dirt cheap, take so much more time to prepare.  And more water.  And lots more fuel. If you can nestle a Dutch oven in your heating fire, or you have a wood stove, maybe you can let them cook slowly away while you heat your space and kill 2 birds with one stone.  But if you are relying on a one burner camping stove, or a rocket stove, that’s a lot of fuel to one pot of beans.

Its one thing if you are “only” planning and prepping for a short term emergency or recoverable disaster.  Space isn’t as critical, and a bit of extra salt and crud in the cans in the short time frame won’t make much difference I suppose.  But for the long haul?  Some of each?  How to balance it?

p.s. I’m still not smoking.  I had some nicotine gum to take the edge off a couple times (I already had it from a flight last February, so no money wasted), but I haven’t had an actual cigarette in my hand for over 48 hours.  I’m grouchy. I’m hating it.  I’ve wanted to buy a pack soooo badly.   But I haven’t yet.

Peas – don’t shoot, I’m unarmed!

One reason I have been working to get my preparedness binder in shape is that otherwise I get distracted with side projects. Take sprouting, for instance.  I was reading about food storage and clicked off on one link or another and was reading about sprouts.  A lot of nutrition, a good way to have something fresh and green with your food storage meals.  Apparently pretty easy to add sprouting items to your preps.

I remember a couple of my Mom’s friends who I suppose looking back, were homesteaders. They raised rabbit for food, had gardens, chickens and compost piles.  I don’t think we called it that, they were hippies. When I was there, meal time was very strange to me. I seem to recall everything had wheat germ in it. Anyway, 35-40 years ago were those times, and that’s the last time I ever really had “sprouts”.

So, reading about sprouts, picked up a kindle unlimited book to read and found learning about growing sprouts are often paired with learning about microgreens.  Well, I pay a fortune for pea shoots whenever they are available at my local New Seasons.   I can grow those?!  In my house?

Pea shoots are amazing. Tons of vitamins, far more than the actual peas that they would eventually produce.  Pea Shoots are a nutritious leaf with high levels of vitamin C and vitamin A. A 50g portion (about 2/3 a cereal bowl full) of these tasty greens offers more than half of the RDA for vitamin C, a quarter of the RDA for vitamin A and significant amounts of folic acid.   They aren’t a significant source of calories (only 9 for those 50g), but for nutrition and for varying your diet and preventing food fatigue, And just because I love them and they are expensive to buy, this sounds like something I “need”.

I tried to figure out online why kind of yield I could expect from a pound of pea seeds.  One site selling organic seeds suggested it’s only 1 pound per pound of seeds. The OSU extension office had far different yields. However, I think that was geared towards large scale growing with multiple harvests from each seed rather than indoor 20″x10″ planting trays, harvesting at the base when they reach a few inches.

So never mind I have a lot more important items to acquire first, I decide that I just have to test it myself. A few days pass.  Ding dong!  My box from sprout people arrived!

img_0362

(In addition to my pea shoot experiment, I also got a pound of a seed blend for traditional sprouting.) So 1 lb. of this particular pea seed was about 2 1/2 cups, and to do half the tray (as you can see, I got a split tray; that way I can stagger the plantings) should take about 3/4 cup.  So my daughter is excited about this experiment too.  She measured out the seeds and set them to soaking so tomorrow we can “plant” them.

img_0366

Of course, there is no way she will eat these. Probably. She might tolerate them in her salad; she does love a salad.  Time will tell 🙂

Eating when the SHTF

Photo of dried pasta in jars on a shelf in a domestic kitchen. Very shallow depth of field focusing on the middle jar.

Next up in my Binder – Food.  I divided the two food sections thusly:

Food Supplies

    1. Food Storage Inventory
    2. Food Storage Calculations & Acquisition Plan
    3. Storage Methods
    4. Storage Containers & Organizers
    5. Sustainable Food

Food Preparation Off the Grid

    1. Off The Grid Supplies
    2. Off the Grid Cooking Methods
    3. Food Storage Recipes

Sustainable Food will probably be supported by a separate notebook, as well as information in the Skill Acquisition section – gardening, food preservation, sprouting, and so on.  I plan to keep a gardening journal.

At the moment, there are no plans to add any livestock of any kind.  We’ve got no land for anything larger than a few chickens or possibly rabbits.  Hubby isn’t on board with either, and realistically with the coyotes in the green space adjacent to my property and the size of the yard and the closeness of the neighbors – neither is very practical either.