Cheddar Powder = Cheddar Chex Mix

Over our long weekend (2 snow days + Saturday & Sunday), we did a family movie night at home.  The girl and I made homemade chex mix, the way my family used to do before the company started packaging it.  It’s so much better crisp and still warm out of the oven, redolent of the Worcestershire and a hint of garlic, IMO anyway.  The beauty of it being you can make it your own too.

Chex Mix

1 C. Butter
3 tsp. Worcestershire Sauce
1/2 tsp. Garlic Powder
2-4 Drops Hot Pepper Sauce
6 C. small Pretzels or Pretzel Sticks
4 C. Wheat Chex
4 C. Rice or Corn Chex
5 C. Cheerios (or Make a Trifecta of Chex)
3 C. Mixed Nuts

On saucepan mix butter, Worcestershire sauce, garlic powder and pepper sauce. Heat and stir until butter is melted. In large roasting pan mix remaining ingredients. Drizzle with butter mixture and toss to coat. Bake in 300F oven for 45 minutes, stirring every 15 minutes. Spread on foil to cool.

I left out the hot sauce; its not much, but my girl is very sensitive to spice.  I also used only cashews.  Two of us don’t like peanuts and I don’t like almonds, so mixed nuts were nixed.  I also did Corn, Wheat and Rice Chex, and no Cheerios, because I forgot to buy them.  But really, you could add a lot of different things to give it your own spin, bagel chips, goldfish, sesame sticks, what have you.  Just stick to about the same volume of the dry ingredients so the butter mixture can have the same coverage.

I dipped into my food storage and tried the cheddar cheese powder I got from Hoosier Hill Farm to season half the batch.  I didn’t really measure.  I just sprinkled on what looked like a good amount when it first came out of the oven, still a little “damp” and hot, and tossed it well.  I’d probably gotten better results and more even coverage if I’d put it in a little mini sifter (like the one I use for powdered sugar on desserts), but it came out just fine.  The cereal bits that got a little too much cheese powder turned out to be the boy’s favorite bites.

He said it was better than the cheddar cheese flavor packaged Chex mix, so if I can’t figure out how to use the cheese powder otherwise, we could have a LOT of cheddar Chex mix. ;)  I am going to use storage powders and see if I can come up with a decent cheese sauce for veggies this evening.  Wish me luck!

Initial tests of the dehydrator

I don’t know why I didn’t take pictures, but I ran a semi successful test of the dehydrator.  I used up stuff that I wasn’t going to be able to consume before it went bad mostly.

I had a mix of items.  I was worried that the onions would flavor the fruits, once it started, because the whole house stunk of onions.  It didn’t seem to though.  Also, the noise isn’t too bad.  It sounded a lot like the microwave in use; and aside from the fact I kept expecting the food in microwave to stop (hah), it wasn’t overly disruptive.

I made Kiwi chips.  These are ok, but when we buy dehydrated kiwi, they are much thicker and a little chewier, and my kiddo prefers that to the thin ones I produced.  I sliced them 1/4 inch thick on my V-Slicer, and they dehydrated down to a double thickness of cardstock.

I did some pineapple slices.  I pulled them out a little chewy, but they are still thinner than my kid would like.  I learned that if there is the tiniest bit of the skin left on, after its dried, the skin is VERY prevalent.  It doesn’t shrink up like the flesh and … yuk.  Bits that I didn’t even notice on the 1/4″ slices before drying made it inedible without trimming after drying.

I also had some chile peppers from my CSA box.  Somehow I ended up with 2 bags with 6-8 peppers per bag.  I am not even sure what they were.  They were much longer than a jalapeno, and red.  Not too spicy, but half my household doesn’t like food that is spicy at all. I didn’t roast and remove skin.  And it seems like that is all there is too it once it dried.  It’s all thickened basically inedible skin.  They don’t have nearly as much flesh as a bell pepper, so I’m not sure I could even skin and de-seed them and leave anything else.  They would likely be candidates for going very dry, whole, and then using like dried chiles in Mexican cooking, cooking in a liquidy dish to add a little spice and then removing, or possibly rehydrating, slitting open, removing seeds and trying to scrape some of the flesh out for adding heat to a dish.  They aren’t good for storing as diced peppers, IMO.

Edit: Turns out they are Doux des Landes Chili Peppers, which are only about as hot as an Anaheim or Dried Pasilla Pepper.  They come from the south of France and are often used in a Basque recipe pipérade, which is a stew like dish made of tomatoes and peppers, flavored with a pork product (Bayonne Ham is the traditional product, but pancetta is probably very close and more readily available here).  Sometimes eggs are poached in it, like a shakshuka.  It is also served over scrambled eggs, polenta, or poached chicken.  Interestingly, I am having trouble finding an authentic recipe that actually calls for these chiles.  Everything in English just says red bell peppers, which I suppose would be similar.  I am straining my high school French lessons from 1000 years ago.

La piperade des Landes

LA piperade des Landes, la plus ressemblante à celle de mon arrière-grand-mère (cap-breton) :

– 3 oignons
– 1.5 kg à 2 kg de tomates, bien mure de préférence.
– 5 – 10 piments vert et doux des Landes (on peu aussi y mettre d autres types, notamment des poivrons, mais c plus tout a fais pareil ^^)
– quelques morceaux de jambon de Bayonne, idéalement les morceaux trop dur et les “coin” avec le gras.
– huile d’olive
– sel, poivre, sucre.
– 3 – 4 gousse d’ail
– thym et laurier.
– un peu d’eau (ou vin blanc).

Haché les oignons, les faire colorer dans de l’huile d’olive. Ajouter piments couper en rondelle et sans pépins, les tomates peler et couper en carré, les coins de jambon, le bouquet garni, l’ail, sel poivre et sucre à votre convenance, un peu d’eau.
Laisser mijoter 30 mn à 1h00 (plus c long, plus c bon). Il faut obtenir une sauce un peu épaisse.

Servir avec des tranches de ventrèche ou jambons de Bayonne poêler. Vous pouvez pocher des œufs dedans.

I believe that this is a recipe for pipérade from the poster’s (Great?) grand mother.  Onions, tomatoes, my chile peppers, hard and fatty corner pieces of Bayonne ham, Olive oil, salt, pepper, sugar, garlic, thyme and (Laurel?  We don’t use that as a cooking thing here, and that’s my daughters name, heh), water or whine wine.  The instructions are harder than the ingredients.  Chop onions, sprinkle with the olive oil (I think in the pan?) and add the sliced peppers (in rounds?), peeled tomatoes (couper en carré?  is that “cut into squares”?  meaning diced?).  Tie up the herbs in a bouquet garni, toss those in, season with salt pepper and sugar and then simmer 30 minutes to an hour until it gets thick.  Serve over slices of  “ventrèche” (a cured pork product like pancetta made from pork belly) or steam fried Bayonne Ham.  Or poach eggs in it.

Well, that was a long interlude, oops 😉

I did some onions, both diced and in rings.  These turned out just fine.  I am going to give them a try in a recipe tonight and see how they are after rehydrating in a dish.

I also dried some citrus fruits.  I had some lemons and mandarins.  I will try grinding a few into powder to see how that goes.  The rest I am using for holiday decorating.

All in all, a good first run of the dehydrator.  I am excited about putting up larger batches of things for my LTS.

Pantry Friendly Meals, I do not think this means what you think it means.

Oh the internet.  Such a wealth of information, and sometimes, oh so useless.  Seeking out good recipes using long term pantry stores is a veritable minefield of annoyances.  It’s amazing what some people consider a “pantry meal”.  I do a search for some variation of “pantry friendly meals” or “disaster meals” or “emergency food recipes”, and it’s just an overload of mostly unhelpful information.  Lots of pages without actual recipes, many pages of recipes that you can make with food bank boxes (and most of them have a staple set for each client that includes some fresh foods), and a whole lot of nonsense.

Result 1 of my search.  7 days of fast, pantry friendly meals.  The grocery list follows:

Fresh Produce – Pears – Apples – Salad greens/lettuce – Avocados – Grapefruit – Limes – Tomatoes – Carrots – Celery – Cucumbers – Onions – Garlic

Fridge – Parmesan – Cheddar cheese – Blue cheese – Fontina cheese – Turkey bacon – Ham or prosciutto – Eggs – Mayo – Hummus – Butter

Freezer – Peas – Spinach


Pantry/Staples – Marinated artichokes – Sun-dried tomatoes – Olive oil – Vinegar – Balsamic salad dressing – Tomato soup/squash soup – Canned/jarred salsa – Walnuts – Raisins – Black beans – Dried pasta – Canned tuna

Spices – Curry powder – Dried oregano – Kosher salt and pepper (to taste)

Breads – Whole wheat tortilla – Whole wheat bread – Whole wheat pita

As many fresh, frozen, and refrigerated products as anything you would store or could make from your stores.  Next search, first hit, a whole blog on Pantry Friendly Cooking.  First recipe calls for mac and cheese with fresh cheese using a pressure cooker.   Next recipe is a little better, if not so practical.  Personalized chocolate Easter eggs.  You of course need the mold, and tubed frosting, and 3/4 cup butter (canned butter is so expensive, and I am not sure butter powder would work in candies), but at least all the ingredients are from the pantry.  The next recipe I see again calls for a pressure cooker, and includes a head of garlic, 3 bell peppers, a couple onions, chicken breast (raw), fresh asparagus, fresh shrimp, mussels, and lemons.  Because it happens to use rice, canned tomatoes and canned chickpeas, its pantry friendly?

Clearly, my definition of a pantry meal is a little different.  And its not just these two sites.  9 out of 10 that I have looked at are like this.  The 10th either is selling a book with actual LTS recipes, or is a list of foods to have on hand without actual giving recipes other than maybe “oatmeal for breakfast, tuna with crackers for lunch, rice and beans for dinner”.

So I picked up a few second hand books.  Apocalypse Chow (be warned, the Robertsons have published at least 3 different disaster meal cookbooks, and there are many repeats between them), Simple Recipes using Food Storage, and 100-Day Pantry.  I read some others via Kindle Unlimited.  I’m not linking those; they were almost all universally bad.  Poorly edited, clearly not self created recipes, but regurgitating things they found online.  People looking to make a few bucks, not credible cookbook authors.  Oddly, almost all of them have high reviews.  You’ll find 1 or 2 low reviews, usually with the same complaints I voice.  They must be creating false accounts, or getting family and friends to buoy the reviews.  I can’t account for it otherwise!  The one exception for me was “Dinner is in the Jar“.  This book provided an excellent walk through on how to make mason jar meals using a vacuum sealer, from long term storage foods, along with add-ons (most of which are also available as pantry staples, like ground beef, or cooked cubed chicken).  The author also provides a method for making these meals using mylar bags instead of mason jars.

At any rate, those 4 I linked do provide what I would consider “Pantry Meals”.  I can’t say they universally appeal to me.  I am not a fan of processed foods.  For a short term disaster, I suppose that is one thing, but I can not see feeding my family endless days of canned soups, spaghetti-os, chiles, et all.  And I am not buying cream of mushroom/chicken/celery soup.  I don’t care how ubiquitous it is in easy pantry meals.  It’s repulsive.  I want to be able to cook mostly as I do now – meals made from whole foods, not pre-processed items.  Of course, this will be more expensive but well, it is what it is.

At any rate, I have been collecting recipes that will work for my family from these sources, although they come in different degrees of pantry-usingness.  I have been labeling them as “Pantry Friendly”, which is almost all long term storage items, but might include 1-2 things that you would have on hand during a short term emergency, or if you had a root cellar (such as garlic), and LTS Recipes, which are those that can be made entirely from pantry stores, including freeze dried or dehydrated items.   Many of the recipes that I use now can be converted as well; I just have to figure out how to use dehydrated garlic and onion and such in place of the fresh versions.

LTS Asian Chicken Soup

1 (10- to 15-oz.) can chicken
I (15-oz.) can carrots
1 (15-oz.) can bean sprouts
1 (6-oz.) can mushrooms
1 (14-oz.) can chicken broth
2 oz. fine noodles (3 oz. Ramen noodles are okay)
1 T. onion flakes
1 tsp. garlic flakes
½ tsp. ground ginger
3-4 T. soy sauce
scant 1/2 tsp. apple cider vinegar

Do not drain the vegetables. Combine all ingredients and simmer until noodles are soft. Ramen noodles are not labeled for two years’ storage, so rotate them more often.

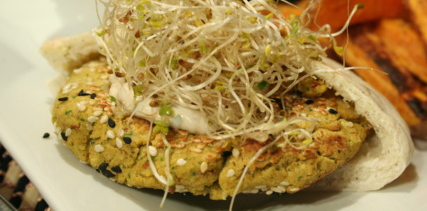
deliciousness Falafel Pita with Salad Mix Sprouts & Tahini Sauce

I like falafel.  It just so happened that I had soaked and cooked a couple pounds of garbanzo beans to make the multi bean salad and hummus, and had more left.  I also have plenty of tahini (used to make hummus, among other things), so what’s a girl to do?

Make a Falafel Pita with Salad Mix Sprouts & Tahini Sauce, of course

Let me say, I don’t claim a lot of authenticity here. I just know what are the typical flavor profiles and I go from there. I also like to form them into flat patties instead of small balls, which is the traditional shape. I often buy my falafel mix in the bulk section of my grocery, but I had the softened cooked beans, so why not. I don’t think falafel usually needs cooked beans, just soaked until soft, but this worked.

pita

So this is a little colorless. Make it more exciting with some tomatoes or roasted red peppers! But I like the basic flavors =)

1 C. cooked Chickpeas
½ C. fresh Parsley. Stems removed
Small handful Cilantro, stems removed
½ small-medium Onion, rough chopped
4 cloves Garlic, peeled
Salt to Taste
½ T. each Pepper, Cumin, Coriander
Cayenne Pepper, to taste, optional
Pinch of Cardamom, optional
Oil, for Frying
¼ tsp. Baking Powder
1 T. Sesame Seeds
Flour, optional
Egg, optional

Process the herbs in food processor until finely chopped. Add onions and pulse until well chopped. Add chickpeas, garlic and spices. Run for 30 seconds, scrape down sides and repeat until all is well combine and the mixture is smooth. Transfer to a container with a lid, cover tightly and refrigerate an hour to overnight. When ready to fry, heat your oil to 350 in a heavy bottomed skillet. I do about ½ – ¾ inch in cast iron. I think if you are doing thicker ball shapes, you might need a deeper oil. Using wet hands, form falafel into oval patties, at most about ½ inch thick – they should be a good size for your pita, to fit with a little room for the toppings, but not so small you don’t get falafel in most bites. If your falafel “dough” doesn’t come together well you can add up to a tablespoon of flour (if it’s too wet) or a lightly beaten egg (if it’s too dry) so the patty will hold its shape. Even without the additions, when its right, the patties will be delicate. If you can shape them and move them into the oil, they will tighten up as they cook. Carefully place your patty in the hot oil. Cook until a deep golden brown on the outside, flipping once. This takes mine about 3 minutes per side. The center should be cooked all the way through, so check your first patty and adjust heat up or down to get that nice brown without burning, and still cooked through. (You can bake these on a lined cookie sheet at 350 for 15-20 minutes, but they don’t have the same yum crunch). Transfer your cooked patties to a plate lined with paper towels or brown paper grocery bags to drain.

For Sandwich:

Pita Bread, cut in half
Sprouts (I used my French Garden Mix)
Tahini Sauce (recipe below) or Hummus
Optional: sliced Cucumbers, Tomatoes, Arugula, Roasted Red Peppers, Sour Cream

Stuff your falafel, sauce and sprouts into the half pita.  Add any extras, such as additional veggies or a dollop of sour cream and yum out.

Tahini Sauce

½ C. tahini paste
2-3 T. plus more, if necessary, fresh lemon juice
1 small clove garlic, minced
¼ – ½ C. water, as needed
¼ -1/2 tsp. salt

Tahini Sauce: Make the sauce by combining the tahini paste, lemon juice, and garlic in a bowl and stirring to combine. Add the water a little at a time as needed to form a smooth, creamy sauce approximately the thickness of heavy cream. (Note that the sauce might appear to separate for a bit before enough water has been added; just keep adding more water bit by bit and stirring until the sauce comes together.) Season to taste with salt and more lemon juice, if necessary. Transfer to a nonreactive container and refrigerate until ready to serve the falafel.

I think this would be fairly adaptable to LTS.  I’ve got some large containers of dried herbs, onions and garlic ordered.  I’m going to test out making this without fresh herbs and garlic.

The final measure

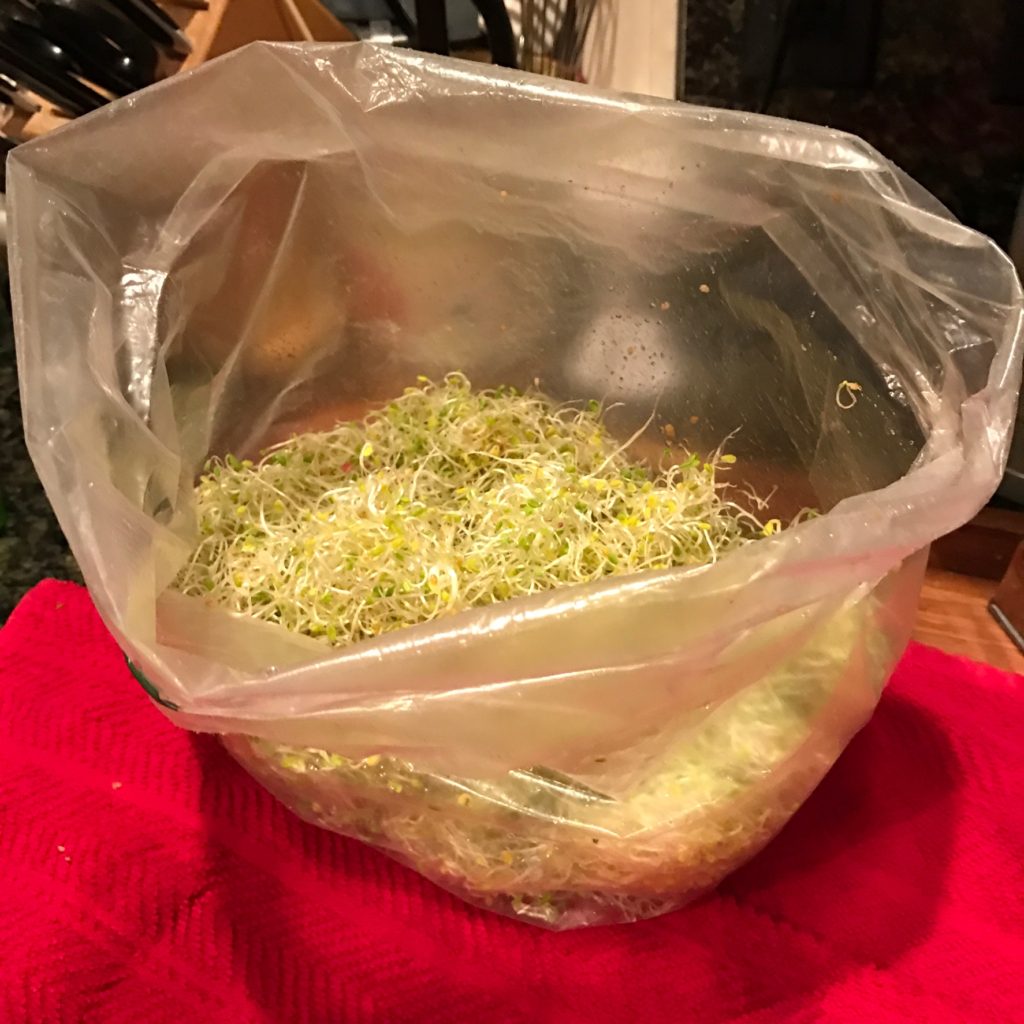
In the end, I got about 12 cups of sprouts from my 1/4 salad mix seeds.

img_1419

A nice dressing for these sprouts is:

1/4 cup minced onion (I used scallion, from my CSA box)
1/2 cup tomatoes, seeded and diced (I used a late harvest heirloom tomato)
2 tablespoons chopped fresh herb (I used basil, but you could use almost any)
Juice of 1/2 lemon
2 tablespoons of red wine vinegar (rice wine vinegar would be nice too I think, or mirin.  A more mild vinegar anyway; I think cider or balsamic would overwhelm the delicate sprout flavor)
1/3 cup olive oil
Salt and freshly ground pepper to taste

I whisked all the liquids together, added the seasonings, whisked again, then mixed in the onion and tomatoes.  I don’t like plain sprout salad, but I put my dressed sprouts on a bed of other greens (arugula is a good with my seed mix, which has arugula sprouts, but whatever works).  I had some more avocado and added a few slices.  Nice, light, healthy and tasty salad.

FYI, the PeakFresh bag my sprouts are in is awesome.  I got mine from sproutpeople although I’m sure there are other sources, and likely less expensive.  I’ve been using them about a month now.  The produce in my CSA box comes loose, and I bag it up in these, and I’ve been very impressed with the longevity of the produce it provides. They somehow move the ethylene gas out of the bag slowing down the ripening (aging) process.

Eat the fruits of your labor

Seeds sprouted in my Easy sprouter aren’t as green as I would like, but perfectly edible.  Would certainly be a quick, easy and low maintenance way to get some fresh food into your diet if the SHTF and you’re surviving on LTS.

In the meantime, after my experiment, I need to eat some of these sprouts up.  Little quarter cup of my mix has resulted in several cups of sprouts.

This morning I threw in a couple extra eggs while scrambling them for the kids’ breakfast.  Then I topped mine with a big handful of sprouts and a small green zebra tomato, cut into slices, then cut in half to make half circles.

I think I’ll pick up some goat cheese so I can make a yumm-o omelette.

Sprout & Avocado Omelette

6 eggs
1⁄2 cup heavy whipping cream
1 avocado (ripe, peeled and sliced into strips)
1⁄2 cup sprouts (delicate salad mix type)
3 ounces goat cheese (thinly siced or crumbled)
4 tablespoons butter or ghee

In a mixing bowl, whisk eggs and cream. Add salt and pepper to taste. Heat 4 tablespoons of butter in a large skillet over medium heat. Pour in the egg mixture.  When the egg mixture is half way through cooking, spread the goat cheese on one half of the omelet, and spread the slice avocado on top of the goat cheese, and on top of the goat cheese, spread the sprouts. (I don’t love avocado cooked myself, I’d rather add them at the end). Flip the ungarnished half of the omelet over the half with the ingredients, and continue cooking to your liking.  Cut the omelet in half and serve.

Multiple Bean Salad Recipe by Food Storage Moms

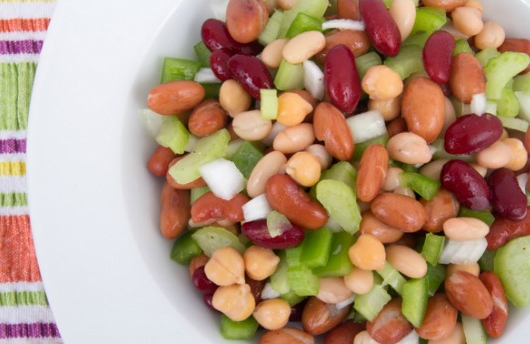
I haven’t had 3 bean salad since I was a kid.  I liked the tangy flavor.  But I really dislike wax beans, which is pretty much always one of the three beans in commercially canned Three Bean Salads.  I was looking into recipes for home canning 3 bean salad, when I came across this recipe at Food Storage Moms.  This is not a canning recipe, and I am not a canning expert to know if its even safe to can, but I thought maybe this is a smart thing to do anyway.  I don’t know if my family will eat canned bean salad at all.  They like beans, but the kids are a but sensitive to vinegary dressings.  What if I canned a bunch of jars and if Mom and I were the only ones that would eat it?  This recipe seemed like a smart way to make a small batch to test the waters, and hooray, no wax beans in sight!

I’ve got all the ingredients on hand, including some interesting celery from my latest CSA that is weird and thin and would be best used in a fine dice so I am definitely making a batch, as soon as I hit post. =)

This recipe is copied directly from Food Storage Moms (I am not sure why salt is listed twice in the brining liquid. I did post a comment and ask, but the original was posted over a year ago, so I don’t know that I will get a response. She did respond and just removed it.)

multiple-bean-salad-recipe1 can garbanzo beans, drained
1 can kidney beans, drained
1 can green beans, drained
1 can red beans, drained
1 can navy beans, drained
1 small onion, chopped/diced
1 small green bell pepper, chopped/diced
½ cup chopped/diced celery

Grab a quart mason jar and fill and shake the following ingredients

¾ cup sugar
1 teaspoon salt
½ cup oil
½ cup vinegar (I prefer white vinegar)
½ teaspoon pepper
½ teaspoon paprika

Mix all ingredients in the jar that will fit. Keep in the refrigerator and serve well chilled. I always have excess beans that I add to the vinegar solution the next day to get one more meal out of it.

Food Storage, Frugality, & Feeding my Family

One thing to do now is to practice feeding my family from my food storage.  Not just making meals entirely from storage, although that’s good practice too, but just using what’s there so it gets rotated and such as I go.  While working on tightening up my finances, I started creating monthly menus to reduce food waste, make multiple meals from one cut of meat, make shopping lists easy, and cut back on my impulse purchases.  Sometimes I need to be flexible to take advantage of what’s in my CSA box or what’s on sale at the store, but overall I am finding my menus useful.  This dinner made use of all those things.

White Beans & Ham, Skillet Cornbread, and Sautéed Greens

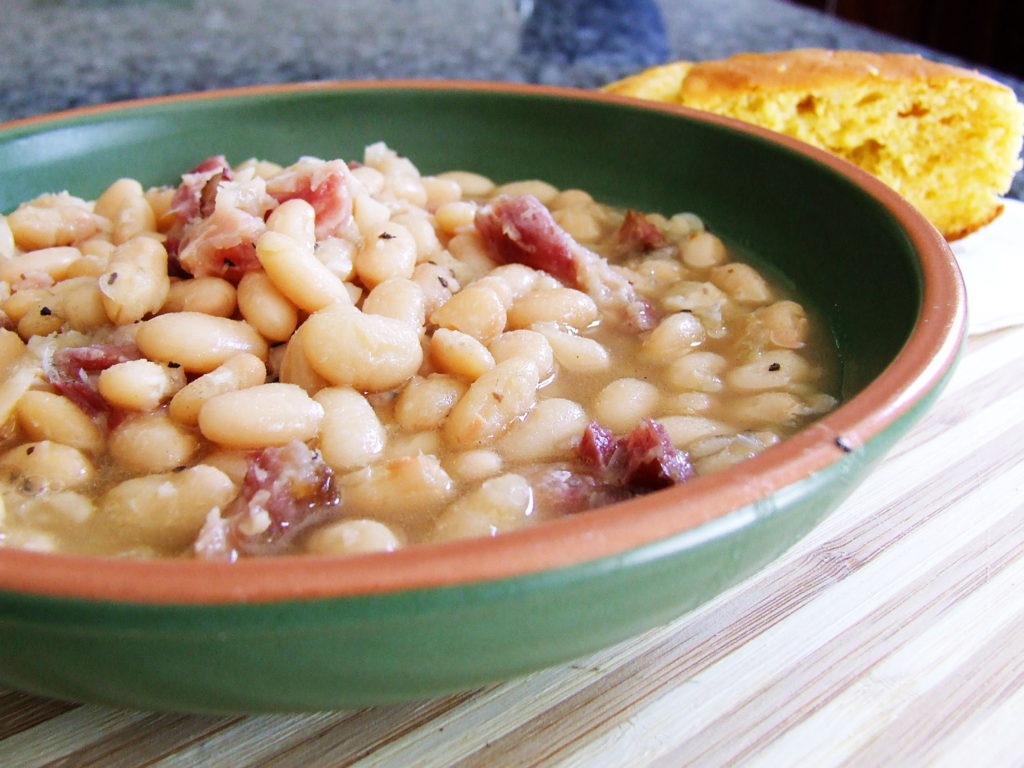
I had a meaty hambone in the freezer from an earlier ham dinner.  I put it in with lots of meat on the bone with the intention of using for a lentil soup or something like that.  I had collard greens, leeks, and some peppers in my box, so I weighed out a pound of white beans and set them to soaking the night before.  The original recipe below.  I added leeks and peppers in addition to the onion, and I sautéed them a little before adding the other ingredients.  I reduced the sugar by half, because I don’t like overly sweet beans.  I also tossed in a bay leaf (removed before serving).  Instead of the diced ham, I threw in the whole bone, then at the end pulled it, pulled off the meat, diced it up, and tossed it back in.  It took longer than 2 hours to get the beans tender enough.  Cooked up some cornbread in a cast iron skillet, and made super simple greens with a bit of lemon since everything else was so rich.  Yum.

White Beans & Ham

1 pound dry great Northern beans
1/2 pound cooked ham, diced
1 small onion, diced
1/2 cup brown sugar
salt and pepper to taste
1/4 teaspoon cayenne pepper
1 tablespoon dried parsley

Rinse beans in a large pot; discard shriveled beans and any small stones. Add 8 cups of cold water. Let stand overnight or at least 8 hours. Drain and rinse beans. Return beans to pot and add ham, onion, brown sugar, salt, pepper, cayenne and parsley and water to cover. Bring to a boil; reduce heat and simmer 1 1/2 to 2 hours, until beans are tender. Add more water if necessary during cooking time.

img_1386

Two things – the basic recipe would be very easy to make all LTS.  With spam instead of ham (I think I would add it in the last 30 minutes; it’s not as sturdy as real ham), and dehydrated onions, you could create it completely from shelf stable foods.  I think dehydrated carrots would be tasty in there.  And you could switch up the seasonings.  Ooh, I think mushroom powder would add  nice umami undertone too.

And … How do people weigh the benefits of storing dried beans v. canned?  Canned are so much heavier and take more space and are more expensive unless you get them on sale.  Plus they are way saltier, and what else is in there?  But dried beans, while they store easily, can last practically forever when stored properly and are dirt cheap, take so much more time to prepare.  And more water.  And lots more fuel. If you can nestle a Dutch oven in your heating fire, or you have a wood stove, maybe you can let them cook slowly away while you heat your space and kill 2 birds with one stone.  But if you are relying on a one burner camping stove, or a rocket stove, that’s a lot of fuel to one pot of beans.

Its one thing if you are “only” planning and prepping for a short term emergency or recoverable disaster.  Space isn’t as critical, and a bit of extra salt and crud in the cans in the short time frame won’t make much difference I suppose.  But for the long haul?  Some of each?  How to balance it?

p.s. I’m still not smoking.  I had some nicotine gum to take the edge off a couple times (I already had it from a flight last February, so no money wasted), but I haven’t had an actual cigarette in my hand for over 48 hours.  I’m grouchy. I’m hating it.  I’ve wanted to buy a pack soooo badly.   But I haven’t yet.