New Acquisitions

I have been continuing to fill my pantry as I do my normal grocery shopping.  I’ve also picked up some bulk items from Costco and from the online retailer, Boxed.
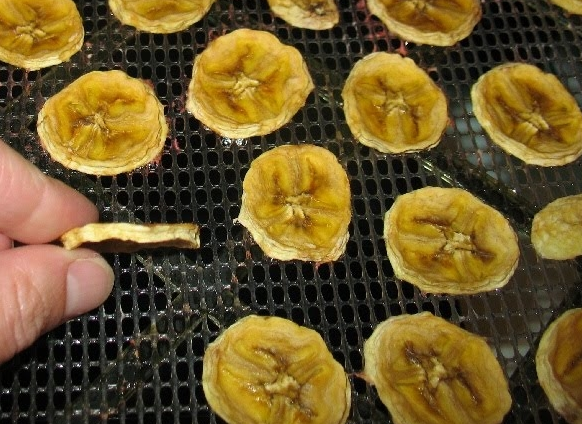
bananachip

The way my son loves banana chips, I can probably recoup the cost of the dehydrator in record time! 😉

As I build my pantry and gather recipes using LTS ingredients to test, I have felt the lack of the ability to dry and vacuum seal my own foods.  So I took advantage of the online Black Friday and Cyber Monday sales, and ordered an Excalibur dehydrator as well as a Food Saver with mason jar attachments while finishing most of my Christmas shopping. Merry Christmas to me!

I also got a few more products to test from Emergency Essentials and Thrive Life, including a couple of pantry cans of freeze dried meat products.

This period from Thanksgiving to New Years is an excellent time for me to test pantry recipes and judge the robustness of the pantry as it is now.  I hate crowded stores.  I do almost all my non-food shopping online as it is.  I don’t like the mall.  And I hate circling the parking lot trying to find a place to park.  Even in non holiday shopping times, I typically go to the grocery store right after they open or shortly before they close to avoid busy times.  But in this 6 week period, no time of day is safe.  The past couple of years, the hubby has done almost all the grocery shopping in this holiday season.

I do plan to have him pick up dairy products and eggs.  I also continue to get a winter CSA box with some produce, although I’ve dropped it to twice a month as the variety is limited in these months.  We mostly get root crops and winter squashes, more than my family can eat in a week, and these items keep well.  For meat, I will mostly be using freezer stores.   The dairy, eggs, and meat are items that I could produce from my pantry, but those items are so expensive in their LTS states (by comparison to fresh) that aside from the small sized pantry cans that I purchased to test recipes, I would prefer to use fresh / frozen ingredients now, since they are accessible.

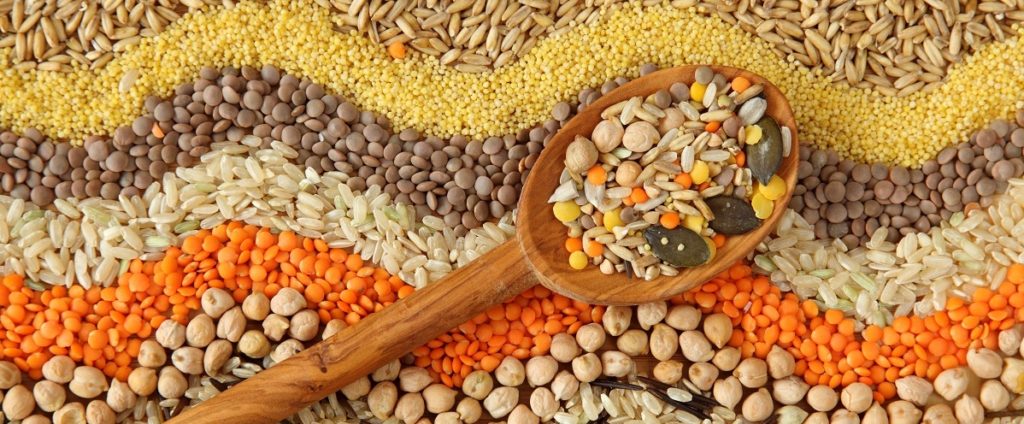
LTS, beans, and you

img_0043

Do you know why after soaking beans overnight you are instructed to drain, rinse well, and then use fresh water to cook the beans?  I was told we do it because it reduces flatulence, old wives wisdom and all that.  And actually it does, but the real reason to do it is to prevent illness.

Legumes and grains contain a type of protein called lectin.  Lectins can be toxic.  Lectins are also responsible for the gas inducing responses we can have to the magical fruit that is beans.  Soaking the beans draws out some of these toxins, so we need to discard the soaking water, rinse well, and start with fresh for cooking to reduce our exposure to the lectins.  The cooking process destroys most of what is left in the legume.

Now, there are different kinds of them, and they vary in how ill they can make you.  In fact almost all foods have some lectins, and some lectins are beneficial.  Different people also respond to the same lectins in different ways.  Beacuse we don’t digest lectins, we often produce antibodies to them. Almost everyone has antibodies to some dietary lectins in their body. This means our responses vary. However, some legumes, such as red kidney beans, are so full of toxic to humans lectins that they should not be eaten unless properly, thoroughly cooked.  (Red kidney beans are not suitable for sprouting!).

The temptation of post-SHTF bean cooking is to reduce water usage.  I’ve even seen advice to just cook  it in that water.  Don’t do it!  Modern packaged beans don’t need nearly the sorting and cleaning; you are unlikely to find rocks and dirt, but it’s still not good to ingest!  Find another way to use that water.  Use it for flushing, or if it’s the right season, water your garden with it.  I actually wonder if this might repel certain animals from nibbling at your plants – it’s thought that plants developed lectins to deter animals from eating their seeds and animals can smell the lectins.  That’s just speculation on my part though.

Keep in mind that it’s not just dried beans that can make you ill.  Some types of grains and legumes can be eaten raw (like a sugar snap pea, pod and all) but others (like a runner bean, can eat pod, but pod and contents needs to be fully cooked, or a mature fava, discard pod, peel inner bean and fully cook) need to be cooked to be safely edible.  If you don’t know for sure that your produce is safe to eat raw, err on the side of caution and cook it.

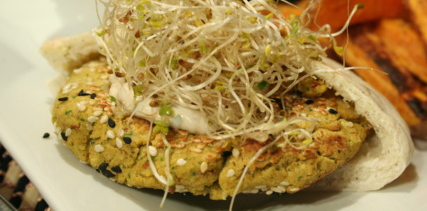
deliciousness Falafel Pita with Salad Mix Sprouts & Tahini Sauce

I like falafel.  It just so happened that I had soaked and cooked a couple pounds of garbanzo beans to make the multi bean salad and hummus, and had more left.  I also have plenty of tahini (used to make hummus, among other things), so what’s a girl to do?

Make a Falafel Pita with Salad Mix Sprouts & Tahini Sauce, of course

Let me say, I don’t claim a lot of authenticity here. I just know what are the typical flavor profiles and I go from there. I also like to form them into flat patties instead of small balls, which is the traditional shape. I often buy my falafel mix in the bulk section of my grocery, but I had the softened cooked beans, so why not. I don’t think falafel usually needs cooked beans, just soaked until soft, but this worked.

pita

So this is a little colorless. Make it more exciting with some tomatoes or roasted red peppers! But I like the basic flavors =)

1 C. cooked Chickpeas
½ C. fresh Parsley. Stems removed
Small handful Cilantro, stems removed
½ small-medium Onion, rough chopped
4 cloves Garlic, peeled
Salt to Taste
½ T. each Pepper, Cumin, Coriander
Cayenne Pepper, to taste, optional
Pinch of Cardamom, optional
Oil, for Frying
¼ tsp. Baking Powder
1 T. Sesame Seeds
Flour, optional
Egg, optional

Process the herbs in food processor until finely chopped. Add onions and pulse until well chopped. Add chickpeas, garlic and spices. Run for 30 seconds, scrape down sides and repeat until all is well combine and the mixture is smooth. Transfer to a container with a lid, cover tightly and refrigerate an hour to overnight. When ready to fry, heat your oil to 350 in a heavy bottomed skillet. I do about ½ – ¾ inch in cast iron. I think if you are doing thicker ball shapes, you might need a deeper oil. Using wet hands, form falafel into oval patties, at most about ½ inch thick – they should be a good size for your pita, to fit with a little room for the toppings, but not so small you don’t get falafel in most bites. If your falafel “dough” doesn’t come together well you can add up to a tablespoon of flour (if it’s too wet) or a lightly beaten egg (if it’s too dry) so the patty will hold its shape. Even without the additions, when its right, the patties will be delicate. If you can shape them and move them into the oil, they will tighten up as they cook. Carefully place your patty in the hot oil. Cook until a deep golden brown on the outside, flipping once. This takes mine about 3 minutes per side. The center should be cooked all the way through, so check your first patty and adjust heat up or down to get that nice brown without burning, and still cooked through. (You can bake these on a lined cookie sheet at 350 for 15-20 minutes, but they don’t have the same yum crunch). Transfer your cooked patties to a plate lined with paper towels or brown paper grocery bags to drain.

For Sandwich:

Pita Bread, cut in half
Sprouts (I used my French Garden Mix)
Tahini Sauce (recipe below) or Hummus
Optional: sliced Cucumbers, Tomatoes, Arugula, Roasted Red Peppers, Sour Cream

Stuff your falafel, sauce and sprouts into the half pita.  Add any extras, such as additional veggies or a dollop of sour cream and yum out.

Tahini Sauce

½ C. tahini paste
2-3 T. plus more, if necessary, fresh lemon juice
1 small clove garlic, minced
¼ – ½ C. water, as needed
¼ -1/2 tsp. salt

Tahini Sauce: Make the sauce by combining the tahini paste, lemon juice, and garlic in a bowl and stirring to combine. Add the water a little at a time as needed to form a smooth, creamy sauce approximately the thickness of heavy cream. (Note that the sauce might appear to separate for a bit before enough water has been added; just keep adding more water bit by bit and stirring until the sauce comes together.) Season to taste with salt and more lemon juice, if necessary. Transfer to a nonreactive container and refrigerate until ready to serve the falafel.

I think this would be fairly adaptable to LTS.  I’ve got some large containers of dried herbs, onions and garlic ordered.  I’m going to test out making this without fresh herbs and garlic.