New Acquisitions

I have been continuing to fill my pantry as I do my normal grocery shopping.  I’ve also picked up some bulk items from Costco and from the online retailer, Boxed.

bananachip

The way my son loves banana chips, I can probably recoup the cost of the dehydrator in record time! 😉

As I build my pantry and gather recipes using LTS ingredients to test, I have felt the lack of the ability to dry and vacuum seal my own foods.  So I took advantage of the online Black Friday and Cyber Monday sales, and ordered an Excalibur dehydrator as well as a Food Saver with mason jar attachments while finishing most of my Christmas shopping. Merry Christmas to me!

I also got a few more products to test from Emergency Essentials and Thrive Life, including a couple of pantry cans of freeze dried meat products.

This period from Thanksgiving to New Years is an excellent time for me to test pantry recipes and judge the robustness of the pantry as it is now.  I hate crowded stores.  I do almost all my non-food shopping online as it is.  I don’t like the mall.  And I hate circling the parking lot trying to find a place to park.  Even in non holiday shopping times, I typically go to the grocery store right after they open or shortly before they close to avoid busy times.  But in this 6 week period, no time of day is safe.  The past couple of years, the hubby has done almost all the grocery shopping in this holiday season.

I do plan to have him pick up dairy products and eggs.  I also continue to get a winter CSA box with some produce, although I’ve dropped it to twice a month as the variety is limited in these months.  We mostly get root crops and winter squashes, more than my family can eat in a week, and these items keep well.  For meat, I will mostly be using freezer stores.   The dairy, eggs, and meat are items that I could produce from my pantry, but those items are so expensive in their LTS states (by comparison to fresh) that aside from the small sized pantry cans that I purchased to test recipes, I would prefer to use fresh / frozen ingredients now, since they are accessible.

Pantry Friendly Meals, I do not think this means what you think it means.

Oh the internet.  Such a wealth of information, and sometimes, oh so useless.  Seeking out good recipes using long term pantry stores is a veritable minefield of annoyances.  It’s amazing what some people consider a “pantry meal”.  I do a search for some variation of “pantry friendly meals” or “disaster meals” or “emergency food recipes”, and it’s just an overload of mostly unhelpful information.  Lots of pages without actual recipes, many pages of recipes that you can make with food bank boxes (and most of them have a staple set for each client that includes some fresh foods), and a whole lot of nonsense.

Result 1 of my search.  7 days of fast, pantry friendly meals.  The grocery list follows:

Fresh Produce – Pears – Apples – Salad greens/lettuce – Avocados – Grapefruit – Limes – Tomatoes – Carrots – Celery – Cucumbers – Onions – Garlic

Fridge – Parmesan – Cheddar cheese – Blue cheese – Fontina cheese – Turkey bacon – Ham or prosciutto – Eggs – Mayo – Hummus – Butter

Freezer – Peas – Spinach


Pantry/Staples – Marinated artichokes – Sun-dried tomatoes – Olive oil – Vinegar – Balsamic salad dressing – Tomato soup/squash soup – Canned/jarred salsa – Walnuts – Raisins – Black beans – Dried pasta – Canned tuna

Spices – Curry powder – Dried oregano – Kosher salt and pepper (to taste)

Breads – Whole wheat tortilla – Whole wheat bread – Whole wheat pita

As many fresh, frozen, and refrigerated products as anything you would store or could make from your stores.  Next search, first hit, a whole blog on Pantry Friendly Cooking.  First recipe calls for mac and cheese with fresh cheese using a pressure cooker.   Next recipe is a little better, if not so practical.  Personalized chocolate Easter eggs.  You of course need the mold, and tubed frosting, and 3/4 cup butter (canned butter is so expensive, and I am not sure butter powder would work in candies), but at least all the ingredients are from the pantry.  The next recipe I see again calls for a pressure cooker, and includes a head of garlic, 3 bell peppers, a couple onions, chicken breast (raw), fresh asparagus, fresh shrimp, mussels, and lemons.  Because it happens to use rice, canned tomatoes and canned chickpeas, its pantry friendly?

Clearly, my definition of a pantry meal is a little different.  And its not just these two sites.  9 out of 10 that I have looked at are like this.  The 10th either is selling a book with actual LTS recipes, or is a list of foods to have on hand without actual giving recipes other than maybe “oatmeal for breakfast, tuna with crackers for lunch, rice and beans for dinner”.

So I picked up a few second hand books.  Apocalypse Chow (be warned, the Robertsons have published at least 3 different disaster meal cookbooks, and there are many repeats between them), Simple Recipes using Food Storage, and 100-Day Pantry.  I read some others via Kindle Unlimited.  I’m not linking those; they were almost all universally bad.  Poorly edited, clearly not self created recipes, but regurgitating things they found online.  People looking to make a few bucks, not credible cookbook authors.  Oddly, almost all of them have high reviews.  You’ll find 1 or 2 low reviews, usually with the same complaints I voice.  They must be creating false accounts, or getting family and friends to buoy the reviews.  I can’t account for it otherwise!  The one exception for me was “Dinner is in the Jar“.  This book provided an excellent walk through on how to make mason jar meals using a vacuum sealer, from long term storage foods, along with add-ons (most of which are also available as pantry staples, like ground beef, or cooked cubed chicken).  The author also provides a method for making these meals using mylar bags instead of mason jars.

At any rate, those 4 I linked do provide what I would consider “Pantry Meals”.  I can’t say they universally appeal to me.  I am not a fan of processed foods.  For a short term disaster, I suppose that is one thing, but I can not see feeding my family endless days of canned soups, spaghetti-os, chiles, et all.  And I am not buying cream of mushroom/chicken/celery soup.  I don’t care how ubiquitous it is in easy pantry meals.  It’s repulsive.  I want to be able to cook mostly as I do now – meals made from whole foods, not pre-processed items.  Of course, this will be more expensive but well, it is what it is.

At any rate, I have been collecting recipes that will work for my family from these sources, although they come in different degrees of pantry-usingness.  I have been labeling them as “Pantry Friendly”, which is almost all long term storage items, but might include 1-2 things that you would have on hand during a short term emergency, or if you had a root cellar (such as garlic), and LTS Recipes, which are those that can be made entirely from pantry stores, including freeze dried or dehydrated items.   Many of the recipes that I use now can be converted as well; I just have to figure out how to use dehydrated garlic and onion and such in place of the fresh versions.

LTS Asian Chicken Soup

1 (10- to 15-oz.) can chicken
I (15-oz.) can carrots
1 (15-oz.) can bean sprouts
1 (6-oz.) can mushrooms
1 (14-oz.) can chicken broth
2 oz. fine noodles (3 oz. Ramen noodles are okay)
1 T. onion flakes
1 tsp. garlic flakes
½ tsp. ground ginger
3-4 T. soy sauce
scant 1/2 tsp. apple cider vinegar

Do not drain the vegetables. Combine all ingredients and simmer until noodles are soft. Ramen noodles are not labeled for two years’ storage, so rotate them more often.

Note to Myself

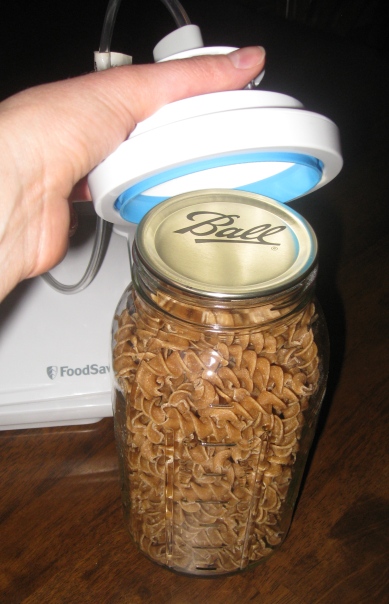
This is from Cooking with My Food Storage.  Very clear steps on how to use a vacuum sealer with a mason jar; not just for meals in a jar, but in general when I start dehydrating foods myself.  I also need to find the tip on how to do this with smaller jars inside a larger jar if you don’t have a jar sealer that fits smaller sizes and record that here for my reference as well.

A reminder about the basics of how to make a meal in a jar.

How to make a Meal-in-a-Jar:   Two Methodsjar-sealer

Method 1:  Use a Food Saver to Seal the Jars

Step 1:  In a clean, dry quart jar, layer ingredients. Shake the powder down into the jar if needed.

Step 2:  Place the lid on the jar.  Don’t add the ring.

Step 3:  Attach one end of the hose to the accessory port and the other end to the jar sealer.  Place the jar sealer over the jar.

Step 4:  Turn on your food saver and remove the oxygen from the jar.

Step 5: Remove the jar sealer (it is easier to unhook the hose from the jar sealer first), add label and ring, store in a cool dry place.

Method 2:  Use Oxygen Absorbers

Step 1:  In a clean, dry quart jar, layer ingredients. Shake the powder down into the jar if needed.

Step 2:  Wipe the top of the jar with a paper towel to remove any powder.

Step 3:  Top with a 300 cc oxygen absorber. Seal tightly.

Step 4:  The lid should seal within a few hours.  Add label.  Store in a cool, dry place.


LTS, beans, and you

img_0043

Do you know why after soaking beans overnight you are instructed to drain, rinse well, and then use fresh water to cook the beans?  I was told we do it because it reduces flatulence, old wives wisdom and all that.  And actually it does, but the real reason to do it is to prevent illness.

Legumes and grains contain a type of protein called lectin.  Lectins can be toxic.  Lectins are also responsible for the gas inducing responses we can have to the magical fruit that is beans.  Soaking the beans draws out some of these toxins, so we need to discard the soaking water, rinse well, and start with fresh for cooking to reduce our exposure to the lectins.  The cooking process destroys most of what is left in the legume.

Now, there are different kinds of them, and they vary in how ill they can make you.  In fact almost all foods have some lectins, and some lectins are beneficial.  Different people also respond to the same lectins in different ways.  Beacuse we don’t digest lectins, we often produce antibodies to them. Almost everyone has antibodies to some dietary lectins in their body. This means our responses vary. However, some legumes, such as red kidney beans, are so full of toxic to humans lectins that they should not be eaten unless properly, thoroughly cooked.  (Red kidney beans are not suitable for sprouting!).

The temptation of post-SHTF bean cooking is to reduce water usage.  I’ve even seen advice to just cook  it in that water.  Don’t do it!  Modern packaged beans don’t need nearly the sorting and cleaning; you are unlikely to find rocks and dirt, but it’s still not good to ingest!  Find another way to use that water.  Use it for flushing, or if it’s the right season, water your garden with it.  I actually wonder if this might repel certain animals from nibbling at your plants – it’s thought that plants developed lectins to deter animals from eating their seeds and animals can smell the lectins.  That’s just speculation on my part though.

Keep in mind that it’s not just dried beans that can make you ill.  Some types of grains and legumes can be eaten raw (like a sugar snap pea, pod and all) but others (like a runner bean, can eat pod, but pod and contents needs to be fully cooked, or a mature fava, discard pod, peel inner bean and fully cook) need to be cooked to be safely edible.  If you don’t know for sure that your produce is safe to eat raw, err on the side of caution and cook it.

Enemies of food storage

img_0044Light:  Exposure to light can cause degradation of taste, appearance and nutritional quality of food. Fat soluble vitamins and proteins are most likely to be affected by light. Store your food in opaque containers.

Temperature: Improper temperature for storage causes nutrient loss and degrades the texture of food. Essentially, food that’s too hot begins to cook and decay, and food that’s too cold begins preserving. Between 40-70 F is best, and in general closer to the cooler side is desirable. The storage life of most food products is cut in half for every increase of 18 degrees Fahrenheit. In a garage or attic, temperature may fluctuate between too hot and  too cold because these places usually don’t have insulation or controlled heat  and air conditioning.  Consider both temperature and consistency of temperature when choosing a LTS location.

Humidity / Moisture:  Too much moisture promotes an atmosphere where microorganisms can grow and chemical reaction in foods causing deterioration that ultimately can sicken us.  Mold in your food is no bueno. Some foods stored in a root cellar situation need a certain amount of humidity, but it’s typically in a specific range. Root cellaring is typically storing food for weeks or months too, and not years.

Pests: Insects and rodents can ruin your LTS if they manage to invade.  Sometimes grains can have an undetectable insect infestation that will eventually become apparent, which is why some people freeze grains and flours before storing.  Others include diatomaceous earth in their packaging, which deters pests, but doesn’t harm humans.  Rodents can be very persistent. If they’re hungry enough, they will get through even the strongest packaging. That’s why you should invest in some 5-gallon food grade buckets for your food and consider traps or repellents in your LTS area.

Oxygen / Air:  The presence of oxygen allows bacteria, microorganisms and pests to thrive and survive in your food.  In addition, many nutrients oxidize in an oxygen rich environment. Over time, oxygen changes the appearance, flavor, and texture of food. When fats oxidize they become rancid.

Time: It marches on, and everything gets old and loses taste, texture, nutrition, or even becomes inedible.  Rotating your food storage is important unless you are talking about very long storage foods (25+ year stuff that you buy, store and “forget”).

Human Nibblers: Kids seeking snacks.  Husbands seeking snacks.  While neither is likely to get into a bucket of lentils, no pack of granola bars is safe in my house.  I have to admit to being guilting of popping open a can of Thrive freeze dried yougurt bits; and those things, my friends, are not cheap!  If possible, store foods that tempt your human nibblers out of sight, repackaged to camouflage them.

Improper Packaging & Improper Handling: The issue here is that doing either thing can compromise your food and allow one of the other threats to your food storage to get a foothold and start degrading your supplies.  A small crack in your bucket, storing food with too many or too few oxygen absorbers, using non food grade containers that leech chemicals into your food – just a few things you might inadvertently do rendering all your effort and money moot.

Storing food is insurance; do it right.

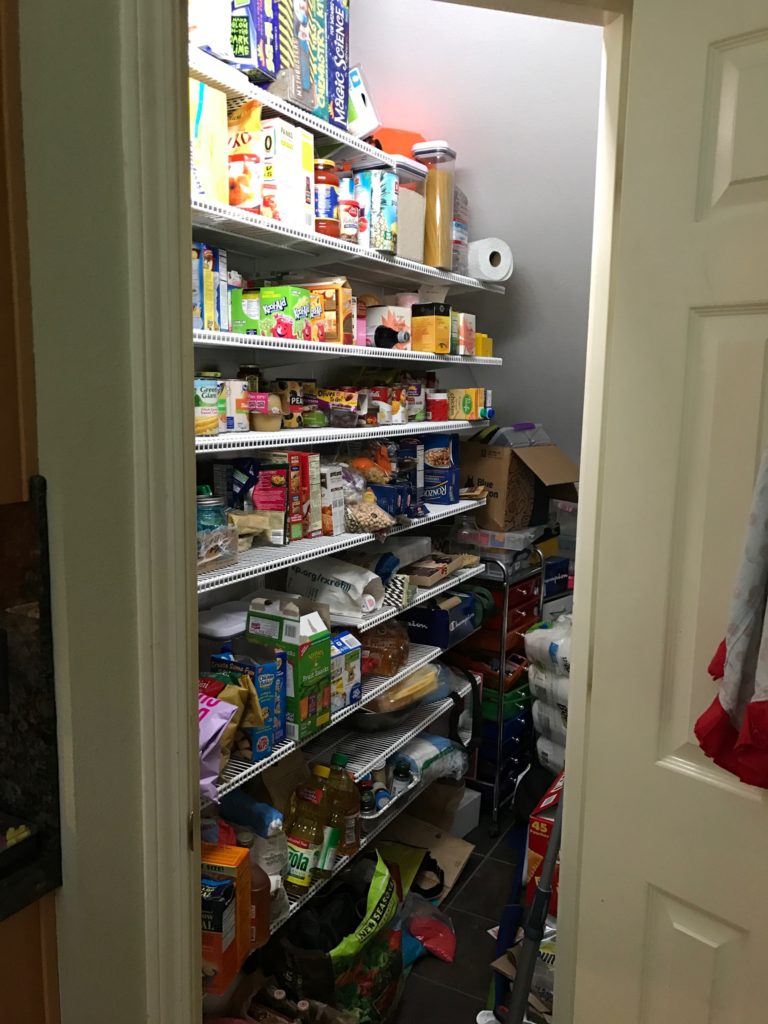
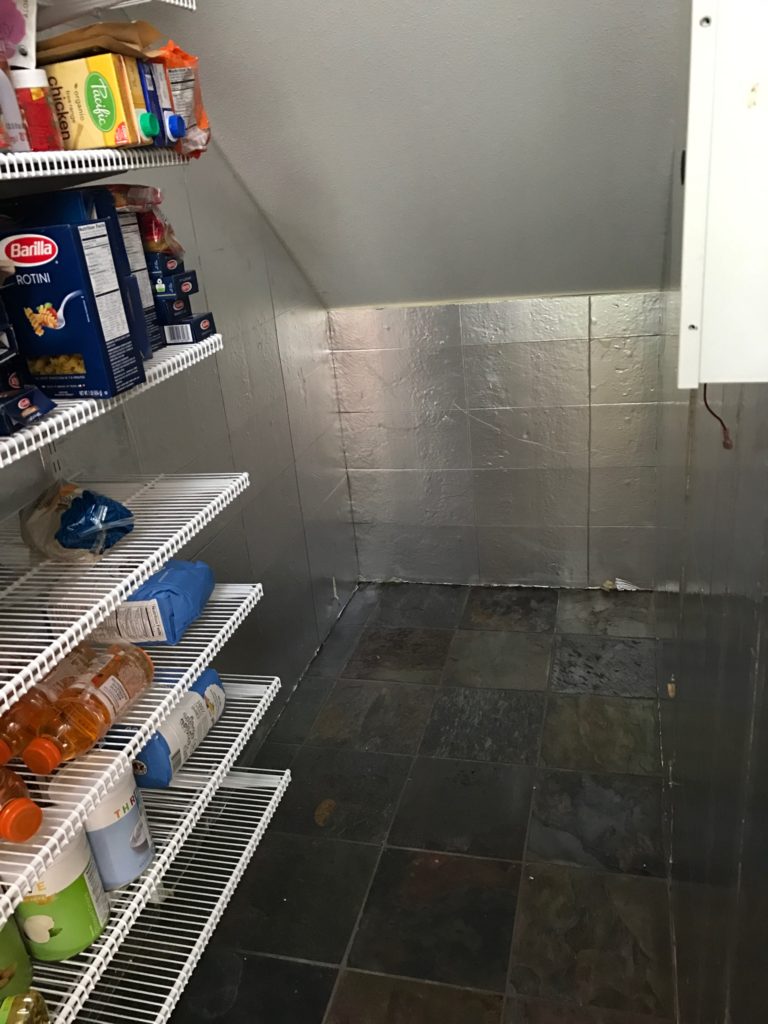
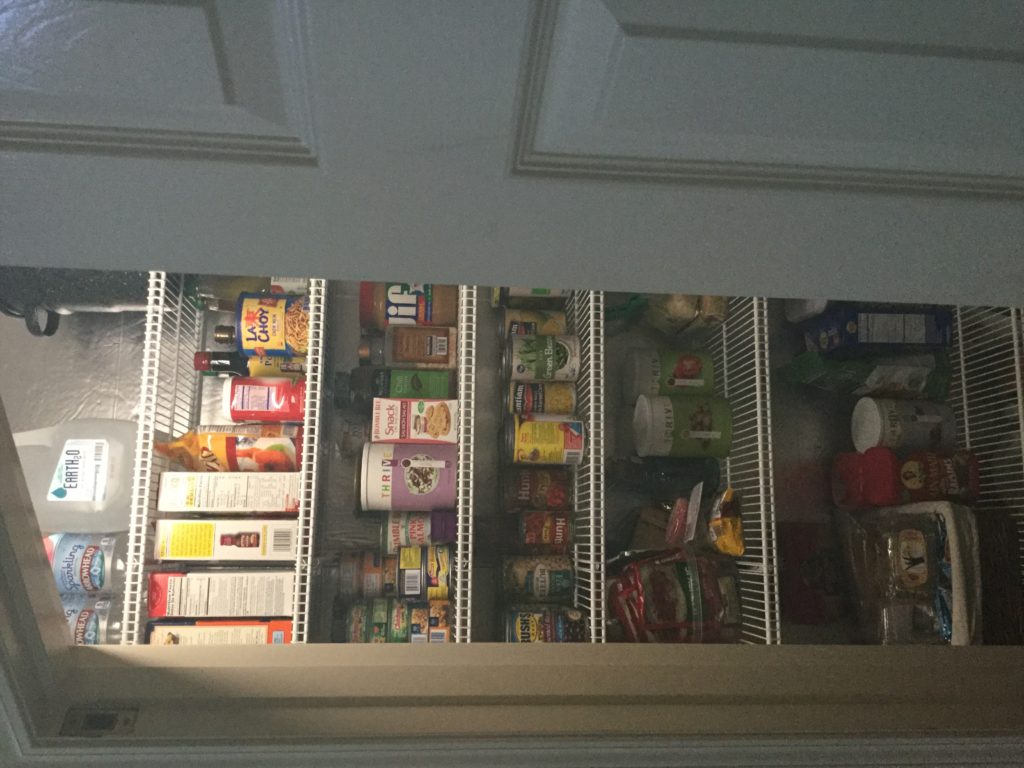
My pantry finally cleaned out

These first two are before.img_1349 img_1350

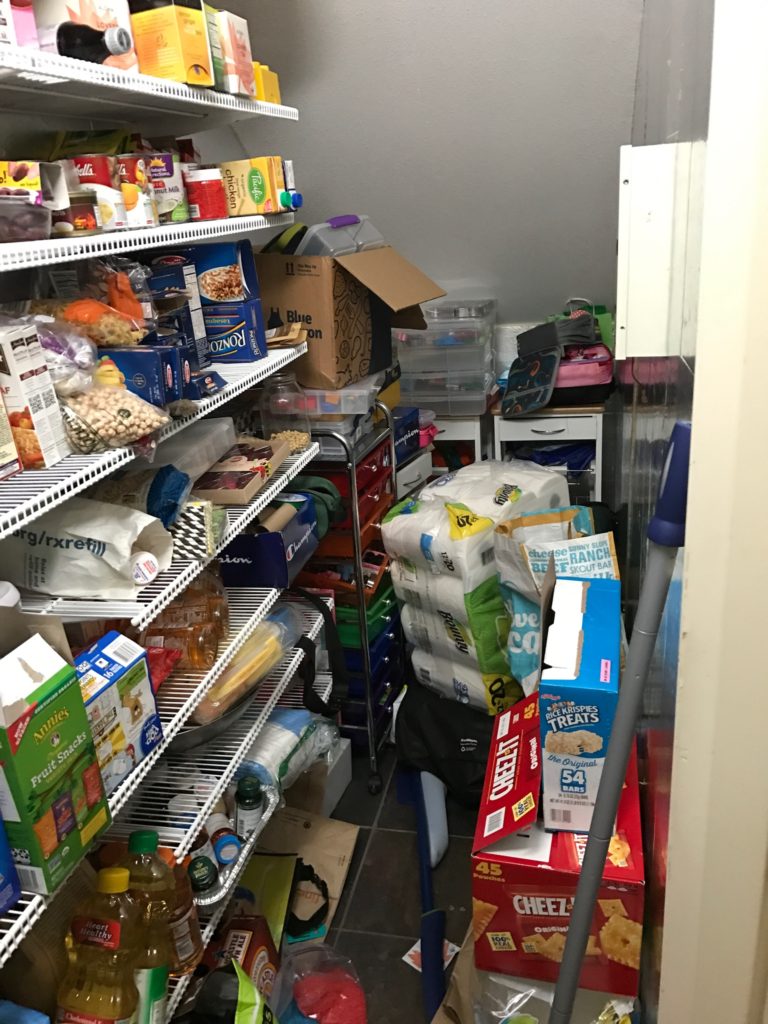
These are after I’d pulled out all the things that should be stored elsewhere.

img_1440 img_1441

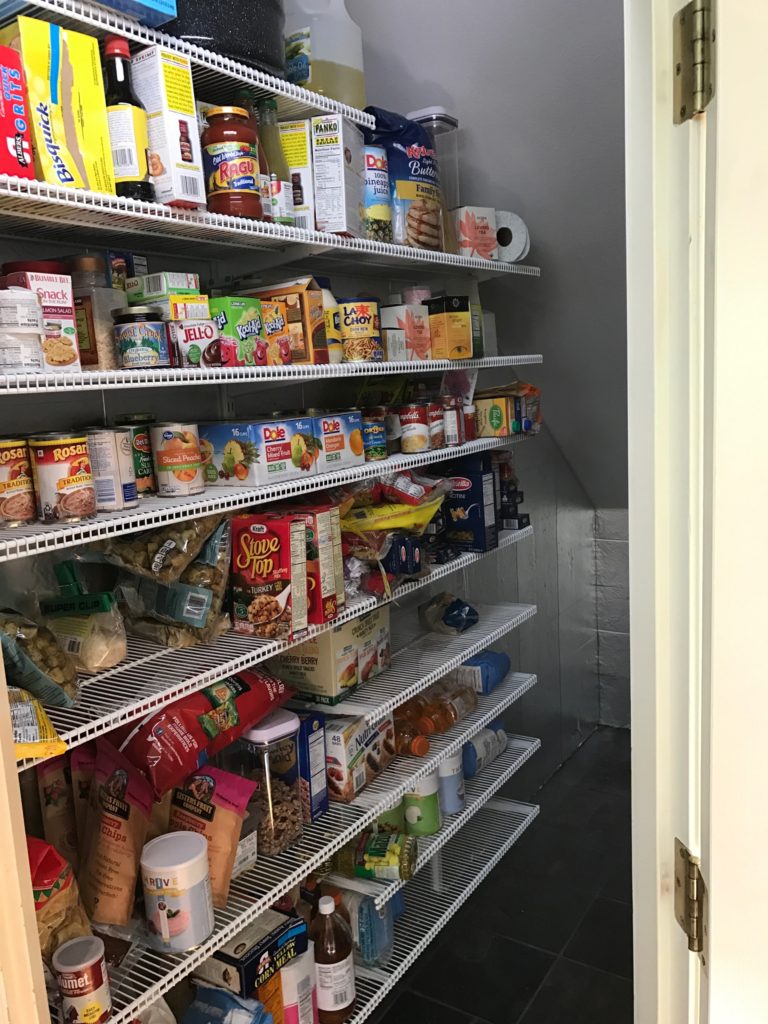
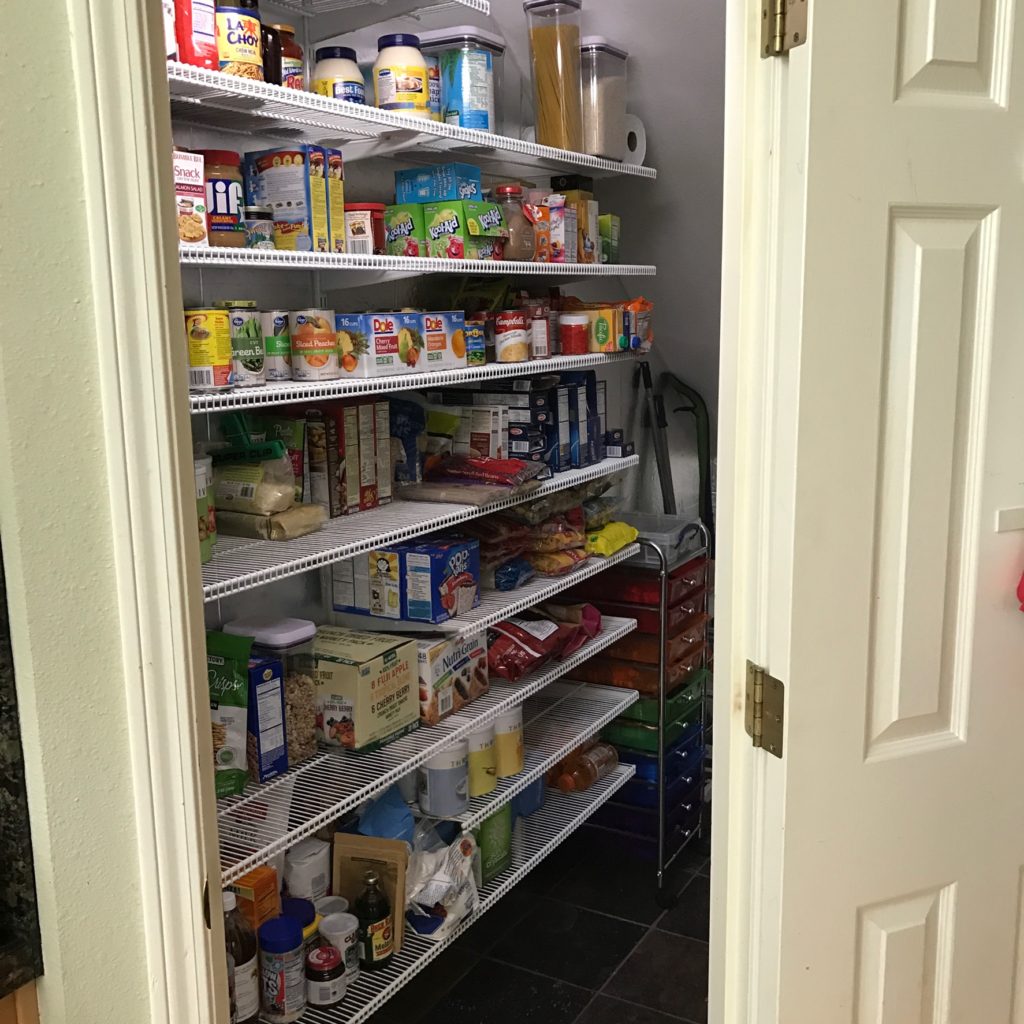
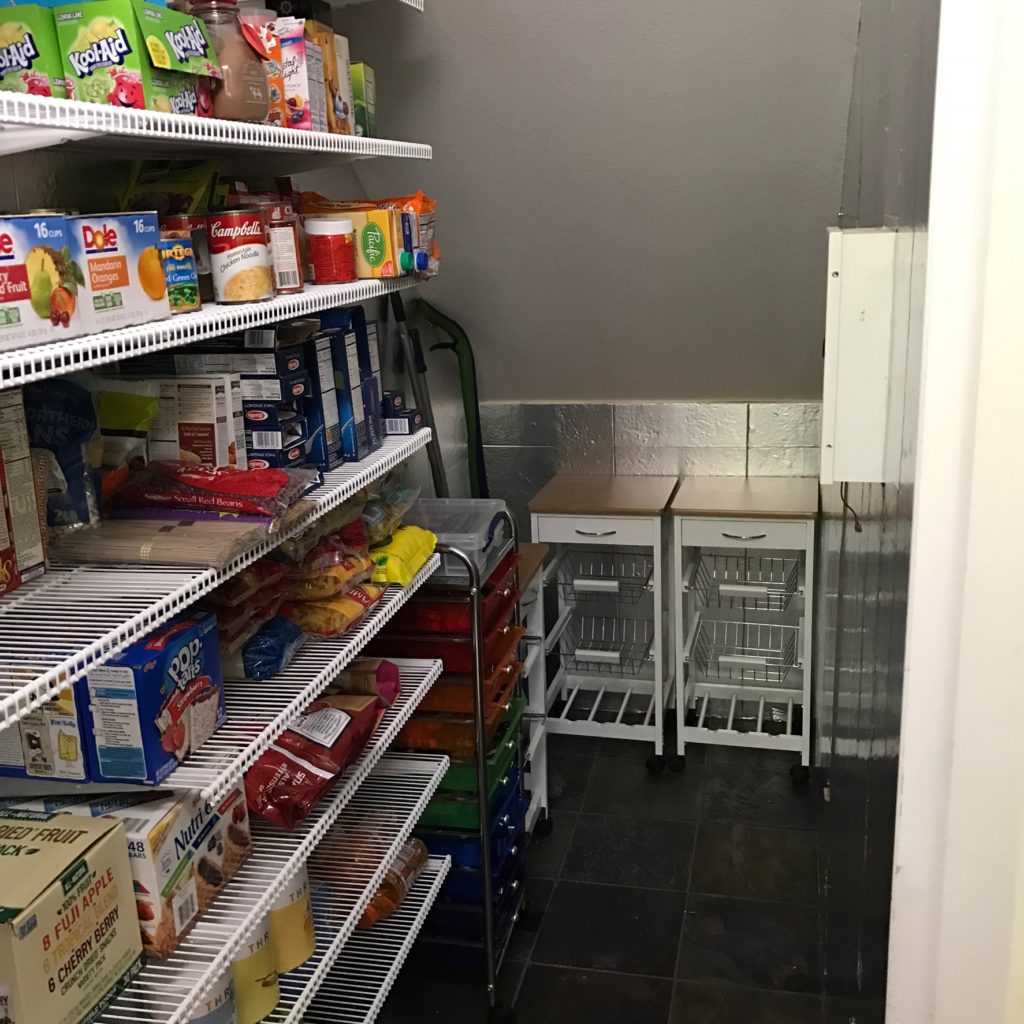
This is where I am now.  I discovered that I have a lot more processed crap than I thought I did.  I don’t prepare so much processed junk on a daily basis.  Some of it has been in there a long time.  I realize food can be good after the expiration, but I had 10 years past the expiration date on a couple grocery bags full of stuff that is gone now.

img_1442 img_1443

So much more room for storing stuff.  I do store potatoes and onions and fresh fruit and squash and things in a different place.  I may use those carts in the back for that now.  Or I may move them and use that 3’x4′ space forfood grade buckets when I get to that point.

This isn’t all my food on hand.  This is really the storage pantry.  Stuff I use every day is more accessible to the stove.  Baking supplies, cereal, fats and oils, spices and seasonings, unrefrigerated condiments, nut spreads, jams, and honey, breads, along with the root veggies and such I mentioned above are all in cupboards and countertop storage containers for easy access.

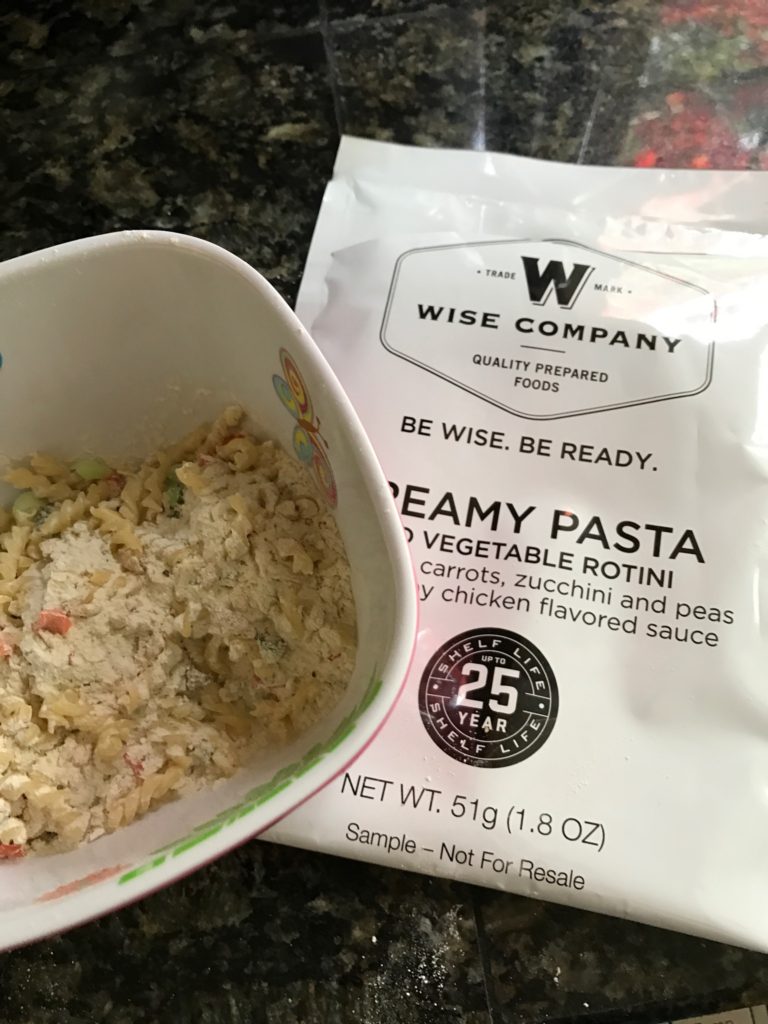
Review: Wise Company Creamy Pasta and Vegtable Rotini

For the most part, I prefer to have my diet consist of whole foods and ingredients that I can use to create my own meals.  That’s what I do on a daily basis.  I don’t use a lot of packaged and convenience foods like canned soups, hamburger helper and the like.  I occasionally use frozen meals, especially really challenging stuff like Chinese foods (potstickers!), but even that’s fairly infrequent.

So of course when it comes long term food storage, I don’t want to make the bulk of it from MREs, freeze fried meals and the like.  It’s not the way we eat.  But.  There may be times when being able to rip open a package and est it as is, or only add water, let it sit, and eat are the only real options.  To that end, I have been looking at some of the companies that frequently market to backpackers and for LTS, like mountain house, wise company, Augason farms, and so on.  The problem is, I don’t care to buy big buckets of multiple servings unless I can try it first and see if my family can exist on it in a pinch!

Wise Company kindly sent me a sample, and they chose Creamy Pasta and Vegtable Rotini.

img_1425

You heat water to boiling, add the contents (I dumped them in a bowl so you could see it), cover and let sit 15-20 minutes, stirring occasionally.

img_1427

After following those directions, the peas were still crunchy in the middle, the zucchini bits very chewy, and the pasta edibly soft, but more al dente than I would like.  The first bite or two were ok.  Not delicious, but ok.  Probably more than acceptable if you are a more common user of processed foods than I. The sauce reminded me of Lipton Cream of Chicken Cup o Soup.  That is, something I only ever have eaten when I’m sick, or the power is out and mom needed an instant meal. But edible.

It cooled off very quickly, and that’s when I couldn’t eat it anymore.  The creamy sauce got quite viscous, almost like it had okra slime in it.  And frankly, well, it looked like gobs of saliva dropping off the spoon.  Yuk yuk yuk.

I think that a tomato based sauced product might be a better option. So I need to find the smallest package options from different companies for my taste tests.

Seventeen Ways to Sabotage Your Family Food Storage Plan

By Carolyn Nicolaysen · July 28, 2015 (Meridian Magazine)  Find her on Facebook at Totally Ready.

(edited slightly for spelling and formatting)
cans-1024x683
In a real emergency, no one is going to ride in and rescue us if the calamity involves the whole community. Government, church leaders, prophets, and emergency response organizations all tell us to prepare – and to expect that in the aftermath of a disaster we will be on our own for 72 hours at least, and possibly for days or weeks after that.

Coping with natural disasters is one thing – coping with a slow drain on our back-up reserves is another. Food storage and emergency preparations require planning, continuing education, and awareness of our changing needs. In this time of downsizing and economic disappointment, it is more urgent than ever before in our lifetime that we commit to self-reliance and stay on top of our family emergency plan. Don’t be left wondering when that crisis comes, “what have I done?” Here are 17 ways we could be sabotaging our own best efforts.

1. Move too fast – that’s right, just go right ahead and jump into emergency preparedness – blow a thousand bucks on off-the-shelf solutions before you’ve educated yourself. Or… Slow down. Take the time to understand your needs. We are all planning for the same things: food, water, shelter, hygiene, sanitation, and medical needs. The challenges we are preparing for may differ. Some live in earthquake country, some in the path of hurricanes, some in tornado alley, some for ice storms or power outages. It really doesn’t matter. The items we store will be the same, but with slightly different priorities and proportions. The knowledge we need to deal with such emergencies is a matter of awareness, study, and organization. Analyze what your family needs before you begin purchasing. Create a list, plan and budget for priorities before buying anything.

2. Follow someone else’ plan. There are many plans floating around on the Internet. Be careful. A common plan challenges you to spend five or ten dollars a week for a year and provides you with a list of items to purchase each week. Take a careful look at those lists. One such list included only a few jars of peanut butter and a few cans of tuna for protein and no veggies or fruit. Storing from all the food groups should always be your goal. Each plan will be unique to the family storing, or at least it should be. Following your own plan also allows you to consider any special dietary needs in your family and only you can determine what to store for those family members. Again, think food groups.

3. Look for the easy fix. They say in real estate it is location, location, location. In food storage it is variety, variety, variety. As you create a list of foods and supplies to store, remember that variety is key to maintaining a lifestyle as normal as possible. You can find many lists that will tell you to store X amount of oats for example, but what if your family hates oatmeal? Remember when you told your mom you loved barbecued potato chips and she put them in your lunch every day? Remember how, after a month, you traded them for a new taste? Do not make the mistake of storing large amounts of specialty foods. You may enjoy these, but if you have others evacuating to your home they may not. Children may also rebel and refuse to eat. Instead of ending up with foods that are unfamiliar, plan to include a variety of foods.

4. Ignore nutritional needs. Again, think about Food Groups. When creating your shopping list, be sure to incorporate all of the food groups into your plan. Each group provides a different nutritional need. You should design your list to include grains, proteins, fruits and vegetables, dairy, and fats. Again – remember variety – but this time think color. Fruits are not created equal. Orange fruits provide different nutrients than blue and purple fruits.

5. Forgetting spices and condiments. If it doesn’t taste good, who wants to eat it?

6. Fail to include non-food essentials. Cleaning supplies, toiletries, personal hygiene products, medications, pet needs, and sanitation needs are all essential for a successful storage plan, one that is truly self-reliant.

7. Ignore a sensible storage strategy. All foods, even grains in cans and dehydrated foods, should be stored in a cool, dark, and dry area of your home. Temperatures should remain at under 80 degrees on the worst days, and hopefully below 70 degrees for optimal storage. Create new names for the areas of your home to break the mindset that you have become used to. The coat closet can be renamed the grain pantry. The linen closet can be thought of as the toiletries and medications cupboard. There is no law that declares a home must have a coat closet by the front door, though it is nice to have one, It is also nice to protect your preparedness investment. In a few minutes, you can add a few shelves and make storage spaces much more valuable areas of your home. It may take a few more minutes to grab a coat from your bedroom closet, but it might just be worth the effort.

8. Improper packaging. Paper bags, paper and cardboard are not good for storing food long term. If you are storing for long term always transfer food to metal, plastic or glass containers. Plastic, except for buckets, should be your last choice. You want containers that are moisture proof and safe from the ravages of pests like mice and insects.

9. Overlook comfort items. Yes – chocolate, candy, and popcorn all have their place in a good, well constructed food storage plan. Did you know popcorn is also the corn you will want on hand to grind for corn meal? Real popcorn, not the microwave variety. During a time of stress, comfort foods can provide the catalyst that transforms kids from whiners to helpers. This is a chance to continue family food traditions in a crisis. Birthdays come even during difficult times, and a birthday cake can really lift the spirits.

10. Storing foods you do not know how to prepare. All the food in the world will do you no good if you can not prepare it. You may have a neighbor or friend who knows how to bake bread and soak beans but when the time comes you better have enough stored for both families if you plan to ask for the friend’s help.

11. Failing to have the proper equipment. If you don’t have a wheat grinder what good is wheat, except for use as a cereal but that won’t make much of a peanut butter and jelly sandwich, so why are you storing peanut butter and jelly? Do you have the ability to cook those foods off the grid if you should be without power or do you have at least some foods that can be eaten right from the can? Which begs the question, do you have a can opener that is not electric?

12. Overdo it! Whether you purchase all at once or create a weekly budget and purchase over time, never purchase too much of just one food group. Always spread your money between all the groups and if you are on a limited budget get a one day supply of everything, then a one week, them a one month and so on. Three hundred pounds of wheat is not going to be satisfactory if that emergency arrives before you add the peanut butter and jelly to make the sandwiches.

13. Underestimate the value of water. Water is often the overlooked or under planned element in a preparedness plan. When designing your plan be aware that dehydrated and freeze dries foods need extra water to reconstitute and prepare. Remember, you need water for drinking, flushing, cleaning, laundry and cooking. Don’t forget pets are family members too and need to be counted when calculating how much water to store. Often overlooked sources of liquids are the canned fruits and vegetables you should be storing and this is precisely the reason for storing them instead of the dried varieties. Additionally, you already know how to use canned varieties and the kids are used to their taste and texture.

14. Put your storage in the basement and forget it! Or, you might consider the importance of rotating your food and other supplies on a regular basis. This is by far the biggest mistake most people make. They run out and purchase food storage and it is not what they are accustomed to eating, therefore, they do not cook with it and they do not rotate it. What they do after a few years, is throw it away. You must rotate your food storage, medical supplies and even cleaning supplies. All have a shelf life. What good is all this hard work and money invested if it all ends up in the dumpster?

15. Who needs dates and labels, anyway? When you purchase foods, label them with the month and year purchased on top of the can. This will ensure you are always using the oldest first. Canned goods do not lose nutritional value for at least two years after the expiration date so you will have at least two years from date of purchase to rotate through your three month supply.

16. Lose track of what you have. Create an inventory system so you can keep track of what you are storing. Design a spread sheet or get out the good old paper and pencil and record what you have so you know what you still need. Once you have completed your three month supply of the foods you eat this can be as simple as a paper on the fridge where you record items each time you use them up so you know how many you need to purchase to maintain your supply at the three month level.

17. Put it all under the bed. If you have a natural disaster strike your home, some rooms may be destroyed while others are untouched. If you have spread out your storage you may be able to salvage at least part of your supplies. Thinking a little more negatively, should someone enter your home with the intent to steal, they may find some of your stash and be satisfied and leave. Or, if you take a needy stranger to one area of your storage with the intent of sharing, they can take what they need while the rest will remain safely unnoticed, just in case they discuss your generosity with others who are not so trustworthy.

Once aware of these preparedness hazards, we can avoid these common stumbling blocks and keep our family storage plan on track, in balance, and ready for whatever may come our way. It’s all in the way we plan, budget, organize, and keep track of our best efforts and intentions to prepare and be self-reliant.

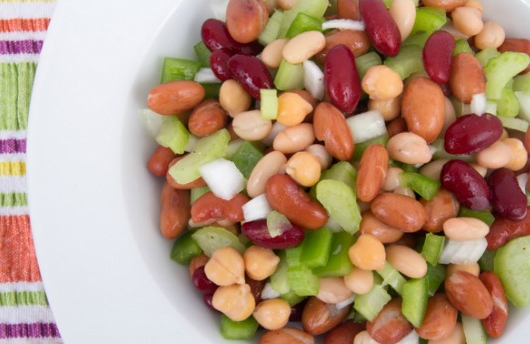
Multiple Bean Salad Recipe by Food Storage Moms

I haven’t had 3 bean salad since I was a kid.  I liked the tangy flavor.  But I really dislike wax beans, which is pretty much always one of the three beans in commercially canned Three Bean Salads.  I was looking into recipes for home canning 3 bean salad, when I came across this recipe at Food Storage Moms.  This is not a canning recipe, and I am not a canning expert to know if its even safe to can, but I thought maybe this is a smart thing to do anyway.  I don’t know if my family will eat canned bean salad at all.  They like beans, but the kids are a but sensitive to vinegary dressings.  What if I canned a bunch of jars and if Mom and I were the only ones that would eat it?  This recipe seemed like a smart way to make a small batch to test the waters, and hooray, no wax beans in sight!

I’ve got all the ingredients on hand, including some interesting celery from my latest CSA that is weird and thin and would be best used in a fine dice so I am definitely making a batch, as soon as I hit post. =)

This recipe is copied directly from Food Storage Moms (I am not sure why salt is listed twice in the brining liquid. I did post a comment and ask, but the original was posted over a year ago, so I don’t know that I will get a response. She did respond and just removed it.)

multiple-bean-salad-recipe1 can garbanzo beans, drained
1 can kidney beans, drained
1 can green beans, drained
1 can red beans, drained
1 can navy beans, drained
1 small onion, chopped/diced
1 small green bell pepper, chopped/diced
½ cup chopped/diced celery

Grab a quart mason jar and fill and shake the following ingredients

¾ cup sugar
1 teaspoon salt
½ cup oil
½ cup vinegar (I prefer white vinegar)
½ teaspoon pepper
½ teaspoon paprika

Mix all ingredients in the jar that will fit. Keep in the refrigerator and serve well chilled. I always have excess beans that I add to the vinegar solution the next day to get one more meal out of it.

Food Storage, Frugality, & Feeding my Family

One thing to do now is to practice feeding my family from my food storage.  Not just making meals entirely from storage, although that’s good practice too, but just using what’s there so it gets rotated and such as I go.  While working on tightening up my finances, I started creating monthly menus to reduce food waste, make multiple meals from one cut of meat, make shopping lists easy, and cut back on my impulse purchases.  Sometimes I need to be flexible to take advantage of what’s in my CSA box or what’s on sale at the store, but overall I am finding my menus useful.  This dinner made use of all those things.

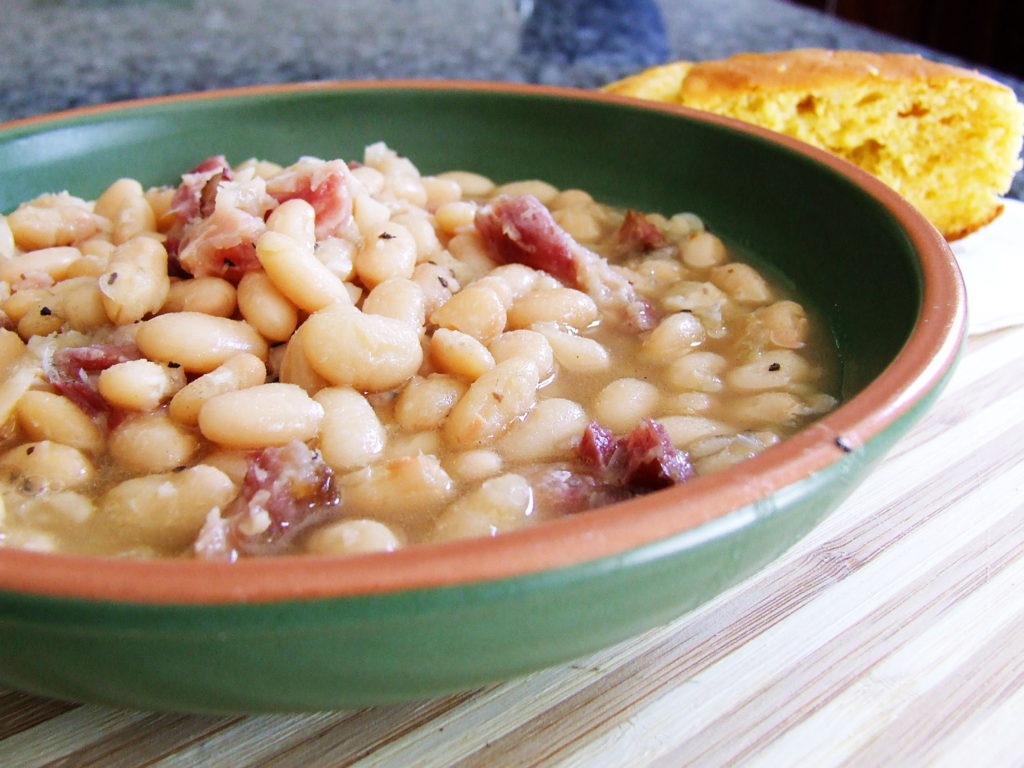
White Beans & Ham, Skillet Cornbread, and Sautéed Greens

I had a meaty hambone in the freezer from an earlier ham dinner.  I put it in with lots of meat on the bone with the intention of using for a lentil soup or something like that.  I had collard greens, leeks, and some peppers in my box, so I weighed out a pound of white beans and set them to soaking the night before.  The original recipe below.  I added leeks and peppers in addition to the onion, and I sautéed them a little before adding the other ingredients.  I reduced the sugar by half, because I don’t like overly sweet beans.  I also tossed in a bay leaf (removed before serving).  Instead of the diced ham, I threw in the whole bone, then at the end pulled it, pulled off the meat, diced it up, and tossed it back in.  It took longer than 2 hours to get the beans tender enough.  Cooked up some cornbread in a cast iron skillet, and made super simple greens with a bit of lemon since everything else was so rich.  Yum.

White Beans & Ham

1 pound dry great Northern beans
1/2 pound cooked ham, diced
1 small onion, diced
1/2 cup brown sugar
salt and pepper to taste
1/4 teaspoon cayenne pepper
1 tablespoon dried parsley

Rinse beans in a large pot; discard shriveled beans and any small stones. Add 8 cups of cold water. Let stand overnight or at least 8 hours. Drain and rinse beans. Return beans to pot and add ham, onion, brown sugar, salt, pepper, cayenne and parsley and water to cover. Bring to a boil; reduce heat and simmer 1 1/2 to 2 hours, until beans are tender. Add more water if necessary during cooking time.

img_1386

Two things – the basic recipe would be very easy to make all LTS.  With spam instead of ham (I think I would add it in the last 30 minutes; it’s not as sturdy as real ham), and dehydrated onions, you could create it completely from shelf stable foods.  I think dehydrated carrots would be tasty in there.  And you could switch up the seasonings.  Ooh, I think mushroom powder would add  nice umami undertone too.

And … How do people weigh the benefits of storing dried beans v. canned?  Canned are so much heavier and take more space and are more expensive unless you get them on sale.  Plus they are way saltier, and what else is in there?  But dried beans, while they store easily, can last practically forever when stored properly and are dirt cheap, take so much more time to prepare.  And more water.  And lots more fuel. If you can nestle a Dutch oven in your heating fire, or you have a wood stove, maybe you can let them cook slowly away while you heat your space and kill 2 birds with one stone.  But if you are relying on a one burner camping stove, or a rocket stove, that’s a lot of fuel to one pot of beans.

Its one thing if you are “only” planning and prepping for a short term emergency or recoverable disaster.  Space isn’t as critical, and a bit of extra salt and crud in the cans in the short time frame won’t make much difference I suppose.  But for the long haul?  Some of each?  How to balance it?

p.s. I’m still not smoking.  I had some nicotine gum to take the edge off a couple times (I already had it from a flight last February, so no money wasted), but I haven’t had an actual cigarette in my hand for over 48 hours.  I’m grouchy. I’m hating it.  I’ve wanted to buy a pack soooo badly.   But I haven’t yet.