Soap Crayons

1 3/4 C. Ivory Snow; (powder)

50 drops food coloring

1/4 C. water


Mix water & soap flakes together. Add food coloring & put mixture into an ice cube tray. Allow to harden. Break or cut into pieces. Fun to write with on the tub when bathing & face & hands!!!

Tags:

  • Digg
  • Del.icio.us
  • StumbleUpon
  • Reddit
  • Twitter
  • RSS
read comments

Fun a-go-go! Wheels, Wheels, Wheels

Make your art roll. If your child can’t put down his favorite car to pick up a brush, let him use the vehicle as a brush. Show him how to drive trucks and trains over puddles of wash-able paint on a cookie sheet, then roll off the paint in designs on paper taped to the floor.


Put wheels on anything. Buy wooden wheels at a hardware store for a dollar or two, then make your own vehicles by attaching them to objects with nails, wooden skewers, or golf tees. Turn a flat-bottomed potato into a spud-mobile. Transform a Styrofoam block into a car, or link three to make a train.


Create a transportation system. On the sidewalk, or on large pieces of paper that are taped to the floor, draw a town’s transportation system, including construction sites for trucks, a garbage dump, an airport, and a bus terminal. Then let your child get rolling, flying, and digging. You can even put “trash” or dirt in little piles for him to scoop up and deliver.


Watch transporting videos. When you need a break from all that motion in your house, slow down with a marathon of Bob the Builder ($10 and up DVD, $7 and up VHS, HIT Entertainment), which shows the functions of various equipment and gives lessons in teamwork and cooperation. I Dig Dirt ($15 DVD, $13 VHS, Dreams Come True Productions) offers a non-animated, realistic view of big equipment in action.


Traffic Lights. Cut a large rectangle of black paper. Cut 3 circles to fit on the rectangle. They should be green, yellow and red. Glue the circles in correct order (Red, yellow, green top to bottom) onto the rectangle to make a traffic light. Talk about what the light and each of it’s colors means.


Simple Car. Cut out simple car silhouette and two discs of card for wheels. Punch hole through wheels and main body of car and fasten with split pins (I think you call them Brads in America – they are called split pins in England!). Decorate car – can be used as a gift for Father’s Day!!! We did this craft at my Mother & Toddler Group and we had the children painting the car – what a mess they made – they loved it. ~ Submitted by Julie


Edible Traffic Lights. Spread peanut butter on a quarter section of a graham cracker. Use a red, yellow, and green M & M’s to make the lights.


Tags:

  • Digg
  • Del.icio.us
  • StumbleUpon
  • Reddit
  • Twitter
  • RSS
read comments

Stages of a Butterfly


butterflyhead1


Ever wonder where a butterfly comes from? It comes from a chrysalis (KRIS-uh-liss) which is also called a pupa. A chrysalis looks like a tiny leathery pouch. You can find one underneath some leaves in the summer.


Some animals don’t change much as they grow up. Think about it: someone your age looks a lot like a grown-up. Grown-ups have more wrinkles and gray hair. But they still have two arms, two legs and one head—just like you.


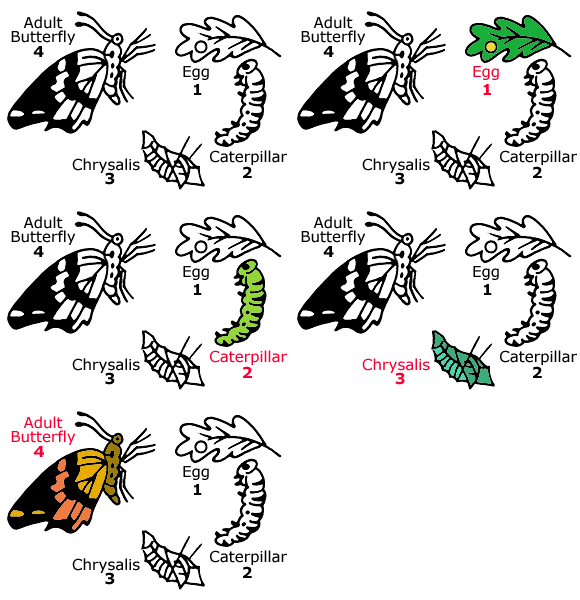
We’re going to meet an animal that’s very different—the butterfly. Butterflies go through four life stages, and they look very different at each stage.


cycleanim 

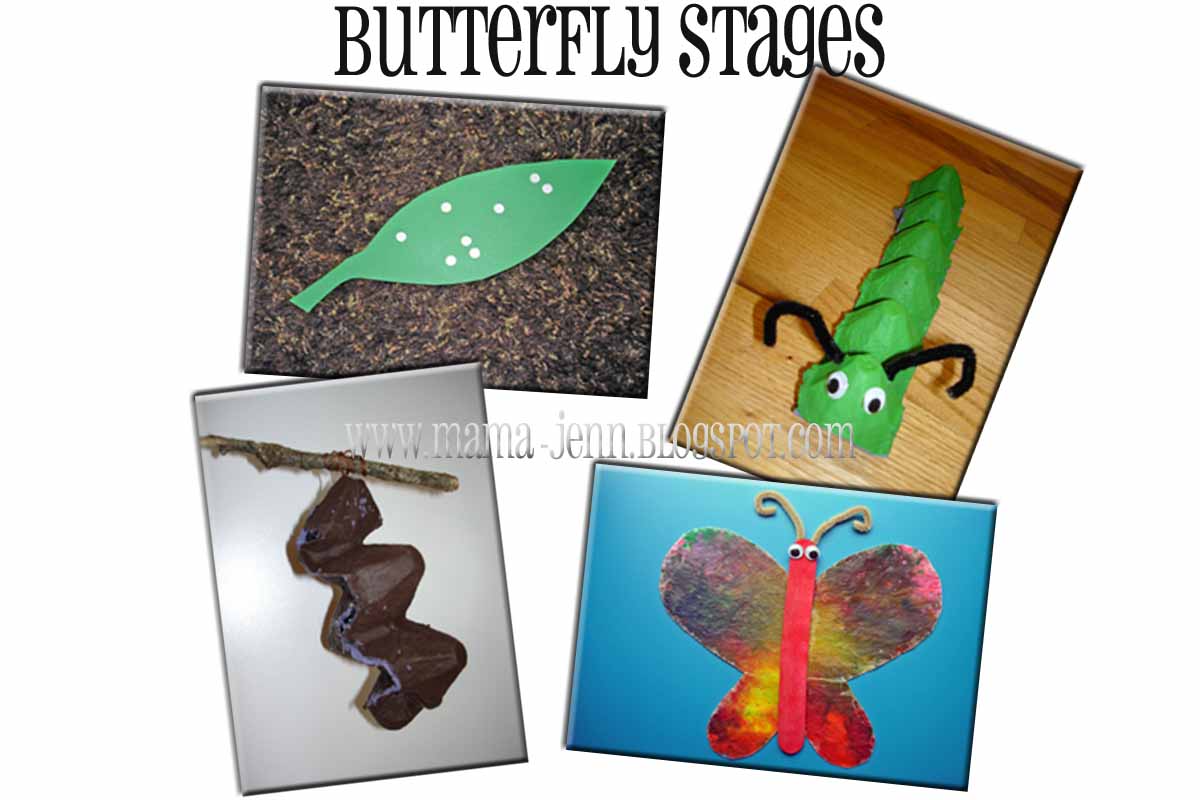
1. An adult butterfly lays an egg.


 For this first stage we cut a leaf out of construction paper and used a hole punch to make tiny eggs to glue onto the leaf.3. The caterpillar forms the chrysalis or pupa.


2. The egg hatches into a caterpillar or larva. 


 For this stage we cut an egg carton and painted it green. We added googly eyes and pipe cleaners for feelers.3. The caterpillar forms the chrysalis or pupa.


 3. The caterpillar forms the chrysalis or pupa.


For this stage we cut two pieces of an egg carton, painted the brown, and glued them together. We finished it off by using DMC floss to attach it to a twig.


 4. The chrysalis matures into a butterfly

For this last stage we used wax paper and crayon shavings. {Iron the crayon shaving between two pieces of wax paper.} We added a large popsicle stick, googly eyes, and pipe cleaner.


butterfly_stages


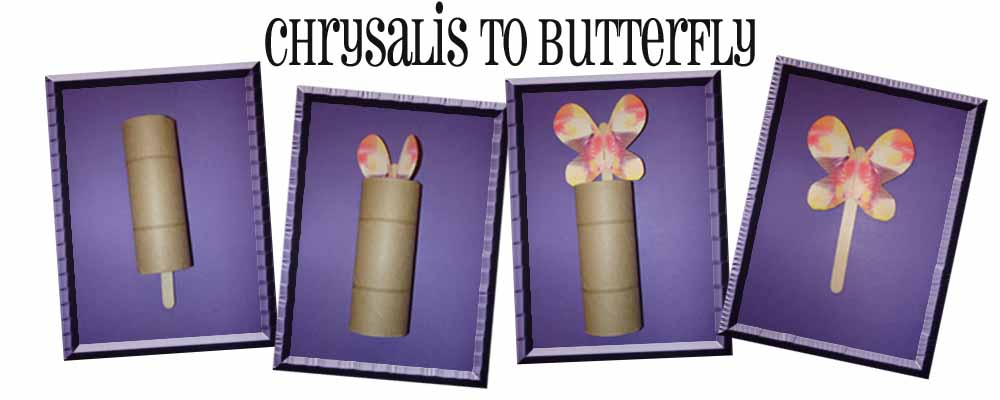
Another way to show an emerging butterfly:


Toilet-paper tube

Tongue depressor or ice-cream pop stick

Heavy paper

6″ (150 mm) piece of pipe cleaner, folded in half

Markers or crayons


chrysalis_to_butterfly


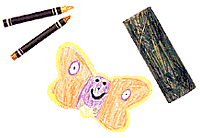
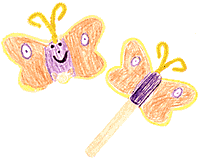
1. Cut out and color a butterfly from the heavy paper. Use any colors, but make both halves look the same. Put a small hole at the top of the butterfly’s head.

step1a

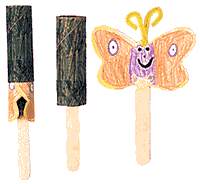
2. Color the toilet paper tube to look like a chrysalis. (A monarch butterfly’s chrysalis is green, but you can use any color.)


3. Take a piece of pipe cleaner and shape it like the letter “V”. Put one point through the little hole in the butterfly’s head and then twist it to look like antennae. Butterflies use these “feelers” to learn about their environment.


step2a


4. Glue the butterfly to one end of the tongue depressor or ice-cream pop stick. Let the glue dry.


5. Curl the butterfly’s wings and slide it into the chrysalis.


step3a


6. Pull the stick to make the beautiful butterfly come out of the chrysalis.

Fly your butterfly like a real one!


Tags:

  • Digg
  • Del.icio.us
  • StumbleUpon
  • Reddit
  • Twitter
  • RSS
read comments

Movement Using Scarves

Age range: Grades K–2 (Extension: grades 2–4)


To get the children moving, demonstrate that dance is a way to communicate, and show how modern dance is different than other forms of dance. Students will learn about body language and moving through space in new ways.


• A “scarf”(piece of colored fabric) for each student

• A variety of music selections


• Long, wide fabric pieces

• 12–16 inch dowels

• A Chinese music selection


Play music with a variety of moods and tempos. Listen carefully to the music, and then begin to move around in space. Think about how the music makes you feel and how you can show that feeling in the movement. Use different kinds of movements: stop, go, high, low, fast, slow, rounded movements, and angular movements. Make shapes with your body and the scarf while you listen and move to each music selection.


(Extension: Chinese Ribbon Dance)


Attach a long wide fabric piece to the end of a dowel. (Duct tape works, or you can sew it on). Listen to a Chinese music selection. Chinese dancers use ribbon sticks to express emotions (happiness, energy, sadness) or landscapes (water, hills, waterfalls). Move around the room exploring the gestures and motions that produce different ribbon effects.

Tags:

  • Digg
  • Del.icio.us
  • StumbleUpon
  • Reddit
  • Twitter
  • RSS
read comments

Amazing Science Projects

Budding chemists aren t the only ones who will get a kick out of these experiments. From gassing up a balloon to making quicksand, every project is enjoyable and teaches something about how the natural world works.


SALT MONSTER

Have an adult bring 1 cup water to a boil in a saucepan; remove from heat. Add 1/2 cup epsom salt and stir until it dissolves (we also added blue food coloring for fun). Keep adding epsom salt until it no longer dissolves when stirred (1/4 to 1/2 cup more). Let the mixture cool, then pour it into a glass jar. Tie one end of a piece of cotton string around a pencil, and the other end to a washer; string should be long enough so washer hangs at least one inch above the bottom of jar. Set pencil across rim of jar with washer dangling inside.Over the next few days, break away any crust that forms at the top of the jar, and watch as the  salt monster  emerges.


WHY IT WORKS: As the water evaporates, the salt flakes will form large crystals that will cling together. To keep your salt formation on display, pull up the crystalcovered string, and hang it in a clean, clear jar.


OCEAN IN A BOTTLE

You don t have to go to the beach to see waves: You can re-create the crashing surf in a bottle. Use a clean, clear, dry bottle with flat sides; fill 1/3 of the way with white vinegar, and add several drops of blue food coloring. Fill the rest of the bottle with a light-colored cooking oil like canola. Screw the cap on tightly; then rock the bottle back and forth to watch the waves.


WHY IT WORKS: Oil is lighter than vinegar, so oil droplets float to the surface and stay there. The two will never mix, even when you tilt the bottle.


FIREWORKS IN A JAR

Set off an explosion of color! Fill a clear jar with water. In a separate cup, combine 1 tablespoon vegetable oil and a few drops each of red, blue, and yellow liquid food coloring; mix them together with a fork. Pour the colored oil into the jar of water, and watch as streamers of color descend.


WHY IT WORKS: The food coloring is water-soluble: It cannot dissolve in oil, only in water. When you first pour the mixture into the jar, the food coloring is trapped in the oil; eventually it sinks, makes contact with the water, and dissolves.


CORNSTARCH QUICKSAND

In a bowl, combine 1 cup cornstarch with 1/2 cup water, and stir with your fingers until mixture forms a thick paste; if the mixture is too crumbly, add 1 tablespoon water (wash hands afterward). Punch the surface:Your fist will barely make a dent. Now slowly dip your hand into the paste. You can pick it up, and it will ooze through your fingers. Squeeze it, turn it over and over in your hands, and watch how it goes from goopy liquid to dry powder and back to glop.


WHY IT WORKS: This mixture is called a “hydrosol” a solid scattered throughout a liquid. Applying pressure to it, as you do when you punch it, traps tiny drops of water between tiny bits of starch, making the surface feel solid. When the pressure lets up, the mixture becomes watery again.


HANDS-FREE INFLATION

Fill a balloon with air without blowing into it: Pour 4 tablespoons of vinegar into a clean bottle. Use a funnel to fill a small balloon with 1 tablespoon of baking soda. Be sure that the bulb of the balloon falls to one side as you carefully slip its mouth over the neck of the bottle.Then lift the bulb to let the baking soda fall into the bottle. The balloon will inflate all by itself!


WHY IT WORKS: When baking soda and vinegar come into contact, they form carbon dioxide. This gas fills the bottle and can t escape, so it rushes into the balloon, causing it to inflate.

Tags:

  • Digg
  • Del.icio.us
  • StumbleUpon
  • Reddit
  • Twitter
  • RSS
read comments

Egg Carton Caterpillar

Inspire your toddler’s creativity with this clever creature. 


• egg carton
• scissors
• pipe cleaners
• glue
• felt
• tissue paper
• markers
Cut an egg carton in half lengthwise, so you have a “caterpillar” that is six egg-lengths long. Cardboard egg cartons work best, but Styrofoam will work too.  If you are working with a cardboard egg carton, invite your child to use markers to color his caterpillar. (The marker won’t stick to Styrofoam.) Cut the felt and tissue paper into smaller pieces (watch carefully to make sure your child does not put the pieces into his mouth). Put drops of glue on the caterpillar and then encourage your child to give the caterpillar spots with felt and tissue paper. Poke small holes on top of the caterpillar’s head and use pipe cleaners to make antennae. Give your caterpillar eyes too!  Finish by asking your child to name his caterpillar creation! You can also read Eric Carle’s classic book The Very Hungry Caterpillar with your child. How is your child’s caterpillar similar to the caterpillar in the story? How is it different?

• develops fine-motor skills


Tags:

  • Digg
  • Del.icio.us
  • StumbleUpon
  • Reddit
  • Twitter
  • RSS
read comments

Changing-shapes Place Mats

Make meals more fun with these math mats kids create.


• several sheets of colored construction paper
• clear contact paper
• Velcro tape (adhesive back)
• adult-type scissors
• markers, crayons, or colored chalk

Invite your child to choose several colors of construction paper. From these, cut out squares, triangles, rectangles, and circles. Name each shape as you cut it out. Make two or three of each shape in different colors. Ask your toddler to choose a sheet of construction paper that will be used as the base of the place mat. Provide her with magic markers, crayons, or colored chalk. Encourage her to draw on the large sheet of construction paper. Talk with her about the kinds of marks she is drawing. Use clear contact paper to completely cover both sides of the drawing. Place several different shapes on the table and ask your child to “decorate” them. Continue to engage her in conversations that describe what you both are doing: “Your blue circle has yellow lines, and my green triangle has blue dots.” Mark each shape with its name. Next, spread out a sheet of contact paper on the table. Ask your toddler to place the shapes onto the “sticky paper.” When she has finished, place another sheet of contact paper on top of the shapes. Cut out each individual shape. Ask: “Can you find the squares? triangles? circles?” Assist her in naming the colors and finding colors that match. Cut several small pieces of Velcro tape. Encourage your toddler to help you attach the Velcro to the backs of the individual shapes. Attach Velcro pieces to the top of the large drawing that has been covered with clear contact paper. Show your child how the shapes will attach to the Velcro on the top of the place mat. She will enjoy using her place mat at mealtimes.

• develops fine-motor coordination
• encourages recognition of simple geometric shapes
• supports distinguishing colors
• builds vocabulary
• develops early math concepts


Tags:

  • Digg
  • Del.icio.us
  • StumbleUpon
  • Reddit
  • Twitter
  • RSS
read comments

stART: Match the Machines

Turn on your child’s fascination with how things work with a simple homemade game.


• Catalog or magazine pictures of different types of large and small machines and appliances your child recognizes
• small basket or container
• oaktag or index cards
• large sheets of paper (chart paper or newsprint)
• drawing paper
• glue stick
• scissors
• markers
• crayons

Together, read some books about machines and the work they do for us. Machines at Work and Big Farm Machines are good choices.  Make your own matching game. Cut out a variety of pictures of different types of machines found in different environments (home, school, and offices, for example). Glue them onto large index cards. On a larger sheet of paper, draw a house, an office building, a farm, or any other familiar place. Show your child the cards you made and talk about the names of each machine. Which is the largest? Which ones are smaller? Where does she think the machines would work best? Lay out all the cards and the drawings and work with your child to match each machine with the place it belongs.

• Supports matching skills
• Promotes vocabulary-building conversation
• Teaches pre-math concepts

Tags:

  • Digg
  • Del.icio.us
  • StumbleUpon
  • Reddit
  • Twitter
  • RSS
read comments
 Page 87 of 103  « First  ... « 85  86  87  88  89 » ...  Last »