The Plumpuppets

The Plumpuppets

When little heads weary have gone to their beds,

When all the good nights and prayers have been said,

Of all the good fairies that send bairns to rest

The little Plumpuppets are those I love best.


If your pillow is lumpy, or hot, thin, and flat,

The little Plumpuppets know just what they’re at:

They plump up the pillow, all soft, cool and fat—

The little plumpuppets plump-up it!


The little Plumpuppets are fairies of beds;

They have nothing to do but watch sleepyheads ;

They turn down the sheets and they tuck you in tight,

And dance on your pillow to wish you good night!


No matter what troubles have bothered the day,

Though your doll broke her arm or the pup ran away;

Though your handies are black with ink that was spilt–

Plumpuppets are waiting in blanket and quilt.


If your pillow is lumpy, or hot, thin, and flat,

The little Plumpuppets know just what they’re at:

They plump up the pillow, all soft, cool and fat–

The little plumpuppets  plump-up it!


Christopher Morley

Tags:

  • Digg
  • Del.icio.us
  • StumbleUpon
  • Reddit
  • Twitter
  • RSS
read comments

Learn the Alphabet Arts and Crafts – P

The letter P is a dependable letter.  It usually makes the “puh” sound as in pan.  This is especially the case when the letter P is not partnered with another consonant

P is silent when followed by the consonant s, t, or n at the beginning of a word (as in psychic).

Also, when combined with the letter “h”, the grapheme ph is formed which sounds like “f”  (as in physical)


1. Present a capitol and lower case P to your child.  See if she knows the name of the letter and the sound it makes.  Give examples of P words, such as popsicle, paper and pencil.  Have her pretend to be popcorn – saying p-p-p-POP.  See if she can list other words that start with P.


2. Read Pete’s a Pizza


3. Go on a scavenger hunt around the house to find items that start with P for the P bag this week.  You might find potato, popcorn, puppet, pumpkin, pizza, pencil, plum, pinwheel, pig, pain, plant, etc


4. Create a P collage.  Have your child search through magazines for P words, and glue them to paper for his alphabet book.


5.  Painted P’s.  Provide a cut out P, taped to wax paper for easy cleanup.  Have your child paint the P with pink and purple paint.  When dry, glue to a sheet of 8.5 x 11” paper for their alphabet book.


6. Provide a worksheet with a line of P’s to trace across the top and a blank spot below, a 6” circle of tan construction paper, 5 inch circle of red construction paper, 1 inch pieces of white yarn and glue.  Glue the red circle in the middle of the tan one, and then glue it to his sheet.  Have him top the pizza by gluing on cheese yarn.


7. Other activities:  Have P snacks – Popcorn, peas, pudding, peanuts and pizza; make potato prints;  taste potatoes cooked a variety of ways – baked, fried, mashed, and chip.  Order them from favorite to least favorite; Make puppets and put on a play; visit a puppy at a local pet store;


Peaches
Pears
Plums
Pineapple
Pudding cups
Pretzels
Popcorn
Pink or purple-colored snacks
Pumpkin-flavored snacks
Peanut Butter and crackers or pretzel dippers or apple slices
Pinwheel Sanwiches
Peppermint Crunch Mix Peppermint Crunch Mix
Pumpkin Pie Dip with graham crackers

Tags:

  • Digg
  • Del.icio.us
  • StumbleUpon
  • Reddit
  • Twitter
  • RSS
read comments

Pineapple Top


A pineapple

Sand

Peat moss

Used coffee grounds

6 inch pot

Large sharp knife

Container to mix soil


Cut top off pineapple about 1 inch below base of leaves. Let top dry for two days. Mix and moisten one part sand and one part peat moss with a handful of coffee grounds. Put potting mixture in pot. Plant pineapple top shallowly, covering with soil to base of leaves. Place in bright window. Keep moist but not soggy. As plant begins to grow, remove any dead leaves and cut off any brown tips. Occasionally pour or spray diluted liquid fertilizer directly on the plant crown.

Tags:

  • Digg
  • Del.icio.us
  • StumbleUpon
  • Reddit
  • Twitter
  • RSS
read comments

Egg Shell Garden

Egg shells

Grass seeds (they germinate in a few weeks) or bean seeds (they germinate in a few days)

Potting soil

Egg carton

Container to mix soil

Popsicle sticks (optional)

Tempera paint or Markers

Hot glue or white glue

A small square of cardboard or a small piece of a pipe cleaner.


To give the tiny plant pot a solid base, glue a small square of cardboard  to the bottom of the eggshell (or use a small piece of pipe cleaner twisted into a circle). If using white glue, let it set for a few hours; hot glue will set in a few minutes.   Clean eggshells and dry them gently. Using tempera paint or markers, decorate the eggshells. Let the paint dry. Put potting soil in the eggshells (fill a little over half way). Add many grass seeds or two bean seeds (in case one doesn’t germinate). The grass seeds take a few weeks to germinate, but bean seeds will sprout in just a few days.  Set them in egg carton. You may want to plant a variety of seeds. Try beans, tomatoes, radish, marigold, and cantaloupe. Cover the seeds with a little bit of soil, and sprinkle lightly with water. Use popsicle sticks to mark the different kinds of seeds. Place in a bright window. Keep just barely moist. When transplanting outdoors, gently crush eggshell and plant the entire thing.

Tags:

  • Digg
  • Del.icio.us
  • StumbleUpon
  • Reddit
  • Twitter
  • RSS
read comments

The New Moon


The New Moon

Dear mother, how pretty

The moon looks tonight!

She was never so cunning before;

Her two little horns

Are so sharp and bright,

I hope she’ll not grow any more.


If I were up there,

With you and my friends,

I’d rock in it nicely, you’d see;

I’d sit in the middle

And hold by both ends.

Oh, what a bright cradle it would be!


I would call to the stars

To keep out of the way,

Lest we should rock over their toes;

And then I would rock

Till the dawn of the day,

And see where the pretty moon goes.


And there we would stay

In the beautiful skies,

All through the bright clouds we would roam;

We would see the sun set,

And see the sun rise,

And on the next rainbow come home


Eliza L. Follen

Tags:

  • Digg
  • Del.icio.us
  • StumbleUpon
  • Reddit
  • Twitter
  • RSS
read comments

Learn the Alphabet Arts and Crafts – N

The Letter N is a generally reliable letter.  It usually makes the “nnn” sound as in nice.  


 The Letter N is sometimes silent when it follows the letter m as in hymn


The Letter N is part of the /ng/ digraph as in bring 
 
 1. Present a capitol and lower case N to your child.  See if she knows the name of the letter and the sound it makes.  Give examples of N words, such as net, nine, nickel or necklace.  See if she can think of some N words of her own.


2. Read Noisy Nora


3. Go on a scavenger hunt around the house to find items that start with N for the N bag this week.  You might find needle, noodles, nightlight, nail, newspaper, necklace, nine, or a nut.


4. Create an N collage.  Have your child search through magazines for N words, and glue them to paper for his alphabet book.


5.  Newsprint N’s.  Provide a cut out N, taped to waxed paper for easy clean up, a newspaper, scissors and glue.  Help her cut out small pieces from the newspaper and then glue them to the letter.  Encourage her to overlap and fill the whole space.  When dry, and glue to a sheet of 8.5 x 11” paper for their alphabet book.


6. Provide a worksheet with a line of N’s to trace across the top and a blank spot below, shiny paper or small flat backed jewels, scissors, markers, tacky glue.  Help your child draw an oval to make a necklace shape in the area under his traced and written N’s.  Then he can cut out jewels / charms from paper and decorate his “chain”.


7. Other activities: Taste noodles, Make noodle necklaces, talk about night time, pound nails, use your noses to smell things, use leftover newspaper:  tear into long strips and glue into a nest shape on a piece of paper.  Cut out and decorate a nightengale for the nest; take a nature walk;


Tags:

  • Digg
  • Del.icio.us
  • StumbleUpon
  • Reddit
  • Twitter
  • RSS
read comments

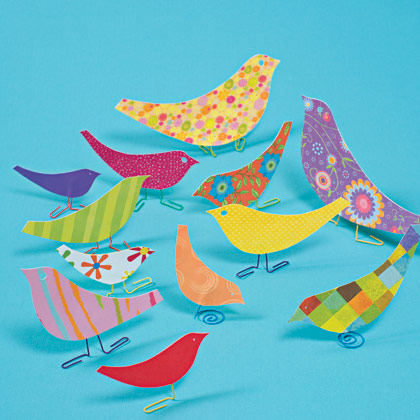
Paper Birds


Here’s a super-simple way to assemble a flock of featherless friends. This nearly no-mess project is easy enough to make in minutes and lets kids add lots of inspired elements of their own.


paper-birdscraft-photo-420-FF0908-PAPERA01


Scrapbook paper

Scissors

Pencil

Colored paper clips

Tape

Glue stick

Hole punch or pushpins


For each, draw a bird figure on a piece of scrapbook paper (or download our template). Cut out this figure, trace it, and cut out the matching shape. Bend a colored paper clip or two into feet and tape them to the back side of one figure. Use a glue stick to join the two matching figures, sandwiching the paper clip legs between them. Make an eye with a hole punch or pushpin and adjust the legs so that the bird can stand on its own.


You could also attach clothesline and hang them from the ceiling as a makeshift mobile.

Tags:

  • Digg
  • Del.icio.us
  • StumbleUpon
  • Reddit
  • Twitter
  • RSS
read comments

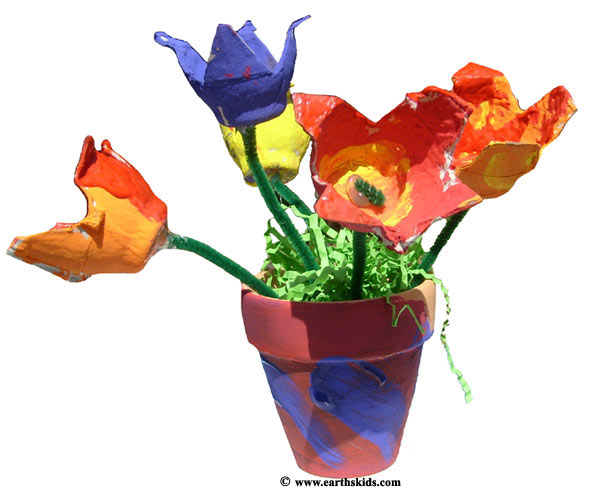
Eggshell or Egg Carton Tulips

Eggshells (or egg cartons sections)

Green pipe cleaners

Tempera paint and markers

Hot glue or white glue  


Clean eggshell halves and dry them gently. Using tempera paint, decorate the shells to look like tulips. Let the paint dry overnight. When the paint is completely dry, add details to the tulips using markers.  Twirl one end of a green pipe cleaner into a spiral shape (this will be glued onto the base of the tulip).  Glue the spiral to the tulip (if using white glue, let it set for a few hours).


egg-crate-tulips_large


Cut the egg carton into separate cups, leaving some of the middle “pop-up” sections. Cut the main cups into the pointed shape of the tulip petals. With the point of the scissors or a sharp pencil, poke a hole in the bottom of each cup. Paint and decorate each cup however you like.


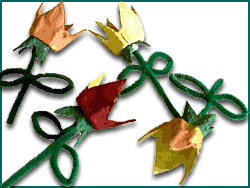
tulips1Cut the little center “pop-up” sections between the egg cups into small pointed shapes that will go beneath the tulip cups. Poke a hole in the center of each and paint green.


When the pieces are dry, poke a piece of green chenille through the holes. Tie a loop on the end in the cup so it can’t pull back out, and add a dab of glue between the two sections. Shape the chenille into leaf shapes and leave a few inches at the bottom for the stem.

Tags:

  • Digg
  • Del.icio.us
  • StumbleUpon
  • Reddit
  • Twitter
  • RSS
read comments
 Page 81 of 103  « First  ... « 79  80  81  82  83 » ...  Last »