Autumn Handprint Wreath

fall-handprint-wreath-craft-kit


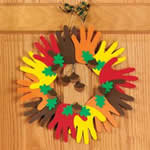
I love handprint crafts! I save each one in a special binder and peek at them every so often. It’s fun to compare and see how they’ve grown. 


Materials you will need for this wreath are glue, scissors, and yellow, orange, and red paint or construction paper.
          

There are two ways to do this craft. One is to trace the child’s hand onto paper and cut out the prints. The second is to make paint handprints on the paper and cut those out.  
 

Make nine handprints (3 of each colour). Cut out the prints and glue to form a wreath. You can decorate the wreath further with pictures (like leaves, pumpkins or corn).  These can be: stickers, art drawn by children, pictures from magazines, etc.

Tags:

  • Digg
  • Del.icio.us
  • StumbleUpon
  • Reddit
  • Twitter
  • RSS
read comments

Fall Maple Tree

Maple Leaf Patterns

Big Maple Leaf Pattern

Coffee Filters

Yellow, Orange, Red and Green Markers

Liquid Starch

Scissors

Stapler

Interesting Bare Stick

Low Temp Glue Gun

Wax Paper

Foam Brush

Clean, Empty Container

Heavy White Paper

Liquid Starch

Yellow, Orange, Red Tissue Paper

Foam Brush

Rocks

Glue


fall_leaves


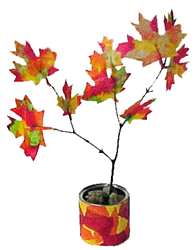
Print at least two of each: Maple Leaf Patterns and Big Maple Leaf Pattern. Color the middle of six or more coffee filters with markers making patches of Yellow, Orange, Red and Green. Make sure you cover an area at least as big as your leaf patterns. Use the patterns provided to cut maple leafs out of the coffee filters. An easy way to do this is to staple a leaf pattern to a coffee filter, stapling all around the outline and cutting on the line. Lay you leaves right side up on wax paper. Brush with liquid starch. Colors will run together. Let dry. Peel leaves from wax paper and use low temp glue gun to attach to your stick. Cut a piece of heavy white paper to fit around your container. Tear yellow, orange and red tissue paper into irregular shapes. Use liquid starch to attach the tissue pieces to the paper, overlapping colors. Let dry. Glue to container. Fill it with rocks and stick your Maple tree inside.


Tags:

  • Digg
  • Del.icio.us
  • StumbleUpon
  • Reddit
  • Twitter
  • RSS
read comments

Let’s Have a Picnic!

 Pack a basket with learning opportunities.


• paper and pencil
• picnic basket
• blanket
• paper plates
• napkins
• cups
• camera
• homemade sandwiches
Invite your child to help check off a list of the foods and supplies that you will bring on your outing. Ask your child to help you write a list of picnic items. (He can cut and paste words and pictures from a grocery-store circular or try writing the words.) Take the list with you to the store so you and he can “read” it as you go through the aisles together. Create the eats together!  Keep the preparation simple so that your child can easily participate. Provide several different choices of containers to carry the picnic supplies. Ask your child to predict which container will hold everything you plan to bring, and then try it out! Encourage your child to make predictions about the picnic before you go. What do you think we will see at the picnic area? What might be the best part of the picnic? Write down his predictions and review them later to see which were true to your experience. Whether you go out to the backyard or take a trip to a park, carry along a camera to record the fun and discoveries of the day! Your child can then write about the event and create his own “My Picnic Adventure” book.

• develops prediction skills
• provides practice with early literacy
• supports early math skills

Tags:

  • Digg
  • Del.icio.us
  • StumbleUpon
  • Reddit
  • Twitter
  • RSS
read comments

3 Little Pigs Snack Mix

1 cup potato sticks

1 cup pretzel stick

1 cup semisweet chocolate chunk (or regular Hershey bars, broken into marked rectangular pieces)


Mix together and serve.

Tags:

  • Digg
  • Del.icio.us
  • StumbleUpon
  • Reddit
  • Twitter
  • RSS
read comments

Creative Ways to Display Kids Art

Hit the High Wire

Choose one picture each month and mount it with previous selections along your child’s bedroom wall, timeline-style, to chart her artistic development. Design catalogs sell sleek steel wall-mounted cable systems 6 ($34, westelm.com) to which you can clip artwork and photos; DIYers can approximate these with yarn or wire and clothespins or binder clips.


Get Digital

Memorialize selected works— your child’s blue period, say, or her armless bodies phase— by scanning them into your computer and creating cool keepsakes. To make a glossy poster, scan 4 to 16 pieces, then visit shutterfly.com or snapfish.com for the poster design and printing (about $20 to $25). If you’d rather not handle the technical aspects, try a print shop— just call first to make sure they do scanning. Once the items are scanned, all you need to do is decide how you want them to look on the poster and choose the background.


Live Large

FedEx Kinko’s will turn PDFs of artwork into large-format prints 1 on foam core (around $80 and up).


Go Mobile

Commission your artist to cut up her old art and create a simple mobile with a wire hanger and thread, or use Fotofalls’ mobile photo clip. ($21, umbra.com)

Make It Magnetic

Updating the artwork on display isn’t difficult if you create a magnetic gallery. Use four coats of magnetic primer (Magic Wall, $36 for 32 ounces, kling.com), then cover it with the wall color of your choice. Mount artwork with super-strong magnets (regular fridge magnets won’t hold). Shape-Up! magnets from Three by Three Seattle ($8 per 4-pack at fridgedoor.com) are too big to swallow and come in a variety of colors and shapes such as stars, birds, and arrows.


Blow Up

The hardest part? Inflating the frames — so let the artist do it. Then slide the work-of-the-week in the pocket and hang. (Instant Masterpiece Blow Up Frame, $10, Brooklyn5and10.com)


Tape It Off

If your child should happen to draw directly on the wall, don’t panic. Incorporate it into the gallery by surrounding it with Do-Frame Tape. It works for pieces he made elsewhere too. ($15, chocosho.com)


Frame It

Lil’ Da Vinci frames ($29 to $37, dynamicframes.com) swing open and store extra artwork (can you say spacesaver?). Or showcase your rotating collection in tried-and-true acrylic box frames. ($2 to $23, archivalusa.com)

Tags:

  • Digg
  • Del.icio.us
  • StumbleUpon
  • Reddit
  • Twitter
  • RSS
read comments

Yardstick Art Display


school-art-display-back-to-school-craft-photo-420-FF0904CRAFTA17

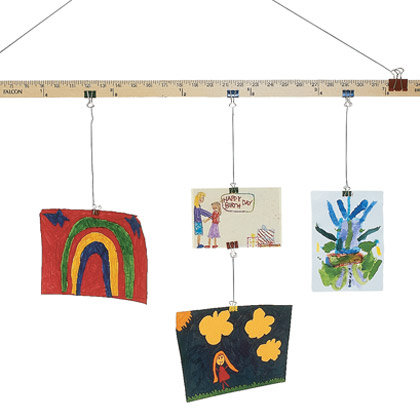
This simple clip-on device makes it a cinch to hang your child’s school drawings — and periodically replace them with her latest works.


Yardstick

Binder clip

Monofilament


First, attach a binder clip to the top of a wooden yardstick about 2 inches in from each end. Then tie the ends of a 4- to 5-foot piece of monofilament to the clips’ metal rings to serve as a hanger.   Now use additional pairs of binder clips joined with monofilament to attach pieces of artwork to the lower edge of the yardstick and to one another, as shown.

Tags:

  • Digg
  • Del.icio.us
  • StumbleUpon
  • Reddit
  • Twitter
  • RSS
read comments

Learn the Alphabet Arts and Crafts – Z

The Letter Z is a generally reliable letter.  It usually makes the “zuh” sound as in zebra.  

The Letter Z sometimes makes the /s/ sound as in quartz


1. Present a capital and lower case Z to your child.  See if she knows the name of the letter and the sound it makes.  Give examples of Z words, such as zoom, zebra, and zipper


2. Read On Beyond Zebra


3. Go on a scavenger hunt around the house to find Z words for the Z bag this week.  Look for ziploc bag, zebra, zucchini, zig zag, zero, zipper, etc


4. Create a Z collage.  Have your child search through magazines for words that begin with Z to cut out and glue to paper for his alphabet book.


5.  Zebra Stripe Z’s.  Provide a cut out Z taped to waxed paper and black rolling paint markers (or black paint and brush).  Put up pictures of zebras so they can see how the stripes look on an actual animal.  Show them how to put zebra stripes on their Z.  When dry, glue to 8½ x 11” paper and place in alphabet book. 


6. Provide a worksheet with a line of Zs to trace across the top and a blank spot below, a zip top bag, a few Z pictures (print from book or internet), crayons or markers.  Glue the zip top bags to the paper.  Color the Z pictures and put them in the zipper bag.


7. Other activities:  Visit the zoo; choose your favorite zoo animal and act it out, charades style; talk about zippers and how they work; practice closing zippers; make a zebra mask from a paper plate; Go on a make believe trip to cities, countries or continents that begin with the letter Z. Some examples could be Zaire, Zambia, Zanzibar (in Tanzania), Zephyrhills (in Florida, USA), Zug (in Switzerland), Zurich, Zuni Indian Reservation (in New Mexico, USA), Zhob River (Pakistan), etc. You could find these on a globe or map, pretend to take an airplane trip there and then sample foods from that area or learn something new about that geographic area. This would be a great way to introduce geography and map skills. You could also watch a video or tv broadcast about that area. Check your local library for what’s available.

Tags:

  • Digg
  • Del.icio.us
  • StumbleUpon
  • Reddit
  • Twitter
  • RSS
read comments

Learn the Alphabet Arts and Crafts – W

The Letter W is an unreliable letter.  It makes the “wuh” (voiced w sound) as in walk, when found at the end of a word or combined with the letter, it often makes the voiceless w sound as in whisper or cow.  At times, the wh combination makes the /h/ sound as in who.


W is sometimes silent as in two or wrench.


1. Present a capital and lower case W to your child.  See if she knows the name of the letter and the sound it makes.  It’s often hard to guess because the name has nothing to do with the sound it makes.  Give examples of W words, such as walrus, water, window or wet.


2. Read Amos and Boris (whales)


3. Go on a scavenger hunt around the house to find items that start with W for the W bag this week.  You might find a whale, witch, watch, whistle, wood, water, wagon, watermelon, wool, wig, wheels, etc.  Pull out an object each day and ask if your child knows anything about it.  Create a list of the items, displayed where it can be seen.


4. Create a W collage.  Have your child search through magazines for W words, and glue them to paper for his alphabet book.


5.  Wheel Painted W’s.  Provide a cut out W taped to wax paper for easy cleanup, seeveral old toys with wheels, preferably with different treads, paint on a paper plate.  Show your child how to roll thier car in the paint until the whole wheel has been touched with paint and then roll it over thier W, making interesting tracks.  Repeat if desired with a different vehicle / color.  When dry, glue to 8½ x 11” paper and place in alphabet book. 


6. Provide a worksheet with a line of W’s to trace across the top and a blank spot below, a whale pattern, a square of blue cellophane, glue sticks, and markers.  Decorate whale shapes.  Glue whale to sheet and then glue the corners of the cellophane over the whale to create water.


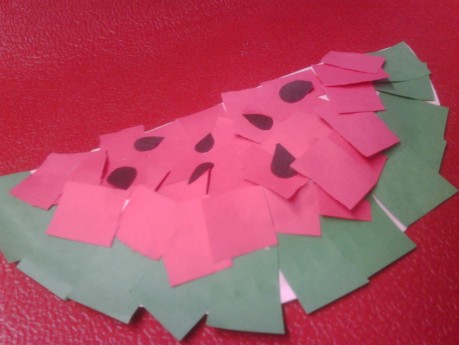
7. Other activities:  Have watermelon, eat waffles; pretend to be worms and wiggle on thie ground; use watercolors; talk about windows; make a stained glass window using clear contact paper and tissue paper; Imagine you have wings and fly around the room – talk about where you would fly if you had wings; make white collages; play with anything with wheels; make paper plate watermelon collages:


Tags:

  • Digg
  • Del.icio.us
  • StumbleUpon
  • Reddit
  • Twitter
  • RSS
read comments
 Page 79 of 103  « First  ... « 77  78  79  80  81 » ...  Last »