Pantry Friendly Meals, I do not think this means what you think it means.

Oh the internet.  Such a wealth of information, and sometimes, oh so useless.  Seeking out good recipes using long term pantry stores is a veritable minefield of annoyances.  It’s amazing what some people consider a “pantry meal”.  I do a search for some variation of “pantry friendly meals” or “disaster meals” or “emergency food recipes”, and it’s just an overload of mostly unhelpful information.  Lots of pages without actual recipes, many pages of recipes that you can make with food bank boxes (and most of them have a staple set for each client that includes some fresh foods), and a whole lot of nonsense.

Result 1 of my search.  7 days of fast, pantry friendly meals.  The grocery list follows:

Fresh Produce – Pears – Apples – Salad greens/lettuce – Avocados – Grapefruit – Limes – Tomatoes – Carrots – Celery – Cucumbers – Onions – Garlic

Fridge – Parmesan – Cheddar cheese – Blue cheese – Fontina cheese – Turkey bacon – Ham or prosciutto – Eggs – Mayo – Hummus – Butter

Freezer – Peas – Spinach


Pantry/Staples – Marinated artichokes – Sun-dried tomatoes – Olive oil – Vinegar – Balsamic salad dressing – Tomato soup/squash soup – Canned/jarred salsa – Walnuts – Raisins – Black beans – Dried pasta – Canned tuna

Spices – Curry powder – Dried oregano – Kosher salt and pepper (to taste)

Breads – Whole wheat tortilla – Whole wheat bread – Whole wheat pita

As many fresh, frozen, and refrigerated products as anything you would store or could make from your stores.  Next search, first hit, a whole blog on Pantry Friendly Cooking.  First recipe calls for mac and cheese with fresh cheese using a pressure cooker.   Next recipe is a little better, if not so practical.  Personalized chocolate Easter eggs.  You of course need the mold, and tubed frosting, and 3/4 cup butter (canned butter is so expensive, and I am not sure butter powder would work in candies), but at least all the ingredients are from the pantry.  The next recipe I see again calls for a pressure cooker, and includes a head of garlic, 3 bell peppers, a couple onions, chicken breast (raw), fresh asparagus, fresh shrimp, mussels, and lemons.  Because it happens to use rice, canned tomatoes and canned chickpeas, its pantry friendly?

Clearly, my definition of a pantry meal is a little different.  And its not just these two sites.  9 out of 10 that I have looked at are like this.  The 10th either is selling a book with actual LTS recipes, or is a list of foods to have on hand without actual giving recipes other than maybe “oatmeal for breakfast, tuna with crackers for lunch, rice and beans for dinner”.

So I picked up a few second hand books.  Apocalypse Chow (be warned, the Robertsons have published at least 3 different disaster meal cookbooks, and there are many repeats between them), Simple Recipes using Food Storage, and 100-Day Pantry.  I read some others via Kindle Unlimited.  I’m not linking those; they were almost all universally bad.  Poorly edited, clearly not self created recipes, but regurgitating things they found online.  People looking to make a few bucks, not credible cookbook authors.  Oddly, almost all of them have high reviews.  You’ll find 1 or 2 low reviews, usually with the same complaints I voice.  They must be creating false accounts, or getting family and friends to buoy the reviews.  I can’t account for it otherwise!  The one exception for me was “Dinner is in the Jar“.  This book provided an excellent walk through on how to make mason jar meals using a vacuum sealer, from long term storage foods, along with add-ons (most of which are also available as pantry staples, like ground beef, or cooked cubed chicken).  The author also provides a method for making these meals using mylar bags instead of mason jars.

At any rate, those 4 I linked do provide what I would consider “Pantry Meals”.  I can’t say they universally appeal to me.  I am not a fan of processed foods.  For a short term disaster, I suppose that is one thing, but I can not see feeding my family endless days of canned soups, spaghetti-os, chiles, et all.  And I am not buying cream of mushroom/chicken/celery soup.  I don’t care how ubiquitous it is in easy pantry meals.  It’s repulsive.  I want to be able to cook mostly as I do now – meals made from whole foods, not pre-processed items.  Of course, this will be more expensive but well, it is what it is.

At any rate, I have been collecting recipes that will work for my family from these sources, although they come in different degrees of pantry-usingness.  I have been labeling them as “Pantry Friendly”, which is almost all long term storage items, but might include 1-2 things that you would have on hand during a short term emergency, or if you had a root cellar (such as garlic), and LTS Recipes, which are those that can be made entirely from pantry stores, including freeze dried or dehydrated items.   Many of the recipes that I use now can be converted as well; I just have to figure out how to use dehydrated garlic and onion and such in place of the fresh versions.

LTS Asian Chicken Soup

1 (10- to 15-oz.) can chicken
I (15-oz.) can carrots
1 (15-oz.) can bean sprouts
1 (6-oz.) can mushrooms
1 (14-oz.) can chicken broth
2 oz. fine noodles (3 oz. Ramen noodles are okay)
1 T. onion flakes
1 tsp. garlic flakes
½ tsp. ground ginger
3-4 T. soy sauce
scant 1/2 tsp. apple cider vinegar

Do not drain the vegetables. Combine all ingredients and simmer until noodles are soft. Ramen noodles are not labeled for two years’ storage, so rotate them more often.

Note to Myself

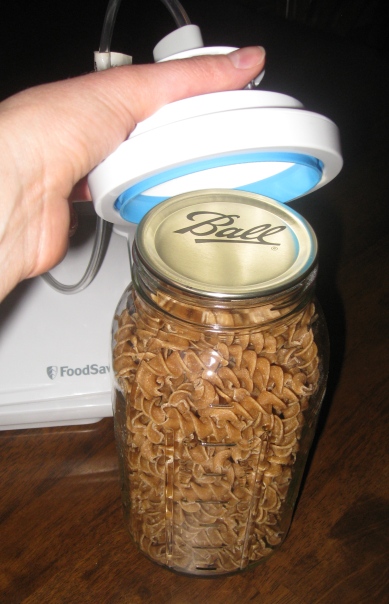
This is from Cooking with My Food Storage.  Very clear steps on how to use a vacuum sealer with a mason jar; not just for meals in a jar, but in general when I start dehydrating foods myself.  I also need to find the tip on how to do this with smaller jars inside a larger jar if you don’t have a jar sealer that fits smaller sizes and record that here for my reference as well.

A reminder about the basics of how to make a meal in a jar.

How to make a Meal-in-a-Jar:   Two Methodsjar-sealer

Method 1:  Use a Food Saver to Seal the Jars

Step 1:  In a clean, dry quart jar, layer ingredients. Shake the powder down into the jar if needed.

Step 2:  Place the lid on the jar.  Don’t add the ring.

Step 3:  Attach one end of the hose to the accessory port and the other end to the jar sealer.  Place the jar sealer over the jar.

Step 4:  Turn on your food saver and remove the oxygen from the jar.

Step 5: Remove the jar sealer (it is easier to unhook the hose from the jar sealer first), add label and ring, store in a cool dry place.

Method 2:  Use Oxygen Absorbers

Step 1:  In a clean, dry quart jar, layer ingredients. Shake the powder down into the jar if needed.

Step 2:  Wipe the top of the jar with a paper towel to remove any powder.

Step 3:  Top with a 300 cc oxygen absorber. Seal tightly.

Step 4:  The lid should seal within a few hours.  Add label.  Store in a cool, dry place.


LTS, beans, and you

img_0043

Do you know why after soaking beans overnight you are instructed to drain, rinse well, and then use fresh water to cook the beans?  I was told we do it because it reduces flatulence, old wives wisdom and all that.  And actually it does, but the real reason to do it is to prevent illness.

Legumes and grains contain a type of protein called lectin.  Lectins can be toxic.  Lectins are also responsible for the gas inducing responses we can have to the magical fruit that is beans.  Soaking the beans draws out some of these toxins, so we need to discard the soaking water, rinse well, and start with fresh for cooking to reduce our exposure to the lectins.  The cooking process destroys most of what is left in the legume.

Now, there are different kinds of them, and they vary in how ill they can make you.  In fact almost all foods have some lectins, and some lectins are beneficial.  Different people also respond to the same lectins in different ways.  Beacuse we don’t digest lectins, we often produce antibodies to them. Almost everyone has antibodies to some dietary lectins in their body. This means our responses vary. However, some legumes, such as red kidney beans, are so full of toxic to humans lectins that they should not be eaten unless properly, thoroughly cooked.  (Red kidney beans are not suitable for sprouting!).

The temptation of post-SHTF bean cooking is to reduce water usage.  I’ve even seen advice to just cook  it in that water.  Don’t do it!  Modern packaged beans don’t need nearly the sorting and cleaning; you are unlikely to find rocks and dirt, but it’s still not good to ingest!  Find another way to use that water.  Use it for flushing, or if it’s the right season, water your garden with it.  I actually wonder if this might repel certain animals from nibbling at your plants – it’s thought that plants developed lectins to deter animals from eating their seeds and animals can smell the lectins.  That’s just speculation on my part though.

Keep in mind that it’s not just dried beans that can make you ill.  Some types of grains and legumes can be eaten raw (like a sugar snap pea, pod and all) but others (like a runner bean, can eat pod, but pod and contents needs to be fully cooked, or a mature fava, discard pod, peel inner bean and fully cook) need to be cooked to be safely edible.  If you don’t know for sure that your produce is safe to eat raw, err on the side of caution and cook it.

Enemies of food storage

img_0044Light:  Exposure to light can cause degradation of taste, appearance and nutritional quality of food. Fat soluble vitamins and proteins are most likely to be affected by light. Store your food in opaque containers.

Temperature: Improper temperature for storage causes nutrient loss and degrades the texture of food. Essentially, food that’s too hot begins to cook and decay, and food that’s too cold begins preserving. Between 40-70 F is best, and in general closer to the cooler side is desirable. The storage life of most food products is cut in half for every increase of 18 degrees Fahrenheit. In a garage or attic, temperature may fluctuate between too hot and  too cold because these places usually don’t have insulation or controlled heat  and air conditioning.  Consider both temperature and consistency of temperature when choosing a LTS location.

Humidity / Moisture:  Too much moisture promotes an atmosphere where microorganisms can grow and chemical reaction in foods causing deterioration that ultimately can sicken us.  Mold in your food is no bueno. Some foods stored in a root cellar situation need a certain amount of humidity, but it’s typically in a specific range. Root cellaring is typically storing food for weeks or months too, and not years.

Pests: Insects and rodents can ruin your LTS if they manage to invade.  Sometimes grains can have an undetectable insect infestation that will eventually become apparent, which is why some people freeze grains and flours before storing.  Others include diatomaceous earth in their packaging, which deters pests, but doesn’t harm humans.  Rodents can be very persistent. If they’re hungry enough, they will get through even the strongest packaging. That’s why you should invest in some 5-gallon food grade buckets for your food and consider traps or repellents in your LTS area.

Oxygen / Air:  The presence of oxygen allows bacteria, microorganisms and pests to thrive and survive in your food.  In addition, many nutrients oxidize in an oxygen rich environment. Over time, oxygen changes the appearance, flavor, and texture of food. When fats oxidize they become rancid.

Time: It marches on, and everything gets old and loses taste, texture, nutrition, or even becomes inedible.  Rotating your food storage is important unless you are talking about very long storage foods (25+ year stuff that you buy, store and “forget”).

Human Nibblers: Kids seeking snacks.  Husbands seeking snacks.  While neither is likely to get into a bucket of lentils, no pack of granola bars is safe in my house.  I have to admit to being guilting of popping open a can of Thrive freeze dried yougurt bits; and those things, my friends, are not cheap!  If possible, store foods that tempt your human nibblers out of sight, repackaged to camouflage them.

Improper Packaging & Improper Handling: The issue here is that doing either thing can compromise your food and allow one of the other threats to your food storage to get a foothold and start degrading your supplies.  A small crack in your bucket, storing food with too many or too few oxygen absorbers, using non food grade containers that leech chemicals into your food – just a few things you might inadvertently do rendering all your effort and money moot.

Storing food is insurance; do it right.

72 Hour Kit / Bug Out Bag

bigstock-illustration-of-a-family-carry-61565363-e1442937903271In the event of a disaster that prevents you from being able to “bug in” and shelter at home, it is important to have a good grab and go solution ready. We cannot and should not rely on the government or relief agencies to meet our immediate needs following a disaster. They will have limited resources and limited staff (estimates say at least 40% of emergency and health care staff do not report for duty in a true SHTF emergency. They may not be able to get there. They may choose to stay with their family).
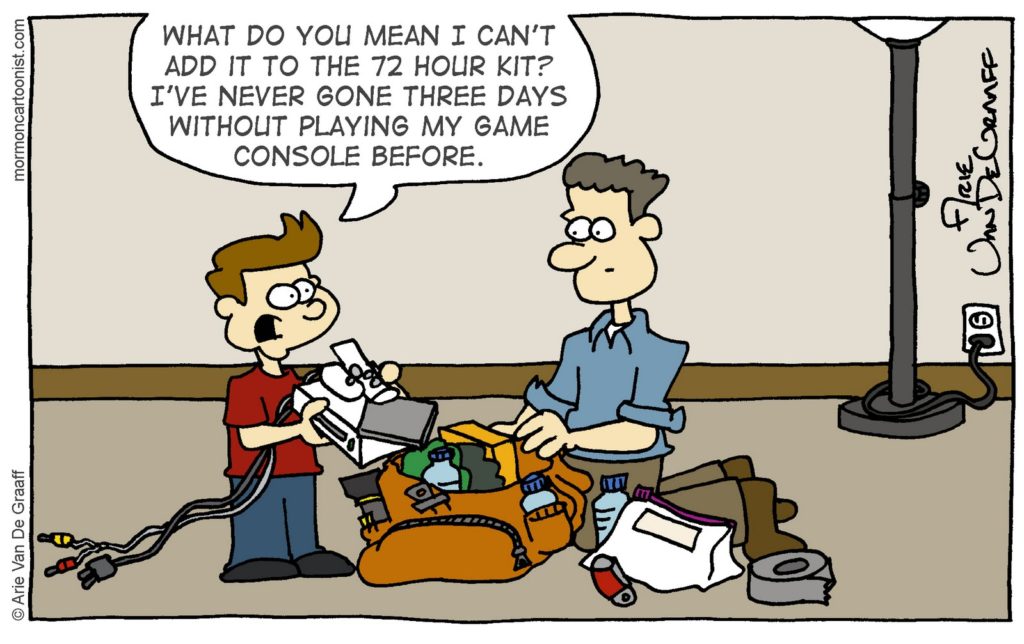
So what is the smart thing to do? Prepare to look out for yourself and your family with food, water, clothing, temporary shelter, and medical supplies for at least 72 hours. (Of course, after that, you had better have a way to supply your basic needs when the gear in your bag is gone!)

72-hour-kitHow do you create a good 72 hour kit / Bug Out Bag? Each member of the family should have their own backpack. It is crucial that children feel safe during a time of crisis and nothing will help them feel secure more than having their own things. Purchase a good pack that is sized so your child can carry it easily. Everyone should carry their own basic supplies such as medications, some food and water, an ID card and glow stick and mylar blanket.
For myself and my family, this is what I have decided on including. It’s subject to change. I did not include survival items to get us beyond 72 hours. I did not include a way to cook food, a mess kit, or survival tools that I don’t know how to use yet. My goal with this kit is to enable us to survive and get to an alternate location with better resources than what we can carry.

A Great Back Pack. Not all packs are created equal. Make sure your pack is large enough to add all your personal items. You do not want to be forced to carry a second pack as the goal is to keep your hands free to care for children or pets, and to clear debris. Your pack should have padded shoulder straps for comfort and should be supported from the waist when it is carried, for optimum support. A pack with several compartments will also allow you to separate items and organize your kit enabling you to find things quickly. Considering purchasing a backpack that is a bright color which can easily be found in a cluttered closet or cupboard, during grab-and-go conditions.

This isn’t a time to scrimp; be open to spending a little bit more to make sure that you get what is comfortable. Here in the PDX area, REI is a more expensive store, but have competent staff on hand to help you find the best backpack for your needs. If you have an outdoors outfitter in your area, I strongly recommend looking for your pack and advice there. Go ahead and observe OpSec. They don’t need to know any more than that you plan to do some off the grid hiking for a long weekend. Of course, if finances do not allow, ANY 72 hour kit is better than nothing.

Basics. Each family member should have an ID card with some basic identification and medical information. Include contact information for yourselves as well as for family doctors, dentists, etc. Laminate this for durability. Parents should carry a copy of their children’s cards as well.

Each kit should have several family photos. You should include individual photos of each family member as well as a family group photo. Individual photos may be used to post if you are separated from a family member. A family photo can be used to prove a relationship if there is a question when you are reunited by emergency personnel.

Include extra sets of keys for any place you might need to access while on the move. Fumbling around, looking for the summer cabin key is not what you want to do in an emergency.

Maps of local area. Compass. Possibly binoculars. Useful information. One page sheets of information; right now, that includes identification of edible local plants (to supplement what I am learning to help me be CERTAIN), ways to make shelter from 8×8 tarp.

Food. This food should be light, and edible without added water, if possible. This is not the place to worry about processed foods. Consider MREs, high calorie energy bars, and possibly foods marketed towards backpackers and hikers (but again, avoid “just add water” meals if you can). Avoid jerky, nuts or other very salty items that will increase your thirst. Canned items are too heavy. Look for foods with a long shelf life – five years (or more). You can plan to rotate these items, but if you fail to rotate your supplies you will end up spending more money on food you throw away than you would have by spending a bit more to get the best items to start. One less thing to have to do for several years, if the food is rated longer. Don’t forget any utensils that you might need. I think disposable plastic might be best. You’ll need several sets, but will you have the water and ability to properly cleanse a metal set? Neither my husband or myself drink coffee, but I may consider a metal cup and some kind of hot drink packets, such as cocoa or cider; a warm drink, a change from plain water could be very comforting.

Water. This is going to be heavy, no way around that. Purchase pouched water that has a five year shelf life. First, that will allow you to “ignore” the BoB, and give you less to do every 6 months (as above). Plus, plastic water bottles do degrade over time and while the water itself won’t go bad, the bottles can develop leaks. Personal water filters such as a lifestraw or berkey water bottle may make a good addition. I plan to include a UV SteriPEN in my bags.

Light / Heat. A flashlight, glowstick, matches, Firestarter(s) and/ or lighter. Be aware that open flame might not be safe in some areas (ruptured gas lines, or so on). If you choose a flashlight, include the batteries OUTSIDE of your flashlight. Put them in a ziplock bag and carry them separate from the flashlight. Batteries can rust, leak, “explode” and ruin your flashlight. I think I will also tuck in a 9 hour candle in each bag.

Multi-Function Tool or pocket knife. These will provide everything from can openers to knife blade, pliers, saw blades and screw drivers. A must-have tool! When you purchase a multi-function tool look for one that has a sheath with a belt loop. It will be a great help to have your tool readily available as you deal with the aftermath of a disaster.

Emergency AM/FM radio. You might consider having one radio that can be operated with a hand crank or by solar power or both. Also make sure your radio has both AM and FM bands as most emergency broadcast information will be on the AM band but it may only be the FM station that survived the disaster. A moderately priced Sangean MMR-88 is a weather and alert radio. It can be charged with build in solar panel or handcrank, includes a flashlight, a siren, and can charge USB devices such as phones. Right now, this is my emergency radio of choice, not just for my 72 hour kit, but for my home as well.

First Aid. A small selection of emergency first aid items is a smart thing to include, even for the children’s’ packs (Avoid medications in the kids’ bags). Consider supplementing a basic store-bought kit with QuikClot. Sunscreen. N95 mask. Moleskin.

Hygiene & Sanitation. Camp Soap, toothbrush, travel sized toothpaste, chapstick, hand sanitizer, aloe vera gel or lotion and toilet paper. In my case, I decided to include Wysi Wipes in one pack instead of a roll of TP. These do require adding a small of water to expand, but take up less room than rolls of TP. They are biodegradable and disposable, but CAN be rinsed and re-used. Obviously, I wouldn’t be reusing them if they were used for restroom purposes (!), but when used as an alternative to pre-moistened toilets, facial tissue and paper towels, if water is available, re-using stretches our resources.

Clothing. I’m not talking about stocking up for a weekend at a spa or such. A change of clothes in case what we are wearing becomes too wet to be comfortable or safe. Extra socks. Lightweight work gloves. Hat for protection from sun or rain. A rain jacket / wind breaker. A couple bandanas.

Self-Defense. I am lacking here at the moment. We do not own any firearms. Im likely to be as dangerous to myself as someone else with a combat knife. This is an area of deficiency that I do need to address.

Shelter and Rest. A Mylar Blanket is inexpensive and has several uses. They have both pros and cons, but for the light weight and flexibility in their use, I plan to include at least one in each BoB. If I have space, I would also like to include a more heavy-duty tarp, as the Mylar blankets are subject to tearing as well as a sturdier emergency blanket.

Extras

Mini Sewing Kit

Ziploc or Biohazard Bags – If we are someplace that we cannot safely discard used toilet tissue, etc., bagging them up makes sense.

Paracord and/or Fishing Line. Multitude of uses.

Whistle & Signal Mirror.

Duct Tape. Is there anything it can’t do?

Fozzils “dishes”. These are flat, foldable tableware. The 3 piece set weighs only a few ounces, and can be used as intended, or for perhaps catching some water from rain or a condensation run off.

Cash.

Small Notepad and Pencil.

Lastly, I am considering adding an ultra lightweight backpackers 2 person tent in each adult bag, rather than trying to hunker down under a tarp shelter.

Note: I do have an EDC which includes emergency survival cards, an altoids tin with small handibits (like safety pins, fish hooks a small Firestarter), a credit card Fresnel lens, and such.
Some good advice from Graywolfsurvival on creating a bug out bag:

To Do:

  1. Start with a weight goal limit.
  2. Lay out all the stuff you have in your bug out gear.
  3. Organize everything by its use. Some things will have multiple uses.
  4. List everything in a spreadsheet that you can put a mark on different uses, along with each item’s weight. The categories will depend on exactly what you have and how you want to organize it. Here’s one way to do it:
    • Cargo
    • Cutting
    • Fire
    • Water
    • Shelter/Clothing
    • Food Prep
    • Food Acquisition
    • Signal/Communication
    • Light
    • Medical
    • Navigation
    • Tools/Construction
    • Hygiene
    • Power
    • Offense/Defense
  5. Fill in the missing pieces that you need to make sure you have adequate backups.
  6. Weigh each and every thing you have in your pack.
  7. Look at how far off you are with your weight goal and start removing items.
  8. Go back to #2 above; rinse and repeat.

Having a weight goal really helps you focus on what you really need and what you don’t.

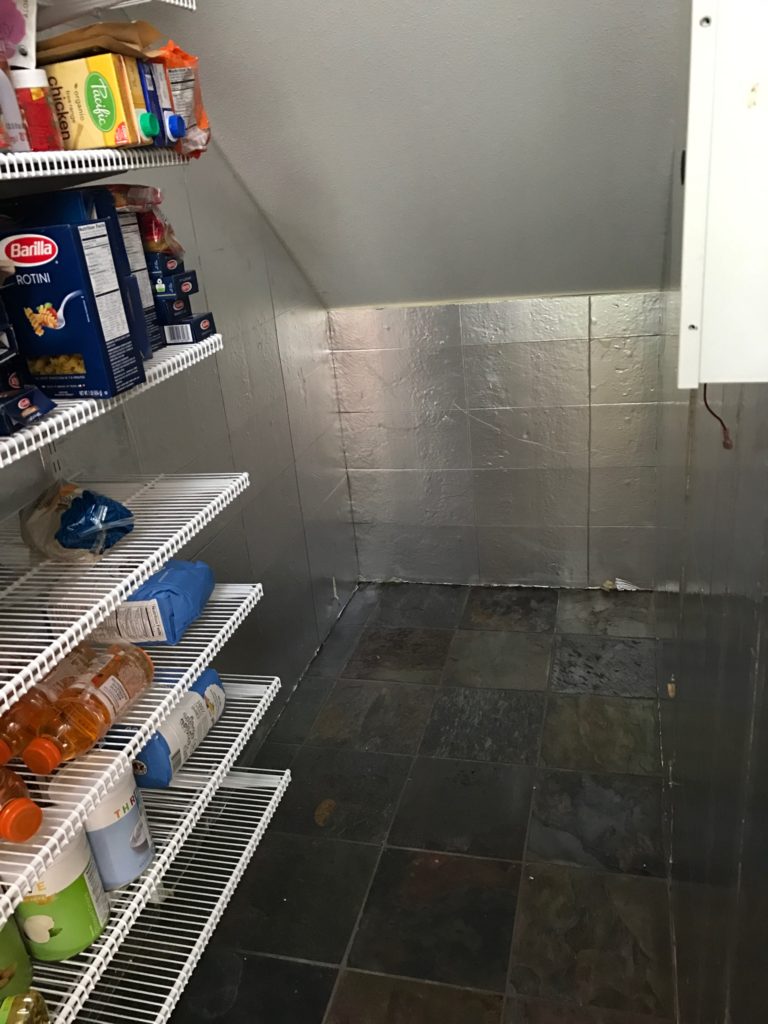
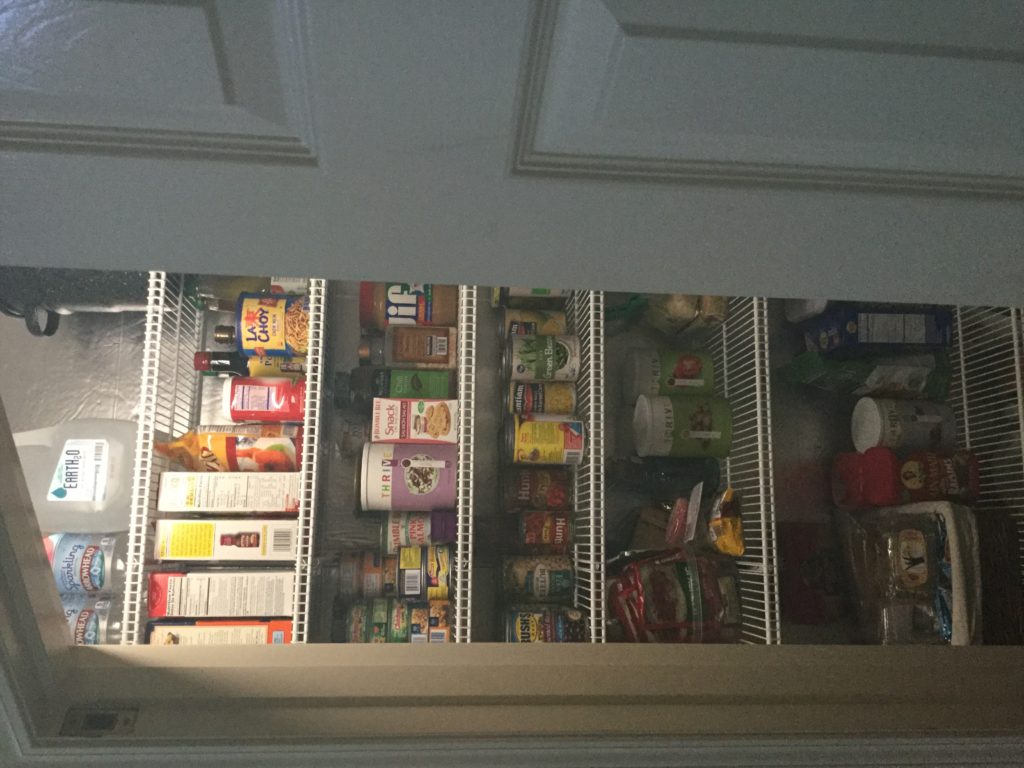
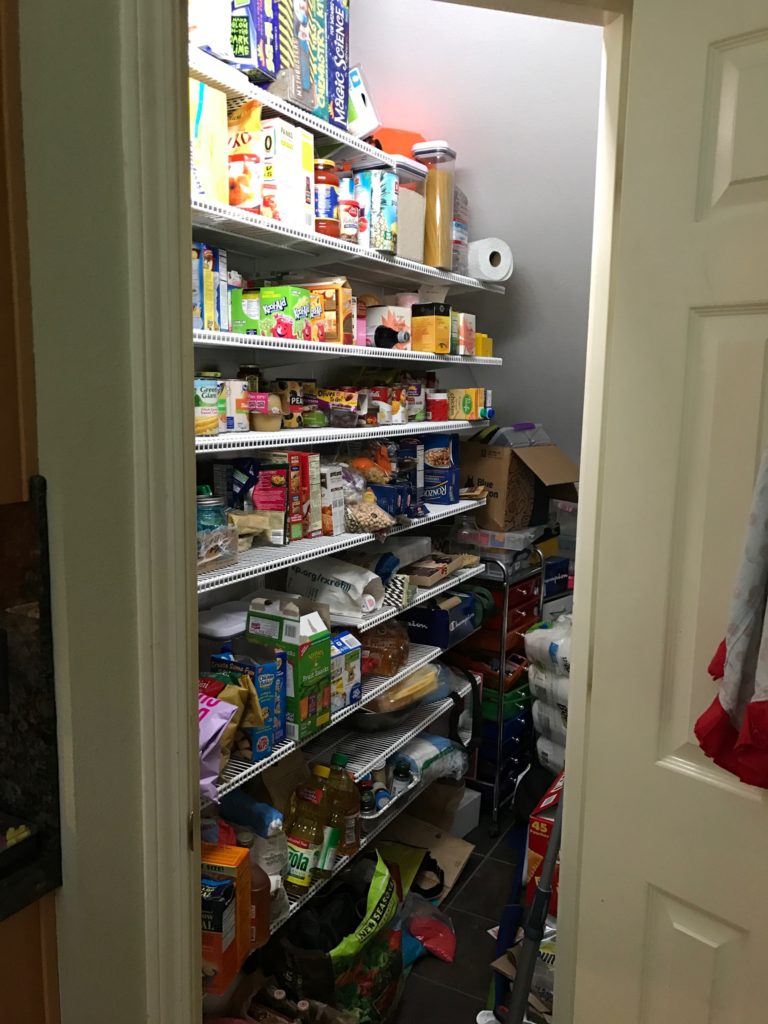
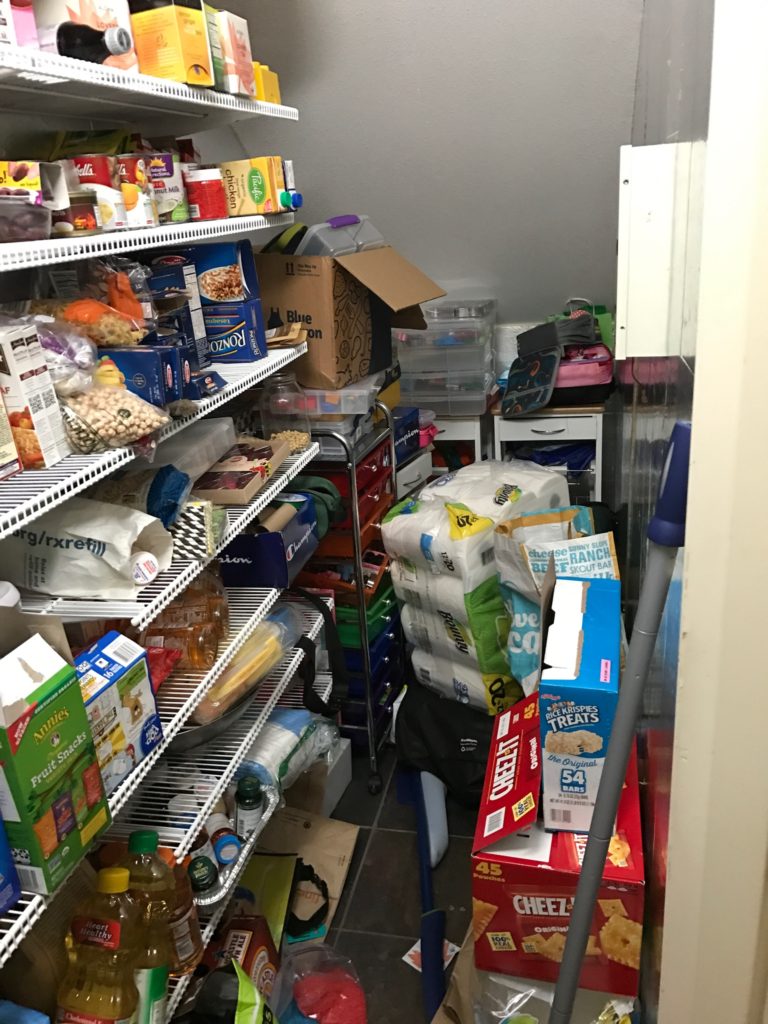
My pantry finally cleaned out

These first two are before.img_1349 img_1350

These are after I’d pulled out all the things that should be stored elsewhere.

img_1440 img_1441

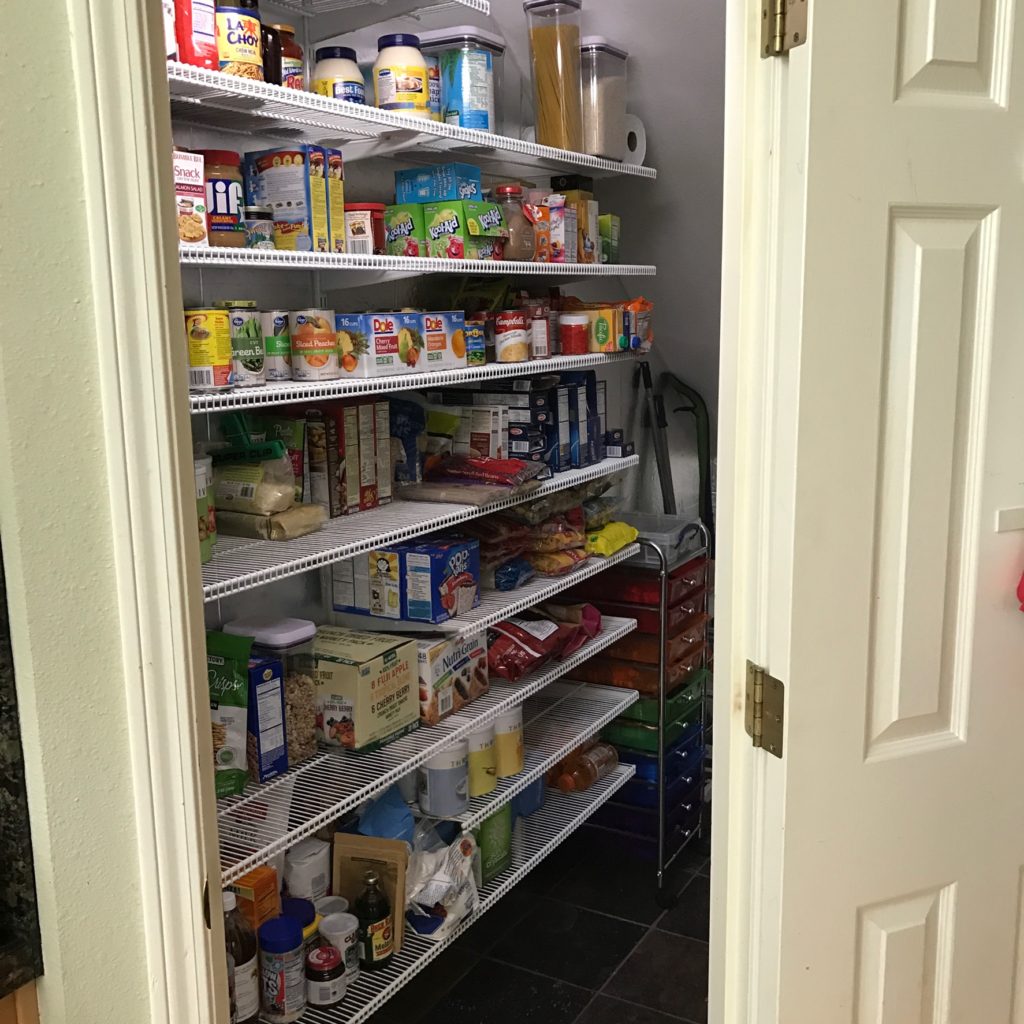
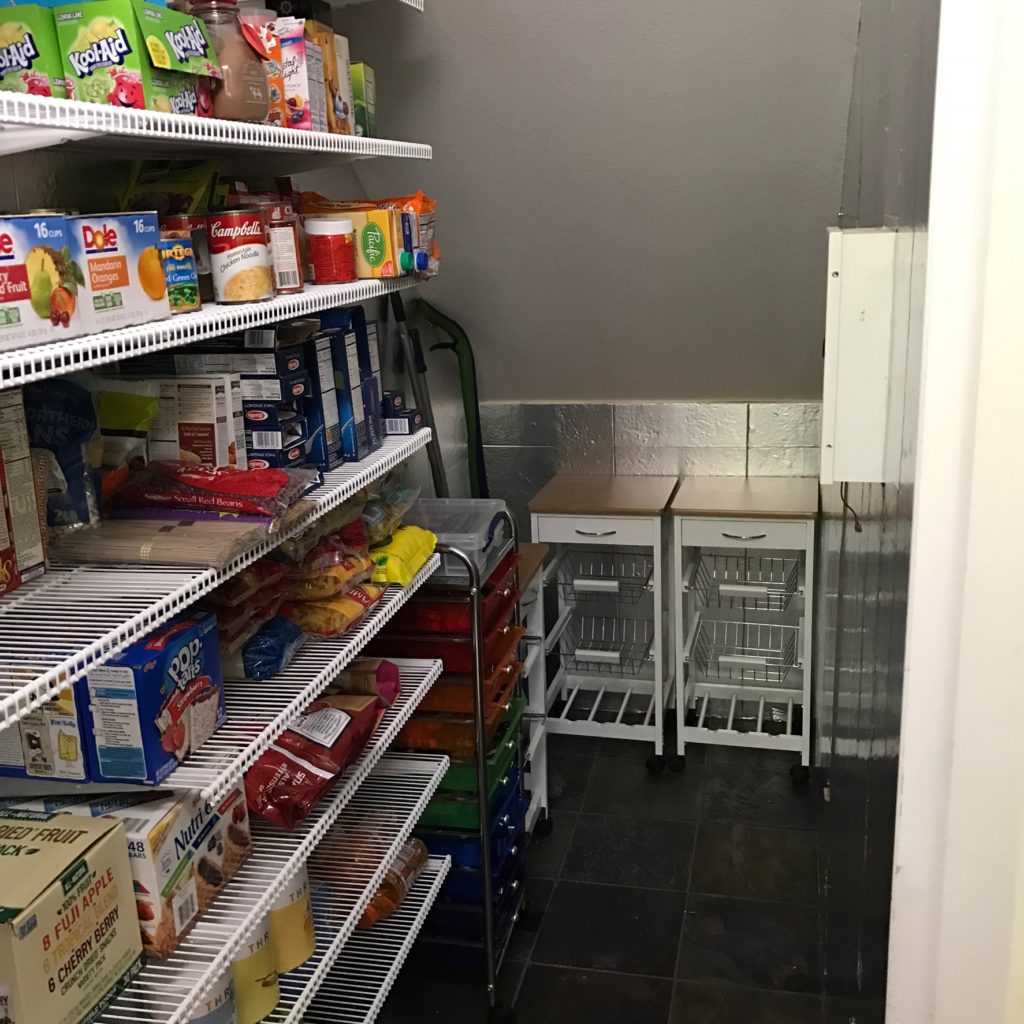
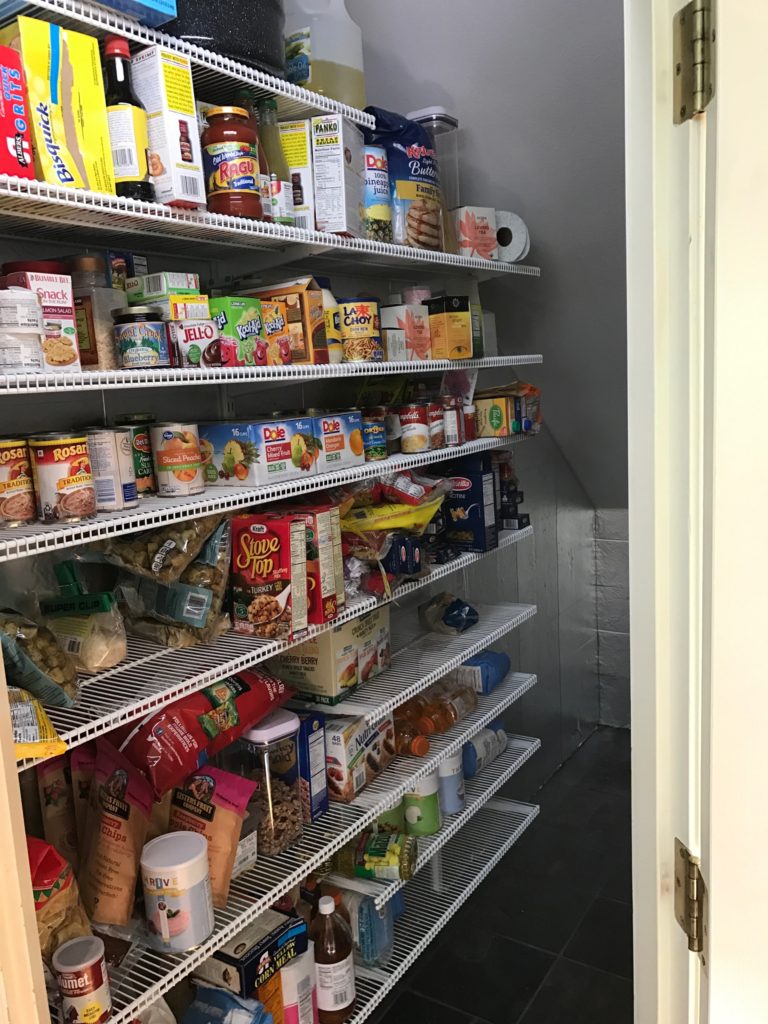
This is where I am now.  I discovered that I have a lot more processed crap than I thought I did.  I don’t prepare so much processed junk on a daily basis.  Some of it has been in there a long time.  I realize food can be good after the expiration, but I had 10 years past the expiration date on a couple grocery bags full of stuff that is gone now.

img_1442 img_1443

So much more room for storing stuff.  I do store potatoes and onions and fresh fruit and squash and things in a different place.  I may use those carts in the back for that now.  Or I may move them and use that 3’x4′ space forfood grade buckets when I get to that point.

This isn’t all my food on hand.  This is really the storage pantry.  Stuff I use every day is more accessible to the stove.  Baking supplies, cereal, fats and oils, spices and seasonings, unrefrigerated condiments, nut spreads, jams, and honey, breads, along with the root veggies and such I mentioned above are all in cupboards and countertop storage containers for easy access.

My vote is in

I dropped off my ballot today.  (We only have mail in votes here; no walk in to vote on voting day).  Still a waiting game; a few more days and we will see what happens.  A part of me is worried about the losing sides supporters going a little bit nuts, but mostly I expect business as usual either way.

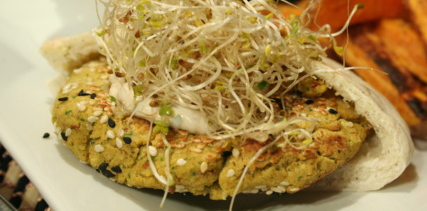
deliciousness Falafel Pita with Salad Mix Sprouts & Tahini Sauce

I like falafel.  It just so happened that I had soaked and cooked a couple pounds of garbanzo beans to make the multi bean salad and hummus, and had more left.  I also have plenty of tahini (used to make hummus, among other things), so what’s a girl to do?

Make a Falafel Pita with Salad Mix Sprouts & Tahini Sauce, of course

Let me say, I don’t claim a lot of authenticity here. I just know what are the typical flavor profiles and I go from there. I also like to form them into flat patties instead of small balls, which is the traditional shape. I often buy my falafel mix in the bulk section of my grocery, but I had the softened cooked beans, so why not. I don’t think falafel usually needs cooked beans, just soaked until soft, but this worked.

pita

So this is a little colorless. Make it more exciting with some tomatoes or roasted red peppers! But I like the basic flavors =)

1 C. cooked Chickpeas
½ C. fresh Parsley. Stems removed
Small handful Cilantro, stems removed
½ small-medium Onion, rough chopped
4 cloves Garlic, peeled
Salt to Taste
½ T. each Pepper, Cumin, Coriander
Cayenne Pepper, to taste, optional
Pinch of Cardamom, optional
Oil, for Frying
¼ tsp. Baking Powder
1 T. Sesame Seeds
Flour, optional
Egg, optional

Process the herbs in food processor until finely chopped. Add onions and pulse until well chopped. Add chickpeas, garlic and spices. Run for 30 seconds, scrape down sides and repeat until all is well combine and the mixture is smooth. Transfer to a container with a lid, cover tightly and refrigerate an hour to overnight. When ready to fry, heat your oil to 350 in a heavy bottomed skillet. I do about ½ – ¾ inch in cast iron. I think if you are doing thicker ball shapes, you might need a deeper oil. Using wet hands, form falafel into oval patties, at most about ½ inch thick – they should be a good size for your pita, to fit with a little room for the toppings, but not so small you don’t get falafel in most bites. If your falafel “dough” doesn’t come together well you can add up to a tablespoon of flour (if it’s too wet) or a lightly beaten egg (if it’s too dry) so the patty will hold its shape. Even without the additions, when its right, the patties will be delicate. If you can shape them and move them into the oil, they will tighten up as they cook. Carefully place your patty in the hot oil. Cook until a deep golden brown on the outside, flipping once. This takes mine about 3 minutes per side. The center should be cooked all the way through, so check your first patty and adjust heat up or down to get that nice brown without burning, and still cooked through. (You can bake these on a lined cookie sheet at 350 for 15-20 minutes, but they don’t have the same yum crunch). Transfer your cooked patties to a plate lined with paper towels or brown paper grocery bags to drain.

For Sandwich:

Pita Bread, cut in half
Sprouts (I used my French Garden Mix)
Tahini Sauce (recipe below) or Hummus
Optional: sliced Cucumbers, Tomatoes, Arugula, Roasted Red Peppers, Sour Cream

Stuff your falafel, sauce and sprouts into the half pita.  Add any extras, such as additional veggies or a dollop of sour cream and yum out.

Tahini Sauce

½ C. tahini paste
2-3 T. plus more, if necessary, fresh lemon juice
1 small clove garlic, minced
¼ – ½ C. water, as needed
¼ -1/2 tsp. salt

Tahini Sauce: Make the sauce by combining the tahini paste, lemon juice, and garlic in a bowl and stirring to combine. Add the water a little at a time as needed to form a smooth, creamy sauce approximately the thickness of heavy cream. (Note that the sauce might appear to separate for a bit before enough water has been added; just keep adding more water bit by bit and stirring until the sauce comes together.) Season to taste with salt and more lemon juice, if necessary. Transfer to a nonreactive container and refrigerate until ready to serve the falafel.

I think this would be fairly adaptable to LTS.  I’ve got some large containers of dried herbs, onions and garlic ordered.  I’m going to test out making this without fresh herbs and garlic.

Water Update

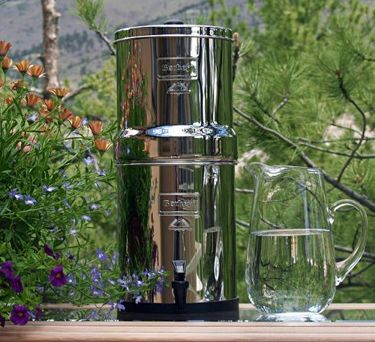
berkI decided after all to go ahead an order a Big Berkey.  On a forum that I read, the safecastle website has a presence, and posts “bunker” passwords for savings from time to time.  The latest bunker had a good deal on Birkey systems, which were already on sale.  I was able to get the Big Berkey with dual black filter AND a stand to rise it up enough that you can fit a glass under the spout for less than just the unit from the Big Berkey site or Amazon.

I have set it up, but I have not yet primed the filters and tested my assembly yet.  The one disappointment, and this is not the fault of the company, but my own failing, is that the unit on the stand is a scant 1/8″ too tall for the spot that I meant to be the filter’s home, which was under a cupboard where the bottom is shaped like an H (center is higher than side cupboards).  I thought I had the right measurements, but that didn’t include the little knob on the cover for easily removing to add water.  Bummer.

Done

Temporary water stored (about 10 gallons in regular store bought milkjug gallons)
Ordered water stand for 55 gallon barrels
Ordered tubing and plumbing supplies to chain 3 barrels
Supply list compiled for rainwater catchment system

Limbo:

Pick up 3 barrels (waiting to hear back from my SiL source)

To Do:

Obtain supplies and install rainwater catchment system
Decide on and order portable filter options for bug out situation. Still leaning towards a UV pen option for portability, but when we “arrive” what then to cleanse water?
Assemble 55 gallon barrel stand when it arrives
Acquire more portable containers for transporting water from catchment system to filter, from filter to barrels, or for immediate use. 7 Gallon aquatainers are looking like a good option. I would like to have 4-6
Buy 4 Water BOBs for tubs, 1 per tub, plus a backup each (if time allows for filling)

Obviously I would feel better if this were all done, and better yet if I had a stream or well on my property, but for someone with nothing, not even plans!, a few months ago, I feel good about where I am at.

PSA

I have heard “that fish anti biotics won’t be available over the counter after the 1st of the year.  If you plan to stock them, you may want to get them now”. I’m pretty sure that this is another fear mongering rumor that spreads through the prepper community, passed on like a germ from hand to hand, gossipy sneezes.  I wish people would do thier research before going all henny-penny.

img_0643

I know that the FDA is making changes to antibiotics administered to Food Animals – cattle, pigs, sheep, chickens and so on.  This is in response to the appearance of antibiotic resistance strains of bacteria, thought to be caused by overuse of antibiotics in our food animals.  The letter from the FDA that was distributed this past summer can be read online.

Fish antibioitics are actually not FDA approved, not even for fish.  So it seems unlikely to me that these regulatory changes will affect the online supplies of fishmox and fishflex.   I am ambivalent about whether stocking them is a good idea or not. (On a side note, I’m on a second anti biotic for my lump; and it’s still an ugly swollen bump of pain.)

The Survival Doctor did a good post on the use of non human antibiotics.