Star Spangled Luminaries

These festive luminaries let you light up the night right in your own front yard. Be sure that an adult takes care of the lighting of the candles.

Cardboard
Tissue paper (red and blue)
Brown-paper lunch bags
Star-shaped stickers and star punch
Sand
Tea light or votive candles (battery operated much safer!)

luminaries

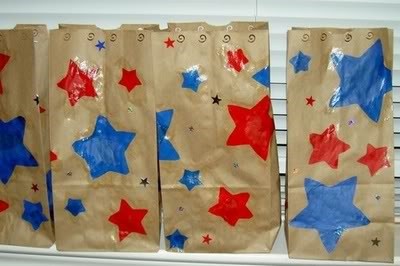
Cut a star from cardboard and use it as a template to cut other stars from red and blue tissue paper. The star can be whatever size you want. Glue the stars that you cut from the tissue paper to the insides of lunch bags with a dab or two from a glue stick. If you wish to really jazz up your luminaries you can add other small star-shaped stickers on the inside and perforate the sides with a star paper punch. Fill each of the bags with 2 to 3 inches of sand and sink a tea light or votive candle into the sand. Place the luminaries in a spot outside where you can keep an eye on them, and light the candles. From inside the bags, the tissue paper stars will cast a red and blue glow guaranteed to shine on long after the twilight’s last gleaming. Tip-To avoid scorching your forearm you can light a piece of uncooked spaghetti and use it to light the candles.  — OR use the battery operated ones, and avoid the risk of burning the bags!

Tags:

  • Digg
  • Del.icio.us
  • StumbleUpon
  • Reddit
  • Twitter
  • RSS
read comments

Independence Day

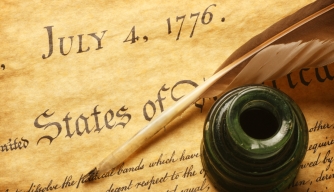
jefferson-drafts-declaration-hero-AMost people in the United States celebrate the 4th of July, but do you know exactly why the holiday is so important to our country? Imagine how you would feel if someone older than you (maybe an older sister or brother) kept telling you what to do all of the time and kept taking more and more of your allowance. That is how the colonists felt in the years leading up to 1776. Great Britain kept trying to make the colonists follow more rules and pay higher taxes. People started getting mad and began making plans to be able to make their own rules. They no longer wanted Great Britain to be able to tell them what to do, so they decided to tell Great Britain that they were becoming an independent country. (To be independent means to take care of yourself, making your own rules and providing for your own needs.)

The Congress met in Philadelphia, Pennsylvania and they appointed a committee (a group of people working together to do a specific job) to write a formal document that would tell Great Britain that the Americans had decided to govern themselves. The committee asked Thomas Jefferson to write a draft (first try) of the document, so he worked for days, in absolute secret, until he had written a document that he thought said everything important that the committee had discussed. On June 28, 1776, the committee met to read Jefferson’s “fair” copy (he put his best ideas together and wrote them neatly.) They revised (made some changes) the document and declared their independence on July 2, 1776. They officially adopted it (made it theirs) on July 4, 1776. That is why we call it “Independence Day.” Congress ordered that all members must sign the Declaration of Independence and they all began signing the “official” copy on August 2, 1776. In January of the next year, Congress sent signed copies to all of the states.

The Declaration of Independence is more than just a piece of paper. It is a symbol of our country’s independence and commitment to certain ideas. A symbol is something that stands for something else. Most people can look at a certain little “swoosh” and know that it stands for “Nike.” Well, the signers of the Declaration of Independence wanted the citizens of the United States to have a document that spelled out what was important to our leaders and citizens. They wanted us to be able to look at the Declaration of Independence and immediately think of the goals we should always be working for, and about the people who have fought so hard to make these ideas possible. The people who signed the Declaration risked being hanged for treason by the leaders in Great Britain. They had to be very brave to sign something that would be considered a crime! So every time we look at the Declaration of Independence, we should think about all of the effort and ideas that went into the document, and about the courage it took for these people to stand up for what they knew was right — independence!

On July 4, 1776, the Continental Congress adopted the Declaration of Independence. Four days later, on July 8, 1776, colonists gathered in Philadelphia to hear the Declaration read. Afterward, they celebrated the national’s first “Independence Day.” In the years that followed, citizens across America celebrated their hard-won freedom July 4. Not until 1941, however, was the Fourth of July set aside as a national holiday.

Tags:

  • Digg
  • Del.icio.us
  • StumbleUpon
  • Reddit
  • Twitter
  • RSS
read comments

Star Studded Door Hanger

Show your patriotic spirit by making this sparkling welcome hanger for your door. Easy to put together and so pretty to look at!

2 miniature paper plates 877563934c9a8f1534890390e45729b3
Star-shaped foam stamp
Red acrylic paint
Red and blue glitter glue
Gold alphabet stickers
Patriotic star garland
White craft glue
White yarn
Scissors

Cut a piece of yarn to 14” in length. Cut patriotic garland into six 16” pieces. Glue two paper plates together so that they are both facing toward each other. While glue on plates is still wet, place yarn into the top between the two plates, insert about an inch of each end between the plates. Do the same with the garland lengths, securing them between the bottom of the paper plates. Let dry completely. Paint star-shaped foam stamp with a thin layer of red paint. Press carefully but firmly into the center of the plate (don’t smash the plate) and lift straight up to remove. Use a paintbrush to fill in any spots on the star that may not have transferred from the stamp. Squeeze some red glitter glue onto the center of the red star and spread out using a small paintbrush, covering entire star. Use white glitter glue to draw a border around the star. Use blue glitter glue to draw a border around the plate edge. Let dry completely. Apply alphabet stickers to the top of the plate, spelling out “WELCOME”. Wrap the garland around your fingers in a corkscrew fashion to create curls. Stretch them out and manipulate with your hands to get them how you want them. Hang on your door! Tips: Check your local craft supply, discount department and party supply stores for patriotic garland. Set project somewhere safe and out of place to dry. Avoid areas where pet cats may jump up to investigate. Styrofoam plates or even bowls may be used in place of paper plates.

Tags:

  • Digg
  • Del.icio.us
  • StumbleUpon
  • Reddit
  • Twitter
  • RSS
read comments

Firework Themed Cards

Capture the sparks of Independence Day with this fun craft idea. To make these fire-work themed cards, you’ll need:

fireworks card

Black construction paper sheet
Colored glitter glue
A straw
Scissors
Sequins (optional)

Cut a rectangular piece from the black construction paper and fold it in the half (long ways). Drop a big blob of soft glitter glue on one side of the folded paper. Blow air through the straw to control the spread of the glue. Repeat the process using other colors. Allow the glue to dry. Glue some silver or gold sequins to create a sparkling effect. Your 4th of July fireworks card is ready, enjoy!

Tags:

  • Digg
  • Del.icio.us
  • StumbleUpon
  • Reddit
  • Twitter
  • RSS
read comments

WorldJugglers’ Day

Tomb paintings indicate that juggling goes as far back as the ancient Egyptians. Today, we’ve got the advantage of juggling “how-to” books and kits to help us get started. Try Juggling for the Complete Klutz by John Cassidy and B.C. Rimbeaux (complete with beanbag blocks) and you’ll be a pro in no time. (Remember, when first learning, it’s best to practice with oranges or tennis balls—not eggs!)

Tags:

  • Digg
  • Del.icio.us
  • StumbleUpon
  • Reddit
  • Twitter
  • RSS
read comments

Rocket Scientists

PROJECT: Make and launch rockets
GOAL:To discover what combination of factors will make a rocket fly farthest

s300_rocketsciencelogo960With seltzer-tablet rockets, your kids will learn about gas, the most mysterious of the three phases of matter. This experiment makes clear that though gas is usually invisible, it can exert force. The chemical reaction between water and the sodium bicarbonate in the seltzer tabs releases carbon dioxide gas inside the film canister. Pressure builds until the lid is forced off, launching the rockets.

rocketBy experimenting with the amount or temperature of the water used, kids discover which combined factors produce the most gas molecules or affect the rate of reaction. Be sure that they steer clear of anything hotter than tap water because the force caused by very high temperatures can pose a safety hazard.

Empty toilet paper roll
Clean, empty Styrofoam meat tray
Plastic mailing tape
Goggles or other eye protection
Water
Measuring cup
Clear film canisters with lids that fit inside the container (available at any store that develops film, Fuji makes the best kind)
Antacid seltzer tablets, broken into fourths (never substitute vinegar and baking soda; they react too fast)
Plastic plate
Popsicle sticks or pencils
A tape measure or yardstick

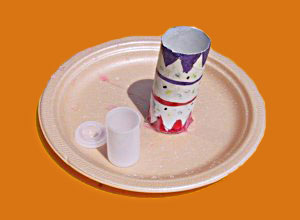
Waterrocket1Make a launchpad by cutting five 1-inch slits in the bottom of the toilet paper roll. Spread open these tabs and tape them to the Styrofoam meat tray. Now it’s time to determine the optimal amount of water needed to send the rocket flying (it’s also time for everyone to put on their protective goggles). The actual experimenting is best done outside or in a basement or garage. Fill the measuring cup with water and pour some into the canister until it’s about 3/4 full. Drop in a piece of antacid tablet, pop on the lid, invert the canister and place it on a plate. (Remind participants not to put their face over the plate.) It can take anywhere from 15 seconds to a minute for the rocket to take off. Follow the same procedure two more times, changing only the amount of water used. Fill the canister half full once and a quarter full another time. Notice which amount of water shoots the rocket farthest. Older children can experiment with water temperature, too. You and your crew now know how much water you need to boost a rocket–time to dust off the launchpad. Prepare the rocket for liftoff, but this time place it upside down inside the toilet paper roll. Tilt the launchpad: The idea is to find an angle that sends your capsule into outer orbit. With Popsicle sticks or pencils, mark the starting point of each flight and where the rocket lands, then measure the distance traveled. (After 15 to 20 flights, seltzer-tablet rockets start to leak. Be ready to continue experimenting with a replacement.) Try having a contest to see whose missile flies farthest.

Tags:

  • Digg
  • Del.icio.us
  • StumbleUpon
  • Reddit
  • Twitter
  • RSS
read comments

Summer Time First Aid

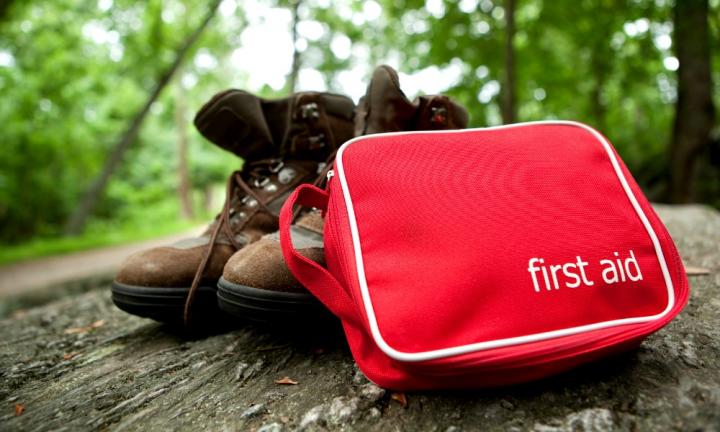
Don’t hit the beach, pool or park without these summer safety staples.

firstaid-20151217154635_jpg~q75,dx720y432u1r1gg,c--

Sunscreen
Spray bottle of water
Bandages
Gauze
Antibiotic Ointment (polysporin)
Rubbing alcohol (if child gets splinter or steps on a nail)
Tweezers (pulling splinters, removing ticks)
Hydrocortizone Cream & Benadryl (bug bites and bee stings)

Summer lets kids splash and play all day, but those good times also up the chances of getting hurt: Forty-two percent of accidental injuries in children occur from May to August, according to Safe Kids Worldwide (SKW), an organization dedicated to preventing accidental injury to kids. “Children are more active in the summer and have less supervision, which may be why we see more accidents,” says Martin Eichelberger, M.D., a pediatric trauma surgeon and chairman of SKW. Here’s what to do when your tot gets a boo-boo.

Cuts, scrapes, and nosebleeds

What to do: Using a clean cloth, apply direct pressure to the wound to stop the bleeding. Flush the wound with water to remove any dirt or debris, apply antibiotic ointment, and dress with gauze pads held in place by medical tape — or cover with a plastic bandage. If your child has a nosebleed, sit her upright and have her tilt her head forward — not back, which could cause her to choke on the blood. Gently but firmly pinch her nose (just under the bony ridge) with a towel for 20 minutes to stop the bleeding. Avoid checking every few minutes to see if the bleeding has stopped; you could dislodge the fresh clot that’s forming and cause the bleeding to resume.

When to see a doctor: If there’s a deep puncture, don’t attempt to clean the wound. Simply wrap it in a clean cloth and call your doctor. Also head to the doctor right away if there are objects deeply embedded in the wound or if the gash is on the foot, since injuries there tend to get infected more easily. Other reasons to seek immediate care: the bleeding does not slow within 15 minutes (the cut may require stitches); the wound shows signs of infection such as swelling or fluid leakage; or the injury has damaged nerves or a tendon (your child cannot move her finger, for example). Also, consult a doc any time your child has been bitten by an animal.

Sprains and broken bones

What to do: If your child broke a bone, he may not be able to move that part of his body without pain. If he can move the injured limb or joint, he’s probably suffered a sprain or strain, in which case you should wrap the ankle or wrist tightly in an elastic bandage or rolled gauze to compress the swelling. Be careful not to wrap the gauze too tightly, as it may impair circulation. Apply a cold compress to the area — 20 minutes on, 20 minutes off — for four to six hours, and elevate the sprain by propping it up on some pillows to stop the swelling and pain. Don’t allow your child to walk on the sprain for at least 48 hours; activity can delay healing.

When to see a doctor: If your child cannot stand, complains of tingling or numbness, or his foot or ankle is swollen or discolored, he could have a broken bone or a more serious sprain. Keep his weight off the injury and visit the ER immediately.

Head injuries

What to do: If there’s any bleeding, apply direct pressure until it stops. The exception: Avoid putting pressure on her eye. To reduce swelling, alternate 20 minutes on, 20 minutes off, with a cold compress for four to six hours.

When to see a doctor: If your child is disoriented, unresponsive, has a headache, can’t walk steadily or stand up straight, is vomiting, has neck pain, or has difficulty moving limbs, she could have a concussion or a more serious injury. If she has suffered an eye injury and has decreased vision, pain when moving her eye, or fluid leakage, head to the doctor. And see a doctor or a dentist immediately if a permanent tooth — not a baby tooth, which is temporary anyway — was knocked out. If you can find the tooth, rinse it in water, place it in a glass of milk to prevent decay, and bring it with you.

Tags:

  • Digg
  • Del.icio.us
  • StumbleUpon
  • Reddit
  • Twitter
  • RSS
read comments

Page Corner Bookmarks

Original post with pictures is at http://nheilke.com/blog/?p=2628
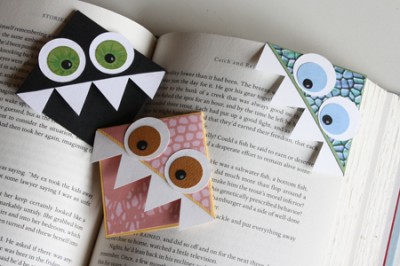
Page corner bookmarks are cute, practical and deeply under-represented in the world. They’re easy to make, easy to customize, and will set you apart from all those same-same flat rectangular bookmarks. Corner bookmarks are where it’s at.

——————————————————————–

What you’ll need:

  • pretty paper of cardstock weight OR a combination of plain cardstock and pretty, decorated lighter weight paper
  • scissors
  • ruler
  • mechanical pencil
  • glue stick
  • [optional] other decorating tools, such as crayons, markers, stamps, stickers, ink pads, embossing powder, etc.
  • page corner monster bookmark template (or you can make your own using the instructions below)

——————————————————————–

Putting it all together:

Below, I’ll teach you how to make two similar-but-different types of corner bookmarks. The first is a square overlapped by a triangle , the second is a triangle overlapped by a smaller triangle.

If you are making your own template from scratch, follow all the steps below. If you’re using the PDF template linked to above, cut the pieces out and skip to step 5.

1) Ok, the very simplest thing to do is to cut a triangular piece off the corner of an envelope, and use that. Decorate it if you wish. If you want to get a bit more in depth, ignore the envelope method and move on to step 2.

2) On a piece of plain scrap paper, draw a square. Use your ruler so its sides are perfectly straight. Don’t make it too big – mine measured 2.5 inches x 2.5 inches, though you could go larger than that. Draw second square exactly the same size on the right side of the first square (so they share a side) and a third square exactly the same size on the top of the first square. You should end up with 3 squares that compose an L shape.

3) Using your ruler, draw a diagonal line across the uppermost square, from its top right corner to its bottom left corner. Scribble out the upper left half (now a triangle) of the square, as you won’t be using that part.

Next, draw a diagonal line across the bottom right square, from its top right corner to its bottom left corner. Scribble out the lower right half (now a triangle) of this square.

4) Cut out all parts of the entire shape that have not been scribbled out. This should be a square with two triangles attached to it, one on the top and one on the right. This is your template.

5) Trace your template onto your pretty piece of cardstock (or onto the plain piece of cardstock that you intend to decorate), and cut the shape out.

6) Using your ruler and the tip of your mechanical pencil with no lead showing, score a line (make an indent) along the edges of the square that connect to the two triangles.

6.5) [optional] Cut a square of pretty paper slightly smaller than the one you used for your template and glue it onto the square portion of your shape. I generally do this if the paper I’m using is quite plain.


7) Fold one triangle inwards, so it covers the upper half of the square.

8) Apply glue to the underside (the side still facing up) of the second triangle, and fold it over onto the first triangle.

8.5) [optional] As in step 6.5, if you’ve used plain cardstock and want to glue fancy paper on top of it, cut out a triangle of the fancy paper that’s slightly smaller than the folded-over triangles of the bookmark. Glue the smaller triangle on top of the larger, folded-over ones.
9) Add any decorations or illustrations you wish. Use by slipping over the corner of the page you wish to mark, like a pocket.

——————————————————————–

Now, here’s how to make a triangular bookmark, where the back is a triangle and not a square.

1) Follow steps 2 and 3 from above.

2) Use your ruler to draw a diagonal line across the remaining, center square, from its bottom right to its top left. Then draw another line, parallel to the one you just created but about 1/2 inch lower down. Erase the first line.

3) Extend the shape’s bottom line and the two side lines so that they meet up. You should now have a shape that looks like a castle flag: a rectangle with a triangular indent at one end.

4) Cut the shape out.

5) Trace the template onto your nice paper. Be sure to make a little mark on either side where the corners of the two outer triangles meet the inner triangle , and extend this mark onto the inside of your shape.

Cut the shape out. If you want a fancy bottom edge, cut that line with fancy scrapbooking scissors.

6) Now follow steps 7 – 11 from above, scoring along the appropriate lines, folding the two outer triangles in on top of each other, gluing them down and adding any fancy paper or other embellishments.

(I actually turned mine over at this point and folded it the other way, so the colours were switched. See below.)

EDIT: Here’s another take on monstrous page corner bookmarks, from another artist who thought it up completely separate from me, long before I even thought of thinking about doing this project or writing this post. Great minds, eh?

2nd EDIT: Many people have seen this blog post over the past months, and many have commented very kindly on it, and many have used the tutorial to make their own page corner bookmarks. A number of the links following the comments below lead to wonderful images of other people’s creative takes on this project. I wanted to post one image in particular here, which I take from the Priestthorpe Primary School Blog. There, a whole classroom of kids made their own page corner bookmarks, and they look fabulous! I love all the different personalities displayed.
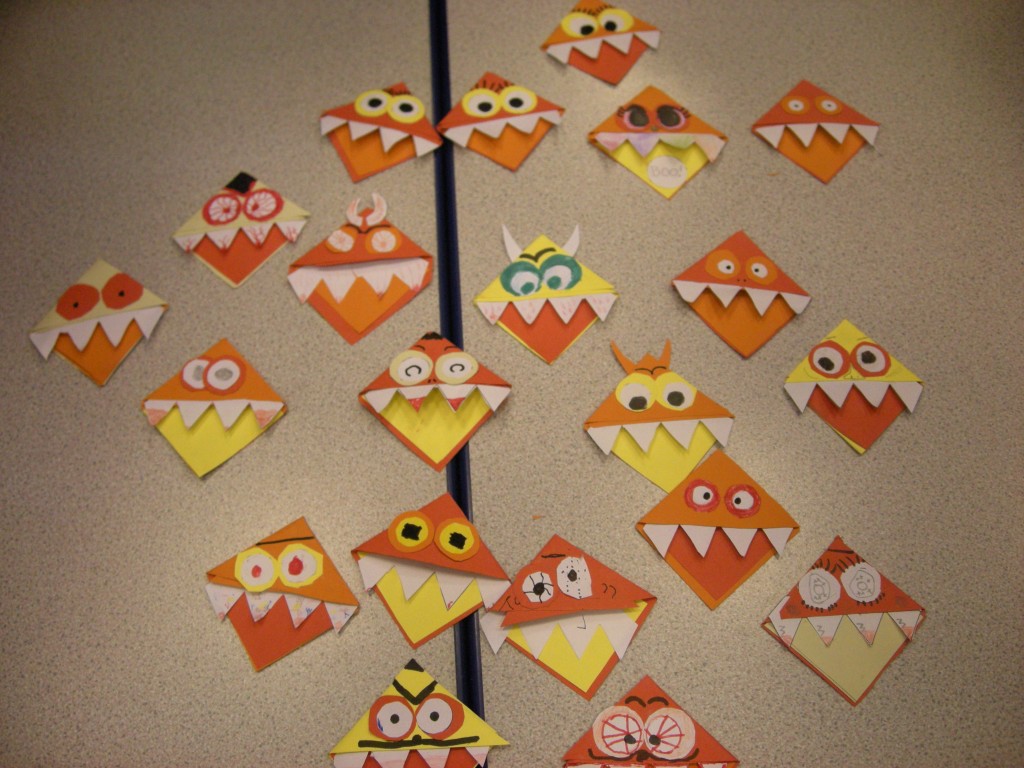
Thanks to all of you who’ve shared your own page corner bookmark results, and all of you who’ve said such kind things about the project. It’s heartwarming to think about all the books around the world that are having their page corners nibbled at this very instant.

3rd EDIT: Yet more thanks to all the folks who continue to make use of this tutorial and post your own wonderful versions. Here’s another idea: This crafter decided to use small round stick-on jewels for the pupils, which I think looks great. The downside of course is that they protrude a bit, so your book won’t close flat, but if they’re fairly small jewels it shouldn’t be too bad. Stickers, sequins or paper buttons could also make great pupil substitutes.

Tags:

  • Digg
  • Del.icio.us
  • StumbleUpon
  • Reddit
  • Twitter
  • RSS
read comments
 Page 6 of 103  « First  ... « 4  5  6  7  8 » ...  Last »