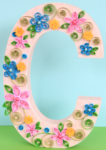
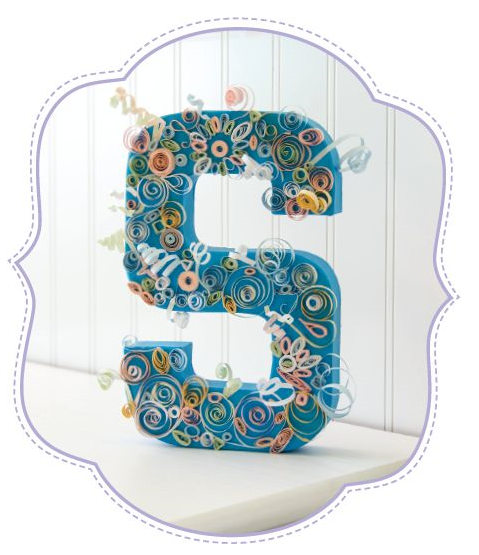
Quilled Letter
 Acrylic Paint
Foam Paintbrush
Papier Mache Letter
Quick Drying Paper Glue with Fine-Tip Applicator
Small sheet of wax or scrap paper
¼†wide Quilling Paper Strips
Slotted Quilling Tool
Quilling Needle
Tweezers
Paint Letter with acrylic paint. Let dry completely. Add a second coat of paint, if desired. (You could also trace your shape onto scrapbook paper, cut it out, and glue it to your letter.) Fold one quilling strip in half width wide, then tear into two strips. Insert both into the slotted quilling tool. Hold tool with your dominant hand, and rest the tool on your other hands forefinger. Roll the tool to quill the paper.
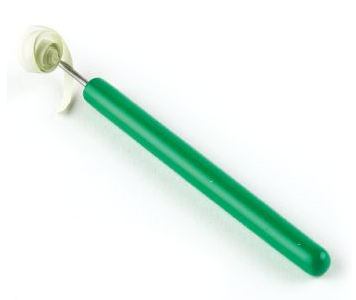
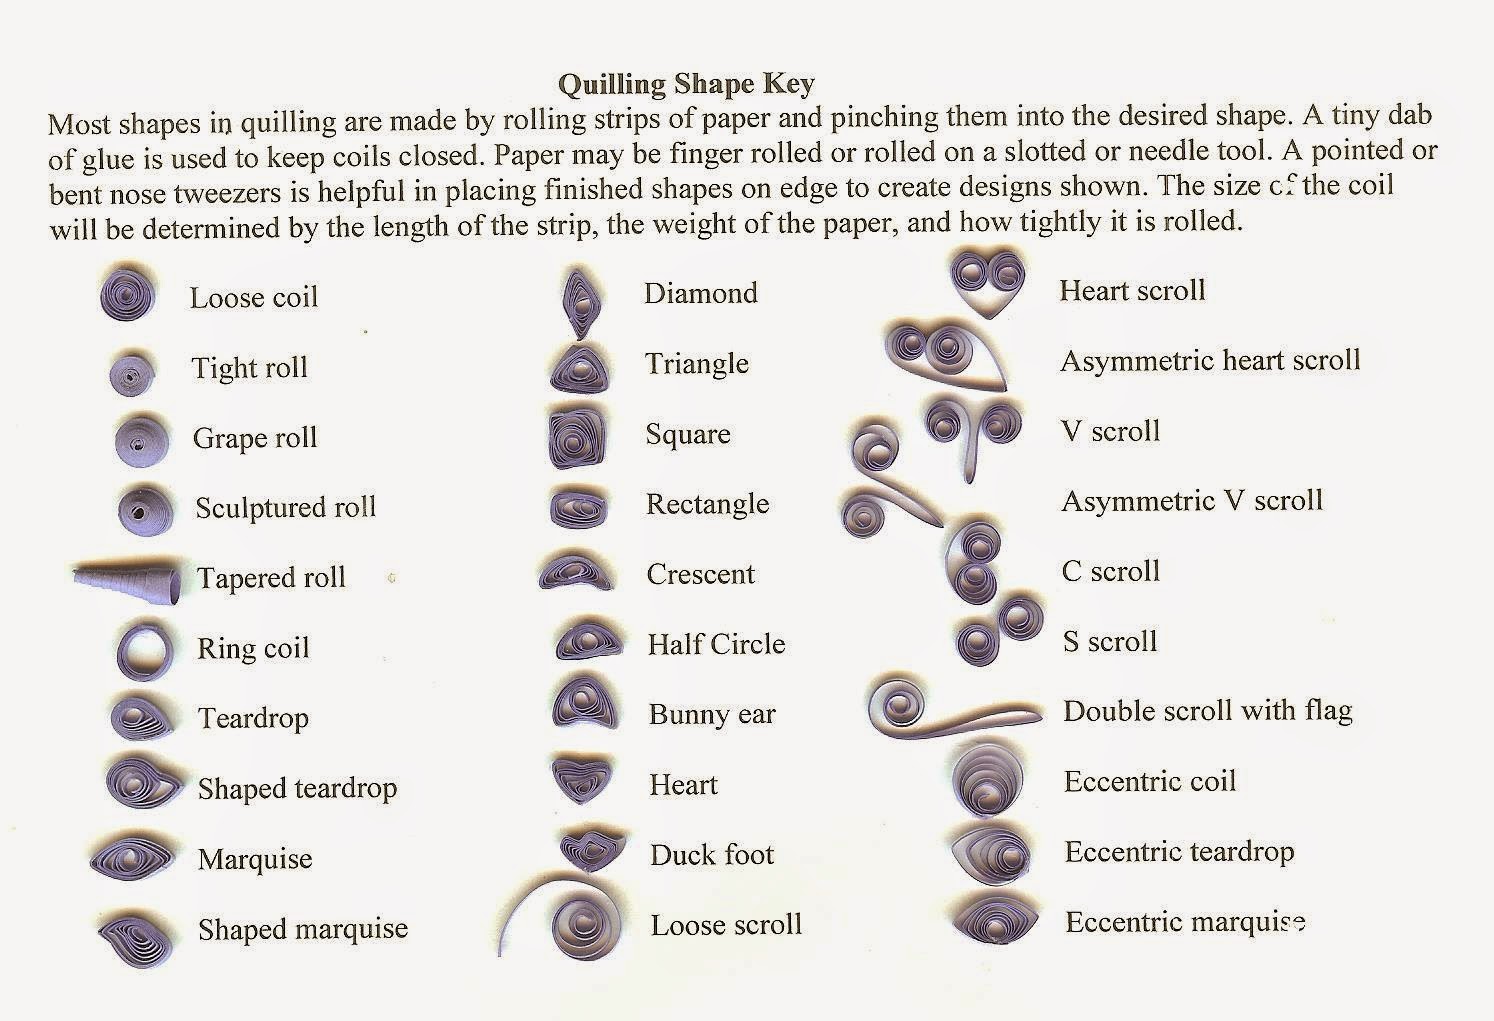
When you get to the end, hold the rolled securely with your thumb and middle finger and push the paper off the tool. Using the quilling needle, apple glue to the rolled paper end. Press and hold until secure. Repeat the steps to create several rolled strips. Be creative with the shapes. Some can be rolled completely, Roll part of some strips, leaving a tail. Squeeze a rolled circle to create a teardrop or oval. Keep some rolls tight, and let some get loose before gluing.
Arrange your shapes onto your letter until you get a design that pleases you. Take a picture with a cell phone or other digital device to use as a reference. You can also skip this step and just play it by ear. When you are ready to adhere your quilled papers, squeeze a small puddle of glue onto wax or scrap paper. Pick up a quilled shape with the tweezers and dip the bottom edges into the glue. Place the shape onto the letter and gently press down with your fingers to secure. Repeat until the letter is as full as you want / your design is complete.