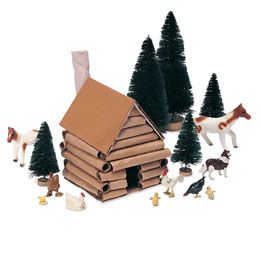
Paper Log Cabin
 • Craft paper
• Scissors
• Pencil
• 3 1/2-inch cardboard square
• Glue
Step 1: Start with 3 x 2-inch strips of craft paper. Make logs by wrapping each one around a pencil, taping down the open edge and sliding the cylinder off the pencil. Create 24 3-inch logs: 17 to use as is and seven to trim into shorter lengths as called for.
Step 2: Begin to assemble the cabin on top of the cardboard square. Glue 3-inch logs along three edges of the square, staggering the log ends. On the fourth side, create a front door opening by gluing a 1-inch log and a 3/4-inch log to either corner. Glue on two more rows of logs, alternating the shorter lengths on the sides of the door.
Step 3: Add another two rows of 3-inch logs all around. For the last four rows, build onto the front and back only, using progressively shorter logs. Taper the ends to create an A-shaped roofline.
Step 4: For a roof, fold a 3 1/2 by 5 inch paper rectangle in half and glue it in place atop the cabin.
Step 5: To make a chimney, loosely roll up a 5-inch paper square and glue down the open edge. Then, glue the cylinder to the rear of the cabin.


