Make a PVC Sand Table for Children
Â
Â
If you look in any preschool, water and sand tables for sensory manipulation seem to be all the rage. Sensory tables emphasizes learning through the five senses.
Â
Water Tables Emphasizes:
Learn Measurements through comparison and trial
Develop Hand/Eye Coordination by pouring
Discover the properties of water
Experiment with mixing different colors (provide eyedroppers with colored water)
Sharing an area with others
Â
 Â
Â
We have had 2 of these sand tables now for over 4 years and they work great. I doubt you will be able to find one commercially to match their price and durability. We have been wanting to have a third for a while now so here is a write up for how we made it.
Â
The credit for the original design of this sand table goes to an article in the July 2005 issue of Family Fun magazine. The original version had legs (no “base”) which I found to be a weak point in the design. Shortly after completion, a leg broke off at the joint so I modified it to have a “base” instead which is considerably stronger. As noted above this is the forth year they have been used without any issues.
Â
All materials can be purchased at Home Depot or Lowe’s. The tub (made by Plasgad) can be found in the masonry aisle near the bags of cement.
Â
Material List
mallet or hammer with wood block
hacksaw
miter box (would be nice but not necessary)
2 10′ 1½” pvc pipe* ………..$3.23 ea.
8 1½” 90° street elbows …..$.82 ea.
8 1½” tee fittings …………..$.90 ea.
1 large Plasgad tub … .. $10.29 ea.
pvc primer ……………..$3.49 ea.
pvc cement …………….$4.29 ea.
2 straps …………… …….$1.98 ea
spray paint (optional) ….$4.34 ea
vinyl gloves
safety glasses
sanding block or sand paper
Â
*NOTE: If you have to cut the pipe to be able to fit in your car do not cut exactly in half as you may no longer get all the cuts needed out of the pipe. Instead cut one @ 61″ and the other @ 50″. See the black arrows on figure 1 below to better see what I am talking about.
Â
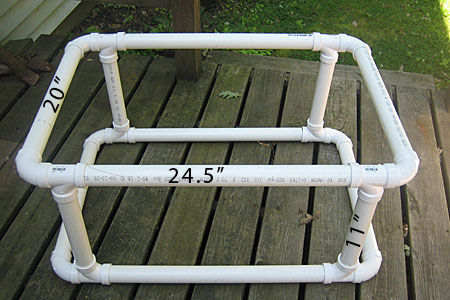
1) Cut Pipe: Use breakdown below to cut pipe to size. If you don’t have a miter box try to cut pipe as squarely as possible. Take and mark your measurement all around the pipe to guide your cut.
Â
 Â
 Figure 1. Breakdown of Pipe Cuts (note: if you need to cut the pipe to fit in
your car, do not cut in half. Cut at black arrows. See note above for details.)
Â
2) Sand the end of each pipe: Sand off the burrs on the ends of the pipes to make inserting them into the fittings easier.
Â
 Â
 Sand off burrs on end of pipe.
Â
3) Assemble the frame: Assemble the frame without glue to trial fit the pieces. Tap in the pieces with a mallet so they are snug. If you are using a hammer, use a piece of wood to soften the hammer blows. If you hit the pvc directly with the hammer it may break.
Â
Â
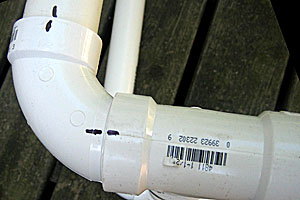
4) Mark the joints: Once together, Mark the joints where the pieces fit together. The most critical joint is where the elbow and the “T” fitting meet. If these are not glued together in the same alignment as your trial fit-up the frame will not be square.
Â
 Â
 Draw alignment marks at connections.
5) Prime the joints: (read instructions on can) You must use primer or the glue will not stick. Put on your vinyl gloves and safety glasses. Do not use this primer in your house. Besides being dangerous the fumes smell extremely bad. Do it outside on a breezy day. The same goes for the glue. Open the can and you will see a little brush attached to the cap (Once you get a whiff of the primer I am sure now you will put on your gloves and glasses if you haven’t already). “Paint” the mating surfaces of the first joint. This is the inside of the wider pipe and the outside of the narrower pipe.
Â
Prime Fittings
Â
5) Glue the joints: (read instructions on can) Glue the mating surfaces that you have just primed. Do not glob the glue all over as it will be a weaker joint.
Â
6) Insert glued end into joint: Insert the narrow piece into the fitting until it hits the bottom, give a 1/4 turn or so back and forth to spread the glue and then hold for 30 seconds (note: it will probably be hard to turn). Move on to the next joint.
Â
Â
Â
7) Paint if desired: Once completed you can paint it if you want. Standard spray paints will not stick well to the pvc as it is too slick. You could scuff all the pipe with a fine grit sand paper and then paint or use a paint made for plastics such as Krylon’s Fusion. I have used the Fusion paint on previous sand tables with just average results. They still have to be touched up occasionally. For this table we sanded and used the Fusion paint so hopefully the durability will be better.
Â
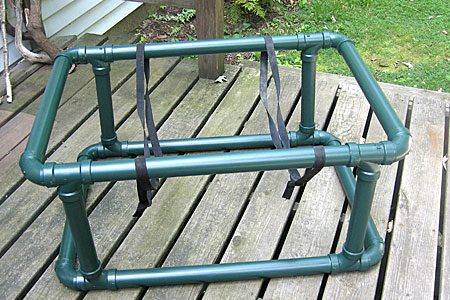
8) Add security straps: To finish up add the straps for extra security. Lengthen the straps just enough so that they are just under the tub when it is set in the frame.
Â
Â
 Straps added to the the frame.
Â
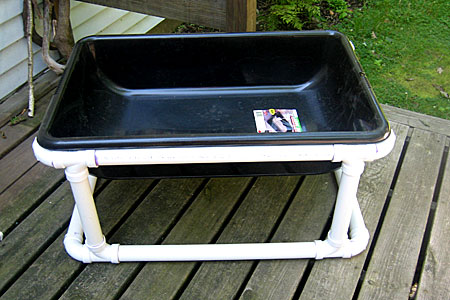
9) Just add the tub and fill with sand and you are ready for action!
Â


