Turkey Table Decoration
Â
Â
Brown paper bag
Cardboard
Paper plates
Stapler
Glue
Colored paper
Decorations (such as glitter and stickers)
Red balloon
Craft eyes
Â
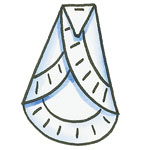
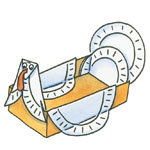
Cut feather shapes out of the construction paper. You can make a stencil out of the cardboard to make it easier to ensure all the feathers are the same size and shape. Cut out a variety of feather colors. Use glue and decorative items to decorate the feathers as you wish. You may use glitter, stickers, markers, crayons, other pieces of paper, or paint to create your own unique look. Set the feathers aside to dry after decorating them. Cut down the corners of the paper bag, making sure the cuts end about 8 inches from the bottom of the bag. Trim off the top few inches. Then fold the bag over, so all the sides line up and the excess is folded over to reinforce the sides. Each side should be double or triple the thickness it was originally. Cut a piece of cardboard that is the same size as the bottom of the bag. Insert it carefully into the bottom of the turkey basket, making sure it lays flat and also holds down the edges of the folded sides of the paper bag. Insert a paper plate along the inside back portion of the bag. This is where the turkey’s tail will be. Staple the plate in place. Make sure that plate is touching the bottom of the bag. You may need to fold the plate to fit it inside the edges of the bag. Staple another plate to the outside of the bag, making sure it is elevated about the edge of the inside plate. This allows you to have two tiers to make up the turkey’s tail. Fold two paper plates in half and staple them over the long sides of the bag. These will be the turkey’s  wings. Fold another paper plate like a cone. Bring the two sides in until they meet in the middle, then crease the edges, so there is a sharp point at one end, and a rounded ridge at the other end. Fold down the pointed end about 2 inches to create a beak for the turkey. Staple the plate to keep the folds secure, then staple the turkey head
  to the front of the paper bag. Glue craft eyes onto the turkey’s head, and glue the red balloon onto the neck of the turkey to look like a wattle. Color all the paper plates brown, using either paper or a brown marker. Glue the feathers you created earlier to the two levels of the turkey’s tail (the back two paper plates). You may attach as many or as few feathers to the turkey tail as you would like. Allow the entire craft to dry before filling the bag with bread or whatever you wish to serve from your turkey decoration for Thanksgiving dinner.
Â
Max and I made one of these a few years ago, but I can’t find the picture =(


