Christmas Tree Crafts
Â
Tree a Tree
Â
Strong scissors
Craft sticks (including 1 wide craft stick)
Tacky glue
Green and brown acrylic paint
Sequins
Small wooden star or other tree-topping ornament
String
Â
Use strong scissors to trim several craft sticks to lengths ranging from around 1 1/2 to 3 3/4 inches (a parent’s job). Have your child choose six pieces, including one full-sized stick, and help her arrange them from shortest to longest on a wide craft stick. Adhere the pieces with tacky glue, then let the stick tree dry. Have your child paint the tree green and brown with acrylic paints. After the paint is dry, she can add sequin ornaments with glue. Our tree’s topper is a small wooden star from a craft store, painted yellow. Tie a loop of string around the top of the tree for hanging.
Â
Â
Blown Egg Christmas Trees
Â
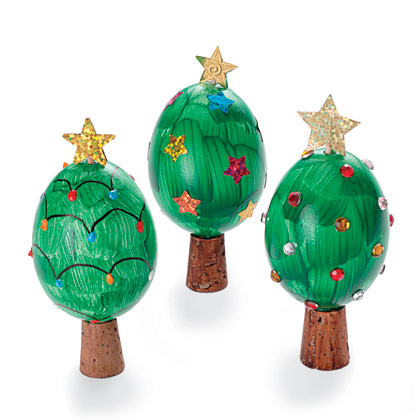
Carefully wash and dry an egg. Use a pushpin to make a hole in the top and bottom of the egg. Â Stick a toothpick into the top hole and wiggle it around to break the yolk. Â Hold the egg over a bowl and blow into the top hole until the egg is empty, being careful not to ingest any raw egg. Rinse the egg under running water, then let it dry. Â Color a small cork with brown marker. Glue the cork to the bottom of the egg and tape it in place while the glue dries. Â Paint the shell green. Let the paint dry, then decorate the tree with paint, markers, and stickers. To add a tree topper, sandwich the end of a toothpick between 2 star stickers and slide the toothpick into the hole at the top of the egg.
Â
Â
Ice Cream Christmas Trees
Â
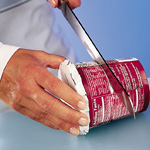
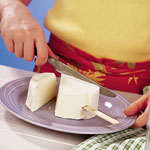
 Chill 4 small plates and a baking sheet lined with waxed paper in the freezer for 10 minutes. Then set each pint of ice cream on its side and slice it in half without removing the container (a parent’s job). Transfer each disk (with the carton still attached) to a chilled plate and quickly place it in the freezer until you’re ready for the next step. Tip: To slice a pint of ice cream in half, use a serrated knife to lightly score the container around the middle. Then warm the knife under hot water and slice through the ice cream. Working with one ice-cream disk at a time, cut or peel away the container and insert a Popsicle stick halfway in on one side. If the ice cream is too solid, use a butter knife that’s been dipped in warm water to start
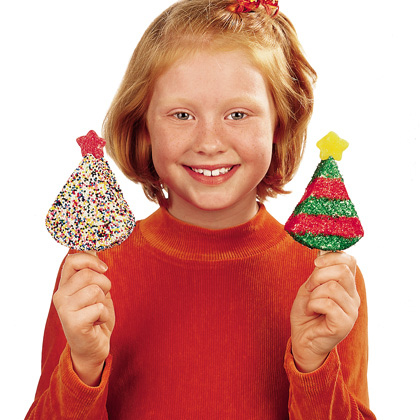
  a hole for the Popsicle stick. Â Using a warmed butter knife, your child can now trim the disk into a tree shape with the stick as the trunk. As soon as she’s done, she should transfer each tree to the baking sheet and keep it in the freezer until the ice cream is very firm. Tip: To make smooth cuts when trimming the ice cream into a tree shape, use a butter knife dipped in hot water. Freeze the cut-away portions in an airtight container to serve on another occasion. Now your child can use the assorted candies to decorate the trees any way she likes, again placing them on individual cold plates and keeping them in the freezer until serving time. Makes 4.
Â
Variations: The best part about making our ice-cream Christmas Trees is decorating them any way you like. Here are a few ideas for inspiration:
Â
Shimmery Stripes: Sprinkle on colored sugar to create broad stripes and use the back of a wooden spoon to lightly press the granules against the ice cream until they stick.
Â
Starry Topper: Cut a star shape out of a flattened gumdrop and attach it to the tree with a wooden toothpick (don’t forget to remove the toothpick before eating the tree!).
Â
Chocolate Garlands: Drizzle on thin lines of melted chocolate, then press on M&M’s Minis for lights.
Â


