Doing ‘Jack’ With Seeds
Carving a pumpkin is a messy job that I usually just enjoy watching my hubby take care of. I did that again, but I decided to salvage the seeds and get creative because usually I don’t do ‘Jack’ with the seeds. I’m trying to keep these weekly crafts easy and cheap to entice you all to enjoy doing them with your kiddos. Since we all spend money on pumpkins each year…and sometimes they aren’t cheap, you might as well get your money’s worth.Â
Â
Pumpkin seeds
Orange, black, and green paint
Elmer’s glue
White sheet of paper (I used card stock…I love card stock paper!)
Â
Â
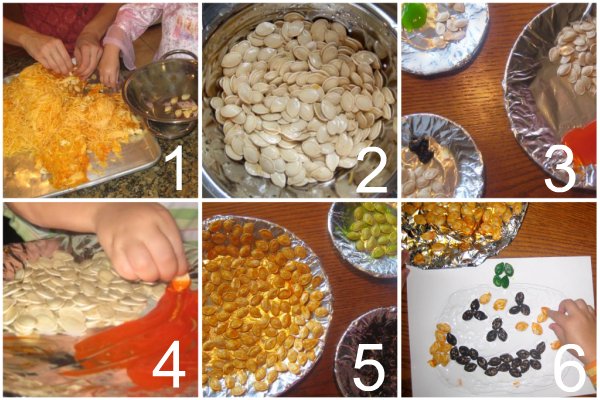
1. Separate the pumpkin seeds from the stringy pumpkin.
Â
2. Wash the seeds and then lay them on a plate or pan to dry. ( I first put them on a paper towel, but as they were drying the paper towel was sticking to the seeds.)
Â
3. To make it easy for the kids I covered 3 plates with tinfoil and put seeds on each of the plates with the color of paint.
Â
4. Paint the seeds! I used finger paint because I thought it would be easier to just let my little girl mix the seeds around in the paint. Depending on what your child would like, you could let them paint each one with a paint brush, because really you only need one side painted. (The green finger paint wasn’t dark enough so we had to paint the stem seeds again.)
Â
5. After painting all the seeds, spread them out on the plate to allow them to dry.
Â
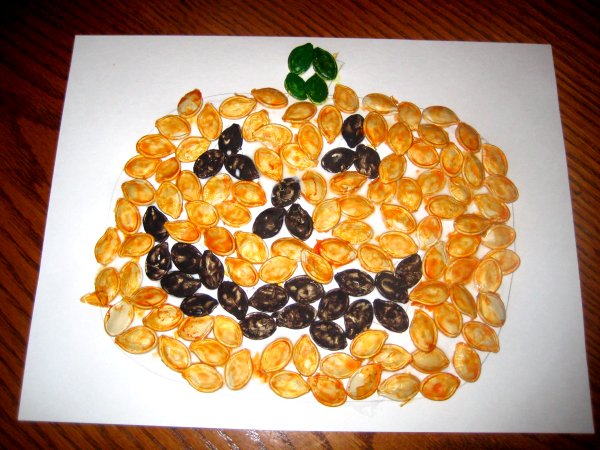
6. Sketch a picture of ‘Jack’ and glue the seeds on.
Â


