Toothy Alligator

action-shadow-puppet-alligator-crafts-photo-420-FF0206COZYA04Card stock in assorted colors

Scissors

Hole punch

Glue

Paper fasteners

Green glitter glue for alligator scales

Flexible straws

Pinking shears


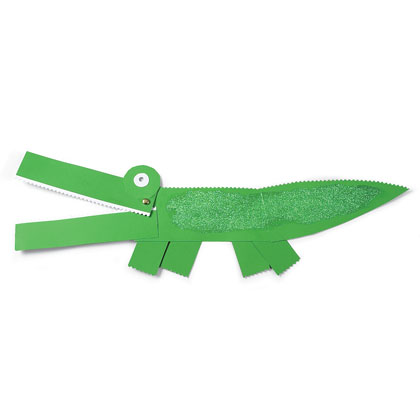
Cut out the shapes as shown from card stock, using pinking shears to achieve a serrated look along the top of the back, tail, and teeth, as well as the bottom of the legs.  Glue the small eye circle atop the larger one. Then punch 1 hole in the eye circle and 1 each in the upper jaw and body where the 2 will join together. Glue together all the pieces except for the upper jaw, which can be attached with a paper fastener as soon as the glue dries. Coat the alligator’s body with glitter glue (for scales). Glue a straw to the back of the body for holding the alligator and another to the back of the upper jaw for opening and closing his mouth.  To cast shadows with your action puppets, simply hold the critters up in front of a desk lamp or flashlight pointed toward a wall. Then have someone turn off any other lights and let the show begin.


Mouth & Teeth: 6 1/2 x 1 1/4 inches

Big eye circle: 1 3/4 inches

Small eye circle: 3/4 inches

Body & Tail: 6 1/2 x 2 1/2 inches

Legs: 2 3/4 x 1 3/4 inches

Tags:

  • Digg
  • Del.icio.us
  • StumbleUpon
  • Reddit
  • Twitter
  • RSS
read comments

Squawking Parrot

action-shadow-puppet-parrot-crafts-photo-420-FF0206COZYA03Card stock in assorted colors

Scissors

Hole punch

Glue

Paper fasteners

Yarn or embroidery floss for a giraffe mane and tail

Multicolored craft feathers for parrot plumage

Flexible straws


Cut out the shapes as shown from the card stock. Punch an eyehole in the center of the head and another in the top of the wing as well as the rectangular body, where you will fasten the pair together. Glue the head atop the body, then glue the straight edge of the belly to the body. For the beak, glue the red circle to the head and snip out a small pie wedge. Attach the wing with a paper fastener. Then give your parrot some fancy plumage by gluing craft feathers to its head, wing, and tail. Finally, glue a flexible straw to the back of the body for holding the parrot, and another to the back of the wing so you can flap it. To cast shadows with your action puppets, simply hold the critters up in front of a desk lamp or flashlight pointed toward a wall. Then have someone turn off any other lights and let the show begin.

Body: 6 1/2 inches

Belly & Wing: 4 inches

Head & beak: 1 3/4 inches


Tags:

  • Digg
  • Del.icio.us
  • StumbleUpon
  • Reddit
  • Twitter
  • RSS
read comments

My Week

My Week

I cleaned my room on Monday
And colored pictures too.
On Tuesday I went skating
And then went to the zoo.

On Wednesday I played jump rope,
On Thursday I played tag.
On Friday I made face masks
Out of a paper bag.

On Saturday I rode my bike.
On Sunday I played ball.
This week was lots of fun for me.


Aileen Fisher

Tags:

  • Digg
  • Del.icio.us
  • StumbleUpon
  • Reddit
  • Twitter
  • RSS
read comments

Learn the Alphabet Arts and Crafts – M

The letter M is an extremely reliable letter.  It only makes the mmmm sound as in mat.  This makes it an easy letter to teach.

The activities are organized from easiest to most difficult.  Feel free to go only part way through the activities depending on the comfort level of the child!


1. Present a capitol and lower case M to your child.  See if she knows the name of the letter and the sound it makes.  Give examples of M words such as mouse, milk and Monday.


2. Read The Mitten


3. Go on a scavenger hunt around the house to find items that start with M for the M bag this week.  You might find mittens, mouse, map, muffin tin, marbles, mask, magazine, magnet, mirror, monkey, milk jug, etc


4. Create an M collage.  Have your child search through magazines for M words, and glue them to paper for her alphabet book.


5. Marble Painted M’s.  Cut out an M, and attach it to a piece of construction paper the same size as a shallow baking pan or cardboard box, using repositionable adhesive.  Place in the pan or box.  Drop a marble into a small dish of paint, using a plastic spoon to roll it until it is covered, and then remove it from the paint and place on top of the M.  Show your child how to tilt the tray to roll the marble around.  Try tilting with several marbles at once, dipped into different colors.  When dry, remove from construction paper and glue to a sheet of 8.5 x 11” paper for their alphabet book.


6. Provide a worksheet with a line of M’s to trace across the top and a blank spot below, cut out mitten shapes, a small length of yarn, stickers or bits of construction paper, markers and a glue stick.  Have your child decorate their mittens as desired, glue them to the page, then glue on the yarn to attach them together.


7. Other activities: Play mitten match – cut out several sets of mittens from construction paper, then decorate, making each pair different; act like monkeys, march to music, bake mini muffins, make macaroni collages, sing five little monkeys, talk about mommies, demonstrate a magic trick, buy a marbling kit – marbling paper is easy and fascinating for children – and use it to decorate an M, make strawberry Mice

Tags:

  • Digg
  • Del.icio.us
  • StumbleUpon
  • Reddit
  • Twitter
  • RSS
read comments

Mothers Always Know


The thing that really puzzles me

Is how much Mothers know.

Mine seems to know ahead of time

When it will rain or blow.

She knows just what will fix a bump

On elbow, shin, or knee,

And scratches that I get sometimes

When falling from a tree.

But this is one time she’ll be fooled.

It’s nearly Mother’s Day

And still she doesn’t know I have

Her present hid away.


Jocinna C. Miller

Tags:

  • Digg
  • Del.icio.us
  • StumbleUpon
  • Reddit
  • Twitter
  • RSS
read comments

No-Sew Felt Bean Bag Chick

 chickfeltPattern

Light Yellow and Orange Felt

Two 5mm Black Round Cabochons

2″ Yellow Pom Pom

1/2 Yard 1/4″ Lavender Satin Ribbon

Approx. 1 Cup of Navy Beans, Poly Pellets, or Plastic Stuffing Pellets

Tacky Glue

Scissors

Clothes Pins

Wax Paper


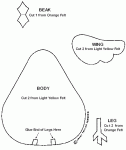
Cut felt pieces using the pattern provided. Glue legs to the top surface of the bottom body piece as shown on pattern. Sandwich between pieces of wax paper, then place a stack of books on top for about 30 minutes. Join body pieces by evenly applying a 1/4″ wide line of glue around edge of bottom body piece, leaving a small opening to pour in beans or pellets. Matching edges, position the body pieces one on top of the other. Sandwich between pieces of wax paper, then place a stack of books on top for about 30 minutes. Glue beak at dotted line to chick’s head. Glue black cabochon in place above beak for eyes. Glue wings in place. Sandwich between pieces of wax paper, then place a stack of books on top for about 30 minutes. Fill the chick’s body with beans or pellets. Seal opening with glue and secure with clothespin until dry. Glue yellow pom pom to bottom back of body for a tail, making sure it is positioned so the chick will sit upright.  Make a bow with the ribbon and glue under beak.


Pattern.  Click for Full Size Image

Pattern. Click for Full Size Image

Tags:

  • Digg
  • Del.icio.us
  • StumbleUpon
  • Reddit
  • Twitter
  • RSS
read comments

Dinosaur Diorama


Create your own prehistoric dinosaur scene in a box. Just print out the dinosaurs, paste, color, cut, arrange them in the box, and – welcome to the Mesozoic Era, the “Age of Dinosaurs.”

Supplies needed: paper and a printer (stiff paper works best – colored paper is great for this project)


a shoe box or slightly larger box

crayons and/or markers

paste (a glue stick works well)

scissors

tape, thread, pipe cleaners

optional: glitter (for great lava!), cotton puffs (for clouds), thin cardboard to glue to the back of the animals if your paper is very flimsy (old cereal boxes work well)

Print-out of late-Cretaceous Period, North America: T. rex, Triceratops, Maiasaura, Pteranodon, and plants.


Print-out of late-Cretaceous Period, North America: Small T. rex, Troödon, Ankylosaurus, Pachycephalosaurs, Parasaurolophus, and plants.


Find a box at least as big as a shoe box – a slightly bigger box works even better. This will be the stage containing your dinosaur scene.  Click on a picture to go to the printable template containing dinosaurs and plants from that time period.  Print out the template(s) you want. To print the template (and not any other things that might be on the screen), go to that page, click your mouse on the template (this is so you won’t print the rest of the stuff that’s on the screen), then choose PRINT from the File menu.  Click here for more information on the Cretaceous period, its climate, and what animals and plants lived then. For a lot of dinosaur information go to ZoomDinosaurs.com. In ZoomDinosaurs.com there are information sheets and other classroom activities about all the dinosaurs pictured here (and many others).  If your paper is very flimsy and you think your animals may not stand up well, paste the template onto thin cardboard (like an old cereal box). Let it dry.  Using crayons or markers, decorate the inside of the box, the dinosaurs and plants. No one knows what colors the dinosaurs were, so anything goes. When decorating the box, remember that the Earth was very warm when the dinosaurs lived. Also, the Cretaceous period was a time of very high volcanism – a volcano in the back of the box looks great. Glitter makes a wonderful addition to lava – just sprinkle some on a little glue. Cut out the dinosaurs, their stands, and some plants.  Fold along the dotted lines on the dinosaur stands. Glue one fold of a stand to its dinosaur.  Arrange the animals and plants in the box. Paste the bottom flaps in place. Hang any flying animals from the top of the box using tape and thread or pipe cleaners. Green and brown pipe cleaners also make nice plants.  Enjoy your Mesozoic diorama!

Tags:

  • Digg
  • Del.icio.us
  • StumbleUpon
  • Reddit
  • Twitter
  • RSS
read comments

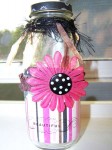
Altered Frappuchino Bottles

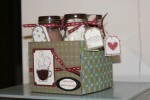
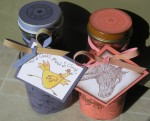
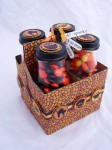
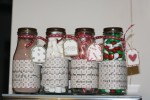
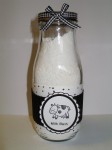
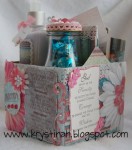
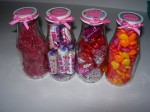
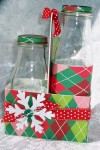
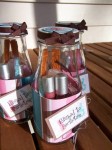
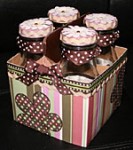
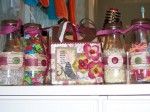
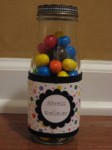
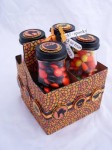
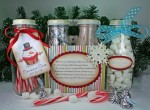
So cute — I almost want to run out and buy some even though i don’t drink coffee!  Click Thumb nails for larger views (most of them have a larger view).

919_3

100_3393

altered_art_006_by_delightfuldaisy

919_2

HPNX7274_copy

100_4813_by_cuccicoo1002

1st_Blog_Candy_5

Chincoteague_Summer_07_074_by_has2stamp

frapbottles2

frap_btl_by_craftycaro

Dualfrap_by_SilverDragoness

DSCN7347

just_rite_monogram_stamper_jacks__2

frappbottles2

justrite_photos_of_frap_bottles_fro

milk_bottle

1st_Blog_Candy_5

Frap_Bottles_07

100_7623

frapbottles

100_4813_by_cuccicoo1002

919_2

919_3

Chincoteague_Summer_07_074_by_has2stamp

100_3393

altered_art_006_by_delightfuldaisy

DSCN7347

delightfrap_by_StickUps

6a00d83451b90869e2010535b2a2a6970b-800wi

100_02248_1

Tags:

  • Digg
  • Del.icio.us
  • StumbleUpon
  • Reddit
  • Twitter
  • RSS
read comments
 Page 99 of 103  « First  ... « 97  98  99  100  101 » ...  Last »