Fridge Art?

I drew some pumpkins on red paper and gave them to Little Mouse to decorate. She decided to draw on them with mostly her black crayon. I then cut them out and glued them to a clothes pin. I then glued a magnet to the back and viola! We have a fridge magnet! Now we have someplace to keep all those important drawings, etc.


100_1030

So adaptable to any season / holiday!

Tags:

  • Digg
  • Del.icio.us
  • StumbleUpon
  • Reddit
  • Twitter
  • RSS
read comments

Papier-Mâché Ghost Craft

A long (oblong) balloon

A bowl that the end of the balloon fits in (this is just to hold the balloon while you work)

Newspaper

Flour and water

A pan and a stirrer

Scissors

White tempera paint

Paint brush

A black marker


Papier-Mâché Glue: Make a simple, thin glue from flour and water. Mix 1/2 cup of flour into 1/2 cup of water until the mixture is thin and runny. Stir into 2 cups of boiling water (the heating gives the glue a nice consistency, but is not necessary). Simmer for about 3 minutes, then cool. Tear a lot of newspaper into strips. Strips should be about 1 inch wide; the length doesn’t really matter. Blow up and tie a long balloon.  Place the long balloon in a container (like a bowl) so that it is stable. Dip a strip of paper in the flour glue, wipe off the excess, and wrap the strip around the balloon. Continue with additional strips and cover the entire top of the balloon.  After one layer is done, allow it to dry fully (at least overnight).  Repeat 2 more times, fully covering and fully drying in between each layer.  Let the balloon dry completely (it may take a few days). Pop the balloon and separate it from the outer papier-mâché skin. Throw the torn balloon away. Trim the base of the ghost to form smooth scallops. Cut two holes in the ghost (these will be its eyes).  Paint the ghost white. Let it dry. You can either put the ghost on a table or hang it from the ceiling from fishing line to make a scary Halloween decoration.

Tags:

  • Digg
  • Del.icio.us
  • StumbleUpon
  • Reddit
  • Twitter
  • RSS
read comments

Open Ended Art: Pumpkins

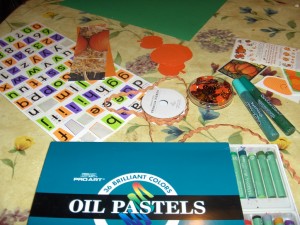
This weeks open ended art project was pumpkins.  I had a bunch of pumpkin stickers and die cuts left over from the bookmark activity we did at his harvest party, so I pulled those all out, added basic art supplies and let him at it.

003

First he started scribbling all over the page in multiple shades of green.  “Those are the pumpkin vines.”

009

He added pumpkin shapes to the patch.

010

Finally, he decided it needed embellishment.

014

The finished product:

015

He liked making pumpkin patches!

0019

For more great open ended art projects, check out the linkie at Mommies Wise Little Bookworms!

Tags:

  • Digg
  • Del.icio.us
  • StumbleUpon
  • Reddit
  • Twitter
  • RSS
read comments

Stone-faced Pumpkins

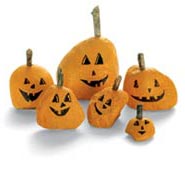
Looking for a rock-solid decorating idea to charm your visitors this year? Try lining up a windowsill collection of these mini stone jack-o’-lanterns.


1005_img_pumpkins1


Assorted stones (just about any shape will do)

Orange acrylic paint and paintbrush

Black permanent marker

Twigs (1 for each stone)

Tacky glue

Picture 174103145

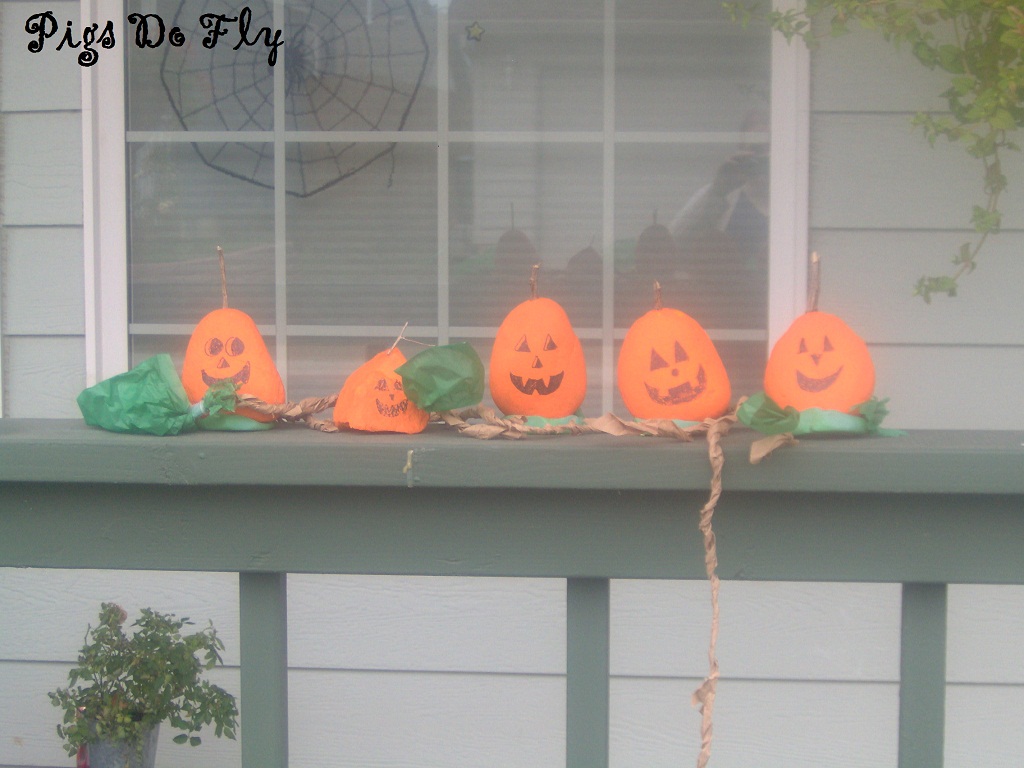
Kidlet and Mommy's Pumpkins with Raffia Vines


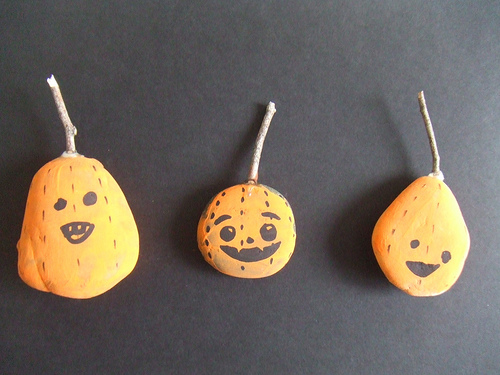
Wash any dirt from the stones and let them dry completely. Then paint them orange, using 2 coats if necessary. Once the paint is dry, draw on faces with a black marker. Finally, glue a twig pumpkin stem atop each stone.


4017203180_a323227f5d


Tags:

  • Digg
  • Del.icio.us
  • StumbleUpon
  • Reddit
  • Twitter
  • RSS
read comments

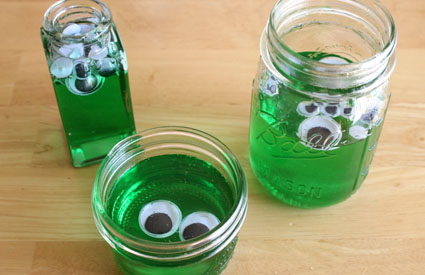
Googley Eyed Green Blobs


corn syrup

empty clear bottle/jar – with or without a lid

green food coloring

crafting googly eyes


blob-front-034


Pour corn syrup into your jar and add 2-3 drops of food coloring. Stir. Now add your googley eyes. These will float, unless you glue on a weight to the back of the eyes, or something heavy. Now your Blob is ready for display. Keep these ghoulish eyes on hand, you may have a monster visit with only one eye that might need a spare!

Tags:

  • Digg
  • Del.icio.us
  • StumbleUpon
  • Reddit
  • Twitter
  • RSS
read comments

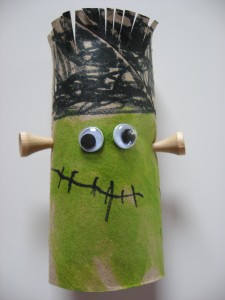
Earth Friendly Monster


Toilet paper roll

A black marker and/or paint

Green marker or paint

Googly eyes

Glue

2 golf tees

Scissors


Start by drawing a line on the roll to mark where the hair will start.  Color the top part black , a trick I did with my son so he stayed in the lines , was to have him hold the other side and cover it with his hand while he colored. Worked great!  Color the other half green.  Add a mouth  with black marker.  Add glue for the eyes.  Add the googly eyes.  Poke  holes in the side for the golf tees.   Have your child put the tees in.  Cut the black part with scissors, multiple times for make hair. This is a good chance for cutting practice since there is no need to be exact, simply make cute into the roll. We added stitches along the smile after cutting with the black marker. 


frankenstien-026-225x300

Tags:

  • Digg
  • Del.icio.us
  • StumbleUpon
  • Reddit
  • Twitter
  • RSS
read comments

Pumpkin Sun Catcher


It’s Fall. So, my kids are starting to spend more time indoors. That doesn’t mean you can’t let a little sunlight in. You can create this simple Pumpkin Sun Catcher craft with just a few supplies. Sun Catchers are a great way to let kids decorate windows and still let the light of day stream in!


Construction Paper (we chose black)

Pumpkin “Template”- you can freehand or trace it

Tissue Paper (in whatever color you desire)

Contact Paper

Pencil, Scissors, Tape


Cut or tear your tissue paper into pieces. Sort them by color, if you wish (this is a great impromptu learning activity for them!) I like using muffin tins to hold the kids craft supplies as they are working. I six-cup tin is the perfect size for each child to have their own “set” of supplies. 


001[13]


Next, freehand draw or print out a “template” onto black construction paper. (You might want to do this first, ahead of time, for younger children with shorter attention spans, or do this while they are sorting). Using scissors, cut out the inside of your pumpkin. Helpful tip: Loosely fold your paper in half, making sure NOT to crease the page. Make a little snip with the scissors on the inside of the traced template to start the cutting. This prevents you from having to cut into the “frame” or outer part of the paper.


009_thumb[6] 


Next, cut out squares of contact paper, slightly smaller than your pumpkin frame. Peel off the paper backing from the contact paper. Lay it flat on the table, sticky side up. Let your children create a tissue paper masterpiece.Peel off the paper on another square of contact paper and carefully lay it over the first piece. Thereby, sandwiching the tissue paper between the two pieces of contact paper. Adhere the tissue paper creation to the contraction paper frame and then adhere that (I used scotch tape) to the window.


015[8]

Tags:

  • Digg
  • Del.icio.us
  • StumbleUpon
  • Reddit
  • Twitter
  • RSS
read comments

Leaf Butterfly


Story + Art = stART


Read the story “Leaf Man” by Lois Ehlert. The book is about a leaf man who blows away in the wind and the reader is taken past all sorts of animals like chickens and ducks, past rivers filled with fish and butterflies in the air. All are leaves pieced together to make these awesome images , some are obvious, some take concentration to see the animal among the leaves. Wonderful creative book to welcome the changing seasons and it will leave you trying to find all sorts of things like butterflies, chickens and fish in leaf piles.


Gather your materials. You will need 2 large leaves with stems, some cardboard, markers, tape, glue and googly eyes.


Start by drawing a butterfly body on the cardboard.  Have your child color it. While they are coloring snip the stems off the leaves, don’t lose the stems they will be made into antenna in a bit.  Cut the body out.  Tape the antenna on underside of the head.  Tape the leaves on as wings. Tape works way way better than glue since the leaves can still have some moisture , they can take forever to dry sometimes.  Glue the googly eyes on add a smile.


butterfly_009

Tags:

  • Digg
  • Del.icio.us
  • StumbleUpon
  • Reddit
  • Twitter
  • RSS
read comments
 Page 36 of 103  « First  ... « 34  35  36  37  38 » ...  Last »